Hey out there, I need a little help fixing a random problem of my Pro XXL plunging into my workpiece. Last week I thought not “Clearing All Offsets” was the problem. I have been meticulous to Initialize the machine, Clear All Offsets, set X,Y,Z (manually or Bit Setter & Bit Zero, tried both) at the top of the workpiece lower-Left corner, I do this for every cut as a precaution. I start each cut with my finger on the kill button. I have holes in my spoilboard. The symptom: Cutter goes to the correct position and cuts air for a few inches in the expected path, makes a few random stabs at the workpiece and then plunges deep.
It will work sometimes and then the next time it will make strange moves and plunge deep into the workpiece. I export .stl files from CAD 3D software to Meshcam for G-code output. Carbide Motion version is up to date. I searched Google and found a long list of similar problems, going back a few years. There must be a known solution for this. I am at dead stop until it’s fixed. Thanks for any insight you can provide. Best Regards, Wayne
Please see:
https://carbide3d.com/blog/unexpected-z-axis-plunges/
if you continue to have difficulties, let us know at support@carbide3d.com
Also, check your motor connectors. I had the same problem with my Pro XXL that I bought a couple of years ago, and had the same problem. My solution required the use of a soldering iron, and heatshrink tubing, eliminating the connectors.
Hey Will, Thanks for your response. The link you provided include symptoms: Have BitSetter, cuts air initially, plunges early in the path. True. I am trying to understand what changes to my workflow will make a difference. My procedure is: Initialize Machine, Clear ALL Offsets (at the Lower-left corner) and then Zero x,y,z (manually or with BitSetter), Hit Run, Load Toolpath, Hit Start, Hope. This has been an ongoing problem since buying the Pro XXL in July. The problem seemed to go away when I discovered that Offsets needed to be cleared so I adopted a procedure that included Clearing Offsets and re-zeroing x,y,z before every cut to avoid this. Is there a specific point in the process intended for Offsets to be effectively cleared? Right now I clear Offsets at the BitZero location. I know the order of actions is important. Thanks
Please send a .c2d file for a simple test cut which has problems, step-by-step notes on how you are securing your stock and setting zero relative to it and managing all tool changes, and a photo showing an attempt at cutting still in place on the machine to support@carbide3d.com
Thanks Steve, Not sure that is the problem, But I will do it anyway. This problem is killing any hope of production so I will make any promising changes. Will Adams responded with suggestions that a flawed workflow could be the problem so I have walked through the sequence of actions looking for anything done out-of-order. I still think Clearing Offsets plays some part in it. Thought that fixed it a few days ago, nope.
I’ve never had to clear offsets. Fire up the machine, let it initialize and set a tool with the bitsetter. Locate where I need the zeros at with the bitzero V2, start a job, let it play with the bitsetter again after a tool change request, and then it works.
I dont think I have ever cleared offsets. I have an SO3 and have never had a problem with the Z plunging. The link above from @WillAdams seems to be primarily about changing a bit without going through the software interface.
For a sanity check always go to the Jog menu and Rapid Positions and check your X and Y position and the Z+6mm before starting a job. If those two things check and you still get a random plunge and you are not manually changing a bit then support should be able to help you. Likely it is something in your work flow that is causing the problem. You could have electrical/mechanical problems so always eliminate those first by powering down your Shapeoko and manually moving the gantry and Z fully from front to back and side to side. Make sure you dont have a vacuum hose getting caught. For the SO4 check your v-wheels. For electrical connections run a job and feel the connectors. If one feels hot push in on the electrical connections from both sides at the same time. The connectors should not feel hot. If they feel hot it is a high resistance connection and can cause lost steps.
Hello gdon_2003, Interesting that you referred to Rapid Postions X Y position. The Cutter does move to the XY postion, however, periodically I get a notice that: “The XY Position is Not Valid. Do you want to procede anyway?” Hell no! This is after it actually found the proper XY position. Still working on it. Thanks
I would like to see an option to revalidate or adjust Z between toolpaths. That would come in handy for my sanity
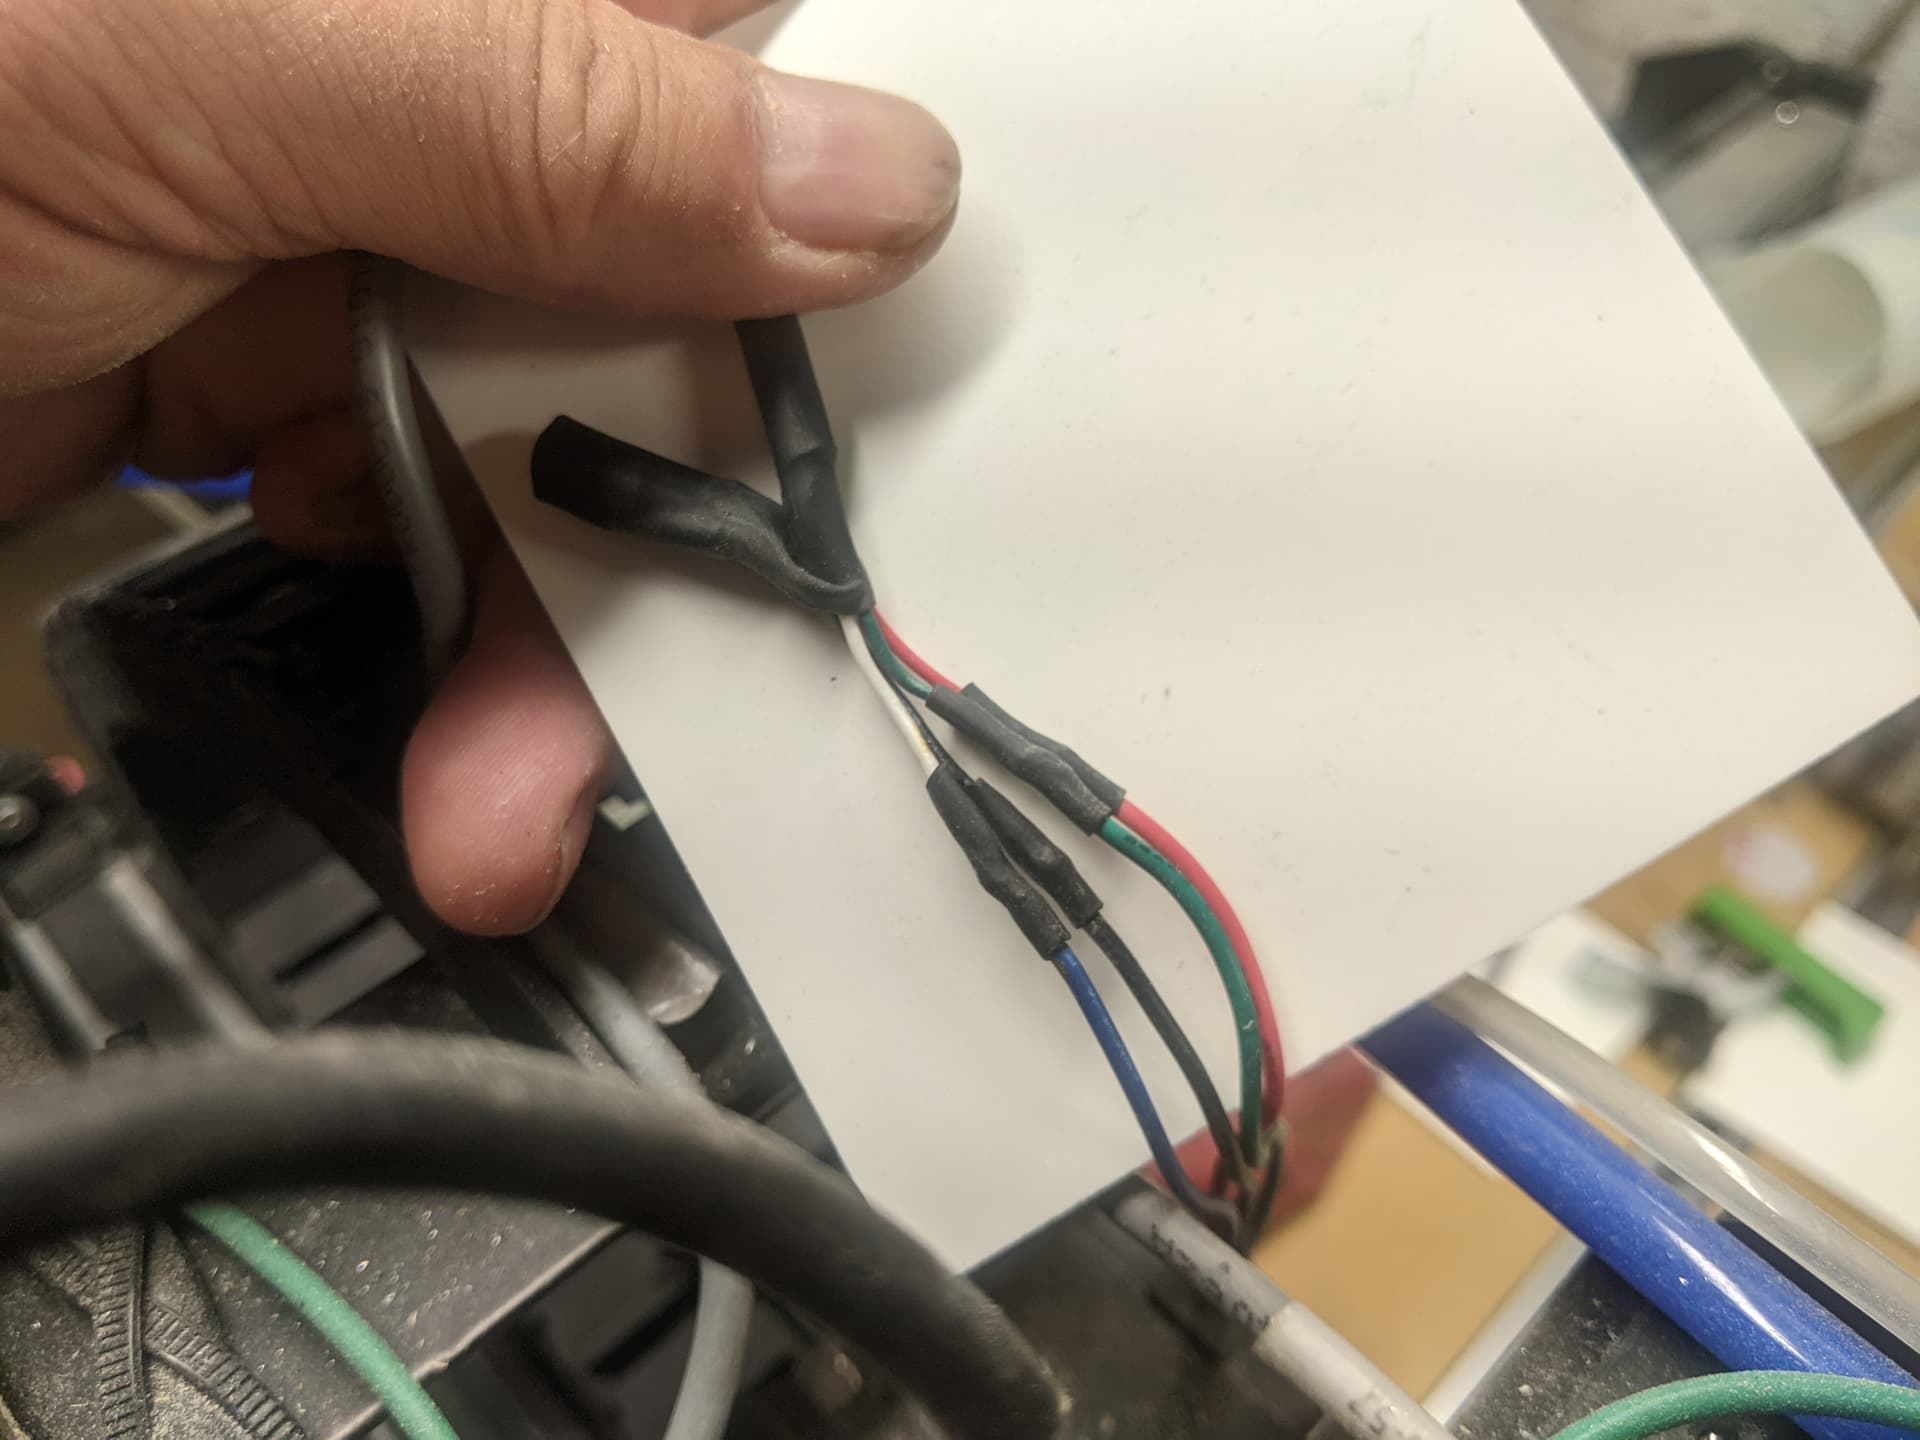
Hey Steve, Late yesterday I soldered all the wire connections. Initially I checked the wire colors on both plastic connectors to confirm that wire colors matched on both sides. It was getting late in the evening for the last few connectors so I skipped confirming wire color matches as the prior configurations all matched. Bad idea. Now Initialization moves to the front left and Z motor goes down. Oops. Only Two connections have different colors matching; X-Limit has Brown and orange connecting, black and blue match, and Y-Motor has Blue connected to white,black-green-red all match (which I did confirm). All other connections have same color matches. Do you know which connections deviated from same color matches? Sorry to bother you with this. I should have been more thorough. Best Regards, Wayne
Yopur limit switches shouldn’t dictate which way they travel at initializing, you can verify they work by putting a piece of metal near them, and the red light coming on, further they can be checked in carbide motion. Attached is an example of my wiring for the x-motor, at the motor. red/red, black/black, green/green, and white/blue. Assuming you’ve set the machine configuration correctly in carbide motion, and you’ve rechecked all of the wiring you’ve done, you can switch one pair of wires on a motor to change direction. On my machine, Black and green are for one coil, and red and blue for the other. Switching one pair of wires, for example to black/green, green/black, will change the rotation of the motor, without having to try and figure out how to change the direction in the configurations. And of course, as a rule of thumb, the controller should be powered down before unpluggin, or connecting the stepper motors. Used to be that would cause the drivers to blow.
This topic was automatically closed after 30 days. New replies are no longer allowed.