I wish to use the carbide file for creating a waste board with the holes drilled in it. I can input the diameter of the hole but the depth changes to be the same as the diameter. What am I doing wrong?
I am not sure about your question but I will try to answer. I made a spoil board with Tee nuts. The Tee nuts were .30 inches around so I made my hole size .301 (through hole). The bottom of the Tee nuts flange was about .75 inches round so I made that about .77 inches because some of the Tee nuts can be inconsistent. Measure the thickness of the bottom of the Tee Nuts you get and make the pocket a few thousands deeper than the actual thickness. Since the bottom of the Tee Nut for me was .06 inches I set the depth of the pocket for .065 inches. For the holes that go through for the Tee nuts I start at a depth of .065 and used the stock bottom for the depth of the pocket. For the tee nuts I used the top of the stock and cut a pocket .065 inches deep.
If you have a bit setter then cut the larger pocket first then cut the through hole. If you do not have a bit setter then disable the through hole and save the tool path for the larger hole with a unique name. Then disable the big pocket and re-enable the through hole and save that with a unique name.
When ready to run your job without a bit setter cut the larger pocket first. Then run the through hole path.
If you have a bit setter have both tool paths enabled and save them into a single file but have the larger hole at the top of the list so it is cut first.
I used the #201 1/4" Upcut Endmull to make both of the features on my spoil board.
3 Likes
Hi @pierre,
Can you post the carbide create file you are trying to use (using the icon with the arrow pointing up), and tell us more precisely how/where you input the diameter and where you see the depth value changing ?
2 Likes
Thanks for your reply. My problem solved if you can tell me what piece of input determines the depth of the hole. Pierre
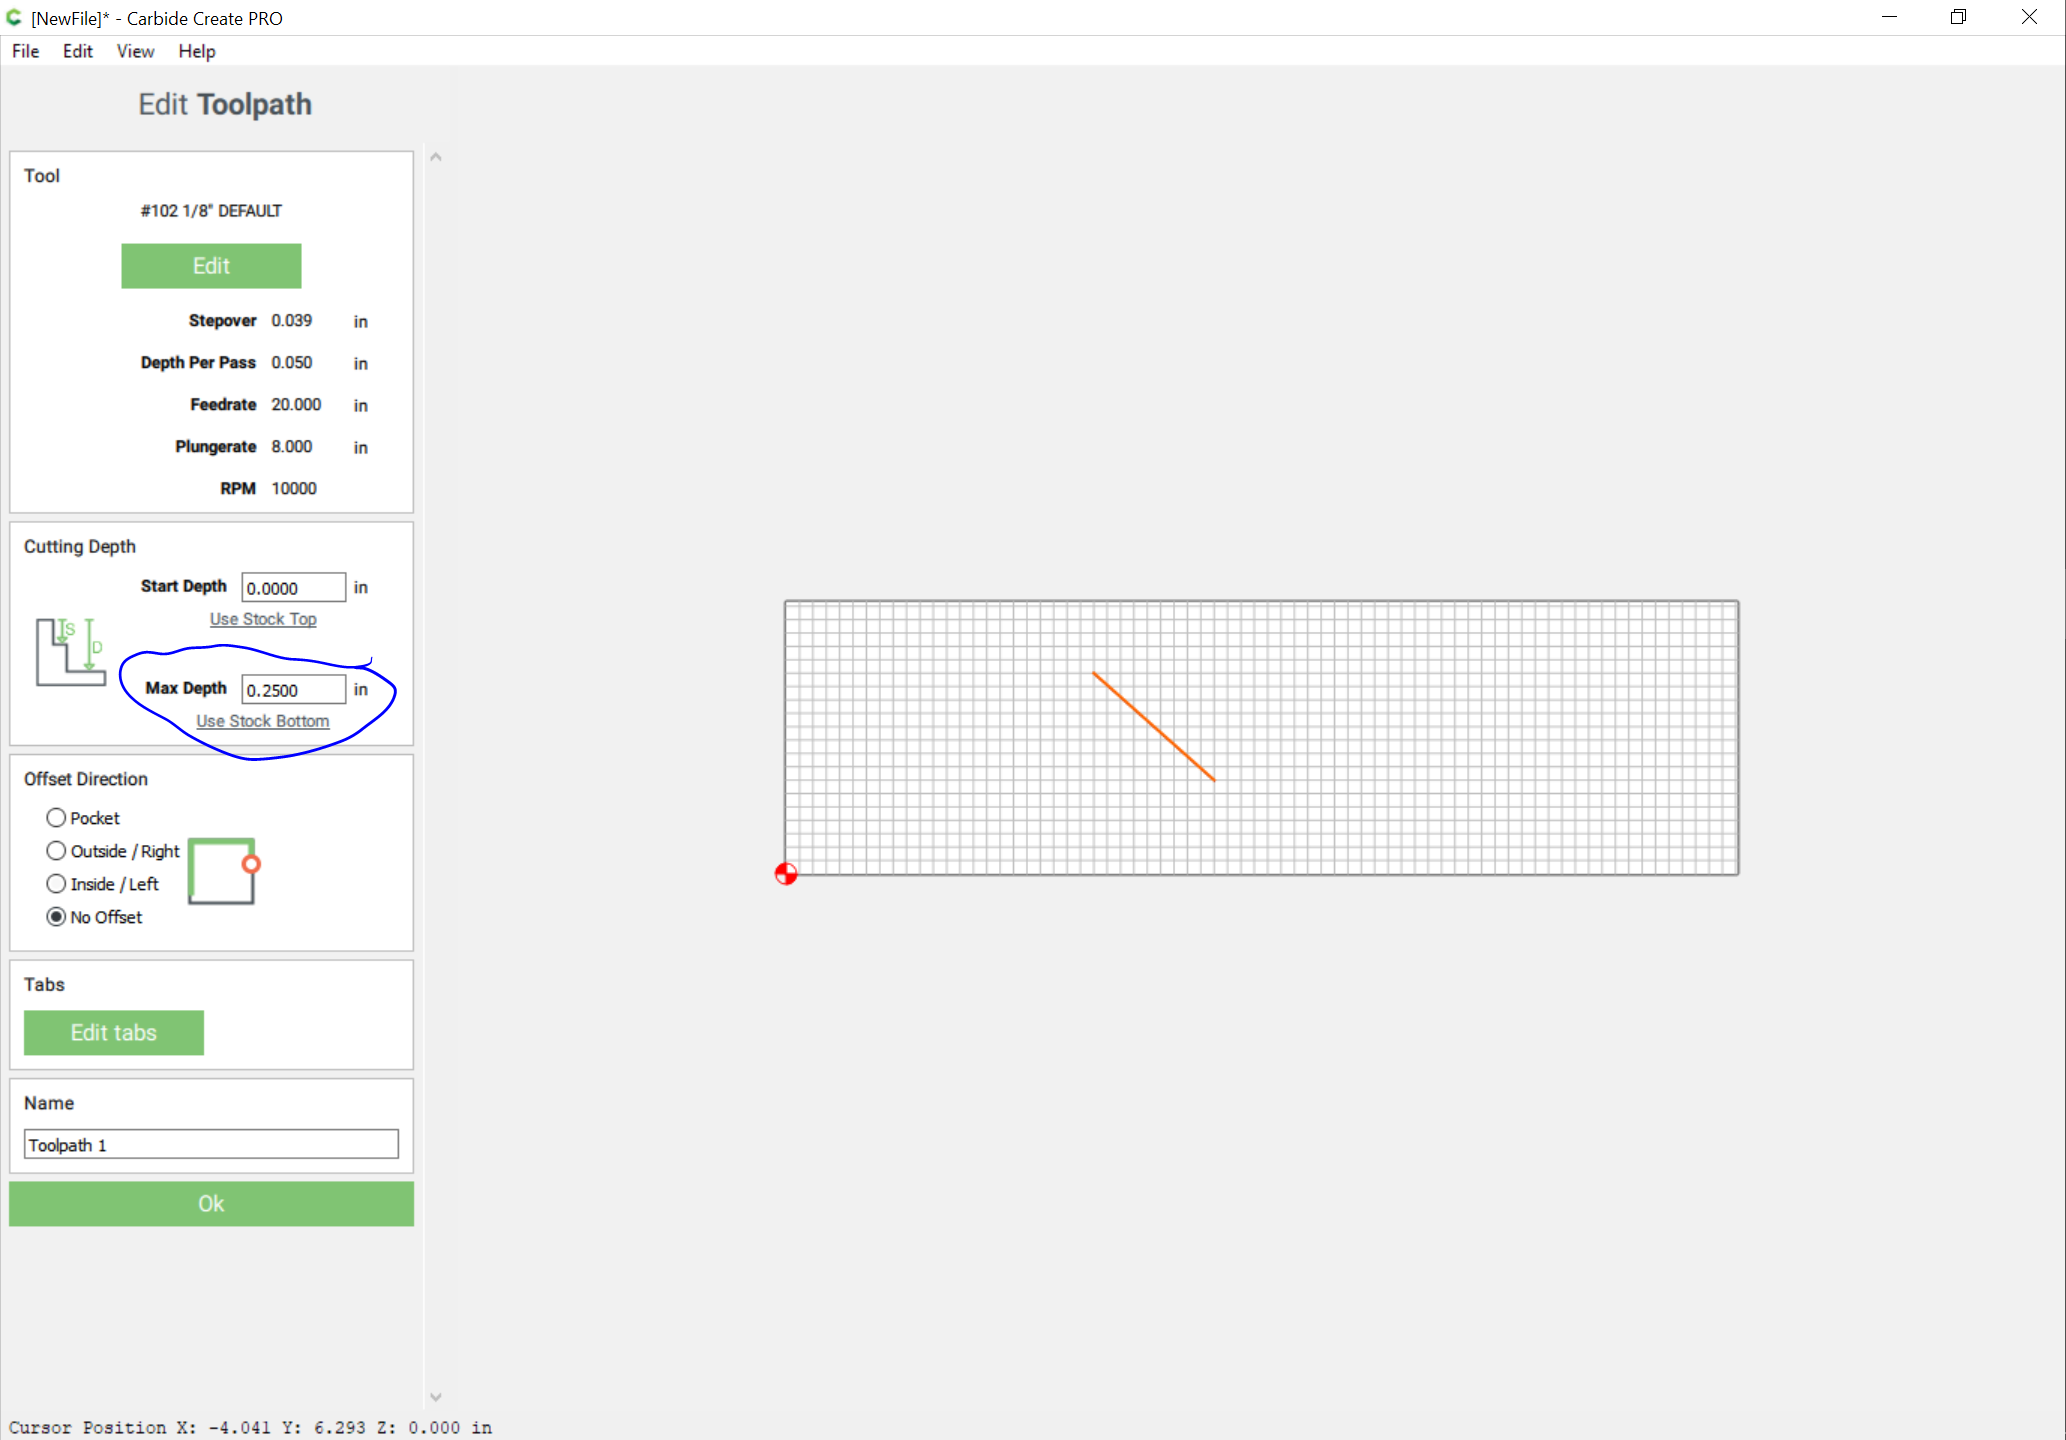
Depth is determined by the Toolpath setting Max Depth:
I suspect though that you’re trying to cut deeper than your machine can:
The Z Plus has a single mounting point for the router mounting collar. The Belt Drive X/Z has two mounting points one higher and one lower. Depending on where the user installs the mounting collar on the Front Z plate of the Belt Drive Z axis, there are two different operating heights. The Z Plus advertises 3 inches of travel and provides more than that. Your reach is different from that of the lower mounted point of the Belt Drive Z axis. There are 2 options for reaching work when using the Z Plus. A longer endmill or lifting the work up with say a spoilboard.
1 Like
This topic was automatically closed after 30 days. New replies are no longer allowed.