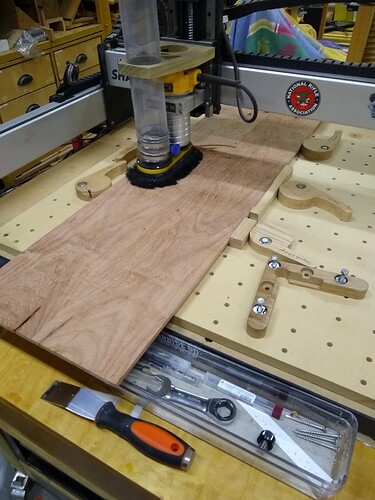
I’d like to use the spoil board that came with my machine and change it so that I can install hold downs clamps. I really hate reinventing the wheel so I’m wondering if there is a Carbide Motion file available that I could simply download and run?
See:
For the Shapeoko 3 XXL I developed a spoilboard considerations document. The doc guides you through making a customized spoilboard that is applicable to any machine. The doc is specifically for the 3XXL but the instructions give you the capability to make any sized machine spoilboard which is optimized to be flattened with no ridges left behind due to the limitations of the configuration of different machines.
My spoil board uses 2" spacing and I use cam clamps along with the gator tooth and tiger claw clamps. I used 1/4-20 5/16" tee nuts to allow me to surface my spoilboard many times before replacement. You can modify your spacing to what ever you want or use metric tee nuts if you are on the metric system. Personally I am not a fan of the hybrid tables due to the limitations of the spacing and the thinness of the spoilboard slats between the t-tracks. Mileage varies.
spoilboard_considerations.pdf (1.3 MB)
Will: Thanks, but I want to follow up with a question. The project you lay out is that based on a new piece of mdf or is it based on the mdf that came with the machine?
Guy: Thanks, but I’d like to follow up with a question. Initially looking at this project it looks like it begins with a new piece of mdf which rests upon the piece of mdf that came with the machine. Is that correct? If so, why? Why not simply do all of this in the piece of mdf that was shipped with the machine?
My machine is a Shapeoko 3. The base material has a very specific pattern for attaching it to the steel frame below. So replacing the factory base board is problematic. So for most Shapeoko 3 owners they add a supplemental spoilboard. Now if you own a Shaepoko 4 or above with the hybrid table you have the ability to replace the individual slats of mdf between the t-tracks. However you cannot tram the entire surface of a hybrid spoilboard because of the mechanical limits of the Shapeoko 4 and above. So if you level your spoilboard you will have a ridge likely on 3 sides. That is not a problem unless you want to tile a project and in that case your project will not be sitting level on the table.
You can use the stock hybrid table but another problem is the distance above the top of the t-tracks and the top of the mdf slats is not all that great. So leveling or removing a damaged area by use of a fly bit is very limited compared to a 3/4" piece of mdf sitting on top of your hybrid table.
Some people love the hybrid table and its functions with the t-track. Me not such a fan for the above reasons. However you could have both. Remove the supplemental spoilboard when you want the functionality of the hybrid table and put the spoilboard back on when you are likely to cut through the project. The best of both worlds.
For me I like the use of cam clamps on my 2" spacing spoilboard. Opinions vary on the use of clamps on the hybrid table but I am not a fan of those type of clamps that stick way up in the air. The Carbide Create/Carbide Motion software has improved vastly from the early days of my use with both. In earlier versions the bit would get dragged across the spoilboard running in to all sorts of clamps and so on. Now the z retracts quite high during many moves so the chances are less about hitting a clamp but during your own jogging with the Z down low you can crash into a clamp if you are not careful. My cam clamps are usually at or below the surface of my material so there is a lot less potential for collisions of the Z axis with clamps.
The last consideration of a supplemental spoilboard would be the loss of Z height. 99% of people never use the full Z height of a Shapeoko. There is still the 1% that needs every thousands of an inch to get their project made. With a supplemental spoilboard you lose 3/4" of an inch of Z height and most people can certainly live with that small loss. But if you are t he 1% that needs that space then simply remove the supplemental spoilboard.
Here is an example of a tiling job that would be harder with a ridge all t he way around your spoilboard on 3 sides. Your project could not sit level. For somethings that might be ok but for vcarving minor differences in surface height would be a mess.
I believe that was based on the MDF included w/ a Shapeoko 3 — it should be adaptable to an SO4 using the PDF for that.
That said, one of the things which I decided a while back was that if I ever did a sea of holes bed again, I would do it by drawing up the machine base, and then using a long reach endmill to only machine holes where and as-needed — that way, I’d be guaranteed that a given bit of installed hardware was used at least once.
This topic was automatically closed 30 days after the last reply. New replies are no longer allowed.
