Shiplap Design Tutorial

Hi I was wondering if someone might be able to help. I am very new and recently purchased shapeoko xxl.

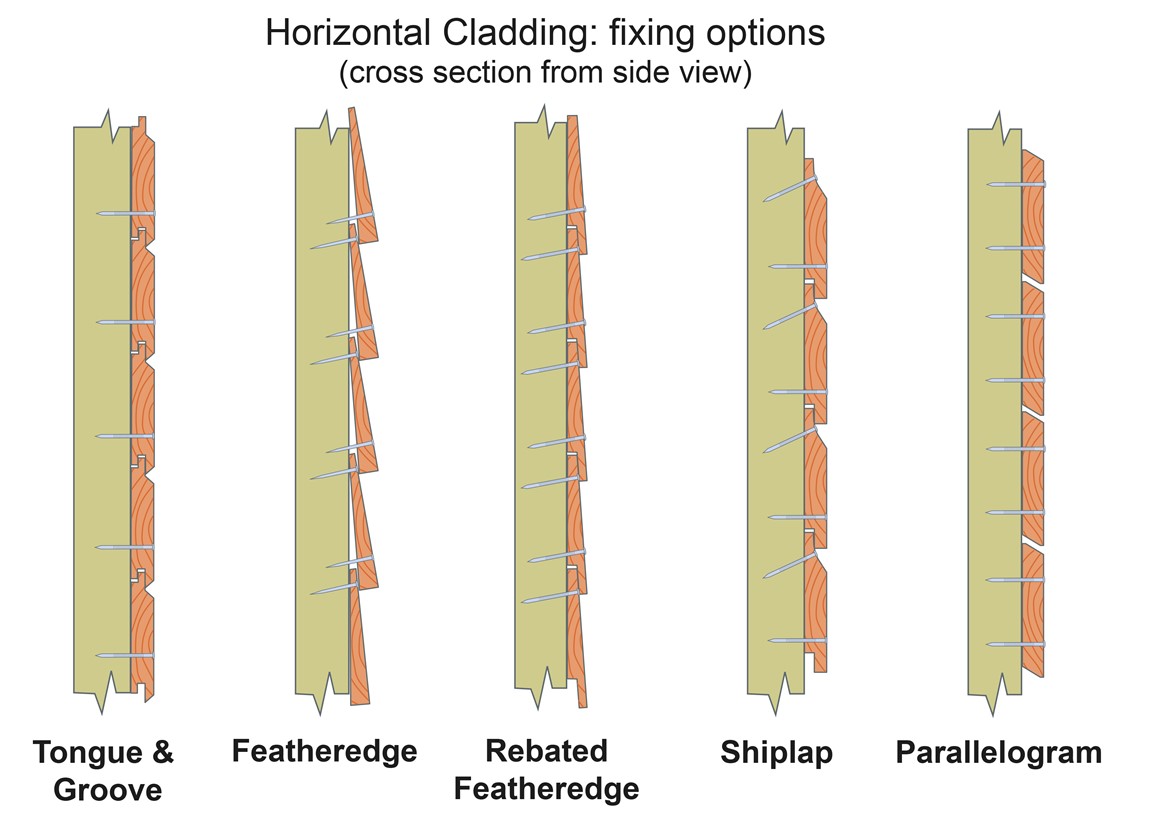
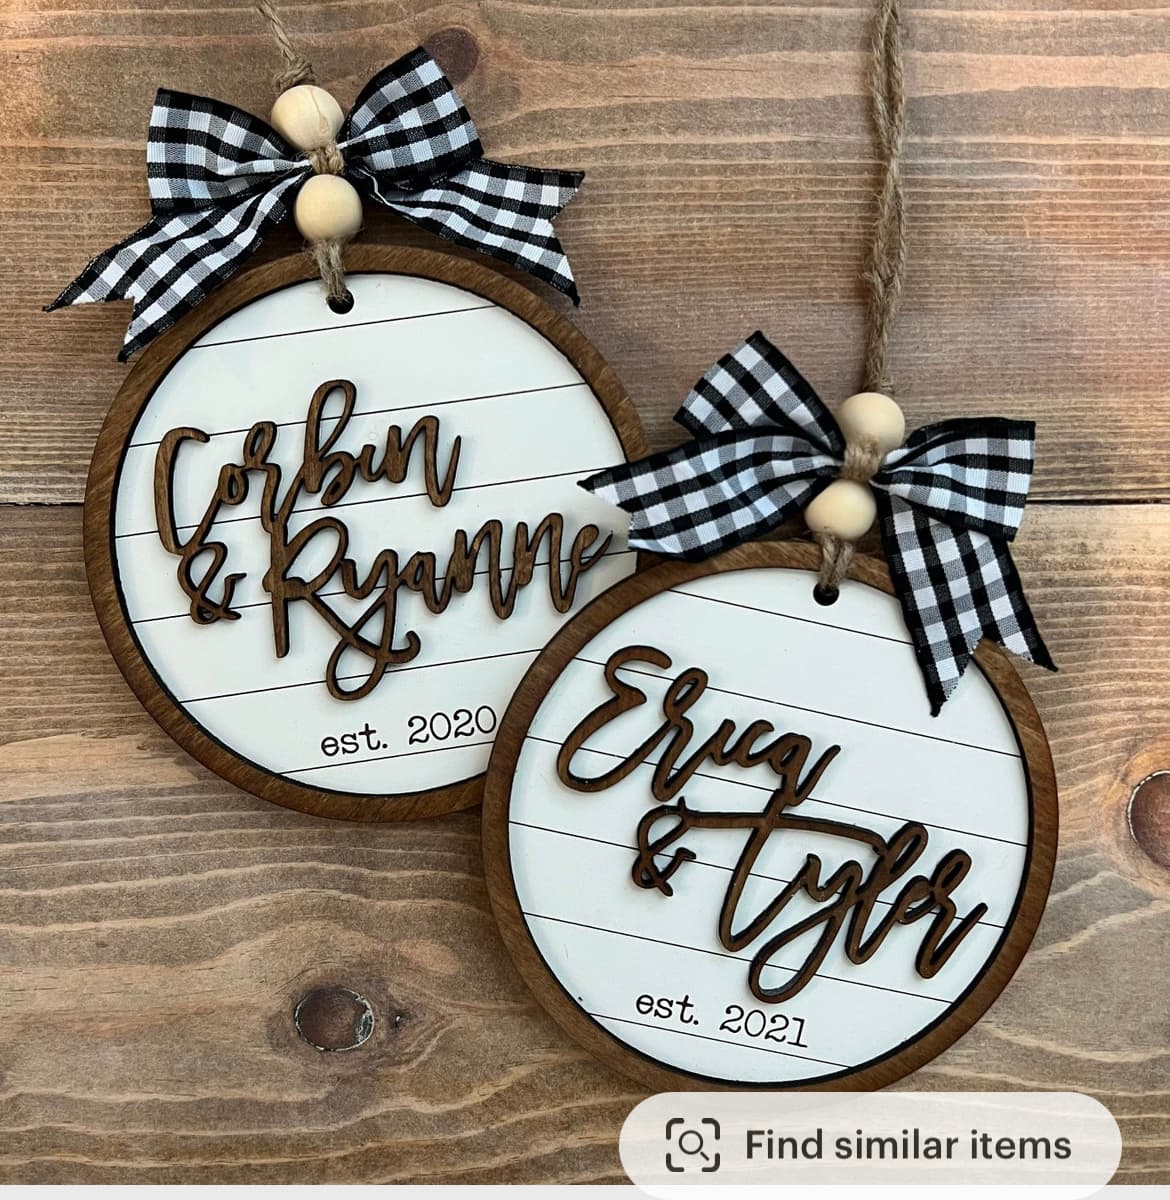
I am trying to make the shiplap design for the backing of an ornament and not sure how to create that on carbide create. Any suggestions would be greatly appreciated.

It’s a bit tricky in that for each angled part one has to draw an area twice what is needed, model that at an angle, then delete it and model again.

shows the basics — one just has to add the base thickness and repeat it.

Draw a series of overlapping rectangles:

Then model one as the desired shape (w/ a bit of overhang/extra):

repeating:

1 Like

Are you talking about a shiplap, or a feathered cladding, with angled faces?

Shiplap could be simulated by parallel grooves, with an optional chamfer on the edges.
Will’s tutorial would be for a feathered cladding pattern.

2 Likes

Until one arrives at:

at which point one can draw geometry and cut away what is not necessary:

The other designs can be done similarly.

1 Like


something like this

I would like to make something like this

In that case, it’s the opposite — draw in the narrow geometry for the V cut, then restore the thickness on one side of it.

If you get stuck doing this, please post a file which shows where you’re stuck and we’ll walk through it w/ you.

If you’re willing to accept just a groove you could do that w/ a V endmill.

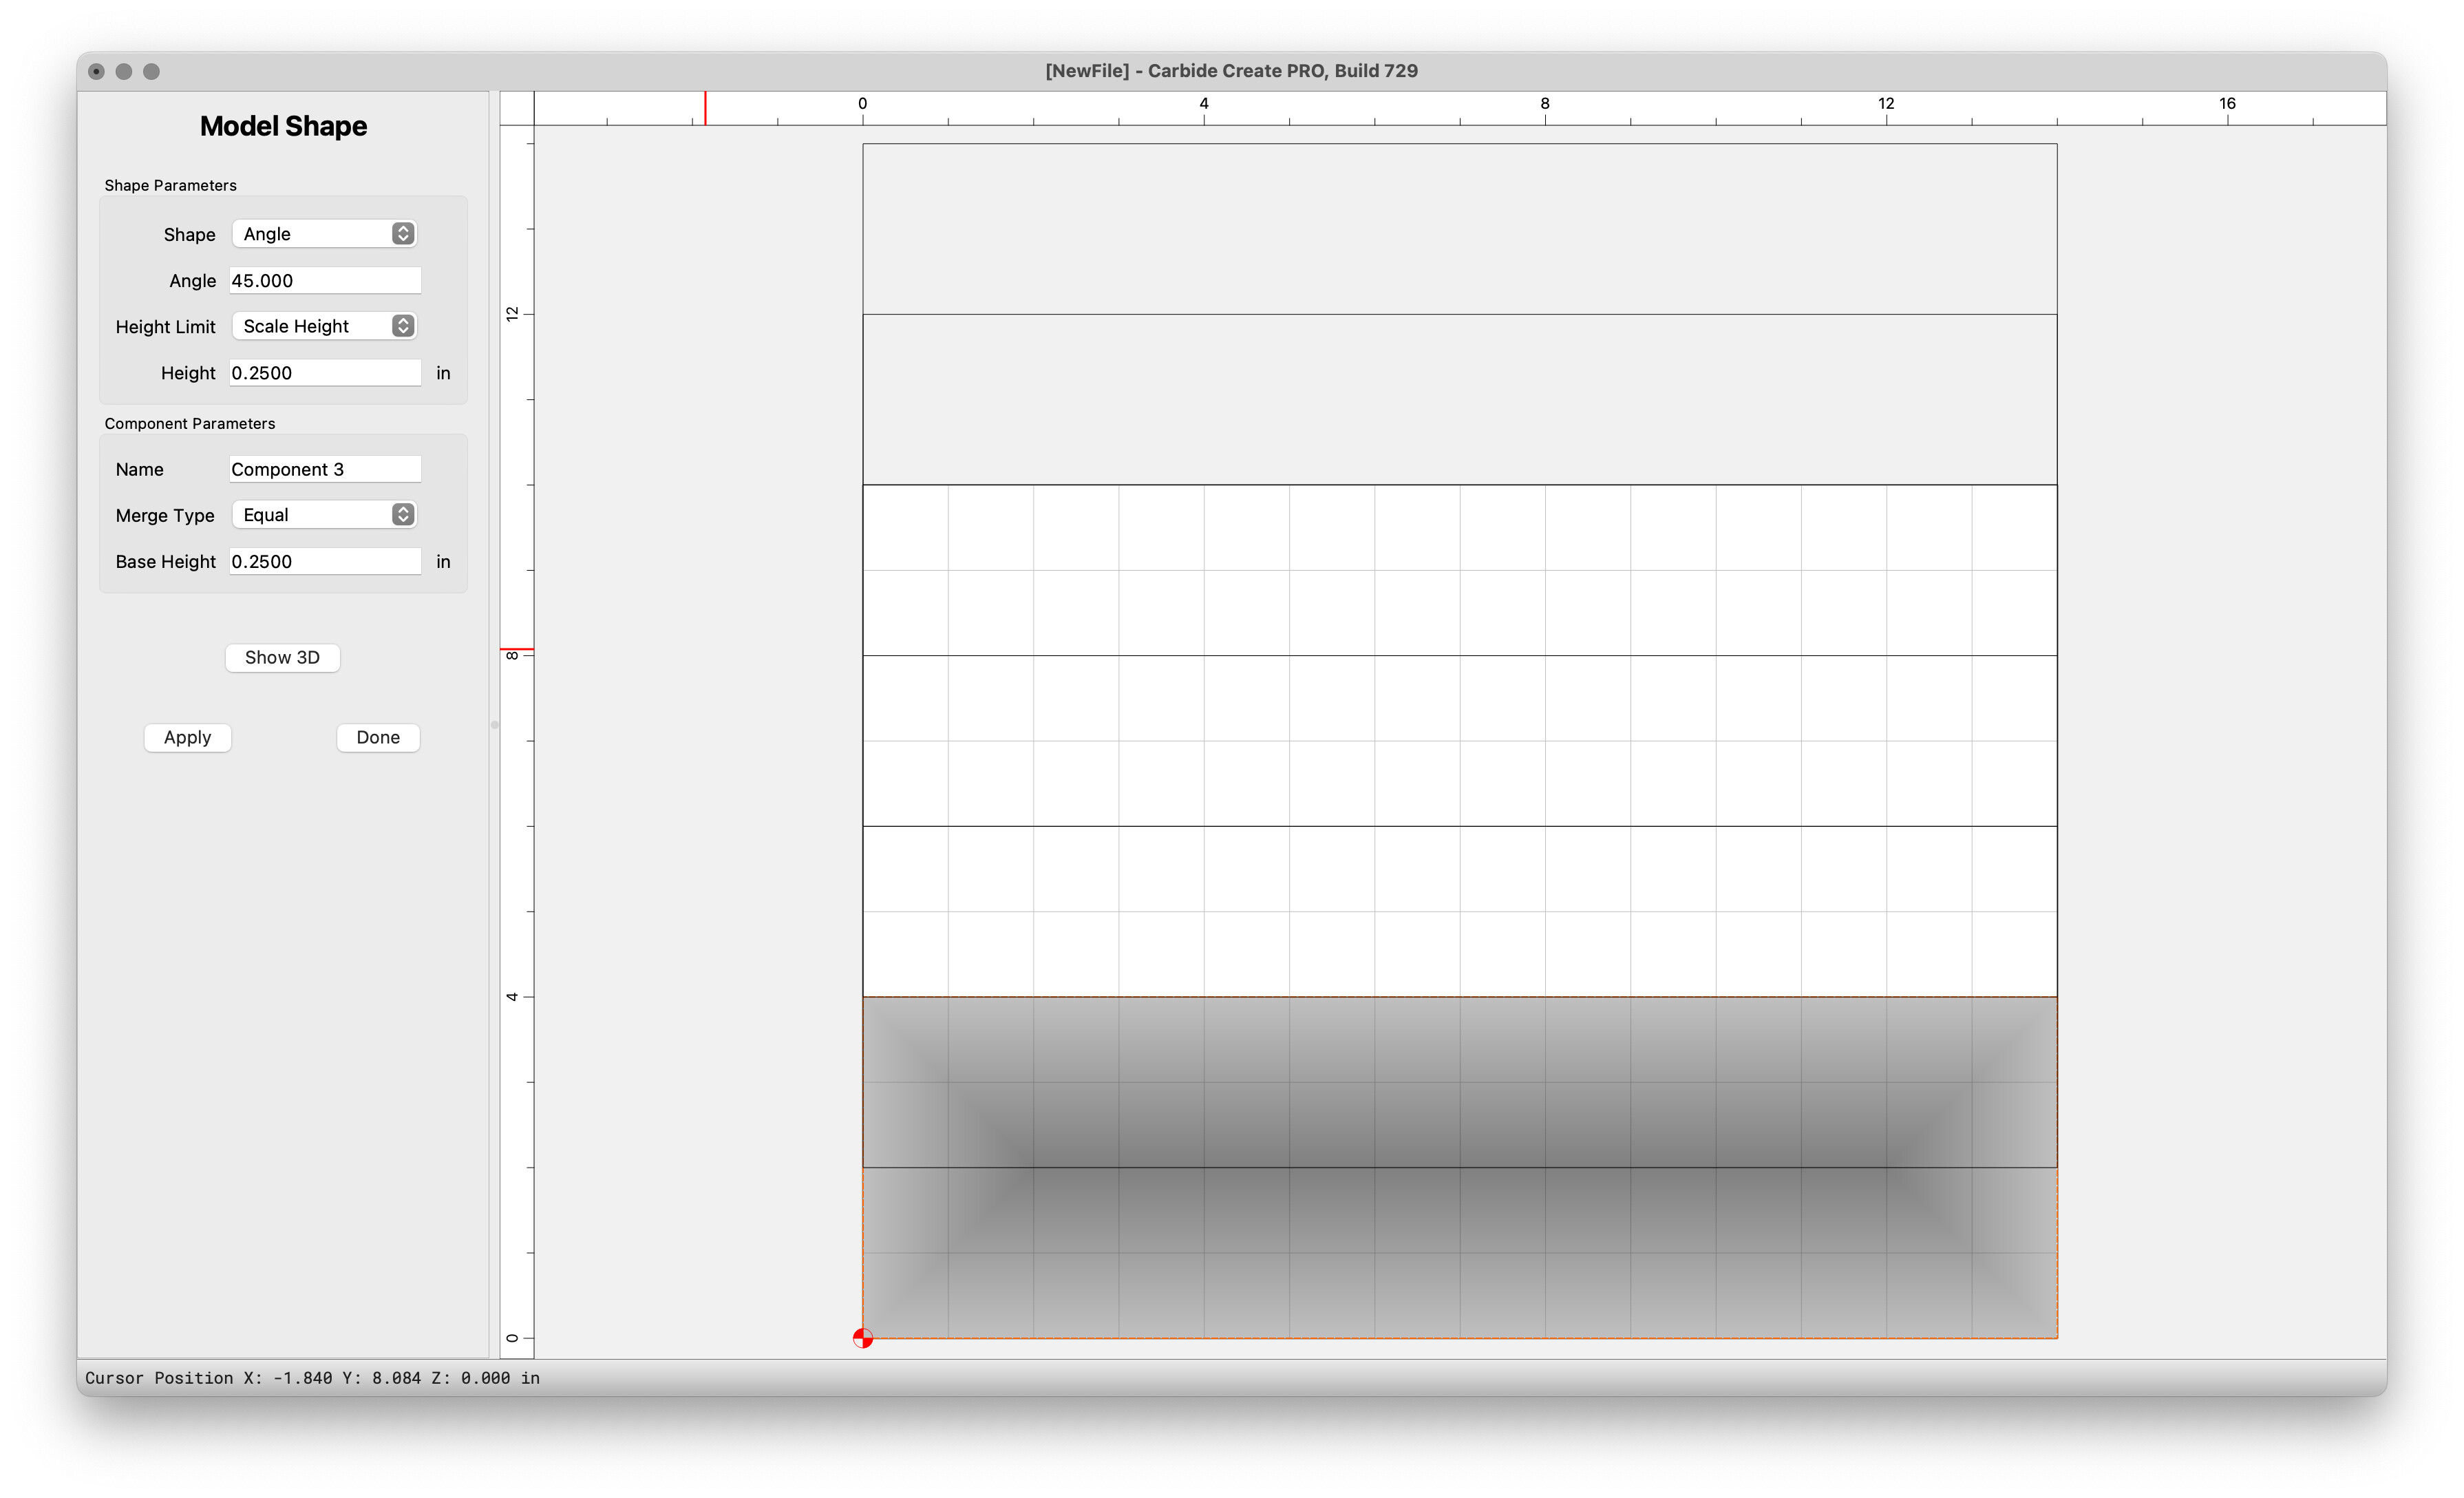
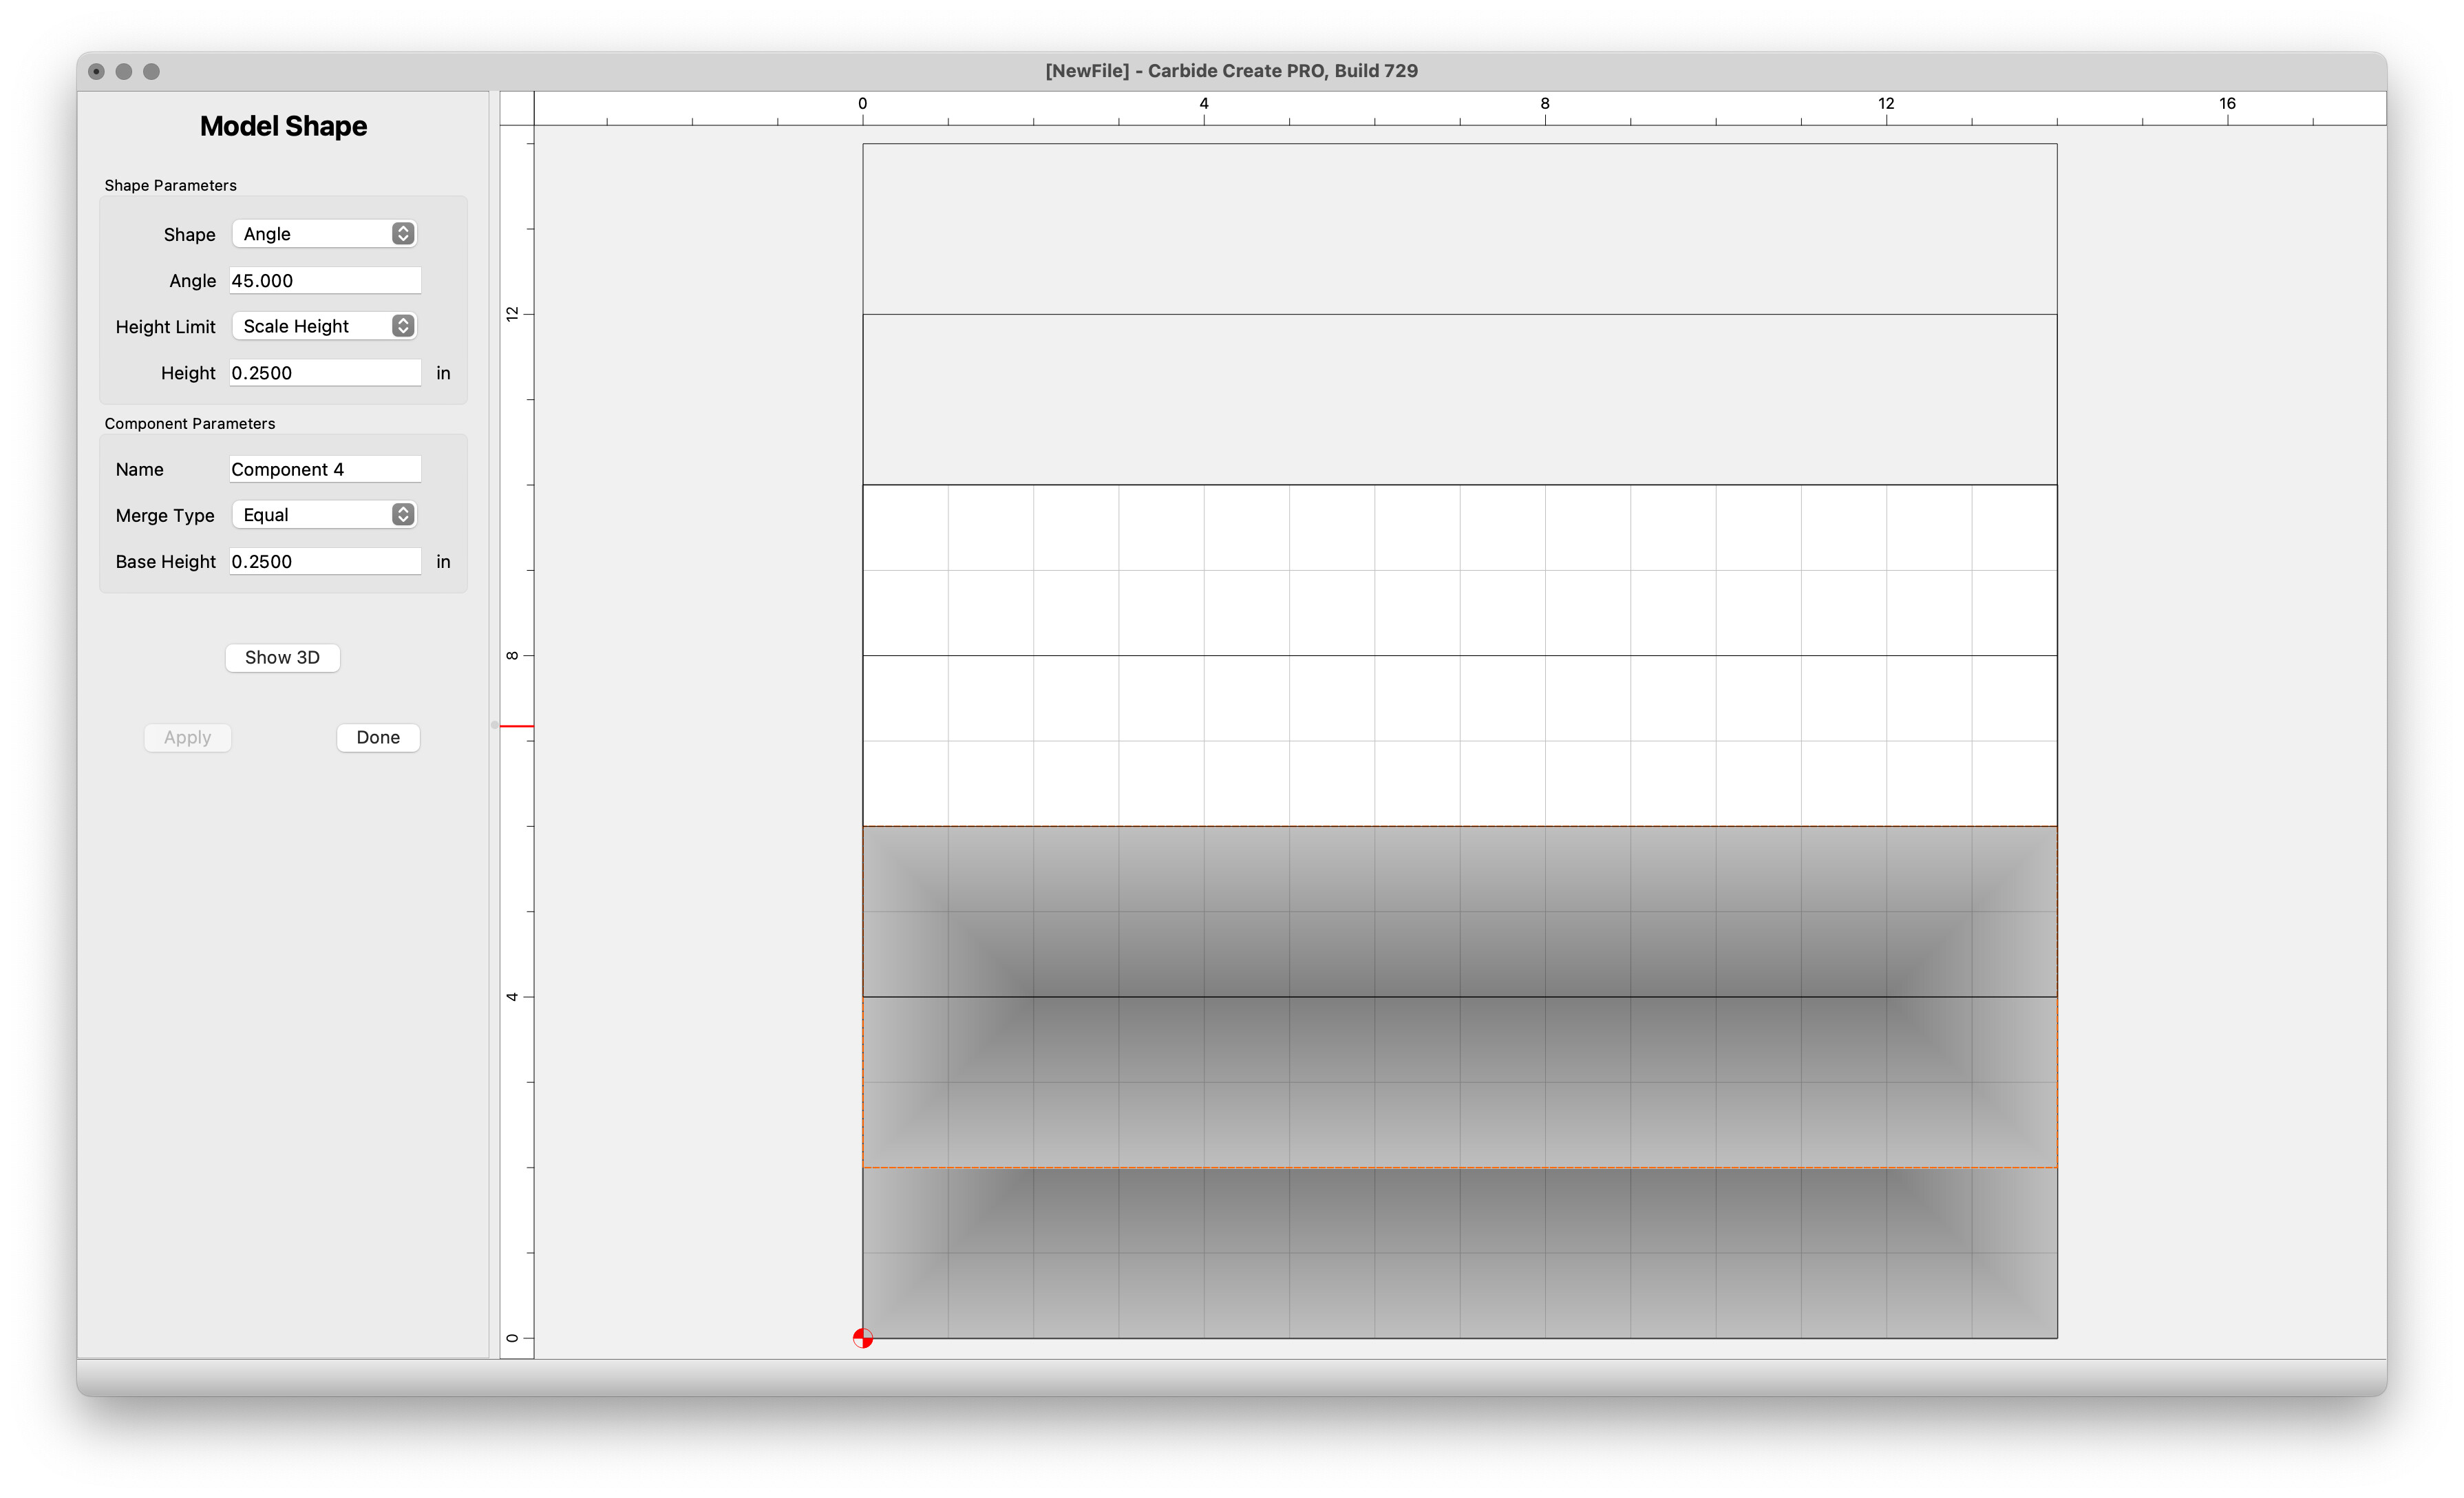
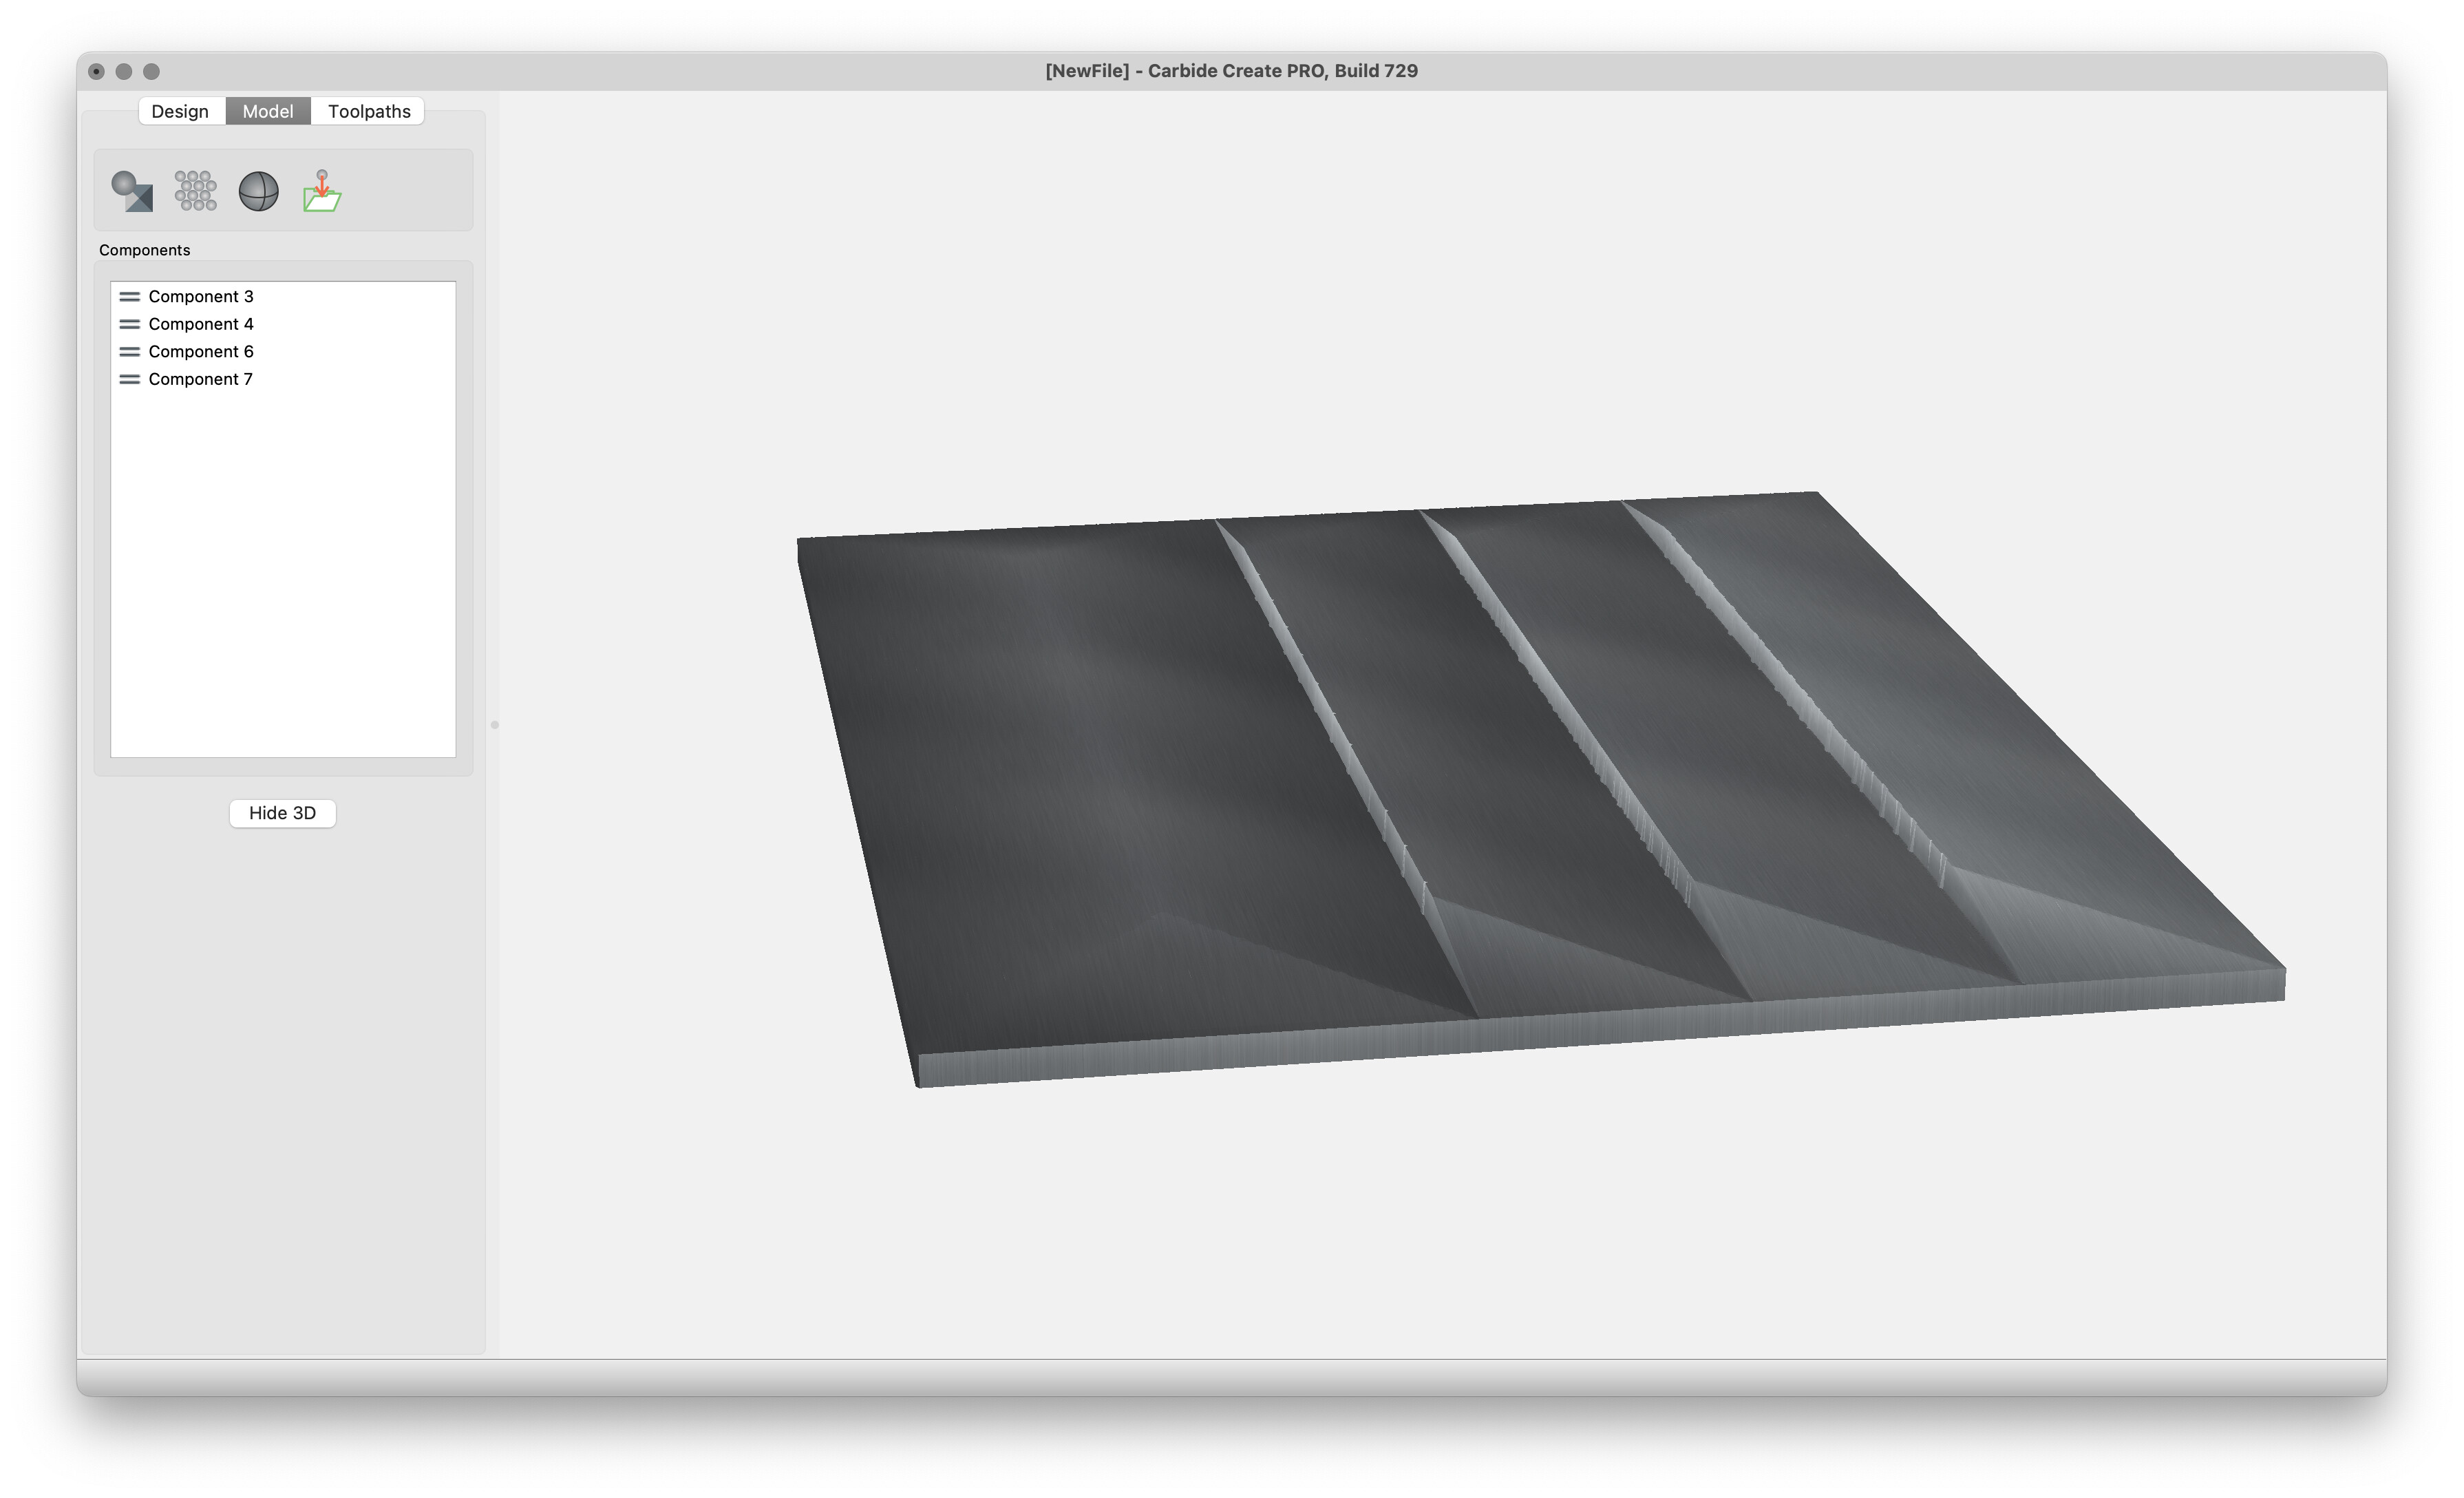
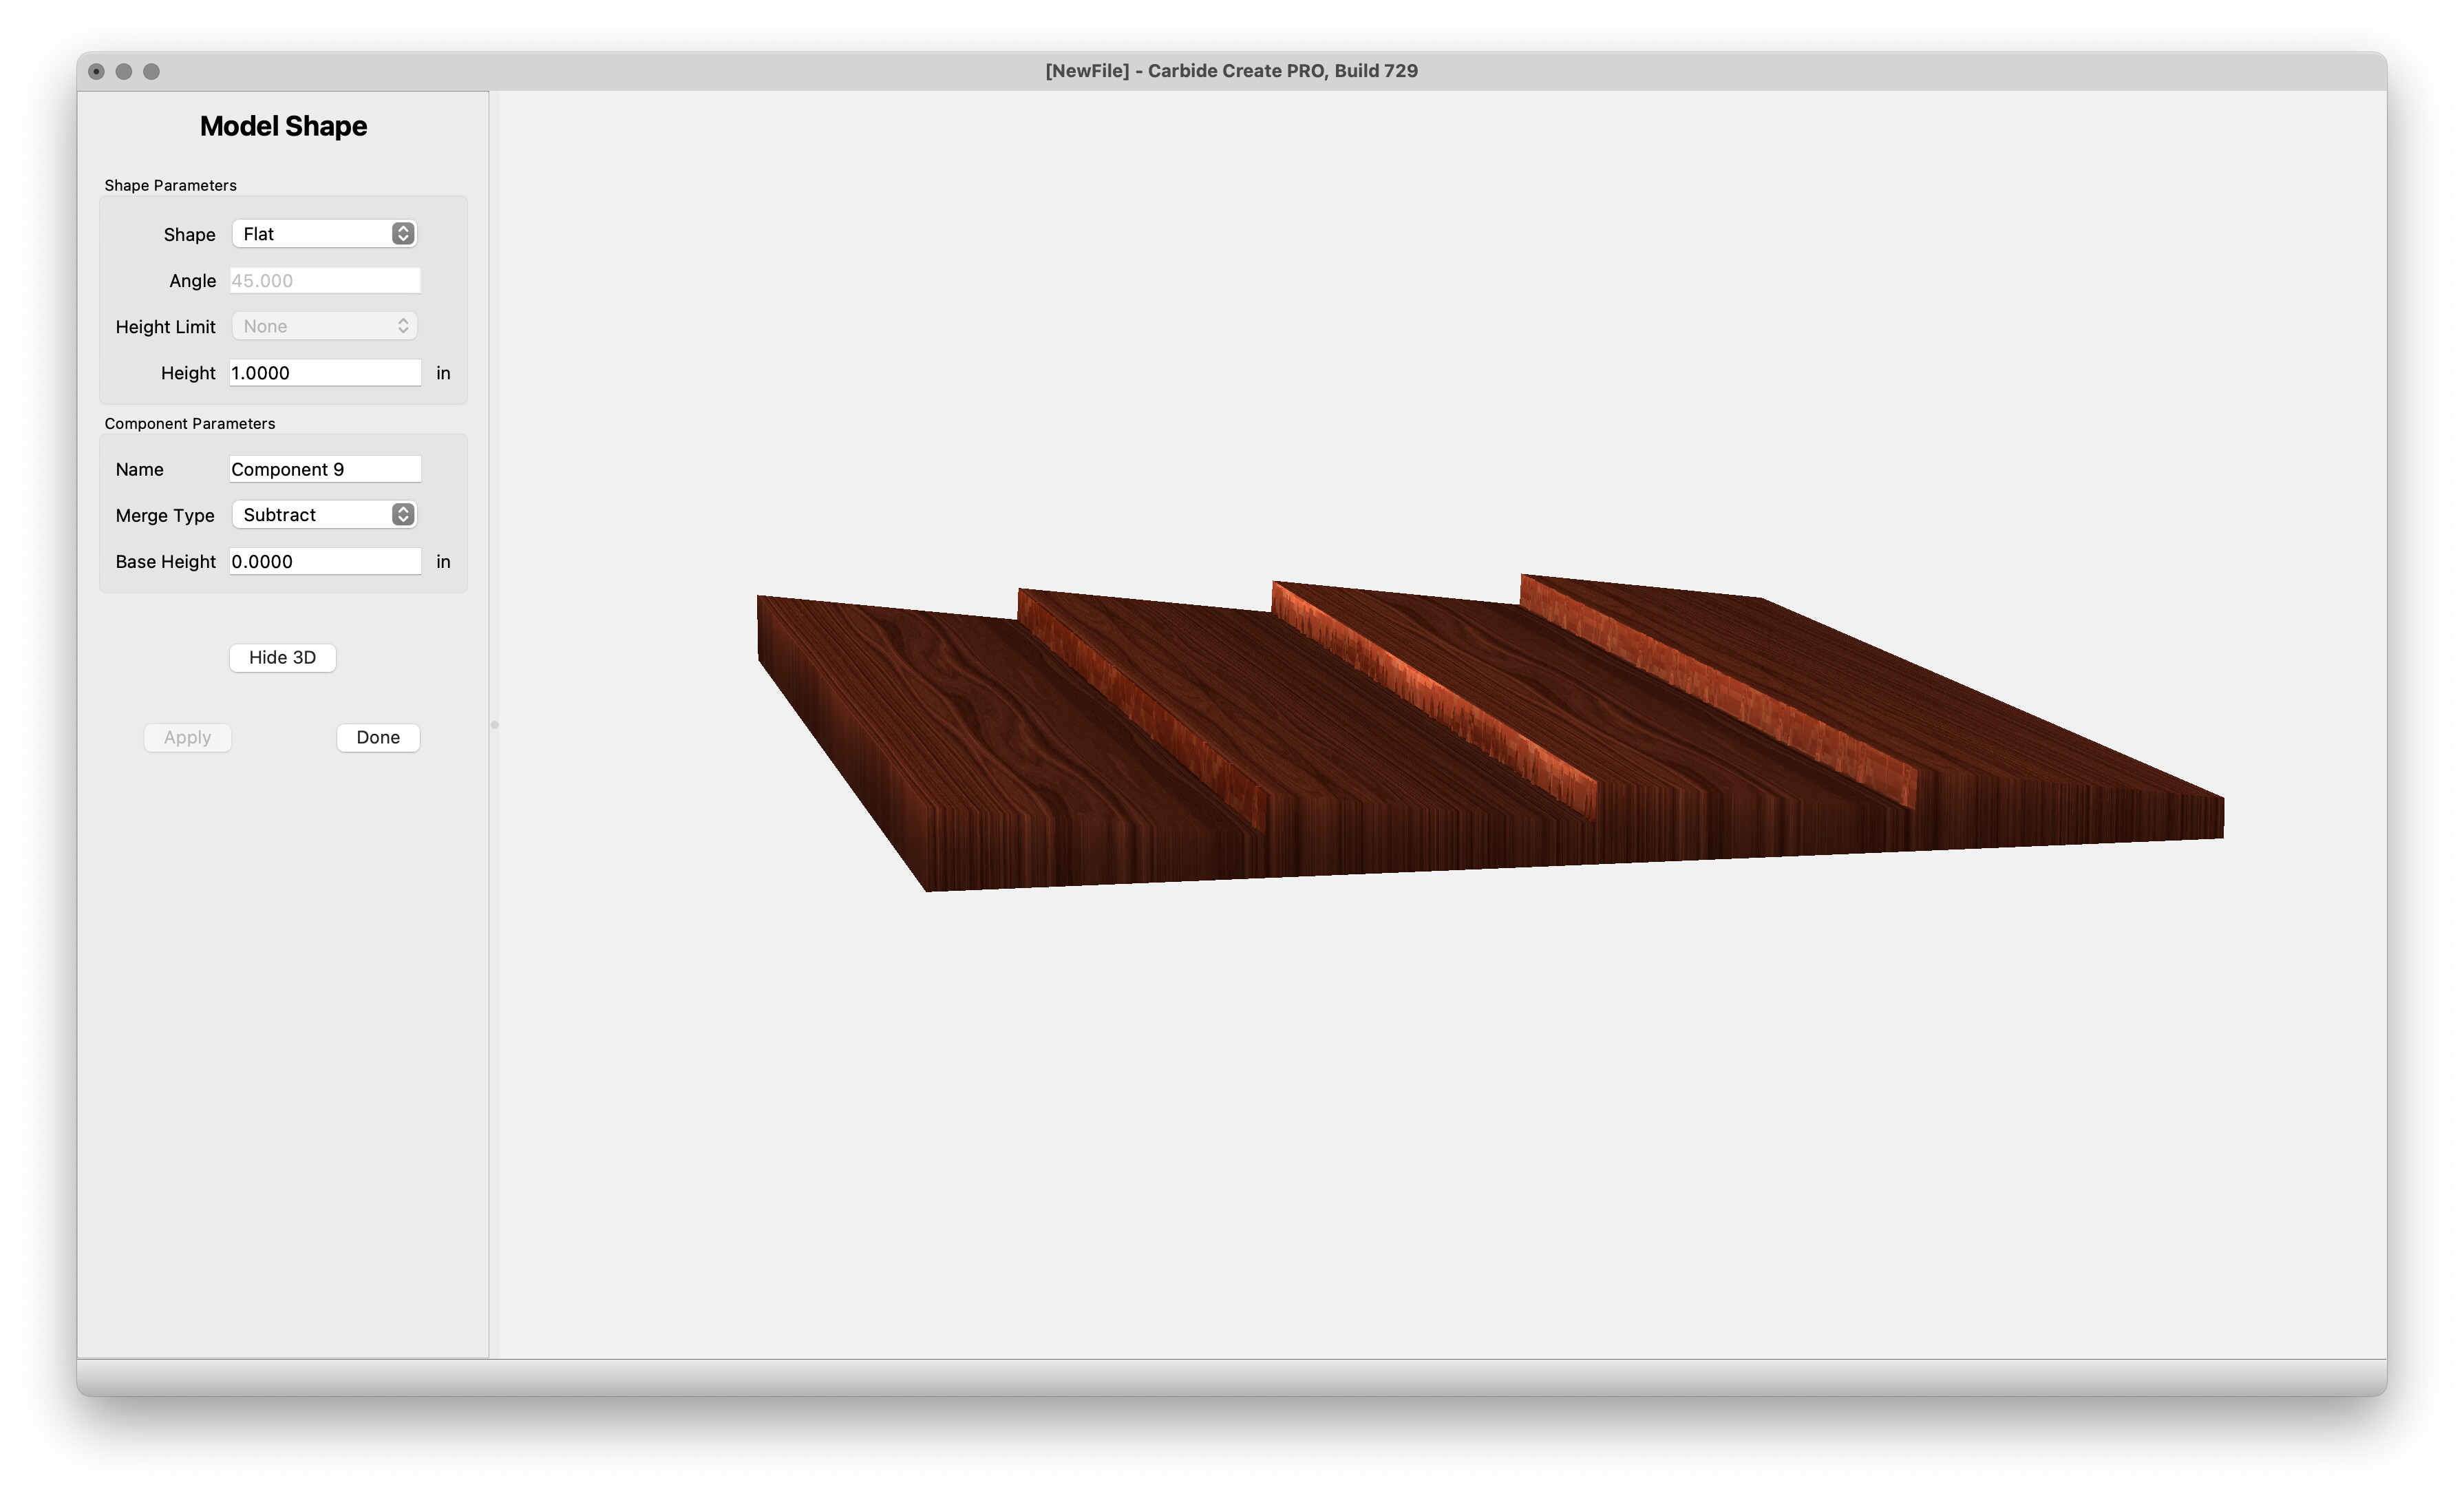
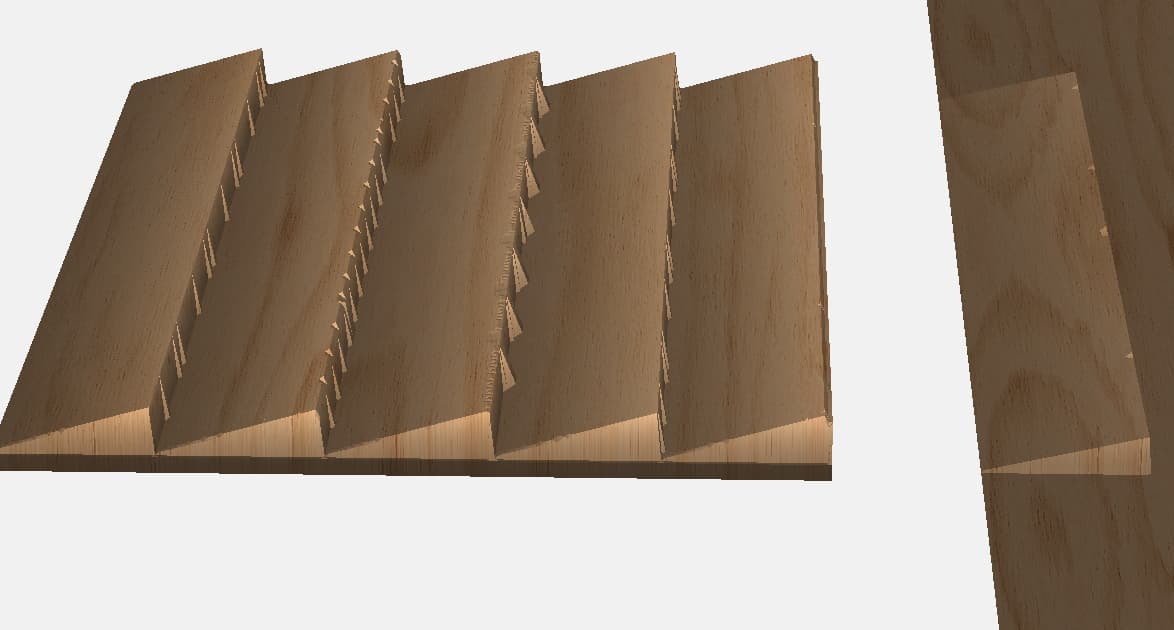
Need more input! OK, I get that the “shiplap” detail is going to be a really tiny groove of some sort.
Do you want to cut this from one solid workpiece? Or glue the rim & lettering to another piece?
Do you want the edges of the rim & text vertical? Or is a tapered/beveled edge OK?

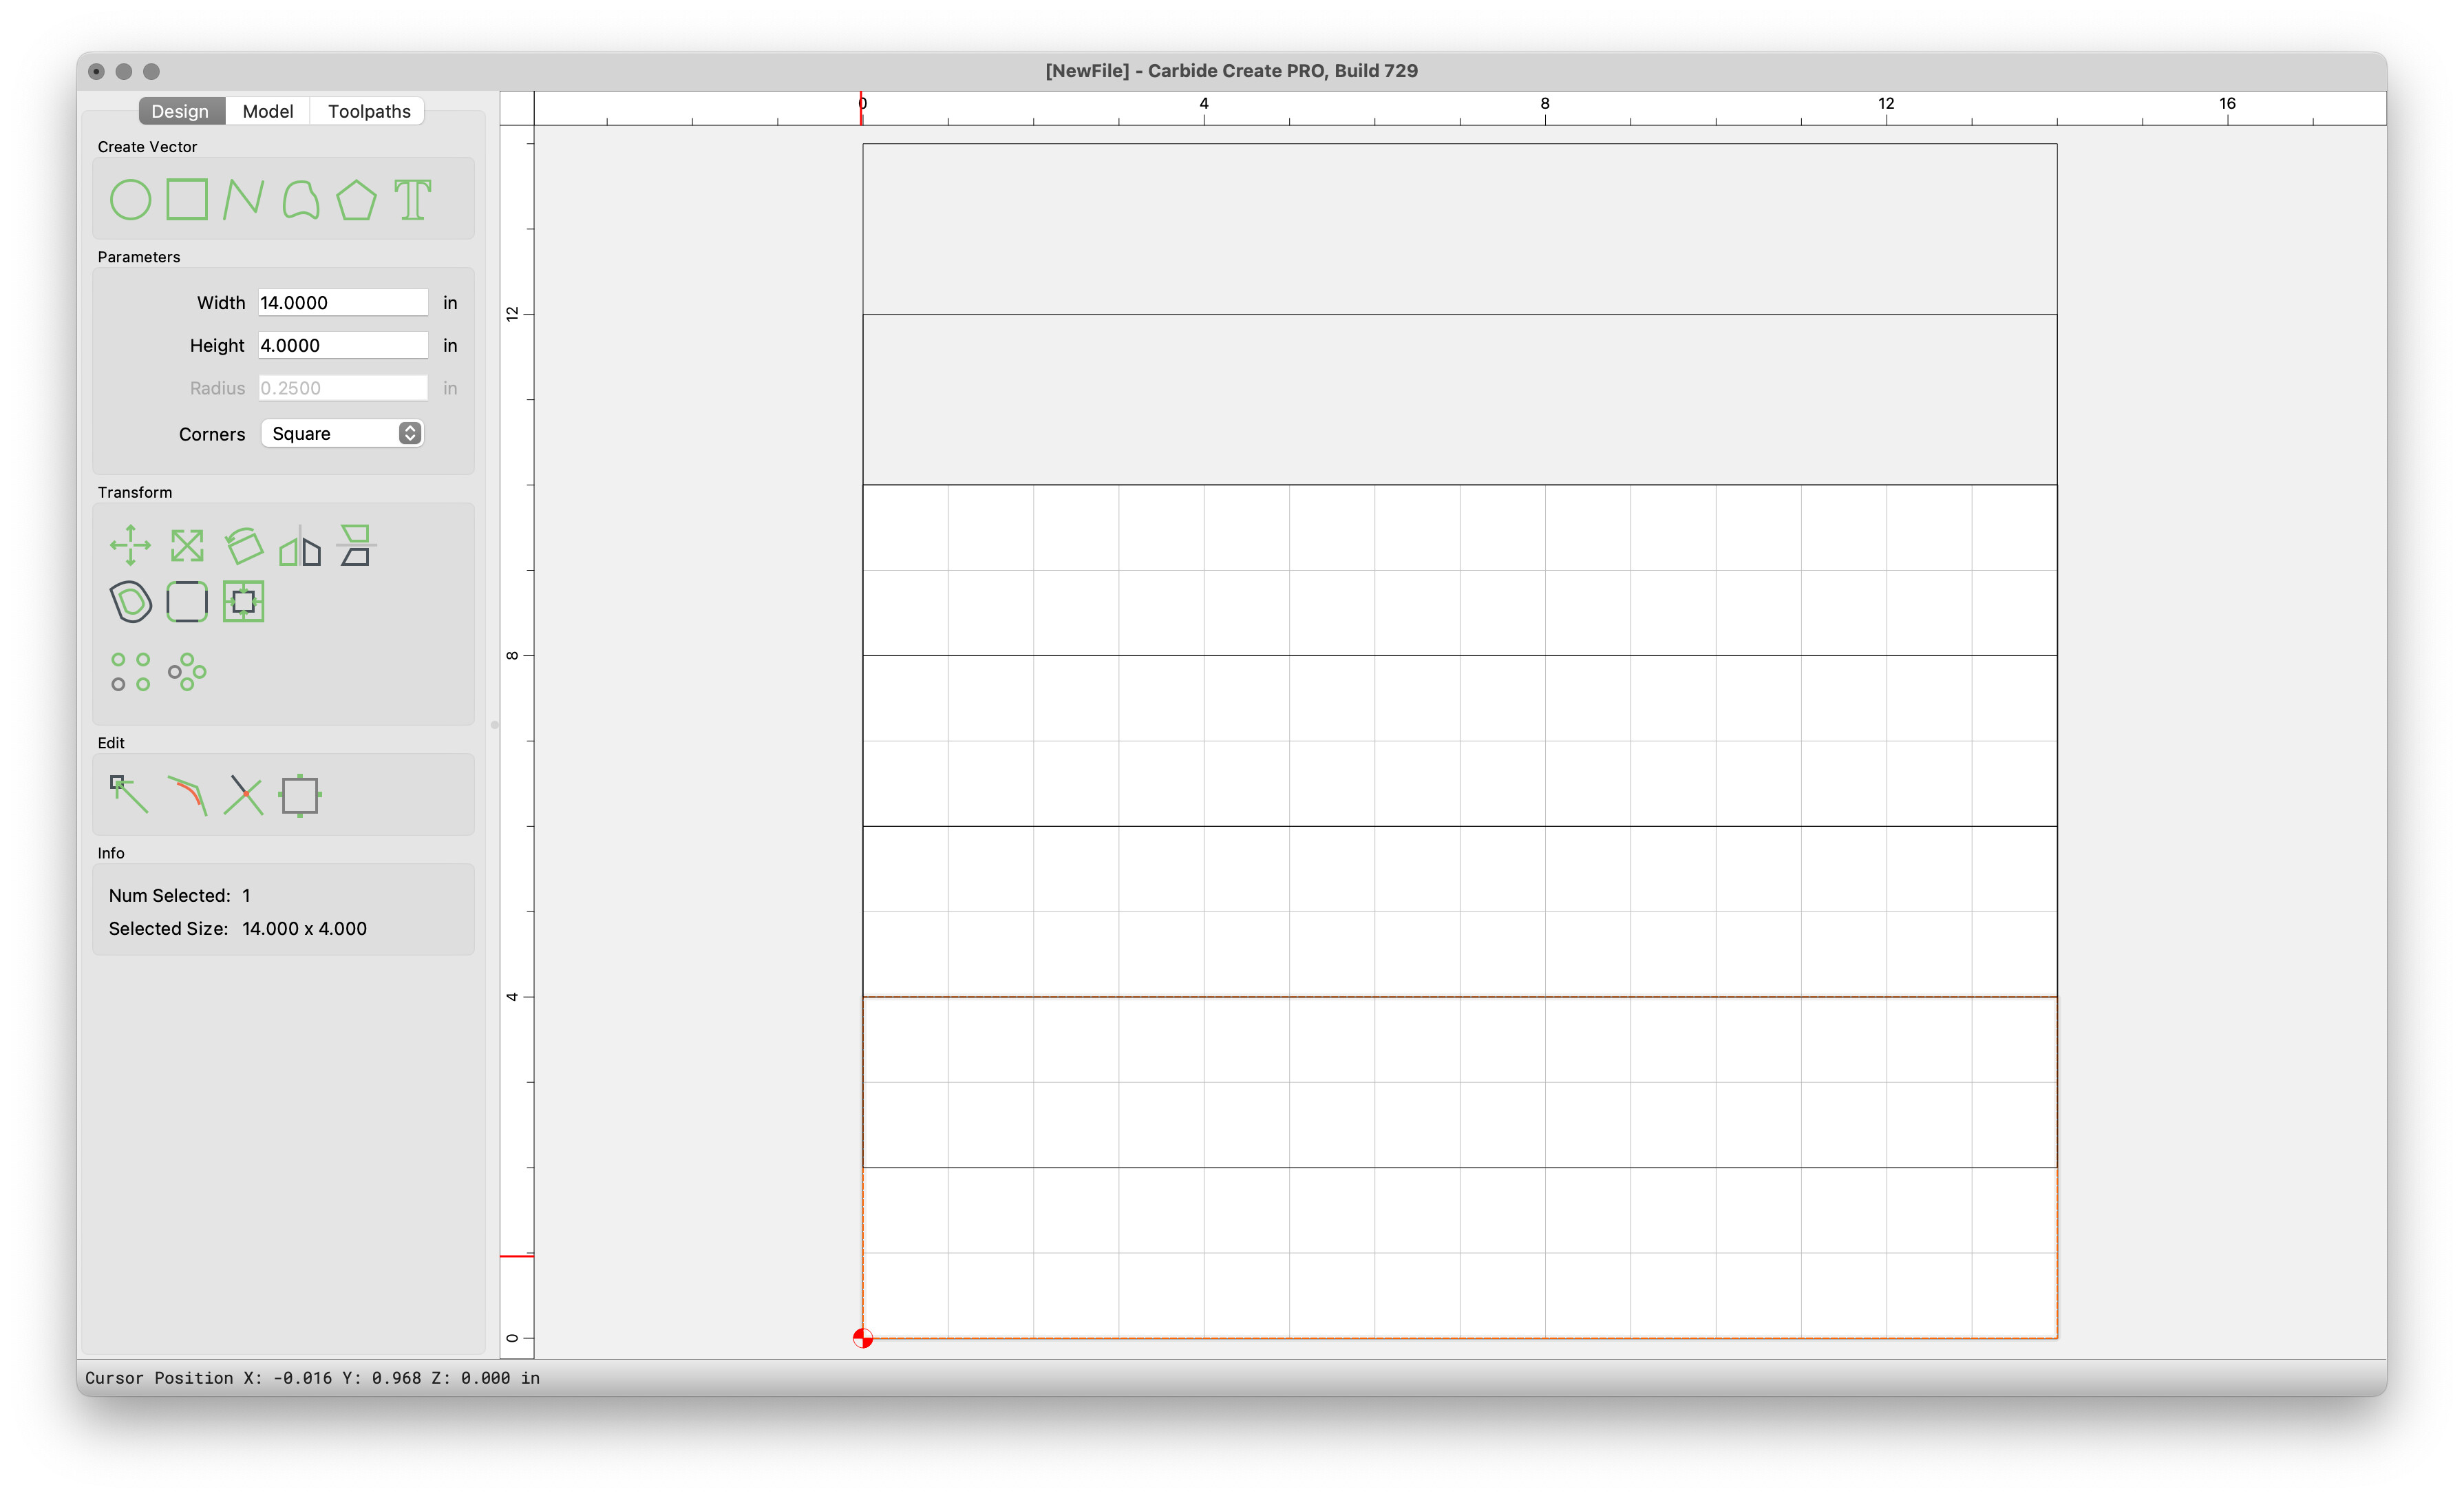
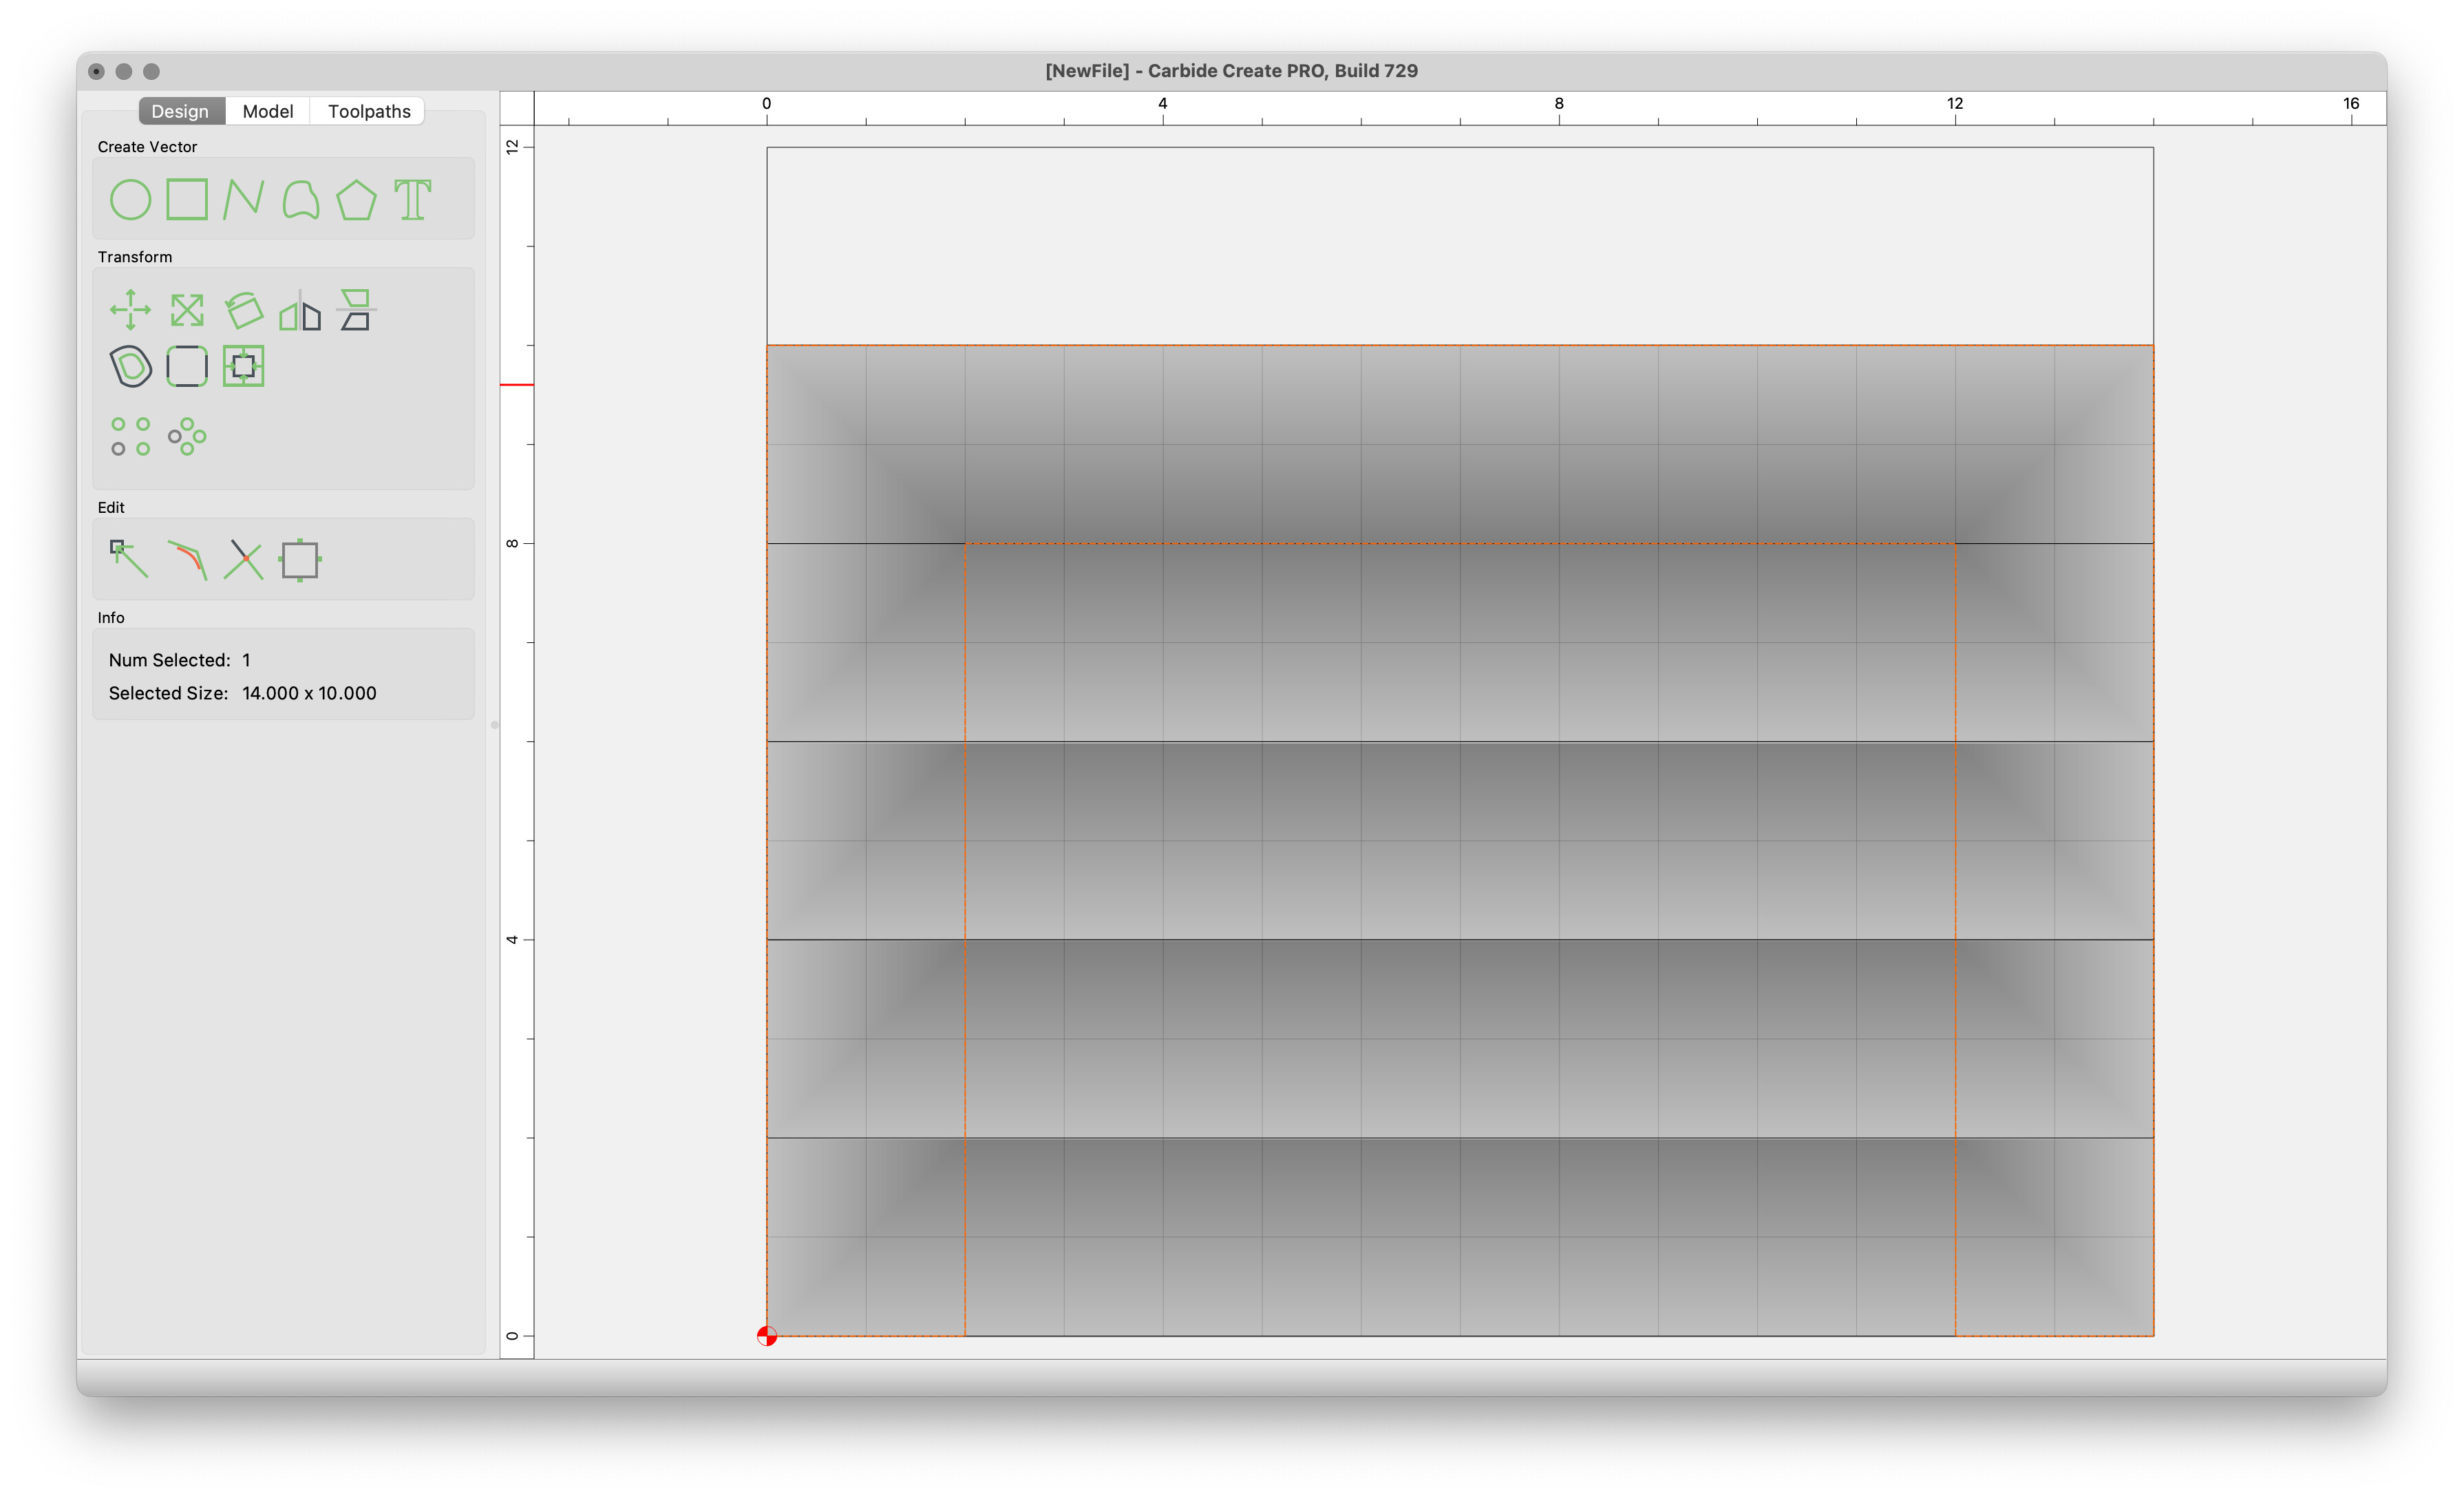
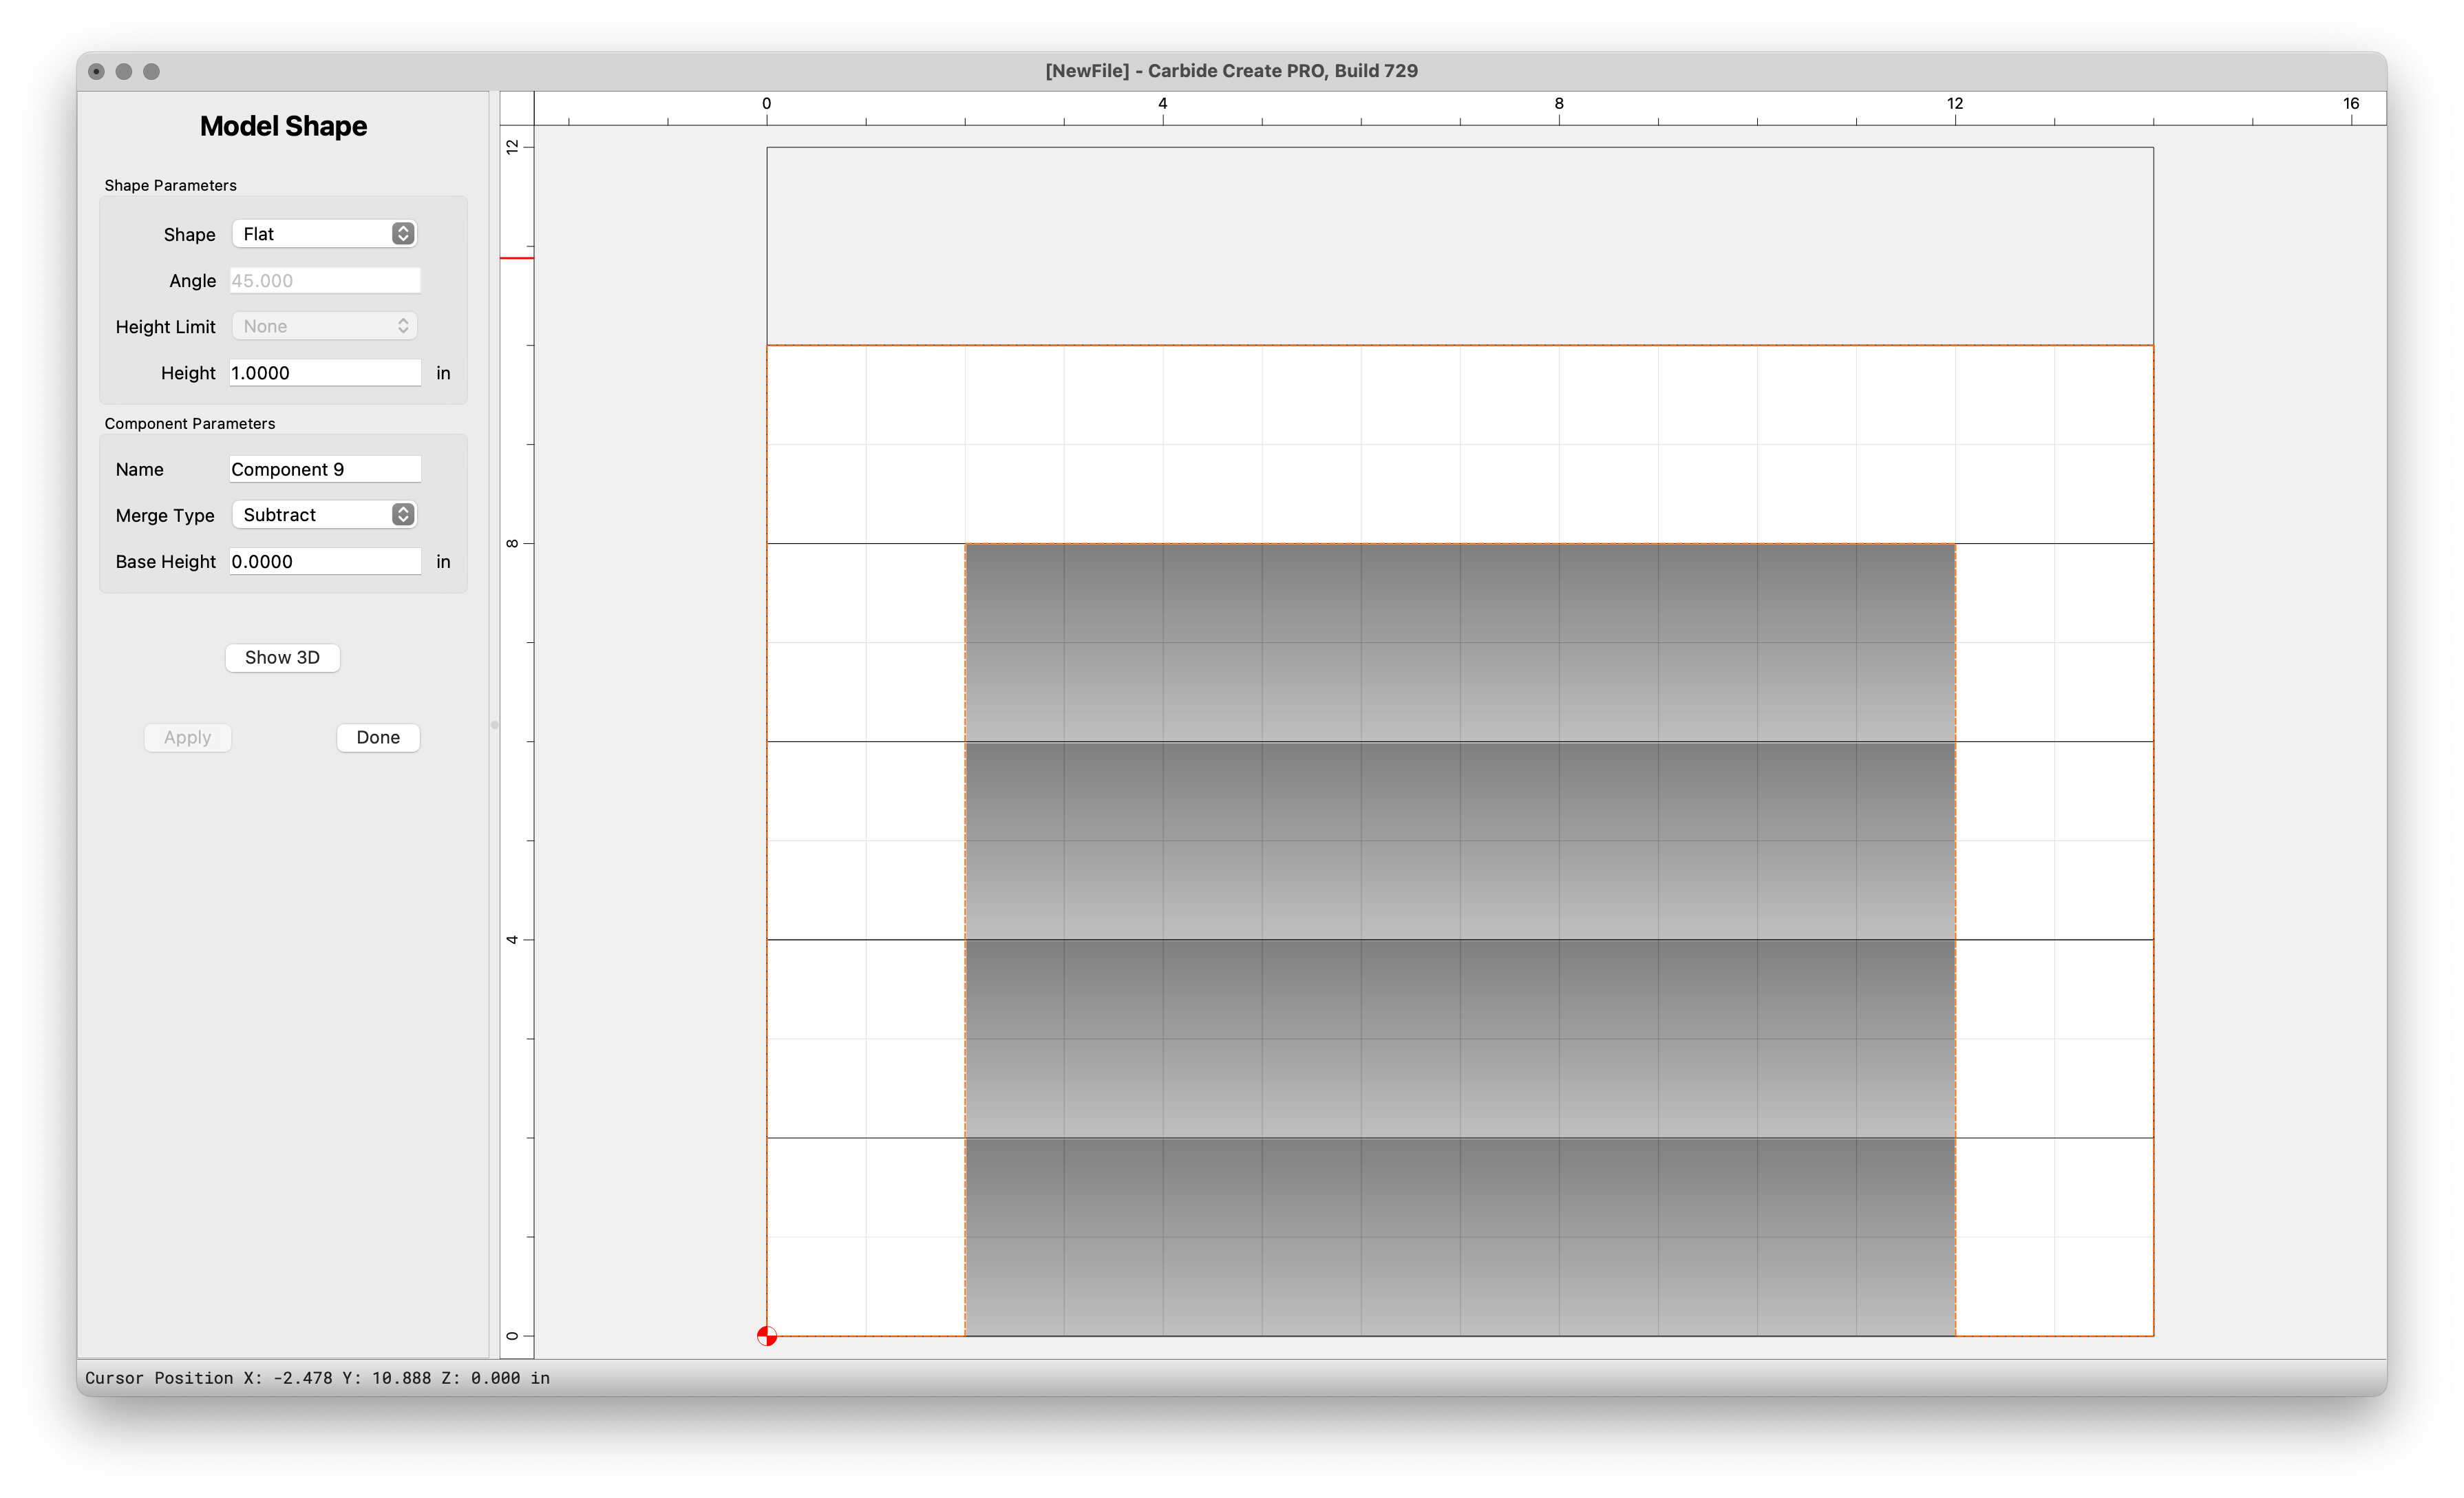
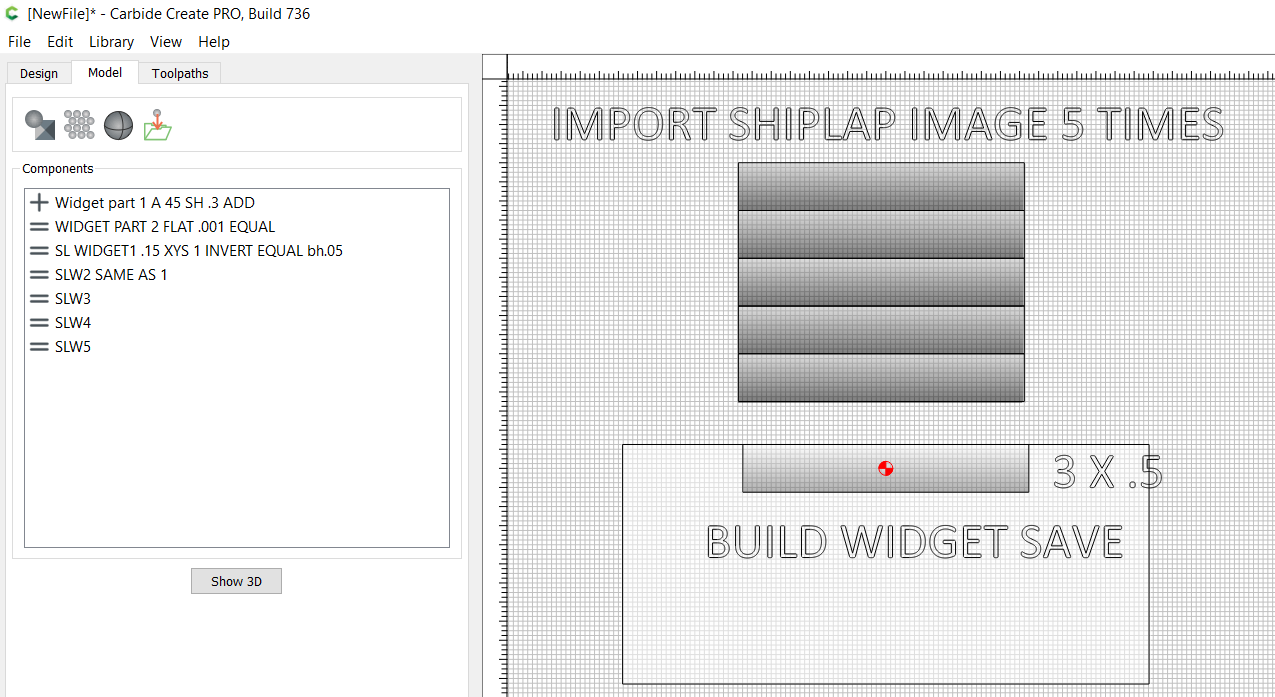
However you cut the tiny grooves, you’ll want to make sure your cutter doesn’t gouge the rim & letters. So you’ll likely need to trim the ends to avoid interfering. But otherwise it could be a simple as 6 straight lines trimmed outside of the lettering & inside the rim. With a contour cut using the appropriate depth.

1 Like

Here is another way to do shiplap. component name tells all the settings for component build.


Make the size and height anyway your like.

Video on how to build widgets.

You can use the widget for other projects.

Make sure the widget you build is centered on the zero point !

This topic was automatically closed after 30 days. New replies are no longer allowed.