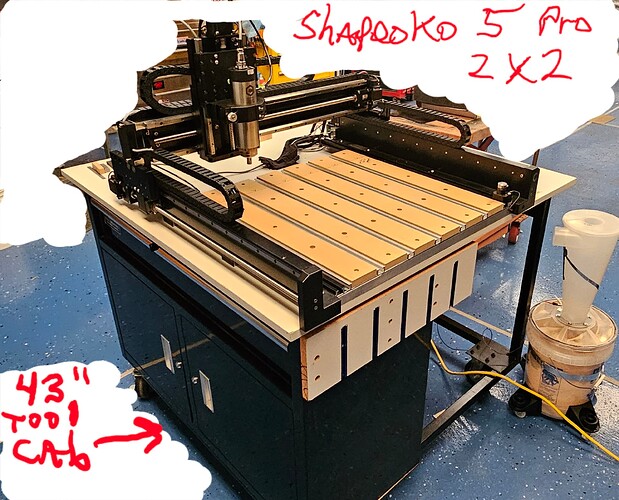
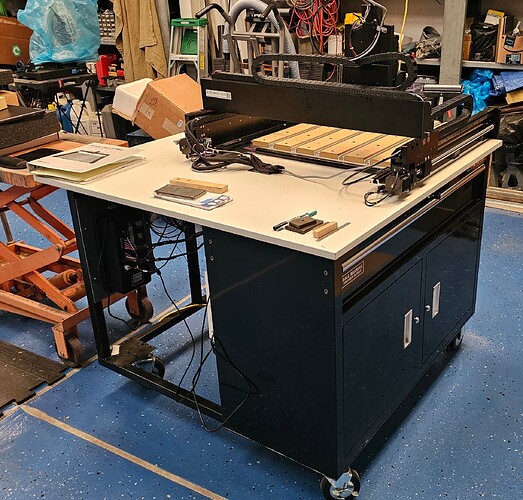
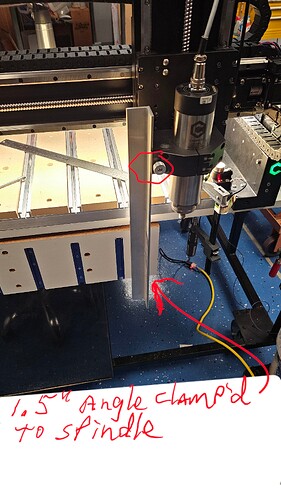
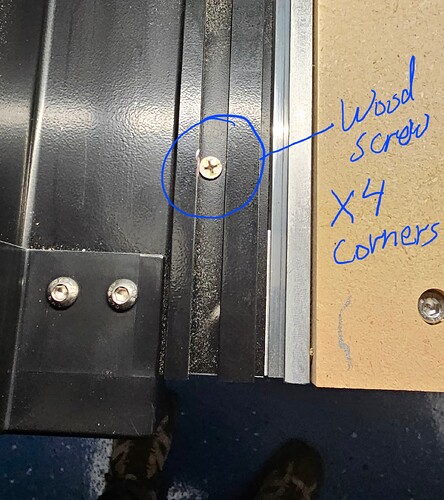
For anyone interested in taking their Shapeoko 5 to the next level with a vertical table to utilize the Y-axis gantry offset; I have detailed how to set this up. To facilitate mounting a vertical table, I built my 2x2 cnc cart around a 43"w tool cabinet, which I extended using welded 1.5"sq steel tubing. I have added notes to the pics attached to convey the process. I machined the side table on the cnc as one of the first projects, only 5 min to cut it!. Also note, I spent extra time to insure the 3/4" melamine sheet is dead flat so the cnc has a good base and no twists.
Note: when assembling your machine, mount gantry on the fwd mount locations on the Y-rails. It’s not difficult to backup and change this if you assembled your cnc in the back std position.
The key points to this setup are the following:
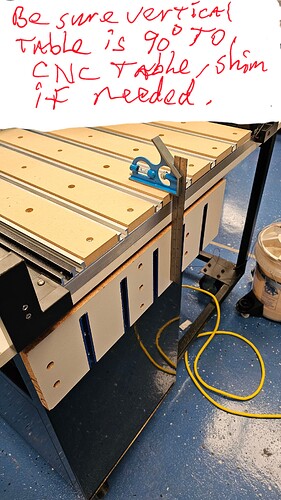
- Vert table must be exactly 90deg to your cnc table, full span
- Vert table must be at least .020"-.030" beyond your cnc table, so matl can extend up to the cnc deck
- This should be # 1 but you must tram your spindle to cnc table to be sure it is running true
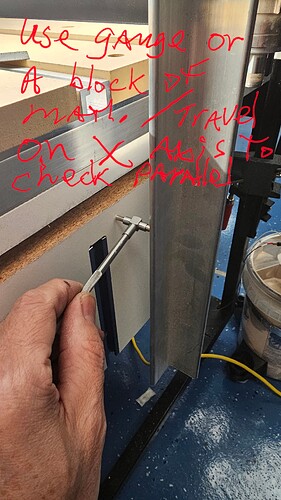
- The vert table must be parallel to the X-gantry axis, you can verify this in several ways. I did it by using a telescoping gauge with a AL angle attached to the spindle. Check each end of vert table by jogging the X axis across your vert table span. This is a very important step, otherwise your spindle will run away from your part or angle features.
- Once the above steps are completed, clamp your cnc to the cart temporarily, then drill through the Y rails in the t-slots as shown and fasten the cnc to the table with deck screws to prevent cnc from becoming misaligned to your vert table.
Have fun; this side table is good for tenon work but also allows you to cut features in parts that don’t fit under gantry! Note, you have 3.5" of overhang travel to work with.
