I’ve been using Inkscape for about 6 years, and love it, but it has never been able to import or open a file in stl format. You can open svg or pdf files, or import png, jpg, or others it considers a bitmap. You can modify svg or pdf files, but cannot modify the bitmaps other than trace (when possible). I too bought CC Pro to do 3d images, but I, too, haven’t learned enough to attempt. Going to have to bite the bullet and take on the challenge sometime I guess.
Please see:
I finally purchased the painter’s tape and glue so I can finally hold down my parts. I have my first 3D project that got all the way through to roughing and then the material came apart. Then I realized that the tape glue holding was a must at this point.
I realized that Inkscape doesnt read stl files. So, I will have to find another program that I can use to read stl files for alterations and designing, unless I just decide to not bother with making or purchasing any stl files, of just bring the purchased stl files into CCPro to just run.
Microsoft 3D builder will allow you to view and make some simple changes like flip/rotate. It may have more advanced capabilities that I have not exercised yet.
CCPro can also rotate and flip STL files. It also inverts them if wanted. I haven’t done anything with the 3D portion of CCPro, but now will be getting deeper into it for work designs. The only thing I can’t do in CCPro is alter the design.
Yes, but I think those operations are a little easier in 3D Builder as you have more control and granularity. It’s free so easy to try. I have also run into cases where an STL from an application did not import correctly in CC. I loaded them into 3D Builder and re-exported and then they worked in CC.
I have noticed my 3D STL file when brought into CCPro is a bit messed up. I ran the program after finishing adjustments and upon reviewing the design it doesn’t look like the picture of the program I purchased. I was going to try to make some adjustments in the imported part of the programming, but it seems that no matter what I do, the design just doesn’t take out the choppy squareness.
Like I said, I did run a test piece to see how well it would do. The problem I see with running test pieces is the length of time it takes to just get to a finished product to figure out errors in designs. I will try this other program and see how well it does in workability and transferability.
I think someone already may have touched on this topic, but I’m going to ask it again instead of digging into the posts to find it. I’m limited on time so, it’s not so easy to go searching and hunting.
Anyways, my question, when a design (STL file) has been imported and the options are given for adjustments in height and scale and such, I saw adding stock raises the carving to be done. If I wanted to cut a 3D design on a piece of wood that is 1 1/8 inch thick and my design is only setup to be full thickness of .450" and I added .200" to the material height, and I set Z zero to the top of the part, will the program be ran on top of the material down only to the .650" and leave the remaining material under it? Or will the machine cut to the thickness I stated in the setup of the program and remove .475" of material to the thickness of the proper cut depth? Or will the machine crash after setting Z zero to the top of 1.125" and then would it come rapidly plowing into the material?
Can the machine be manipulated into thinking the material is only .650" thick and cut at the top of the material down to the .650" and leave the remaining .475" material untouched?
I started using the blue painters tape and super glue to hold material and am now trying to run 3D programs. It holds well after the board’s surface has been prepped for taping and glue up. Problem I have with the glue is, the tubes I bought are only half full of glue and it gets frustrating to think there is more glue in the tube and I find out that the tube has a big bubble in it and all the squeezing I do to the rest of the tube yields my no more glue. Anyways, I’m hoping to figure this cutting stuff out about the designing part of the program before I go and crash another bit. I screwed up my surfacing bit when it crashed into the material holder and hit the metal screw inside.
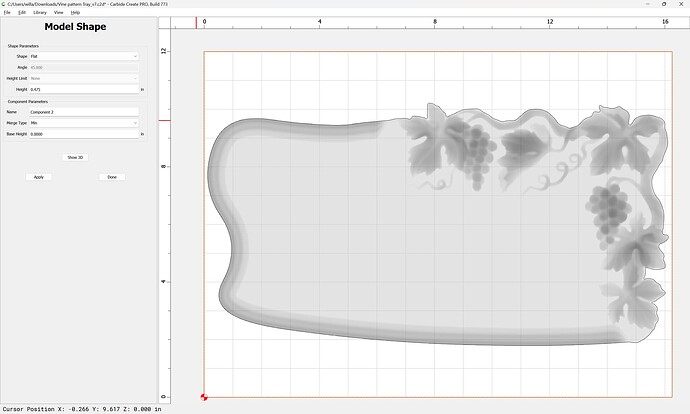
If you set your stock thickness to 0.650, then import the STL at 0.450 with a 0.200 Base Height,
Then the program will cut from the top of stock, 0.650 deep. Regardless of how thick the actual stock is.
If you set your stock thickness to 1.125, then you will remove 0.475 before cutting into the 3D model
Models are built from the bottom up. Programs are calculated from the Top of stock down.
To your previous post: It would be really helpful to open the STL in a program that can view it & measure it. It may be that the model is just not that detailed or smooth. STL is faceted geometry. It’s a whole bunch of planar triangles that represent the shape of the object. Tolerance controls the size of the triangles. Imagine representing a circle as a polygon. the more sides, the closer it looks to a circle. But it will never be a circle.
So you’re starting with the model that is an approximation of the actual part. Then you’re applying toolpaths that are an approximation of the model.
You could also measure the actual size of the STL model. (that gets scaled when you import to CC)
If it already has the base height built in, and you add more base height, you’ve scaled the 3D detail on the top down and flattened it out, so you won’t get as deep a carve which could lose some detail.
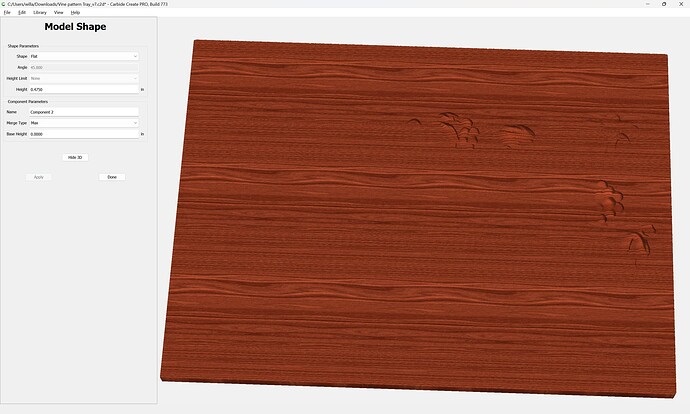
Model the design so that it has 0.475 inches of thickness at a minimum:
(using the “Maximum” setting)
I see what you mean with the triangle thing about the STL file. When I import the STL file and then click “show 3D model” the detail is seen in many types of triangles. The picture representation of the design before importing is crisp and smooth. There are no flaws in the design. Then once it is imported into CCPro, the design becomes distorted and much of the detail is lost. Even when I go to a smaller endmill to cut finer lines, the detail still is lost.
The program design has no material addition to it and looking at it before doing any adjustments, the thickness is preset to around .1515. If I add thickness to the carving It distorts even more. Then if I add base height to make the carving thicker, it makes the sides cut these rough textured lines along the side of the material. Seems that no matter what adjustment I input into the adjustments before okaying the imported design, nothing really gets better. I zoom in to view the design and see all the triangles you speak of.
So, what I have in the design verses what I actually import into CCPro are two different designs. The details are removed and many things become majorly distorted. I’m ready to start producing these 3D carvings so I can place them in some local businesses to help promote business with the locals, but I can’t get the details to come in better and I also can’t seem to remove the cutting lines, no matter how small I make the cross over cut.
My last attempt at the 3D carving, I had the overlap set for .012" and was running a 1/8" tapered ball nose endmill. Yes, I know that really that was still big for the carving but the lines left behind per pass was like I set the set over for .08" or .09". There are cut lines all across the material throughout the whole carving, which means I would have a ton of cleaning up to do just to make the carving look somewhat closer to the original design, even though that wouldn’t be possible with the design distorted from the beginning at import.
I think I am a bit confused as to what you are showing me here.
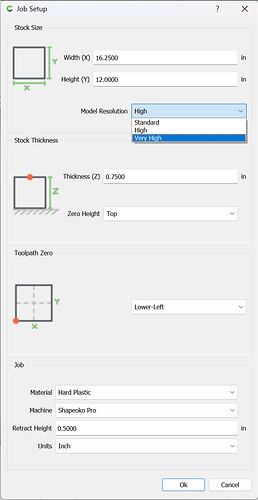
The triangular tesselation of an STL is converted into a height/depth map pixel image when imported into Carbide Create — the quality of this conversion is determined by:
Job Setup | Model Resolution
and the distribution of the pixels across the stock area — a tiny 1" x 1" stock area will allow intricate detailing and smooth modeling (say for jewelry) while a 4’ x 4’ stock area will only allow detail suited to a large scale decorative piece.
You had asked how to do two-sided work — it was shown how to fill in the bottom half of a 3D model so that it would only cut the upper half.
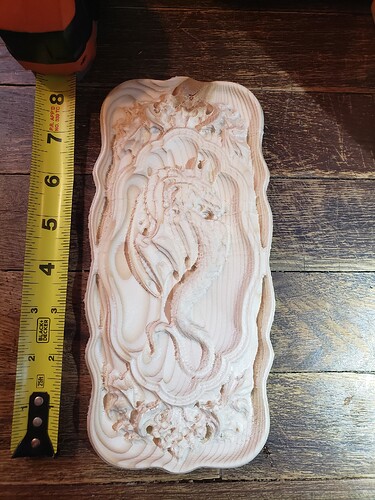
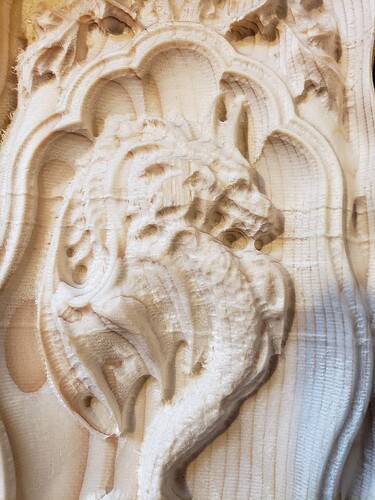
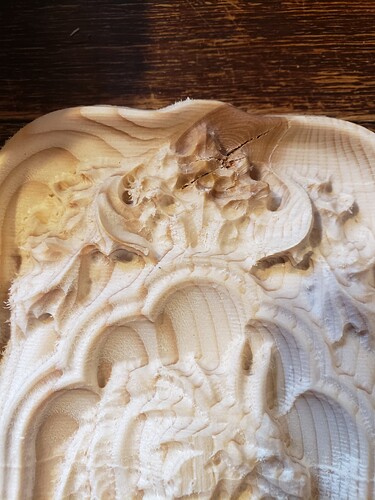
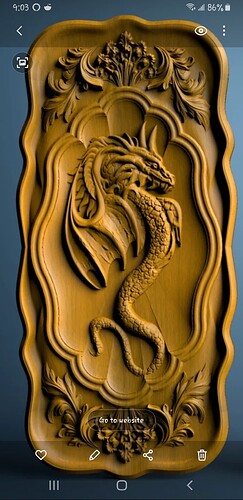
I uploaded some of the pictures of the carving that I ran and one of what the carving was supposed to look like. I understand that some detail will be lost because I was not running a small endmill, but at least I would expect a bit more detail then this guessing game of what it is and it’s details.
As you can see in this pic, the carving isnt that big at all.
The lines you see in the carving have bigger steps between passes then the little .012" that I set my stepover to. There are even trace lines across the part that shouldn’t be there. The preview in my program doesn’t have any of these lines in them. I thought about running this carving with a 1/16" endmill, or even a 1/32" endmill, but the problem with the smaller endmill is clearance on the body of the endmill up past the flutes. The 1/32" endmill would hit the material with the upper side of the endmill and more then likely would break it. And the other issue with running such smaller endmills means the job would take all day to carve. There is no way that I could make any money off any of this kind of carving if the process takes 8 hours to carve with smaller endmills.
If I figured $25 per hour machining time, that would mean that I would have to sell this little carving for $200 plus. I dont know anybody in their right mind who would pay over $200 for a small wooden carving like this. This carving that you see took me 2.5 hours as well and the detail sucks still. Even if the detail was good, I would still have a bit of sanding to do, which is expected, but I would still have to price this at $75 in order to make it worth the cost and time spent on it. Maybe some people are willing to pay that kind of money for these carvings, but I cant move forward with anything until I figure out why the details are so distorted.
Maybe it is because I’m using too big of an endmill. I was going to try this same carving with a 1/16" ball nose endmill. I also was going to reduce the height of the design some to see if the details come in a bit clearer as well.
I added an actual picture of what the carving is supposed to look like as well. This will give you all perspective of how it was supposed to look like.
To also add, when I import the image from my computer into CCPro, the height of the design starts out at .1515". I know I made this one above a bit too tall around .500" and I would expect a bit of distortion. I try to bring it down and find that somewhere between .25" to .35" the carving looks better, but looking at the design still in simulation, the design is still distorted in all of the detailed areas even before assigning toolpaths. I kept the design as low as the .1515" and zoomed in to see the details and it still is distorted as well. As I increase the height of the carving the details come in a bit more until they start going back out again and become distorted again worse. So, I am figuring that CCPro just doesnt import a very clear picture of this carving and that means I will have trouble running any stl files within CCPro because details are removed and all I am left with is a kinda design of what I want. The ship design that I have with this dragon, has a lady on the bow of the ship and when I import this ship, the lady turns into a big glob in the face.
This topic was automatically closed after 30 days. New replies are no longer allowed.
