Hi all, I’m looking for guidance on what could be causing small depth changes during a job. The pictures do a better job explaining what I mean. The machine is a 5Pro and is a few months new. I probably have about 50 cutting hours on it. The job is a guitar fretboard that has both flat and radiused surfaces.
Job 1: Rough cut pockets for inlays using 1/16" end mill.
Job 2: 12" radius cut along the length of the fretboard using 1/8" ball mill
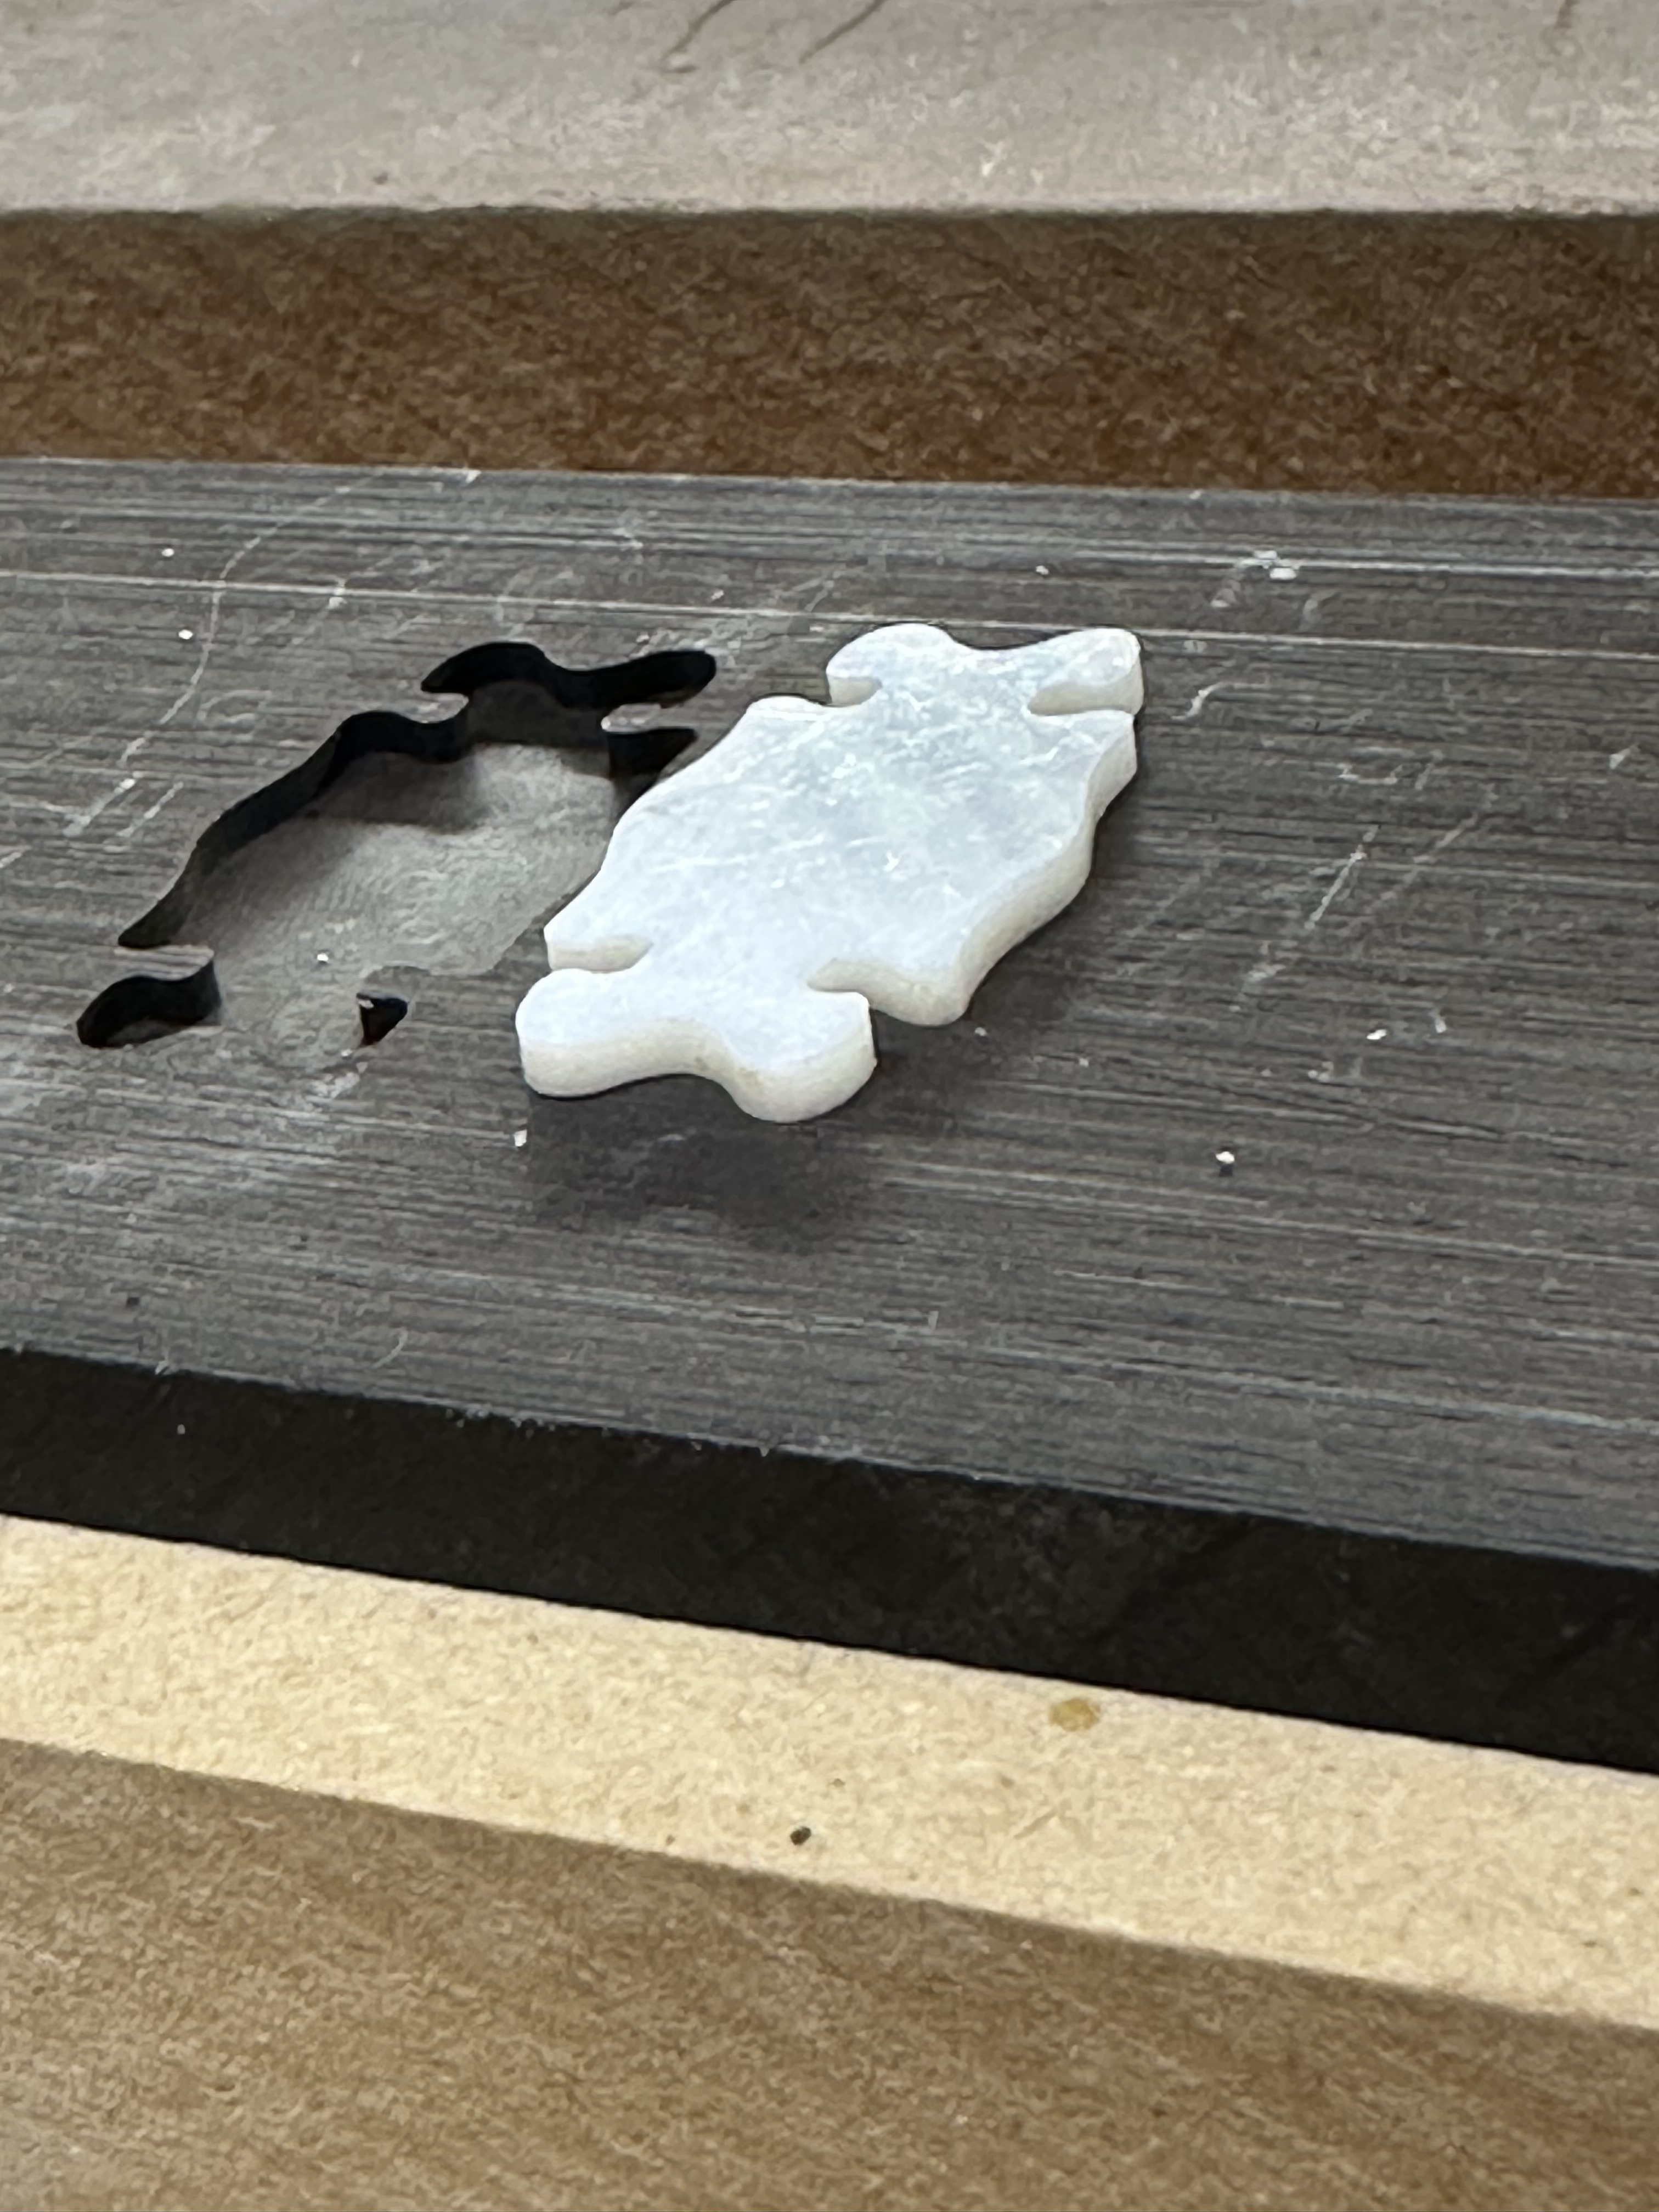
As shown there is a bottom height difference that is the pattern of the shape of the cut where it is the desired height, then a ‘track’ that is higher, then it goes back to the expected depth.
This behavior is the same whether I am using and end mill or cutting a 3D shape like the radius.
Interestingly, the behavior will only happen on one or two of the 11 inlay holes - and - they can be different holes from job to job…
Has anyone else seen this or have insight? Not sure if this is software, job setup, hardware or if the problem is somewhere between my chair and the keyboard…
If you look at the simulation, are the deeper areas where the cutter is fully engaged? i.e. cutting a slot the width of the tool.
With the machine on, but the spindle stopped, grab the tool and with a good amount of force see if it will move up/down. If so, the force on the tool when it’s fully engaged may be pulling down on the tool enough to mis-align it.
Thanks Tod,
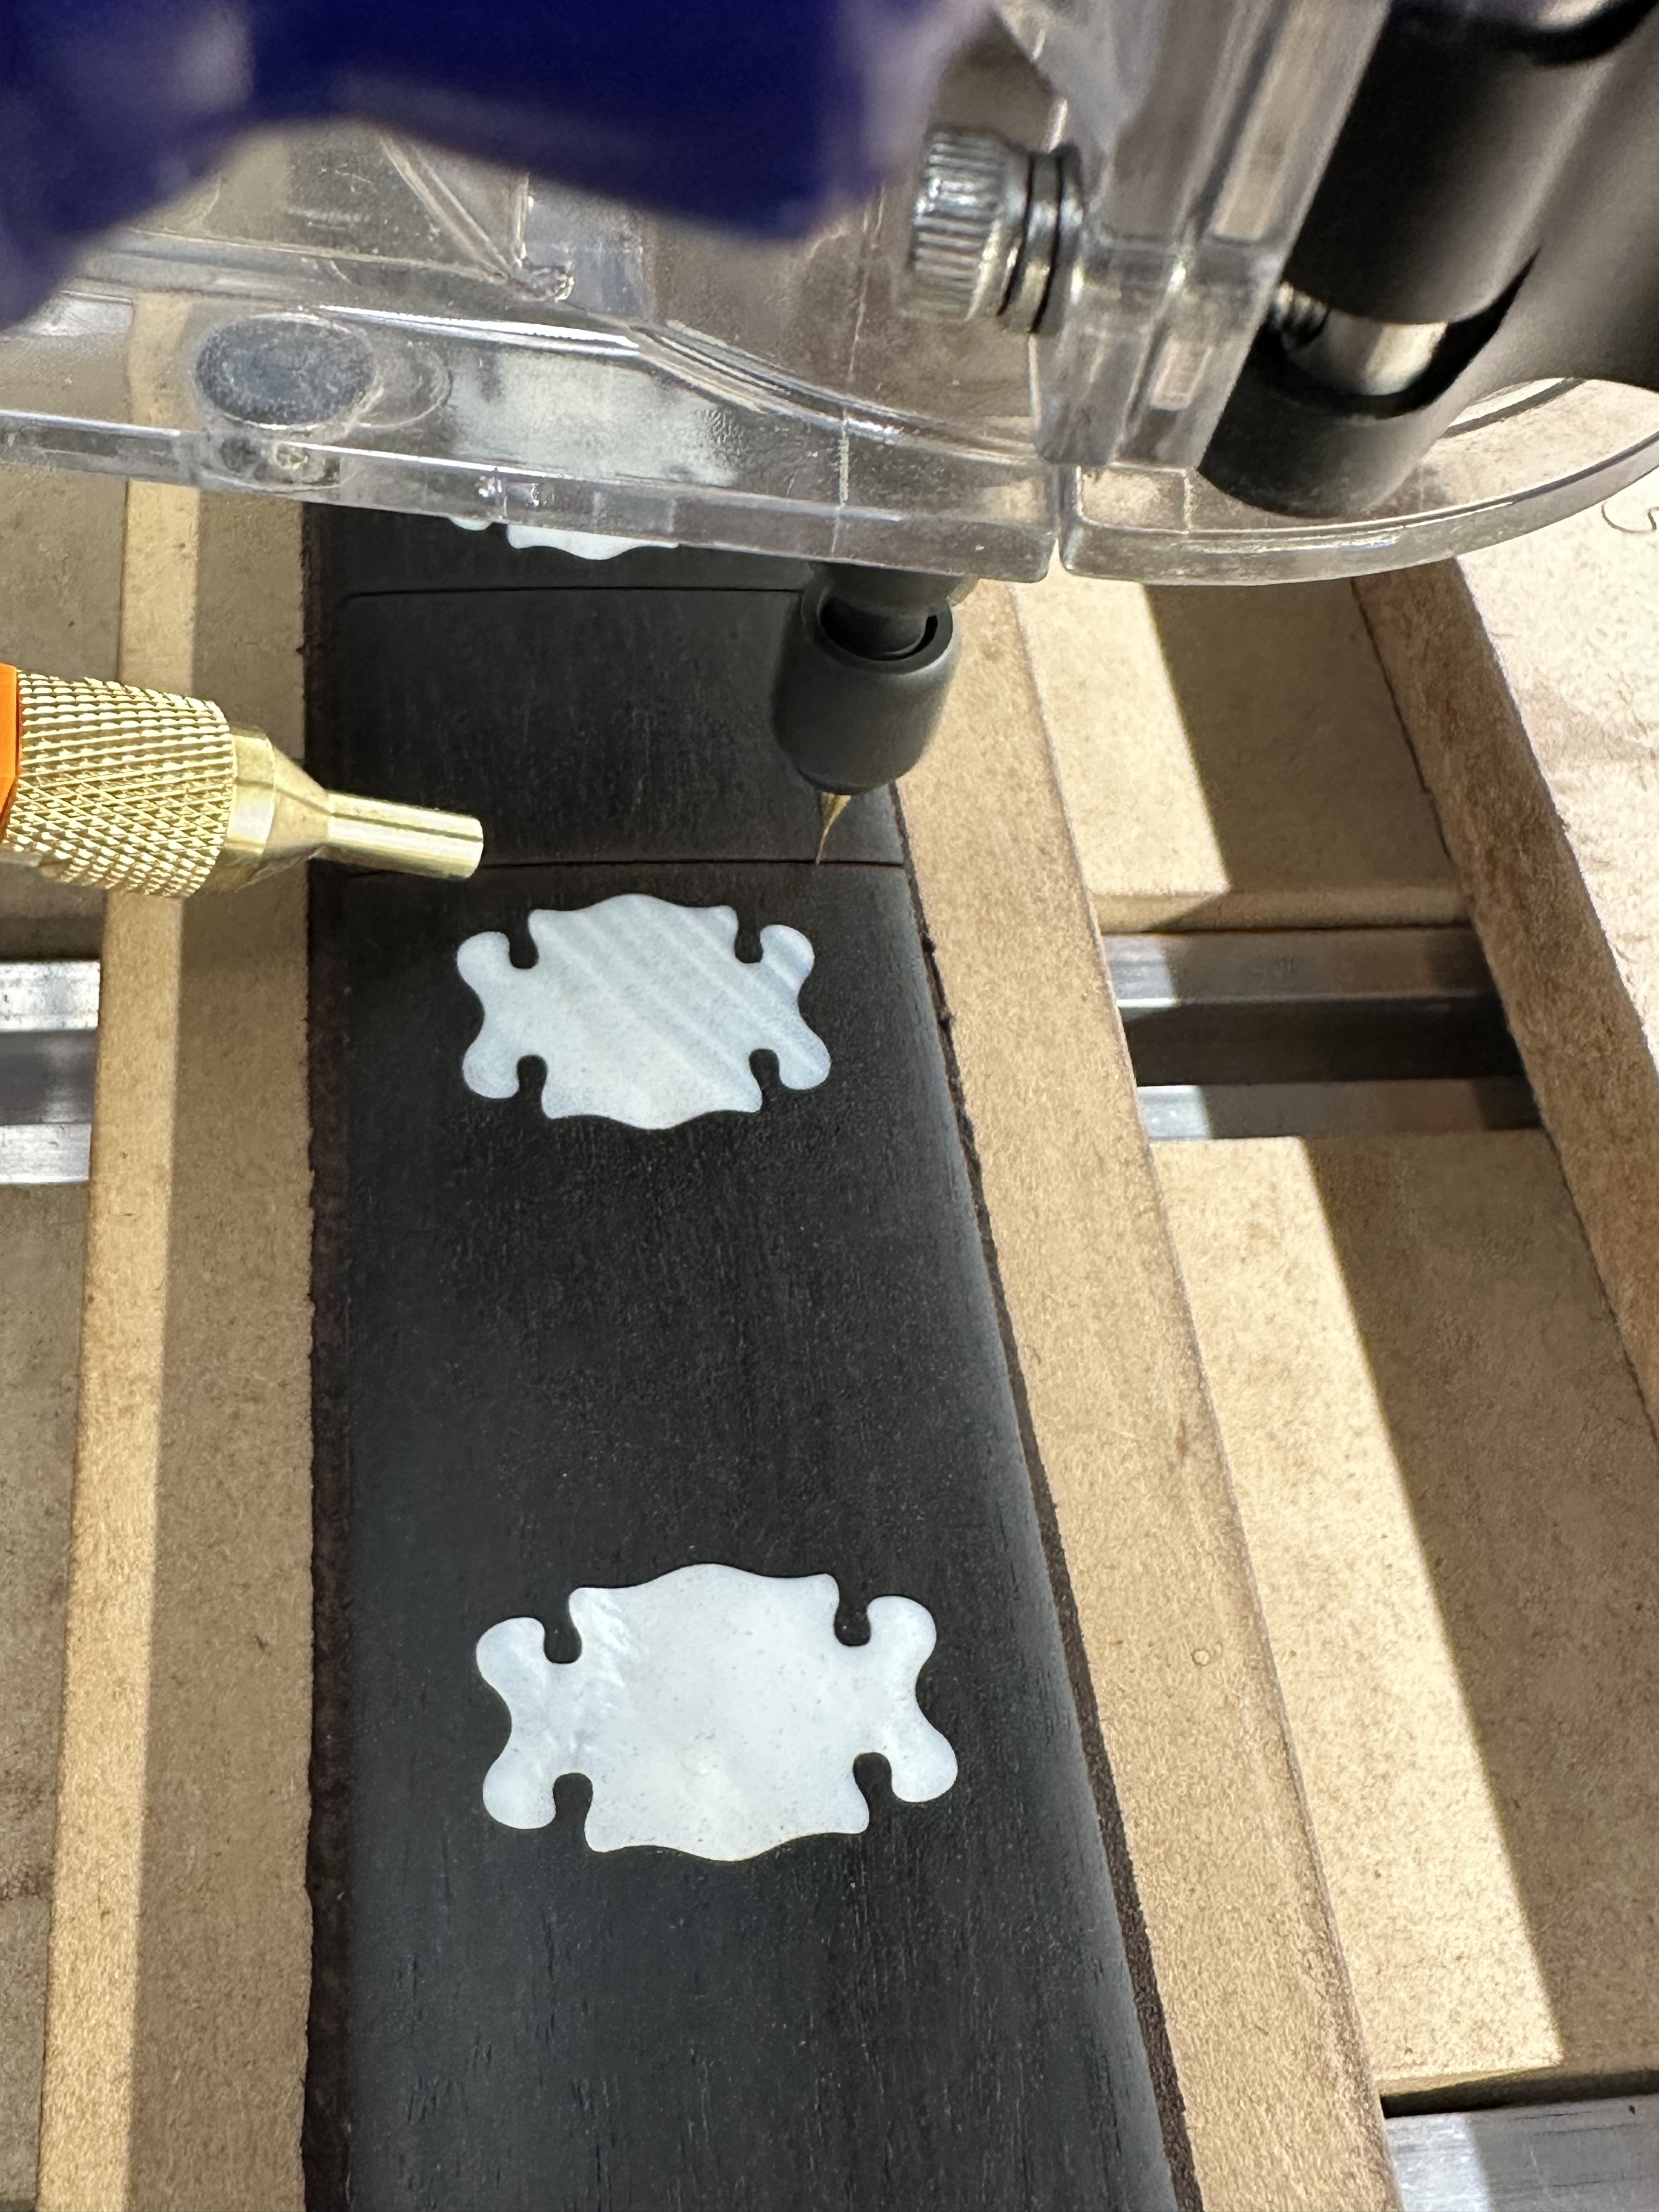
Good inputs! The simulation shows the output as flat. The cutter for the flat inlay bottom is slightly less than half the width of the ridge shown in the inlay. I cut at 40% of the width of the tool per pass. The second inlay in the picture is flat and is cut using the same gcode file and parameters One file for all 11 rough cut inlay patterns. And, if i run the job again on a new blank, a different one of the 11 inlay pockets may have this anomaly. This is why I’m confused.
I checked the tools and spindle like you recommended and the tools seems tight to me. I know that’s somewhat subjective, but I tried… I’m using the 120v spindle. I’m using Onshape CAD to do the 3D design (stl file for the radius) and V-Carve Pro 12 with the Shapeoko postprocessor to create the essential shapes, paths and gcode.
Could the stock be lifting (really, flexing) because of the cutting forces? Perhaps the wood is being lifted up in the center rather than the bit sometimes being lower.
Do you have a downcut bit you could experiment with?
Also, you could experiment with the tool depth-of-cut, so that it always makes a shallow finishing pass.
For example, say you are making a pocket 3mm deep, and the DOC is 1mm. The last pass would be a full 1mm. If you change the DOC to 0.9mm, then you will get a forth pass that is only 0.3mm That would reduce the lifting forces.
Hi Michael,
Great call on the moving material! I clamp a 3/4” mdf board as a spoil board then mount my 1/4” thick hardwood blank to that with two-sided tape. After your comment, I looked more closely at the tape and found it to move in and out just a bit when pressed hard.
I landed the blank to the tape by rapping on the entire surface with a rubber mallet. I think this set the tape adhesive better on both sides. I ran new jobs and the problem disappeared!
Ok - so for those who read through threads like I do to learn…
I fixed the depth cutting problems on my guitar fretboard using two methods:
1: if I use two-sided tape to secure the blank I clamp the taped blank to the wasteboard using a good amount of pressure to set the tape more reliably.
2: if I use the painters tape and CA glue method I pressure roll the tape on both the blank and the waste board to flatten it and set it prior to gluing.