I finished extending the limit switch cables. That took more time that I thought it would.
The motor extension cables came yesterday. They are way too long. Hopefully this gets corrected at some point and we get cables that are the correct length. They are WAY too long. However, they work
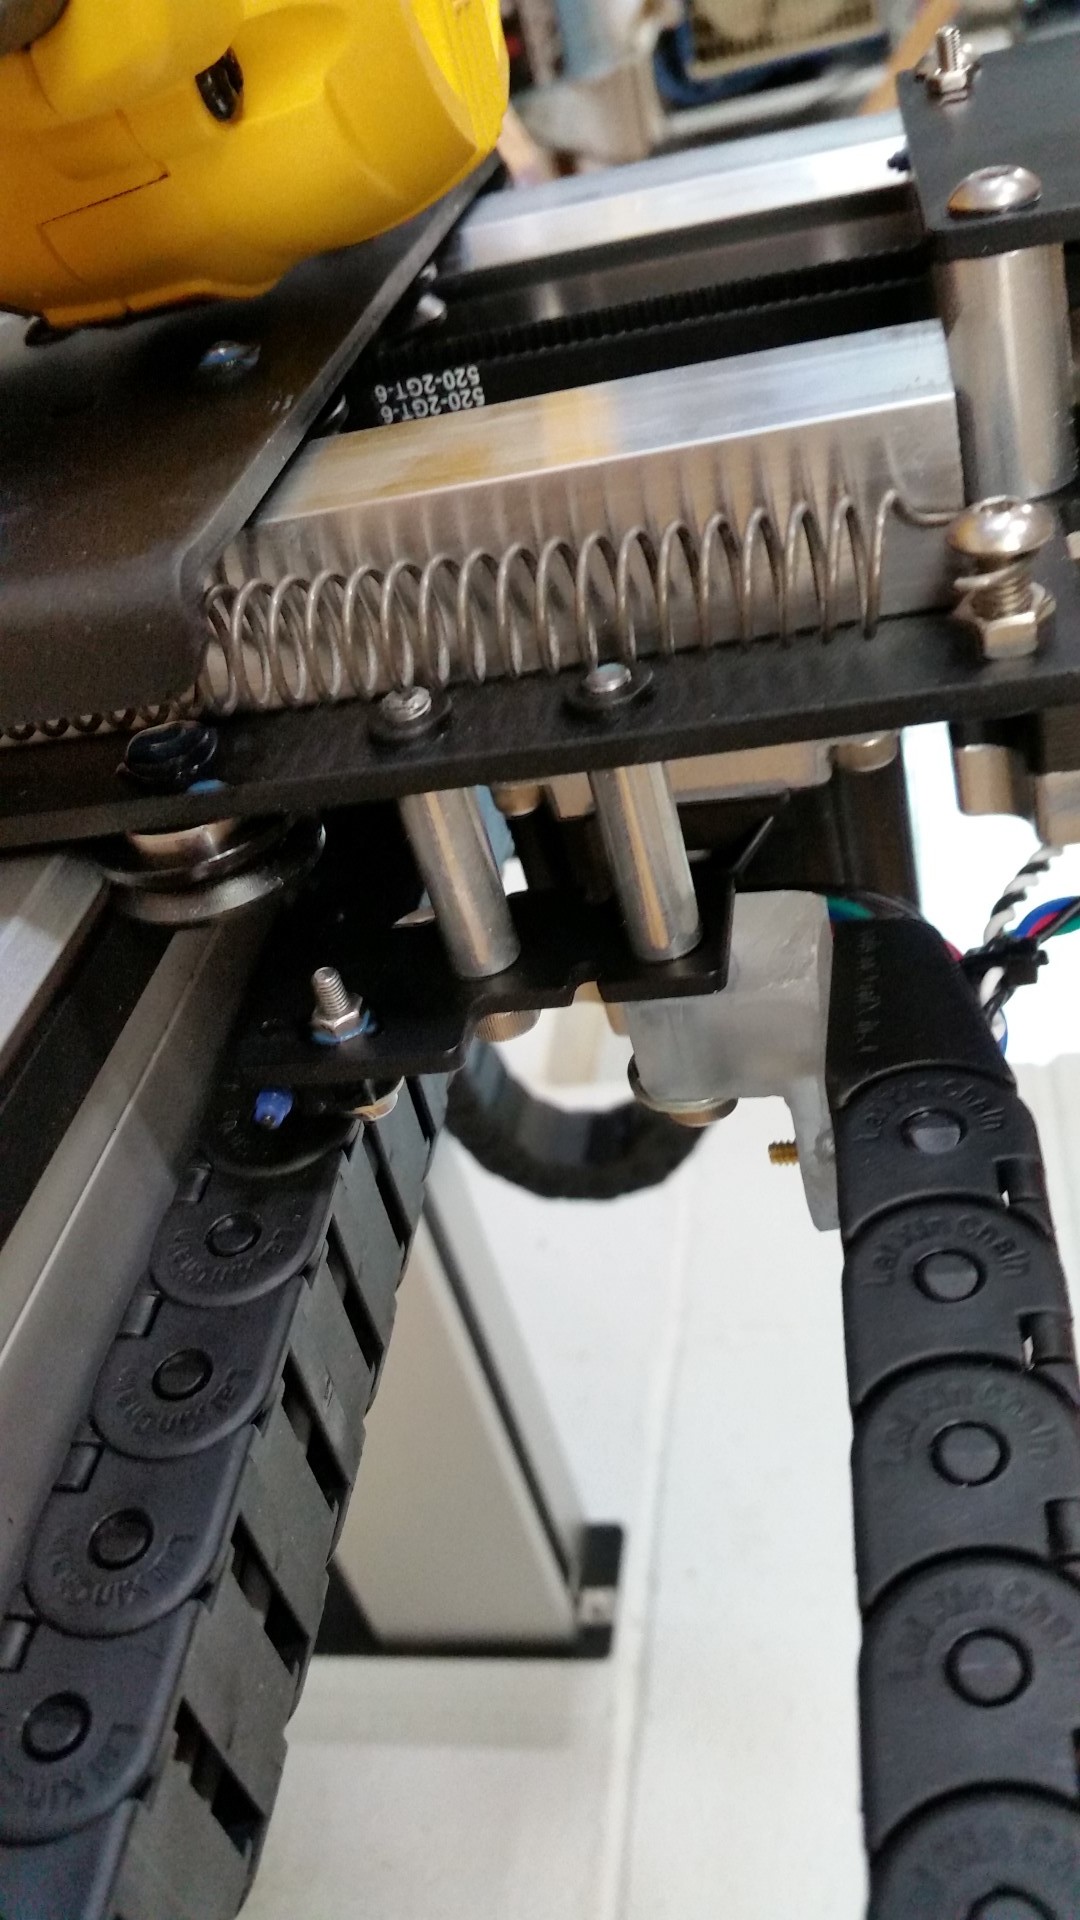
I figured out that I actually did receive the limit switch mounting brackets. The X axis bracket is shown here along with the hacked out cable track bracket I made. The Y axis bracket is identical and mounts on the controller box side gantry assembly. Both use the same standoffs. I did NOT get the correct screws but there were some that did come that were too long so I just cut them off and they worked fine. (I don’t know why this forum turns pictures like this but its a pain to try to get them right)
The cable tracks are really one size too small. There’s really not enough room for all the cables plus the extension cable connectors. There’s absolutely no way to fit the router power cord inside which seems very unfortunate. Do yourself a favor and pop ALL of the hinged tabs off of the cable tracks and install the cables that way then just pop the tabs back on. Its much easier that way. You probably won’t listen to me and you will try to fish them through. That works okay for the first cable but its impossible by the last one. Popping the tabs off is easier than you might think.
Carbide Motion doesn’t recognize that the machine has limit switches so you can’t home it using the UI like you can with the Nomad. It also doesn’t show the rapid positioning UI buttons like it does with the Nomad which means you pretty much have to turn it off and move it by hand to get close to where you want to be. Even the “fast” jog setting is very slow for this size machine. I looked up how to get it to recognize the limit switches and ran the $h command and it worked but I still don’t know how to get the UI settings changed to they recognize that it has limit switches and offer the fast move buttons where you click on the center and it moves there quickly, etc… Maybe someone can help me with that?
I just noticed you are building a stand and not a housing. Yeah, 4x4 would work great for a stand. Sorry if I caused any confusion. I’m working on a housing design to contain dust and noise so I had “housing” in my mind.
As regard limit switch support — thus far, pretty much everyone on the ShapeOko forums has been using bCNC, UGS, or some sender other than Carbide Motion. It seems that in the publicly available versions homing support is dependent on the touch probe hardware on the Nomad, or at least that’s my impression.
I’d love to be wrong and to see a clear step-by-step set of instructions for enabling and using homing on an SO3 w/ CM, and suspect that there will be a new version which does support it, hopefully soon.
You should be able to speed up the jogging by changing the max feed rate in Grbl.
$110, $111 and $112 control the max speed (used by G0 commands) and can be set pretty high.
If you set it around 10000 you will be pretty happy. Anything over 25000 will get you into trouble with the step speed limitations of the Grbl controller. I had mine set to 30000 for a while until I realized it was causing problems with diagonal rapid moves.
I think this thread has reached its conclusion. I’m still waiting on some parts from C3D but I went ahead and made my own so its not been a problem.
I think anyone receiving the SO3 XL or XXL should be prepared for the following:
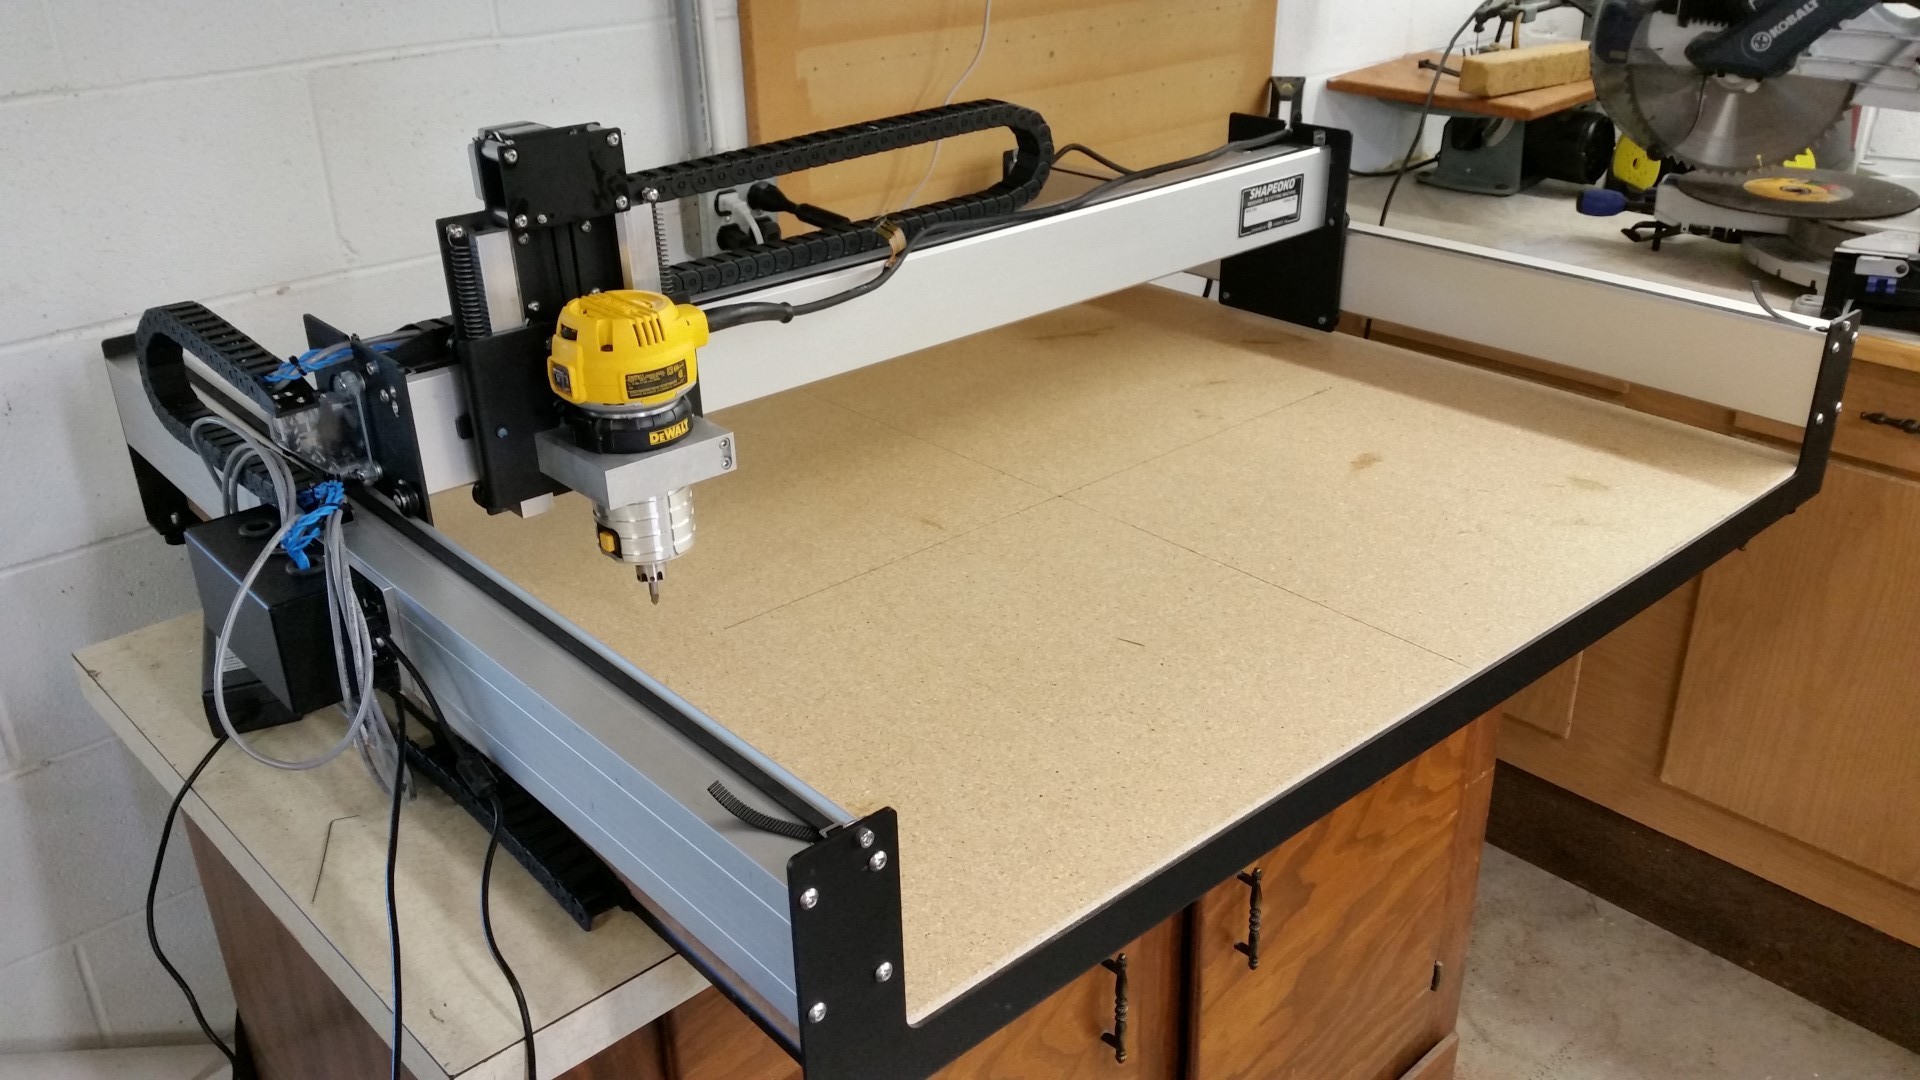
The assembly instructions haven’t been released yet so the pictures in this thread and the other “unboxing” thread are about the best you have for now (as of 4/21/16). Feel free to ask if you want specific pictures posted. My setup is somewhat custom because I had to make some of the missing parts but it will give you an idea. The good news is that the carriages are pre assembled so that takes away 90% of the work.
There were a lot of issues with the kits sent out so far. C3D really needs to work on their QA process for packaging. I think they will learn a lot from this round of shipments. Its cheaper to invest in a good QA process than it is to deal with the aftermath.
If you are missing parts you should send an email to support@carbide3d.com. C3D has been pretty good about communicating with me. However, considering this is a small start-up, its not unusual to not hear back for a few days.
You should pop open the cross links on the cable chains to install your cables. Do NOT try to feed the cables through the chain or you will waste a lot of time. It doesn’t take very long to pop all the cross links open and then snap them shut again.
You will need to supply your own waste board. The boards supplied with the machine are not meant to be used as the waste boards. Make the waste board less than the full width of the machine so that you can remove it from the front. Otherwise you will have to remove it from the side which means moving what ever is sitting next to the machine. 37" wide is enough to cover the full travel plus room for some hold down holes.
This is a lot of machine for $1700 and C3D is a startup learning as they go so be prepared to exercise some patience. The machine is very nice for the price so I’m very pleased. The following are some issues you may anticipate running into.:
Missing parts.
C3D overnighted me extension cables which is the only part I definitely didn’t want to make myself. However, the extension cables are between 12" and 24" too long (approximately). I just tied them for now. That did allow me to mount the control box outside my enclosure though, which is great.
The cable tracks are too small. The wires are really packed in to tightly and there’s no room for the router power cable. I tie-wrapped my router cable to the back side of the cable chain in several places which seems to work okay. It hasn’t caused any EMI issues so far but I’ve only made a few cutting passes with it so far.
I shortened my cable chains so that they didn’t run out past the edge of the frame
I had to wedge the aluminum router mounting block apart with a large screwdriver to get the router in. Its probably machined a little too small but poses no issues after getting it mounted.
I had to adjust the eccentrics to get the carriages to not be too tight or too loose
The Z axis belt was set too loosely so I tightened it up