The closest Tractore Supply near NYC is about 40miles away. Bummer. I’m actually in PA right now and they have abundance of them here so gonna swing by and check it out. I’m assuming by ‘normal’ fasteners you mean SAE not metric? I’m working on making motorcycle parts and all my designs are based on metric fasteners so that may not work but the great tip anyways. TY
Wow, that is incredible! Looks like a great machine.
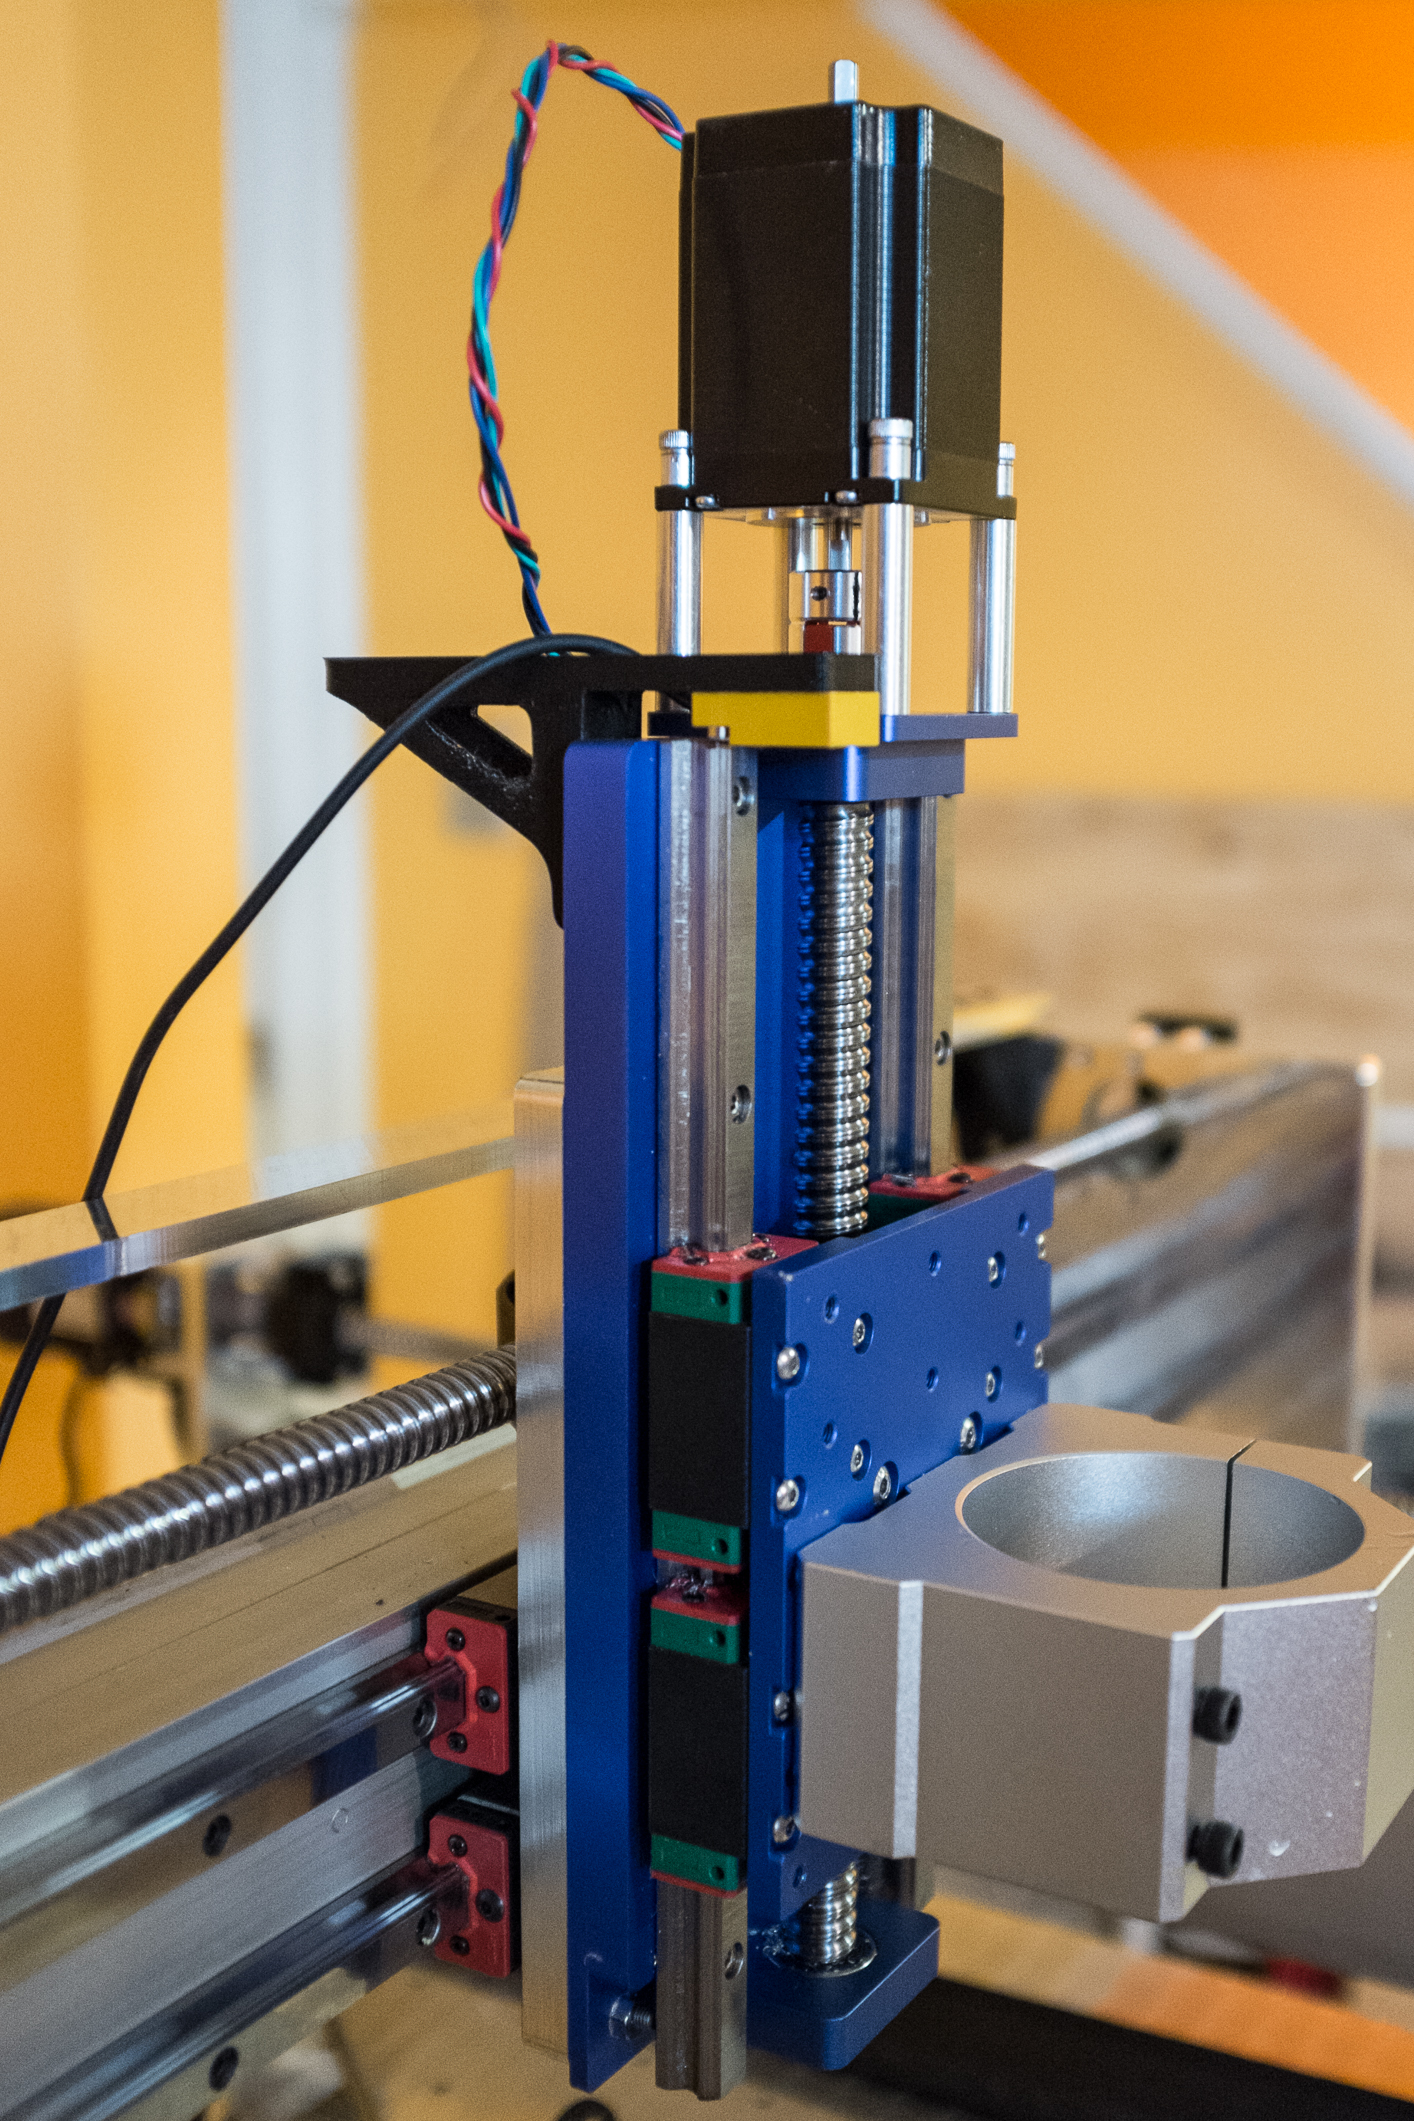
After finishing my HDZ, I want to do the x-axis linear rails you did. I don’t think I need to make any brackets except for the one that holds the HDZ on to install that. Any tips? Would you share your designs?
1 Like
Both sae and metric sizes
1 Like
Thank you. Honestly so3 with aluminum bed seems like a very solid machine. It’s sturdier than the router I built and I’m very impressed with it myself. Dont think that ballscrew conversion is really required. I’ve been using this machine to cut aluminum with steel core belts and it was doing fantastic job that’s why I’m planning on slightly modifying this design to allow for use with belts. I’d rather not share the design for two reasons. My f360 file is super messy and that’s a bit embarrassing but also I’m considering running a small production run once it’s tweaked to work with the belts.
That being said I’ll be very happy to give you few pointers on designing your own. There’s a f360 file of a stock so3 floating around the internet and you should be able to find it with a 3 min google search. I’ve flipped the X extrusion 180deg to make installing the linear rails easier. Aligned the bearing blocks to the flat part of the extrusion using 123 blocks and it came out perfect. Everything within 0.05mm despite using only hand tools to do that.
Also when designing your plate/plates use already existing models of linear rail and bearing blocks they’re readily available on eg grabcad. That streamlined the design process for me significantly as I didn’t have to sketch all the parts separately, like I did couple months ago with my diy machine.
Also, Before installing HDZ I just measured all the holes on the back of it but I’m sure if you asked Luke he’d provide a diagram for you.
Hope that helps and if you have any more questions ask away.
4 Likes
Awesome, thanks. I appreciate the help. I’m most interested in installing linear rails, not concerned about ballscrews as steel-core belts work great for me.
Thanks for the tips. As I get closer to being able to do this, I’ll hit you up.
1 Like
Smaller, open source, might be worth a try too.
2 Likes
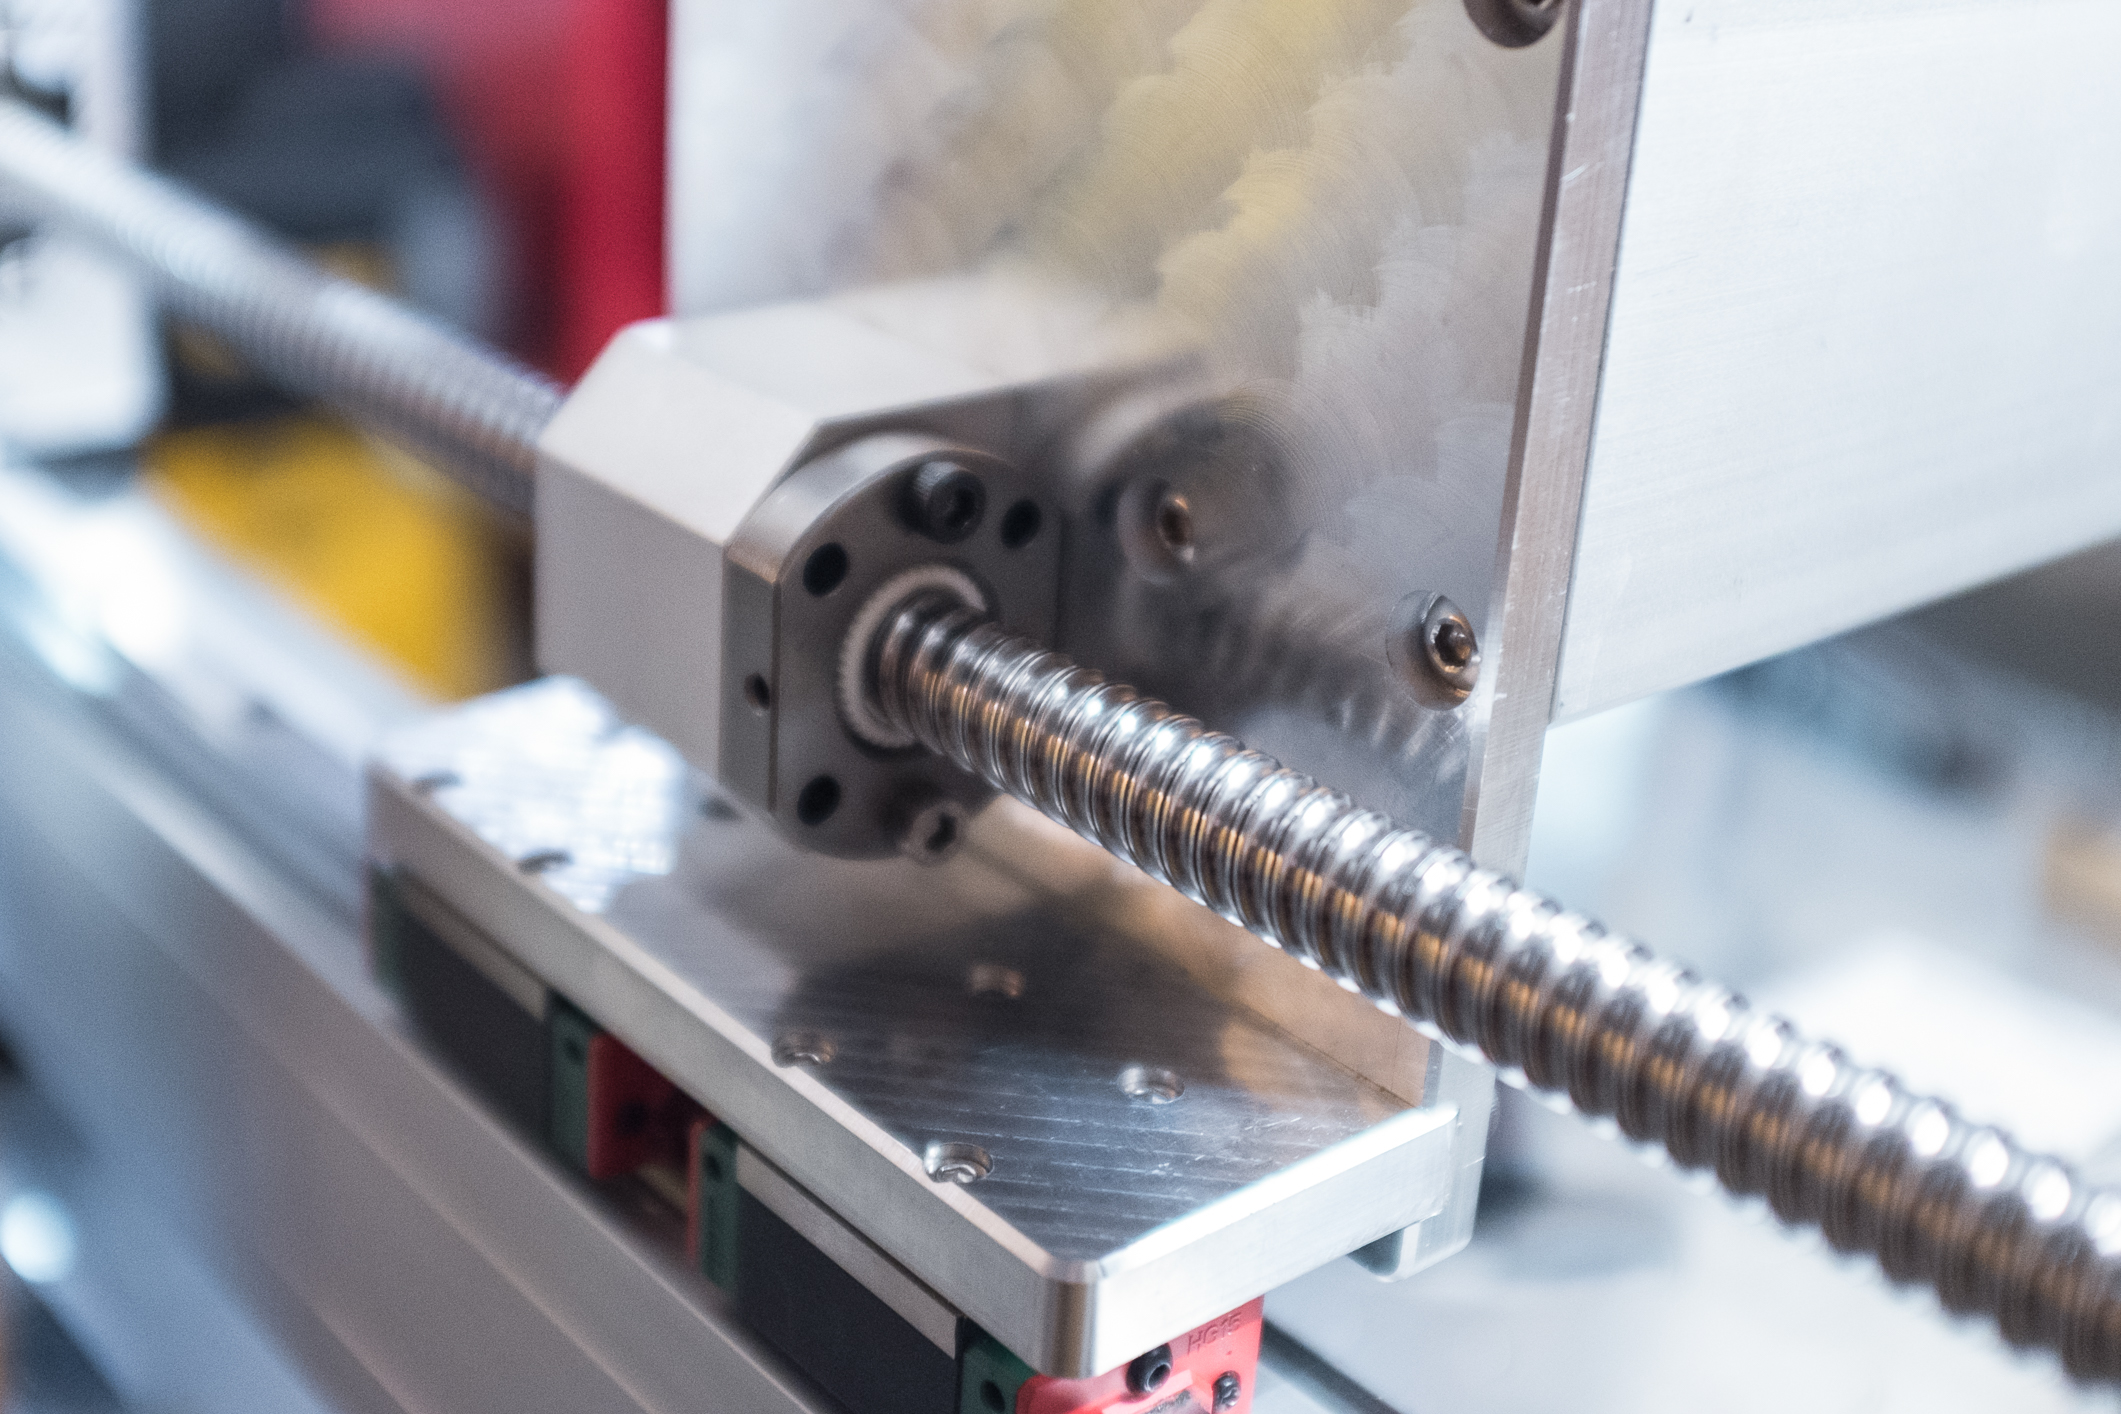
Finally had some time to finish cutting remaining plates and put everything together. I’m still waiting for some parts to be delivered. Not sure when I’ll be able to test the machine because had to order new ballscrew couplers and they will arrive in 3 weeks or so. Initially was planning on using nema23 420oz like on my other build, therefore stocked up on 10mm to 10mm couplers but since I’m using closed loop steppers, which have 8mm shaft now have to wait. In the meantime have to figure out how to build a new enclosure that will be sturdy enough and won’t break the bank.
Oredered 20mm spacers from Openbuilds hoping that they’ll be long enough to enable mounting bearing blocks but turned out to be around 6mm too short so will have to order some more.

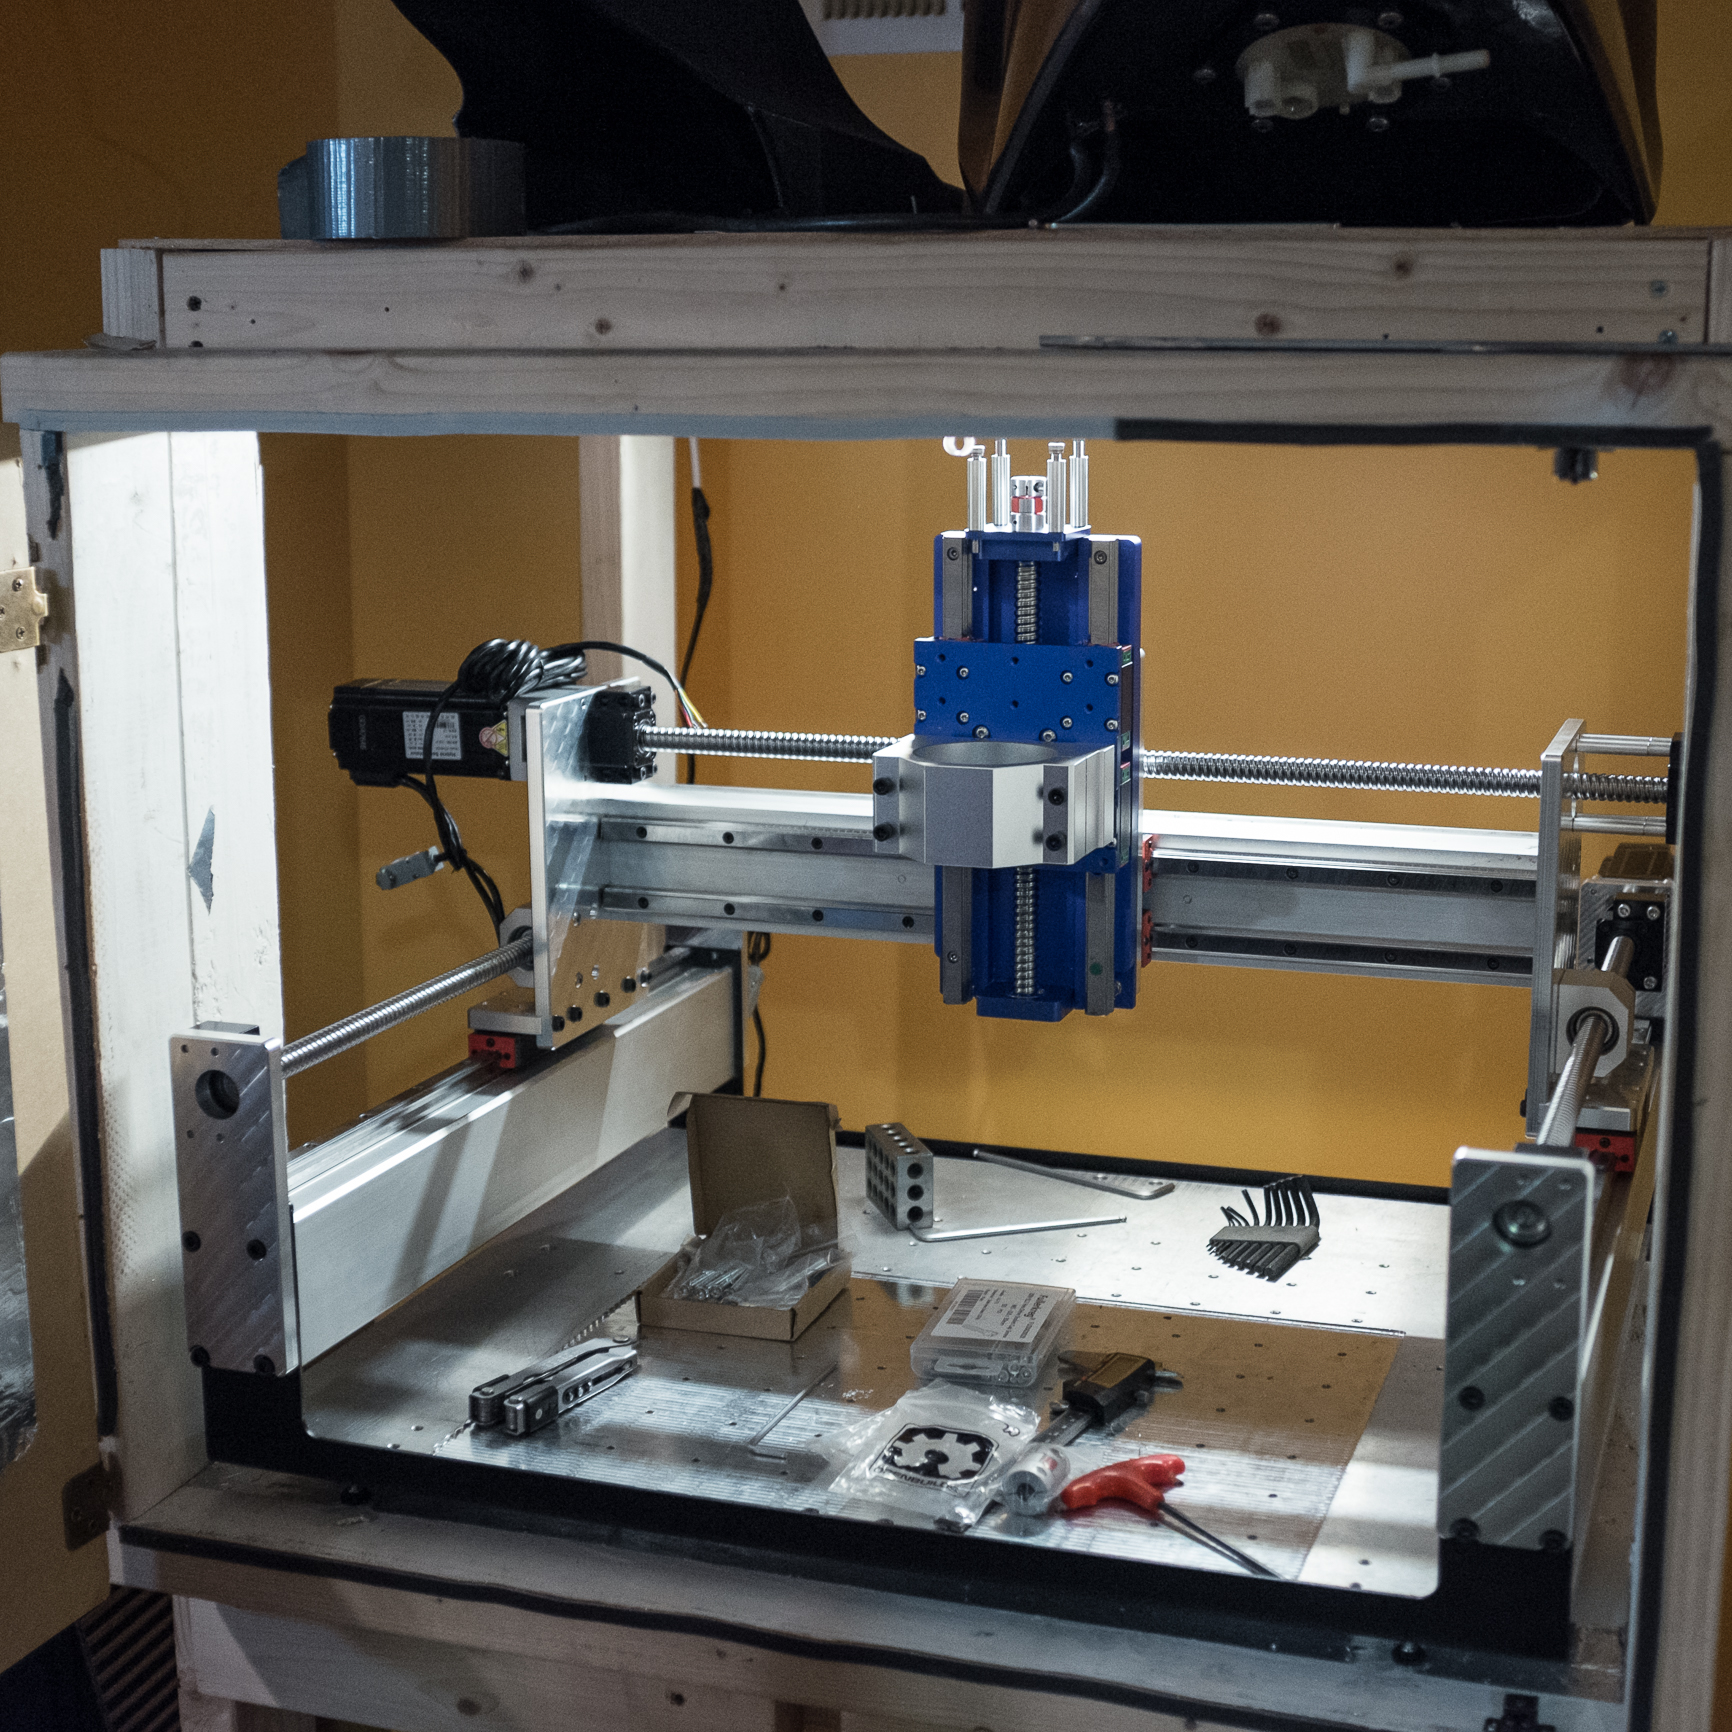
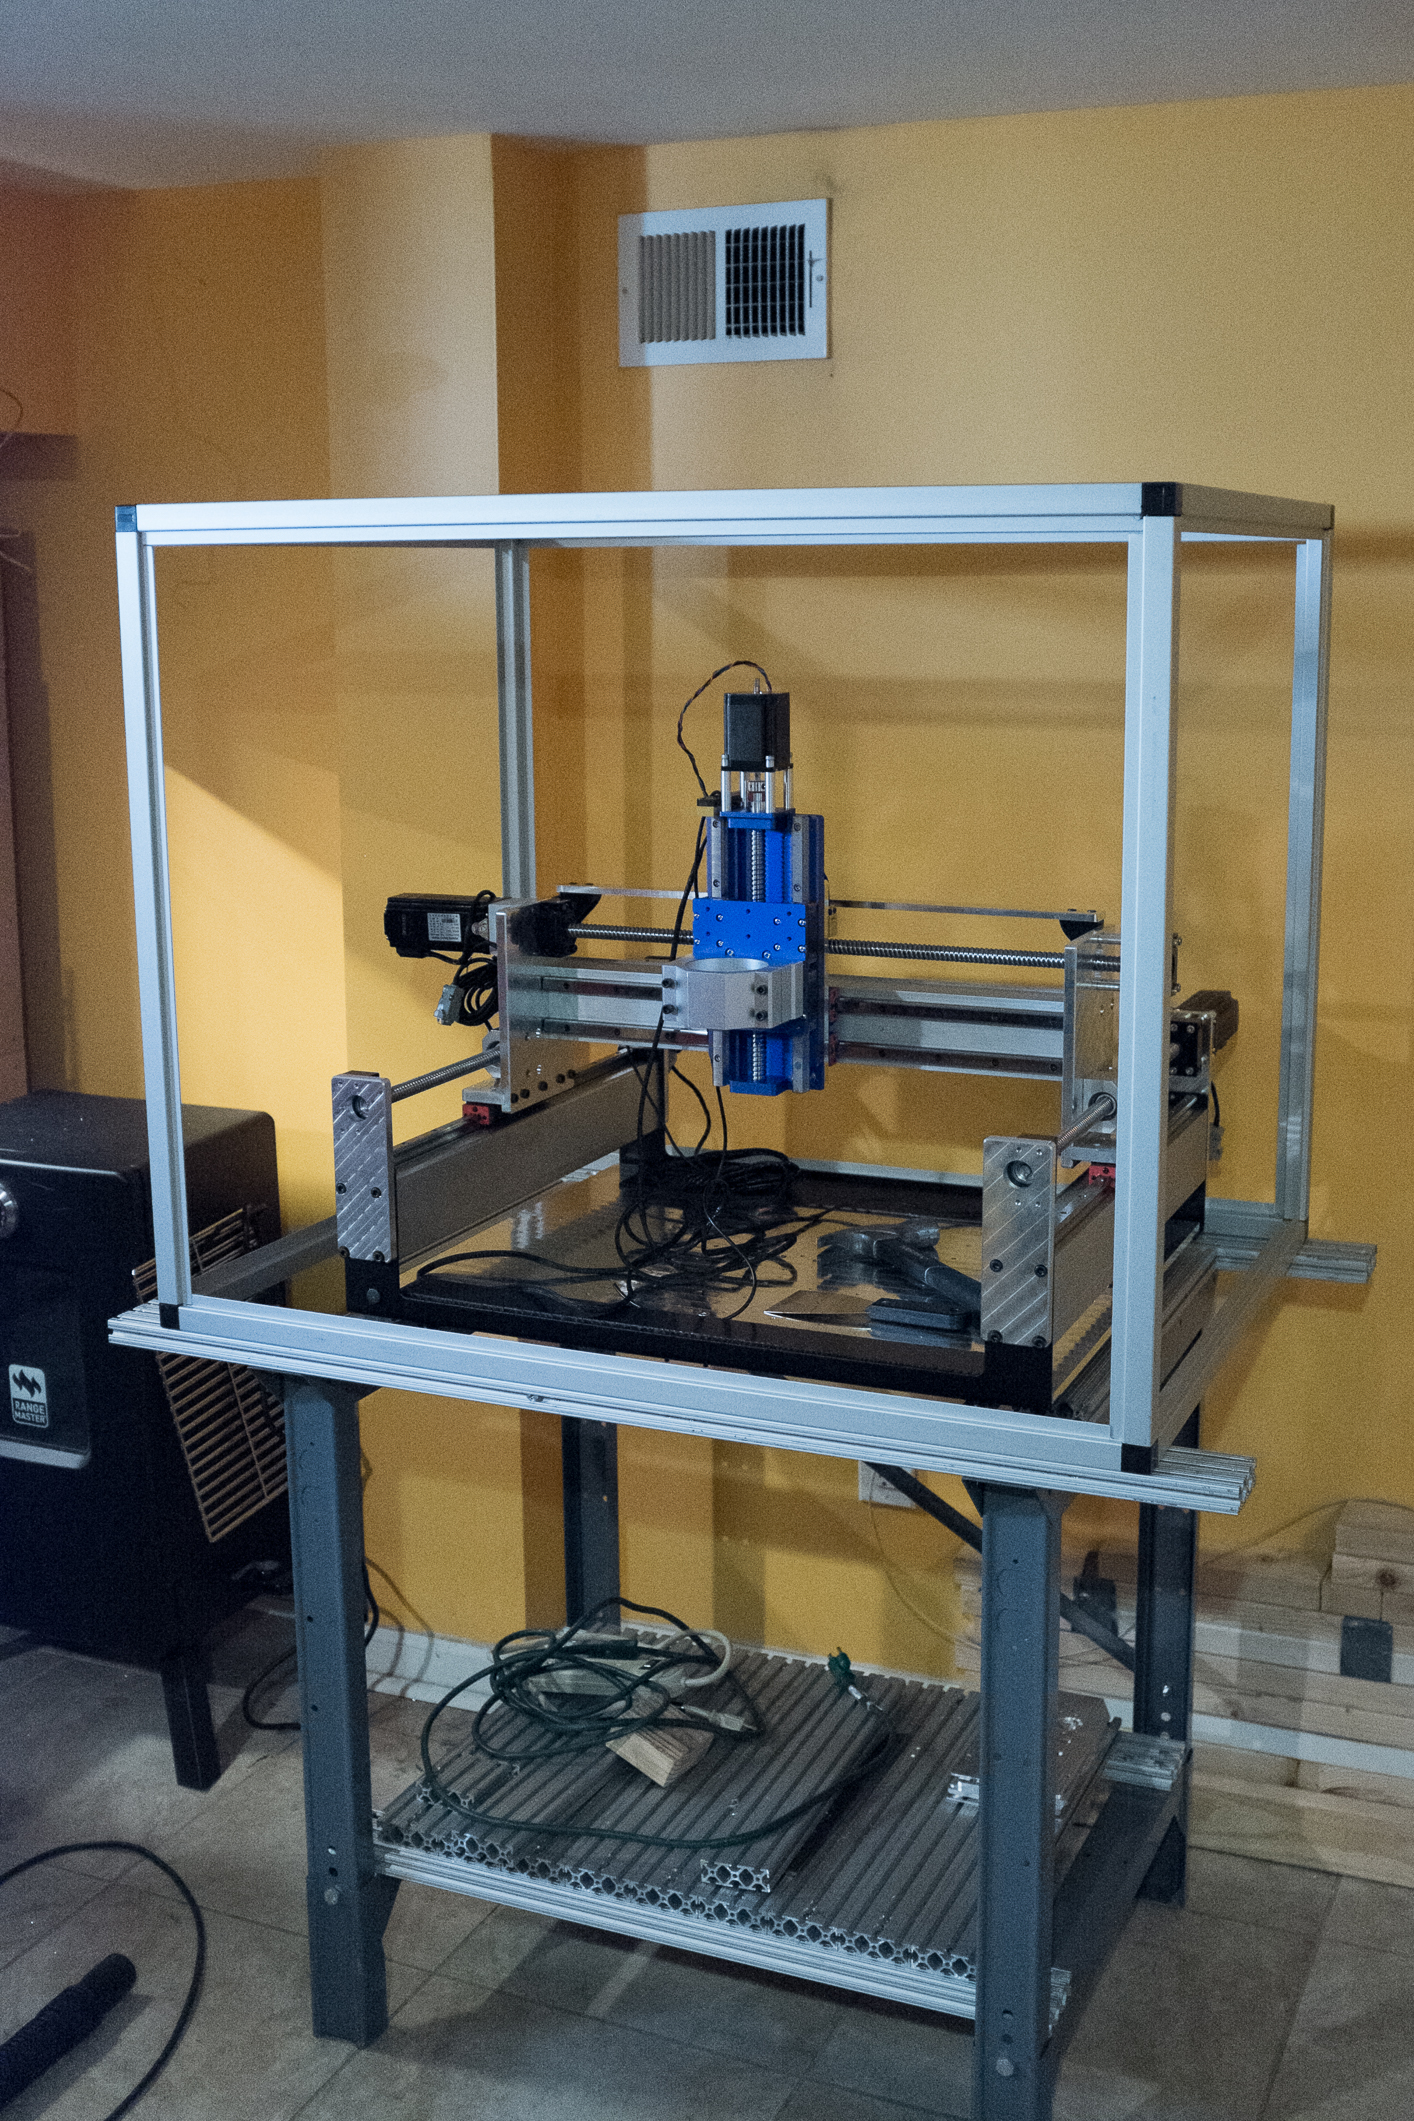
The mechanical part is nearly done. But I’m far from being ready to cut anything on this beast.
6 Likes
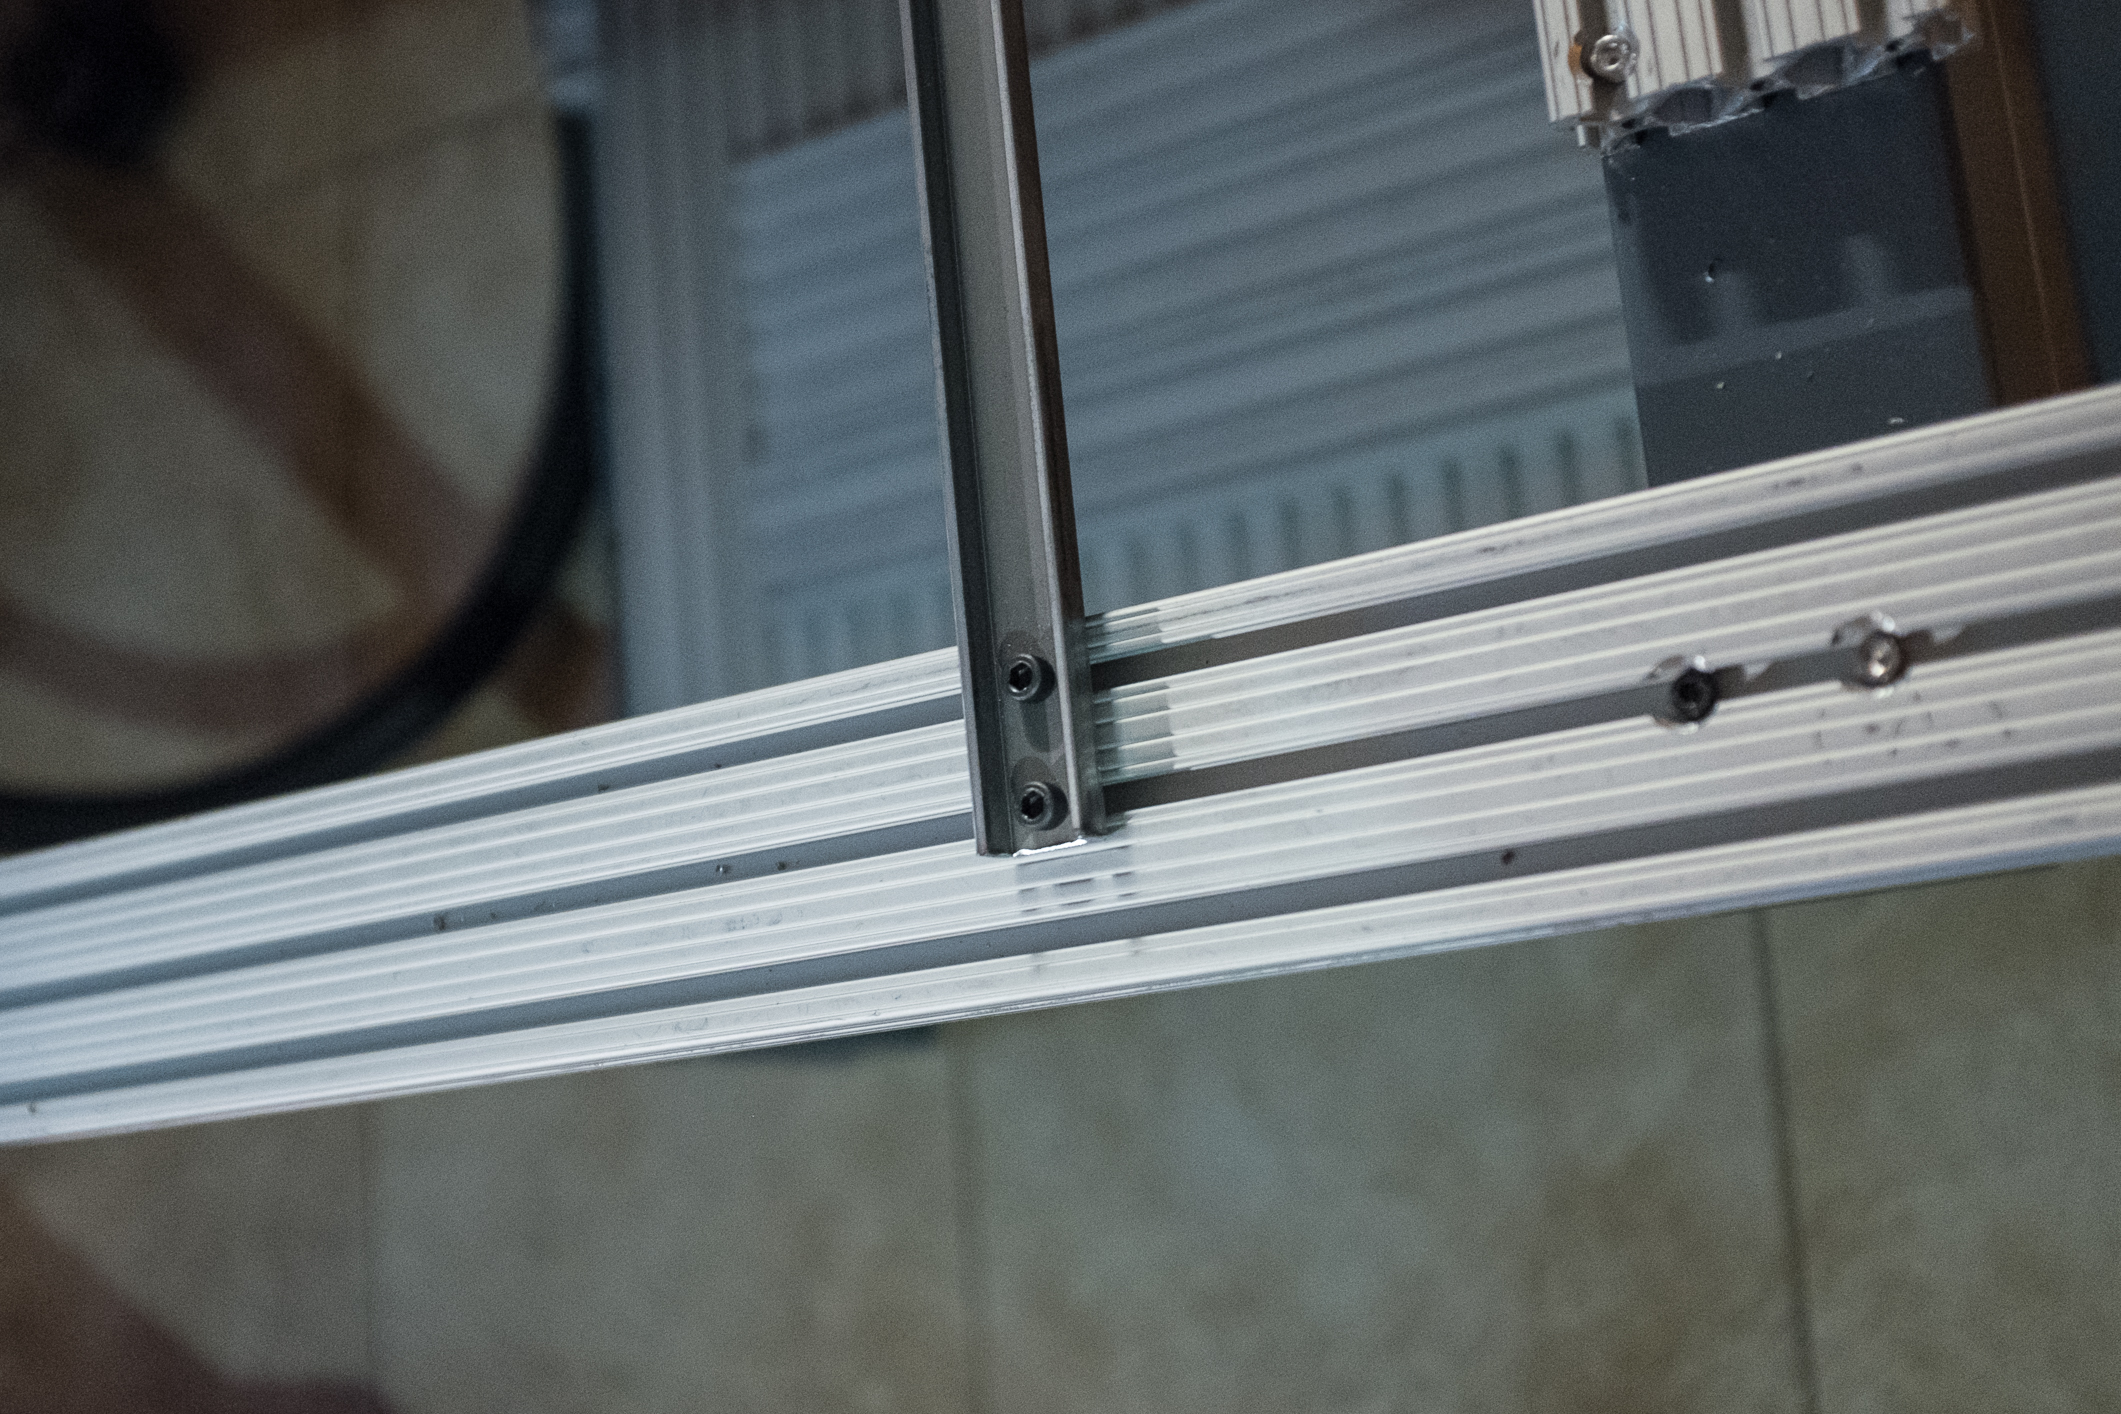
While I’m waiting for some parts to arrive, have to decide on how to build a new enclosure. My initial idea was to build or buy a sturdy metal base to put the machine on and then build a light-duty aluminum frame around it. Was considering welding frame from 2x2 square tube but ultimately settled on building it from some scrap laying around and that’s what I have so far.
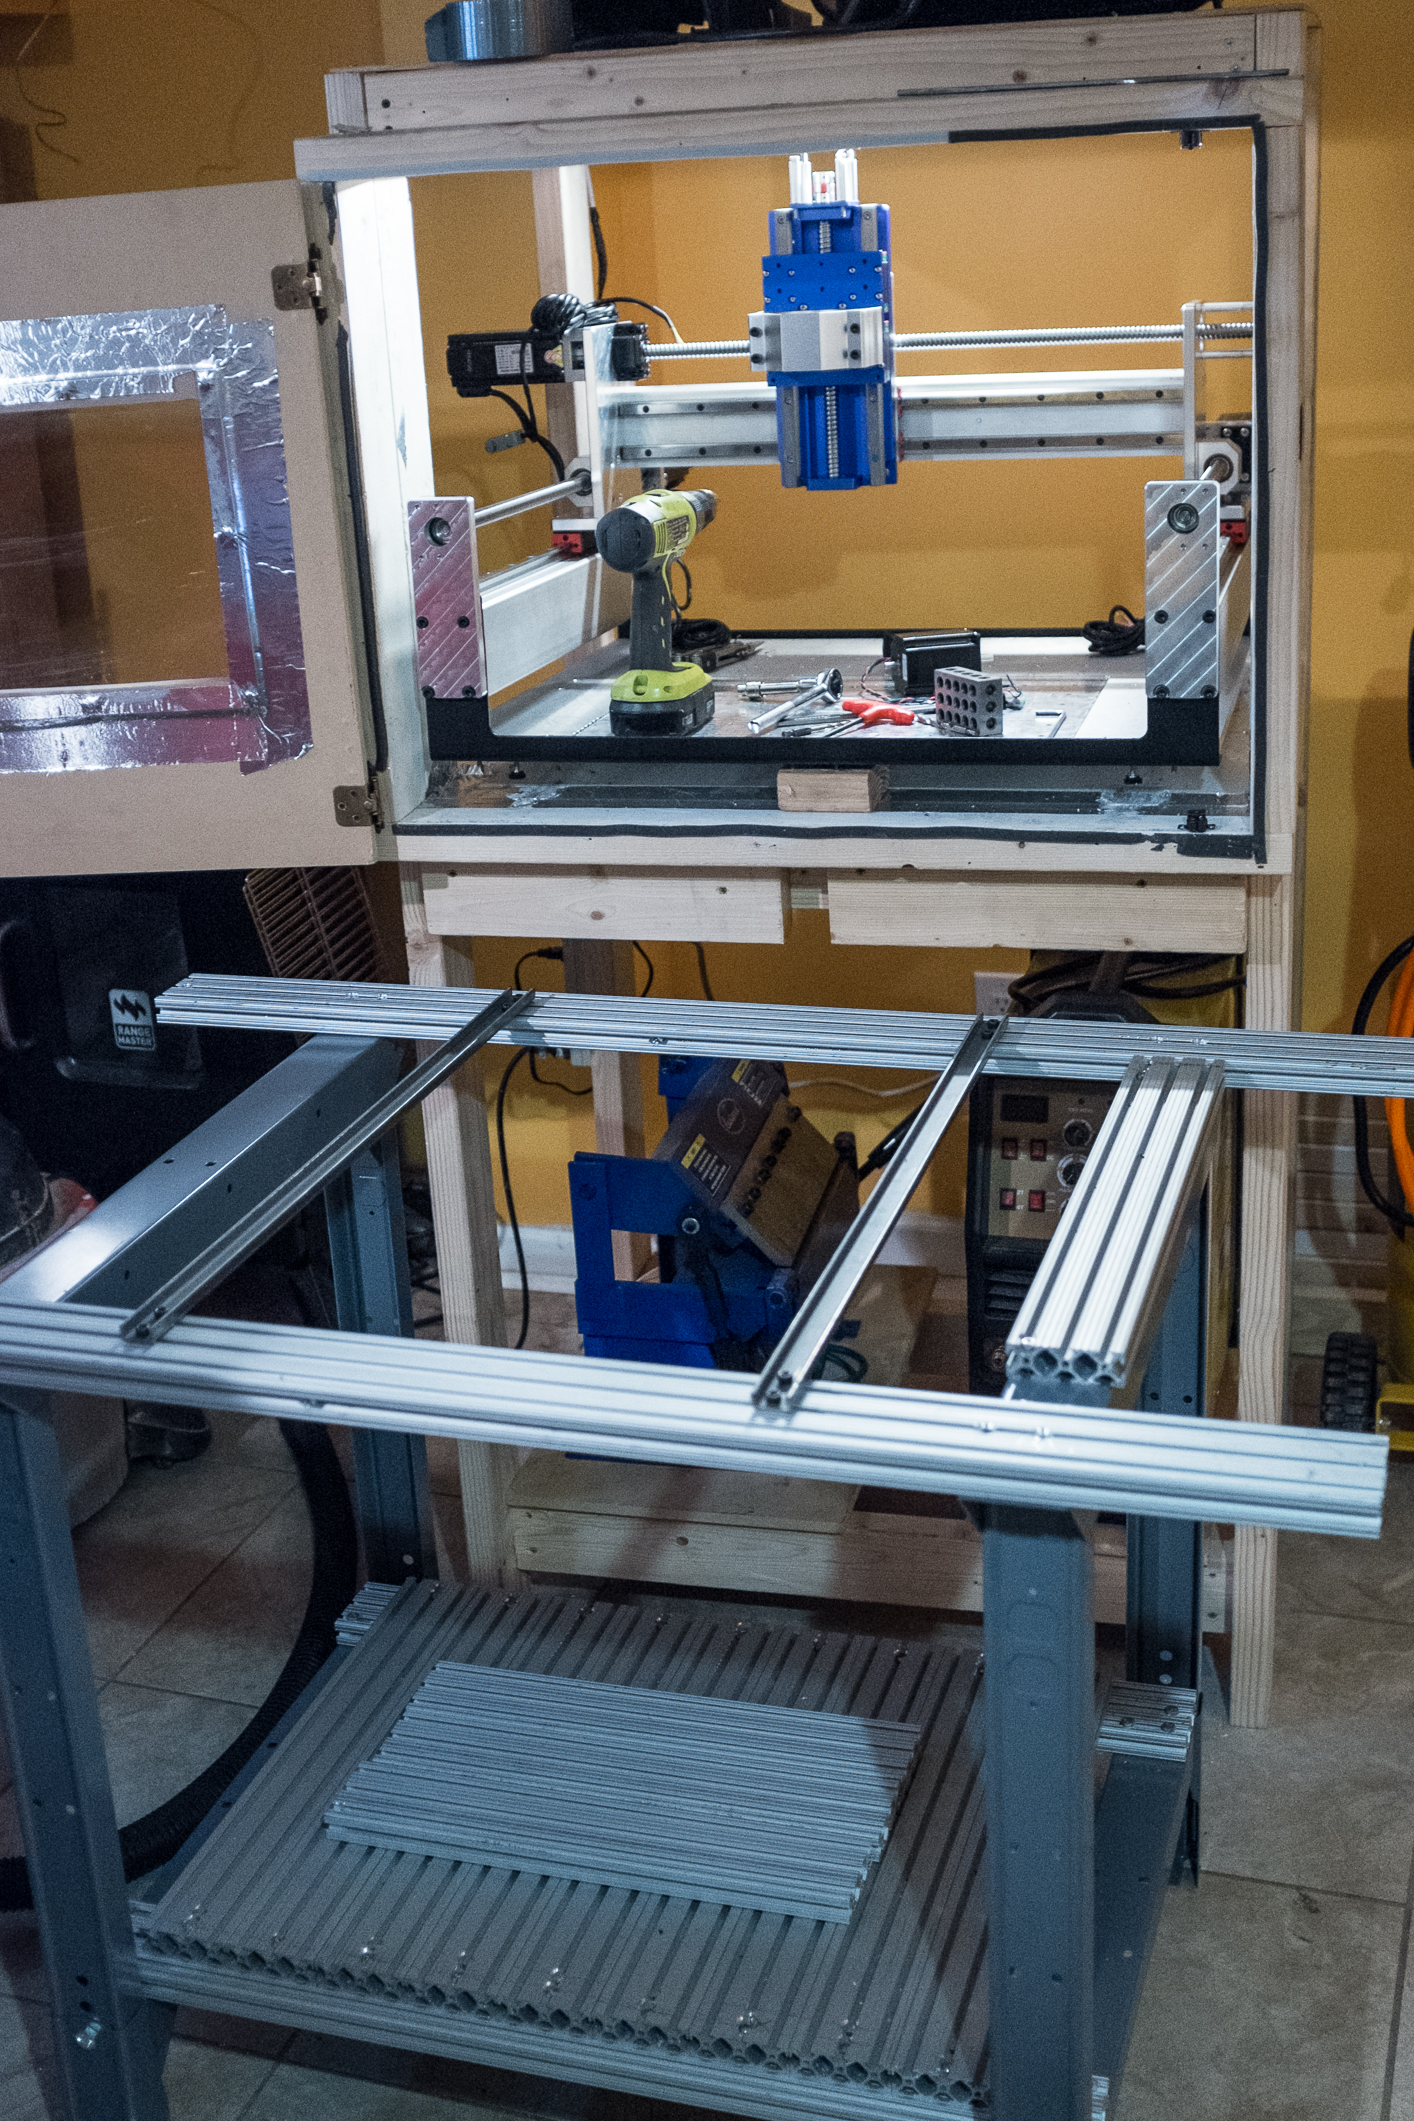
Used 8020 extrusions that were originally installed as a wasteboard on my first so3 xl and some workbench legs picked up from wayfair for $60. Was hoping everything would be much sturdier but have to add cross braces between the legs to stop it from moving side to side. Once that’s done should be much better. Also installed small u-channel to ensure that the so3 won’t be moving around. Will have to paint them at some point to prevent from rusting.
The biggest issue I’m having with using machine in the enclosure is that I need to vacuum chips between the jobs but they still accumulate around and after awhile there’s so much of them that it’s difficult to remove them. I’m considering using bottom shelf of the stand for a bucket to collect chips and ideally would use some kind of chute or a funnel to let them fall into a bucket but I’m not sure if I feel like doing that much custom work. Might just install wooden board to cover the hole and call it a day. We’ll see.
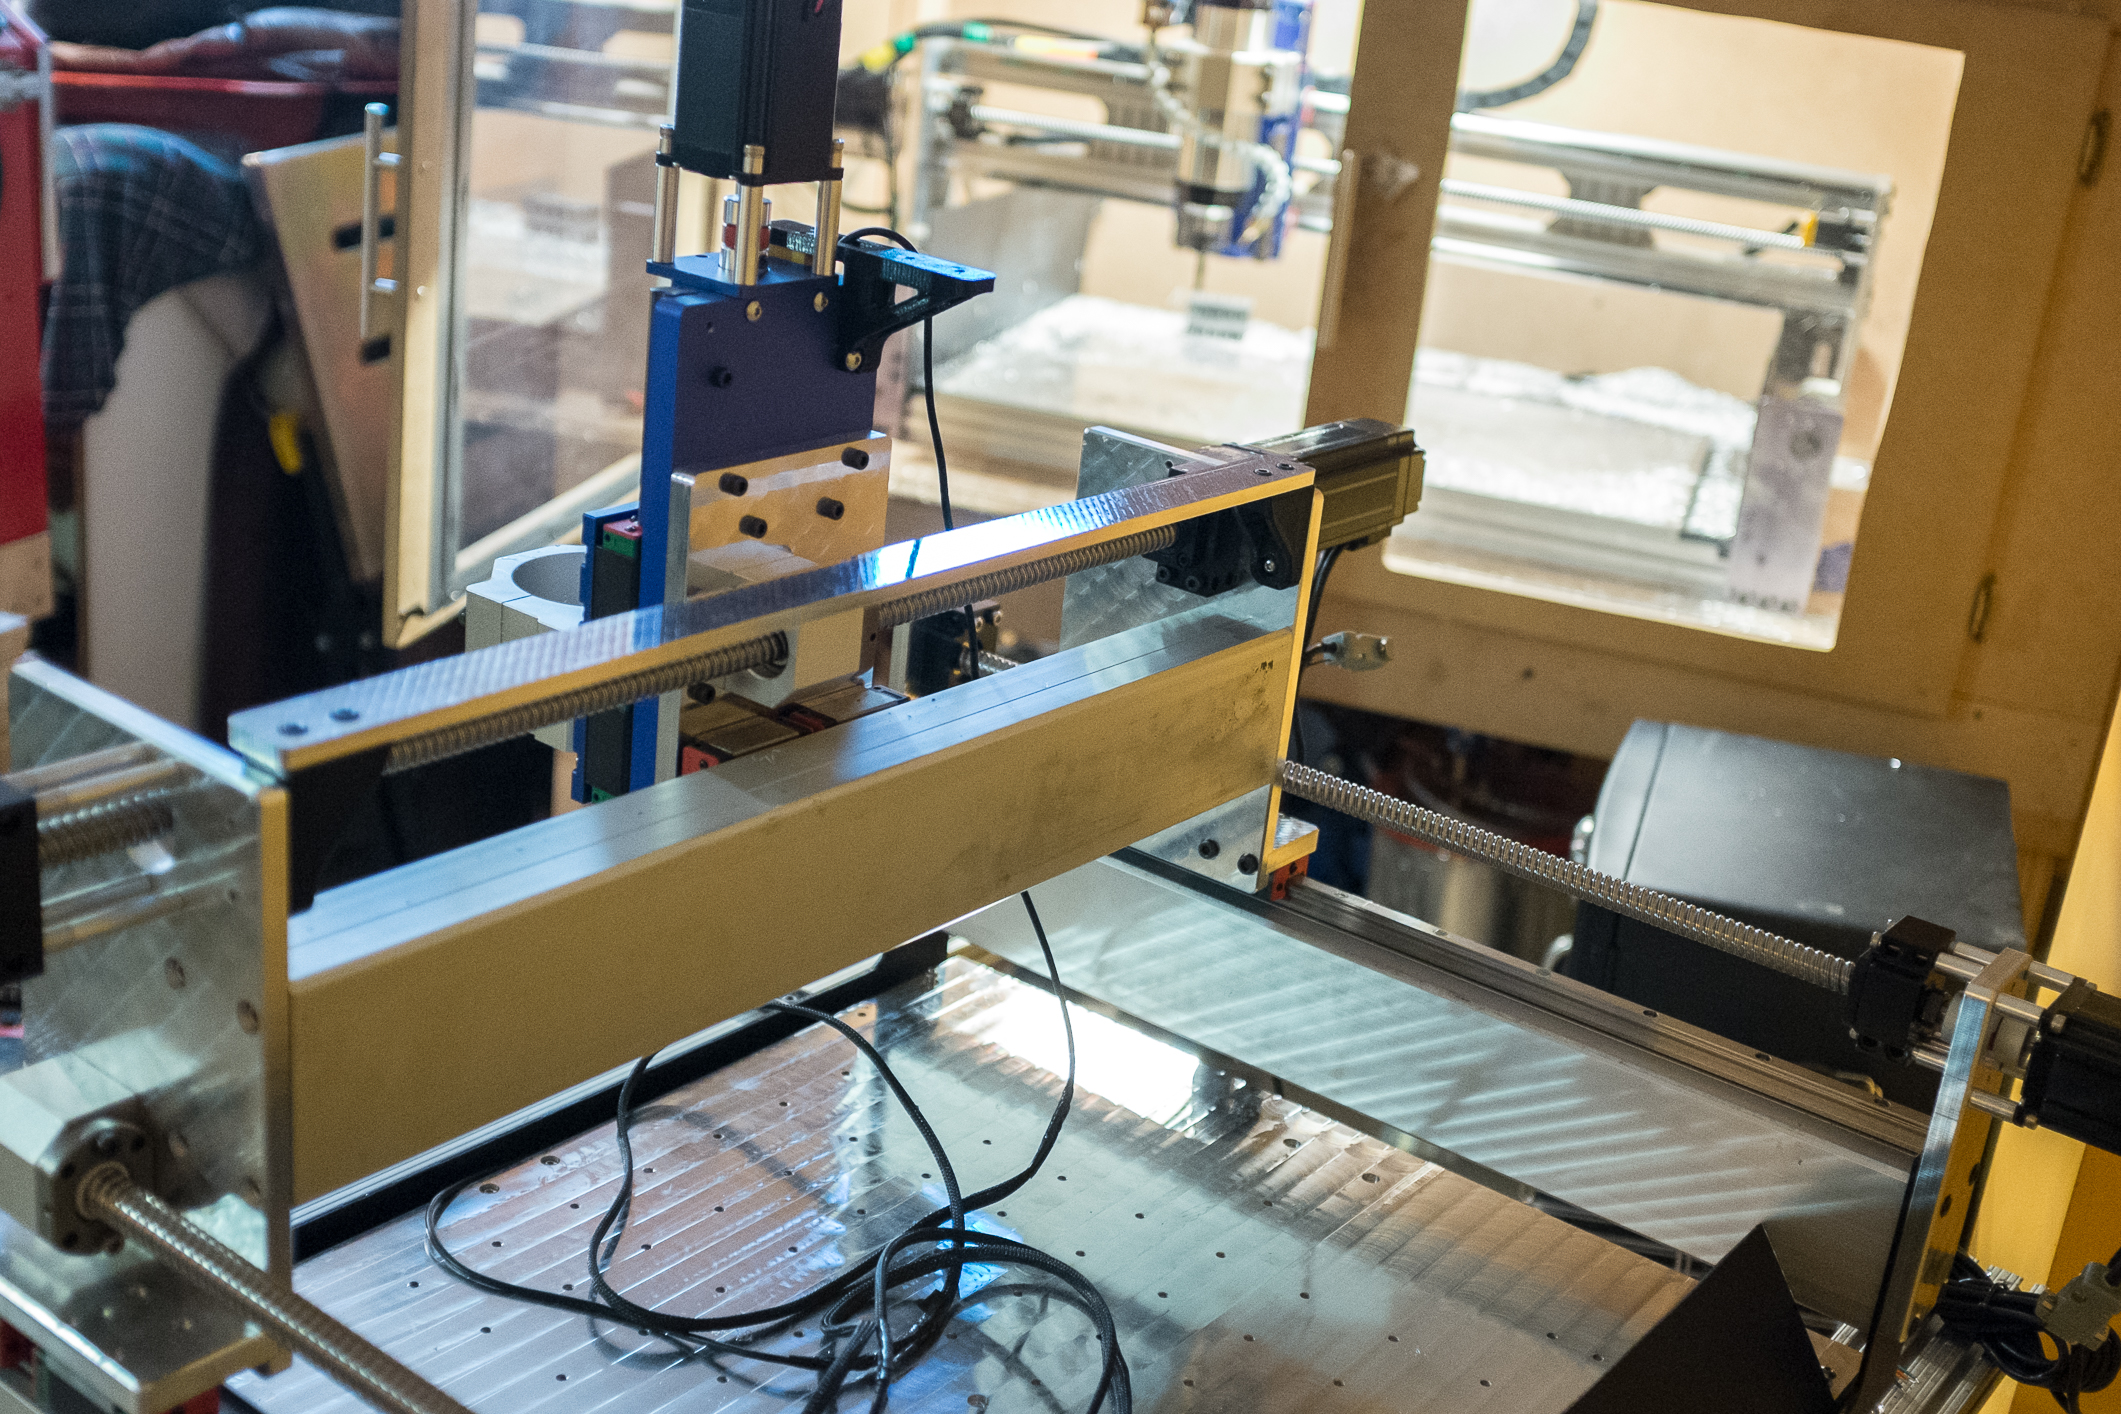
Finally, this is how the machine looks on the stand. There’s couple of options I’m taking into consideration for finishing the top part -
- using simple aluminium square tube with 3d printed corners,
- 8020 quick frame extrusions
- open builds v slot extrusions.
Whichever option I’ll choose it has to look neat and be as cheap as possible.
9 Likes
Progress on the build slowed down as I’m waiting for some key components to arrive but in the meantime trying to do as much work as possible. In the photos from the previous post you can see that my aluminium wasteboard had a ‘surfacing pocket’ carved into it, which after all, was a huge mistake. Needed this aluminium plate to be as close to flat as possible because next week I’m going to install 24x24 3/4thick sheet of hdpe to it. My other cnc is only slightly bigger than a shapeoko but luckily managed to surface that plate.
It took a long time and didn’t come out perfect, especially that the plate turned out to have a bow in the middle but it’s good enough.
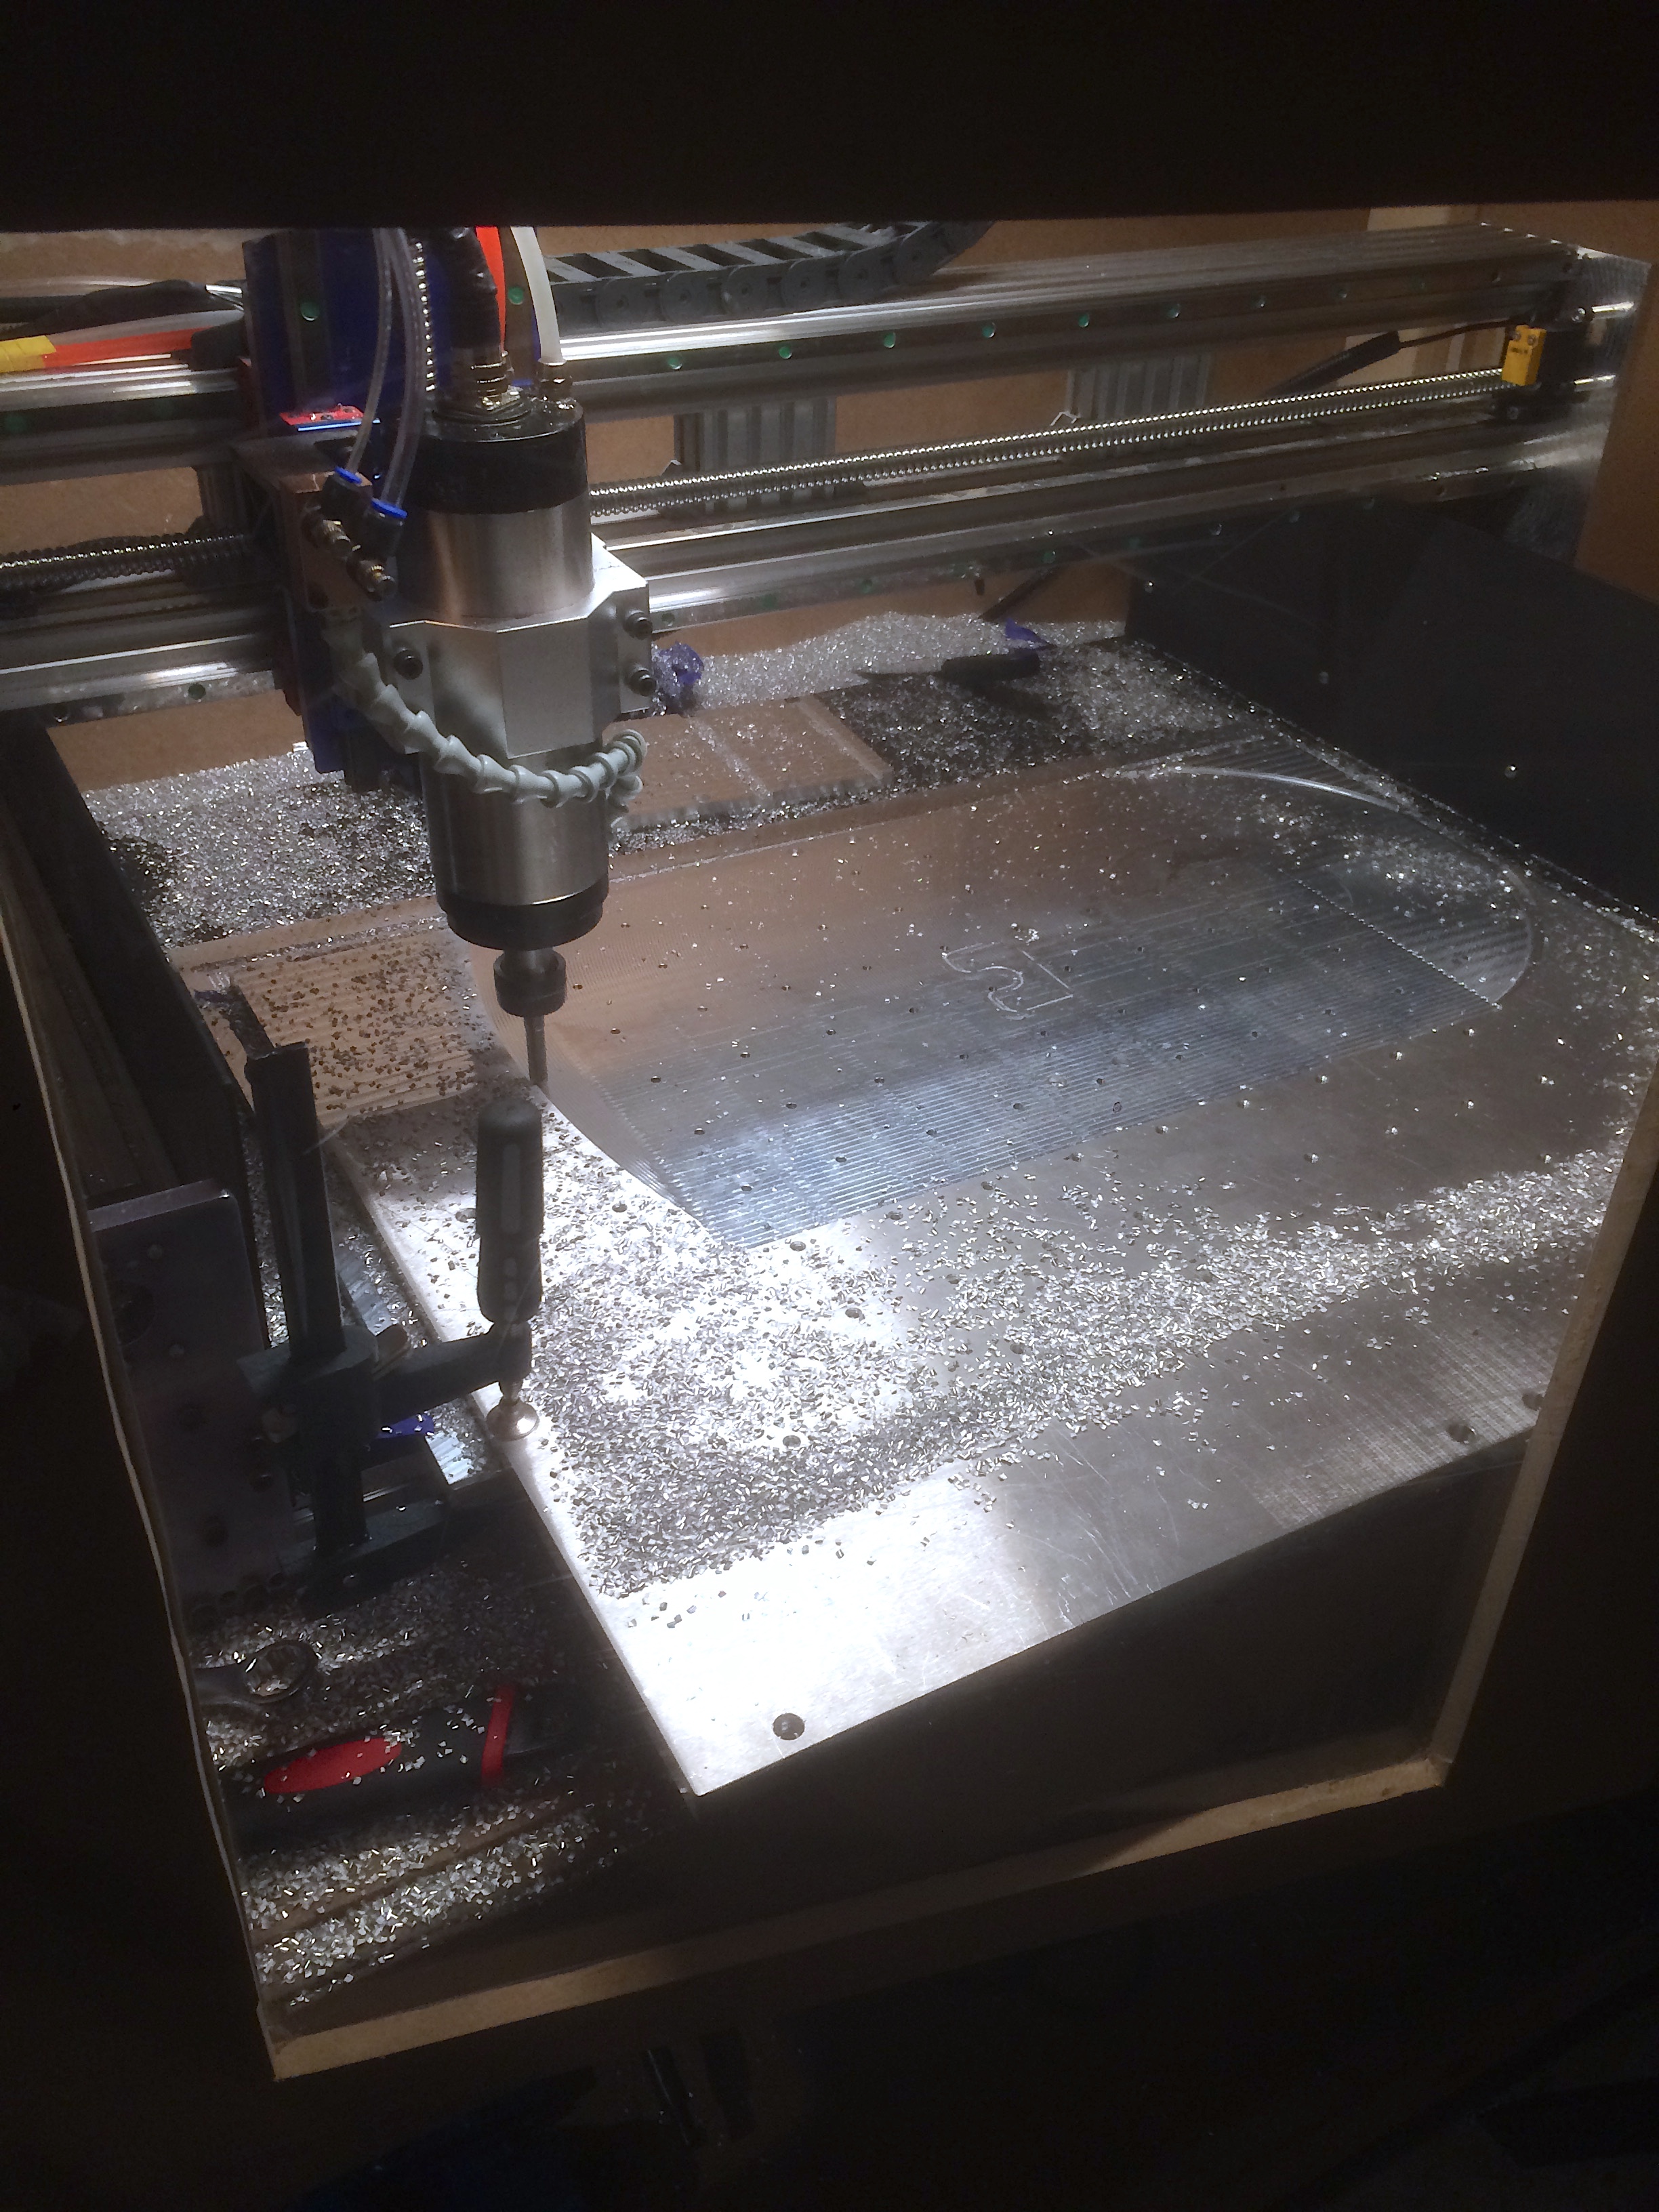
love how shiny it looks now.
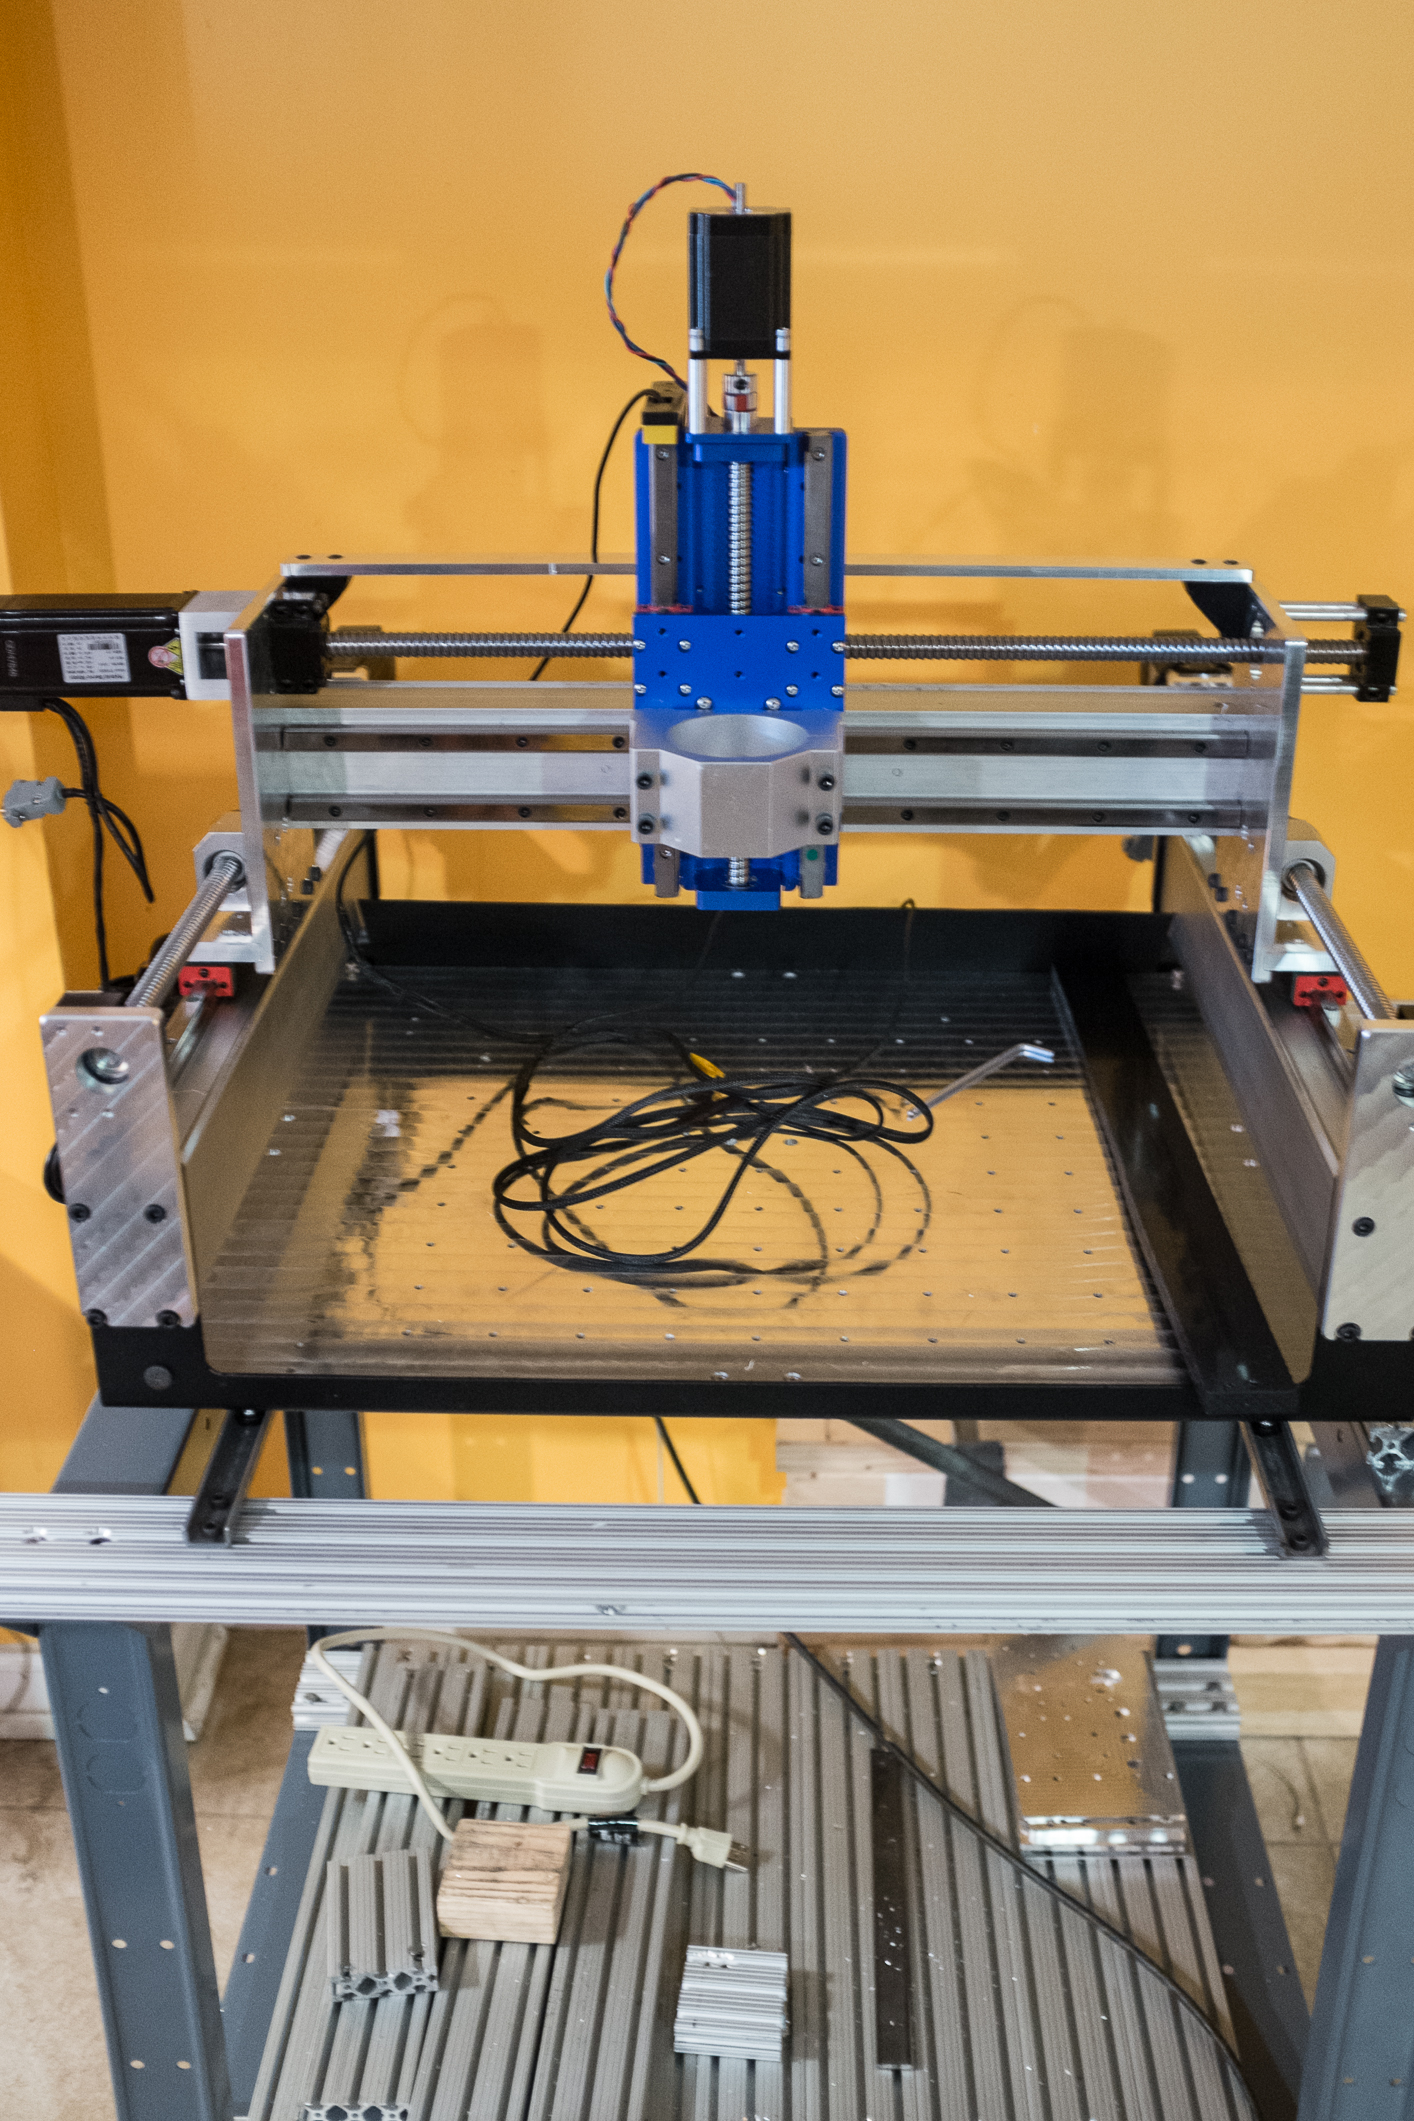
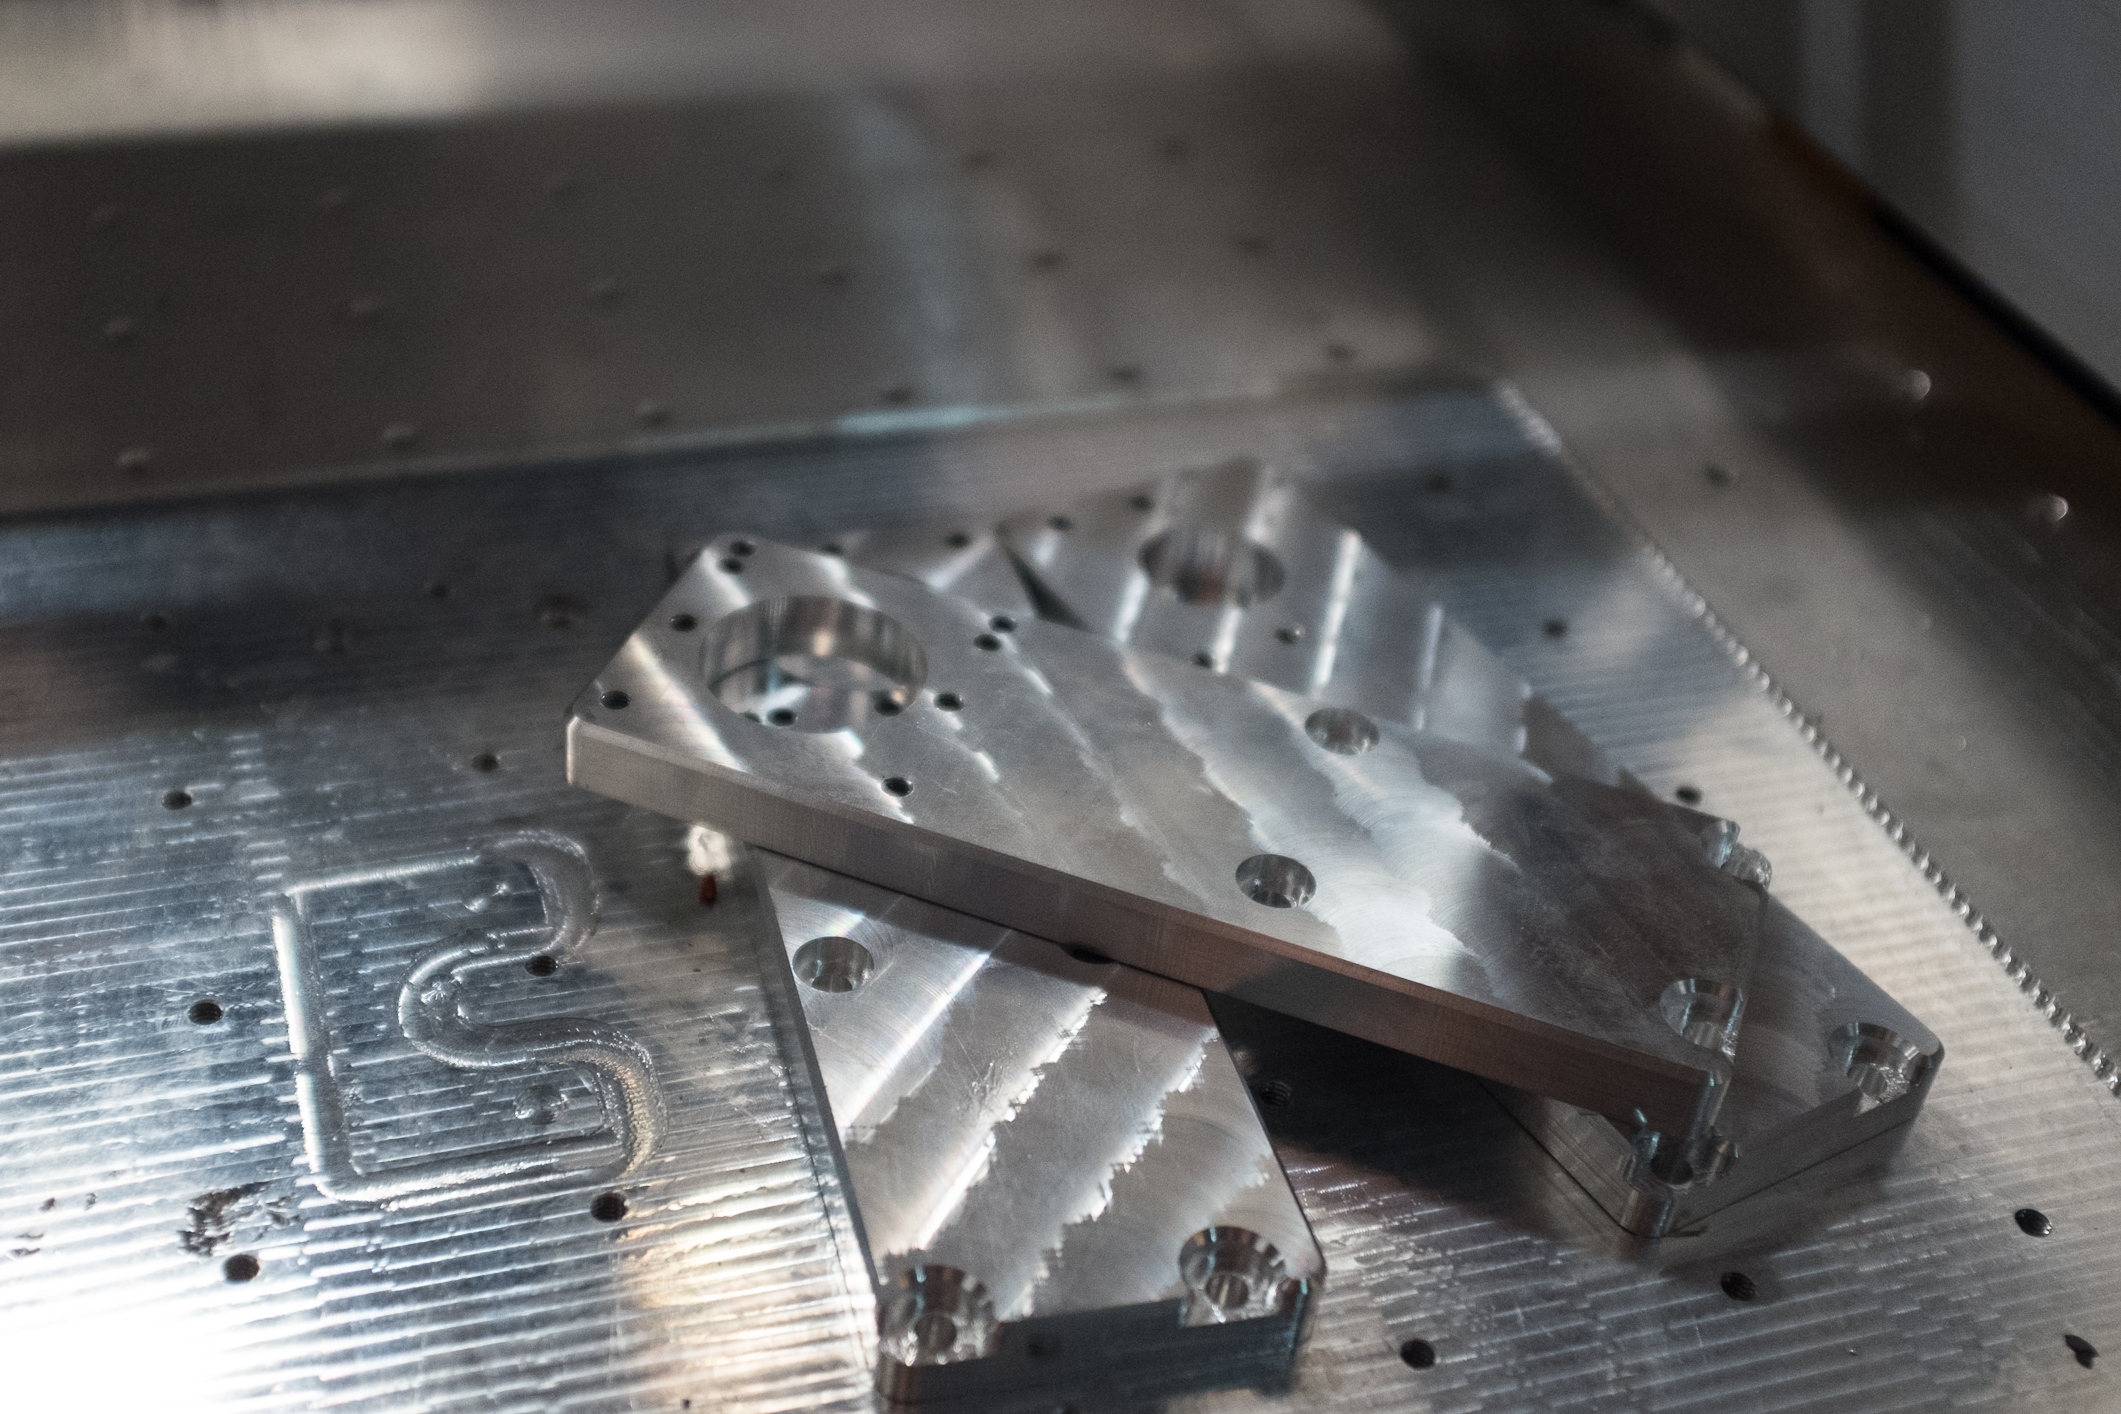
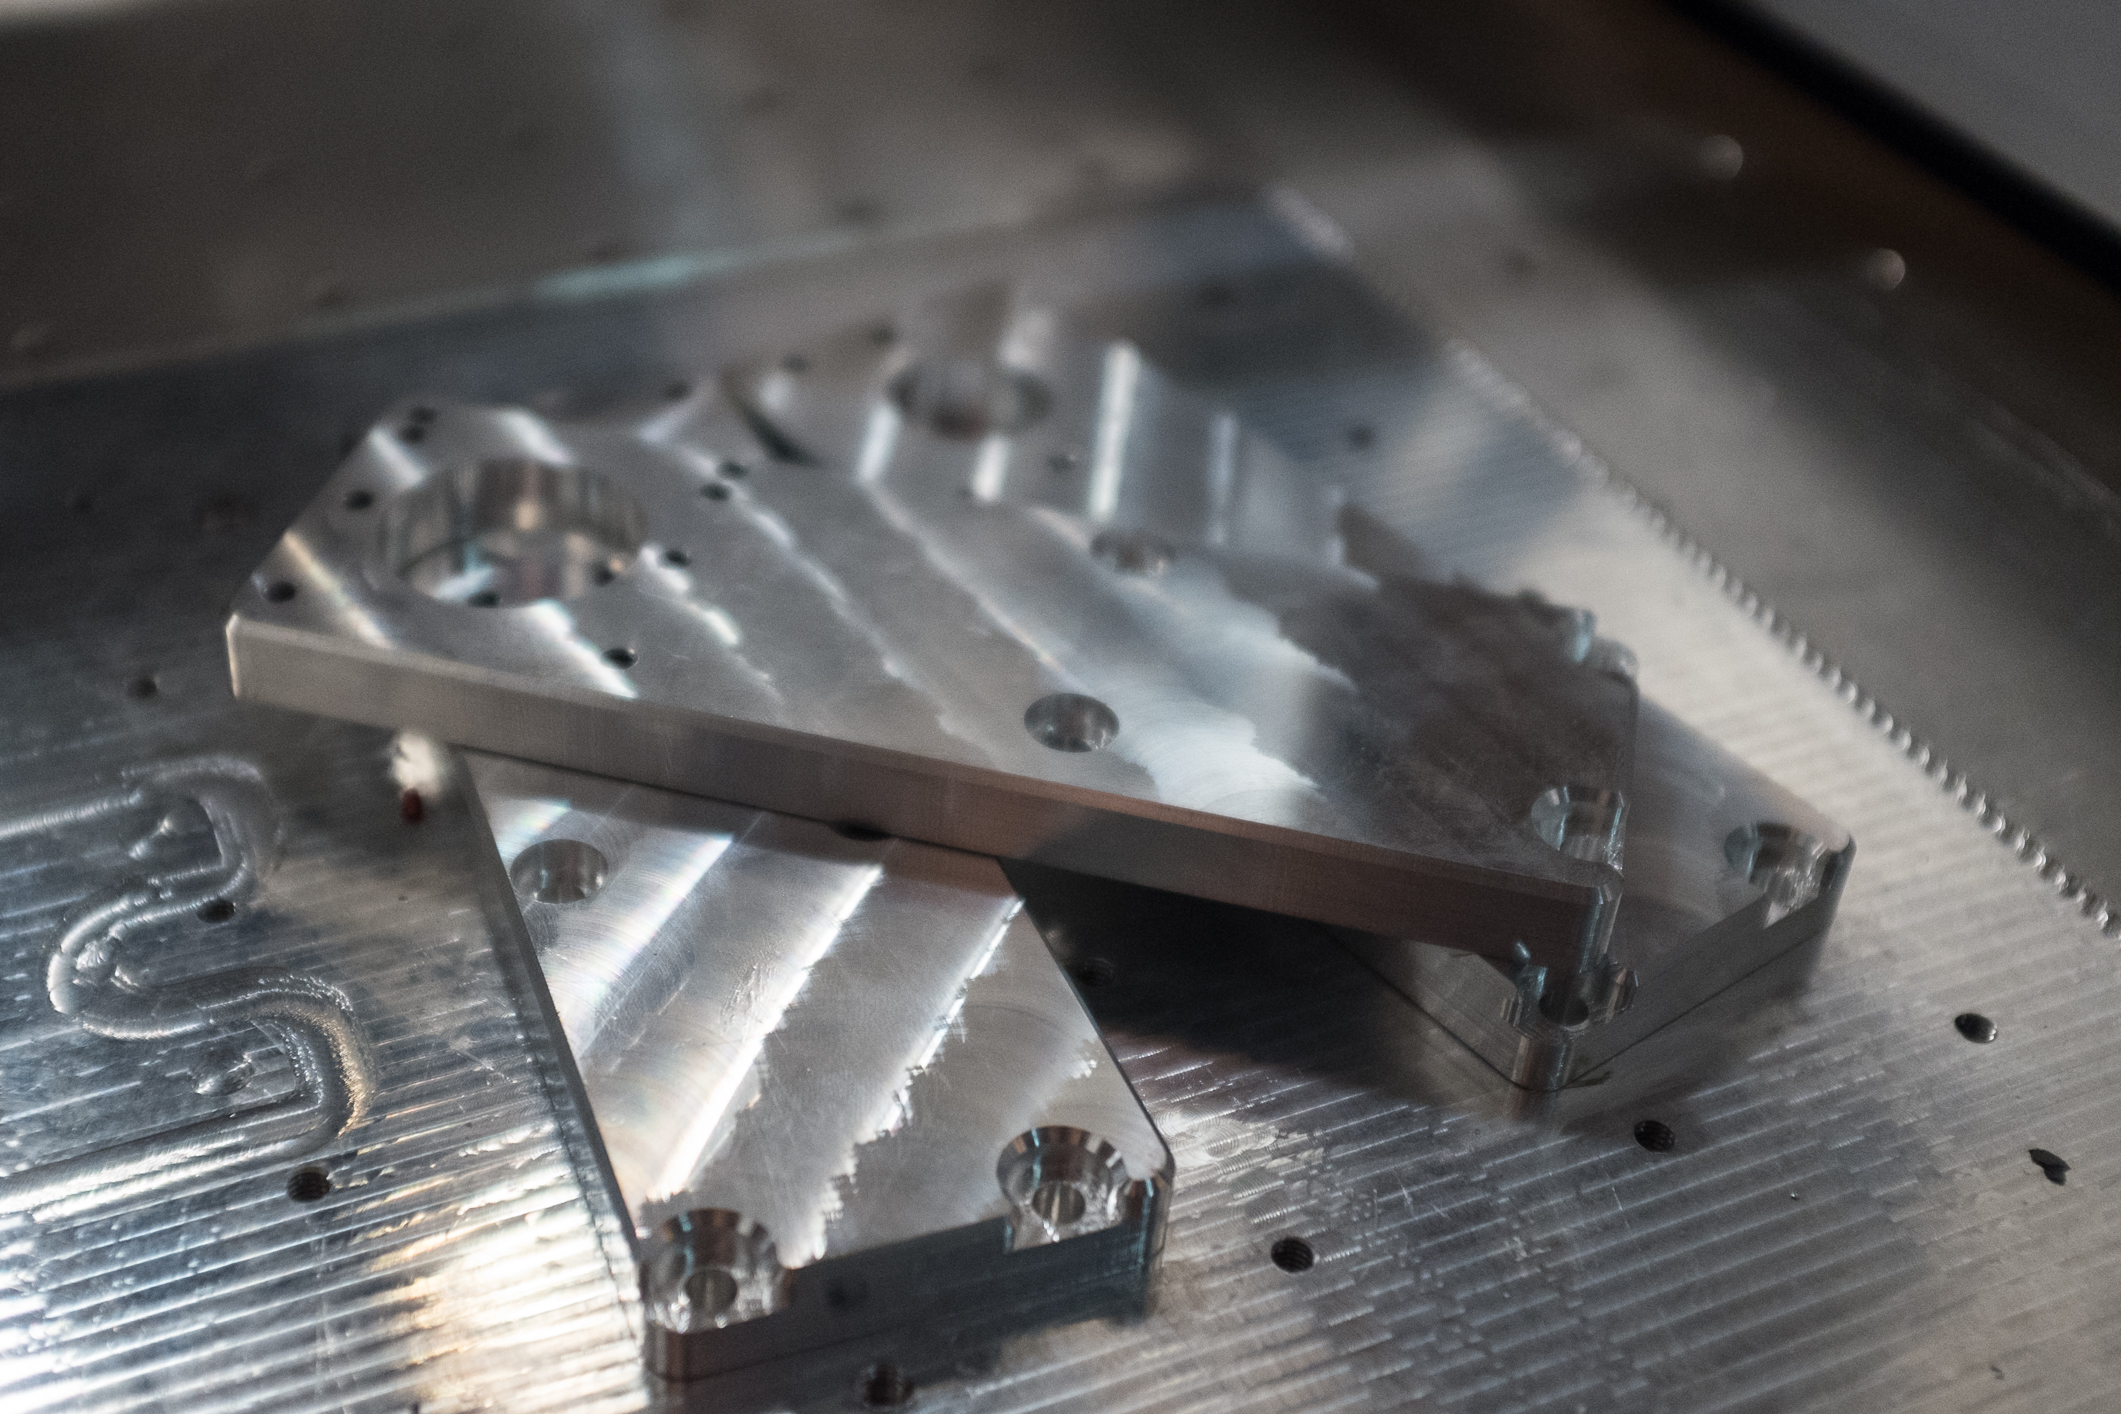
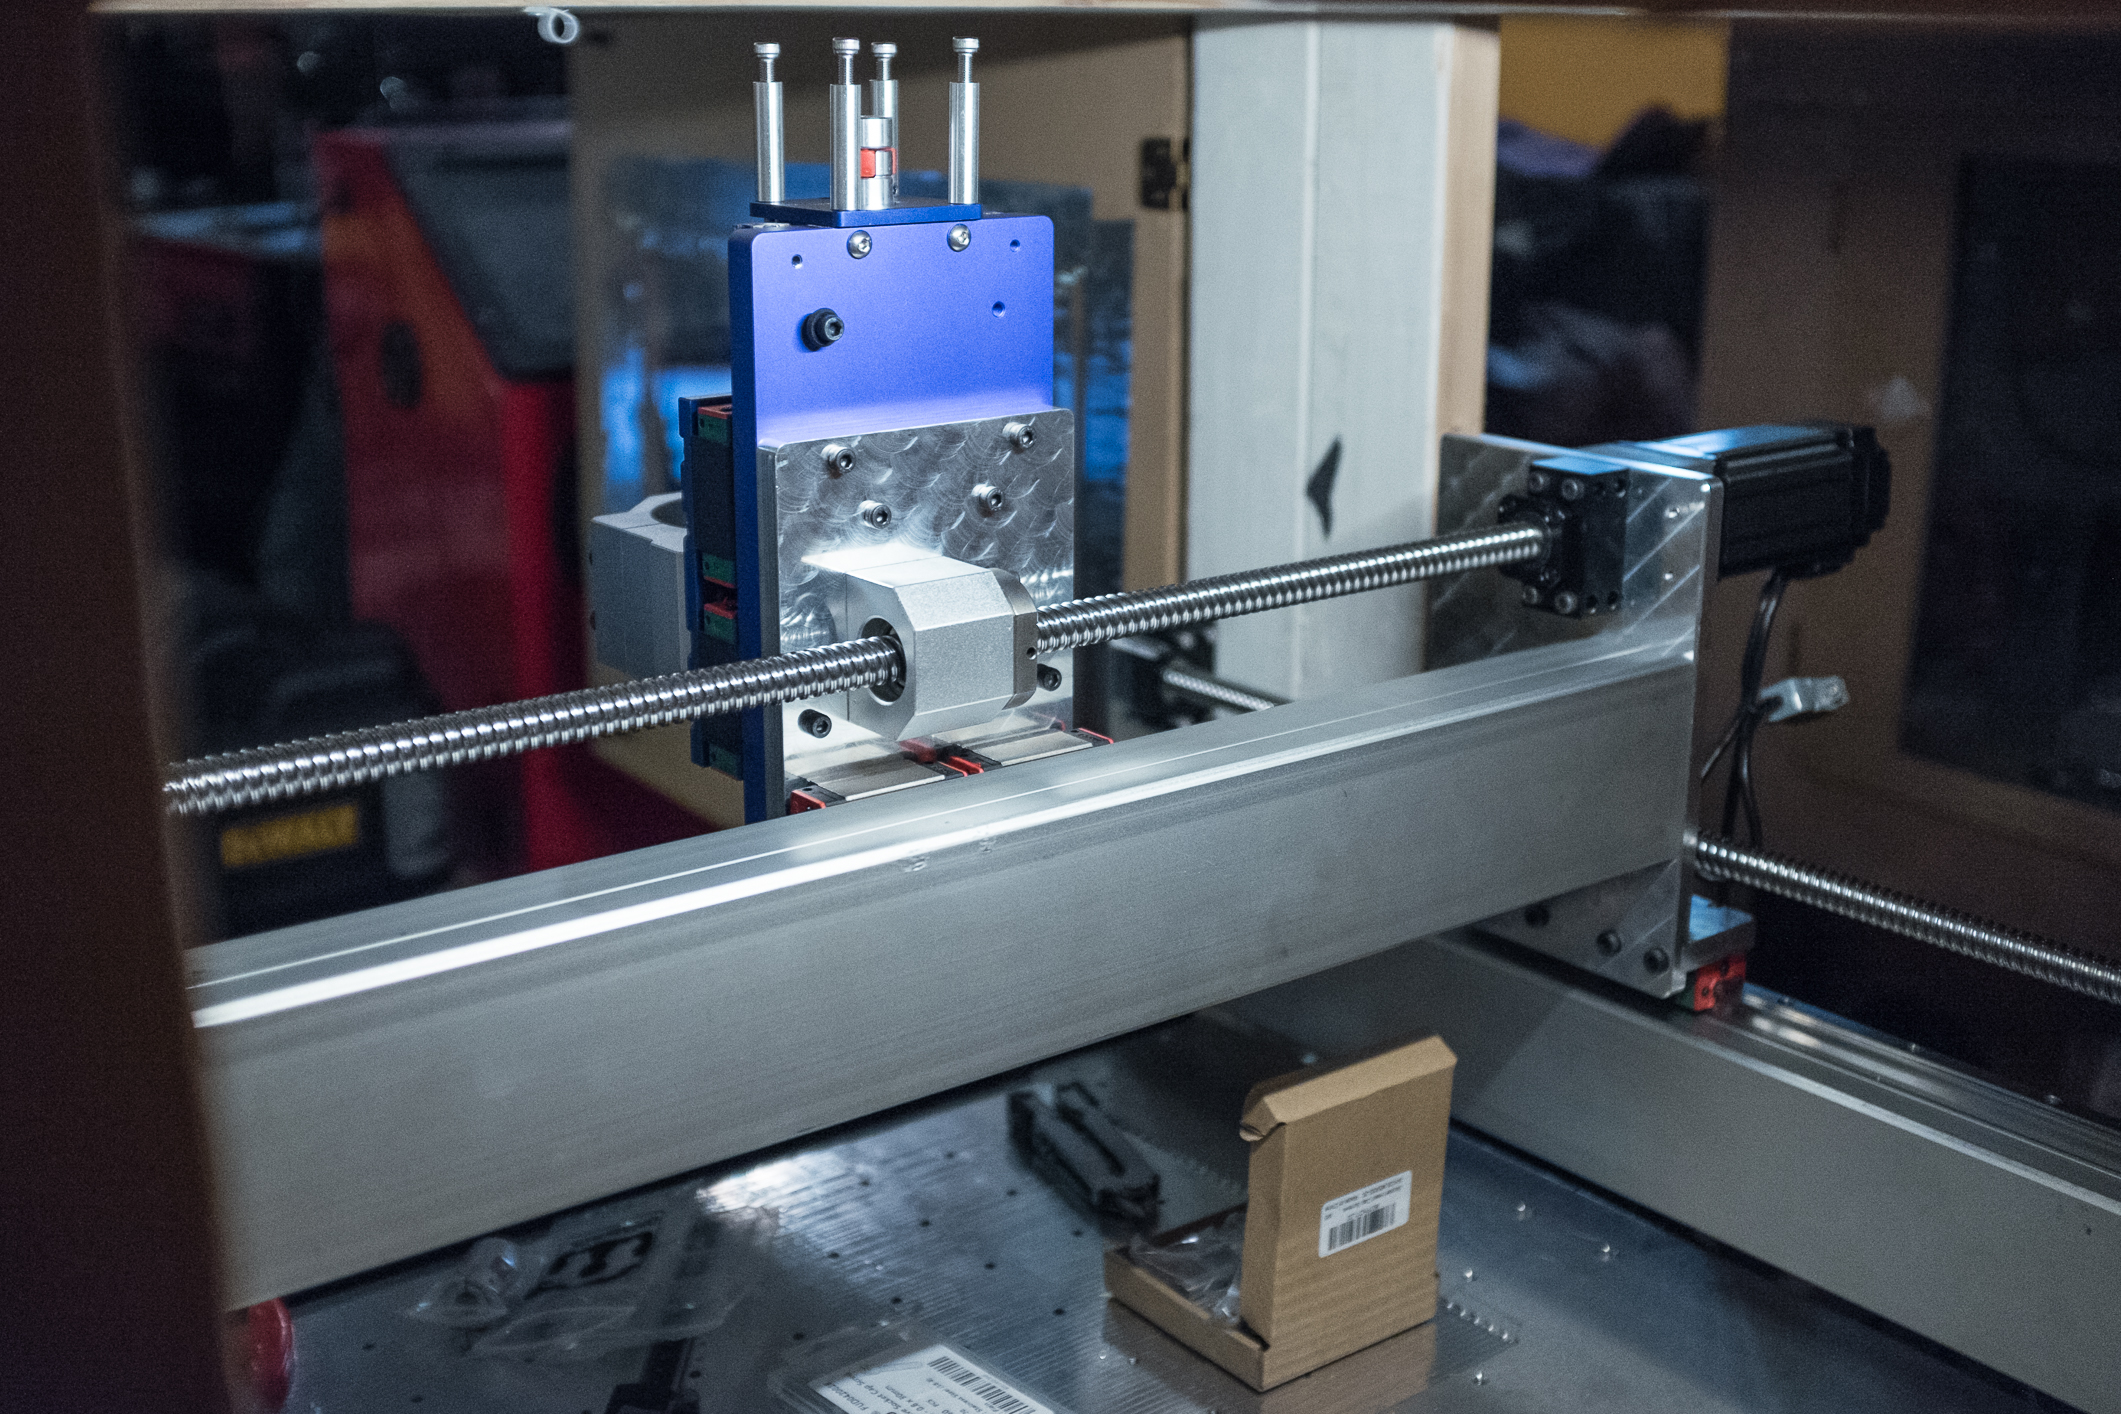
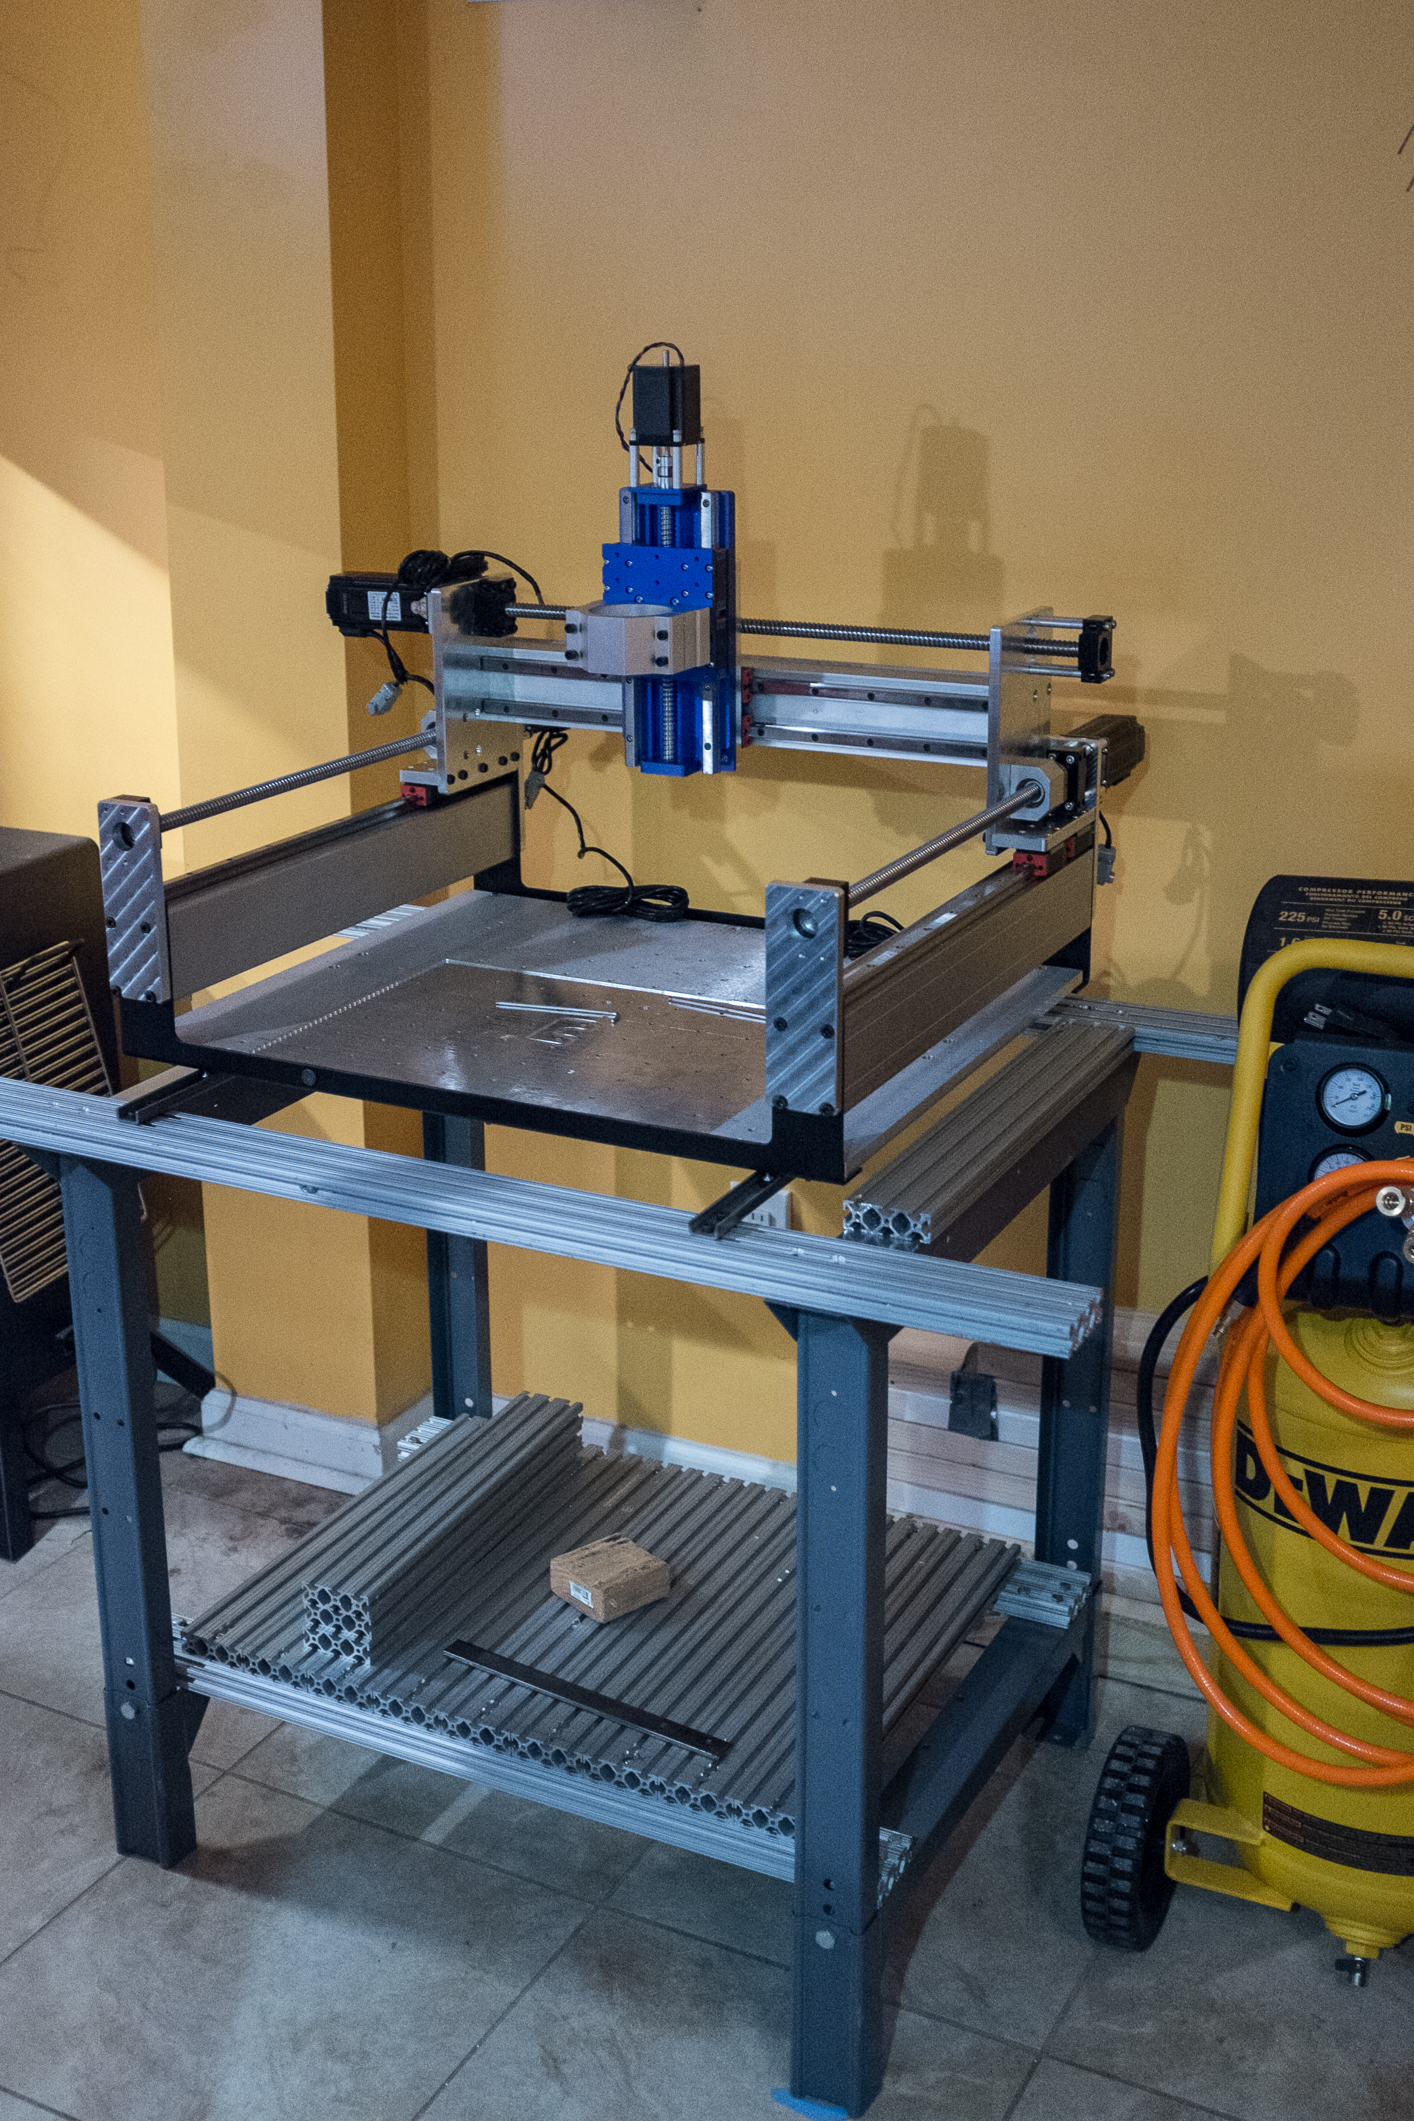
I’m slowly adding parts to the machine and it’s beginning to look less lake a naked chicken and more like a proper cnc. yesterday 3d printed all sorts of brackets.
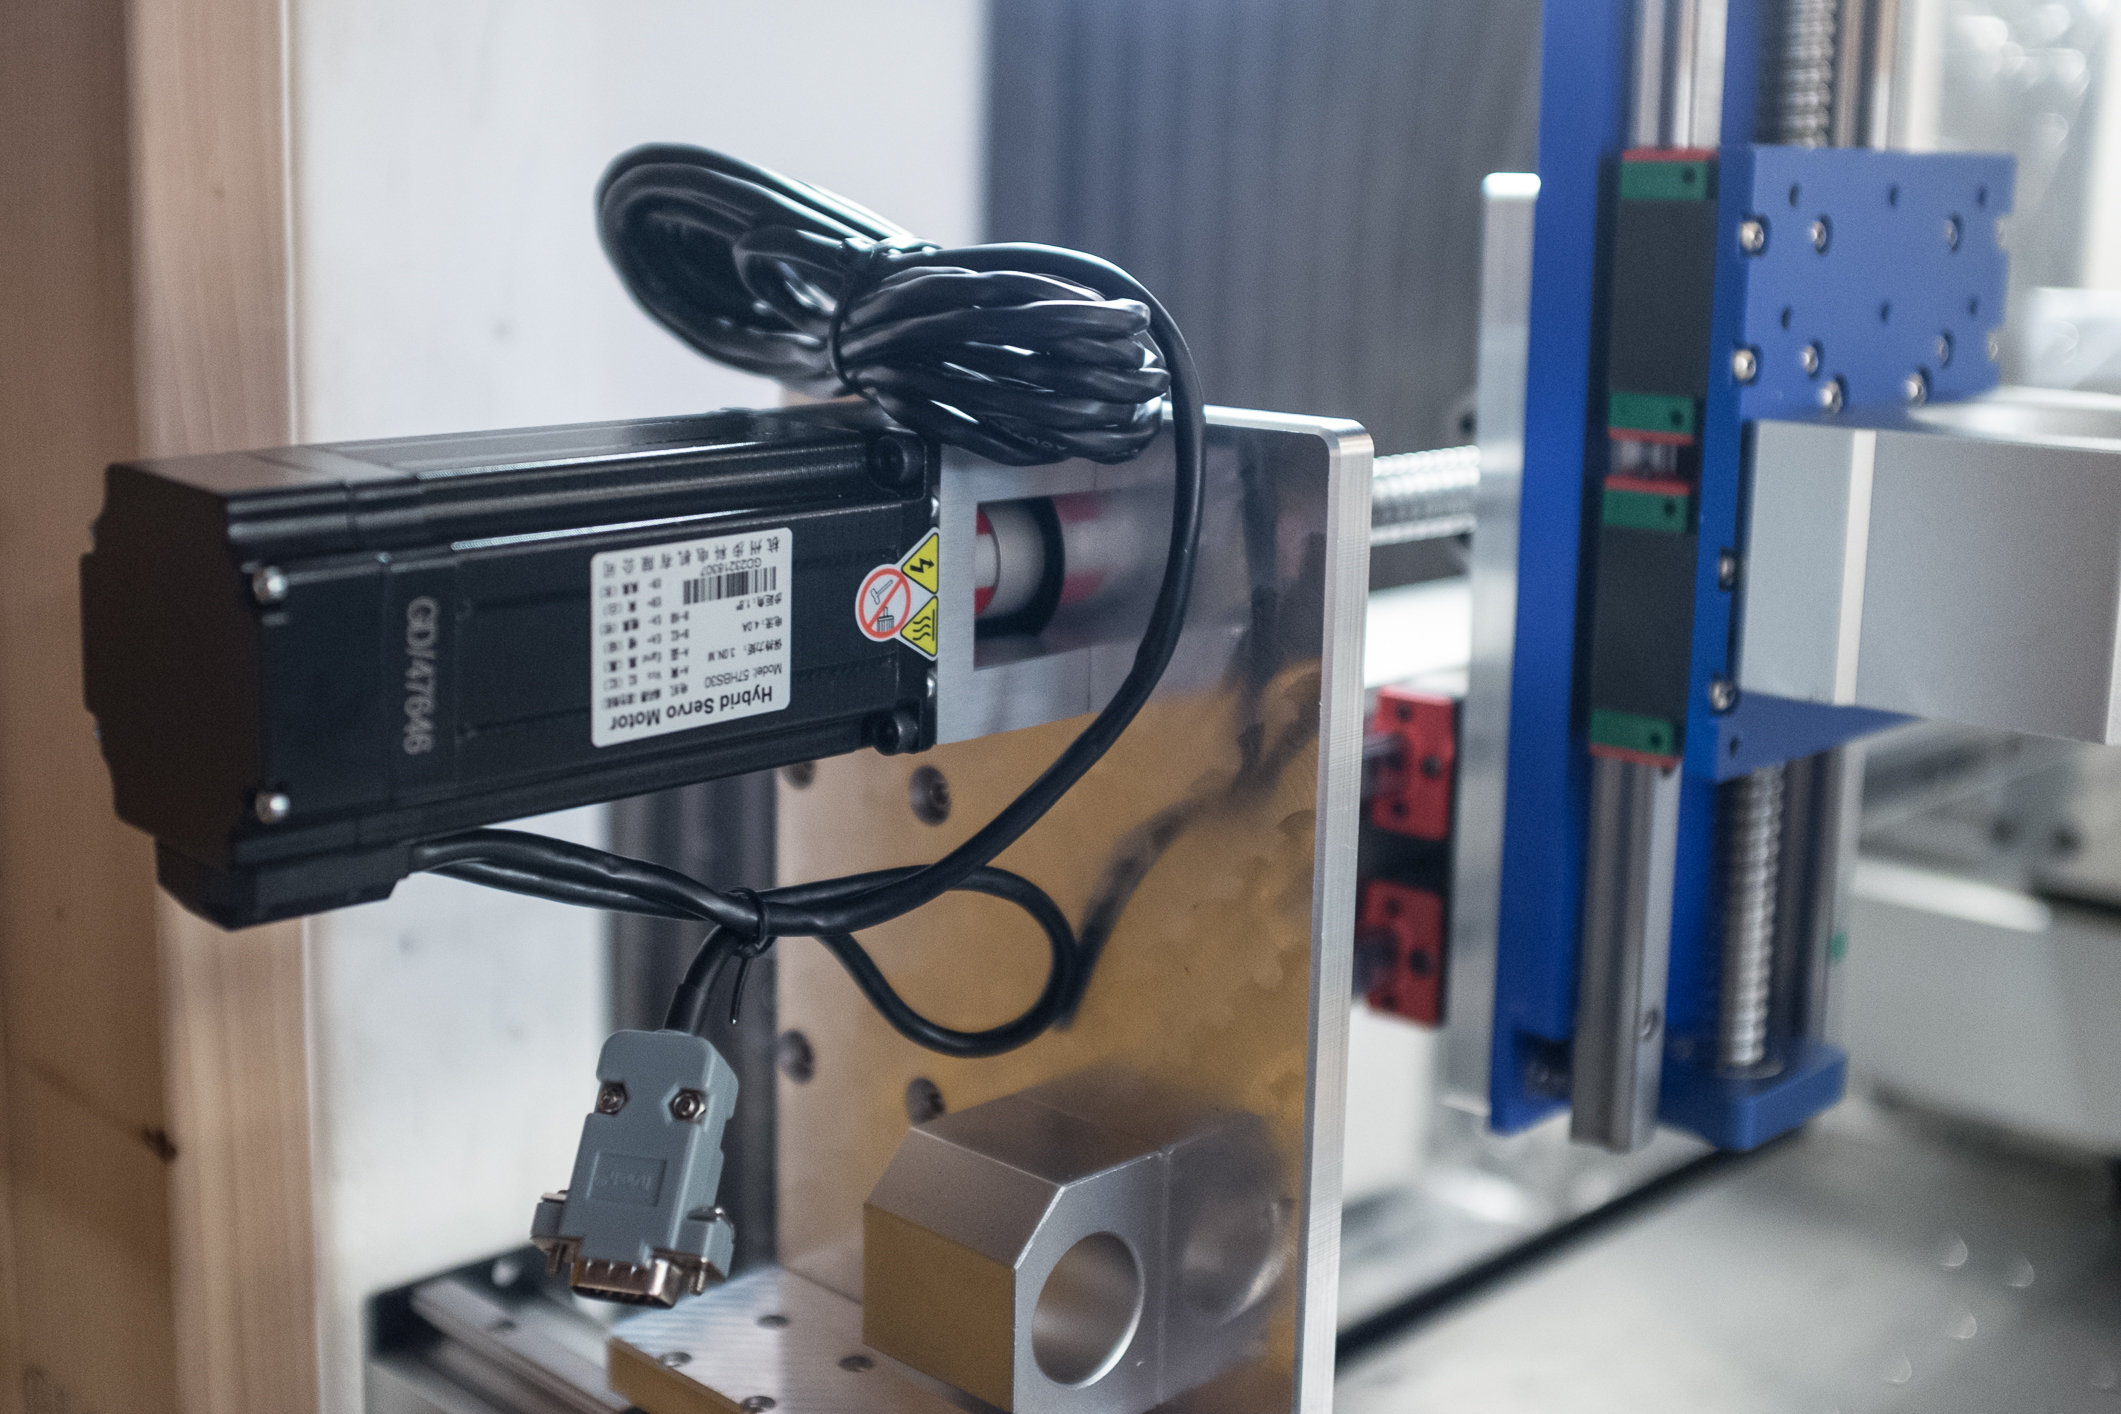
I’m going to use two drag chains (which wasn’t really necessary on the regular so3) but becasause the ballscrew on the x axis is exposed had to add some kind of a shelf to keep it elevated. Used some 3/8 scrap aluminium and 3d printed brackets. Another end of the drag chain will be mounted to the limit switch bracket.
I tend to be lazy so whenever I can use 3d printing rather than cutting aluminium I do it. Love how simple it is to press a button and a part is ready, no set ups, to messing around with glue or clamps.
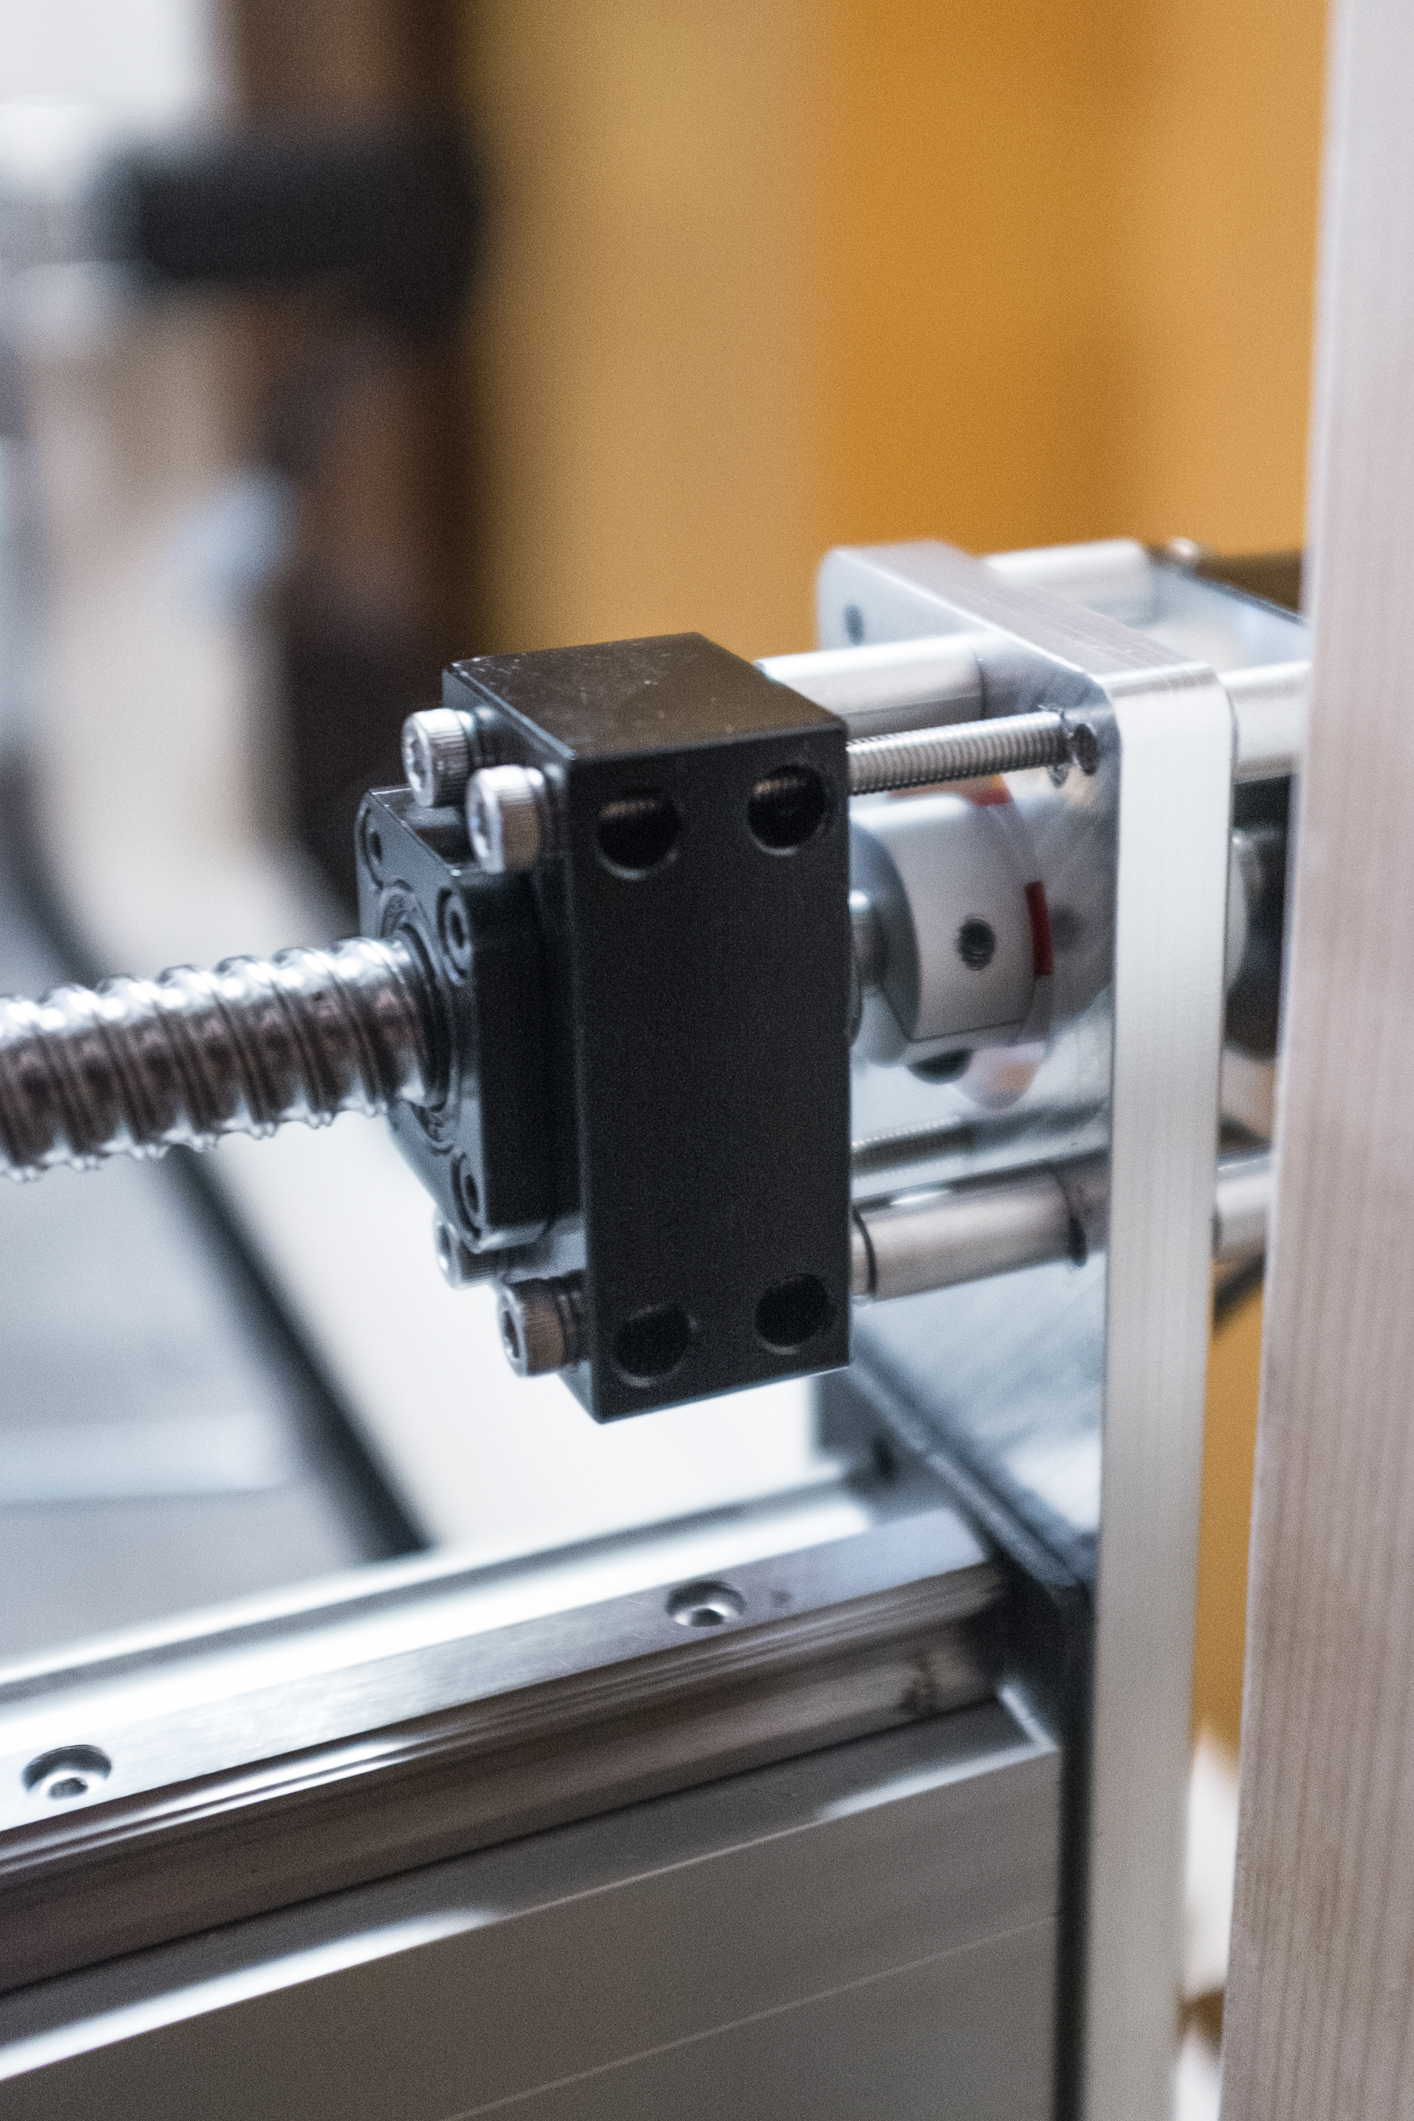
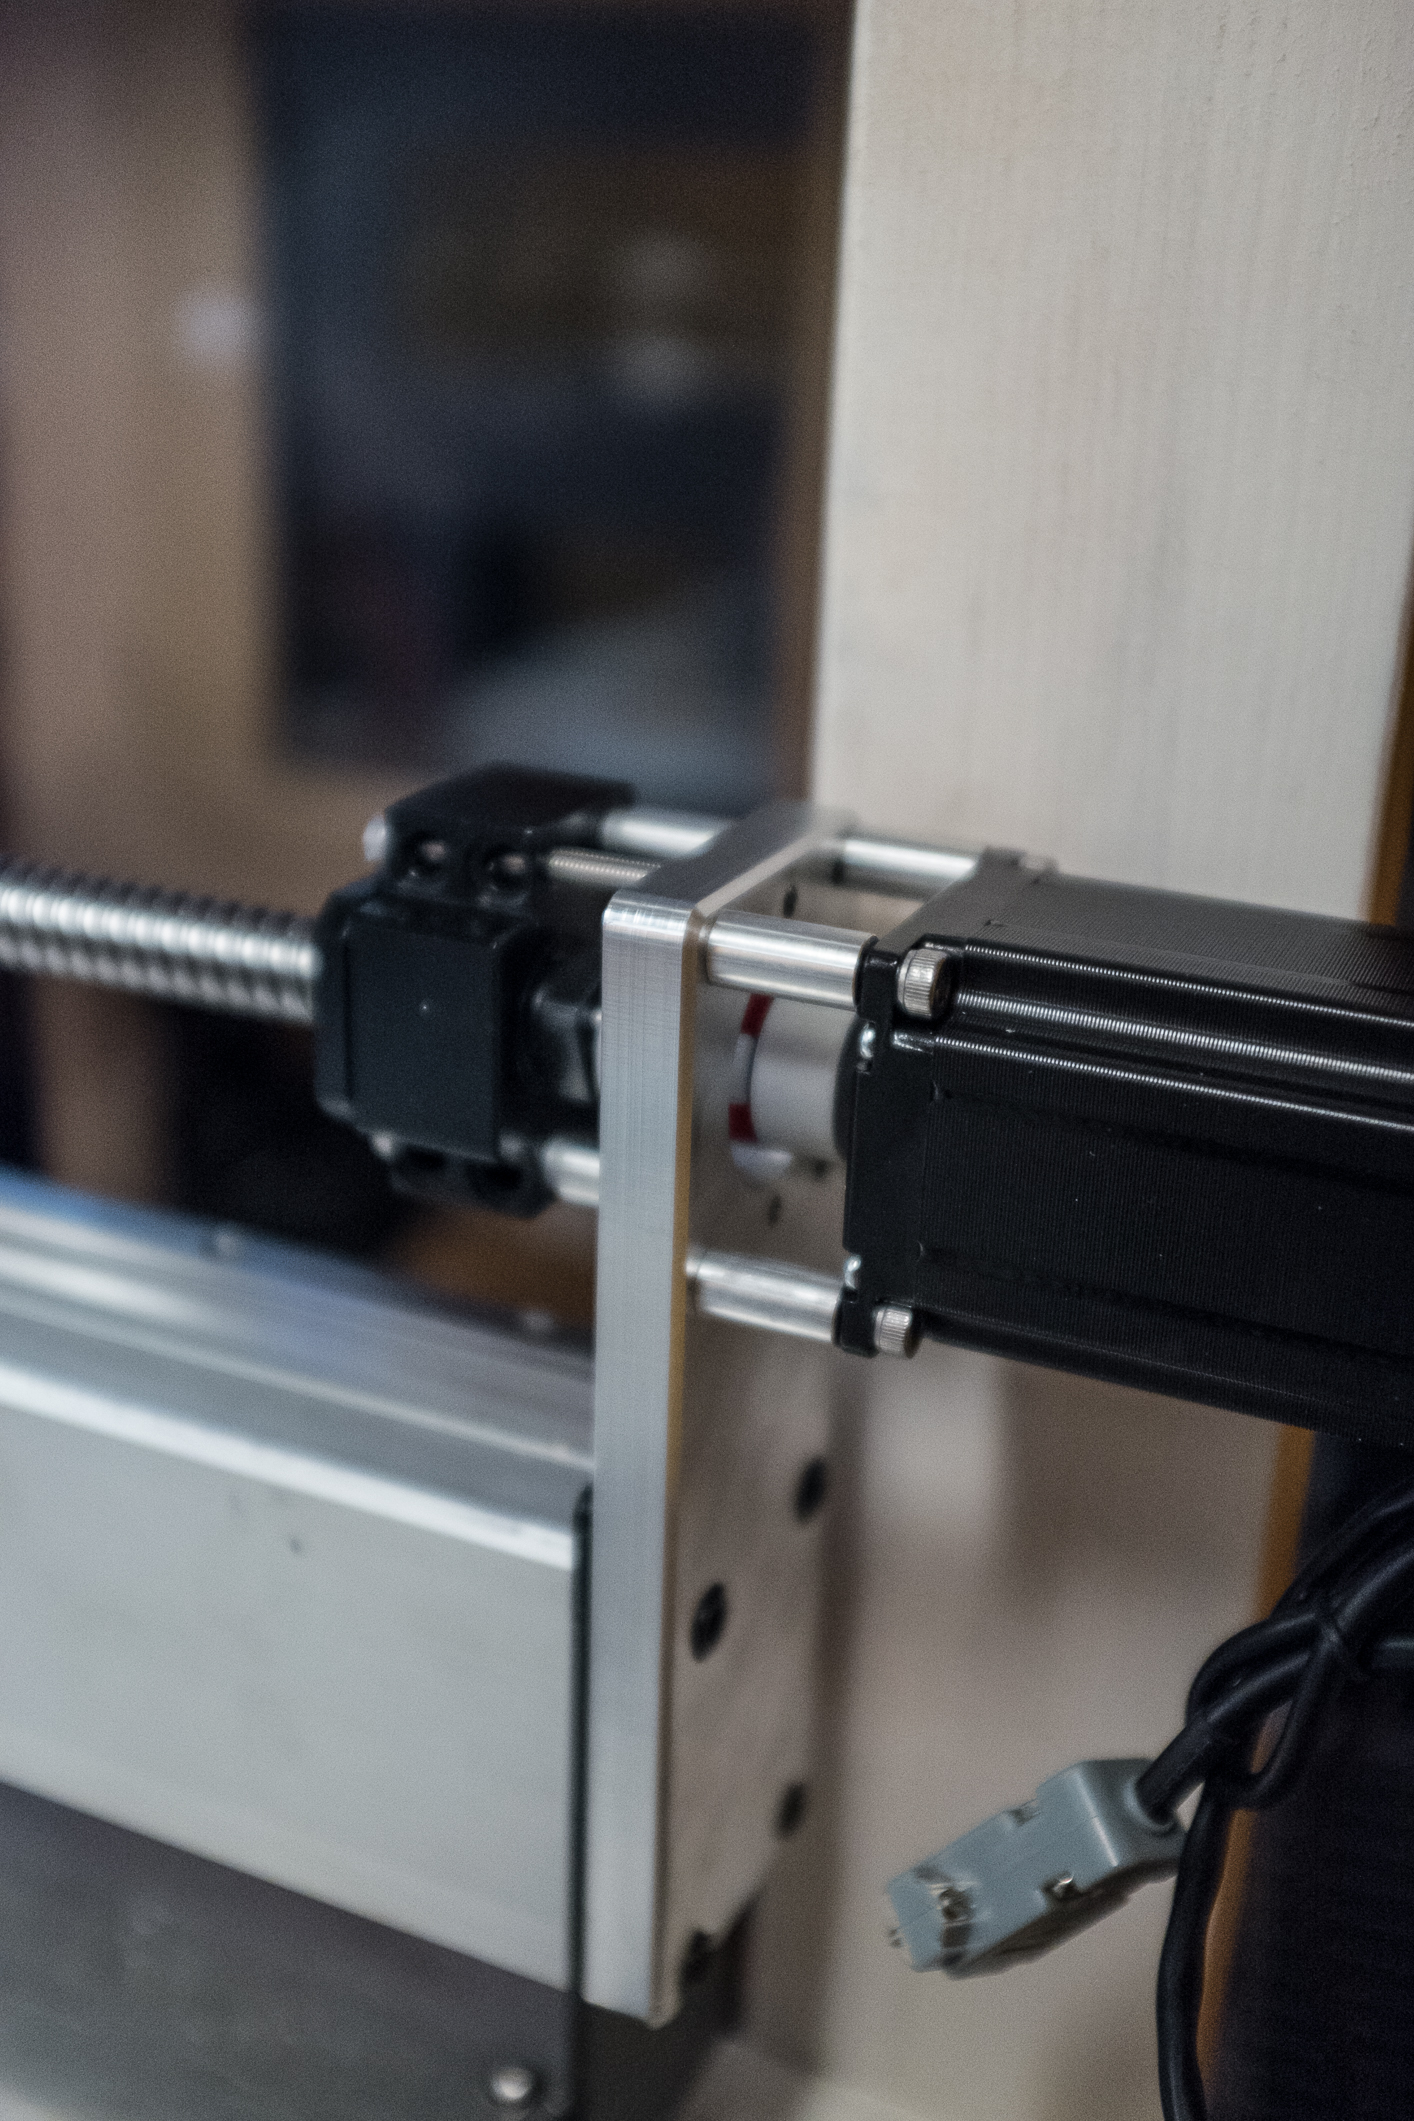
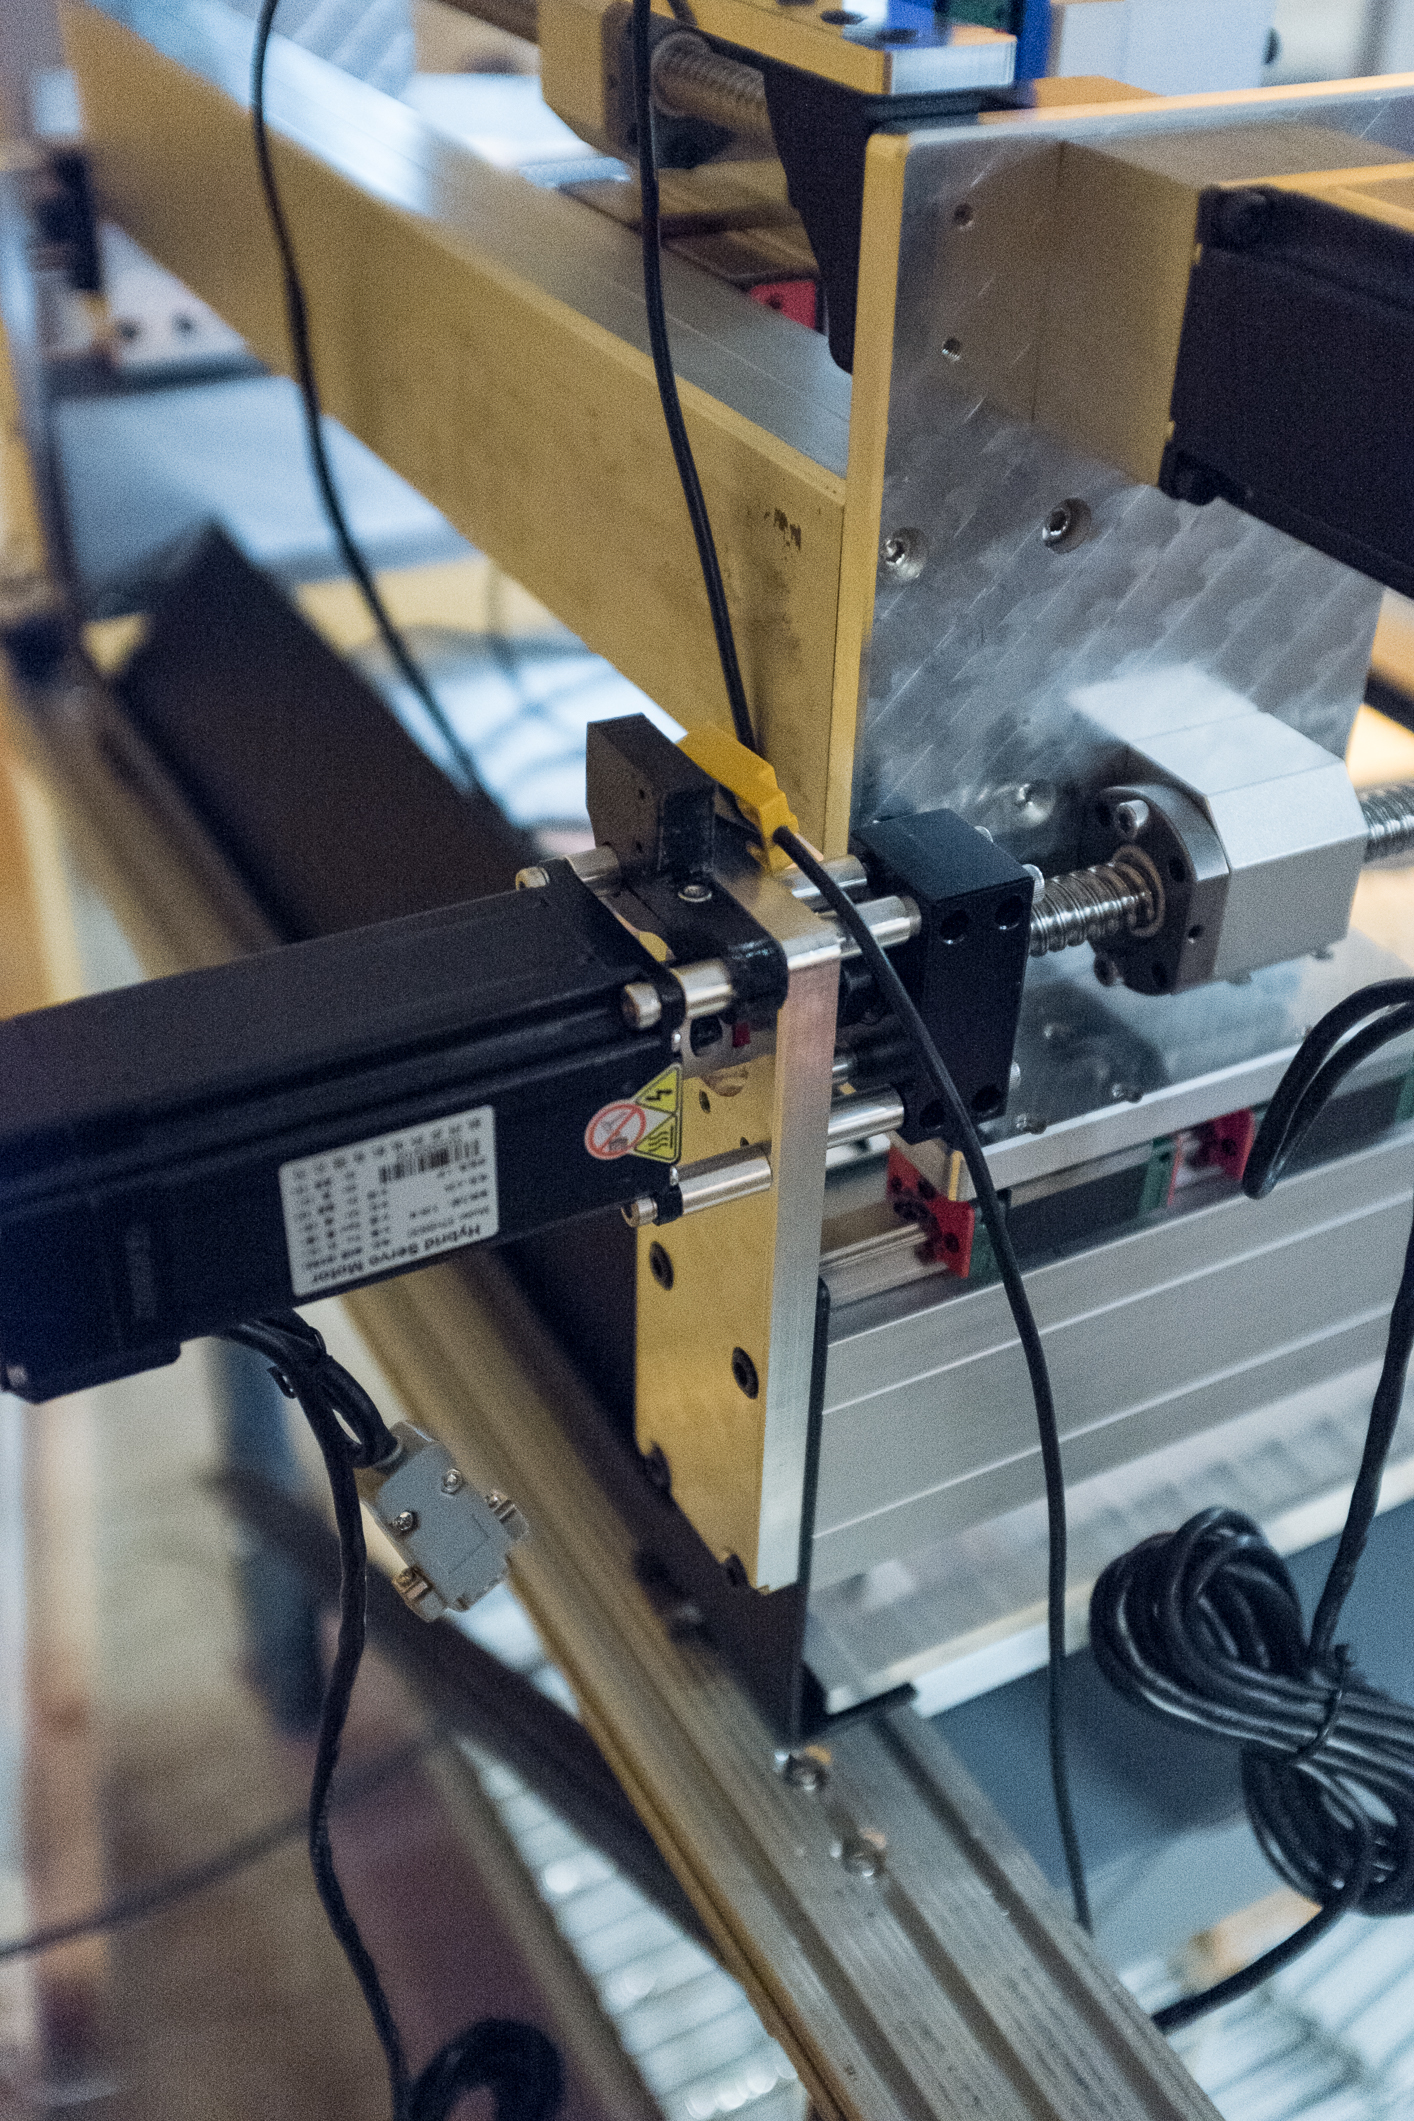
Z limit switch with a support for the drag chain. I’m still going to add an extension to it to increase the bend radius of the drag chain so it should be mounted closer to the top of the stepper motor.
X axis limit switch mounted but I still might change it’s position.
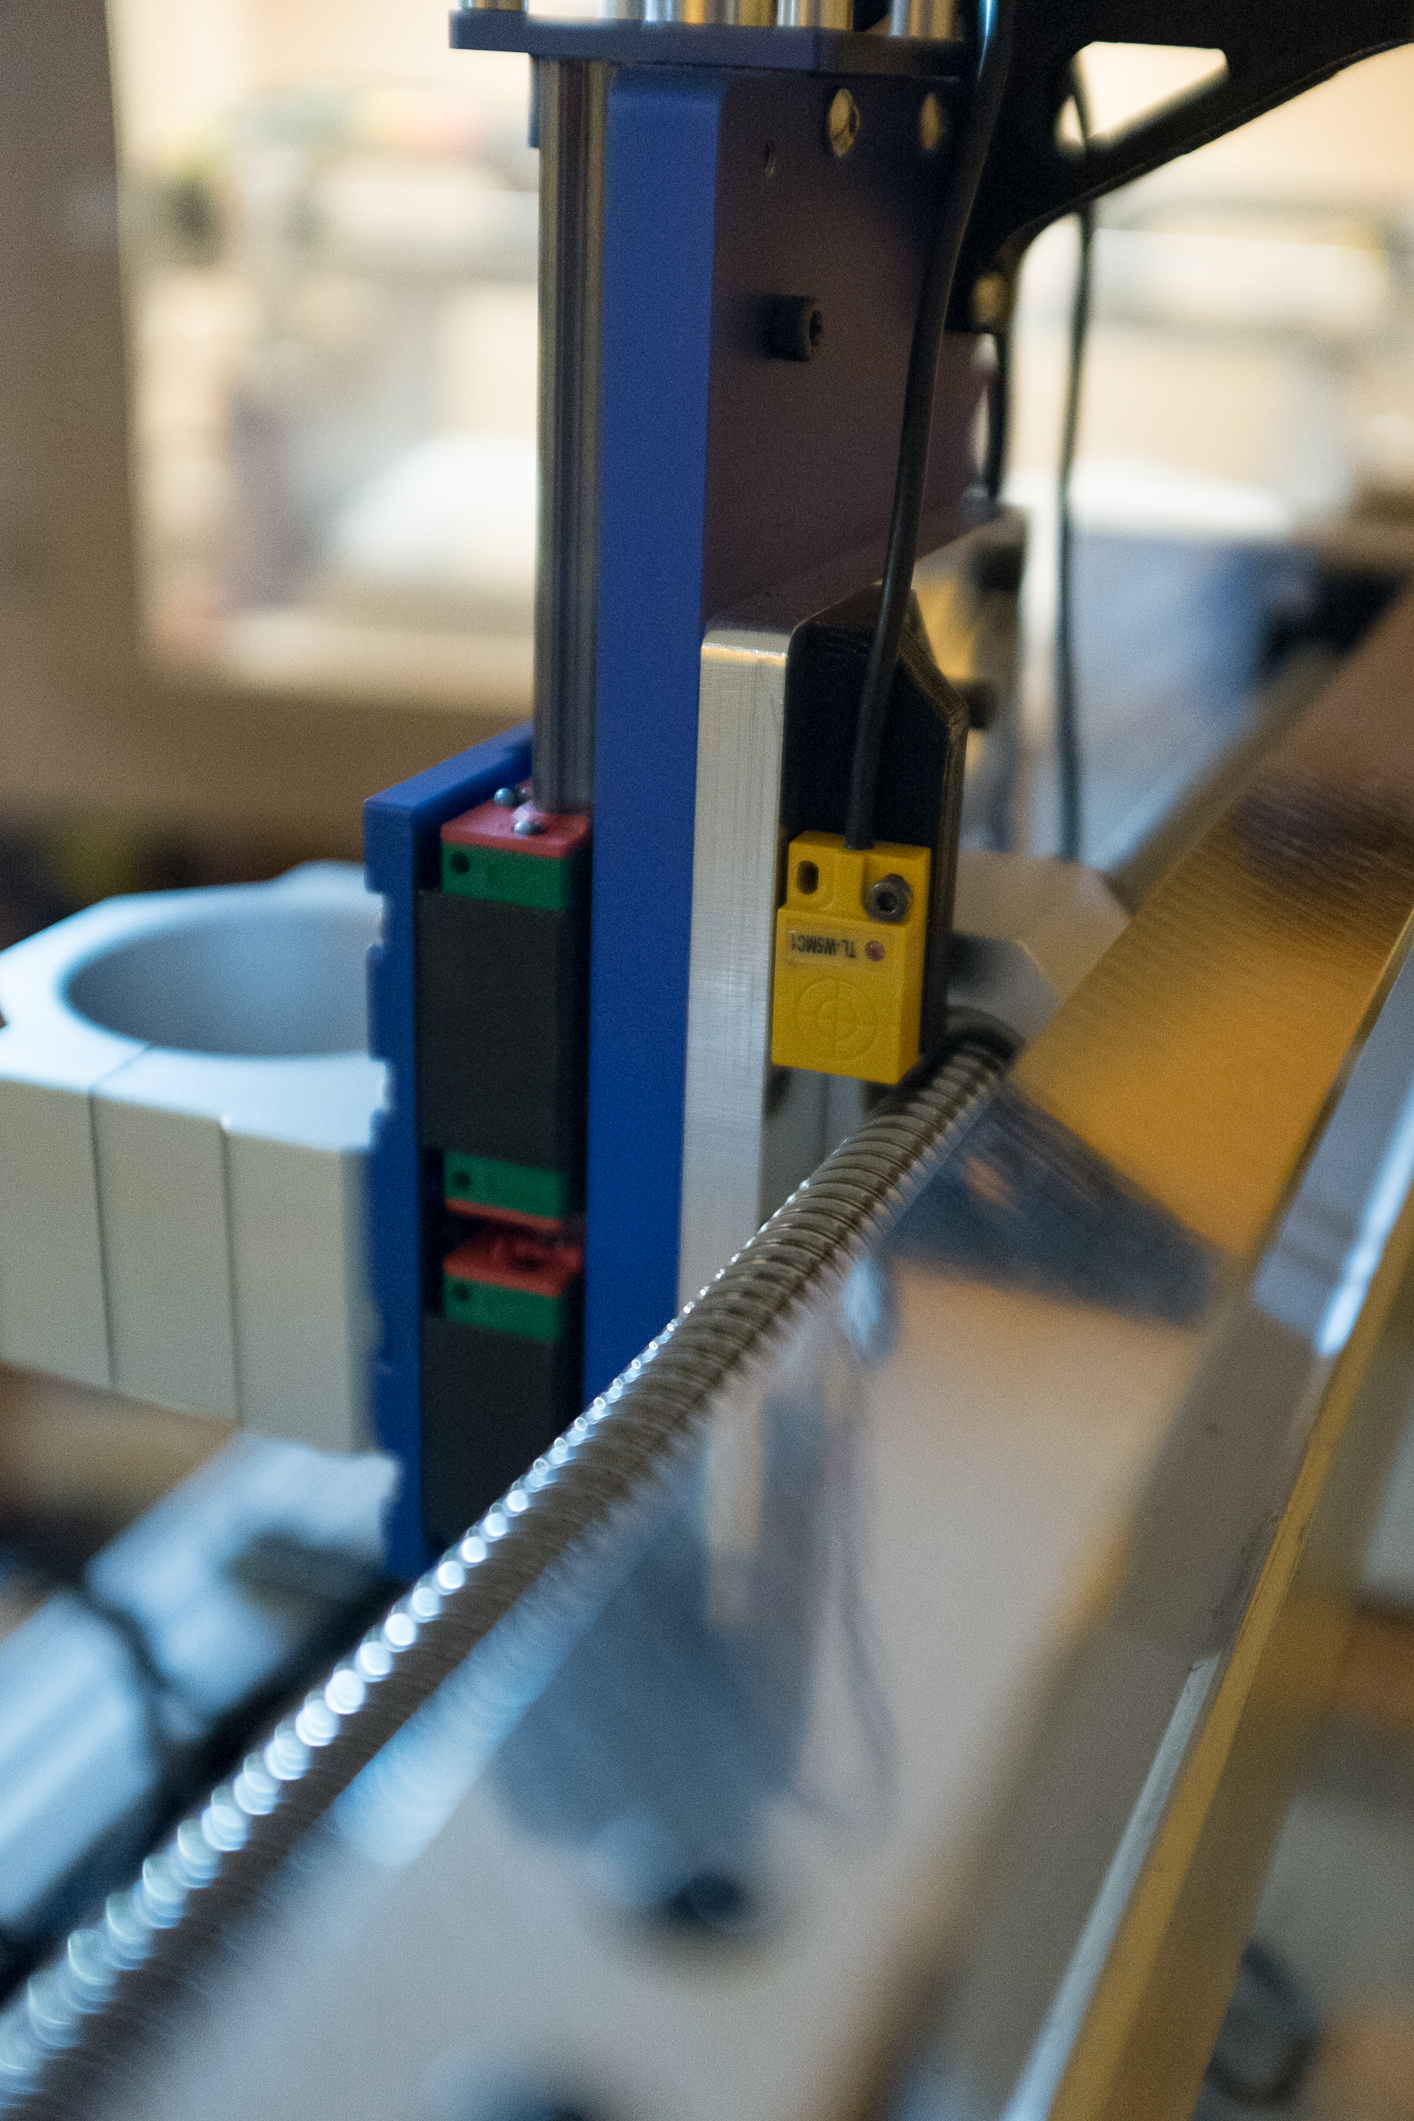
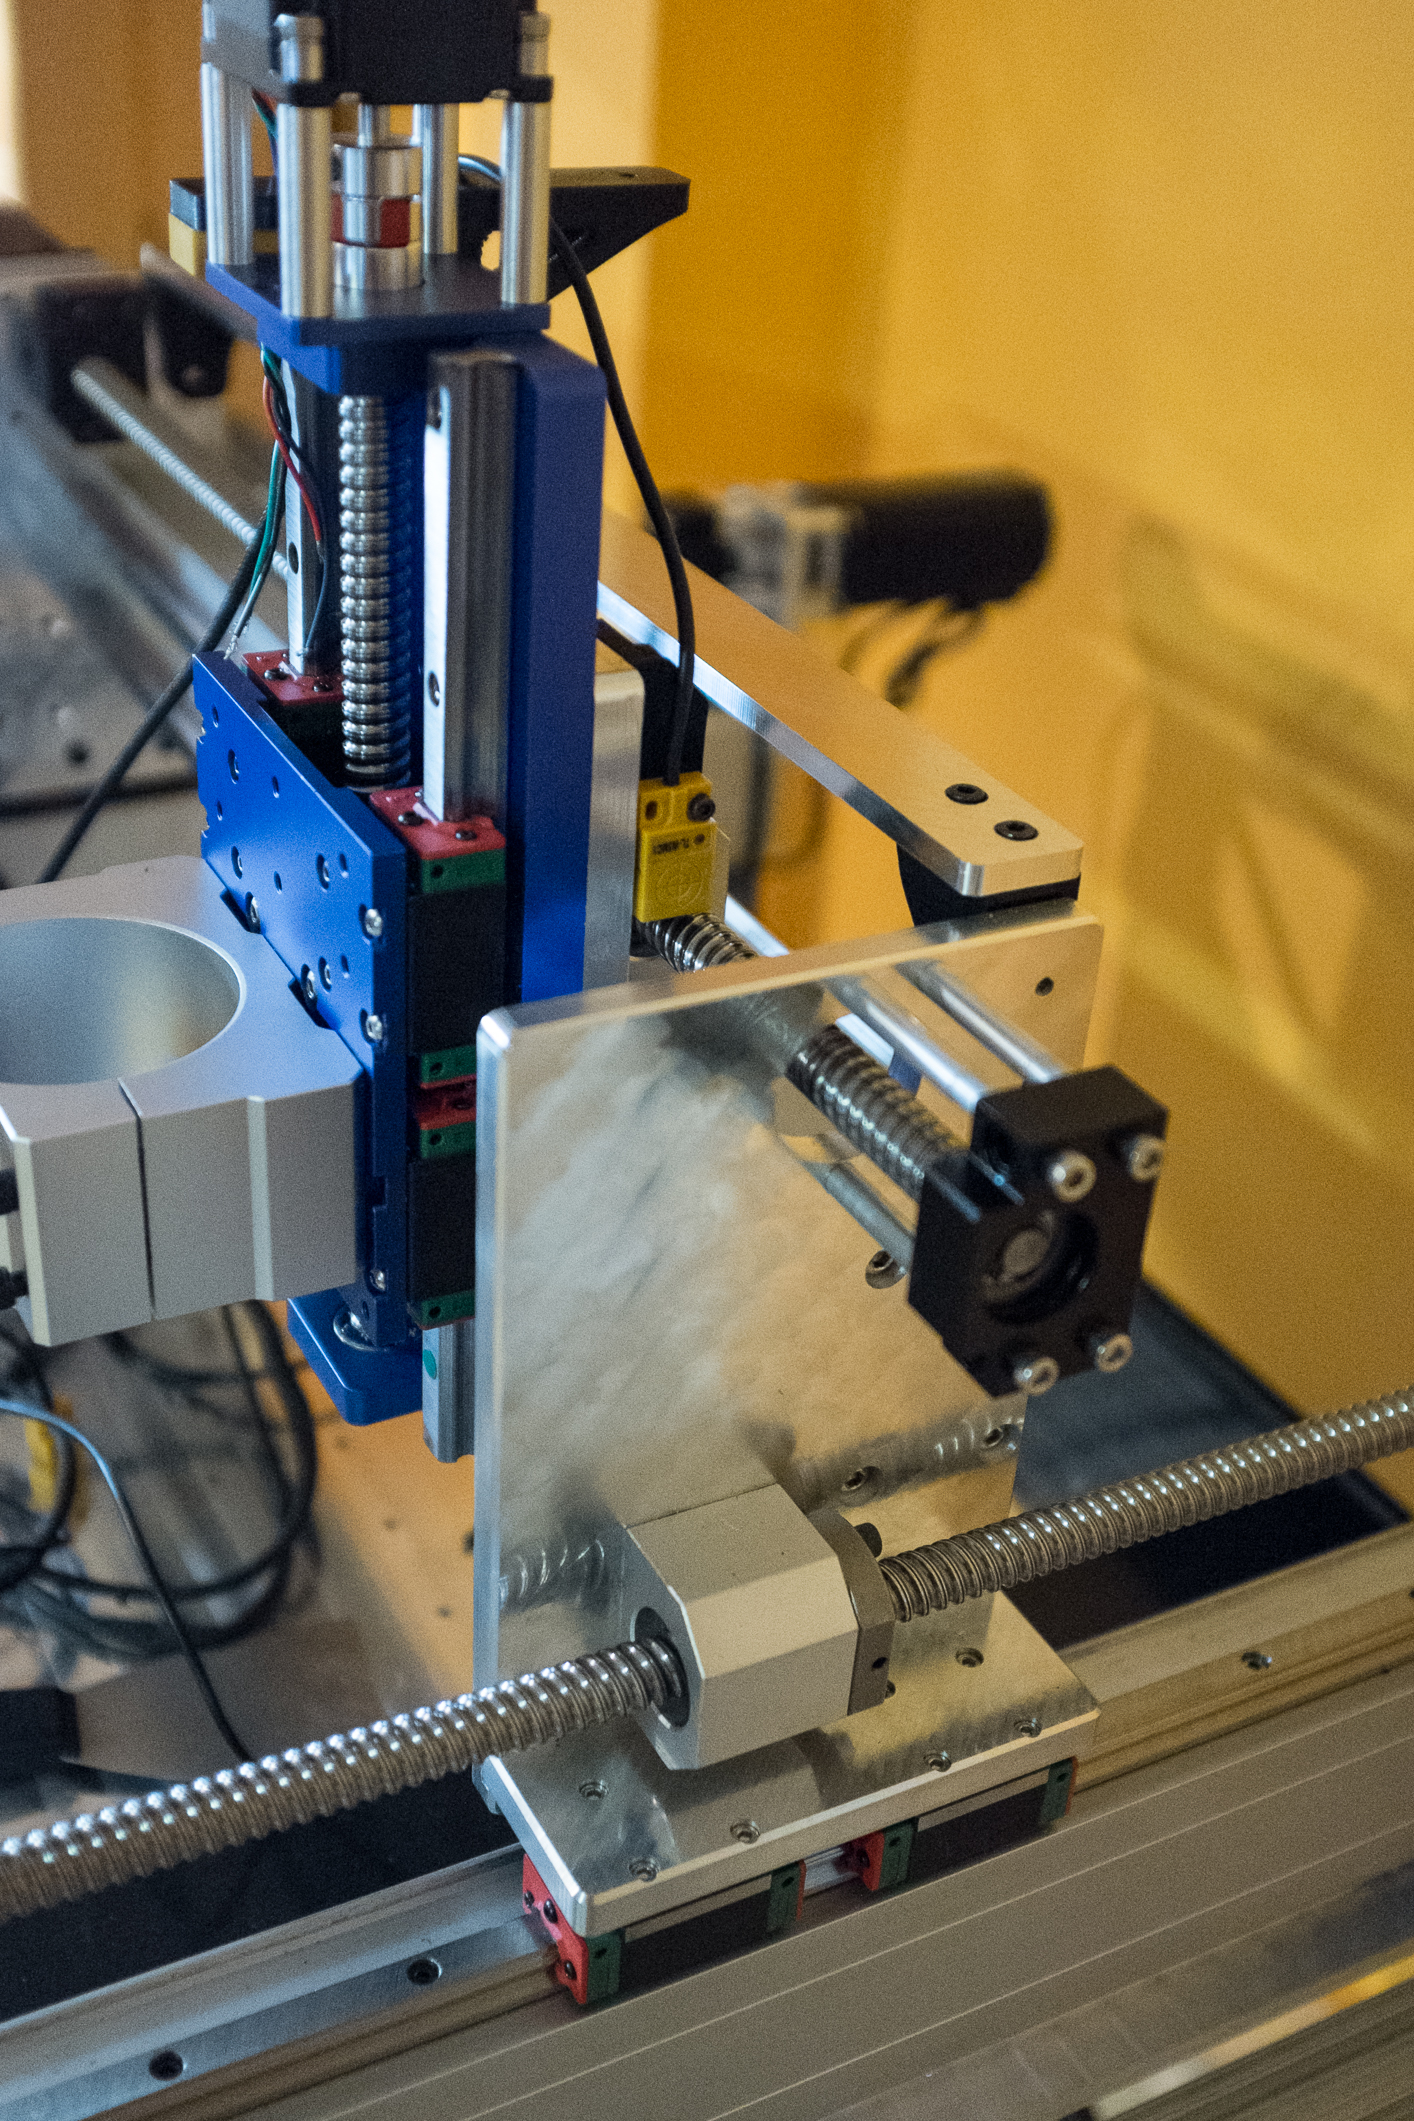
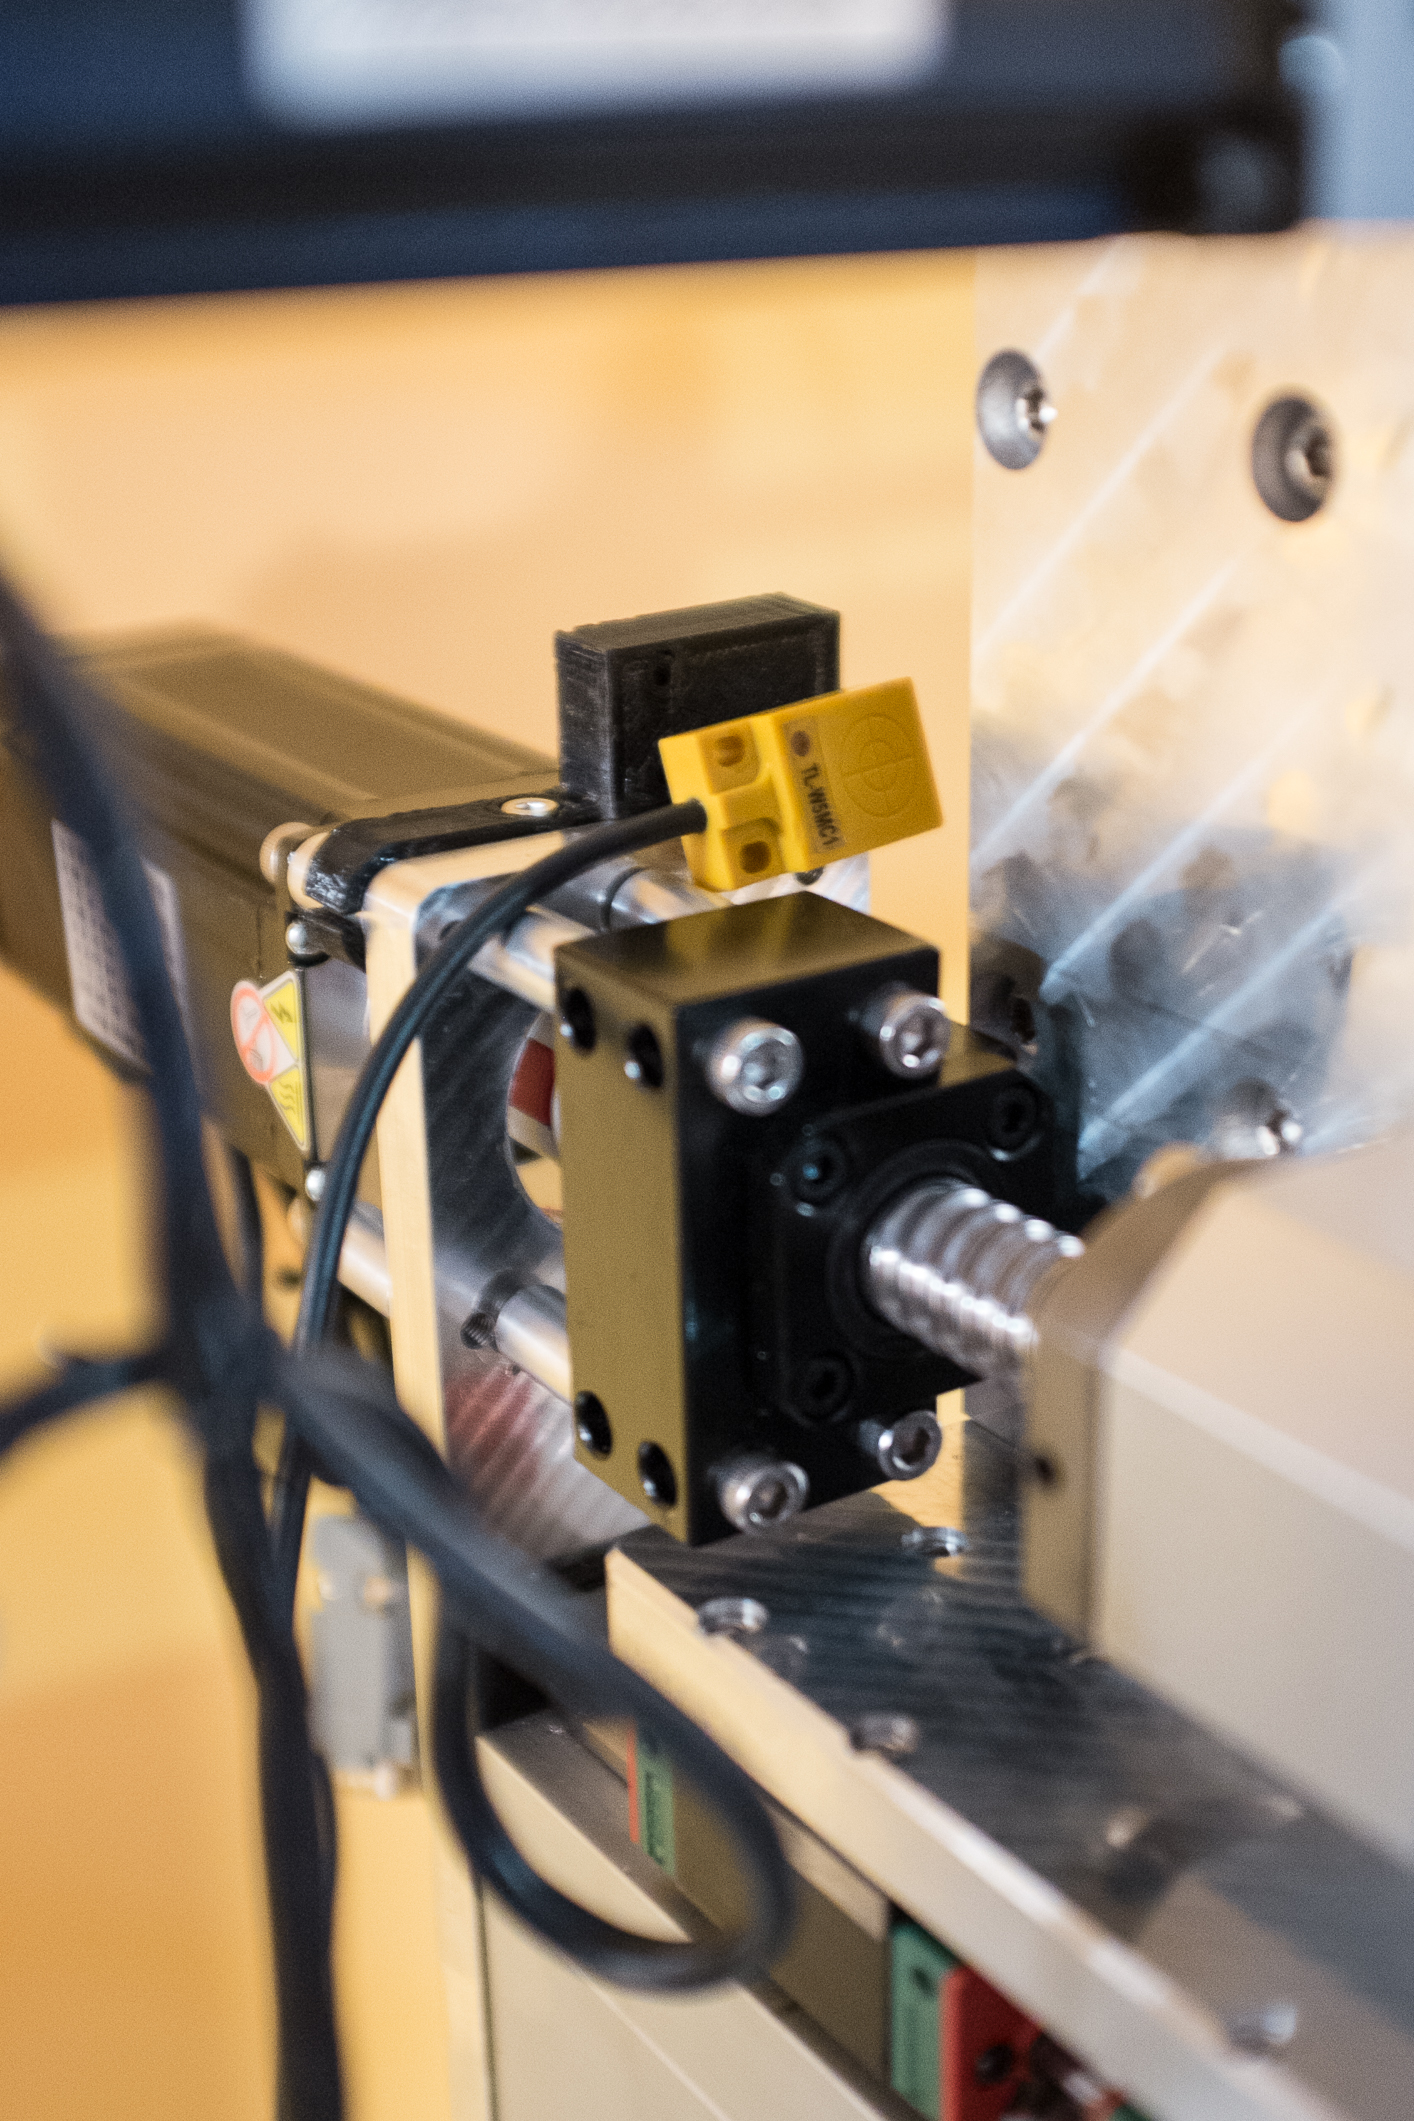
Y axis proximity sensor is mounted to the stepper motor spacers.
Wish I could already test the machine but I’m waiting for the stepper motor couplers, 60v PSU and a spindle to arrive. It might take awhile I’m afraid. Spindle hasn’t been manufactured yet, decided to go with a 1.5kw 110v spindle but most of the units available on ebay and amazon come with er11 collet and since I didn’t want to limit myself to only using 1/4 bits, ordered model with er16 collet which takes longer to deliver and isn’t available anywhere in the states. sic!
Today should be a good productive day. My extrusions needed for the top part of the enclosure are scheduled to be delivered. Went with 8020 quick frame extrusions. Seems easy to work with, all the pieces will arrive pre-cut and were cheaper than Openbuilds or any other solution I could come up with.
4 Likes
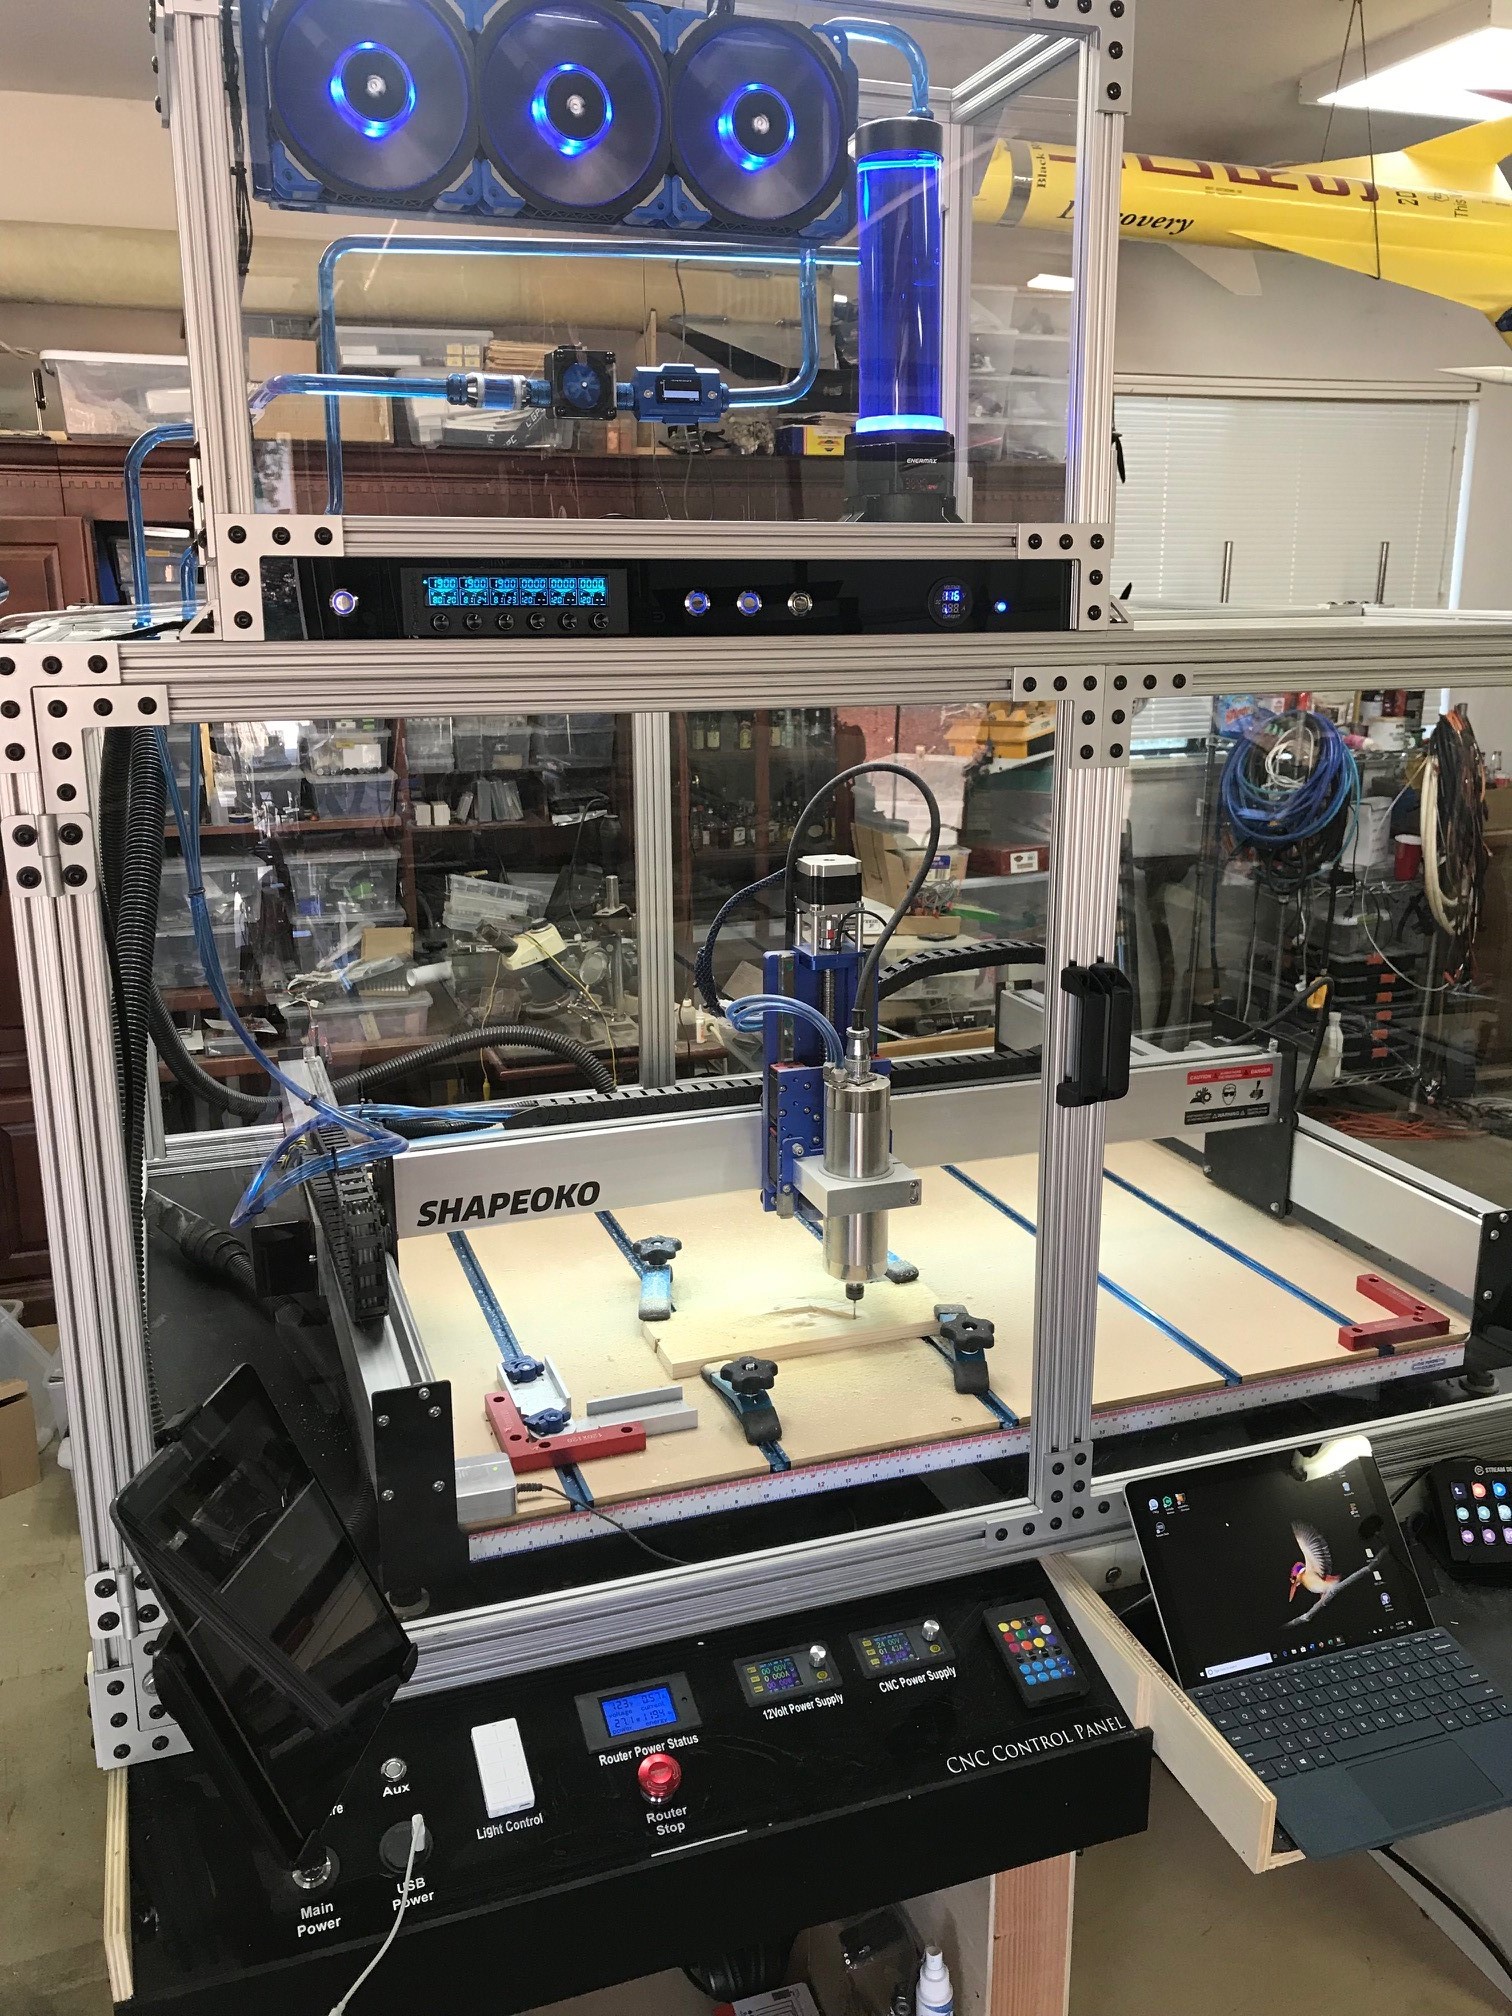
Awesome. Seen other shapeoko owners use much MUCH much smaller water cooling setups. Is it really required to be this humongous?
1 Like
just stuff I had on hand , also good lights all around are a must.
and make sure you add the BIG red button.
lol keep looking at that pic and it looks sick! kinda wish there was something bigger and more expensive sitting in that enclosure 
Also FYI I have clear 1/4 plastic all around and on top, doors on both sides to help with clean up. All 8020, Keeps the noise down and looks cool.
I have seen a lot of enclosures made for SO that just do not look good.
You might also look at getting the StreamDeck to help control
all of this. Just upgraded from the 16 button to the 32 button.
I’m planning on going with corrugated plastic all-around and polycarbonate on the front. No funds for as lavish enclosure as yours. Maybe one day will upgrade it hehe. Been wanting StreamDeck ever since others started posting videos using them but sadly have more important expanses atm. This build is already costing more than expected. But I will add all the cool lights and switches one day  hehe
hehe
AT first thought maybe youre running 40k spindle and need all the extra cooling possible. That would explain the size of the radiator. I’ll just go with a smaller two fan computer setup and pray my spindle wont burn.
For me StreamDeck was a game changer. I would put that up hi on your list going forward.
1 Like
Hmmm I have two routers so if I wanted to upgrade them both at the same time it would cost fortune so it’ll have to wait unfortunately. What sender are you using? Heard Streamdeck is awesome with UGS but I’m using CNC js and really not looking forward to going back to ugs.
I have been using both ugs and cncjs with new streamdeck
My go to is ugs