I mainly cut alu and brass. I’m metric so you will have to convert, but here is what I use time and time again.
Machine: Shapeoko 4 pro, Makita spindle (but shapeoko regular router spindle is just the same)
Chip Extraction: vacuum always on for every cut
Lube: none ever
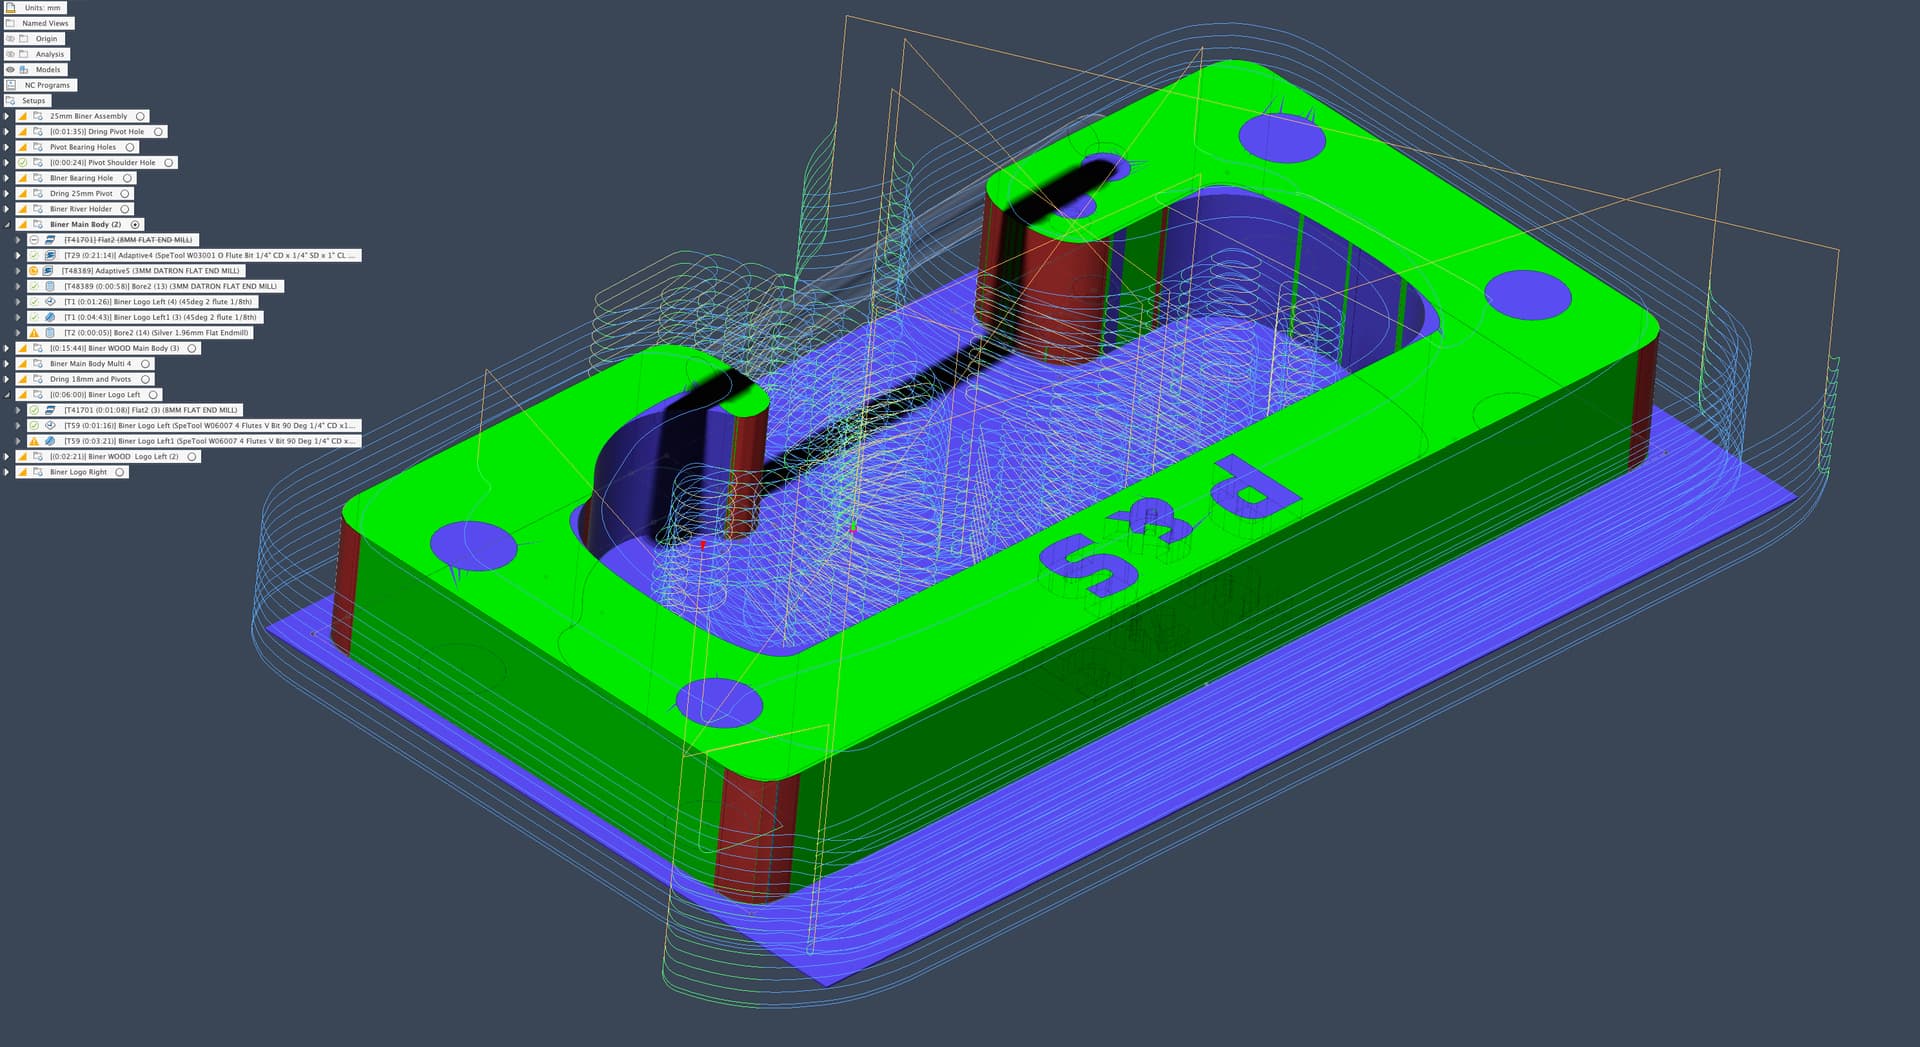
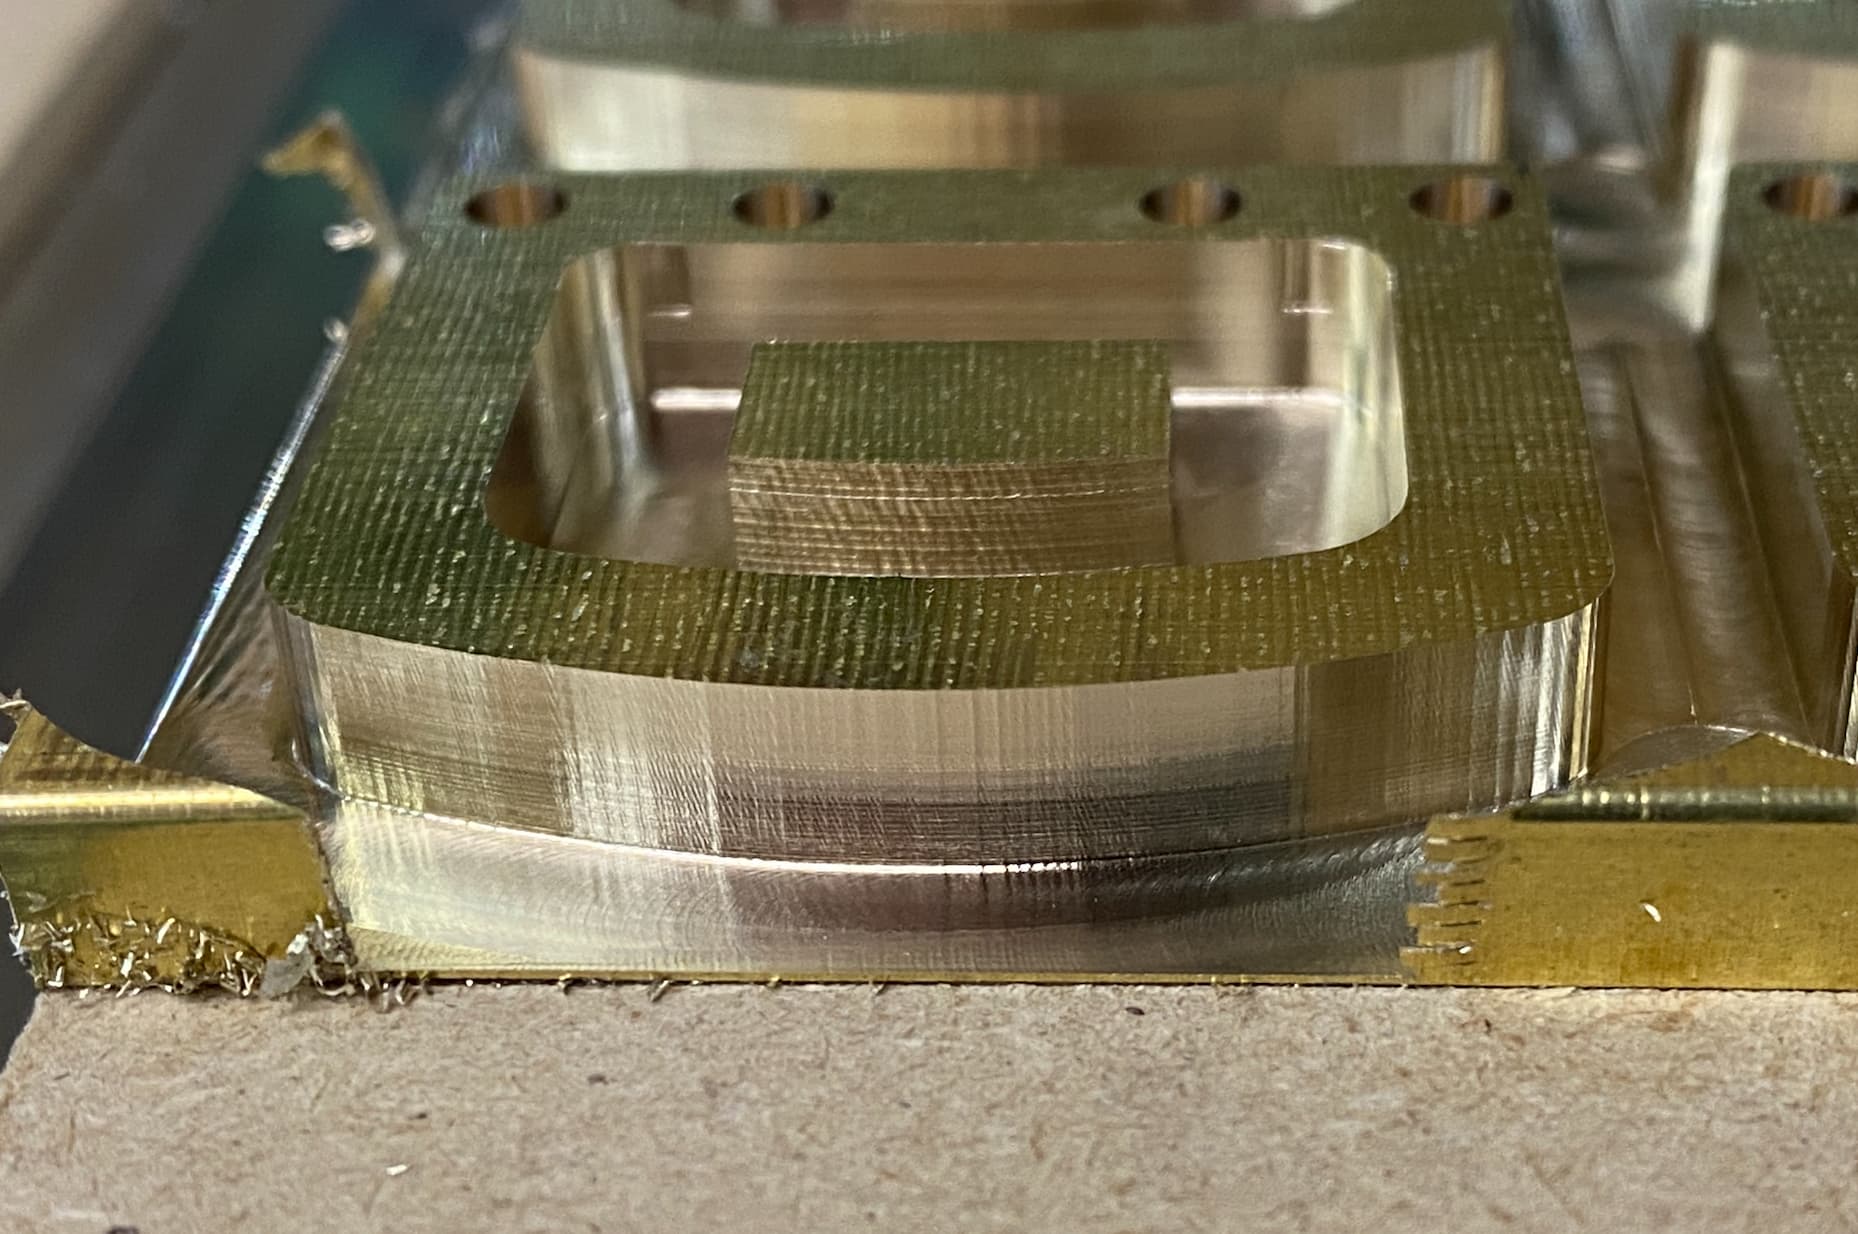
Work Holding: generally blue tape and super glue works well. However I use 3M 468MP Adhesive Transfer Tape almost always as the thickness (and therefore offset for the spoil board) is homogenous. Most of my work is double sided so bottom(flipped) side is either the adhesive method or (SMW Modular Vise (Gen3) – Saunders Machine Works). Work holding has issues with flipped pieces because when you flip the piece you need something to hold and I really don’t like having to hand file tabs off. So on the top side I will mill down to 0.1mm from the bottom of the piece. This stops adhesive getting on the bit, and leaves a large surface area (the entire stock bottom) contacting the adhesive but then at 0.1mm it’s really just a very thin foil that can be torn/sanded off when I flip the piece. You can see the “blue” bottom thing here is the foil thickness stock that is left. This setup stock here is 55mm x 32mm x 6.25mm.
If using a vice for the bottom side I’ll flip the piece into a Saunders vice where Carbide Motion has a stored XY Zero. I use a small 3D printed piece holder under the Saunders vice that I can guarantee the piece position registration. (A 3D printer is an excellent add on if you CNC smaller pieces: for cheap prototypes, work holding, sacrificial stuff.) Because my flipped piece only needs the very top surface finishing (in this case a Logo engrave and simple edge chamfer), I don’t need to worry about accidentally hitting the vice. The 3D printed holder holds the piece at the correct height for the vice jaws to grab the piece bottom edge, keeping the piece top surface well about the jaws. My edge chamfers on this piece are only 0.32mm so that means for them to look good my flipped registration has to be that accurate.
Bits: SpeTool 5PCS O Flute (Single Flute) End Mill Set 1/4" Shank these are cheap and work well. They are noisy, but the finish is ok for horizontal surfaces and good for vertical surface finish. Datron 4 In 1 Single Flute End Mill these are around 15x more expensive, (Datron are by far my preferred bit provider) and sound sweet when cutting, all surfaces can be pretty much perfect finish as long as you have trammed. I use approx the same feeds for both cutters. The Datron is balanced so it can spin up to 24k rpm but I typically use 4-4.5 on the Makita which is around 20k rpm ish
Paths: I’m a Fusion user. I typically use the 2D and 3D adaptive however the 3D adaptive will try and remove all stock which takes time and wears the bit, whereas a 2D adaptive will only cut what you ask it to, often a contour is even faster. However I found that the best idea is to make your stock as close to the dimension of the piece itself, using a saw (which is super cheap!), and this also stops you wasting expensive metal stock. Then you can use the adaptive paths.
Here is the Path for the main stock removal pass using (in this case) the Spetool 1/4".
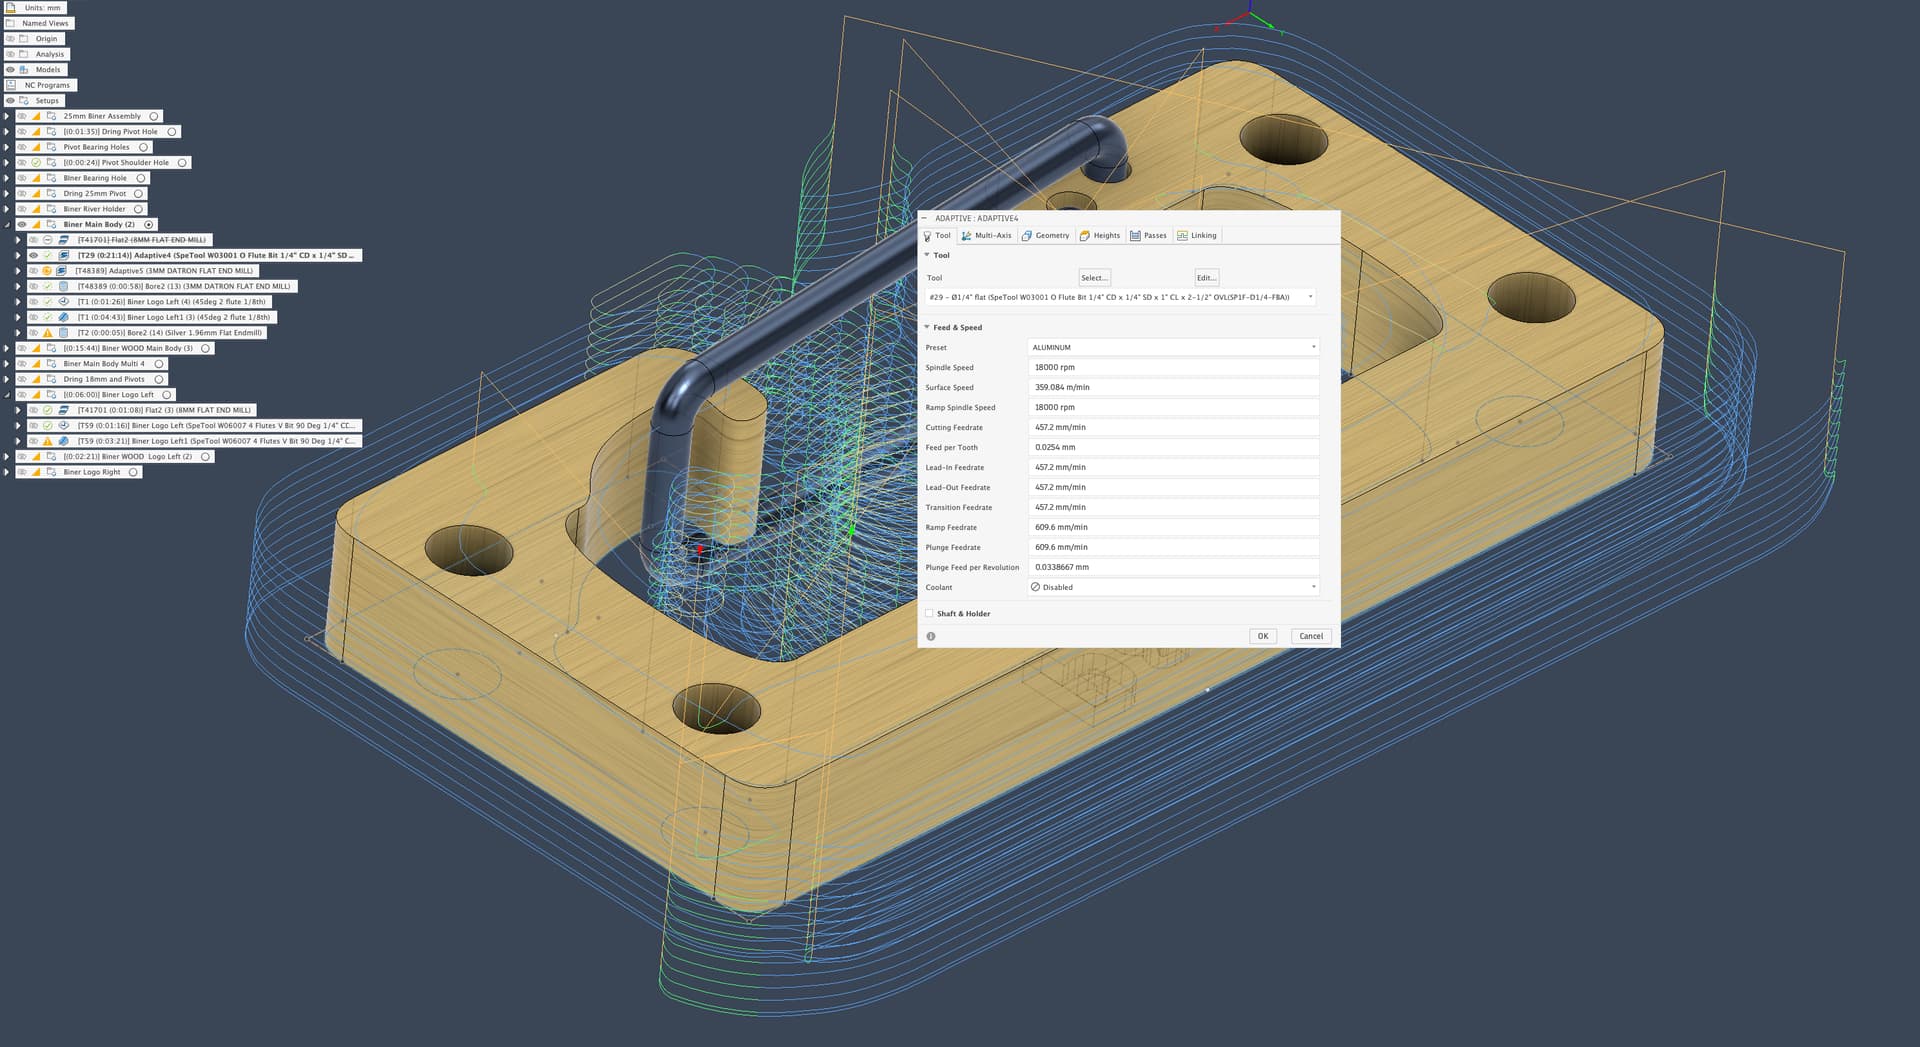
From Saunders YouTube the key point is the “Feed per Tooth = 0.0254mm” I almost never diverge from this. So on the Datron with a higher RPM I’ll increase the Cutting feed rate to achieve a FPT of 0.0254mm.
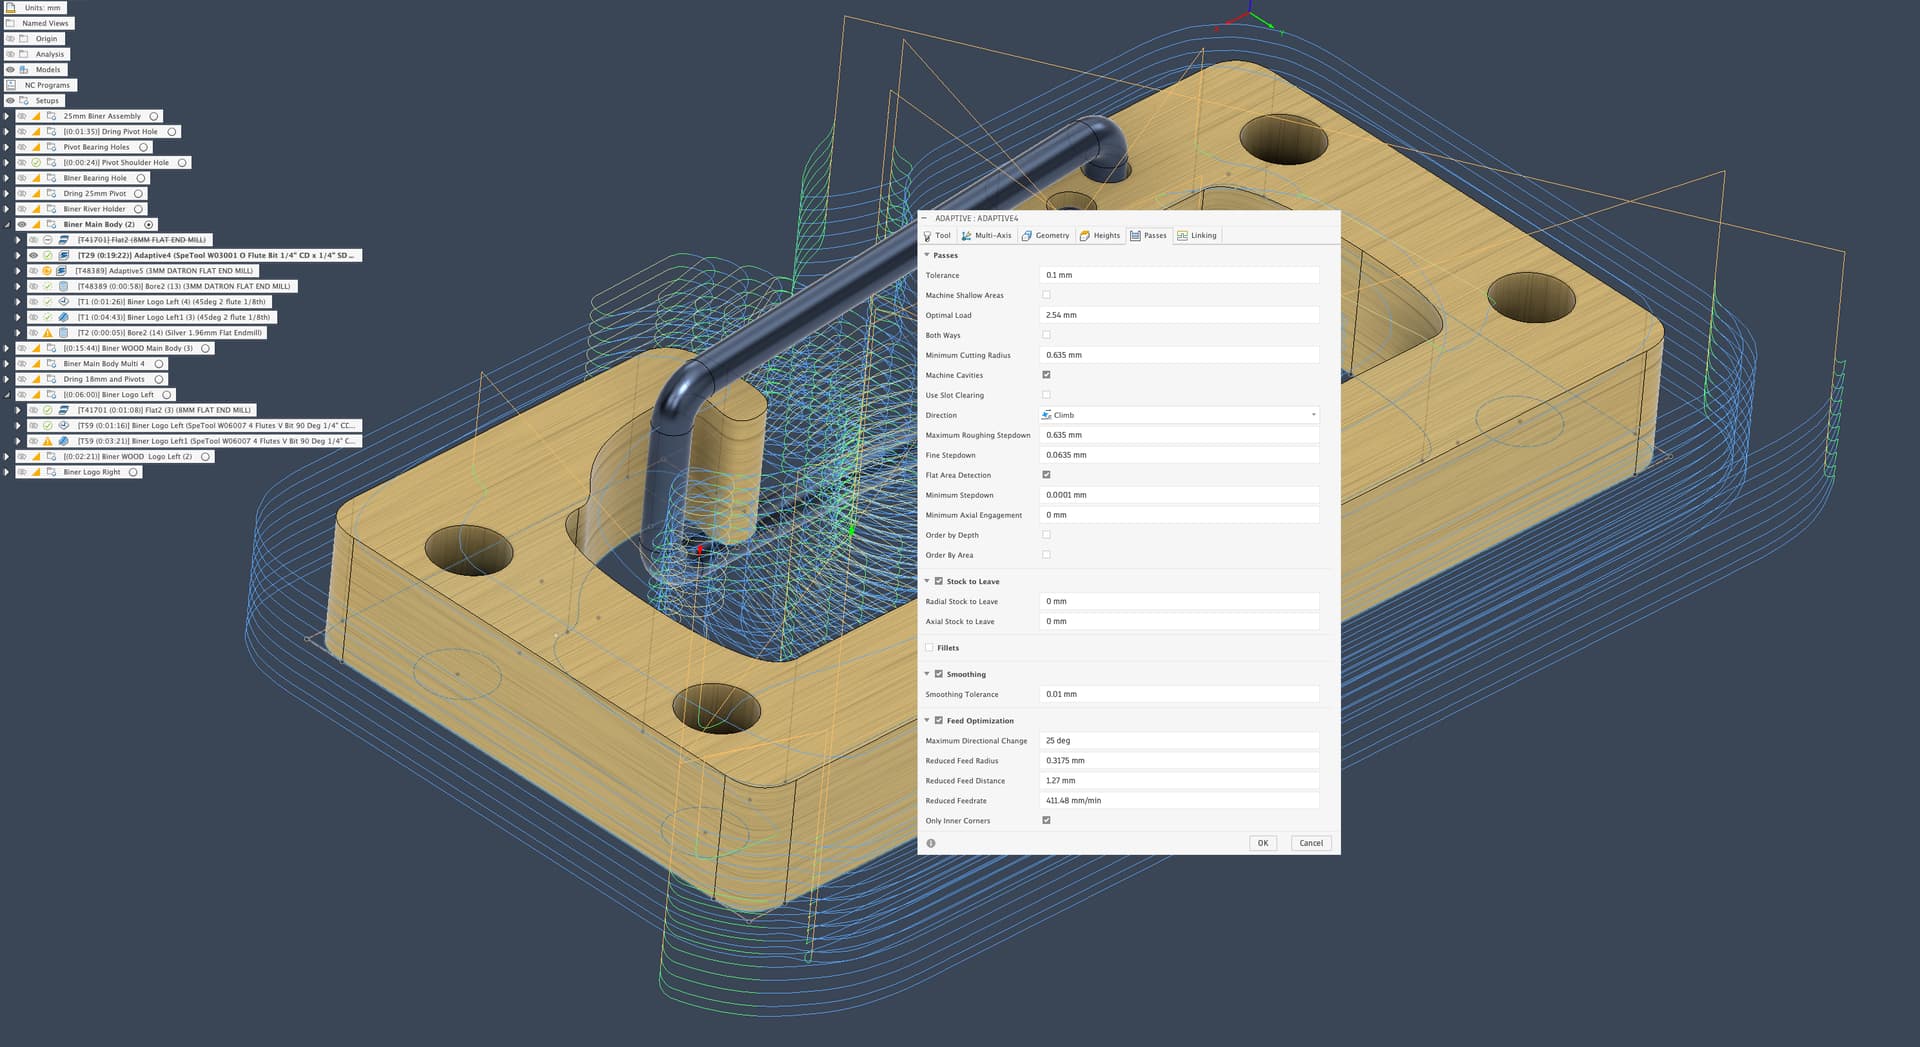
Here are the pass depths. The roughing depth (all cuts but the bottom cut) are at tool_diameter x 0.1, in this case 0.6mm. The Optimal load is tool_diameter x 0.4. I use these on almost all paths/tools.
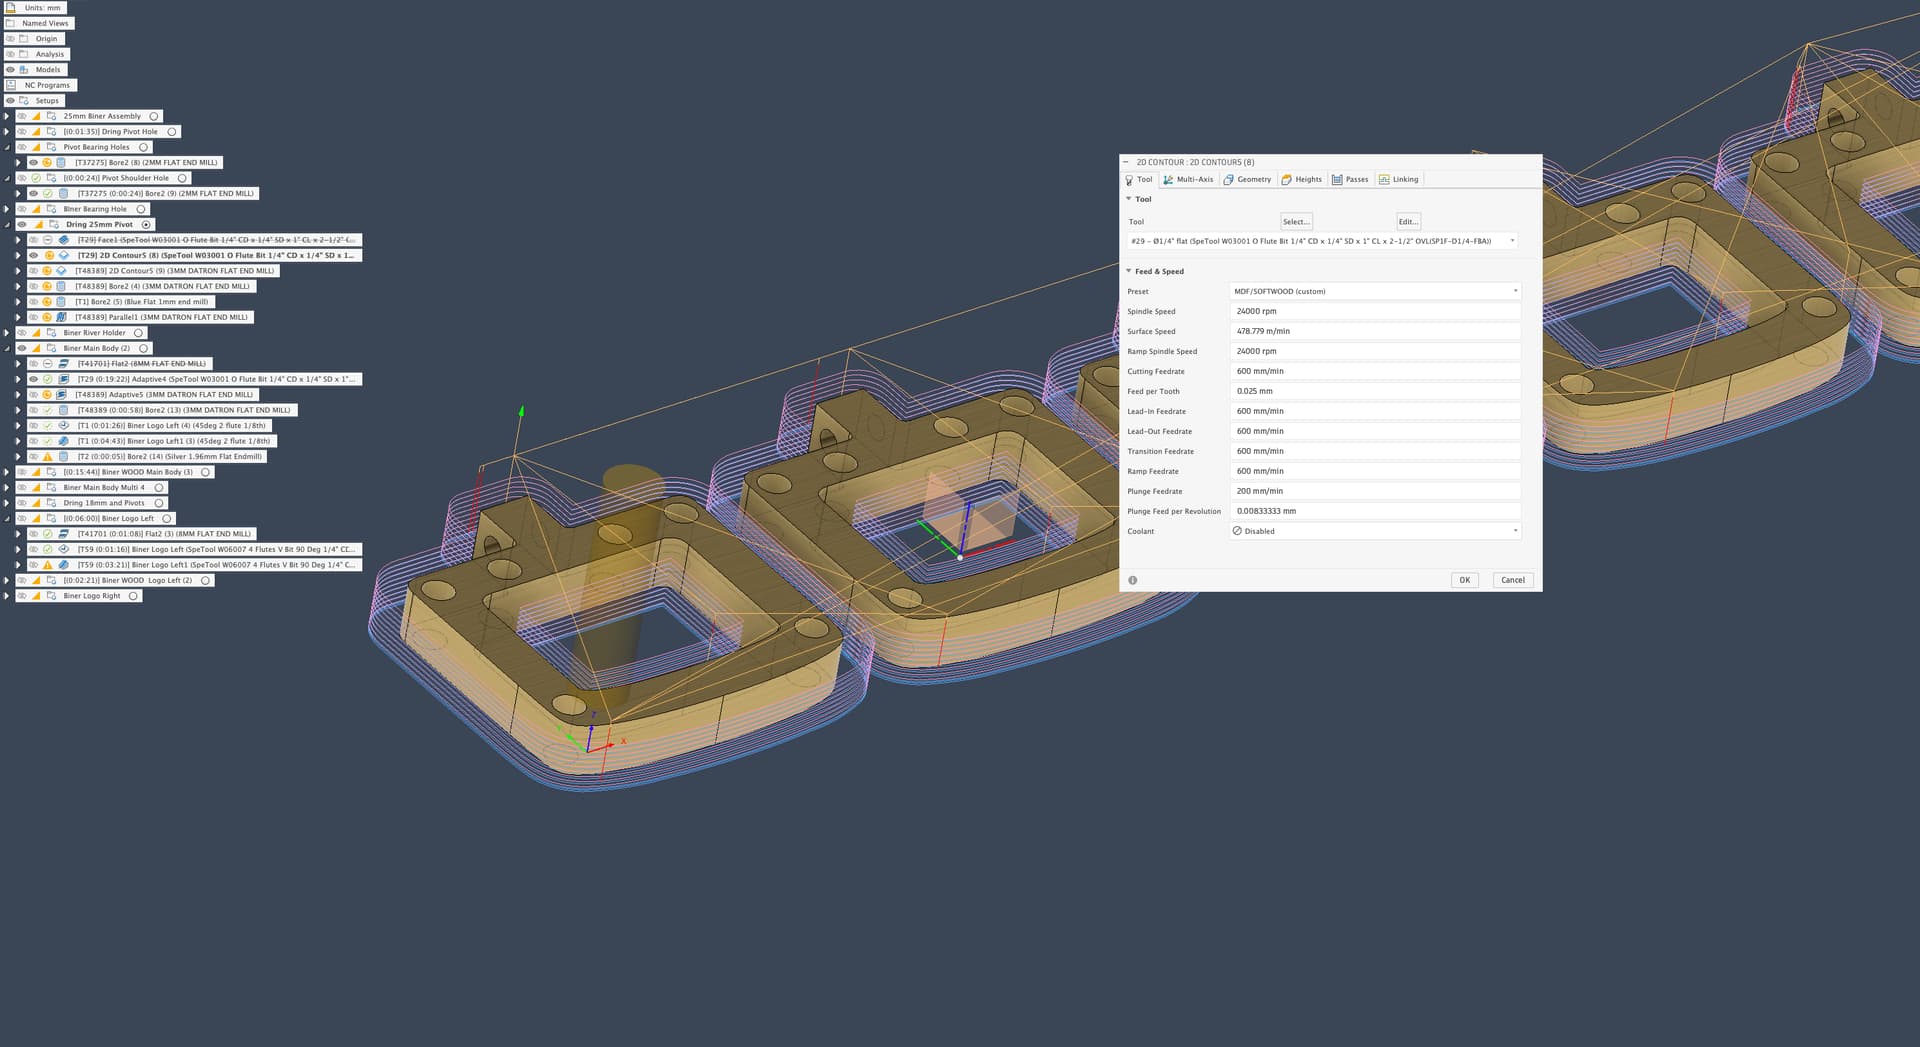
The Spetool bits are that cheap that I’ll sometimes just use a contour (slot cutting). In the case shown below Adaptive would take way ,way more time. I still use the same speed and depth of cut, so 0.0254fpt and depth = tool_diamter*0.1. Still just vacuum for this deep chip removal. It’s worth noting that slot cutting like this, with this tool, is not pretty to listen to, but is effective.
Typically all my work is brush finished by hand after it comes off the machine, so here is what you could expect the Spetool finish to look like. Worth noting that I could put another finish pass on this and get it smoother, but it’s already pretty good. This piece is approx 28mm left to right.
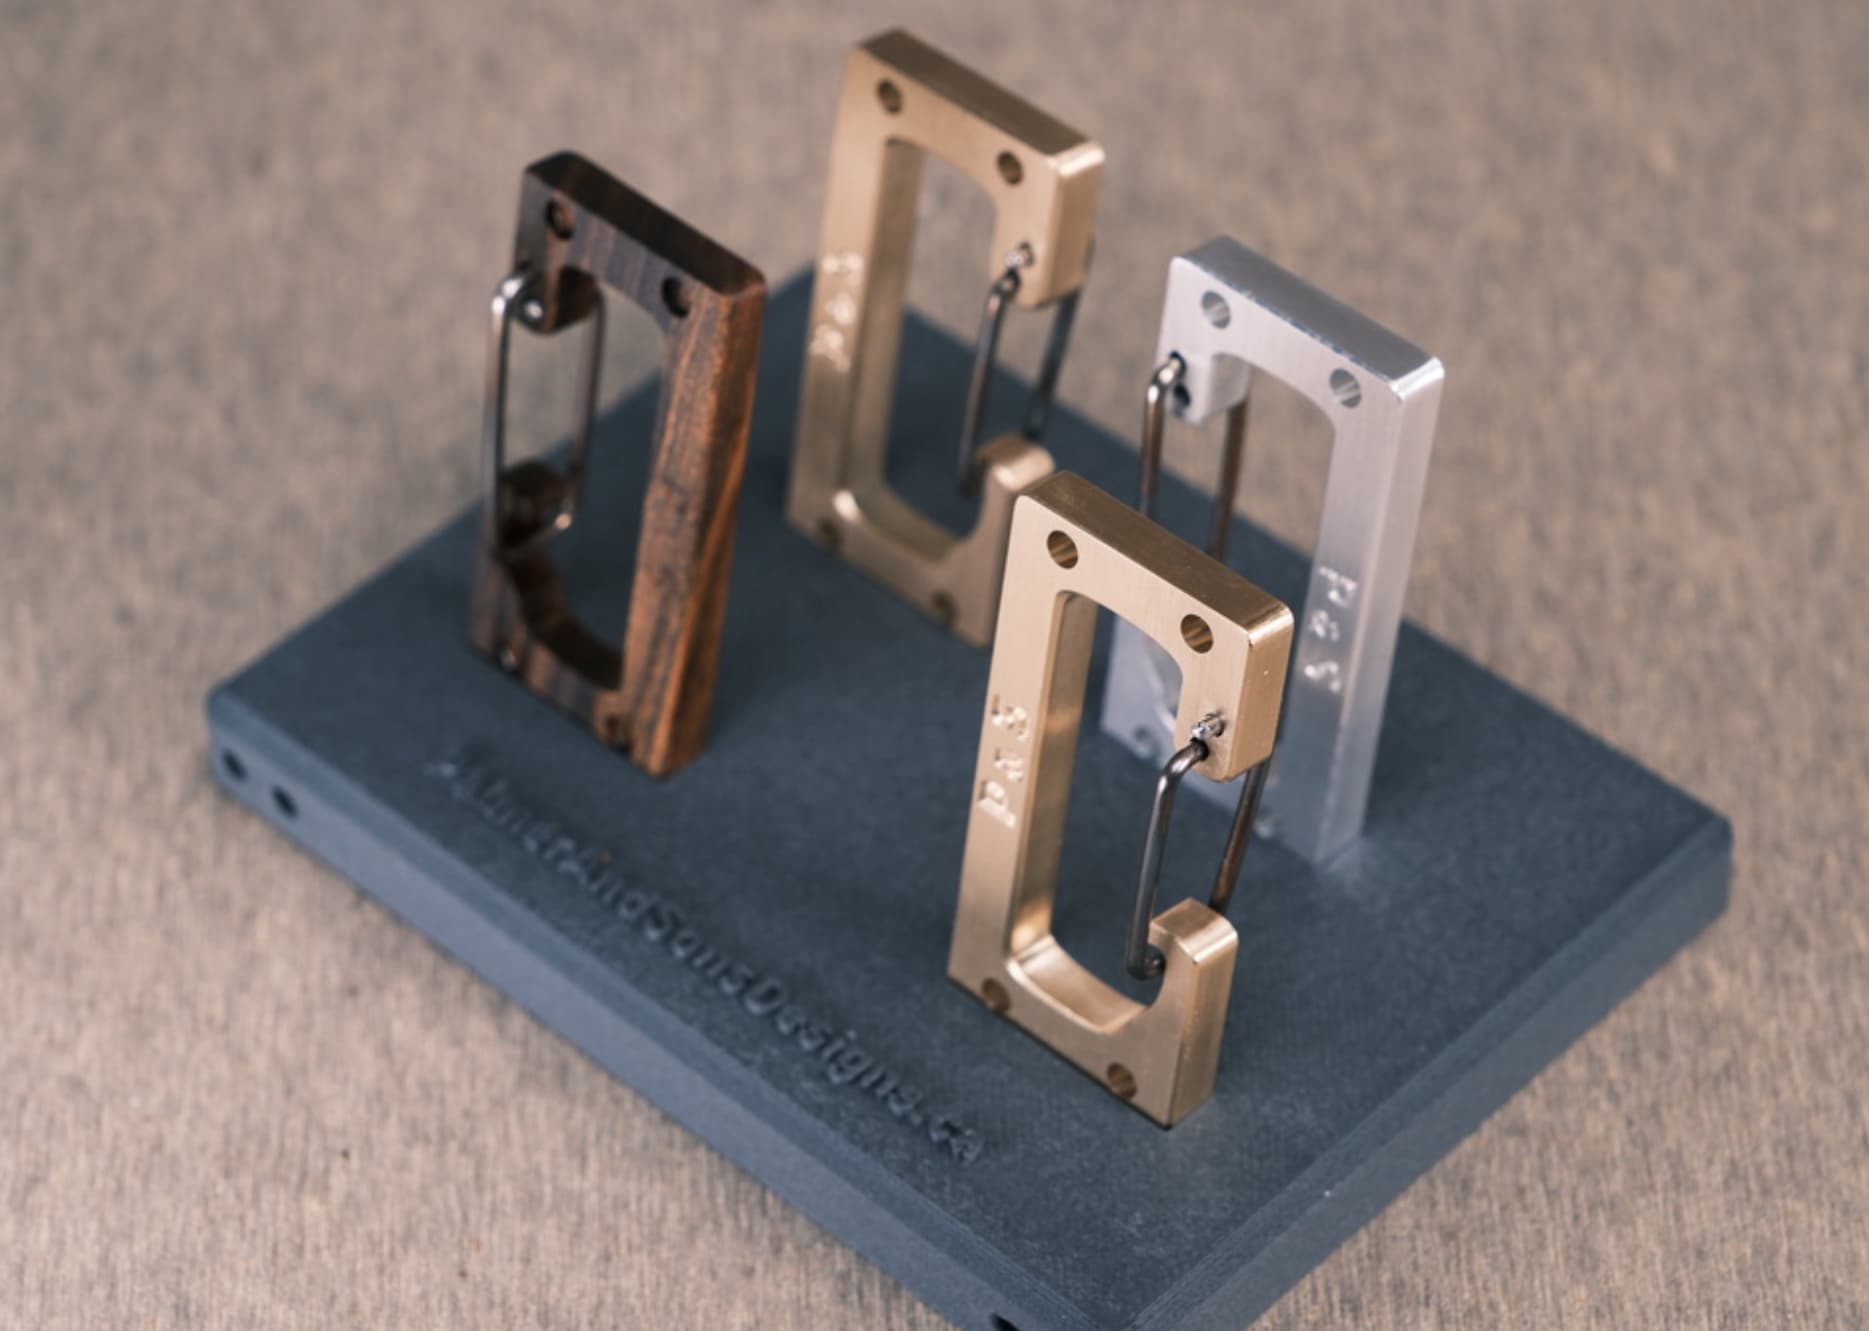
And for those interested here is what the finished pieces look like
Hope this info helps someone.