Trying to install the cable from a VFD (early version) to the controller of a Shapeoko 3. I purchased a new cable from Carbide3d (they carefully verified the P.N.) The connector slipped easily into VFD and clicked into place. Not so with the controller connector. I have read where you can easily damage the PCB if not extremely careful. I have taken the cover off the controller but the parts do not easily align. Is there a procedure or technique I am missing ?
A new cable (verified as correct by Carbide3D support) was purchased but does not fit. I have read that this connection is VERY tight to the point of breaking the solder connections on the PCB if not VERY careful. I am working with support but so far no solution. Does anyone know what size or type of connector this is so if I have to resort to having a custom cable made I can. Hopefully won’t have to go down that road.
Is the connector on the cable a different size and wont physically connect to the control board connector?
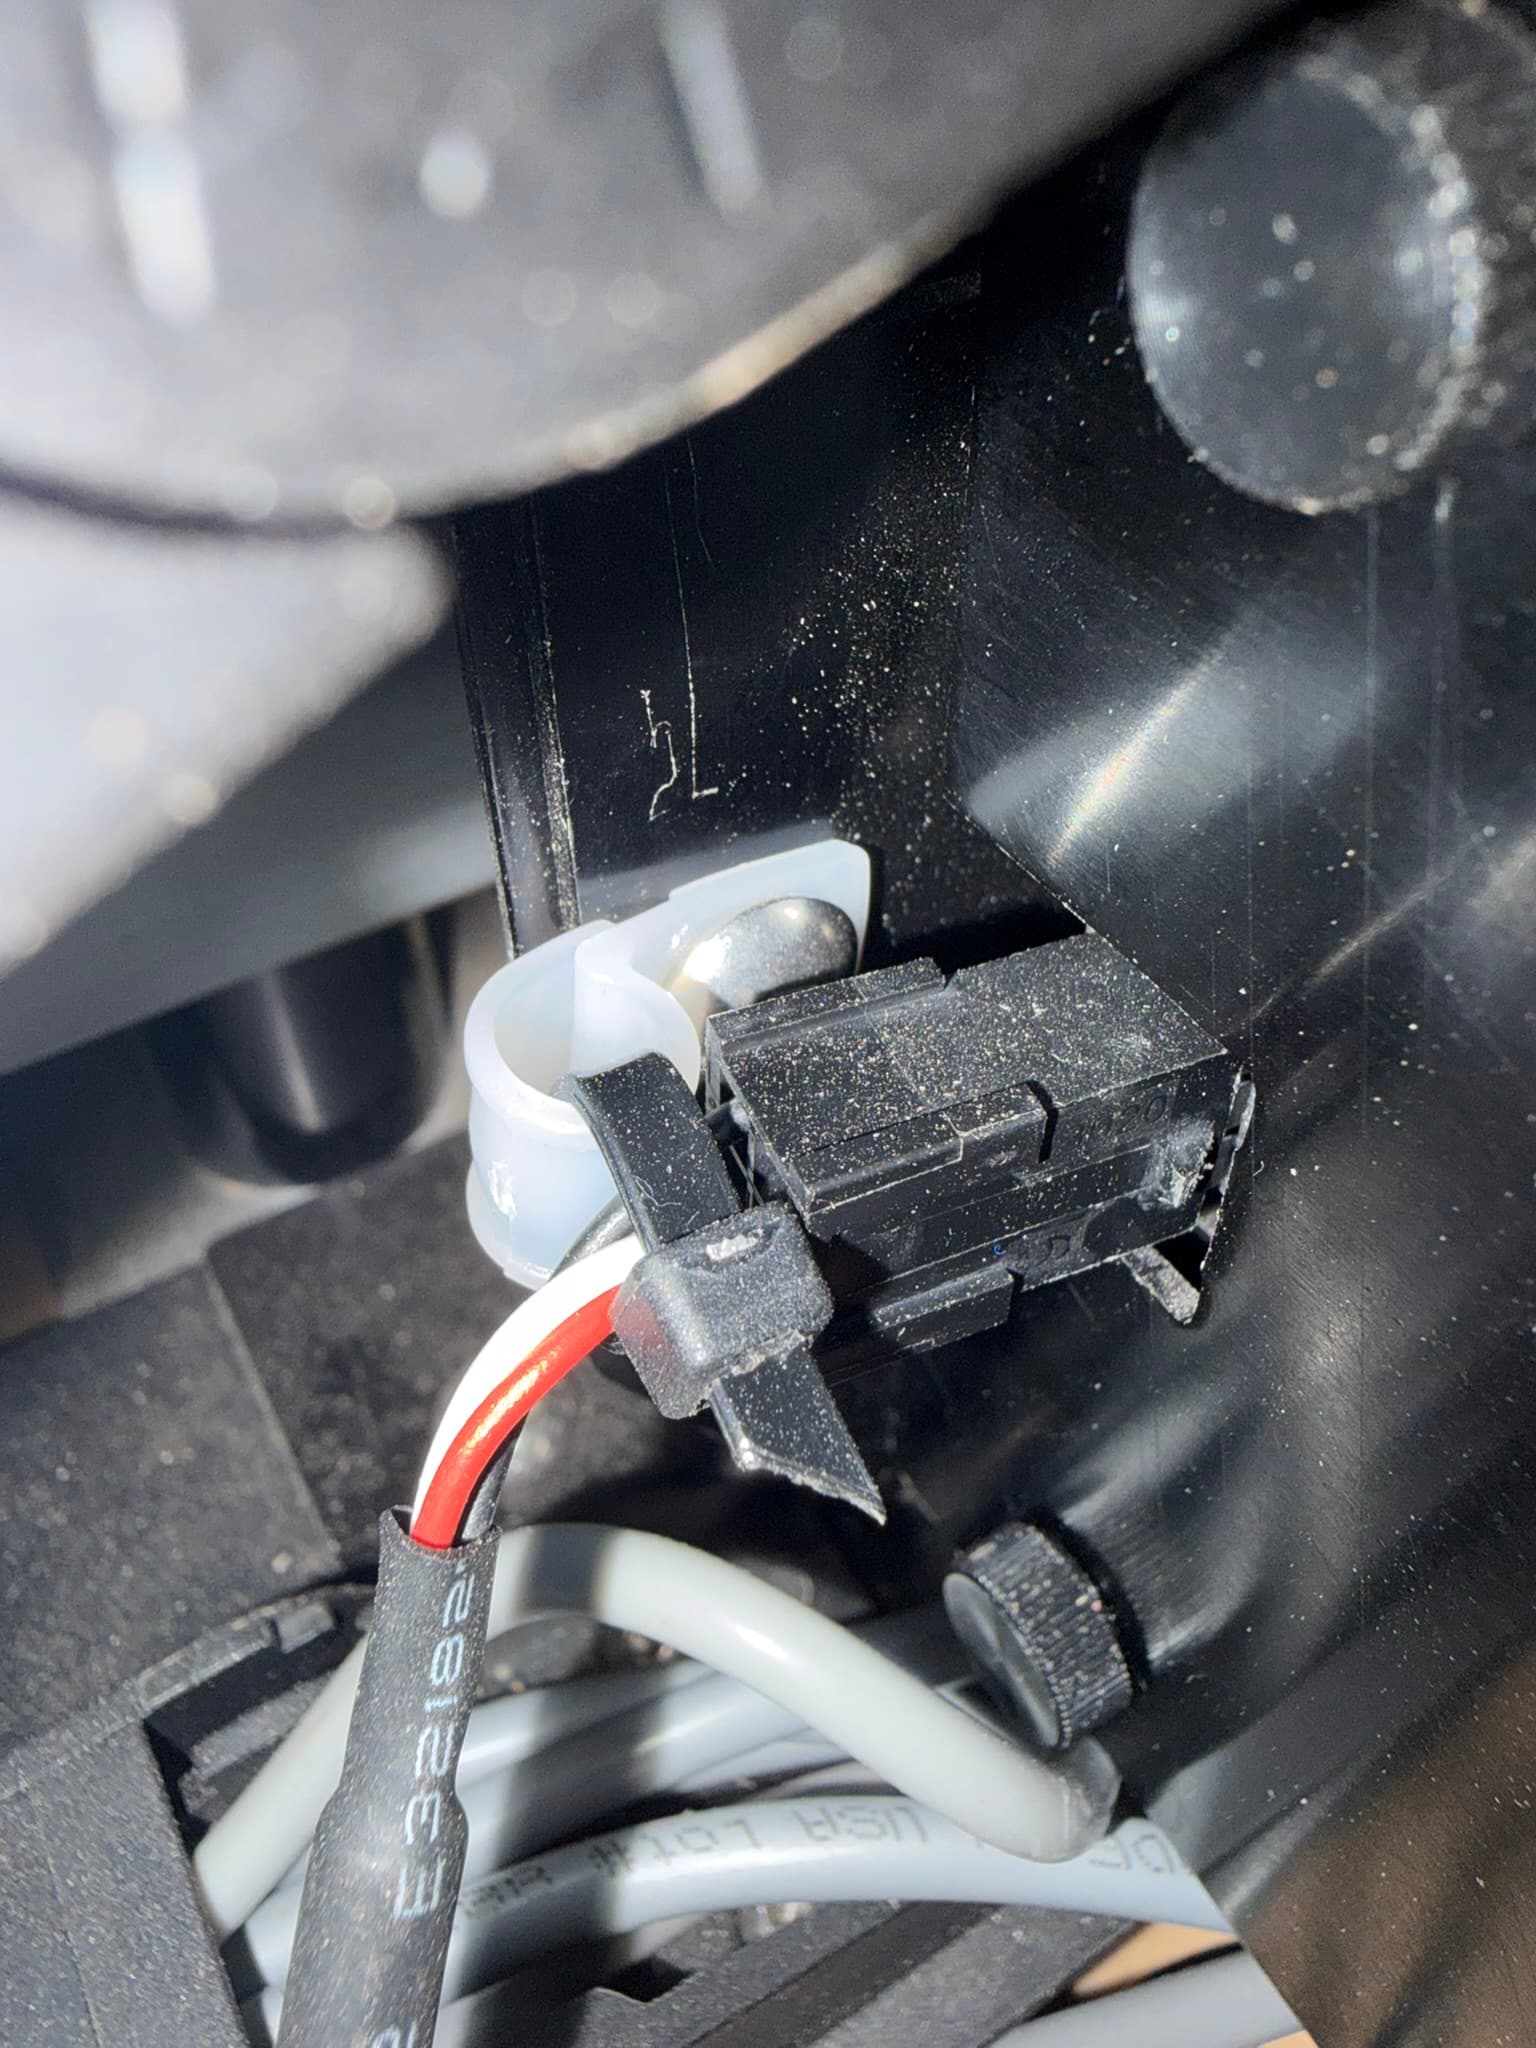
When I upgraded to a spindle I found that connector was a very tight fit at the control board. I took the cover off the control box, held the board connecter against the board and pushed the connector hard onto the board connector. Also make sure the connector is correctly aligned pin to pin with the board connector.
I have the cover off the control board. I cannot get the cable connector to slip over the PCB connector to even try to push it on. I have verified I am aligning the pins correctly.
Thanks for the reply. Pushing ‘hard’ seems to be a recipe for disaster. Hoping for a better solution from Carbide3d. Would it be too much to ask for for a correctly fitting connector ? Carbide3d does a lot well. I hope this problem is not the exception.
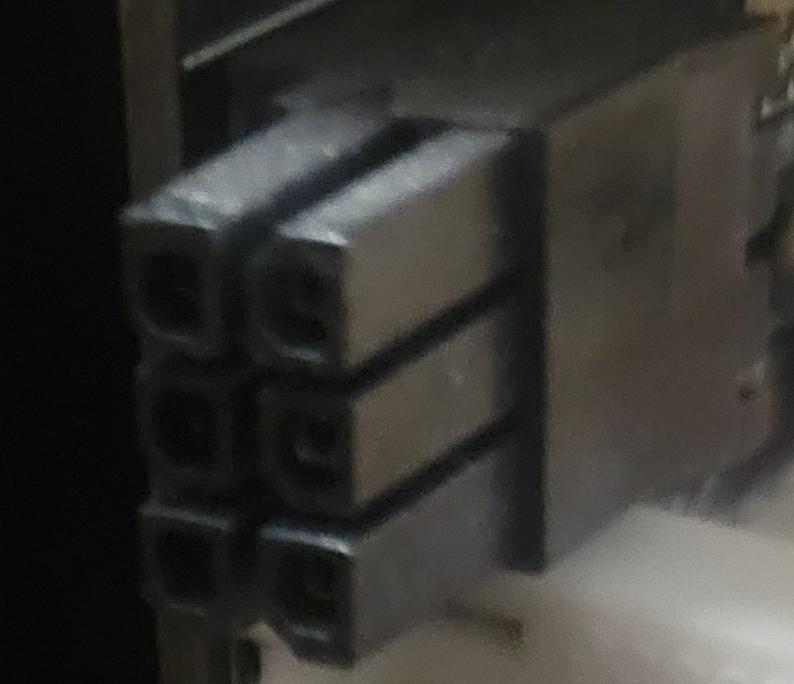
Looking at the two pictures it appears that the plug pin shapes do not match the controller board receptacle. I had a similar issue with my VFD controller cable, support shipped me a different cable that matched up. Apparently they have several different supply chains for connectors they use, I imagine this makes it very difficult on the company to keep track of who has what version.
Yeah that connection to the board is pretty fragile. I held mine in place with finger pressure against the connector then pushed the cable connector on. The connectors do move slightly and I’ve had to use a tiewrap to hold it in place so my VFD stays connected.
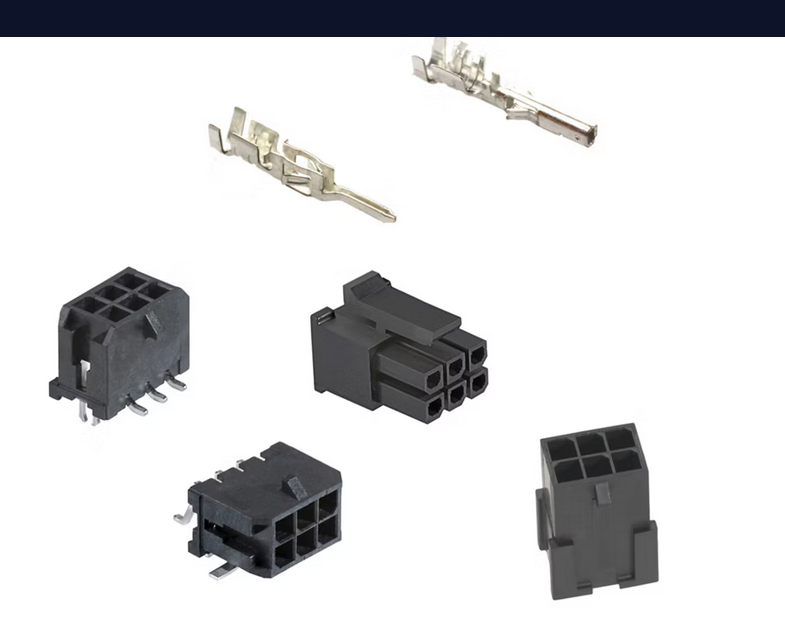
It closely resembles the connectors for the VFD Cable to Shapeoko 3XL controller PCB. They are referred to as a Micro-Fit Connector. Whether this an industry standard name or unique to Molex.com I do not know. When describing the differences in these connectors what is the correct terminology ? Specifically when referring to the shapes of the inter-connecting parts ?
Its hard to see the plug and receptacle shapes in your photos, if the slanted corners of the plug match the ones on the receptacle then it should work.
It could also be that the pins in the plug are off just enough (out of center) that they are hitting the edge (metal part) of the receptacle.
Jarret:
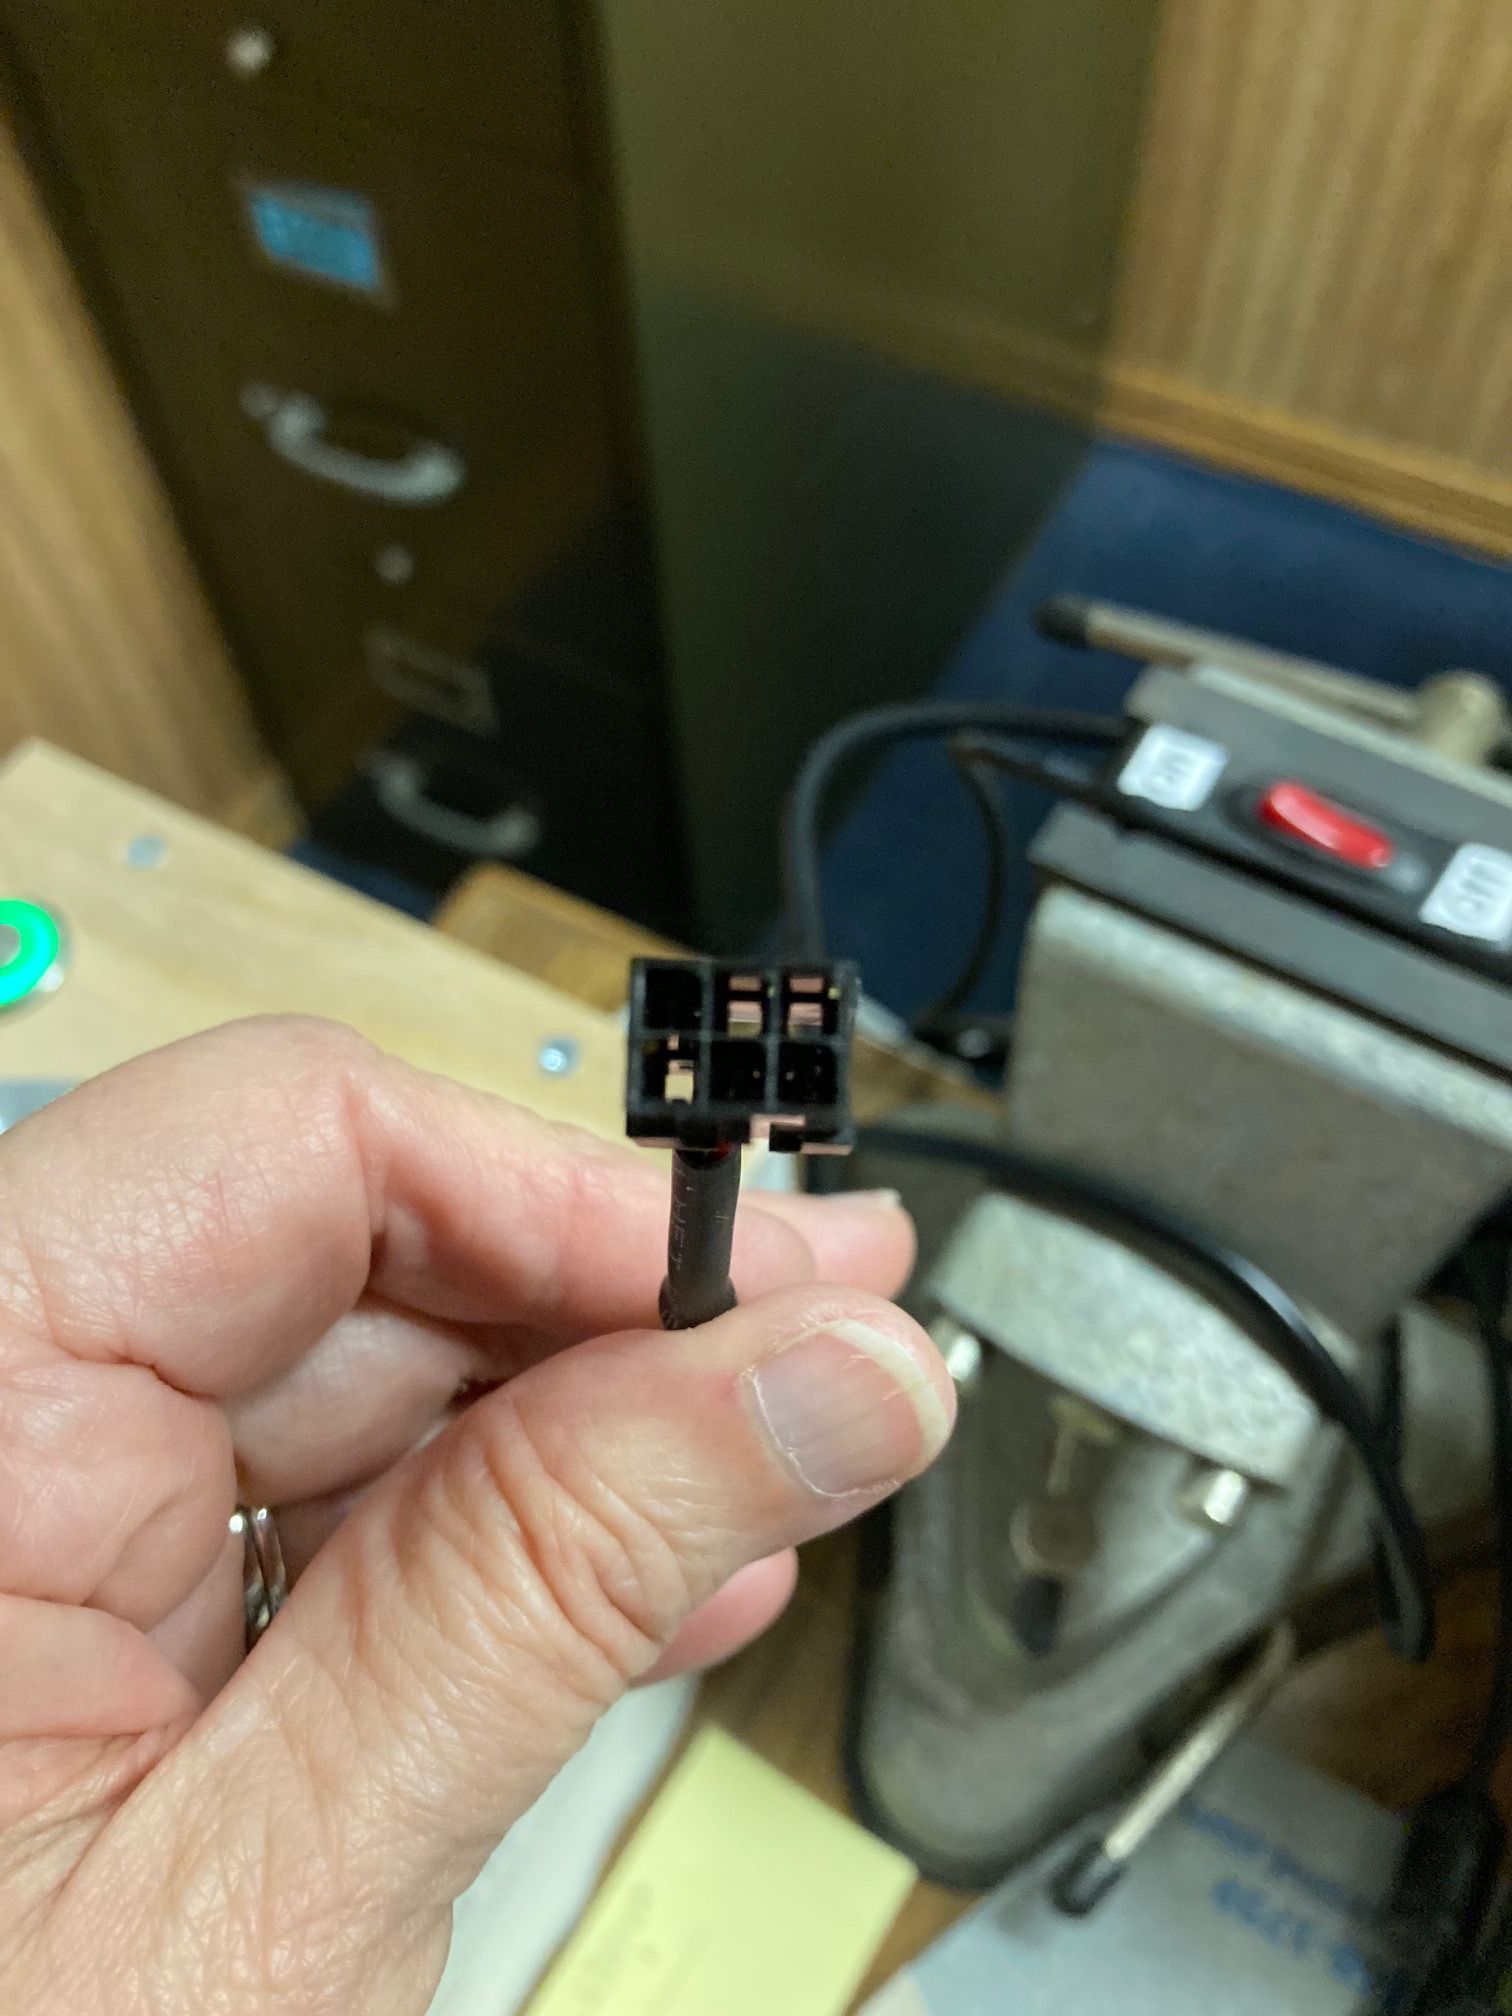
After your posting of a new cable fixing the issue I took some careful measurements comparing the old (damaged cable - the VFD end) and the new cable.and found .005" difference in the length. Knowing where I needed to apply a little careful pressure (using a small rubber band to compress the fingers of the PCB connector) and direct pressure with the point of an Xacto knife I was able to slip the two halves together. After that I could apply careful pressure to push the two parts the rest of the way to make a snug connection.
Thanks for helping sort this out.
After getting the cable connection working it was on to the next step. No power to the VFD. Troubleshooting this with Carbide3d support proved helpful. The lack of any documentation on how the system should look at different steps of troubleshooting was a bit frustrating. Support stuck with me as we methodically eliminated possible issues. In the end it was determined to be a bad CarbideMotion control board. A replacement (latest version ‘g’) was sent.
After disassembling / assembling during troubleshooting it was easy to put it together the last time and satisfying to see it all come to life.
Now back to work fixing a plumbing issue in our kitchen