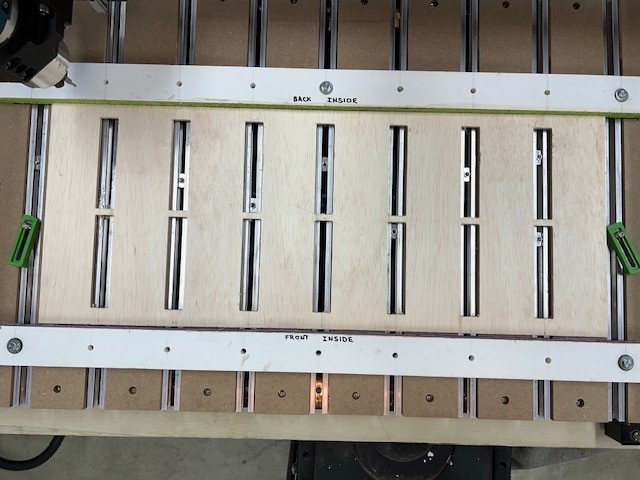
Since i just replaced all the slats on my Pro XL. Thought I’de try to make a cover to protect it when cutting all the way through a job. I know lots of folks have made covers with tons of inserts for hold downs but i thought that was over kill for me so i came up with this. Just used cheap luan 3/16 underlayment but if this works out will redo with 1/4 birch plywood.
If cutting through material is a concern you could change to using bottom of material in your design. I use bottom for any cut through jobs and have very little damage to my spoil board. The change of work flow is not difficult. When starting a job I go into jog and use the rapid positions to check my X and Y zero. If you use the Z+6MM be sure to jog off the material to a clear space on the spoilboard or your bit will drive itself into the material of the project. On jobs where I am just vcarving I still use top of material. Which ever Z origin you set it is still important to accurately measure your material size.
When you use bottom how do you set X Y and Z. Do you set X and Y on the top of the material and zero it, then move off the material and set Z and zero it?
I have used the bottom on occasion. The benefit I think is that it makes material thickness measurements less hyper critical. If your measurement is slightly thicker than the material then the cut will just start a little higher but in theory shouldn’t go past a zero.
If you are using tape on the bottom set your zero on top of that.
It makes sense on the through cuts, but not as much on the ones that are not.
Yes use BitZero to set just x and y or all 3 but z would be on top. After setting x and y then jog off material to clear space and use BitZero to set z on bottom of material (spoilboard). After setting z on spoilboard and in jog rapid positions do a z+6mm to double check. In cc job setup use bottom of material. When cutting and bit is cutting air job you set bottom of material in cc but physically set z to top of material.
Since I use both bottom and top I open cc project and job setup before starting cm to refresh my memory on job setup.
I am retired now and after working that many years I have boxes and boxes of business cards.
For through cutting designs:
I put down stacks of 4 business cards under the blank stock. Then I set the x and y off the corner. Then move off the blank stock and lay 3 business card on the deck and zero off that. This way I cut through one business card and leave a clearance off the deck by 3 cards. Seams to work for me
For non through carvings:
I set z off the top of stock.
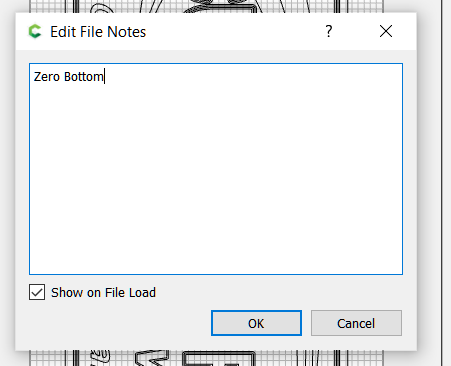
I also add notes to the CC note field for setup instructions. I don’t believe the notes come through to CM, That would be nice
Zero instructions, Min Max Stock thickness …
When you load the job in CM an initial info screen pops up with some job info. I used to blow past this screen all the time but longer in it now and inspect the info.
It gives you the cut envelope dimensions (or material dimensions) depending on the design software and post processor I think.
It also tells you cutting distance below Z zero. If you zero to the spoilboard and this has something other than zero in it then it is a good indication that your job was set up to zero on the material.