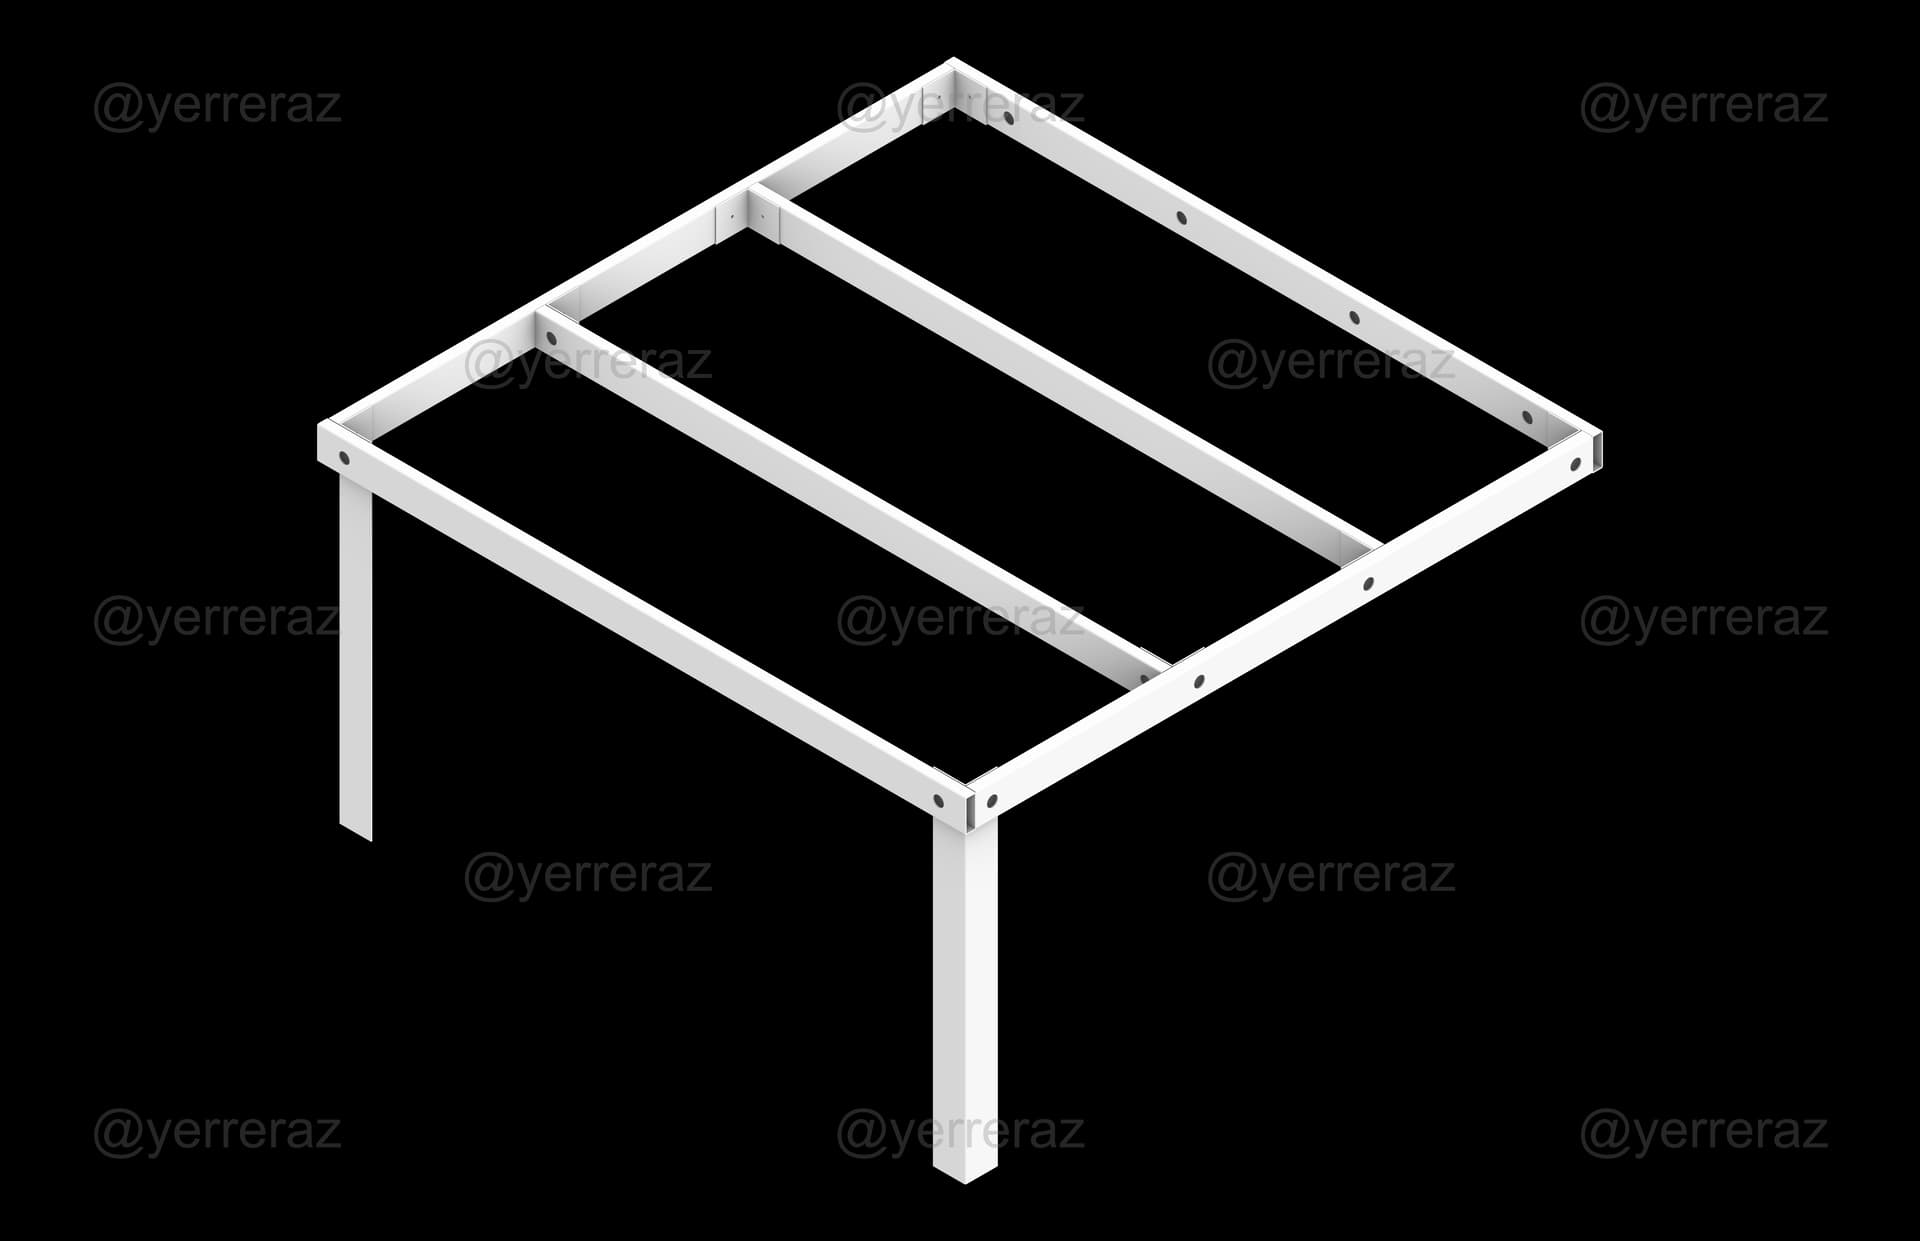
Hi everybody I’m planning to buy a 4×4 Shapeoko 5 Pro in the coming weeks and wanted to share my idea for a steel table to support it, and hopefully get some feedback.
Note: I don’t need the station to be mobile, hence the wall-mounted approach. However, it can be easily modded to have four legs instead, and casters for mobility.
I’m thinking 3"×1" steel tubing for the frame and 3"×3" steel angle for the legs. It will all be fastened with bolts, with exact-sized holes on one side of the tubing and oversized-holes on the other side for access.
I’m also considering pre-drilled holes along parts of the frame and legs for future attachments, like a monitor arm, under-mount drawers, power strips, etc.
Any pointers on what can be improved or added is much appreciated thank you!
wall-bolted is great, but consider orienting your shapeoko 90° from the wall, such that you can do tiling. You may not think you will need it, but trust me, someday you will, and then you’ll regret having your Shapeoko’s back against a wall
the front legs are going to be the weak element, I highly recommend adding braces in the design, on the front, and diagonal braces on the sides, for a more rigid table. A Shapeoko5 Pro moving rapidly back and forth can make a non-rigid table dance in a way you will not like. Also recommend adding braces in between the tubing, 90° from what is show. And then it will start to look like a torsion box, so you should go and build one. Look up that term if your are not familiar, it does wonder to provide a flat, rigid mount for your machine.
I agree with @Julien about the tiling issue. Plus you need to do maintenance and repairs and the heavy SO5 is not easy to move. So I would consider 4 legs with two way locking casters. That you can still push it up against the wall but have the option of moving it for tiling and maintenance. The price of two more legs is very little at this point instead of trying to add them later. Also Julien’s advise about braces seems good. Even if you weld up the legs braces would make sense. The braces could be in both directions on the back on maybe just on the sides in the front to give you more options for installing cabinetry or storage space under the table.
Most shops are over crowded with stuff. So there are two options for more space. The first is to expand the foot print of the shop. That is the least practical from a stand point of money and the space required for expansion. The second option if you cannot go out is to go up. So utilizing wall space and even ceiling space will make your space bigger without increasing the foot print of the shop. So utilizing the blank space under your table would make sense. If you want to utilize that space then the decision is to make it part of the table or a separate unit on wheels. In the planning you can make the holes necessary for the stretchers for shelves or other cabinetry under your table.
Funny enough, it dawned on me after the fact that maybe I should mount the table to the wall sideways precisely to allow for tiling. So yeah, this is most definitely something I’m going to revise.
I didn’t think to add diagonal bracing to the legs since the table will be fixed in place i.e., not mobile, and bolted to the ground. But maybe I should future-proof and pre-drill the legs and frame to accommodate diagonal braces down the line.
The torsion box approach would certainly add rigidity! However, I am trying to keep the cost down as much as possible. That being said, if the added tubbing can serve a second purpose, like further points of attachment for add-ons, then it might just be worth it.
I thought the wall-mounted approach was pretty bulletproof. Especially after revising the design and mounting the table on its side so as to allow for tiling. But you bring up a really good point on maintenance, so I may have to (much to my disillusion) make it mobile.
Space is limited, so I am trying to think of where I could add pre-drilled holes (and for which purpose) for add-ons like a monitor arm, under-mount drawers, power strips, the vacuum hose, etc.
Any insight into what’s good to have handy at all times when operating a CNC router like the Shapeoko 5 Pro? So that I may consider it when revising the table design.
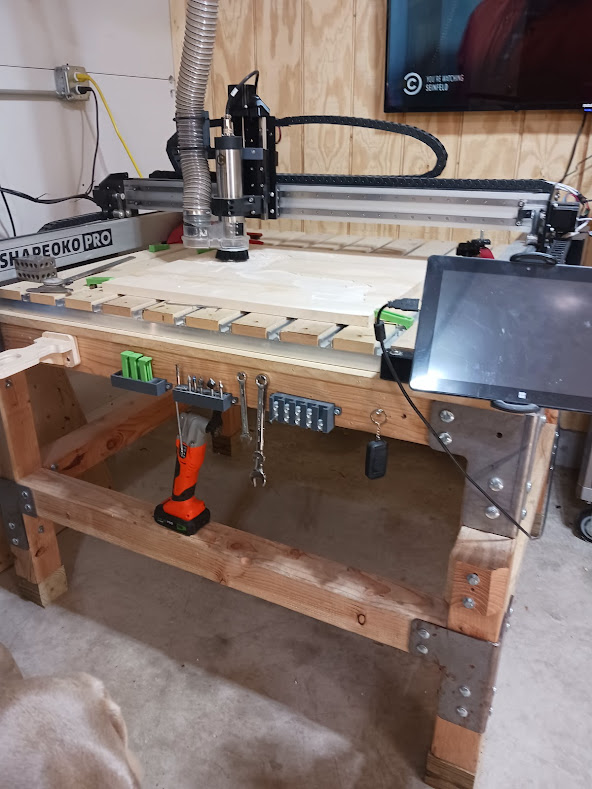
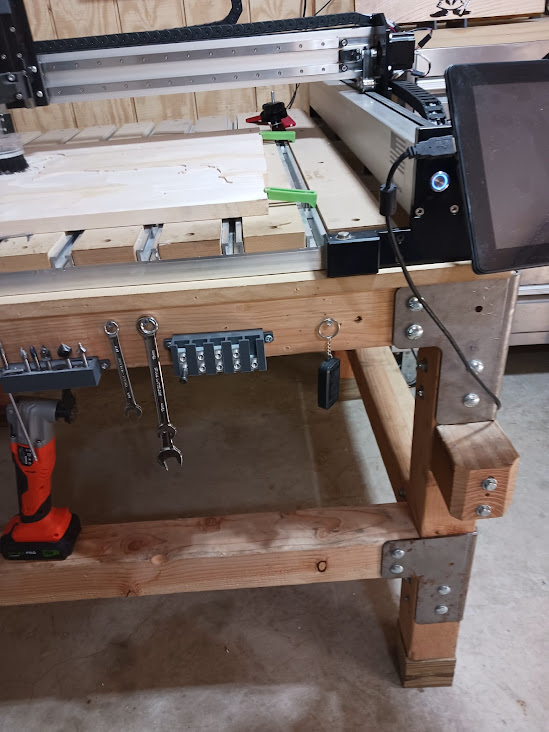
Something that stands out to me is the toolset you’ve attached to the front of your table. I had considered pre-drilled holes for add-ons like a monitor arm, under-mount drawers, power strips, the vacuum hose, etc., but not for tools and bits and work-holding.
Sure, they can be stored elsewhere. But this is a really nice setup you have here, and a dedicated, handy spot for those things might just make its way to the final design.
I made some shelves a few years ago from a plan from Woodsmith magazine. I put some banks of drawers in the bottom. Instead of putting the shelf standards on the sides of the shelving I made a plywood box and put the drawers inside. That way if I ever want to rearrange I can remove the drawers and unscrew the boxes and remove them. I will not likely do that but that gave me the strength of the heavy drawers being supported with all the screws on the drawer guides instead of just some on the ends.
So for just about any CNC you need space for the following:
Computer
Monitor Arm if you want that instead of the computer screen.
Tools, calipers (digital), router wrenches, allen wrenches and router bit storage.
I built a torsion box for my machine to sit on. So I have about 8-10 inches in the front to lay things. I have a plastic tray under where the router bits tend to fall out. I keep a sanding sponge there just to hit the fuzzies. I have a magnetic led flexible neck light so I can see the router bit on my mark for the center of projects. I have another tray that I have a 7/16" socket wrench to tighten up my clamps. I also have a bottle of CA glue sitting on the extreme right for use in the painters tape method of holding work down. I also have a set of metric allen wrenches which are Whia brand. Only buy good allen keys because cheap ones round off and can cause the set screws to wallow out. On the calipers I have a 6" set but also a 12" set. The 12" is not used much but the 6" can be limiting and you want good measurements of your material. My laptop sits on a Lifetime portable TV tray on the left side at about 45 degrees to the machine where my usb cable is easy to hook up. The SO5 has the VFD power supply and some people mount that on the back due to cable length. It would be a good idea to make some cable extensions so you can see the VFD power supply. That may not be necessary but you want good accessibility
On my table I have a shelf at the bottom and on the side I have a large drawer to keep the accessories and accessories for long term storage. I have a middle tool box on the shelf in the front to keep tools in and another drawer beside that I keep clamps in.
So most any CNC had at a minimum of these things. I am 69 years old and my table is designed so I have a nice office chair to sit in and can reach most of my machine without having to get up. Younger people may not want such a low profile but you will spend a lot of time watching the paint dry watching your CNC. You cannot just walk away and leave the machine running. As long as you are in ear shot you can do other things in the shop but do not leave the machine running and go in the house or leave home with it running. The material can come loose and has started fires.
Any shop should have multiple fire extinguishers. I live in the country and by the time the fire department gets there all they have to do is roast marshmallows. Also important is a good industrial first aid kit. Things can happen quickly and it is better to have the safety equipment and not need it than need it and not have it. I hope to never need the extinguishers or the first aid kit but I am also a long way away from a hospital.
Using a CNC is wood working and you need other machines to feed the CNC. A circular saw with shooting board and/or a table saw is needed. As well as sanding because you still have to finish the CNC projects. A good steel cabinet to keep flammable chemicals in like mineral spirits, acetone and finishes and stains. I have a Ridgid ossiliatitng belt/spindle sander to sand down tabs. I also have a 10" Jet bandsaw to cut away things I need to. You dont need all the full woodworking shop I have but there are some things that are a necessity. Good dust collection is required. That can be a shop vac but a dedicated dust collection works better.
For flammables I have seen people use an old fridge. No I don’t have the room like many of us. I have an old steel cabinet. Used wood stove gasket on the latchable door
In addition to the 90 degree rotation @Julien mentioned, make the table slightly wider in X (as the S5Pro would be oriented) to make room for servicing the side. Make it easy to get in there to oil and check fasteners.
I hope you are tall.
At least make sure that you have room to maneuver around all three exposed sides. I am not tall and I can’t reach effectively too much past mid way on my Pro XXL and the 5 4x4 has a bigger footprint.
I also built a table for mine out of steel but I only used 3/4” angle for my pro4 xxl. I have ran into sagging issues in the middle and needed to shim it which is not exactly perfectly flat and shows on some large projects. I should have used square tubing but you may also want to consider how far apart your braces are.
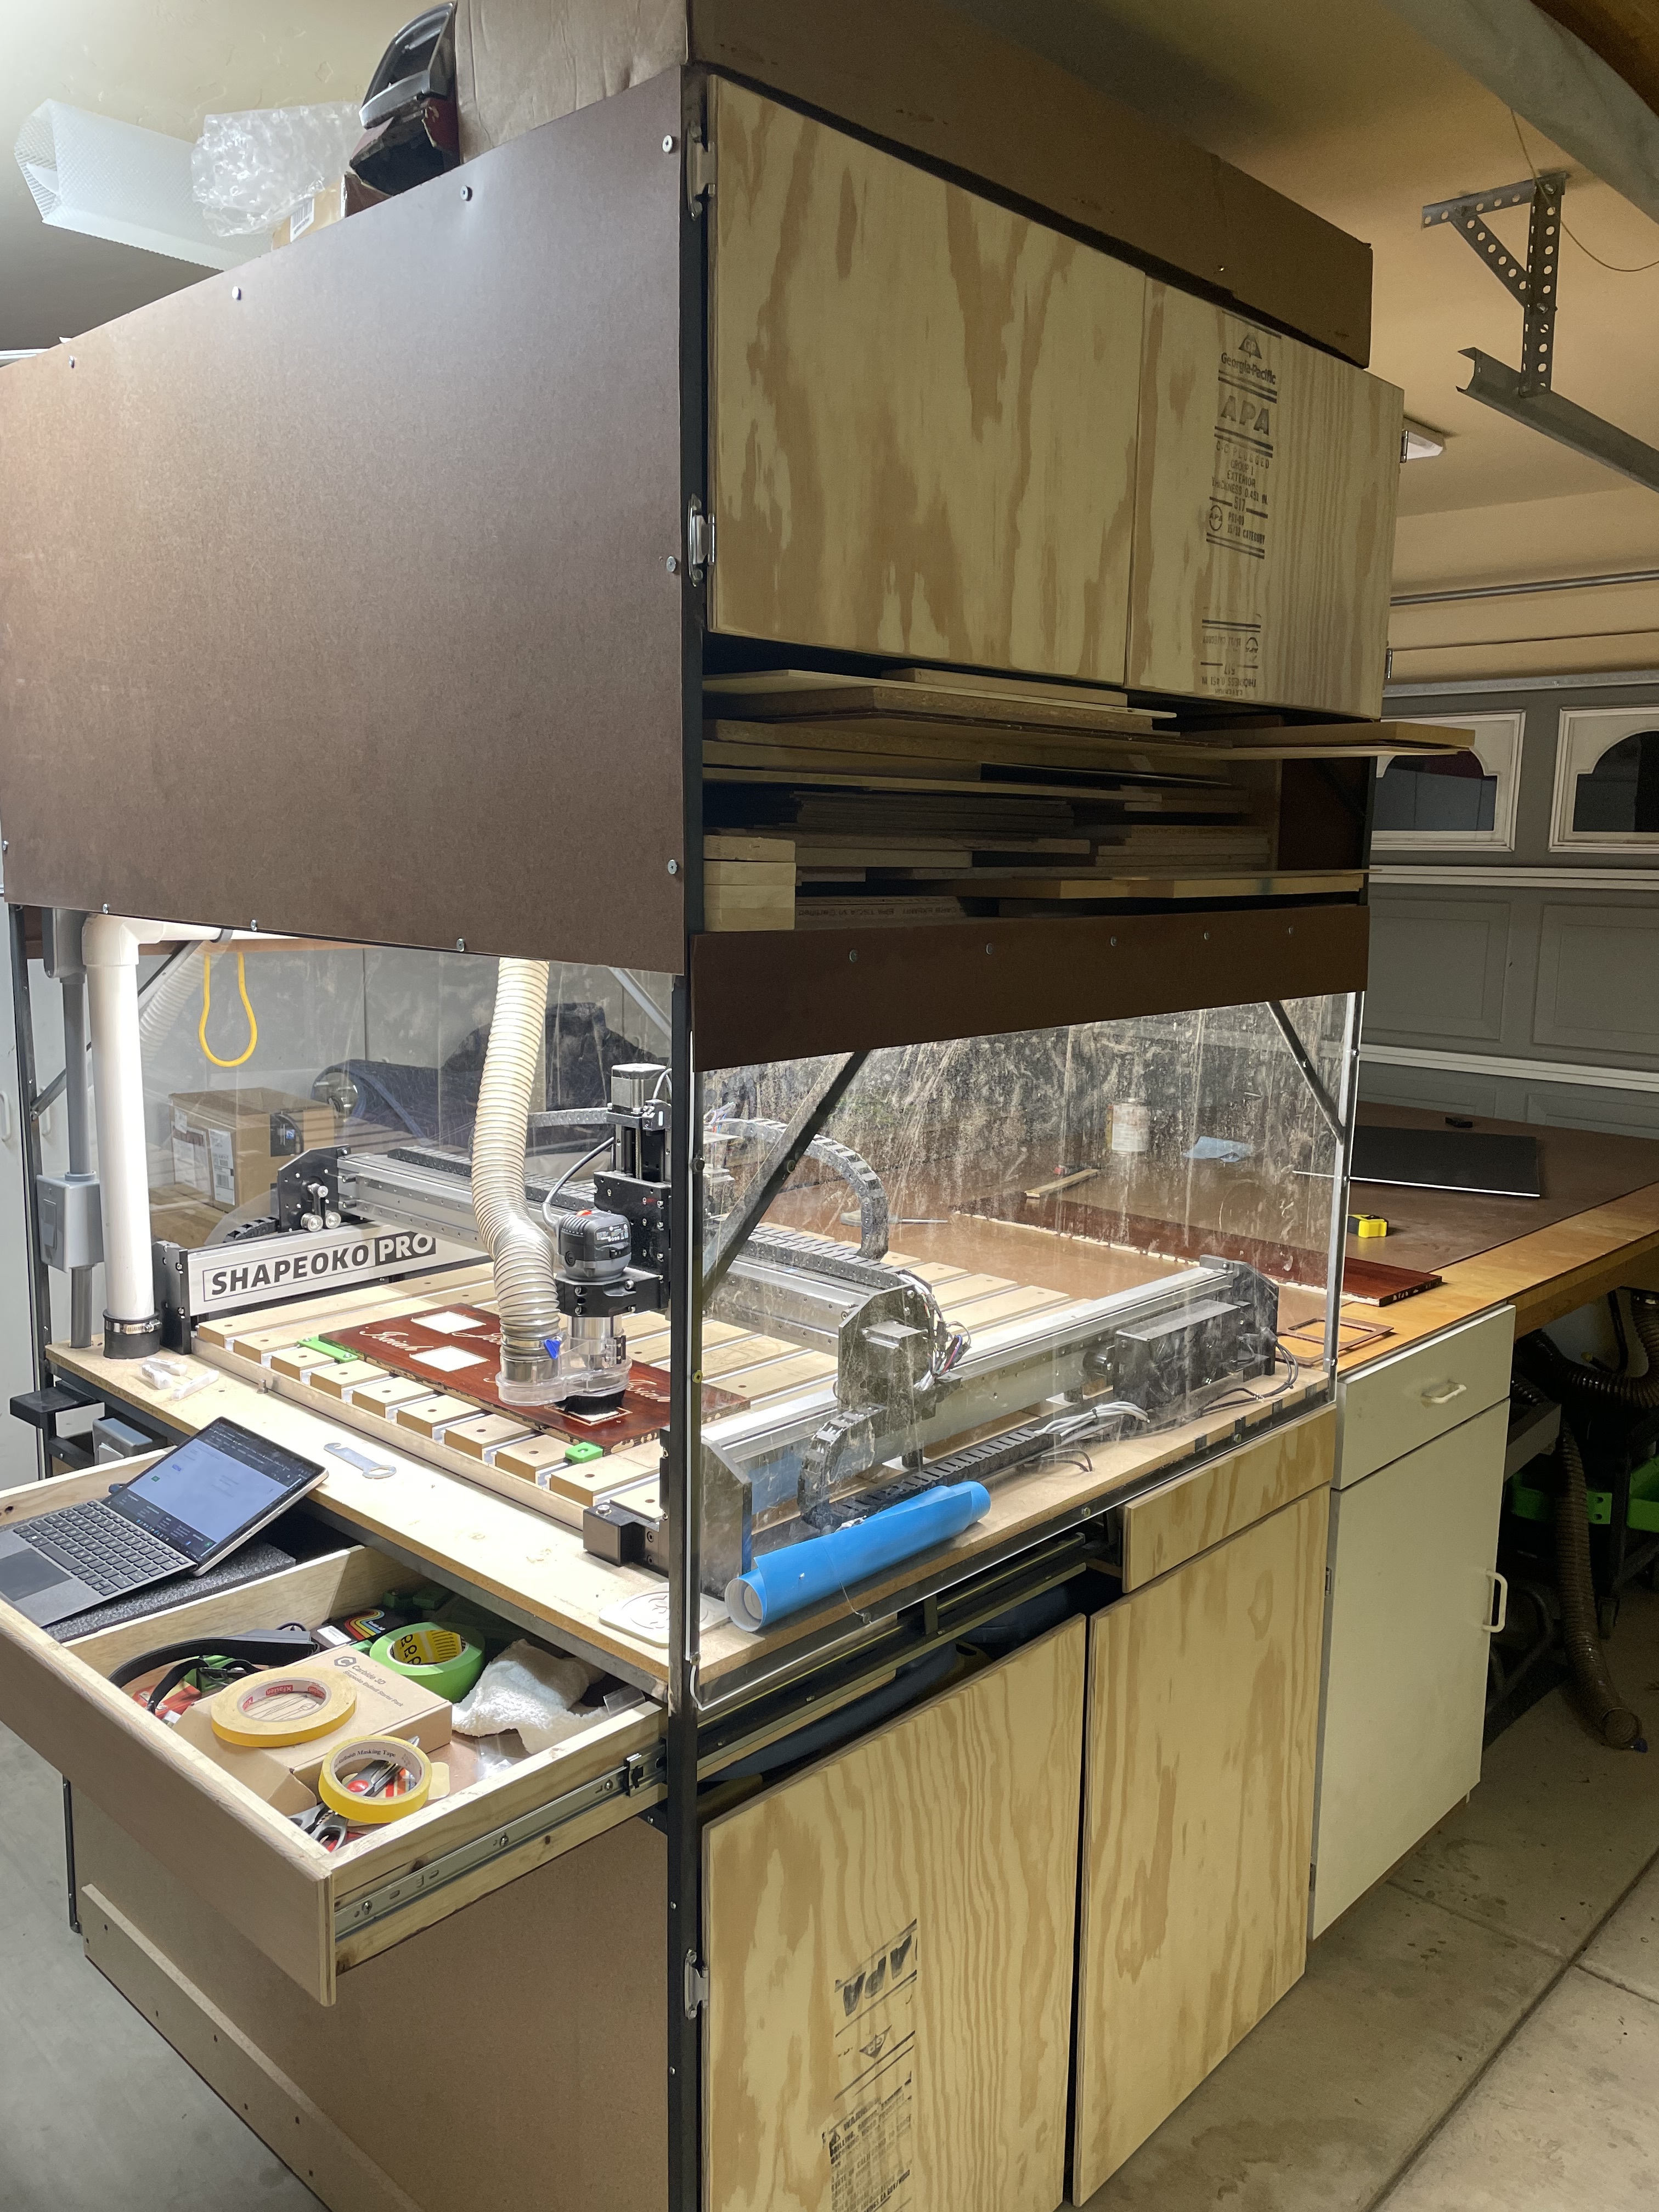
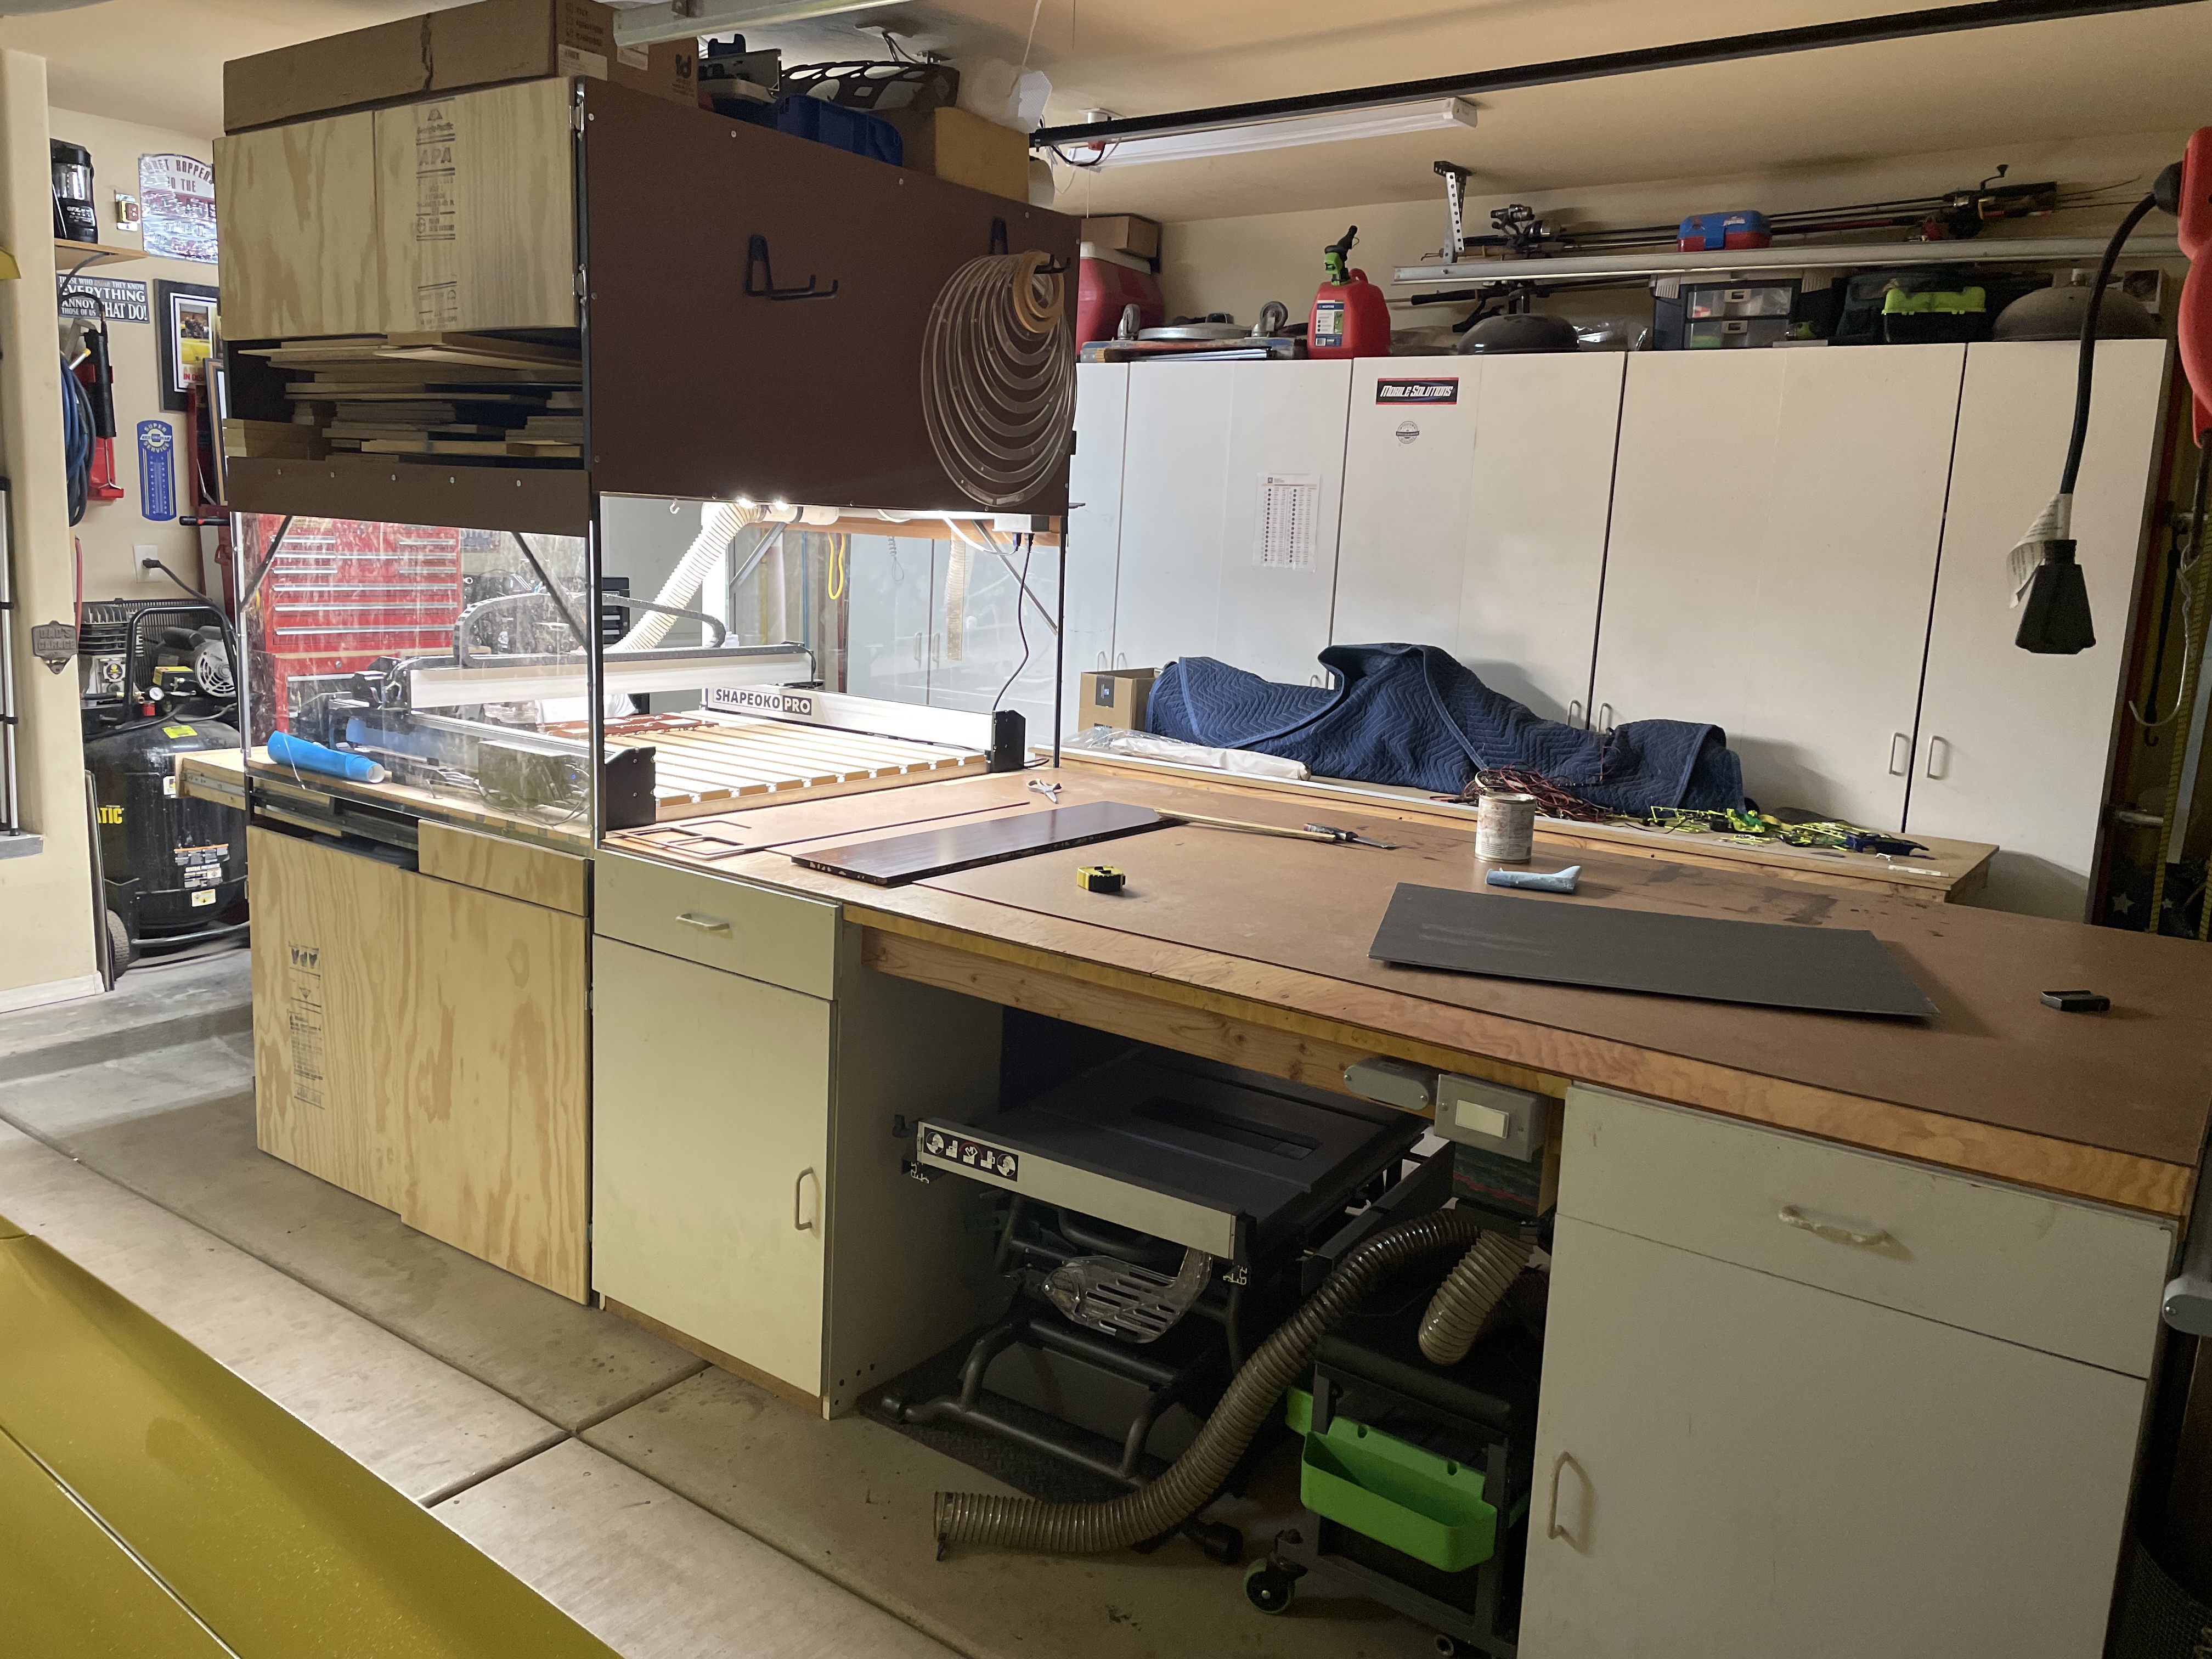
For me space is a premium in my garage so I made it tall enough for storage above and below it. And I can easily slide it back to my work bench to work on it. I have reconsidered how I do the siding and for now I just slide a board over the back but I was a more complete design. I would also like a door, but I think it will just get in my way at this point.
I really like my drawers at the front. It’s nice to store my tablet and bits right there at the front.
I am not aware of the tilting mentioned above, I am also new to this so this is my first bench and CNC. I do expect to build a new cabinet one day, probably when we buy a bigger property where I actually have a shop space.