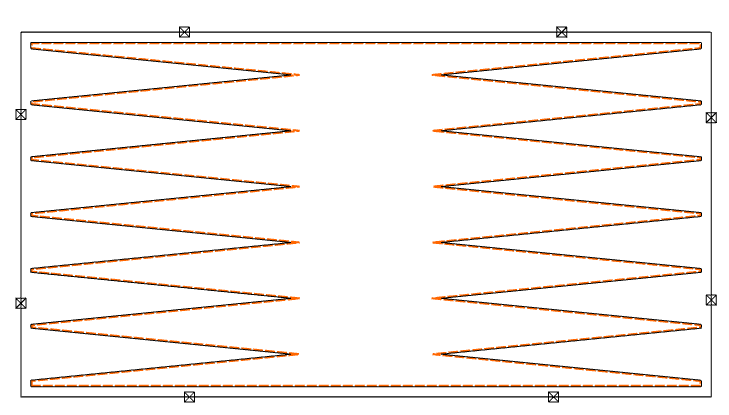
I’m working on a backgammon board. I have created the files and tool paths which when viewed in the simulation appear fine to cut the triangle pockets that will get an inlay. I am using 1/4 in endmill to do the rough cut then using rest machine using a 1/8 endmill and a second rest using 1/32 to get the corners sharp. But when the machine makes the cut the points are not smooth towards the top. there is a step off. Did the first pass in some cherry, then rather than wasting more stock I did another pass in MDF with same results. Happy to post picture and file if I can figure out how.
It could be a difference in deflection between the 3 tools. Try to keep the “stick out” length of each tool as short as possible. I would suggest cutting the 1/4" & 1/8" using an offset to leave about 0.005" - 0.010" stock on the wall, then cut an entire profile rather than a rest mill with the 1/32"
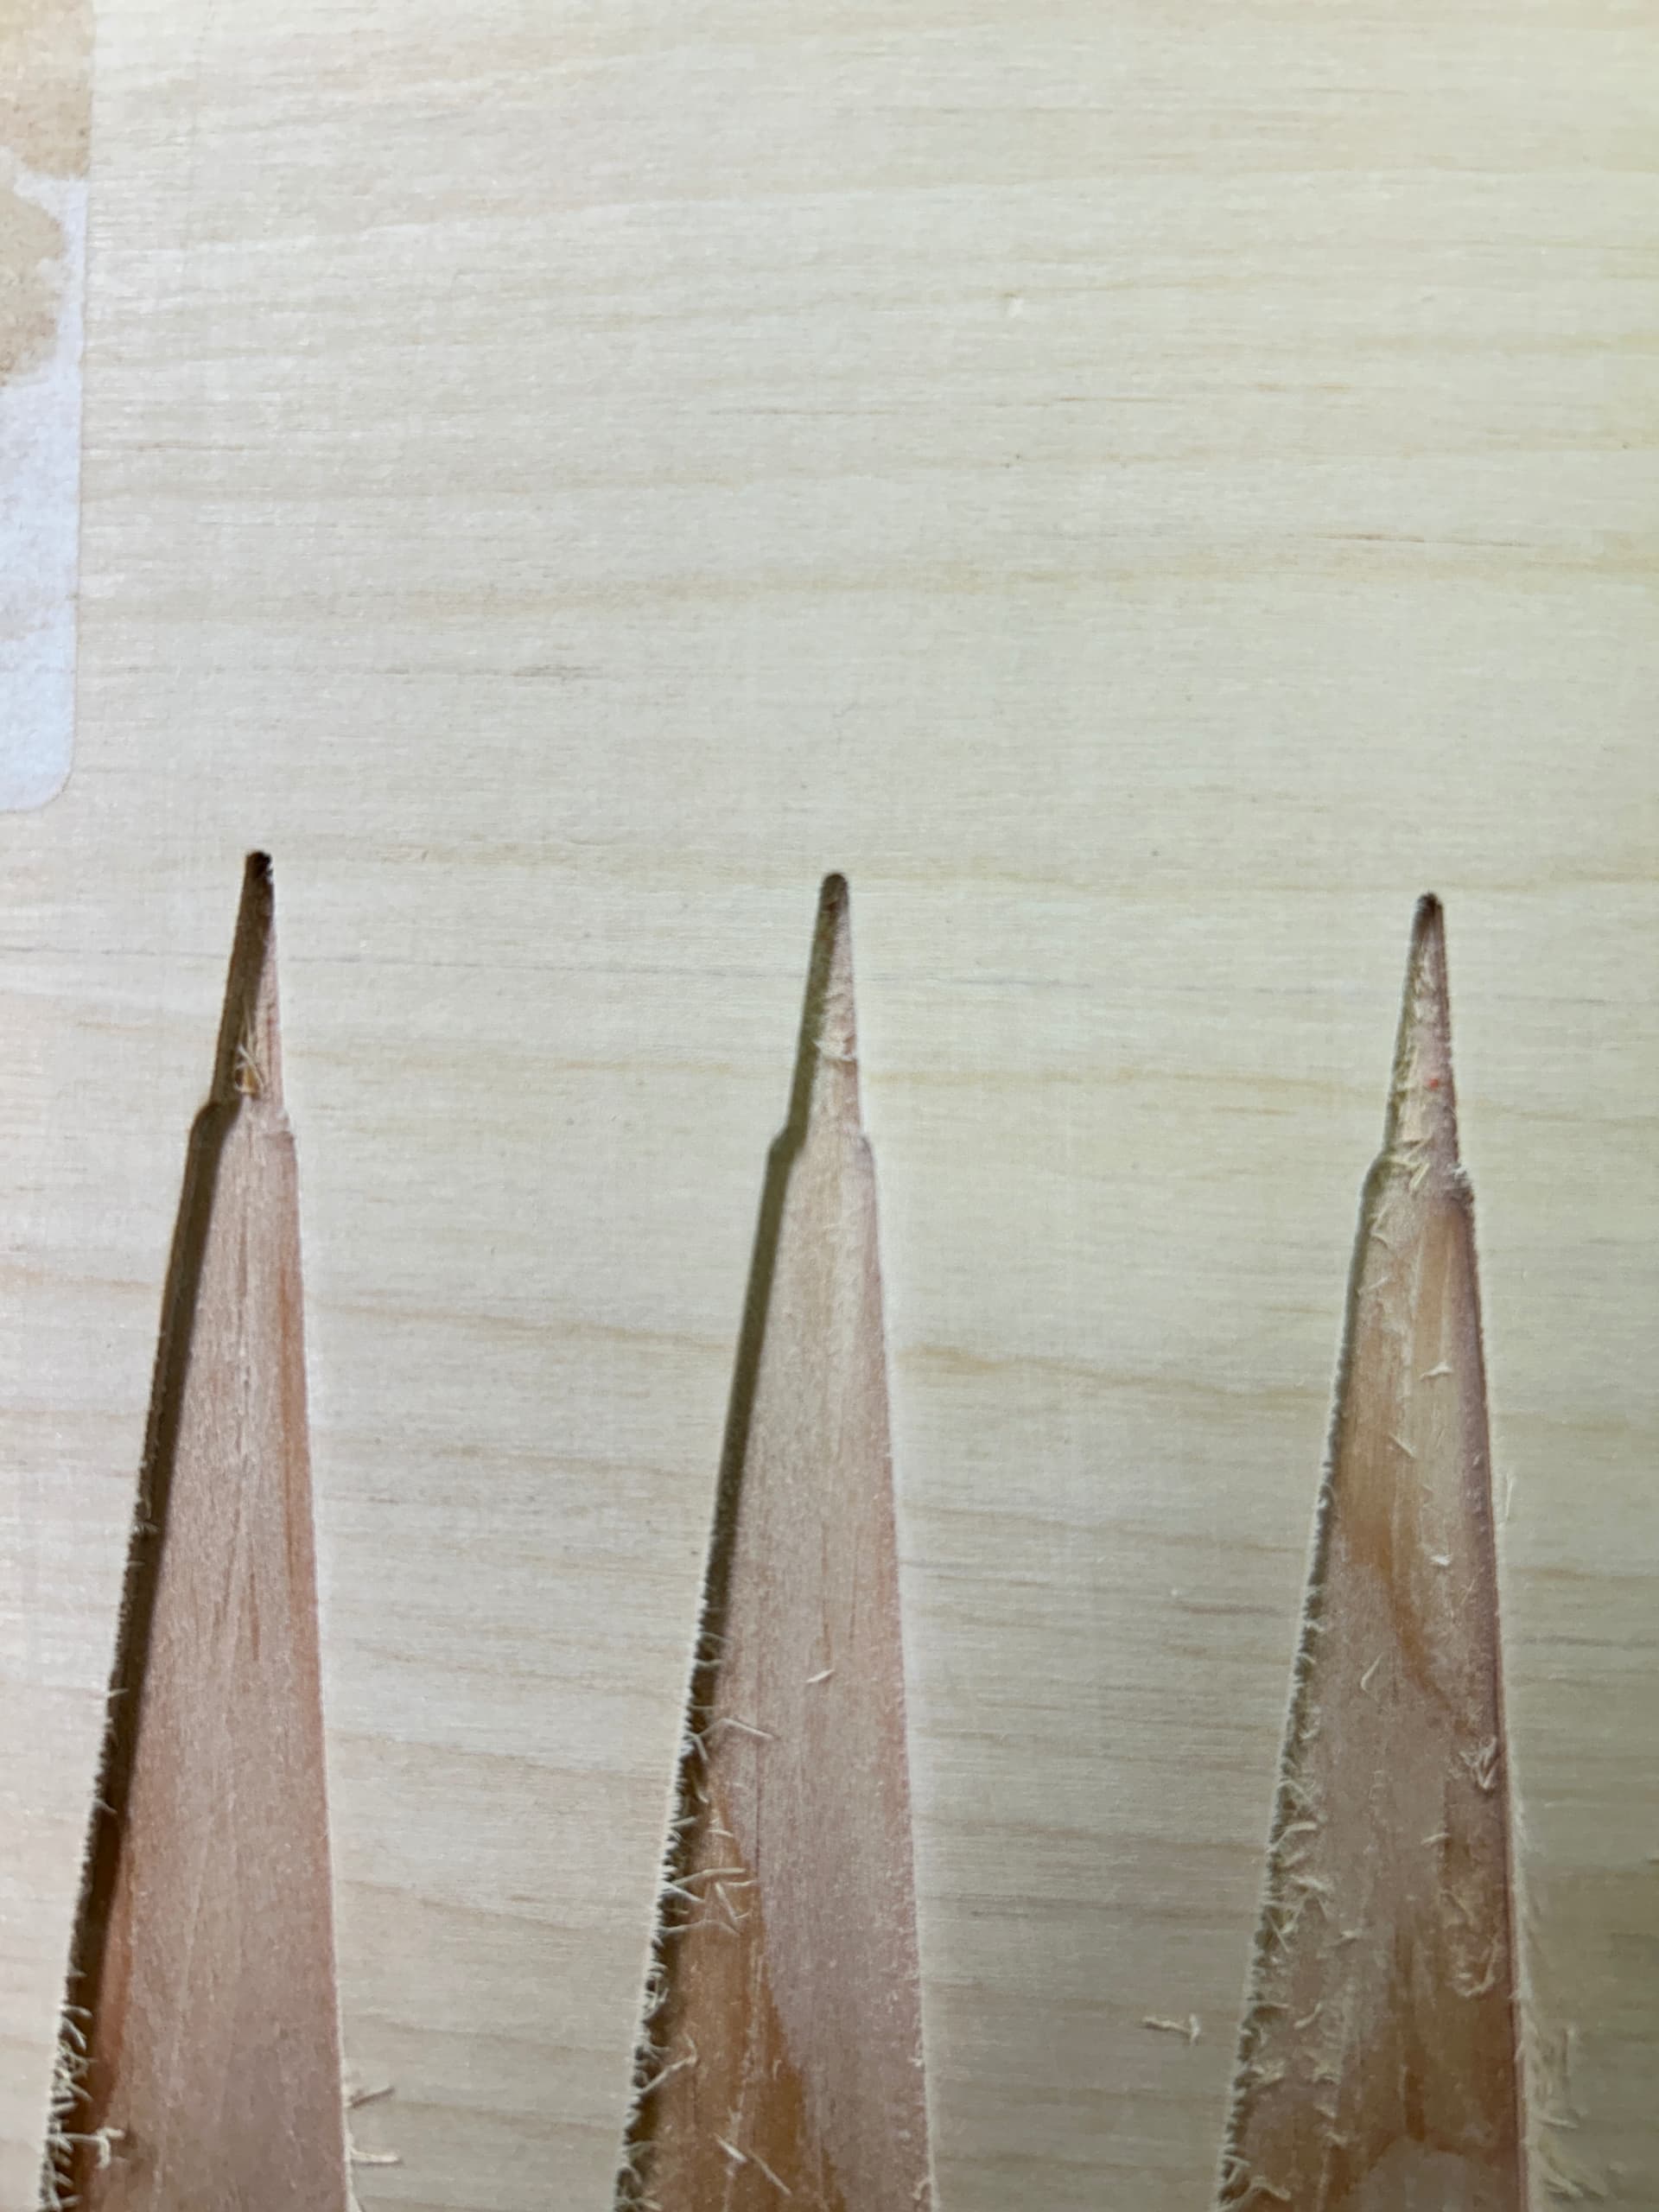
Getting a little frustrated. as the entire reason I bought machine was to help with the project. I attempted to recut the triangle pocket inlays again today and the same issue happens. I have my endmill chucked up so only a small amount protrudes and still having the same issue with the profile.
Hopefully you can see the picture. The larger width was cut with the 1/4 endmill and then for some reason when the 1/8 endmill comes in to do the tip it does not pick up the edge to make it a smooth transition.
You are using Rest machining w/ a #102, while cutting the bulk of the material w/ a #201 — did you use those two tools? Or could you have cut w/ a #201 for the bulk, then used a smaller tool (say a #112)?
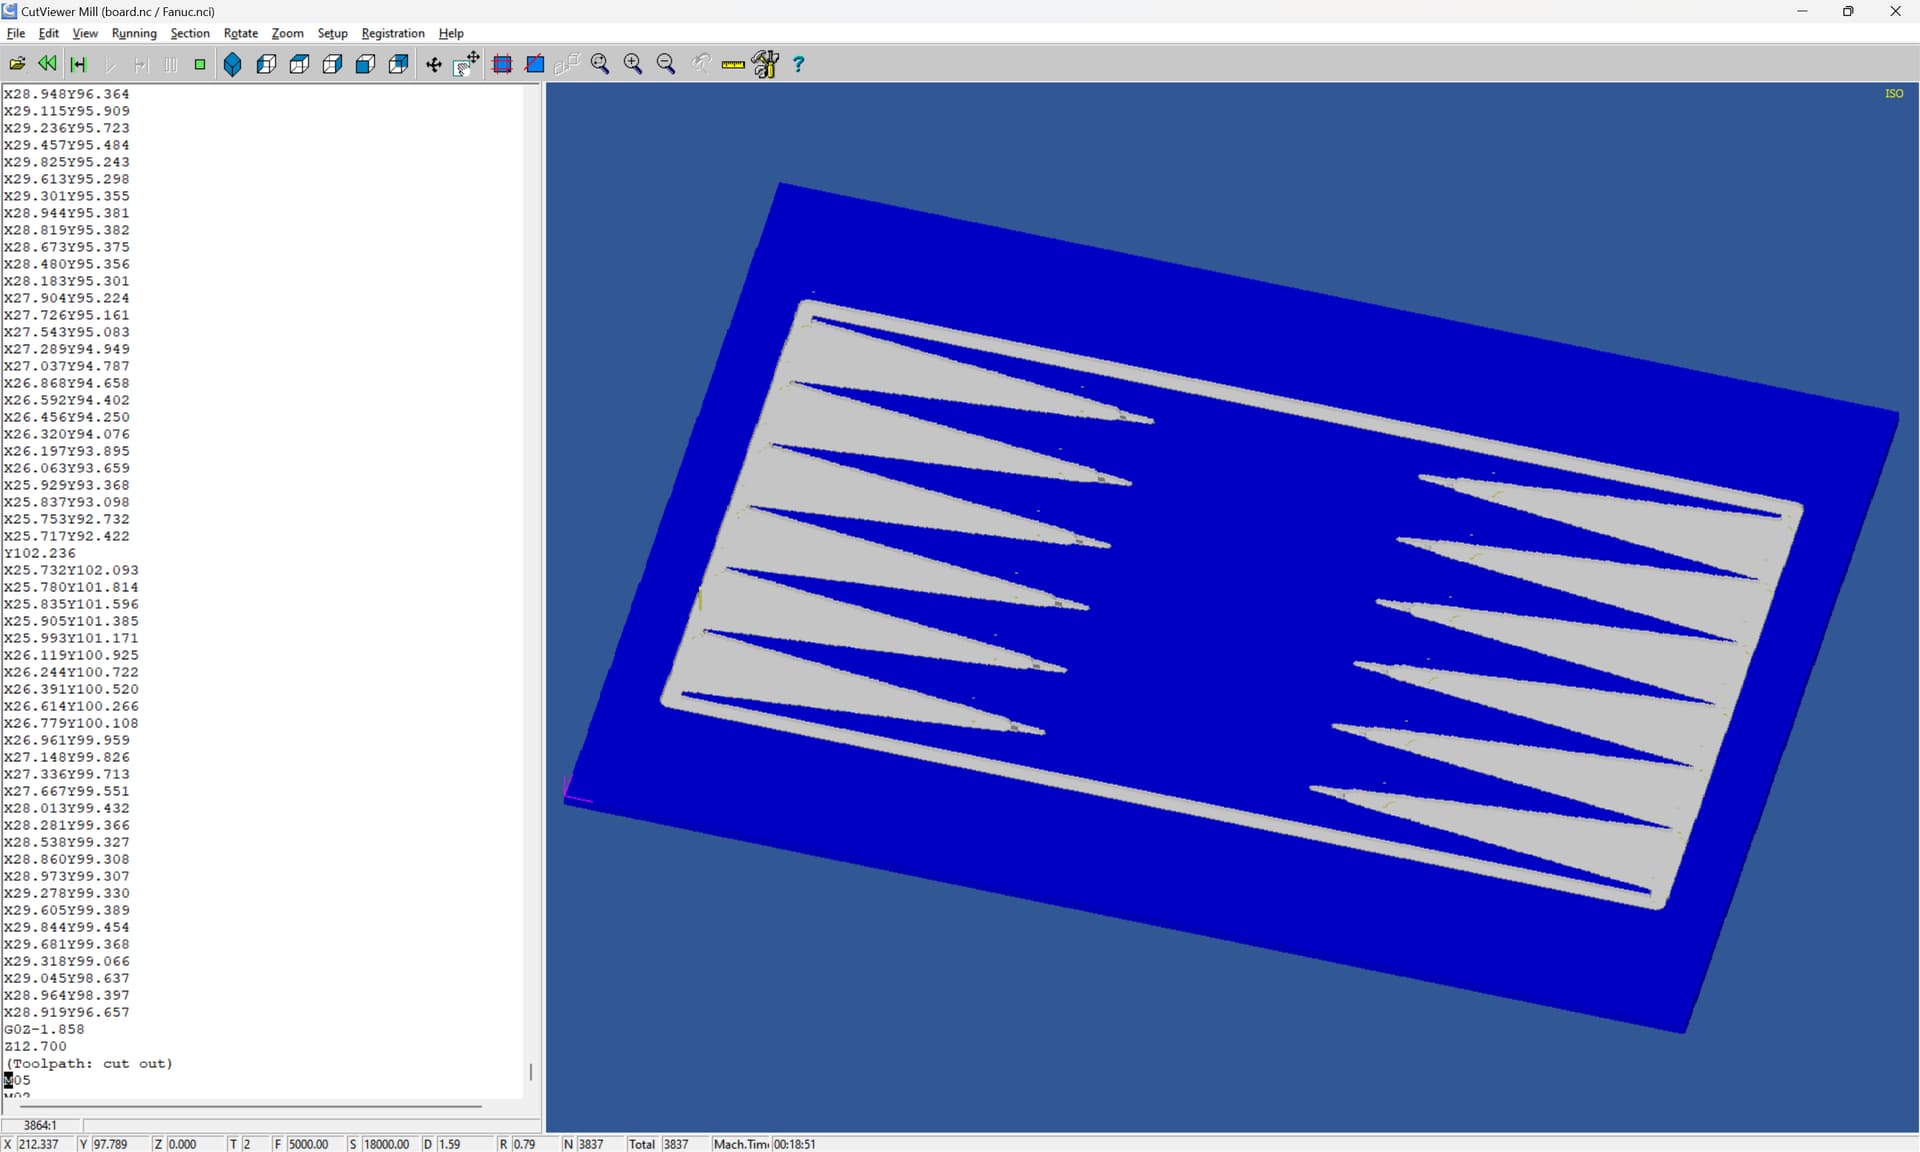
This is the appearance I get when previewing with that latter tool combination:
If the correct tools were used, then the #201 seems to be cutting more widely than it ought, and/or the #102 is not cutting as widely as it should — this is could be some sort of issue w/ feeds and speeds or deflection — I’d recommend leaving a roughing clearance and taking a finishing pass.
Now program the pocket paths using the offset vector. This will leave 0.020" stock left to remove. Then program a contour path using the original vector with the 1/32 tool.
Run the contour several times if needed.
Another option would be to use advanced V-carve to get nice sharp corners.