Need suggestions from the group. I am trying to engrave challenge coin for a group that I am apart of. The blanks in the pic are 14ga .0623, 2" round alum blanks. I am using the 90 degree MC Etcher. The quality is not great.
Should I just invest in a laser? I am looking at thicker blanks.
I’ve found that the 90° can get too aggressive when there are lots of small details. Because you are not cutting material, but rather displacing it, the top edges of the engraving lines can muddle your finished design. The 120° tends to do a better job with those tight detailed areas. With the 120° I’ll run the paths twice to get super clean lines. In my experience, less displacement tends to equal a better look.
Send a few more closeup photos as well as the file and I’ll take a look.
One other thing about metals, I find the use of full crosshatching produces an almost mind bending set of reflective surfaces. For brass jewelry I use 30° linear lines. You can manipulate the coverage by reducing the step over of those lines.
I’m happy to look further at your project when you get back to your shop.
I would recommend getting thicker blanks (3/16" or 1/4" thick) and v-carving the details on the obverse and reverse sides with a 30-60 degree v-bit instead of DDE.
Do you have anything to take the burr off?
I was doing some tiny engraving on aluminum. I tried the 90 and 120 drag bits as well as some V bits from dremel. The spinning v bit lets you get deeper than the drag bits. All of them leave a raised burr that makes the work look rough. If you’ve already machined the entire top of the coin, you can run a surfacing pass again a couple thou higher than the surface to catch the burrs.
I had decent results running the toolpath twice. The second pass cleaned up some of the crap leftover from the first.
And if you’ve ever cleaned a piece of glass with a razor blade, I use that same motion using a razor blade across the top of the aluminum to shave off any material thats sitting proud of the surface. Its a little harder with aluminum than glass, because the aluminum is softer and easier for you to gouge if you dont do it right.
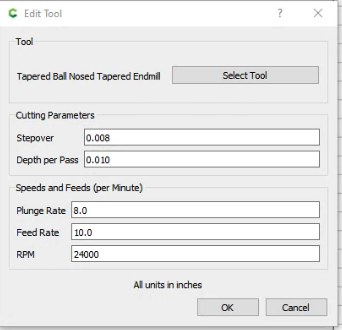
I’ve been using these: https://www.amazon.com/gp/product/B08FSZVL1D/ref=ppx_yo_dt_b_asin_title_o00_s00?ie=UTF8&psc=1 with decent success. I haven’t tried as fine of detail as what you are doing, but I’m pretty sure these could handle it. I went REALLY slow and had a really shallow depth (0.01 in per pass). I used a lot of wd40 (probably not the right stuff to use, but it worked)… I added a texture to the coin on the lower left of the pic. For Aluminum, I just used a cheap 1/8in sheet and let the shapeoko cut it them out…
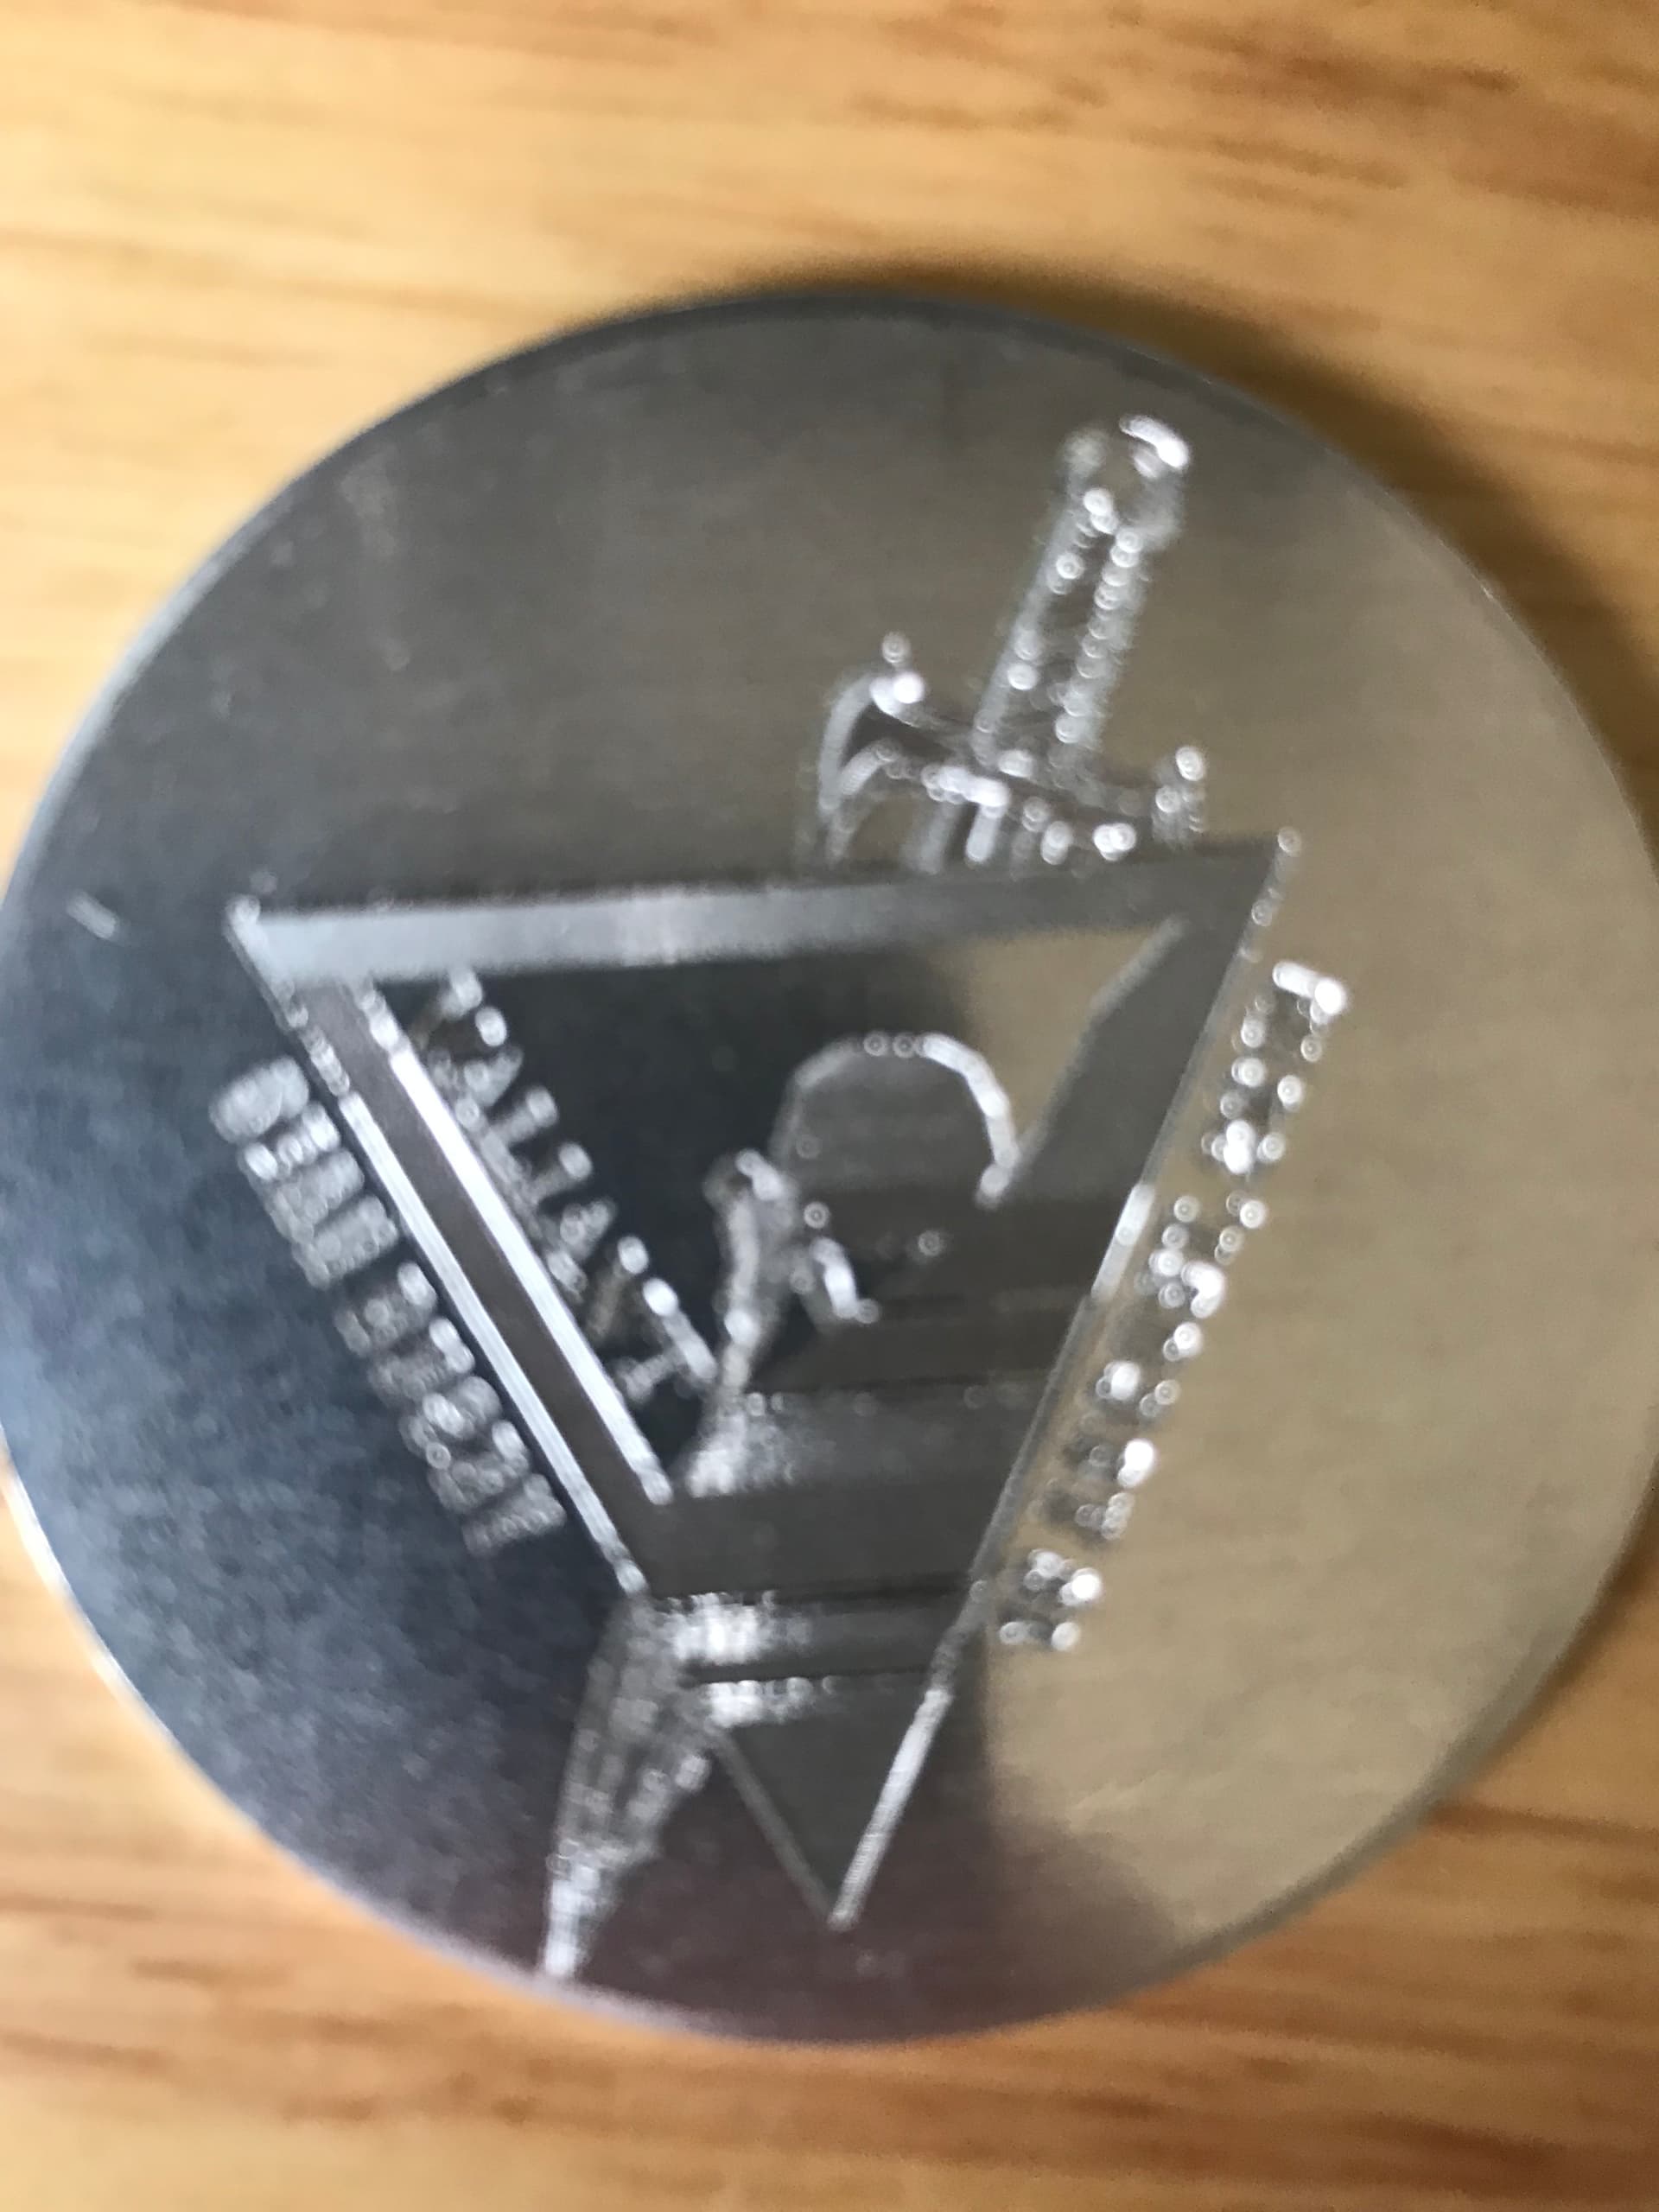
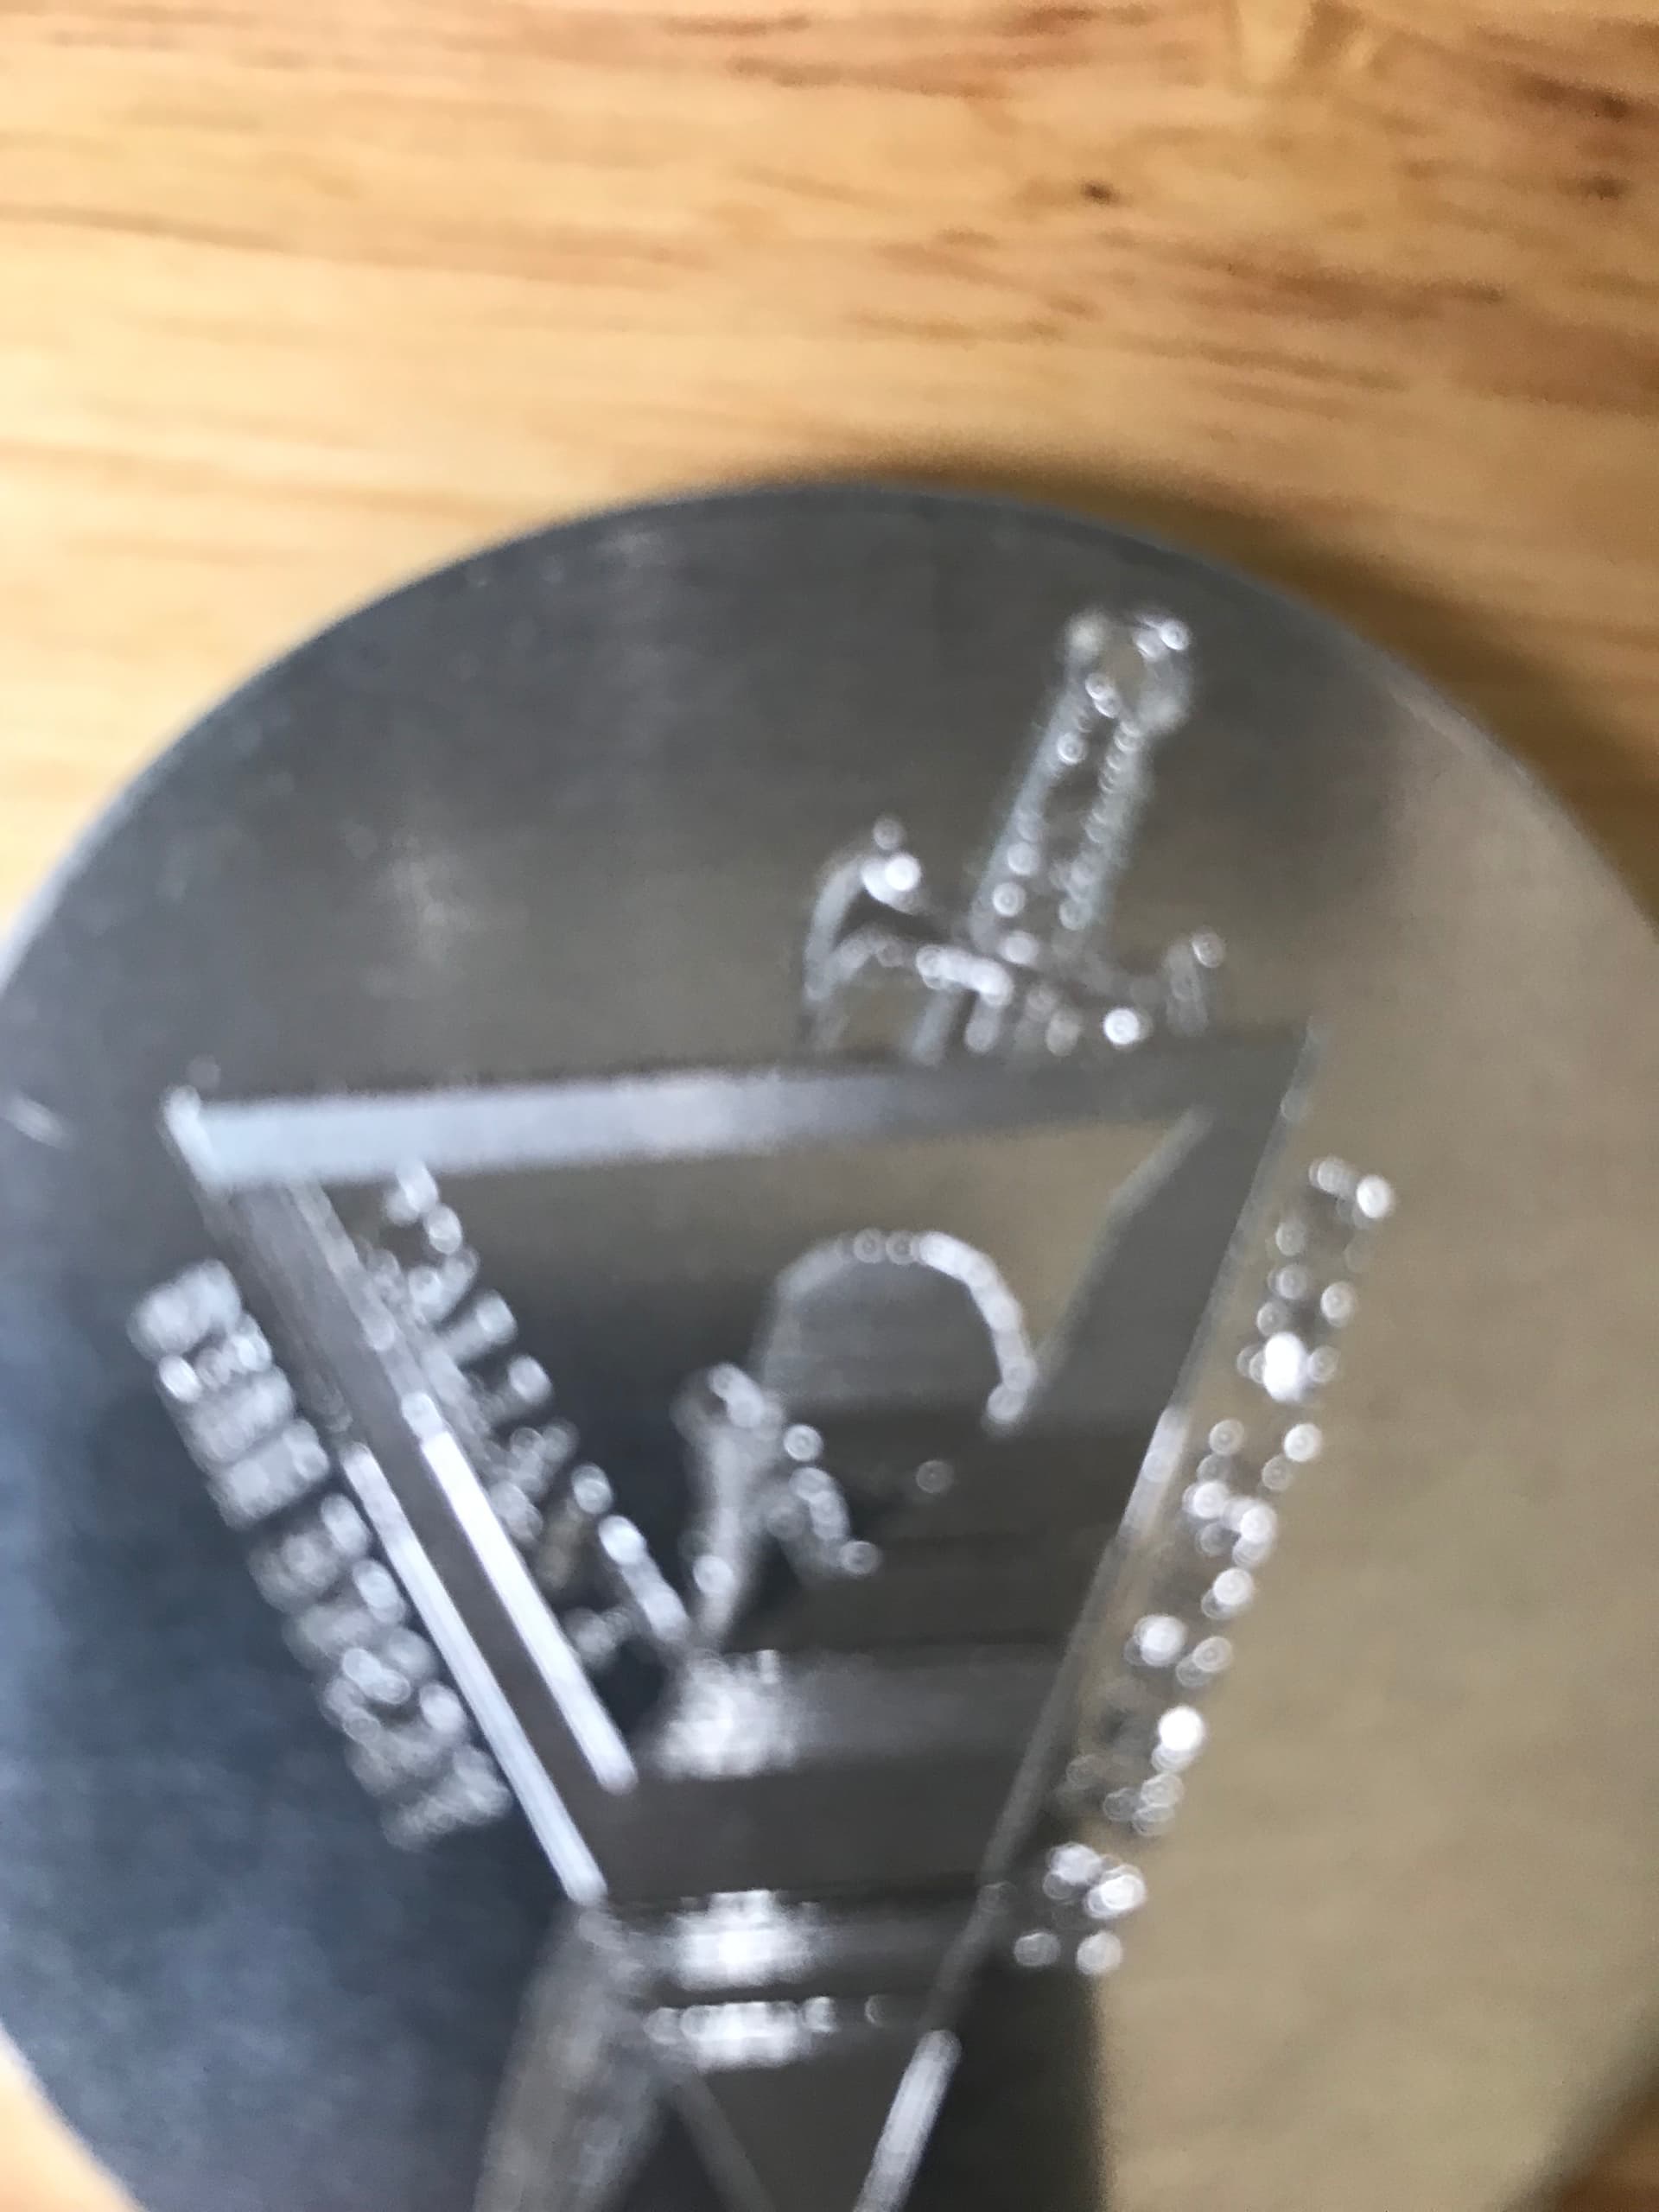
I am working to make a challenge coin for my K9 partner and I. It’s a picture of him and his QR code. My friend did it on a laser engraver but I would like to use my shapeoko machine…here is a pic…any suggestions?