I have read Squaring, surfacing, tramming | Shapeoko CNC A to Z.
The question is which bolts to loosen to fine tune the trimmer.
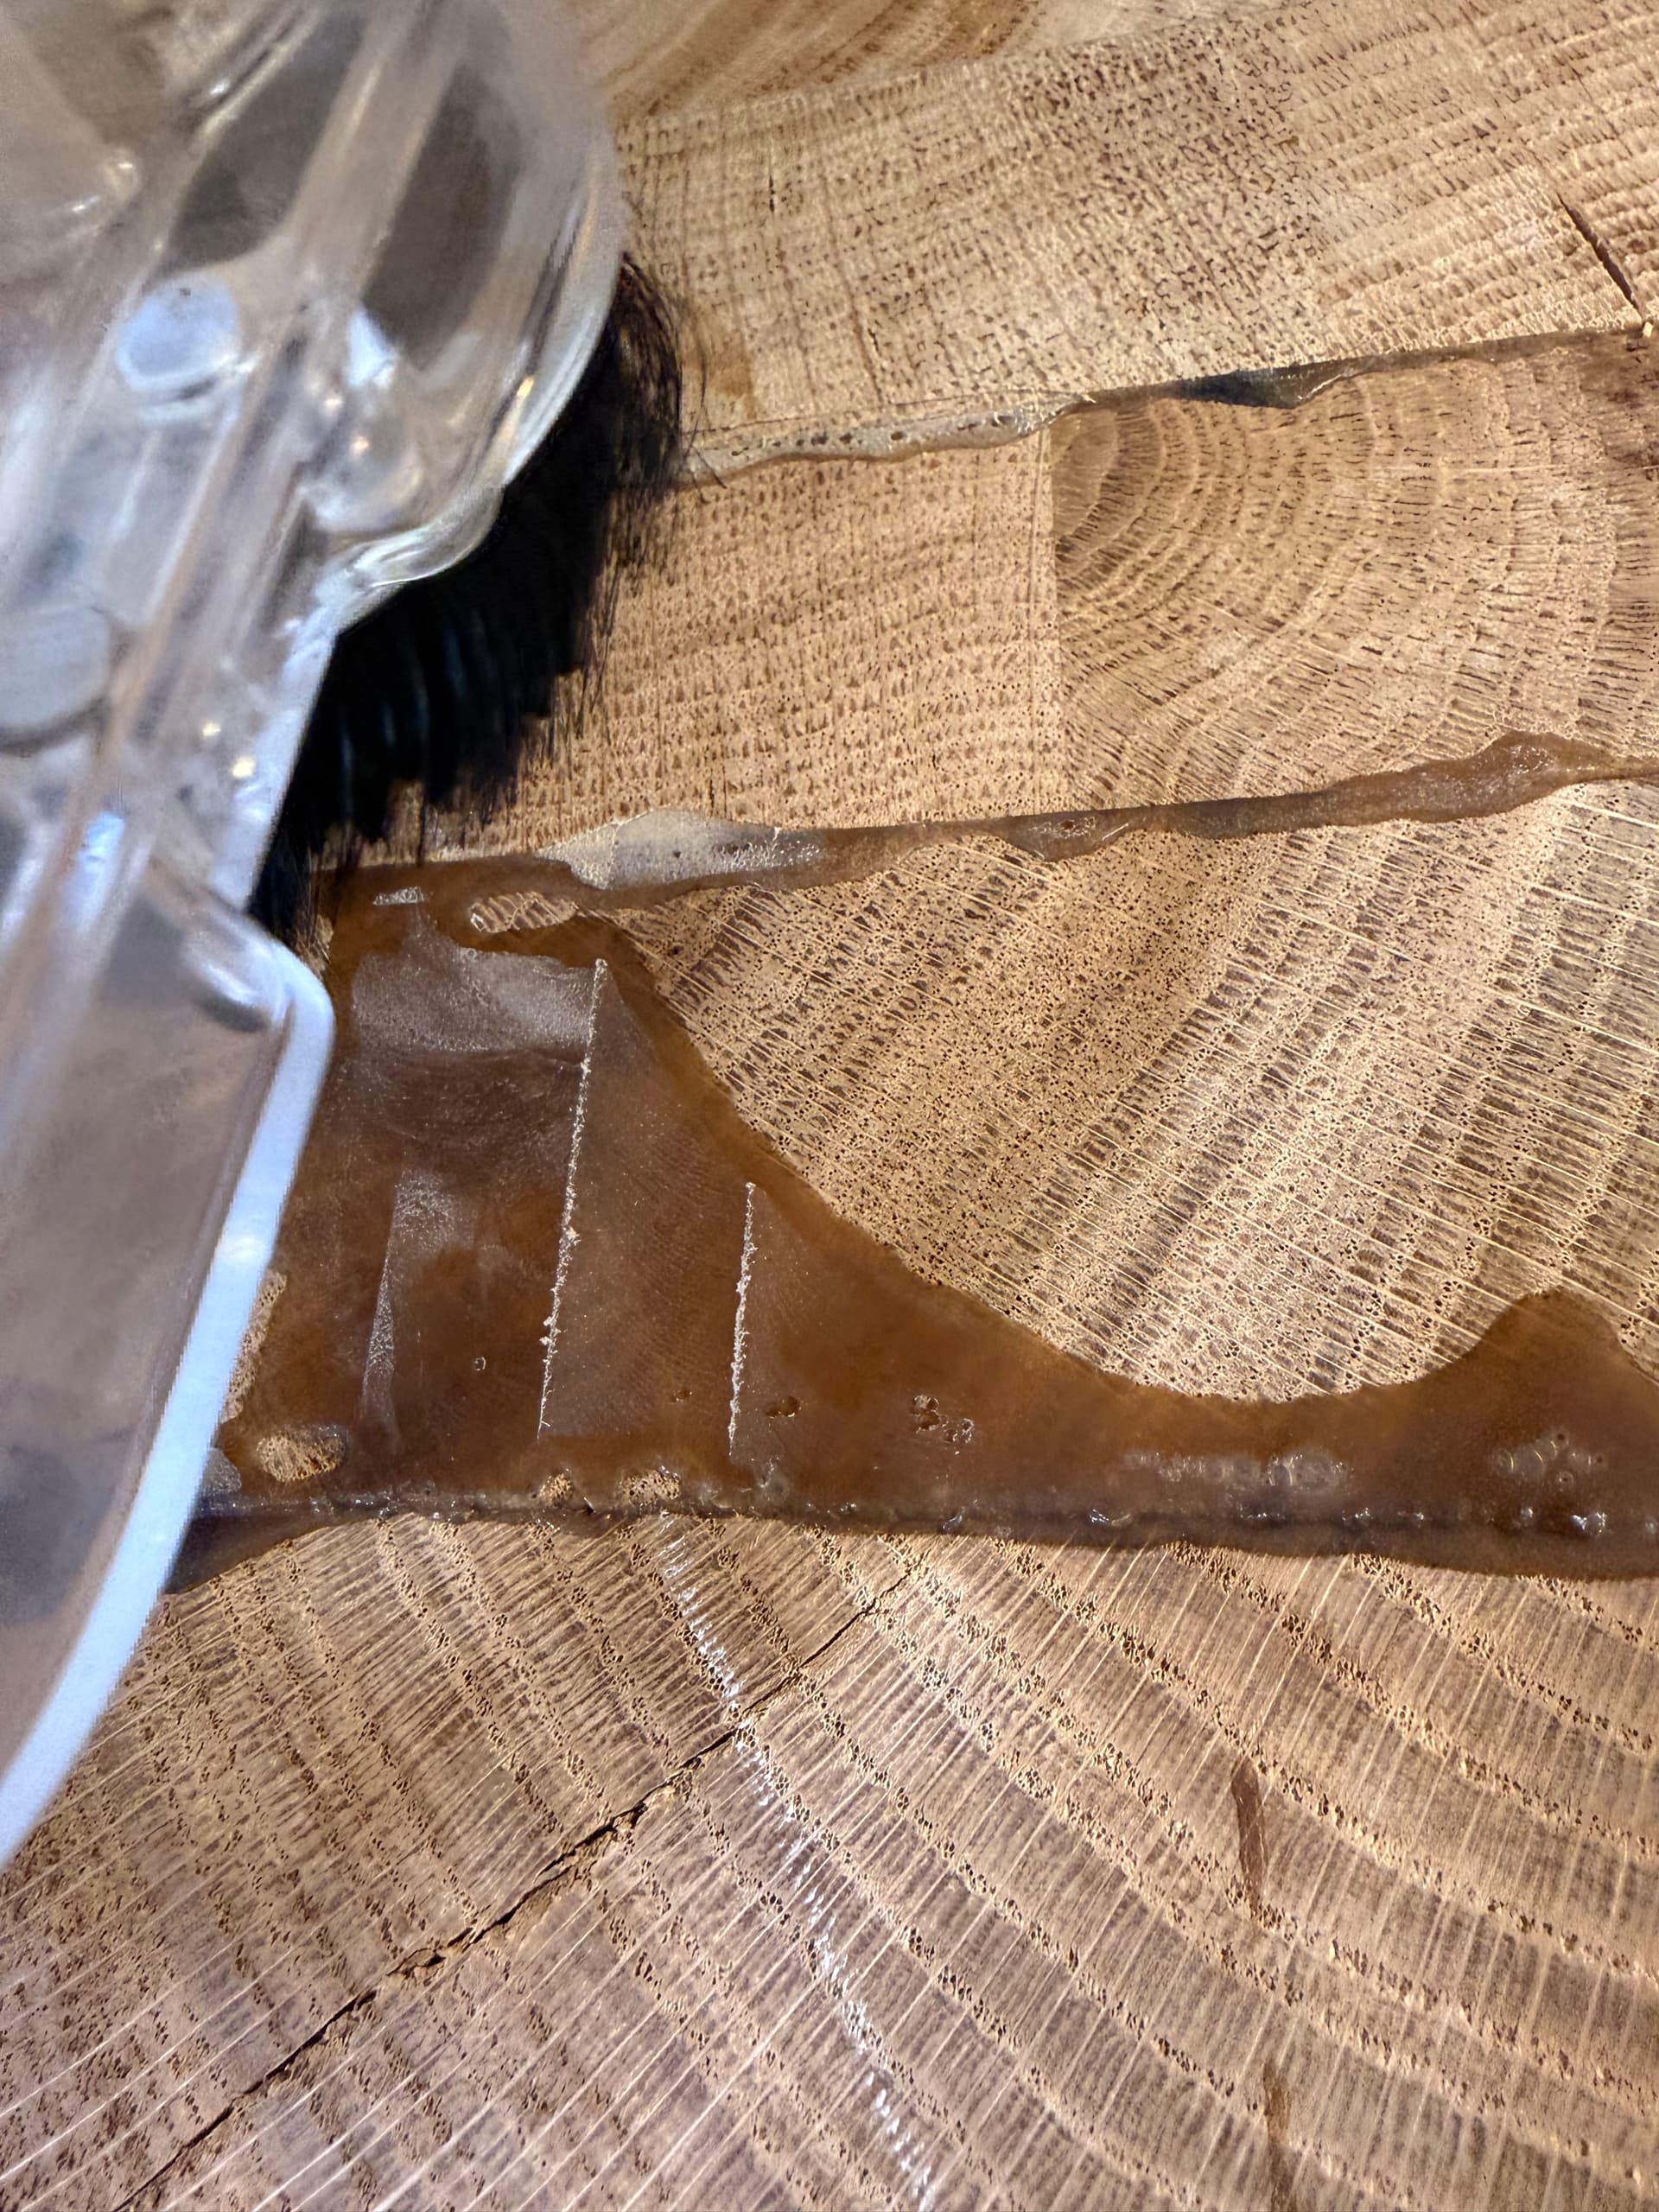
Here is the issue, shown clearer on the glue. Also I notice the trimmer is making a strained noise when moving right and not left. The surfacing but is very slightly “leaning back” when going right.
Would 0.1 degrees be enough to generate those very slight lines and noise? If so, is it a case of undoing and retightening the 4 bolts that hold the mount onto the gantry?
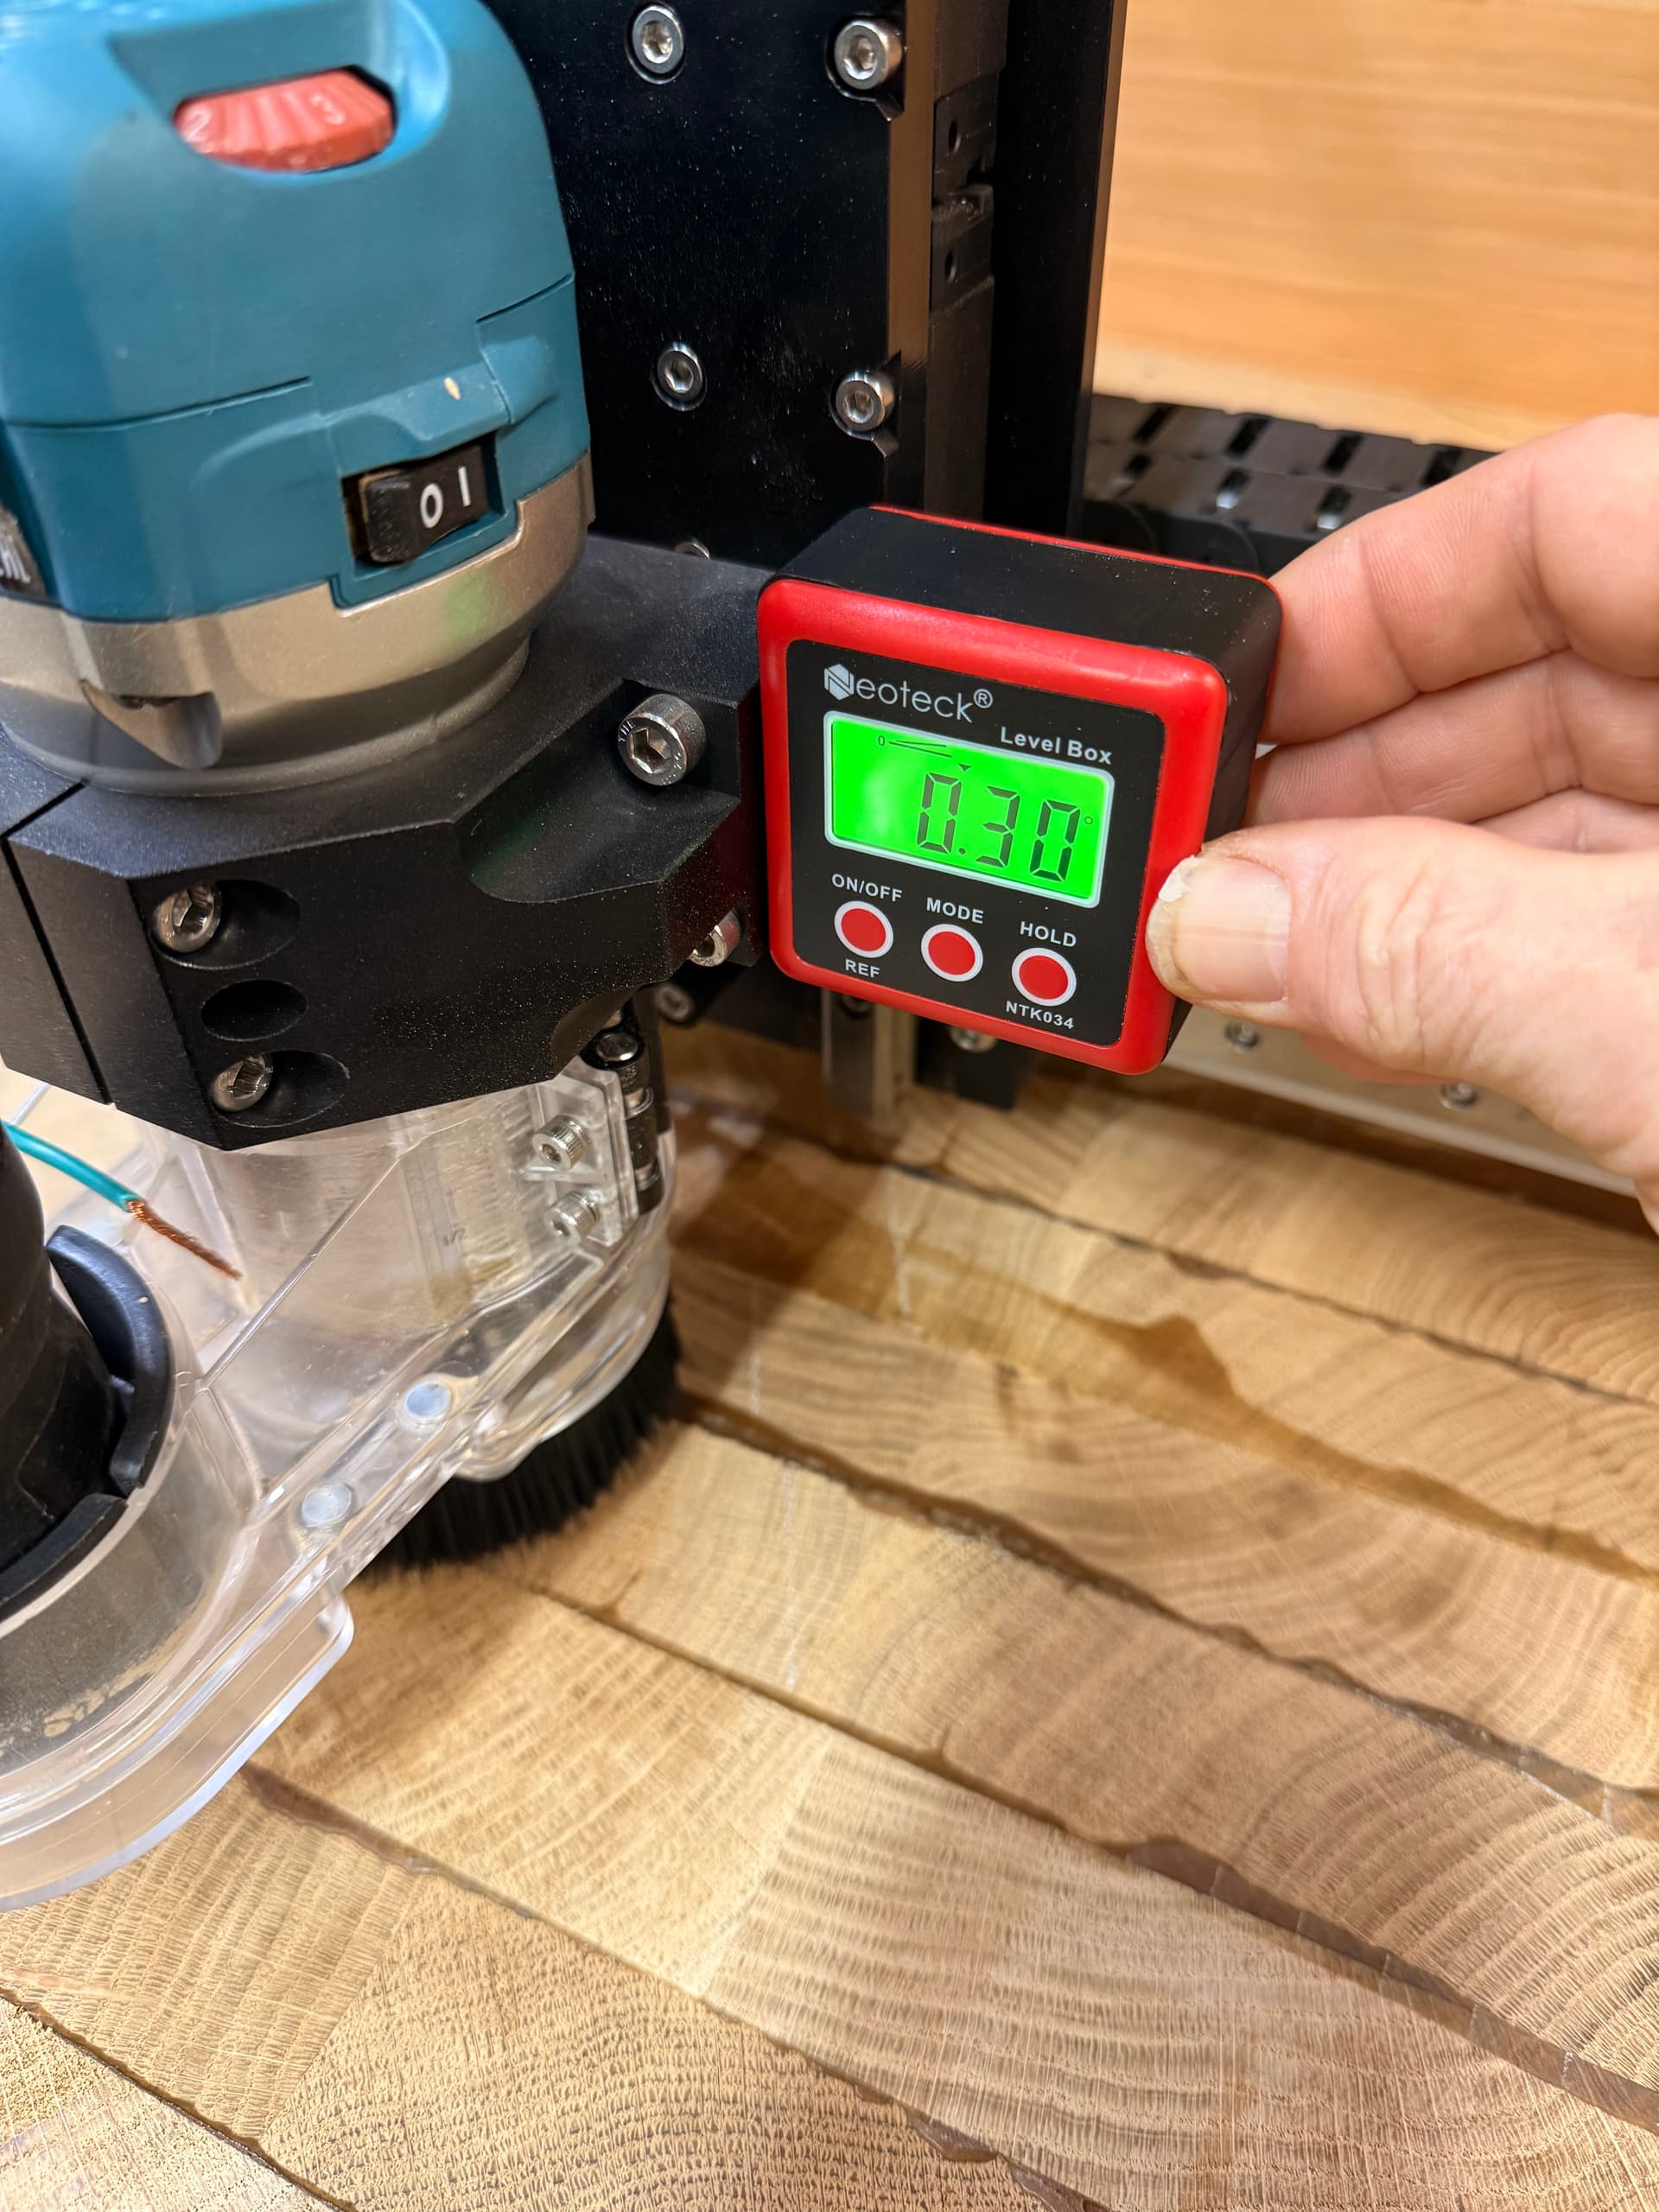
Did you zero the gage off the Z mount first? Normally to check the delta between surfaces you zero off one then check the other.
0.30 - 0.18 = 0.12 deg.
Hard to tell from your first photo how much trimming you need. Run a pass and then place a bright light on the surface and look for the shadow line if needed. If you surfaced the entire board you should see consistent shadow lines.
The larger the cutter diameter, the more pronounced the mis-alignment shows on the surface.
EDIT: Seems you found the culprit. A lesson for all of us for our maintenance checks
Whilst my left-right travel is super square, I now find that the back-front travel is probably 0.1 degree out. I particularly notice that the wood is warm behind the bit in the back-front direction but not left-right. Is there a special way to make a micro-adjustment in this direction i.e. slightly push the top of the router back the tiniest amount.
I have not had a reason to tram my S5 Pro as of yet. There are several threads on the forum in which it is described in great detail. The use of shims made out of tin foil for example will provide smaller adjustments and can be added/subtracted as needed. I have also used aluminum can material for shims too.
While it’s desired to be perfectly square on the tram, if it’s a tad off its easier to remove the indication by sanding which most folks do as part of their process already. From some of the reports it can be a deep dive down the rabbit hole to obtain 0.0 deg square…… Do you really need that for wood? Especially knowing wood moves with moisture.
Yes sanding is going to work to hide the lines, but I just wanted to try and get rid off the very small step because hand sanding such a large piece of end-grain is a proper bore. Noted about the silver paper.
When I trammed my machine I needed a very slight adjustment in the front/back tilt (aka “nod”). I used very thin shim stock behind the top part of the mount to achieve this with great results. Almost anything can be used for the shim, for example some have used the appropriate size feeler gauge blade.
Interesting use of a digital angle gauge. You’re assuming, of course, that the router mount’s opening is parallel to the outside edges. Which, as you found it, is the case although I suspect that’s not one of the tolerance’d fit specification.
However, for checking that two angles close to vertical or horizontal are the same, they’re well suited. As in, repeatable measurements are usually repeatable, but the actual angle specified may not be just what the display shows.
Anyway, thanks for posting, as I hadn’t thought to try measuring that way.