So, I am waiting for my Pro 5 4x4, and prepping for its home in my shop. However, I do plan to be moving (possibly having to store for a few months). With this in mind, I was hesitant to build a full table right now at 60+" square. Hard to get into a truckbed to move without fully dissasembling.
Looked at the Open Builds 64x64, but still requires a full disassembly for moving. Plus with shipping and top and shelf material Im at about $1k+ and a wait time…
Other option I thought of was these 24x72 work benches that have heavy duty casters and drawers. Figured I could do 2 together with a 12-16" gap to get 60-64". Any reason it wouldnt be a good idea to do so? Plan on using mdf top with threaded inserts and bolts to fasten (2 layers for rigidity across the gap and tie the 2 benches enough?).
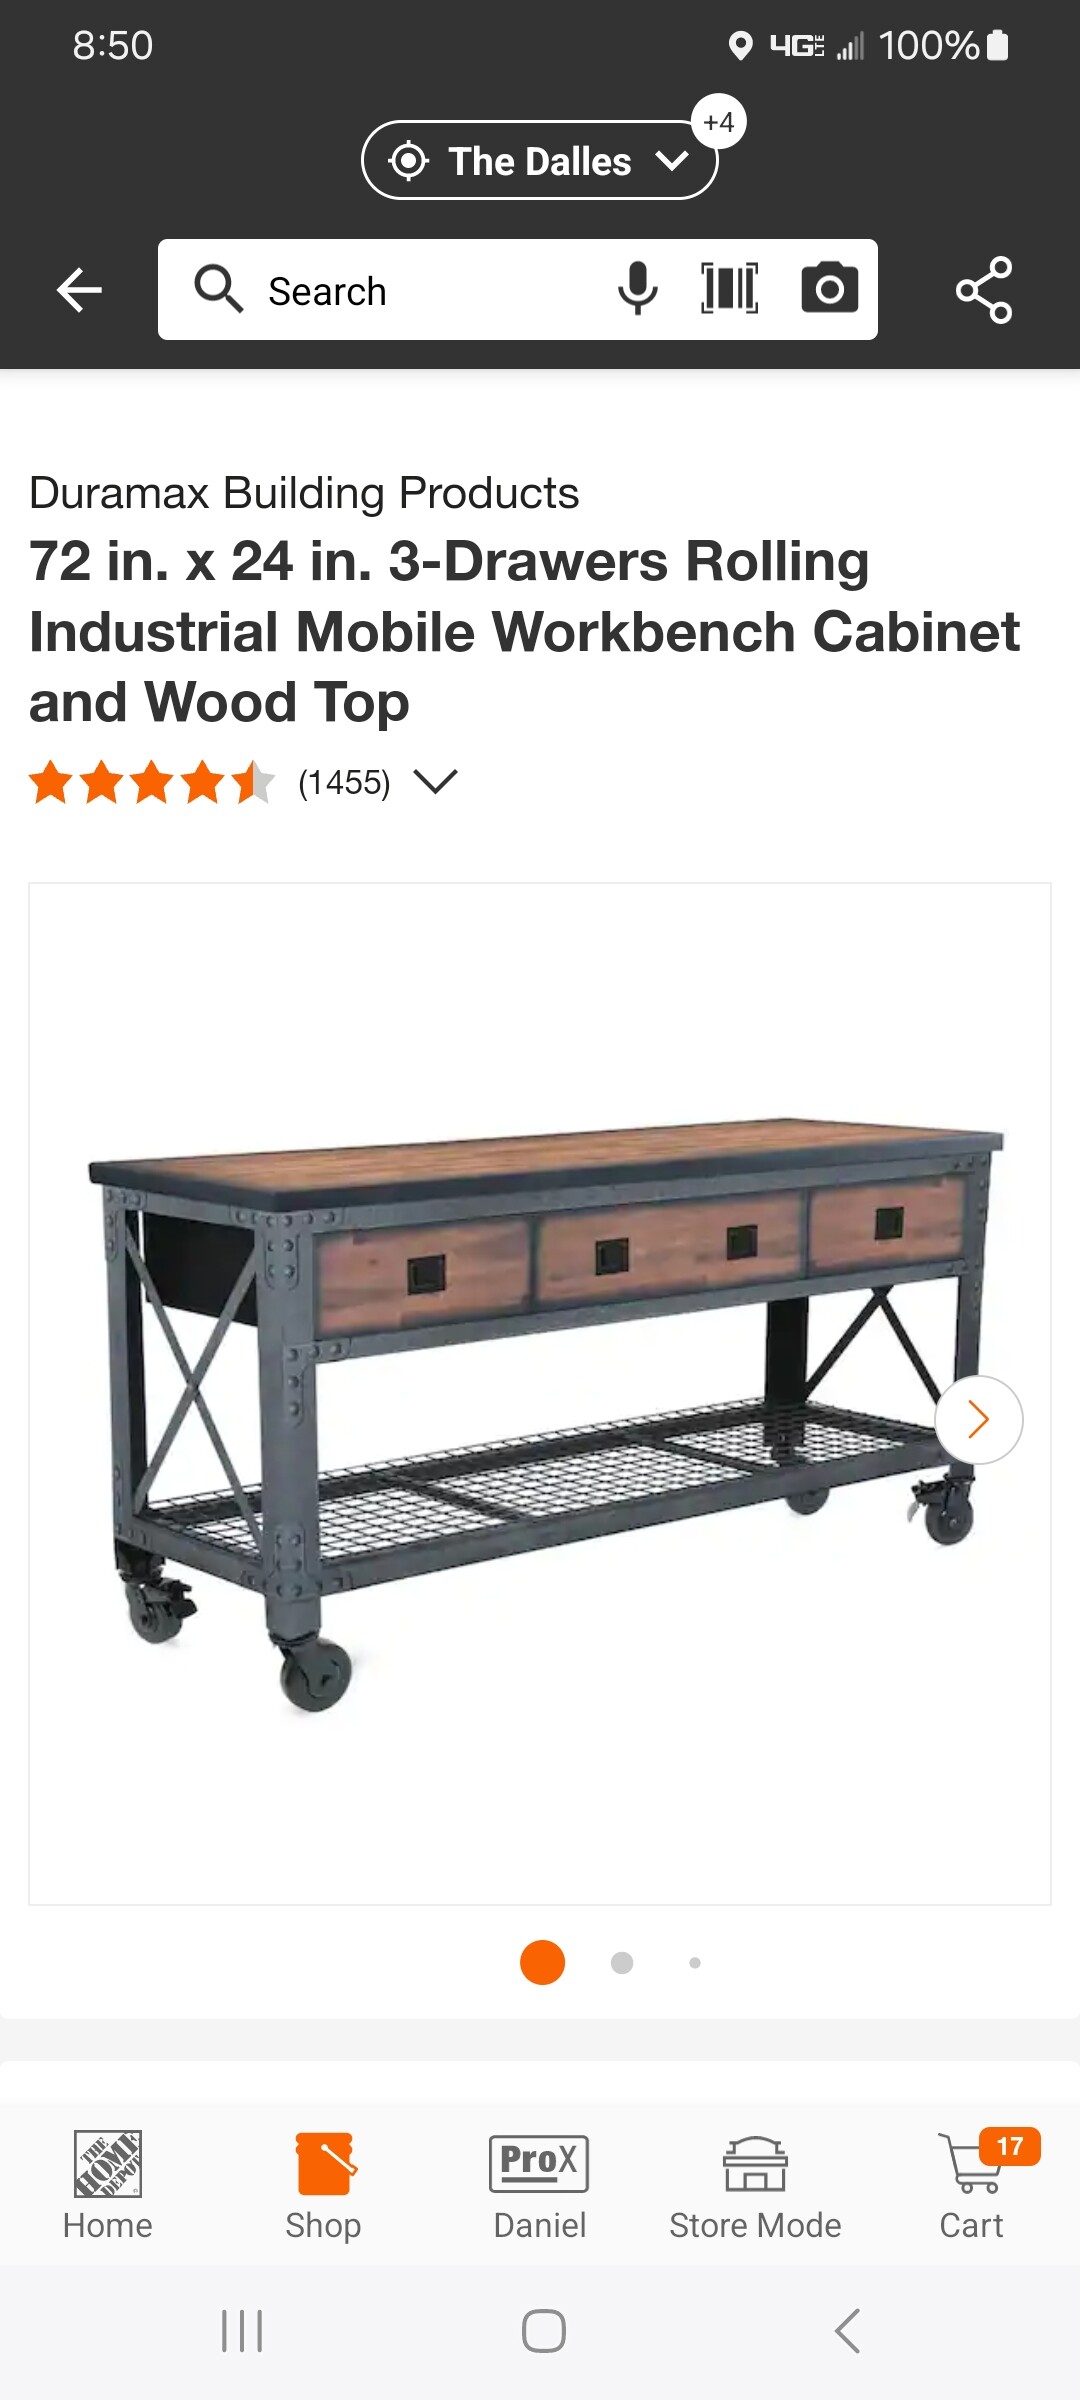
We’ve had a number of folks do this sort of thing — bridging the gap w/ a sheet of plywood, or better, a constructed torsion box will help a lot in terms of rigidity (It will help to also reinforce the bottom shelf for when rolling it), and I like to put a sheet of foam in-between the sheet goods and the machine (helps keep the sheet from working as a sounding board).
Good to know, what kind and thickness of foam would you recommend?
I usually use the “Anti-fatigue” “Puzzle Mats” from Harbor Freight — I believe they are not quite 3/4" thick — you don’t need much, just enough to take up any irregularity and dampen the vibrations. I used much thicker foam 1.25" or so) under my SO Pro and didn’t notice that it made much difference.
I asked that question to support. They said not to bolt the machines to a wood table. That temps and humidity could twist the machine. Better to let them just set on the top. There is enough weight they won’t go anywhere. I do like the idea of some foam to reduce vibrations.
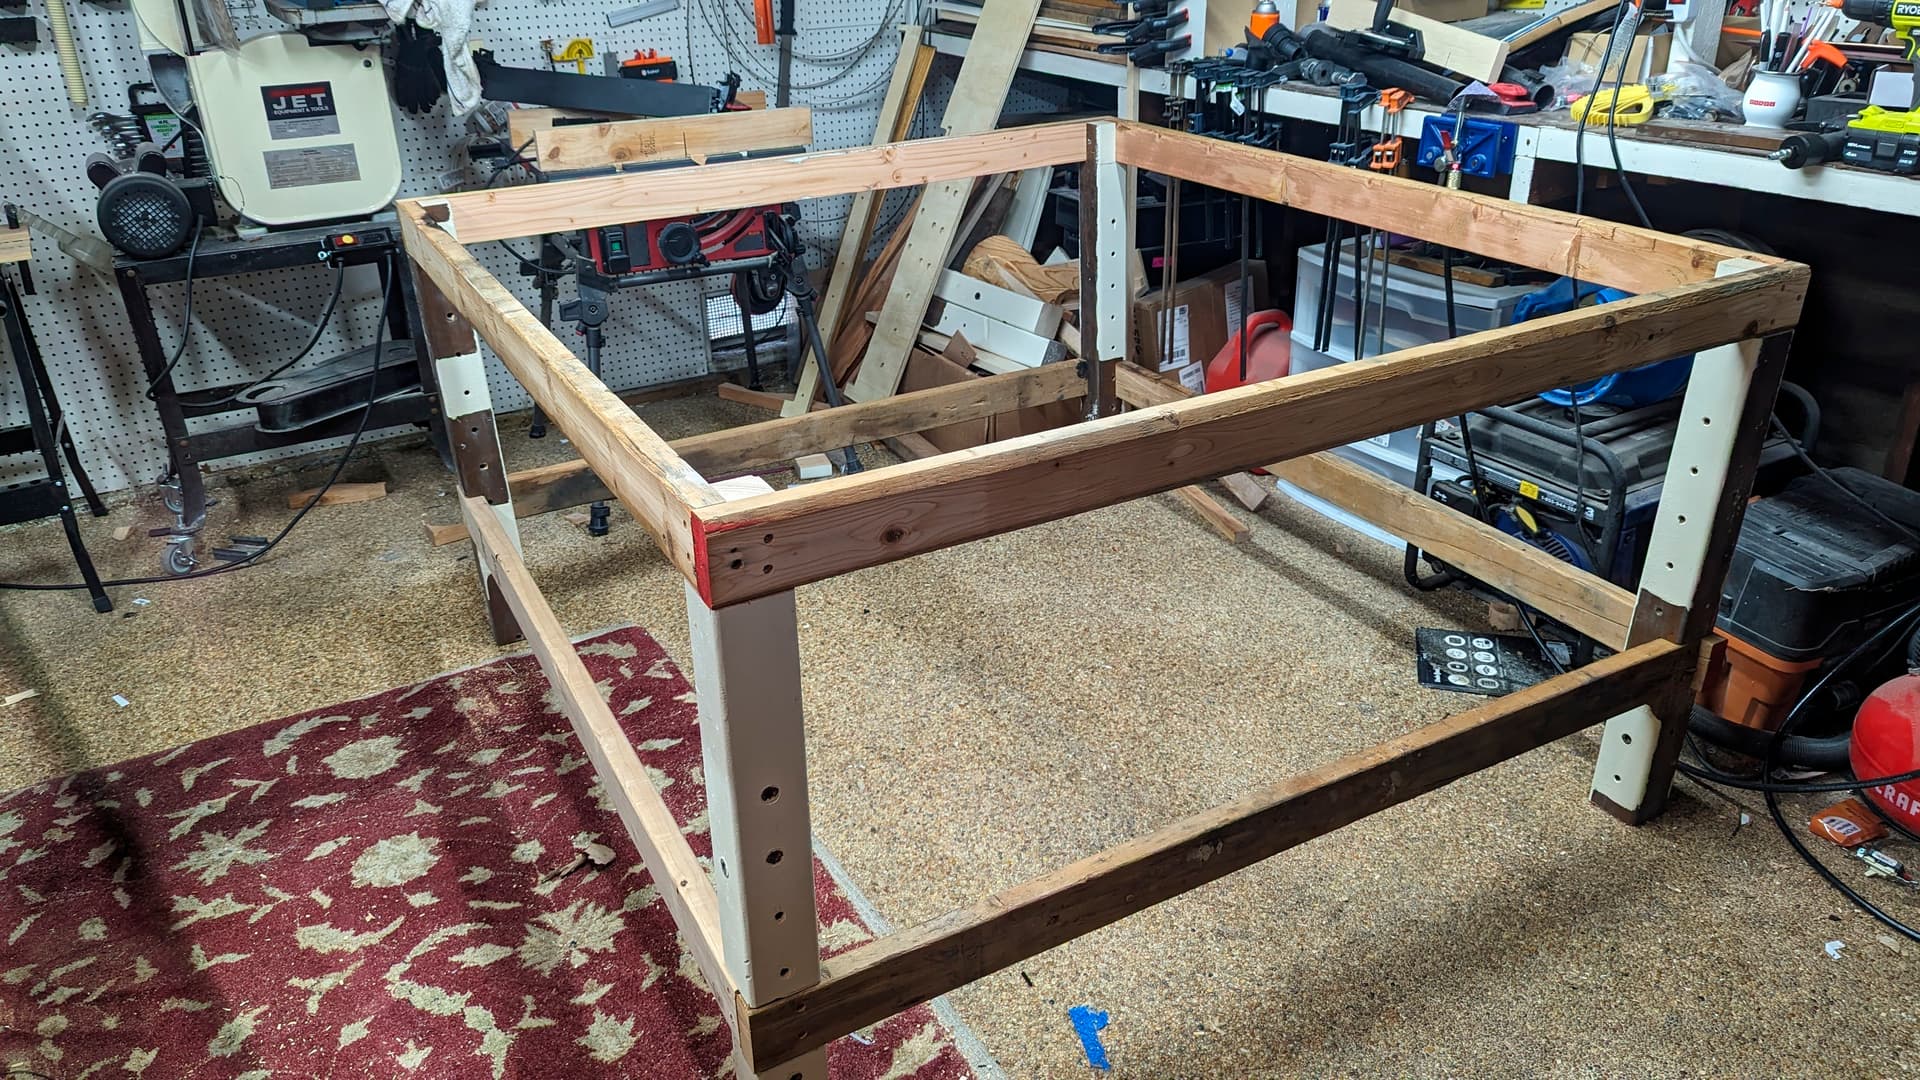
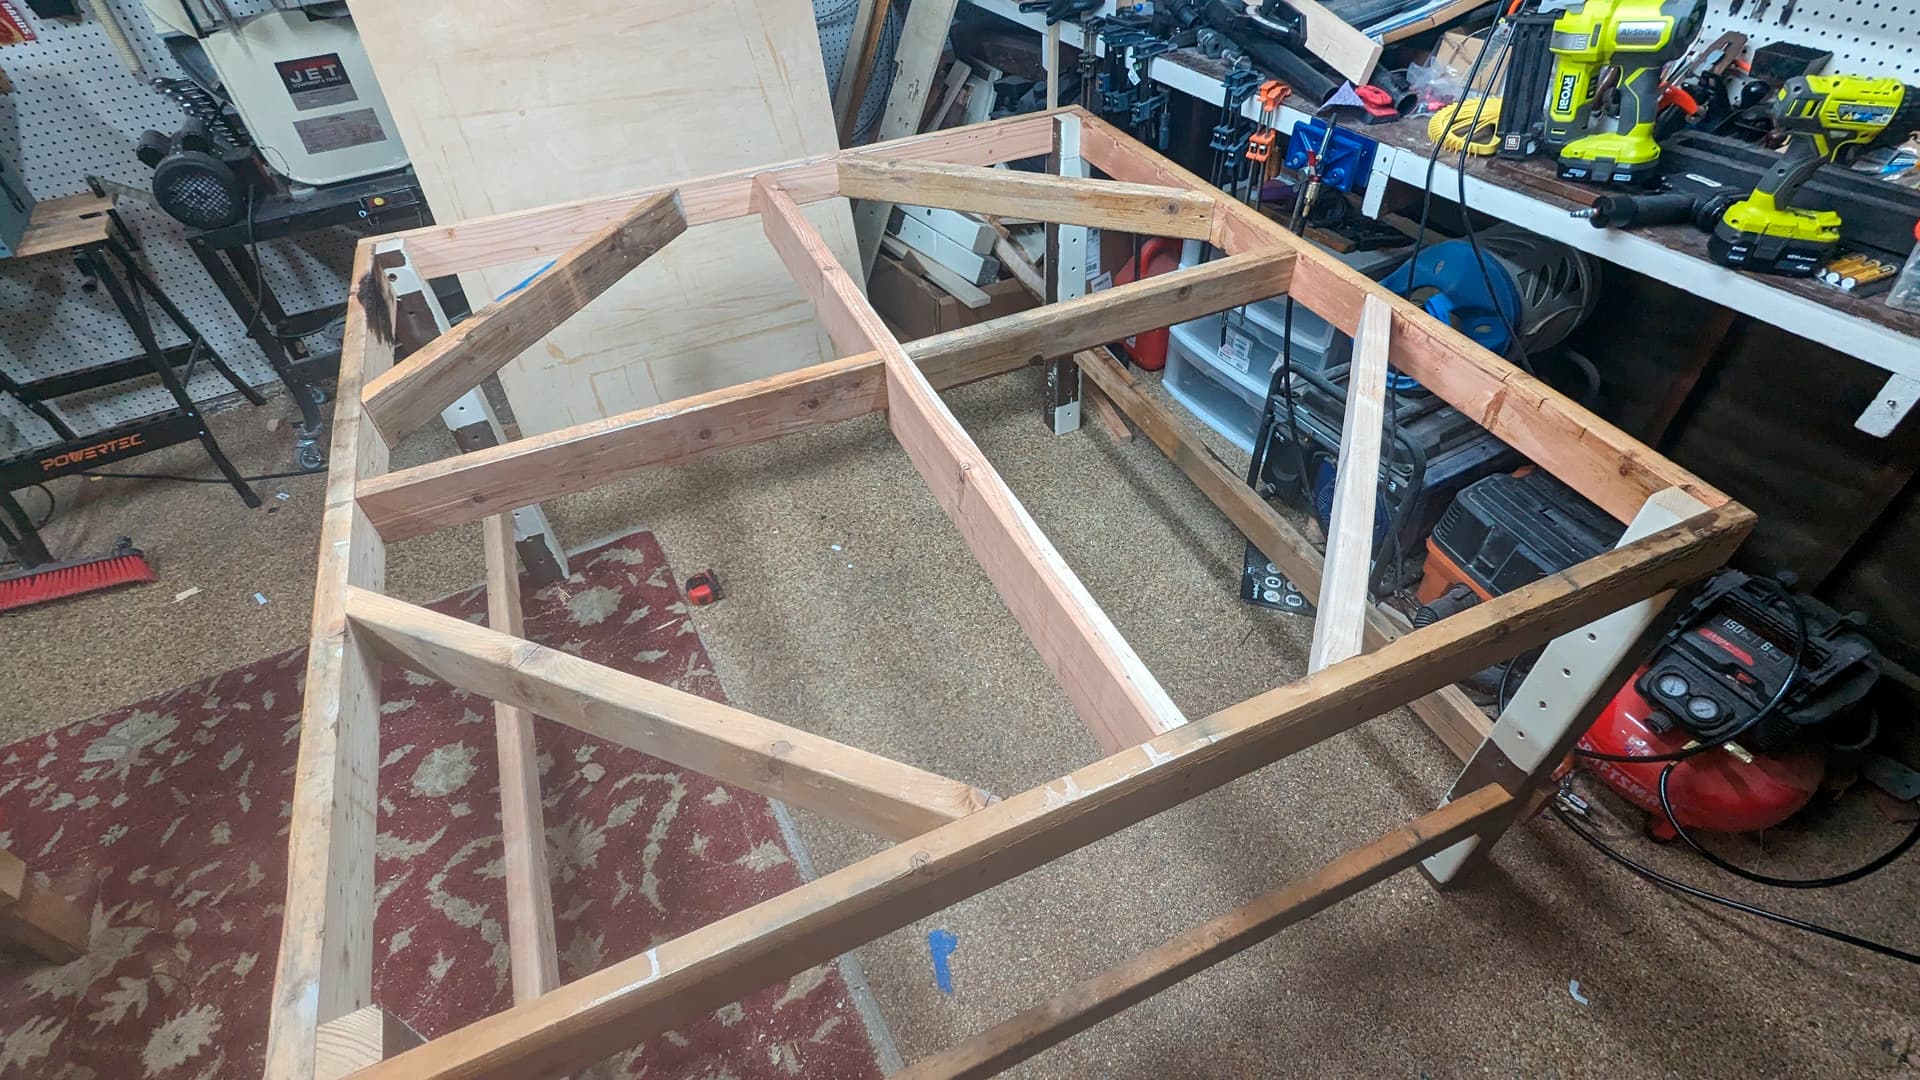
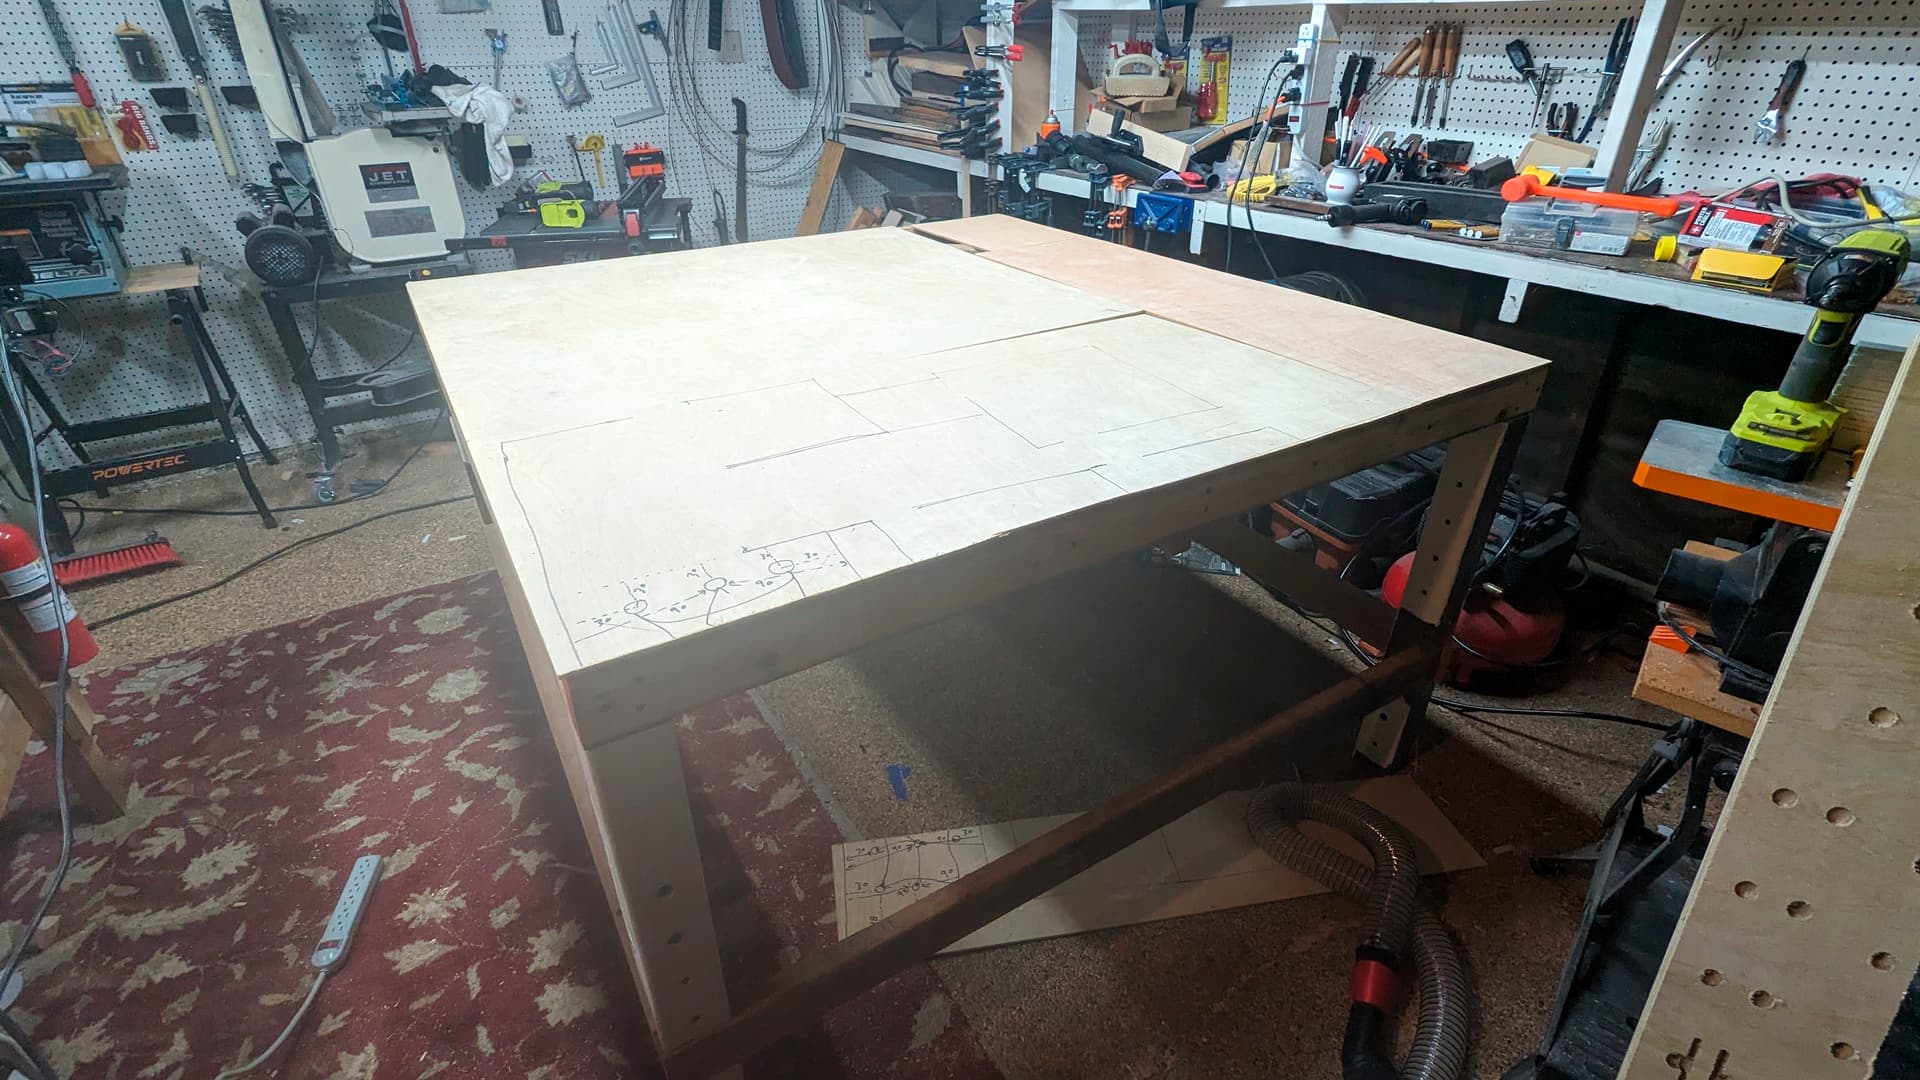
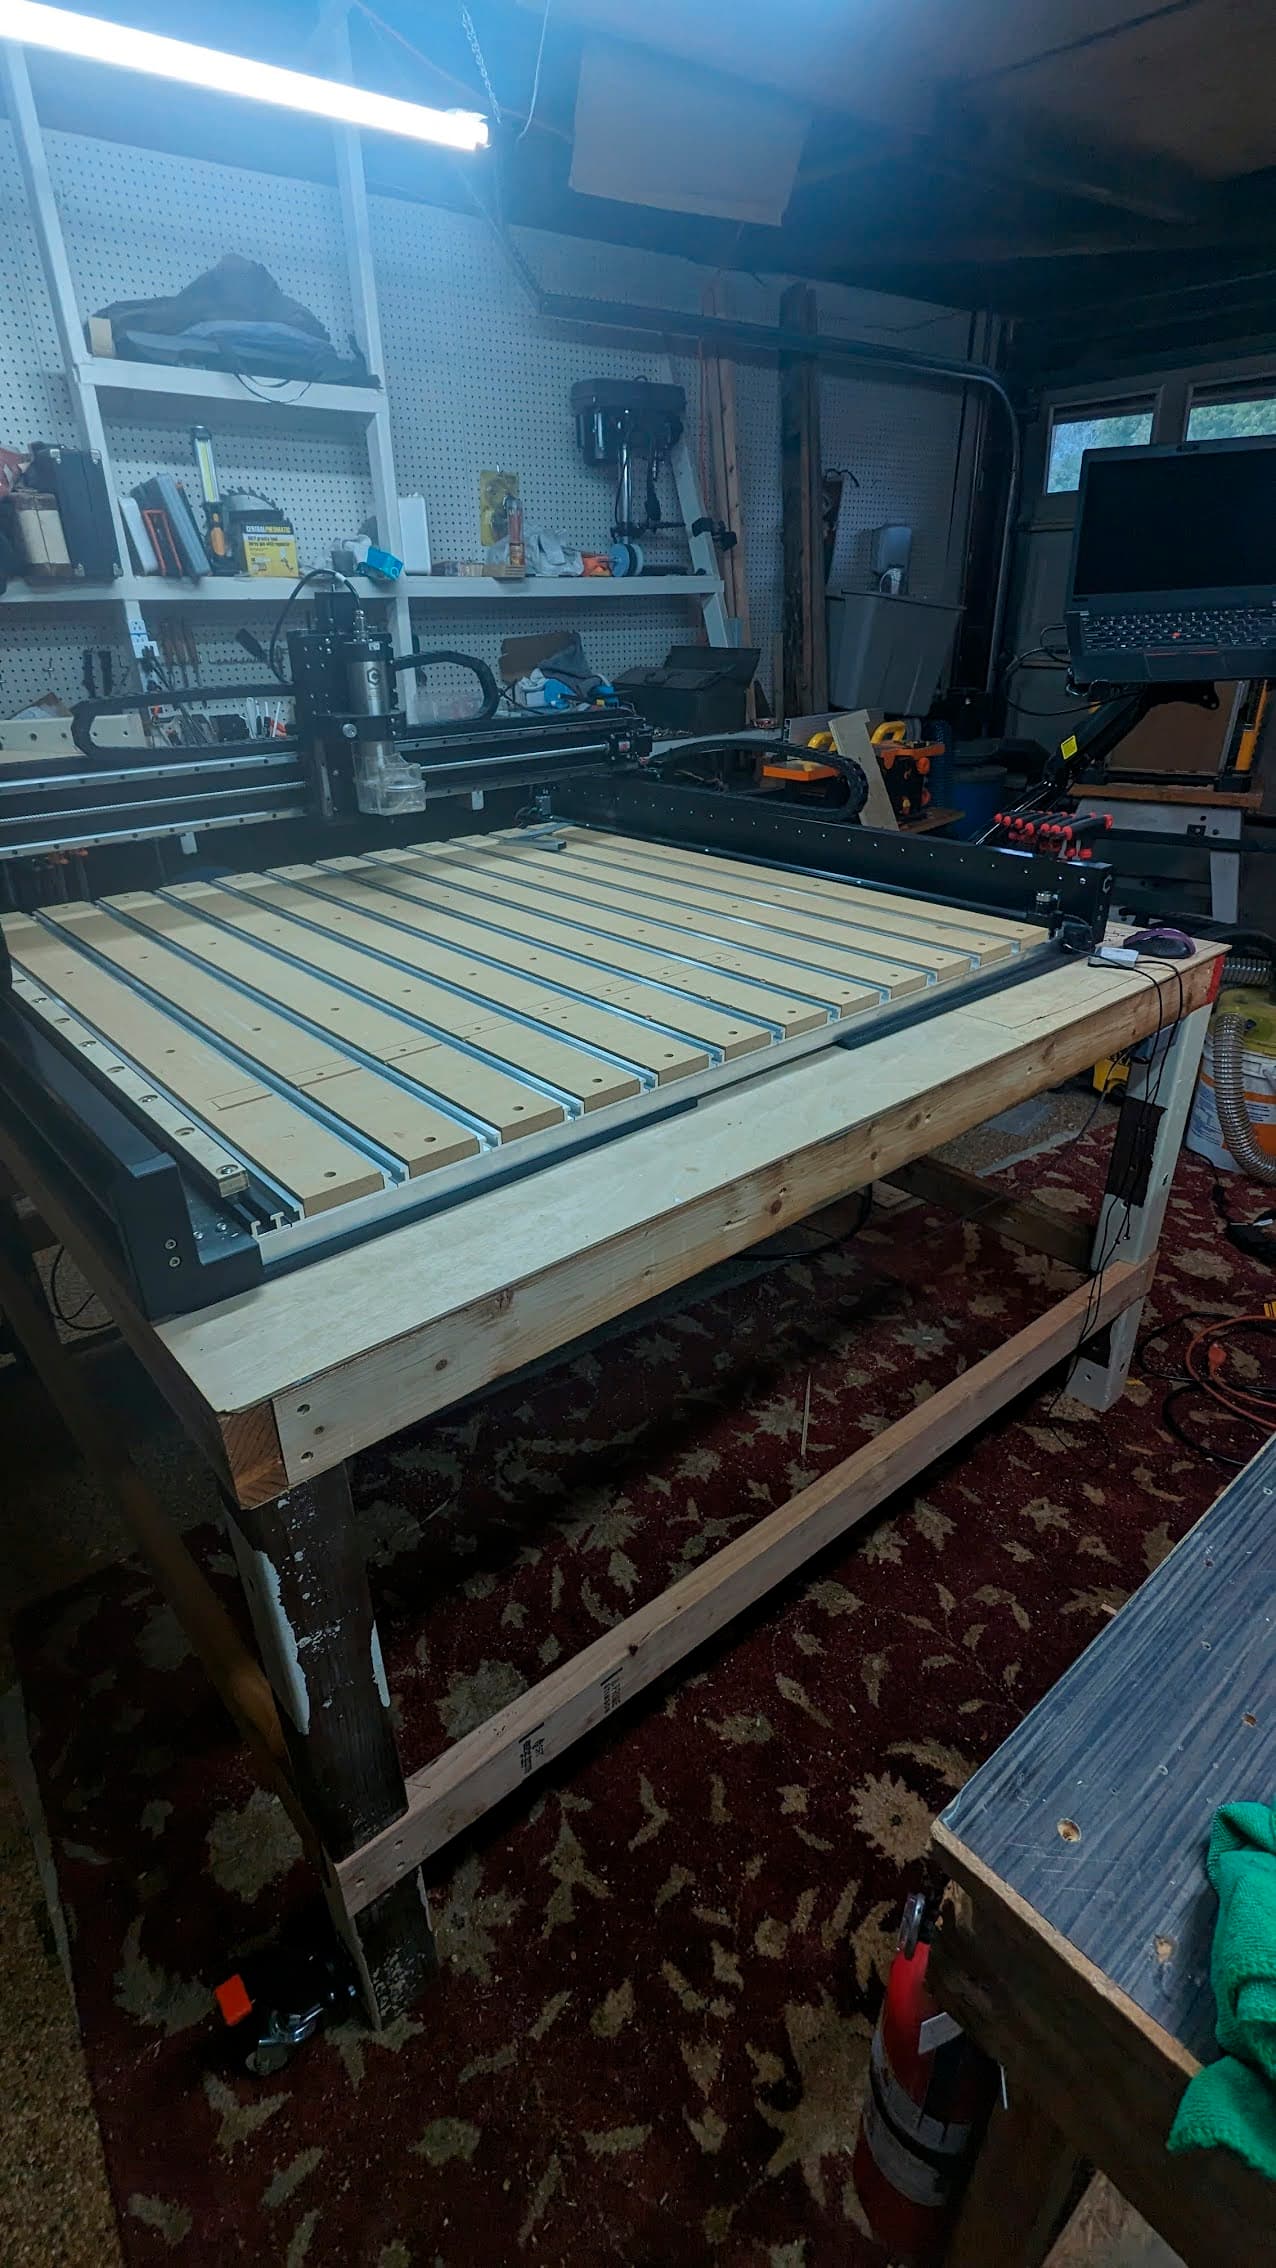
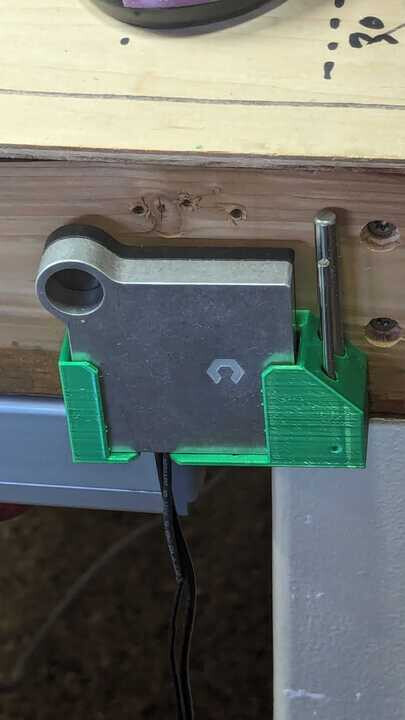
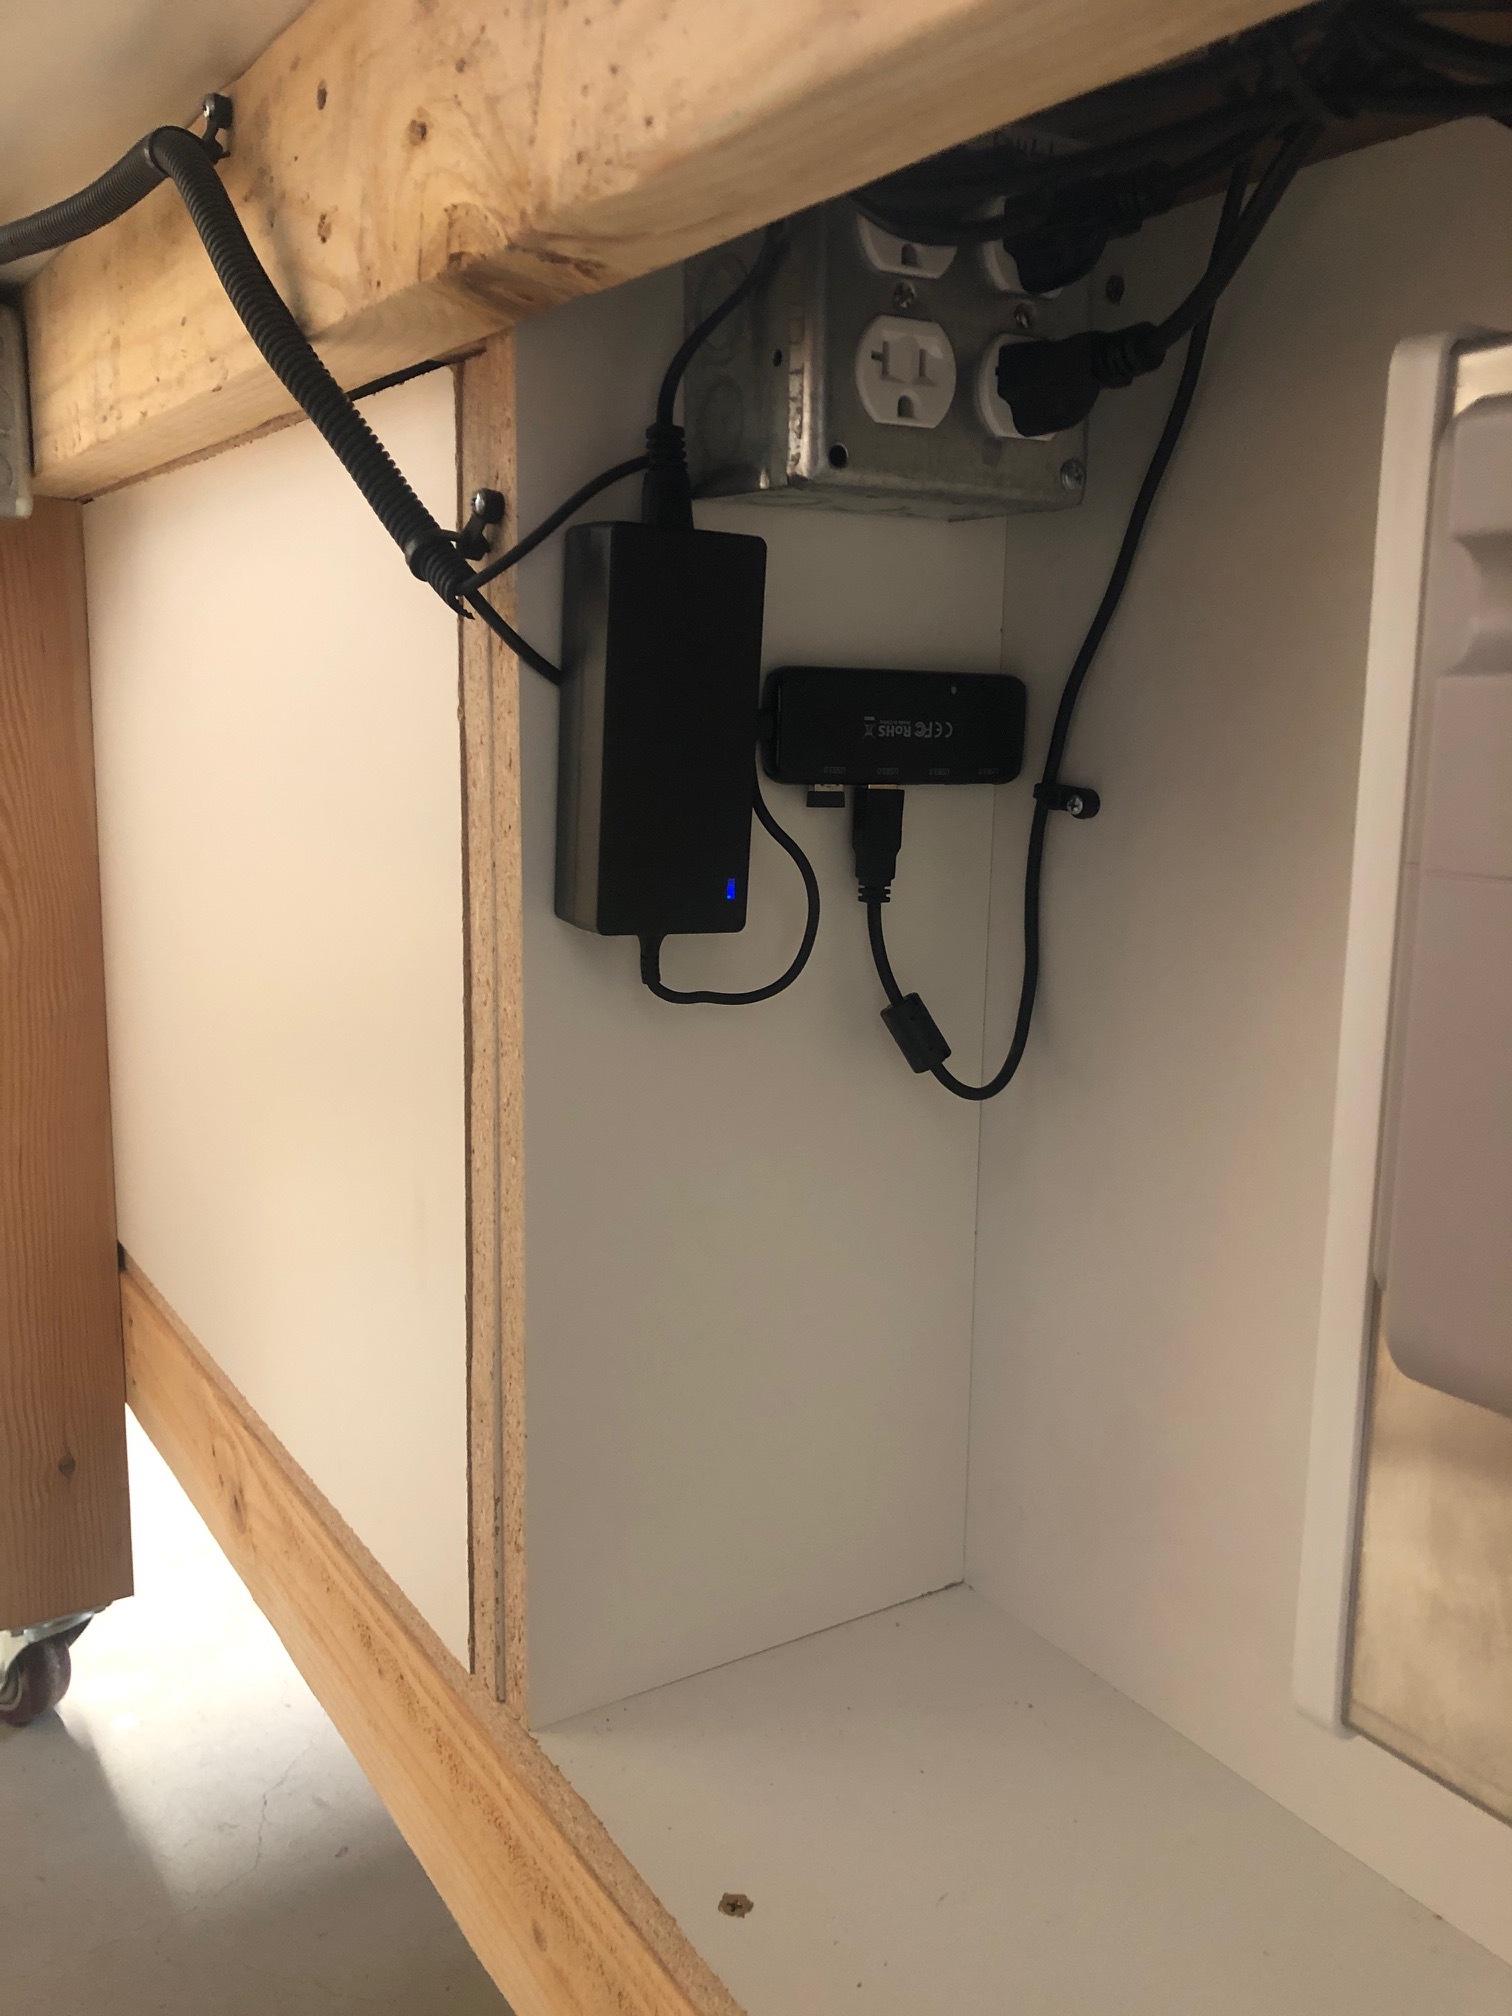
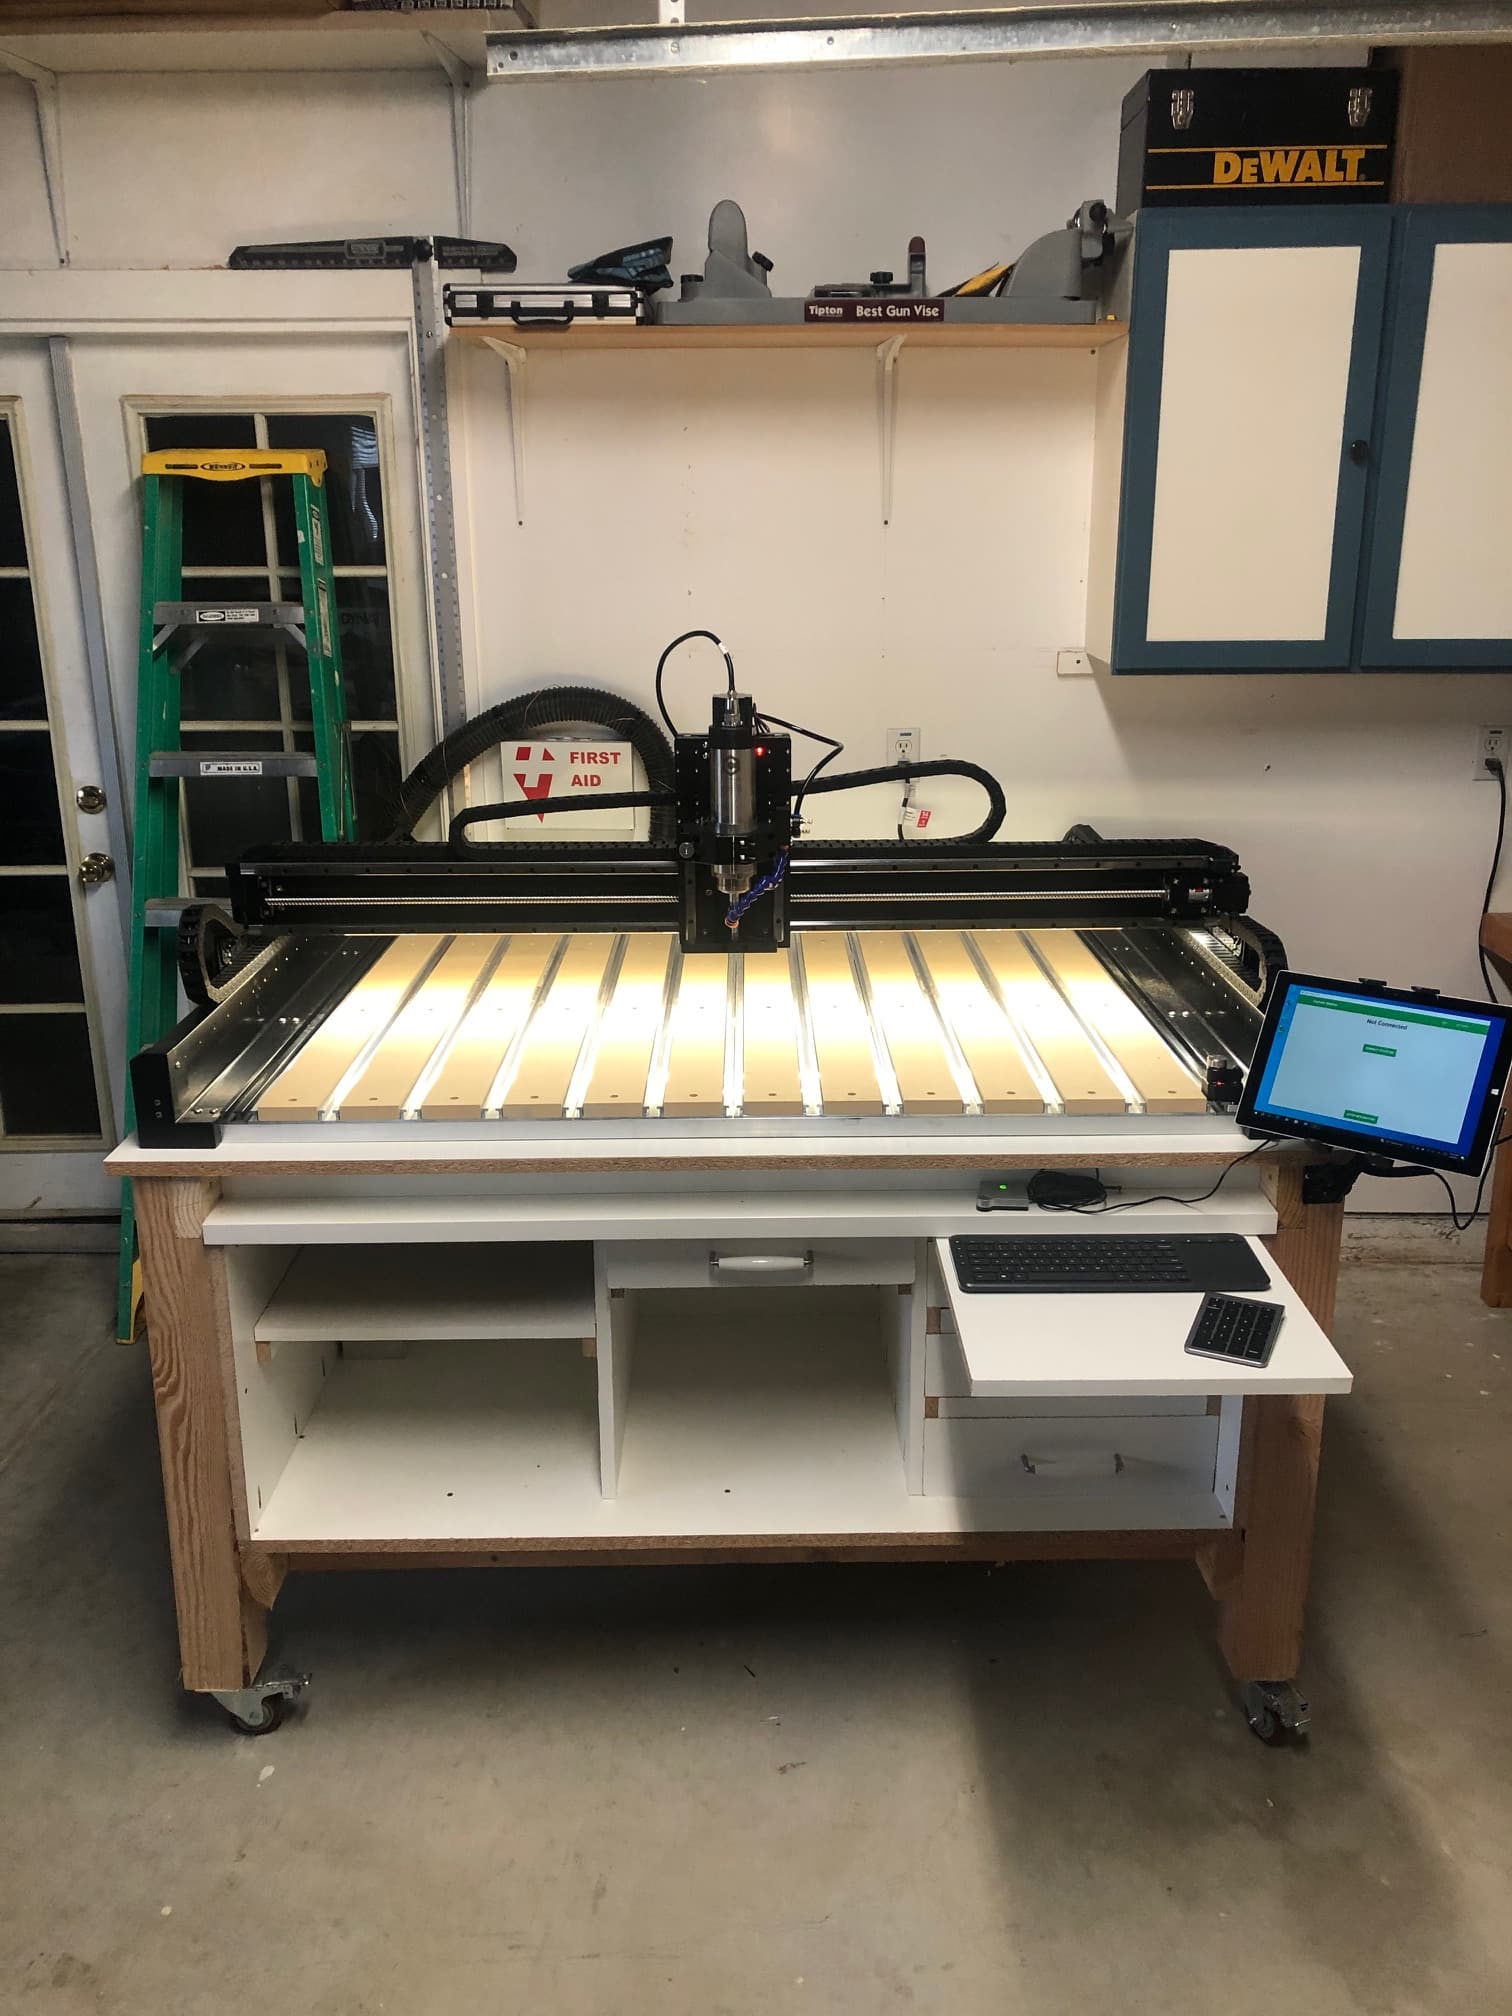
Shop is a mess, but I’m rearranging around the CNC, so it’s all gonna get organized this weekend. It had been living on my main workbench, but I wanted that space back, so I built a table from a bunch of the lumber I had lying around. It ain’t pretty, but it’s super sturdy and it rolls around so I can move it as needed. The top is skin with 1/8" ply because it’s what I had on hand, hence all the support under the top. Controller and VFD are mounted on the rear legs to the inside, and there’s a power strip in the center of the back rail so the whole table has one “tail” for power. Printed the caddy for my BitZero as well.
Anti Fatigue mats from Harbor Freight will help take up any discrepancies that might occur as well as help quiet the machine movements.
Good Job
Yep, forgot to mention it, but have those under each corner.
Now I see it. Talk before engaging brain is a common habit of mine.
My Z-cuts were not going evenly across the workpieces. Some places plunge depths were perfect and some were either too deep or too shallow.
I chalked this up to my table not being level since my basement floor is terrible. I decided to take my machine apart. I then built a level platform that my whole table sits on. So my starting point for the machine is better than before.
I need to resurface my spoil boards so they are level with the new set up. I have purchased the surfacing cutter off the carbide3D store. From some of the posts I’ve read in other threads it seems like the working area that can be surfaced is smaller than the total area of the spoil boards. It was on older posts with the other shapeoko machines. So I wasn’t sure if it applies to the SP5.
Does anyone have any recommendations on how to do it properly?
See:
If you plan to eventually use Fusion360 or some other CAM, facing the spoilboard seems like a good starter activity and makes more sense than trying to design a pocket in Carbide Create to accomplish the same. I followed the facing tutorial here which requires the additional activities of setting up a machine and tooling in F360 as well.

You should be able to jog around the 4 corners of your machine with the facing bit installed and determine if it will give you full coverage of the spoilboards - on a S5P 4x4 I was able to do it but it’s snug in X.
Happy to share the Fusion360 machine, tool, and facing .nc file for the 4x4 if you like. I can’t promise they’re perfect as I’m learning as I go as well.
Also happy to report that my janky table only required 0.8mm of face cutting to take out all of the high/low spots ![]()
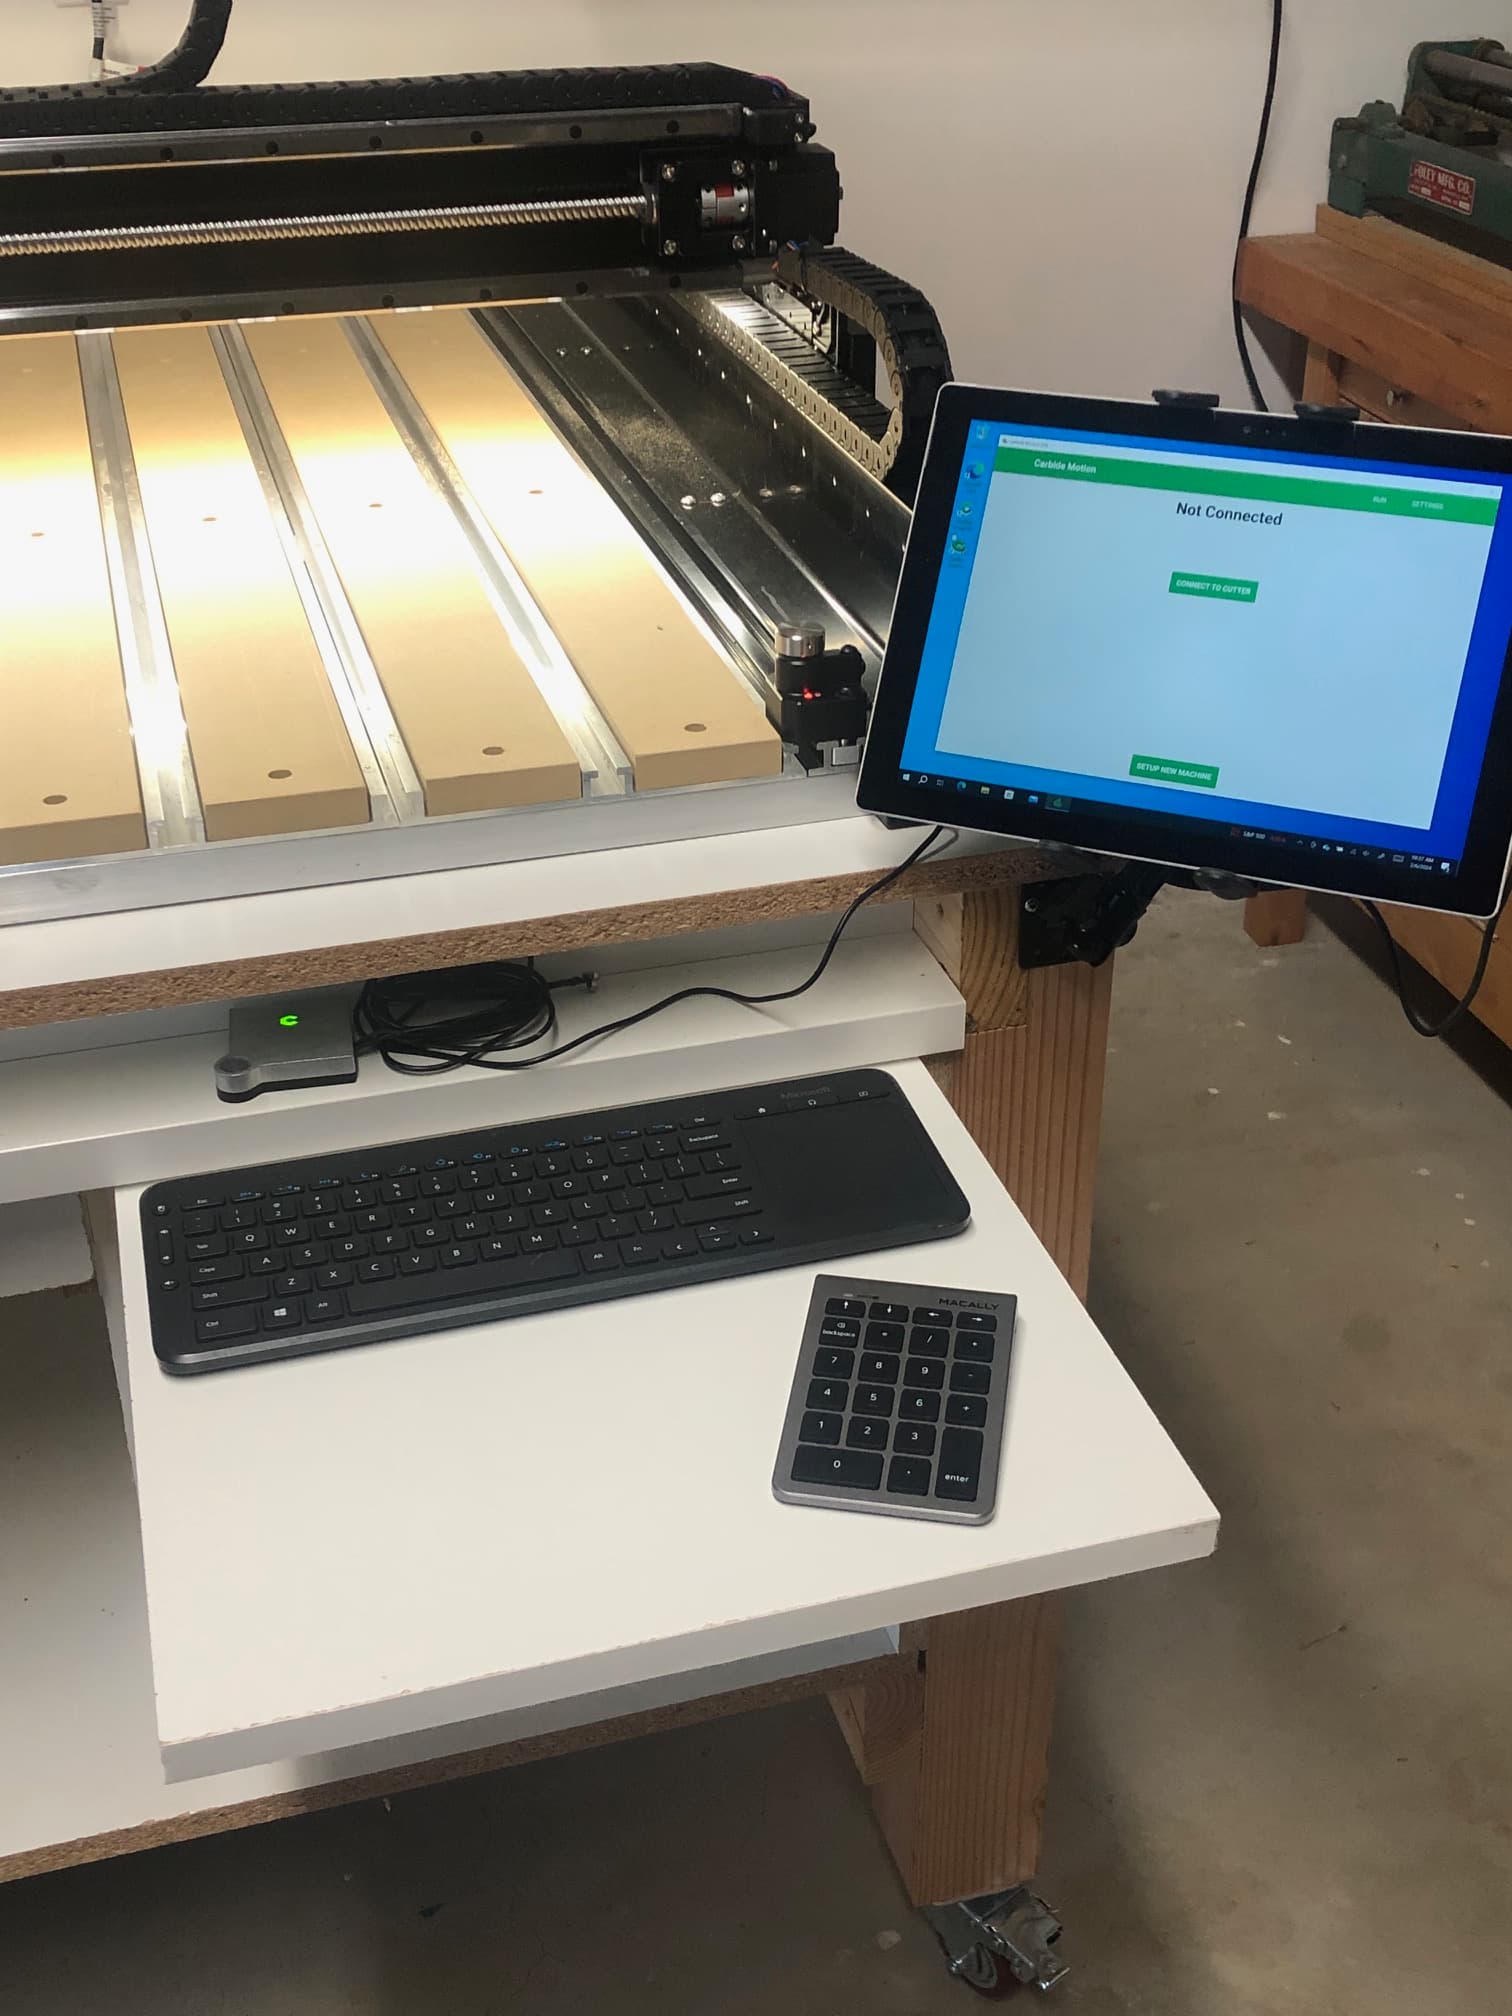
Built this table a couple weeks ago and installed my machine yesterday. Table size is 62 wide and 61 deep.
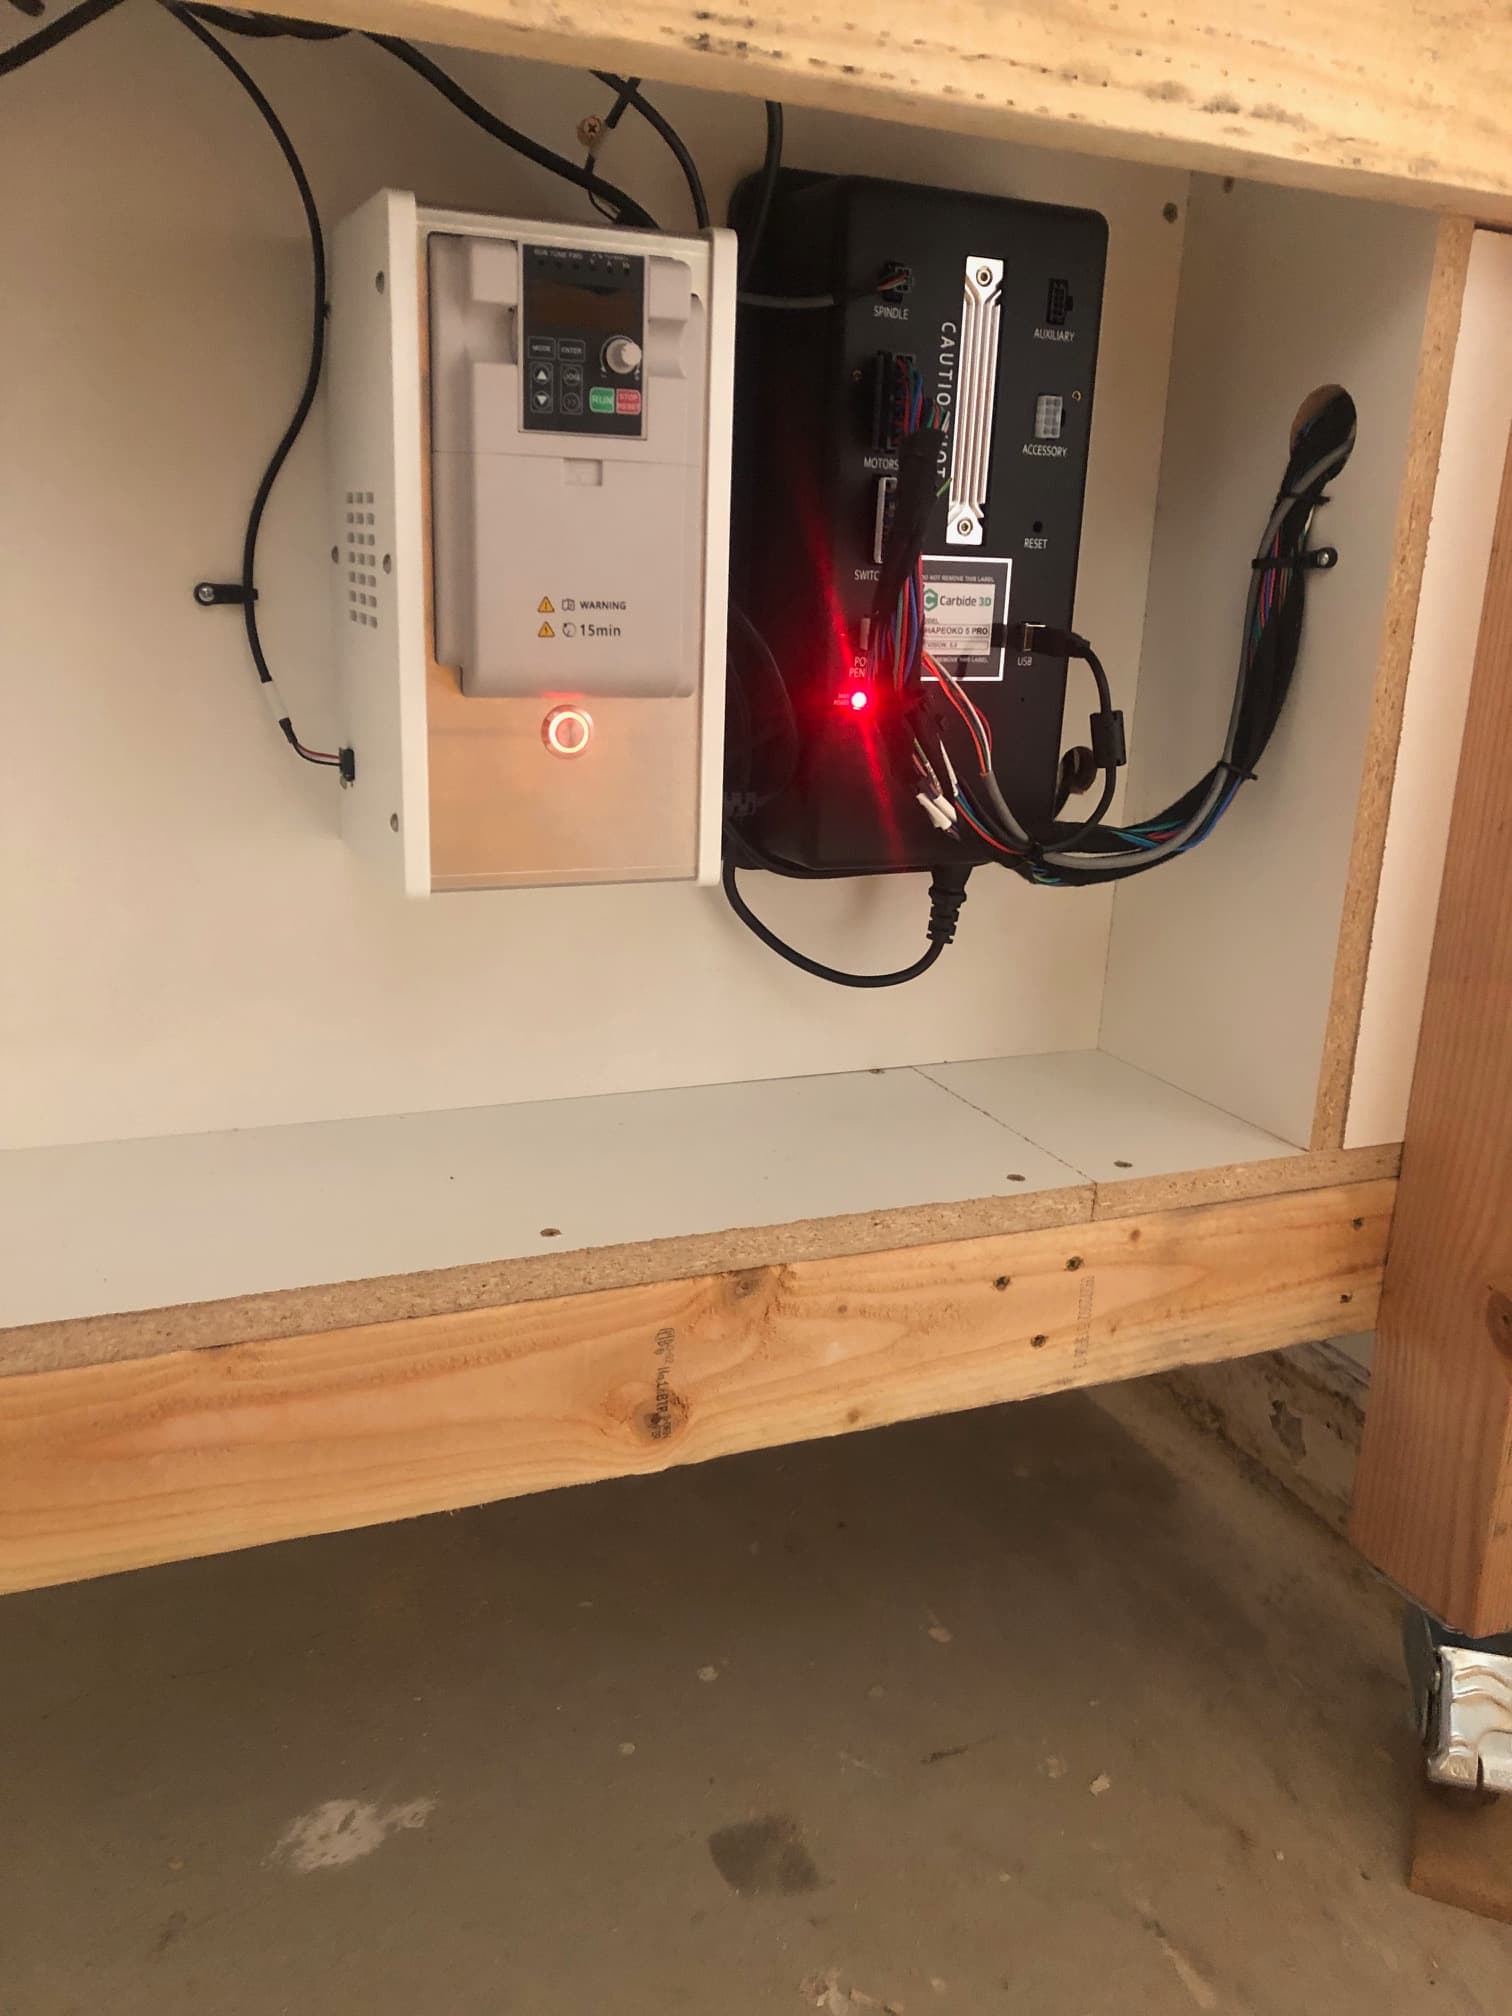
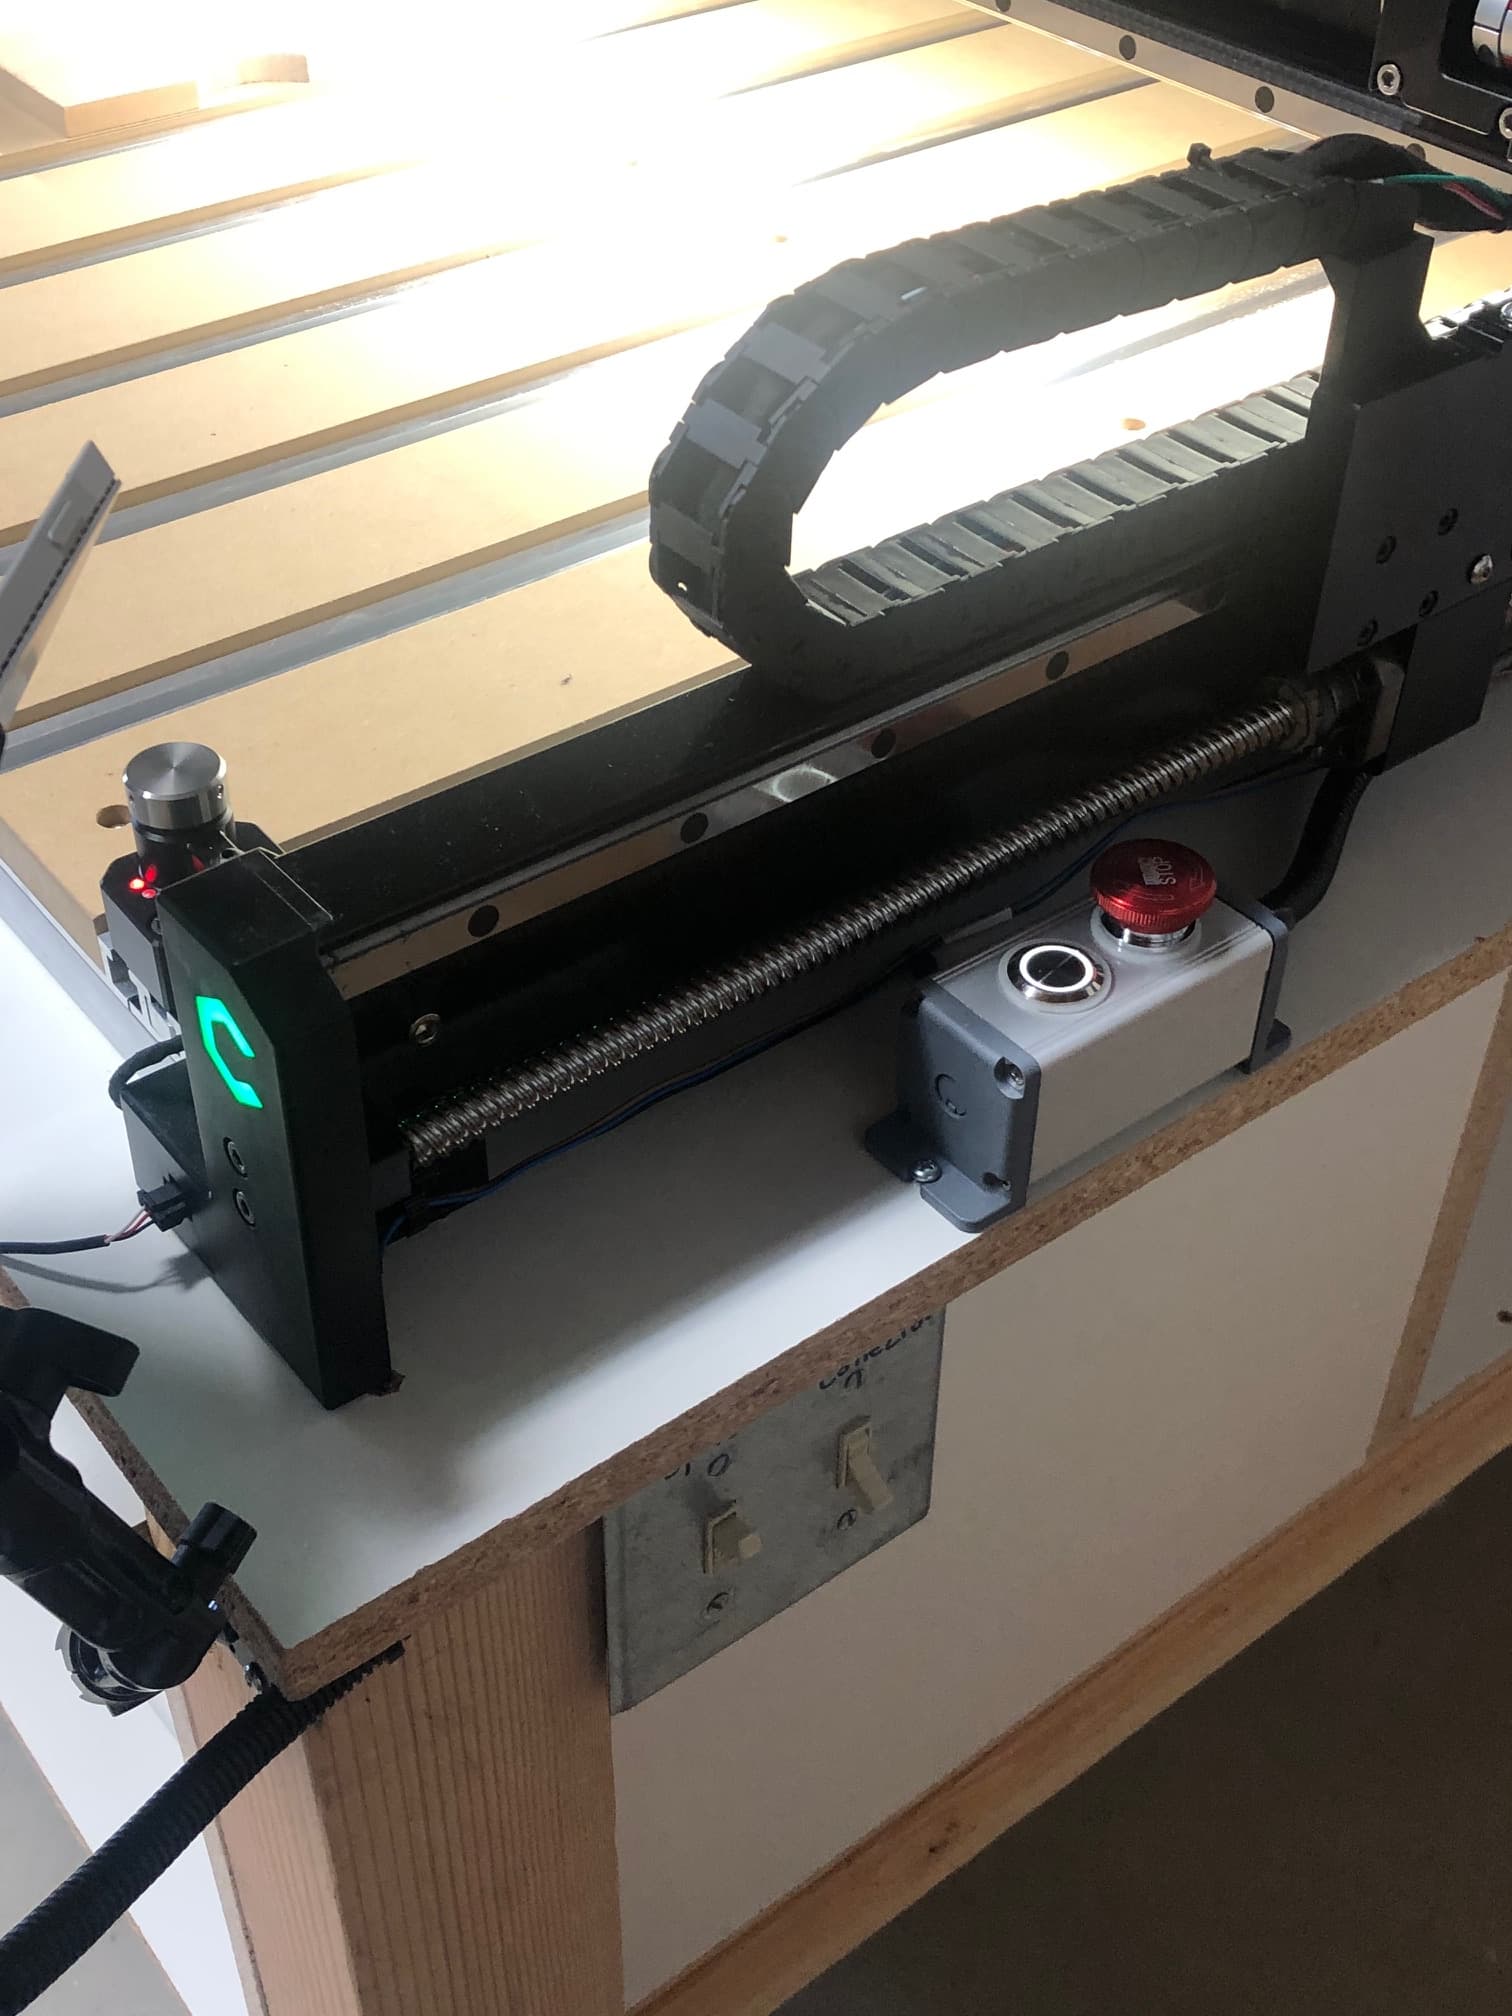
Nice. Like how you have the wires tucked up.
Question for you. The “E” stop you have mounted, Would it be better in a more accessible location? I don’t have one, just wondering.
For one example, here’s how I have my control station arranged:
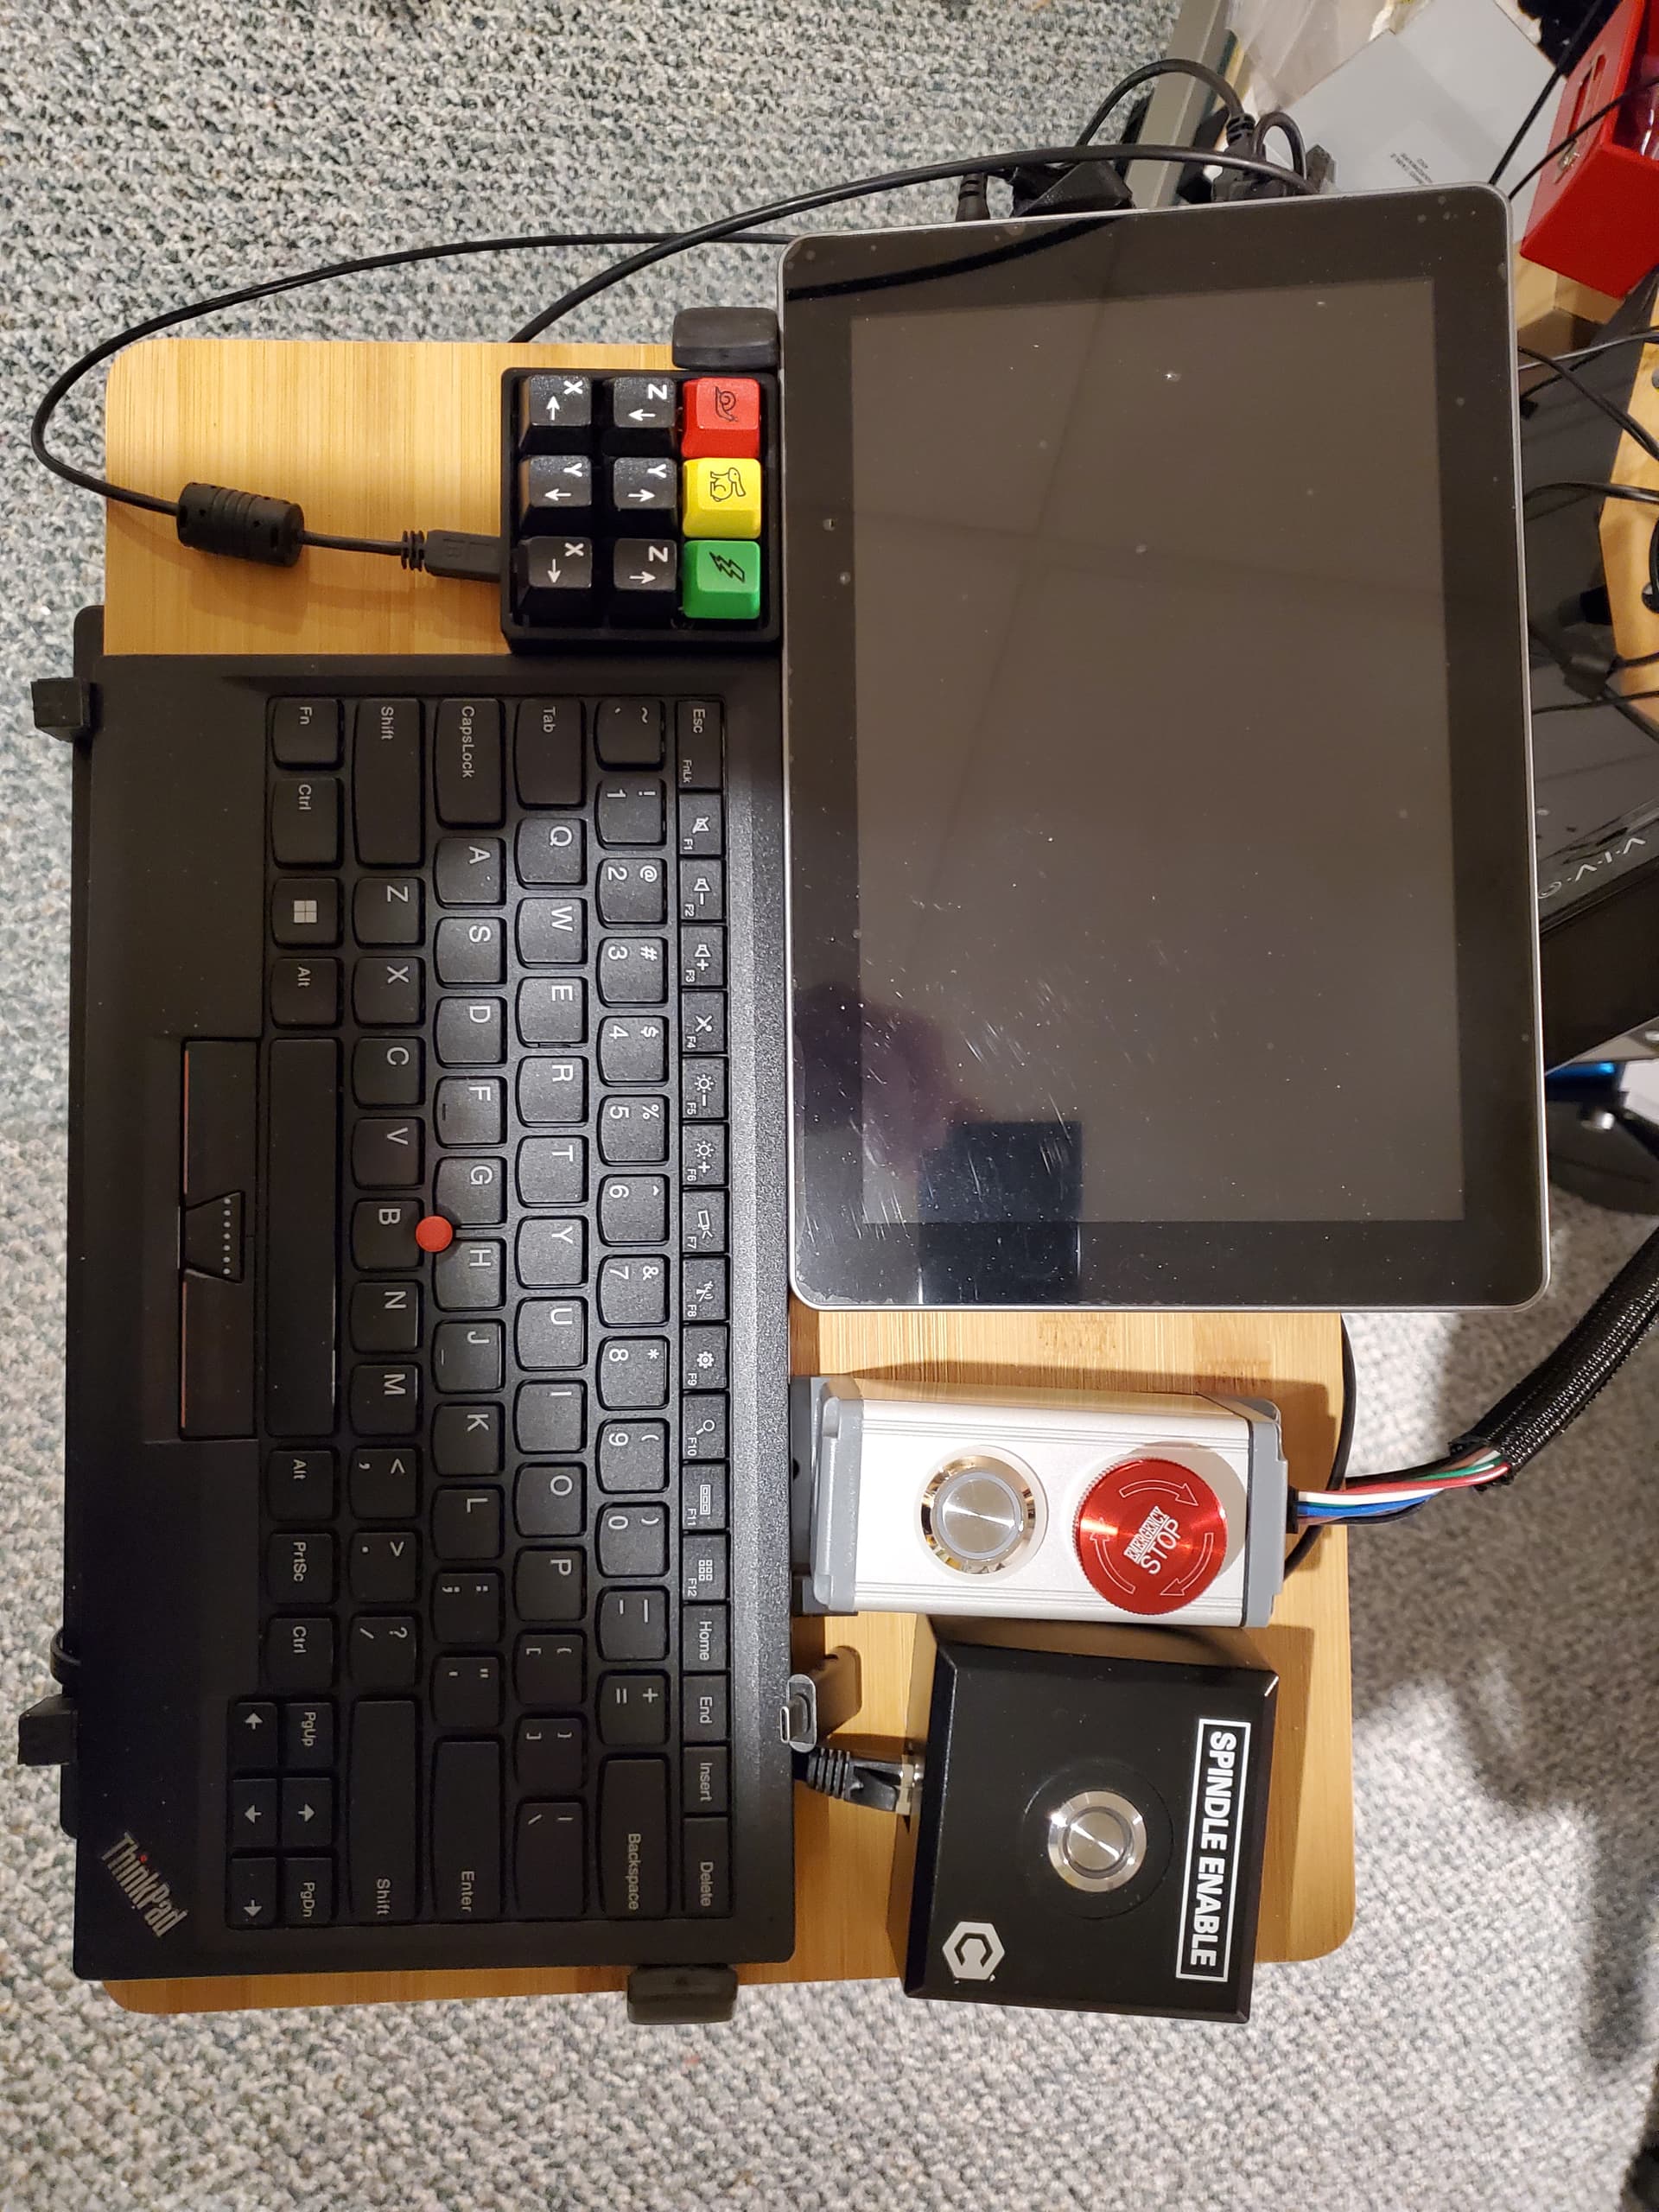
(it’s on a swing arm attached to the table the machine is on)
I was gonna say it looked like a TV Tray table ![]()
This topic was automatically closed 30 days after the last reply. New replies are no longer allowed.