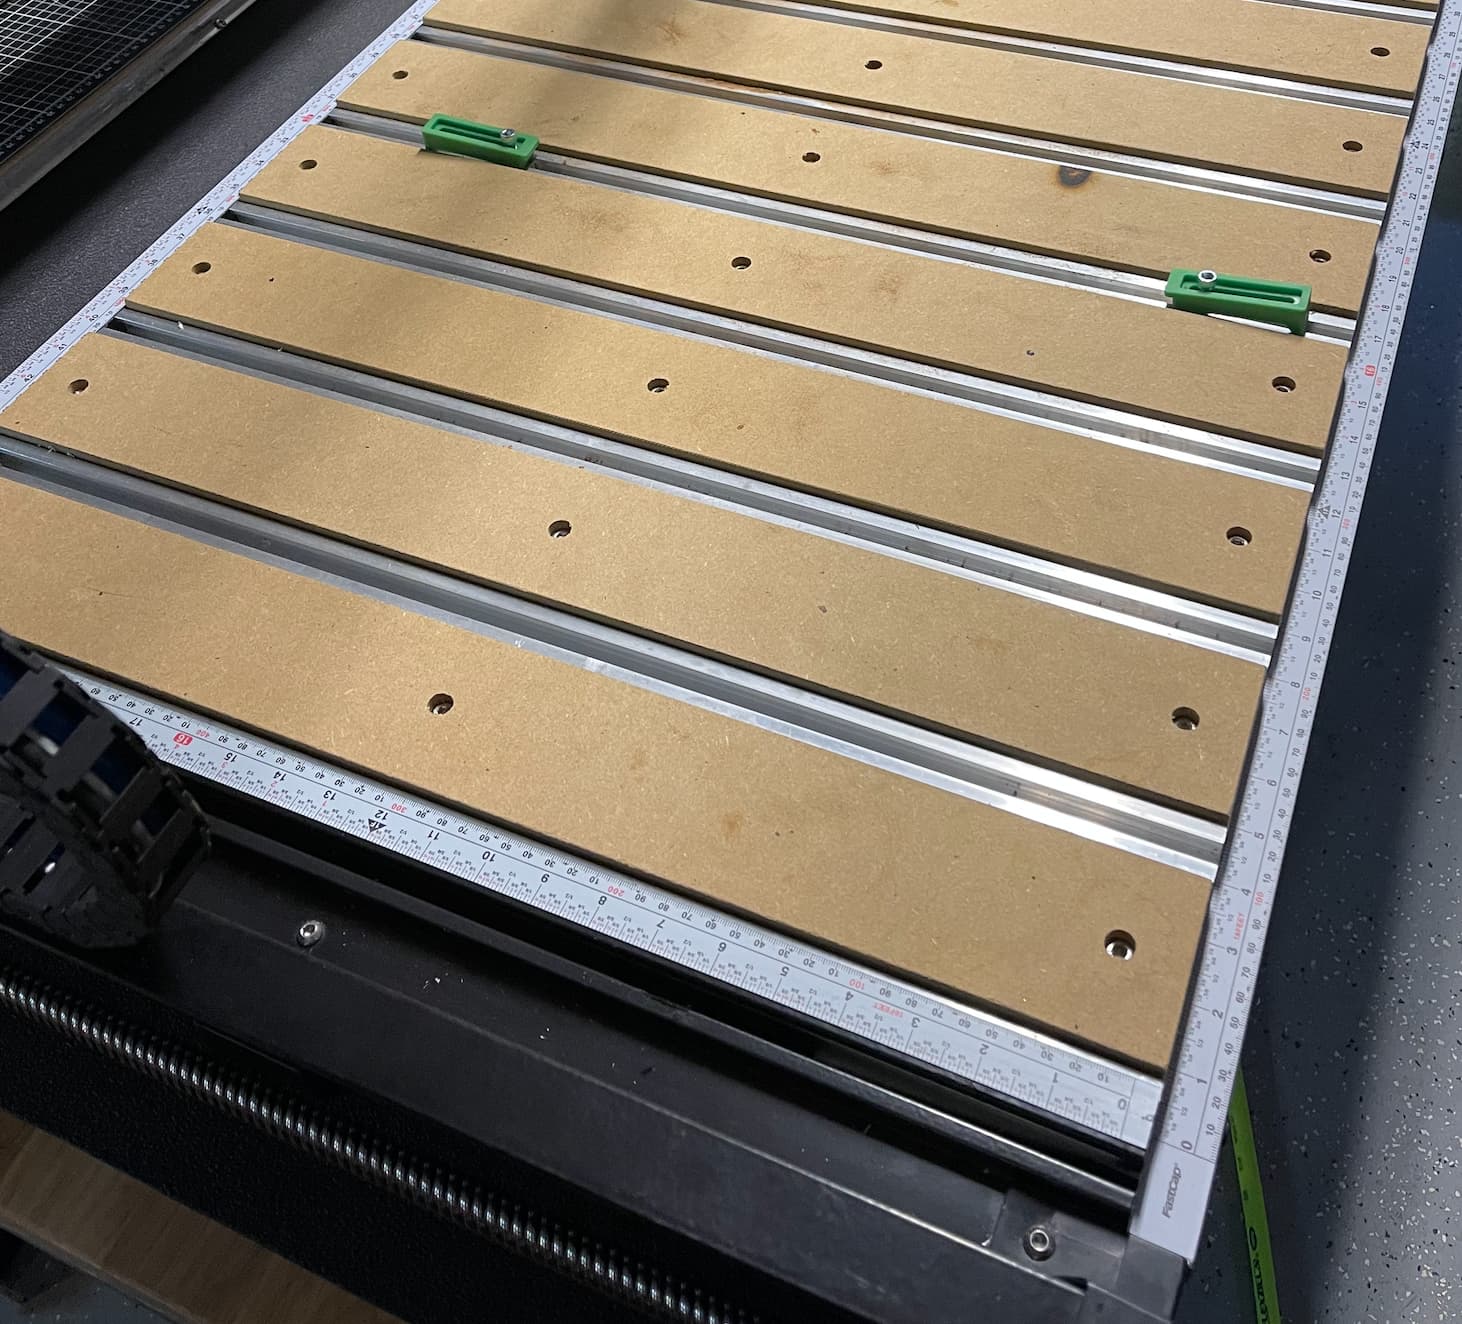
Something for C3D to consider as an option… Rail measurement guides (imperial / metric).
Purpose:
Quick sighting of material placement on the wasteboard.
My Solution:
2x 7/8" aluminum rail for south and north X axis
2x FastCap Peel & Stick Standard / Metric Measuring Tapes
Start Southwest X/Y Axis at 0 for 1st tape measure set
Start Northeast X/Y Axis at 0 for 2nd tape measure set
This provides for quick NW homed positions (running negative E->W / N->S) as well as SW homed positions (running positive W->E / S->N). Perhaps this is not a need for many, but for me I like having a visual on my materials and correlating to CAD designs. Not particularly accurate, but good for approximations. Thinking to make a jig for quick X/Y coordinate spotting.
Would be nice if Carbide Motion had jogging to specific location like some other GRML progs… (maybe I missed the option if it already exists).
Though this is a recommendation, I am also receptive to considerations I might have missed / downfalls with this solution.
Note: The guides match on X/Y axis zero - the angle of picture gives appearance they are not aligned…
I think you can set up jogging to a specific location in quick actions. Haven’t tried it myself because going into that screen seems to hang the Pi sometimes.
I actually have some of those peel and stick tapes that I bought some time ago and may use them for this.
If you have s specific location you want to return to more than once or twice, then you can use Quick Actions. I would recommend using metric for this kind of positioning.
I am assuming here that you want to move to a given location relative to the machine, not to your current toolpath zero.
Jog to the location you want to return to.
While on the Jog screen, click on the text on the left that reads ‘Position’. Your display should now be in Machine Co-ordinates. In particular, all the co-ordinates should be negative numbers.
Create a new Quick Action. Give it a good name for that location. Add the following code:
G90 G21
G53 G00 Z-10
G53 G00 X-10 Y-10
G54
As written, this will first retract on Z, then move to the upper right (i.e, near Machine 0). I use this Quick Action before I shut down the machine, so that the next time I use that machine the Homing process will complete more quickly.
Substitute your own Machine co-ordinates on the second-last line.
click on “Positions” to put the machine into Machine Position readout (or jog all the way to the front-left corner and set zero there) — note that machine position will start at the back right corner