I have been mostly using my new Shapeoko Pro XXL to cut shapes out of polycarb. I have found that either the tabs turn out paper thin and break while cutting (when they are set to default thickness) or they turn out super thick (when the thickness is set to .15, a pain to clean up).
How do you all decide on tab thickness and placement? Could this be related to how deep the software thinks the part is (it often cuts slightly into the baseboards)?
Any tips on tabs and setting material thickness in general would be appreciated.
I try to relate the tab thickness/height to the stock/part thickness as well as the depth per pass — at a minimum, 2 times the depth per pass, usually 3.
Width of tabs is related to the part size/geometry, and the feature which it is attached to, and what sort of post-processing the part will need.
Big thing is, having suitable tools to cut the tab (I like a razor saw for wood/bamboo, mini hacksaw for metal) and then remove it (a good quality, fine file — unfortunately, it’s been a long while IME since one could get a decent file in a local hardware store — if you find any NOS Nicholson files which were Made in the U.S., grab them).
I mostly cut wood. Some thin and some thick. I have started using super glue and painters tape a lot. When I use my cam clamps I always make my tabs .25" long and .125" high. I have never had them fail. In the past I have tried flush cut saws, oscillating saws, and small bandsaw. All of those have their good and bad attributes. Recently I have been just using a chisel right on the spoilboard before I dismount the project. I keep my chisels razor sharp and get a good clean cut. I use a wooden mallet to smack the chisel with. Admittedly my projects are wood and not brittle.
The problem with saws is inevitably I nick the project and not just the tab. So the chisel works quite well. I place the flat part of the chisel against the project. For tabs on curves this may not work as well but a .25" chisel would still work. I usually use a .75" chisel.
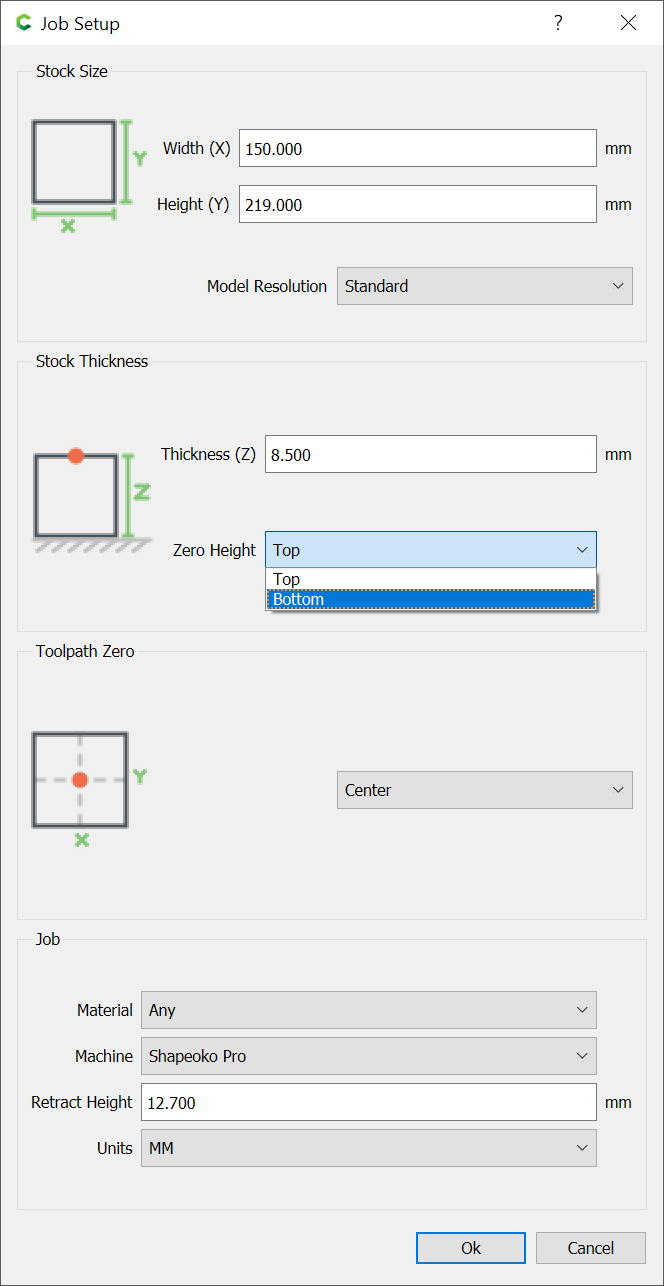
If you are getting inconsistent depths on your tabs then you need to make sure your material is a uniform thickness and you are measuring it correctly. I use the bottom of the material for most projects (Spoilboard) and I get very consistent tabs. The only down side to using the bottom is if you measure incorrectly the material thickness the first cuts either are air cuts or cuts that cut more deeply than intended. So try the bottom of the material and see if that helps your tab size issues.
I have been using the top of the material, but using the bottom sounds like a better idea. What would I have to do differently in the program? How do you set the zero?
I use the bottom almost all the time. As @WillAdams showed above select bottom (spoilboard). I put my BitZero on the spoilboard and zero Z only. This takes some getting used to. One caution is if you regularily check the Z+6mm in rapid positions make sure the bit is setting over spoilboard and not on top of your project. If the bit is over the project it will come down and crash into your material. The rapid position for X and Y still work just as before and the Z+6MM does take some getting used to.