looking for a little help again. need a simple file to build my threaded waste board. for my shapeoko 3 xxl.
Thank you in advance.
Here are some resources on threaded inserts:
3 Likes
I originally created a Myers Woodshop threaded spoilboard. That was fine but as the versions of CC got newer the files would not cut properly. Now the current versions seem to handle older versions better but my point is for you to design your own.
The XXL can cut 32x32 but do not make a 32x32 spoil board. Part of the 32 is off the front of the machine. If you make a 32x32 spoil board you will not be able to flatten the very back of the spoil board. That would leave a ridge at the back and if you ever wanted to tile a project that would cause a problem. Additionally if you have a suckit dust boot or others you cannot get the full 32 inch X travel.
So move your machine with your tramming bit installed to the extreme right and left and front to back and make your spoil board conform to those measurements.
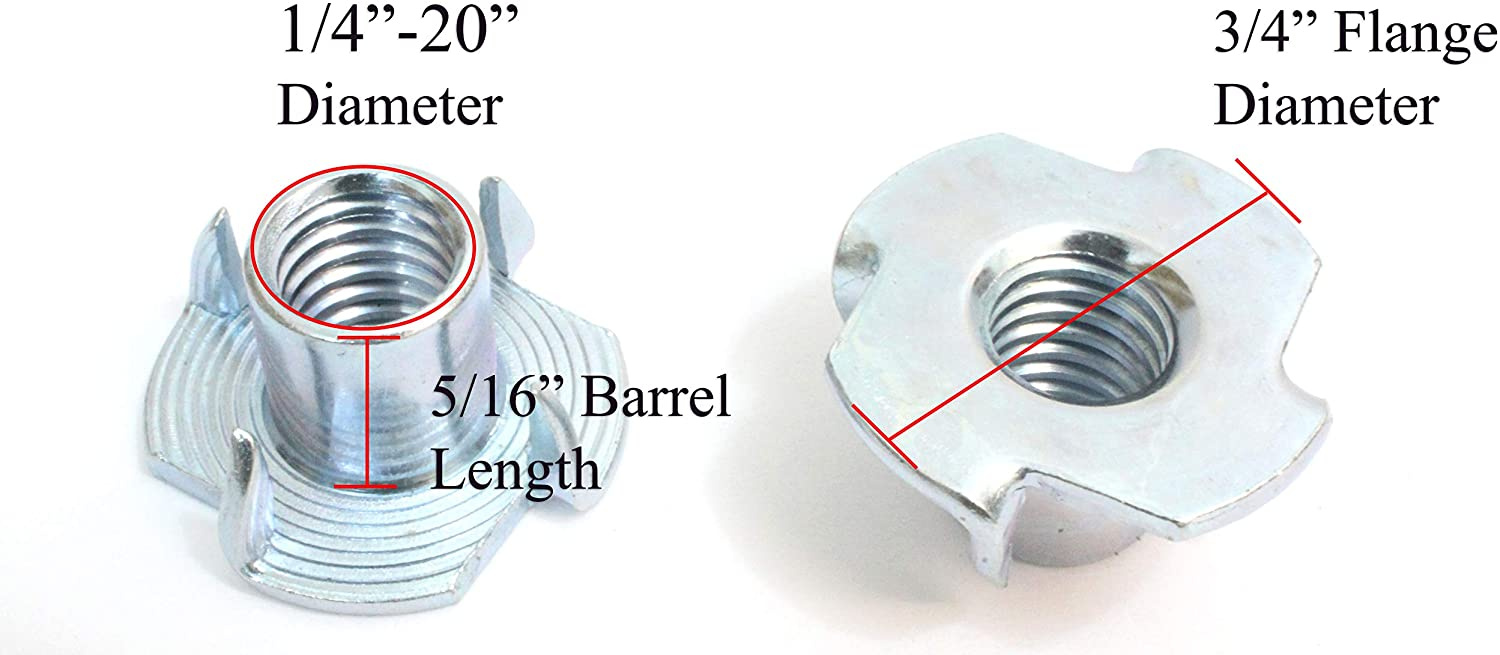
I used 1/4-20 Tee nuts. I got ones that were 5/16 inch tall so my 3/4 inch mdf spoil board could be surfaced a few times. Additionally I used 2 inch spacing for my spoil board and that works well for me using the Myers Woodshop cam clamps. There are two sizes in Myers plans but truthfully I only use the large cam clamps.
Get your Tee nuts and measure them. For me I made a .75 inch recess for the flange of the Tee nut that was 0.0610 deep. You dont want your Tee nuts not seated all the way causing your spoil board to be uneven. The through hole was 0.31 inches round starting at 0.0610 depth to the bottom of the spoil board.
Your measurements may be different depending on what type of inserts you get and want. Because the measurements were larger than .25 inches I cut the spoil board with a #201 bit.
Make a grid that is at 2 inches and create a row of your holes, group them and copy them and then group the small holes and group the larger holes to simplify your tool path creation.
Dont rely on others to make your basic objects. It is good exercise for how and why you do things.
4 Likes
Also this video:
3 Likes
I am not a fan of the above type of threaded inserts. The Tee nuts have the advantage of not being able to pull them out of the mdf. The second advantage is you can get the 5/16 inch length and have a lot of room to resurface your spoil board. The above type of threaded nuts can be buried deeper so you can still surface your spoil board but they can come loose and turn with your bolts where the Tee type nuts will not come loose under normal operating conditions.
You can get the Tee nuts in metric sizes if that is your preference. I have used imperial measurement all my life and am not ready to go metric yet. The metric system is quite logical and I understand it but some habits are hard to give up. As an old dog I dont want to learn new tricks when the tricks I do know are still useful to me.
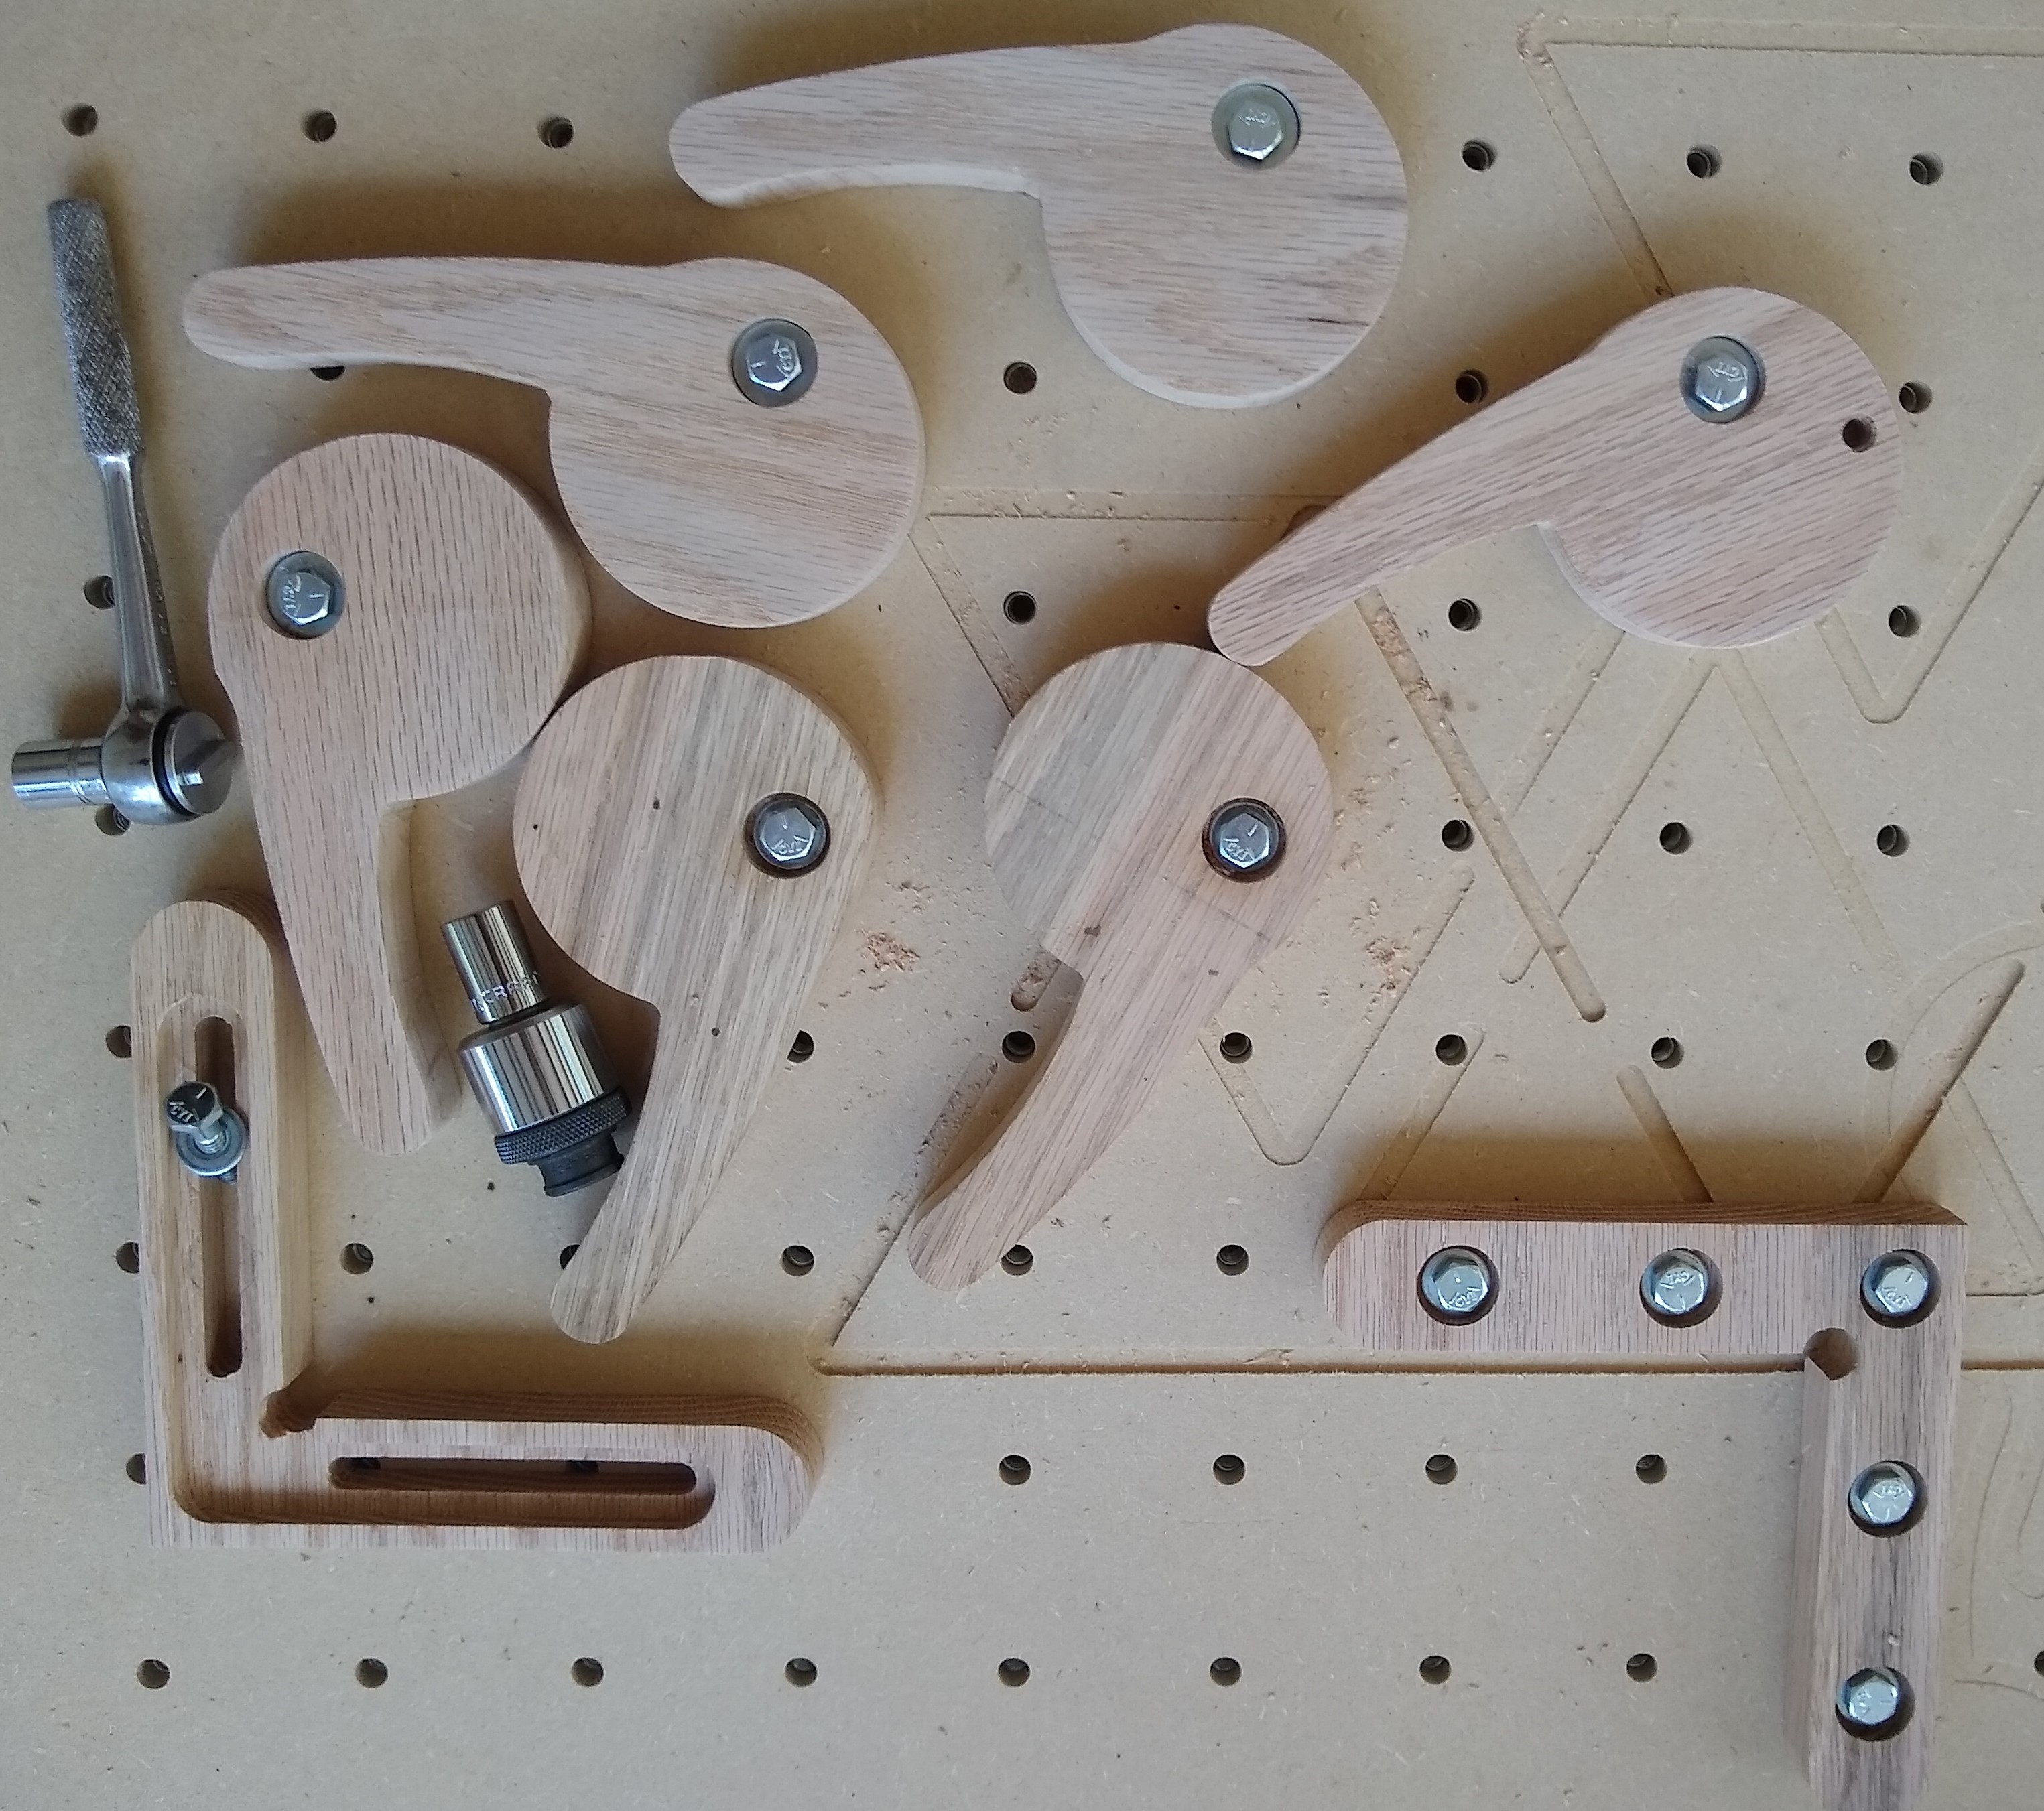
Whichever type of insert you get you need to be careful with your bolts that you use on your method of clamping. You do not want your bolts to bottom out on the stock base board. If the bolts bottom out before tightening you will lift your spoil board up and make it uneven. The uneven surface can lead to problems in carving. For me I made cam clamps that have a recess for the bolt that is 1/2 inches from the bottom of the cam clamp to the top of the recess. My spoil board starts out at 3/4 inch tall and will become shorter as time and leveling takes place. So initially my maximum length of bolt is 1.25 inches and before I replace my spoil board the bolts may have to be replaced with 1" length bolts.
My cam clamps were made with whatever oak I found around the shop and varied in thickness. So after making them I took them to the drill press and used a stop with a forstner bit make sure each clamp had exactly 1/2 inch of thickness for the bolt and each hole had a thick washer below the bolt to make sure I did not bottom out my bolts on the stock base mdf board.
I also have the tiger claw and gator tooth clamps from carbide3d and have to measure these and get cap screws that will not bottom out like the cam clamp bolts above. The tiger claw and gator tooth clamps as well as the stops come with 1/4-20 bolts as well as 6MM bolts. Just measure these clamps if you have them and get t he appropriate length bolts in imperial and/or metric.
1 Like
Per your first paragraph about threaded insert types, I have the type shown in @Radiation’s video he shared and I agree with what you say except if you put them in through the bottom of the waste board and not the top. If you put them through the bottom, they won’t come loose, they won’t pull out, and you get plenty of vertical clearance to shave layers off your waste board.
4 Likes
That is why they makes Fords and Chevy, to each his own. I have not used the thread in type on spoilboards but I have had problems with them on other projects so my preference are tee nuts. However on some projects the thread type are the only option for situations where there is no bottom access.
I have had the same experience with Threaded Inserts in jigs I have made for my woodshop that Guy mentions. They can loosen up - more so in MDF than a hardwood. All that keeps them in place is where the threads meet the material.
The prongs on the T-Nuts in Guy’s posting greatly reduce the likelihood of them spinning in place.
Bill
1 Like
This topic was automatically closed after 30 days. New replies are no longer allowed.