Get the chip fan in there. It will clear the area.
1 Like
If you spec the same endmill there should be no Tool Change process for the machine. The machine will take a slight pause then continue on it’s way. This is true when you have an RPM change while maintaining the same tool. The machine will pause movement in XYZ, change RPMs, then continue on it’s merry way.
Love this exploration. Testing like this and the information you gain from it is invaluable. Everyone should test/play to conquer new territory. Well done @HeuristicBishop
2 Likes
Any updates? Excited to see the finished product. ![]()
Should be picking this back up today. Spent a bit of time thinking about the lessons learned and how I want to proceed. The biggest issue is securing those magnets so I’m doing some tests to see if I can press fit them.
Also need to come up with a different way to retain the rings. Magnets in both the ring and body is just too strong an action. Which is great because it’s both cheaper and gives me a lot of flexibility in designing the feel of the motion. I think I can do some clever things to trade off between detent strength and smooth rotation ![]()
Hopefully I’ve got a proper finished prototype by tonight ![]()
1 Like
Yeah but there is no situation in which hand finishing isn’t better than an MCD tool unless you are so in need of insane tolerances in which case idk EDM probably makes more sense.
1 Like
make some smaller circular cutouts around the magnet in a circular array 4-8 of them and then add a chamfer to the main press fit hole and make the hole size bang on or a half thou undersize, the deformation will occur mainly in that chamfered area and shouldn’t lead to any changes to flatness. chamfer size probably 45deg .010-.020"
1 Like
That’s what I was thinking too. Basically crush ribs with some clearance on the top to keep from pushing material into the bottom plane of the slot.
I don’t think I can keep the tolerances I need for a straight circular press fit given how fragile magnets are (even if my machine can, I don’t trust the magnet tolerances)
So I’ve got a test of a few different bore shapes and tolerances to test.
I’ve been looking a bit for a tool to do the slotting, boring, and chamfering but I’ve not found anything quite yet. Seems harder to find these kinds of combo tools in less than 1/8" sizes.
When using the same tool within a single job it behaves as you described but if paths are spread across multiple jobs the machine will still perform a tool change.
For example, say I make a 3mm hole and the job completes. I measure the hole at just under 3mm so I adjust the stock to leave in the c2d file, save, and start the modified job. The nomad 3 will still perform a tool change and tool length probe because of the M6 at the beginning of the job.
Just to be sure I was up to date I’m running carbide motion 644 beta on MacOS and have this behavior.
The only way I know around this is to export the gcode and remove the M6 manually. I’d love to hear I’m just doing something silly but it doesn’t seem like the machine keeps track of exactly which tool is installed between job runs.
I once heard
“machinists are quirky people who prefer to spend time with other people by way of group problem solving instead of just hanging out with people because they want to.”
Which is probably why I’m here while the wife is at brunch with her friends…(I prefer you people ![]() )
)
So here are some owed updates:
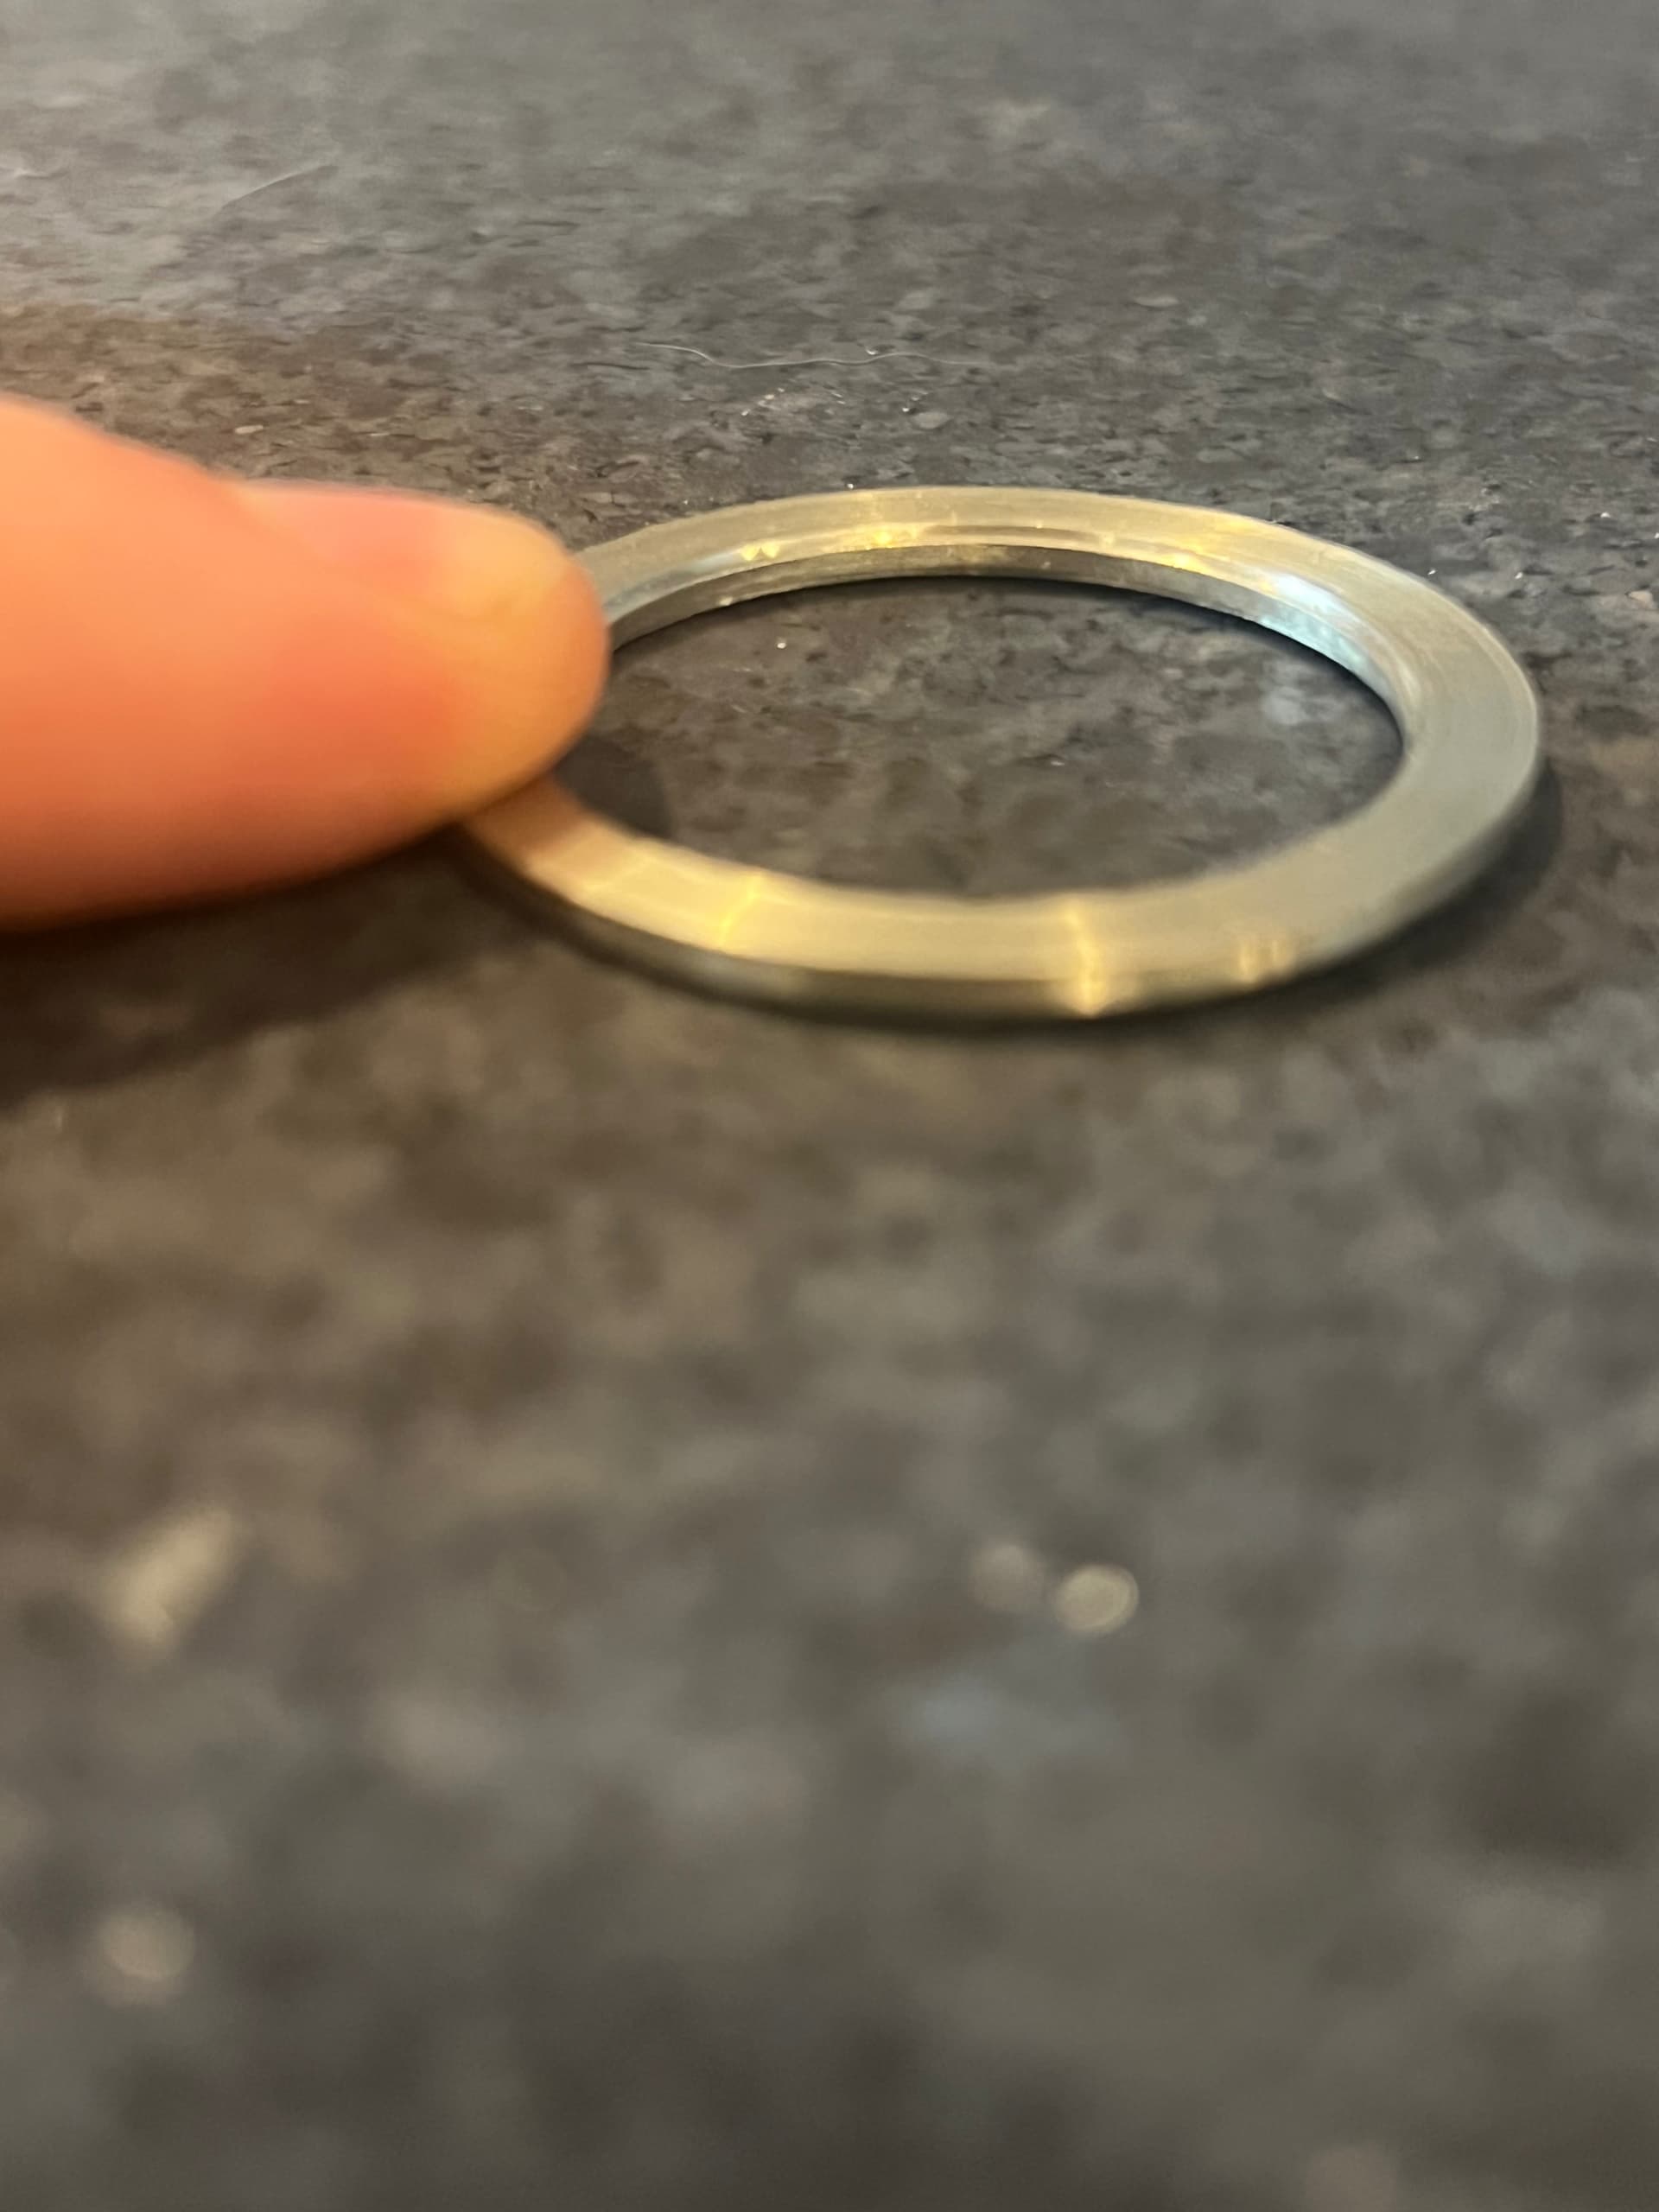
Relieving the corners on the edges of the rings needs to be less aggressive. The rings have a touch of wiggle when pressed on the very edges and I’m not a fan of that feel.
This photo is exaggerated without the slots to constrain the motion but it gets the point across. The ring lifts slight on off axis pressing:
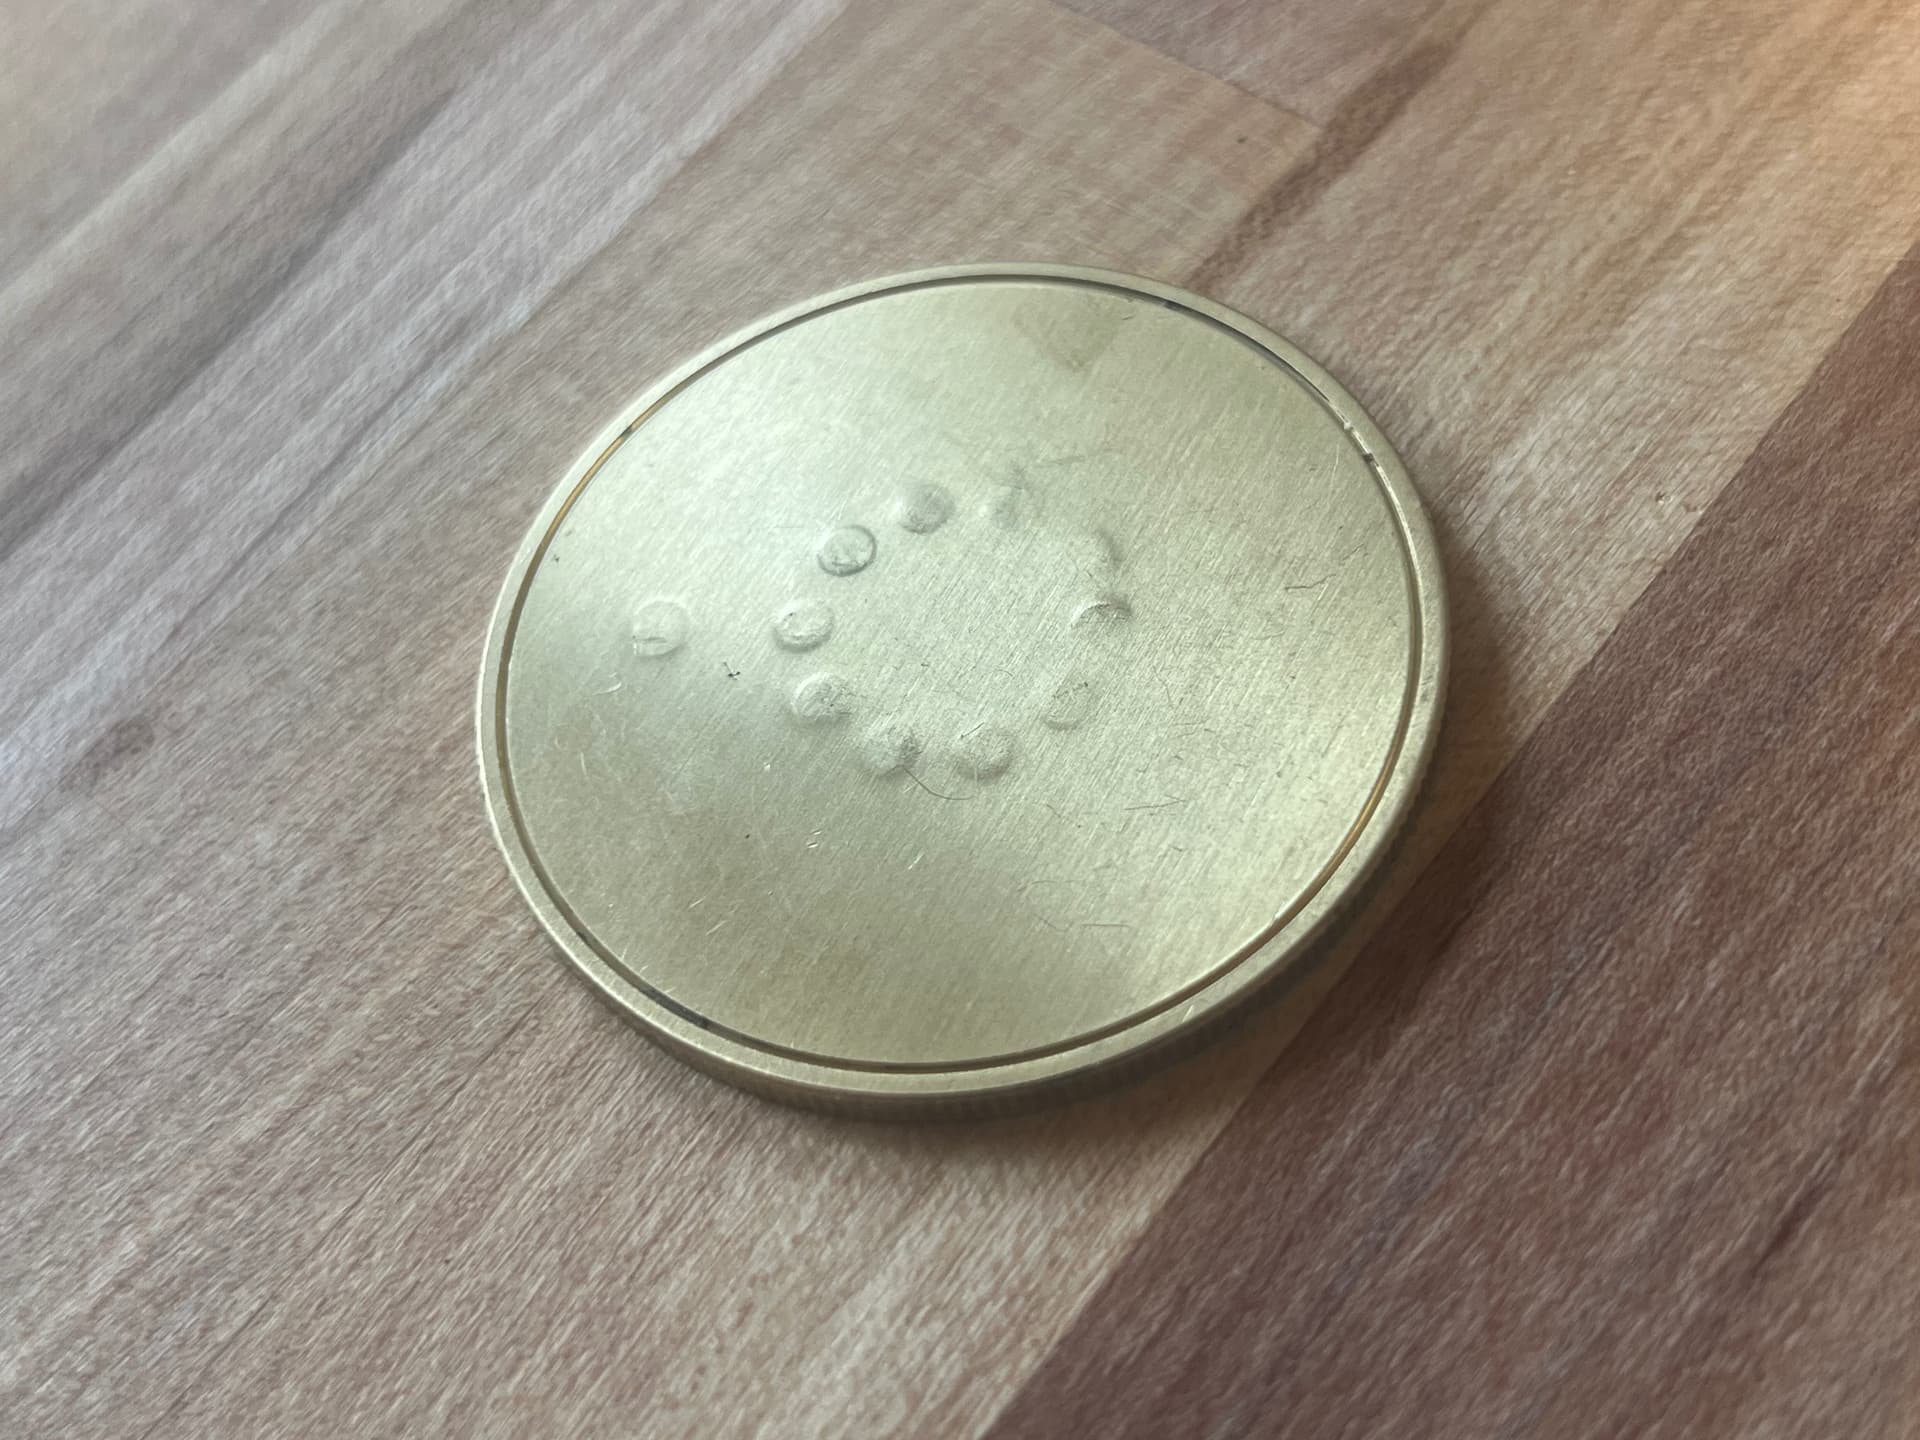
On tolerancing the magnet press fits, I decided to try a simple press fit in the off chance it worked. It went surprisingly well. Too well. I still don’t trust it ![]()
I started with a hole bang on 3mm and no tolerancing at all.This fit like a hot dog in a hallway.
From there I made a bed of holes, increasing stock to leave in increments of .005mm.
I assumed this tolerancing would be too small to be repeatable so once I got a range that seemed to work, I replicated them 4 times each to see how consistent the fit was.
Every hole worked exactly as expected with very similar fits and feel when press fitting compared to the first test. I don’t know how accurate the holes are but giving credit where credit is due, the nomad 3 is surprisingly repeatable ![]()
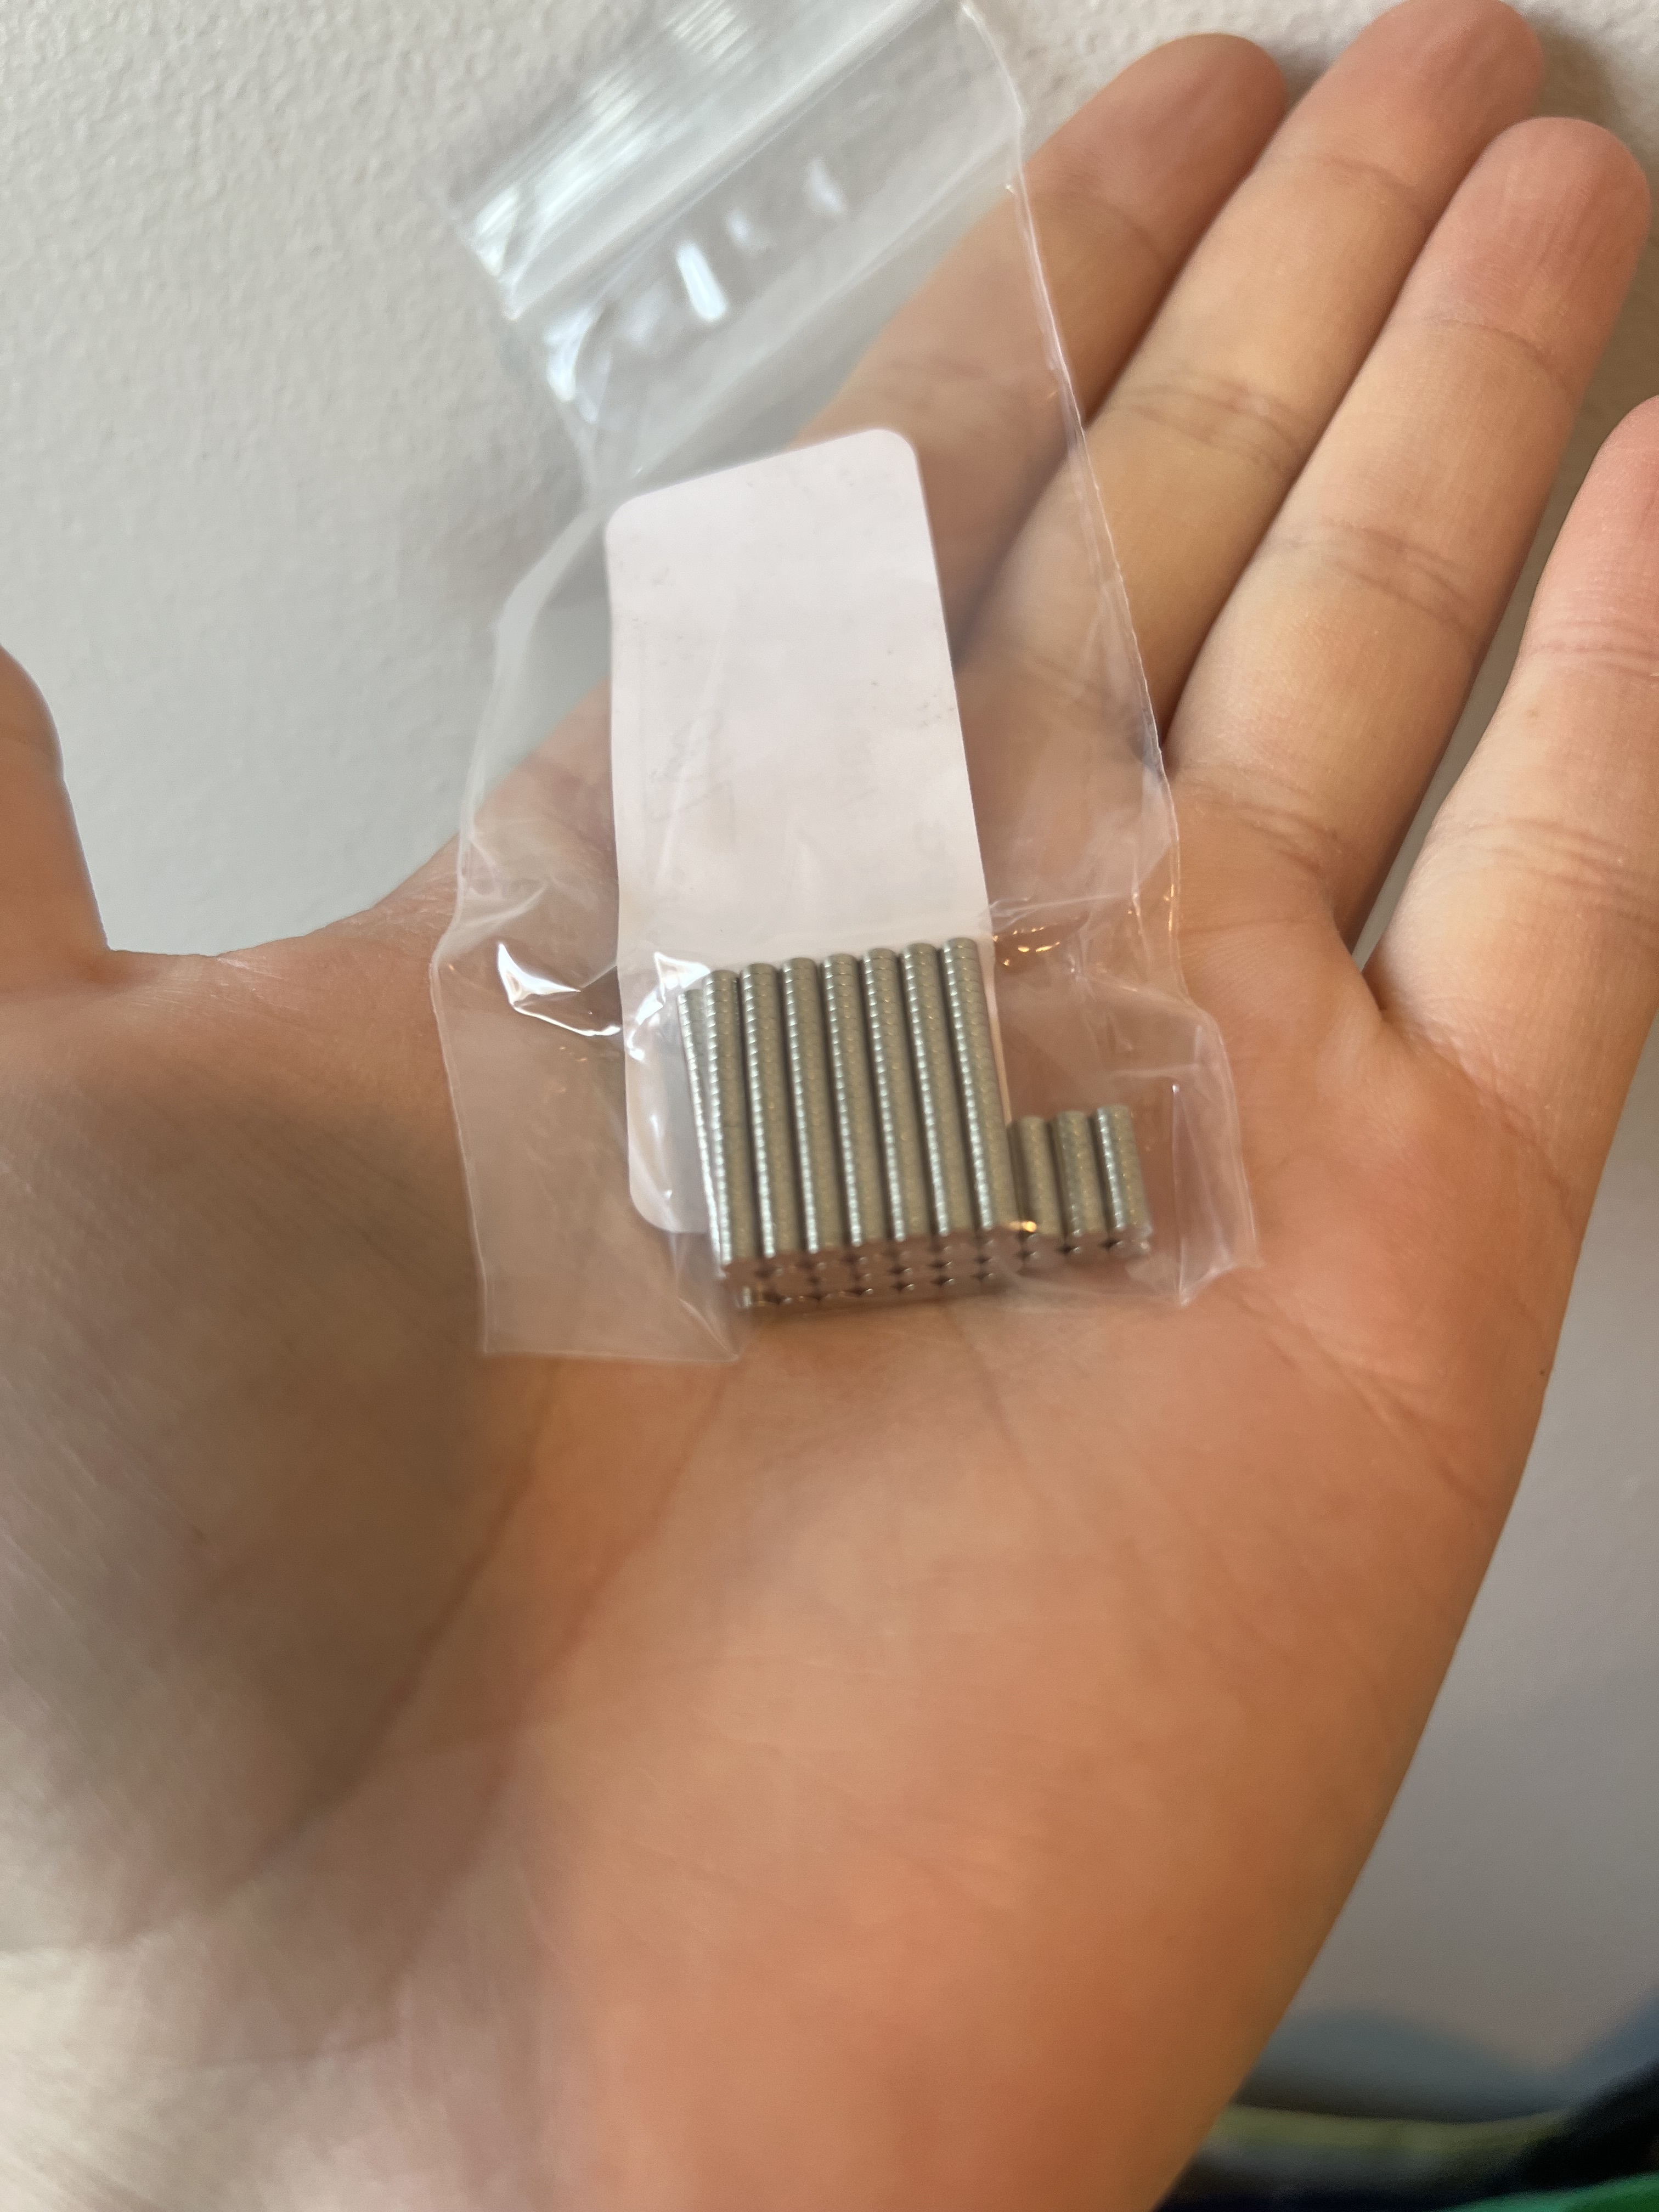
As a reminder, I am using 3mm by 1mm magnets, as standard in the tabletop gaming scene. This means they are dirt cheap compared to most other small sizes.
On the batch I received, a stock to leave of .07mm creates a very slight press fit which can be pushed in with just my fingertip.
The force increases as expected until a stock to leave of .105mm which requires a press and feels dangerously close to shattering the magnet. I really want to set up a little force gauge for documenting this kind of thing properly someday. ![]()
I counterbored the holes by offsetting the diameter by 0.5mm and giving it a depth of just 0.15mm. Enough to give it a sleek look and absorb some material being pushed up around the press. I also added 0.3mm to the depth of the magnet bores so the magnets can be pushed just below the surface if necessary.
Here is a photo of the test bed:
(There’s a method to the madness, I promise…just don’t ask me to explain it ![]() )
)
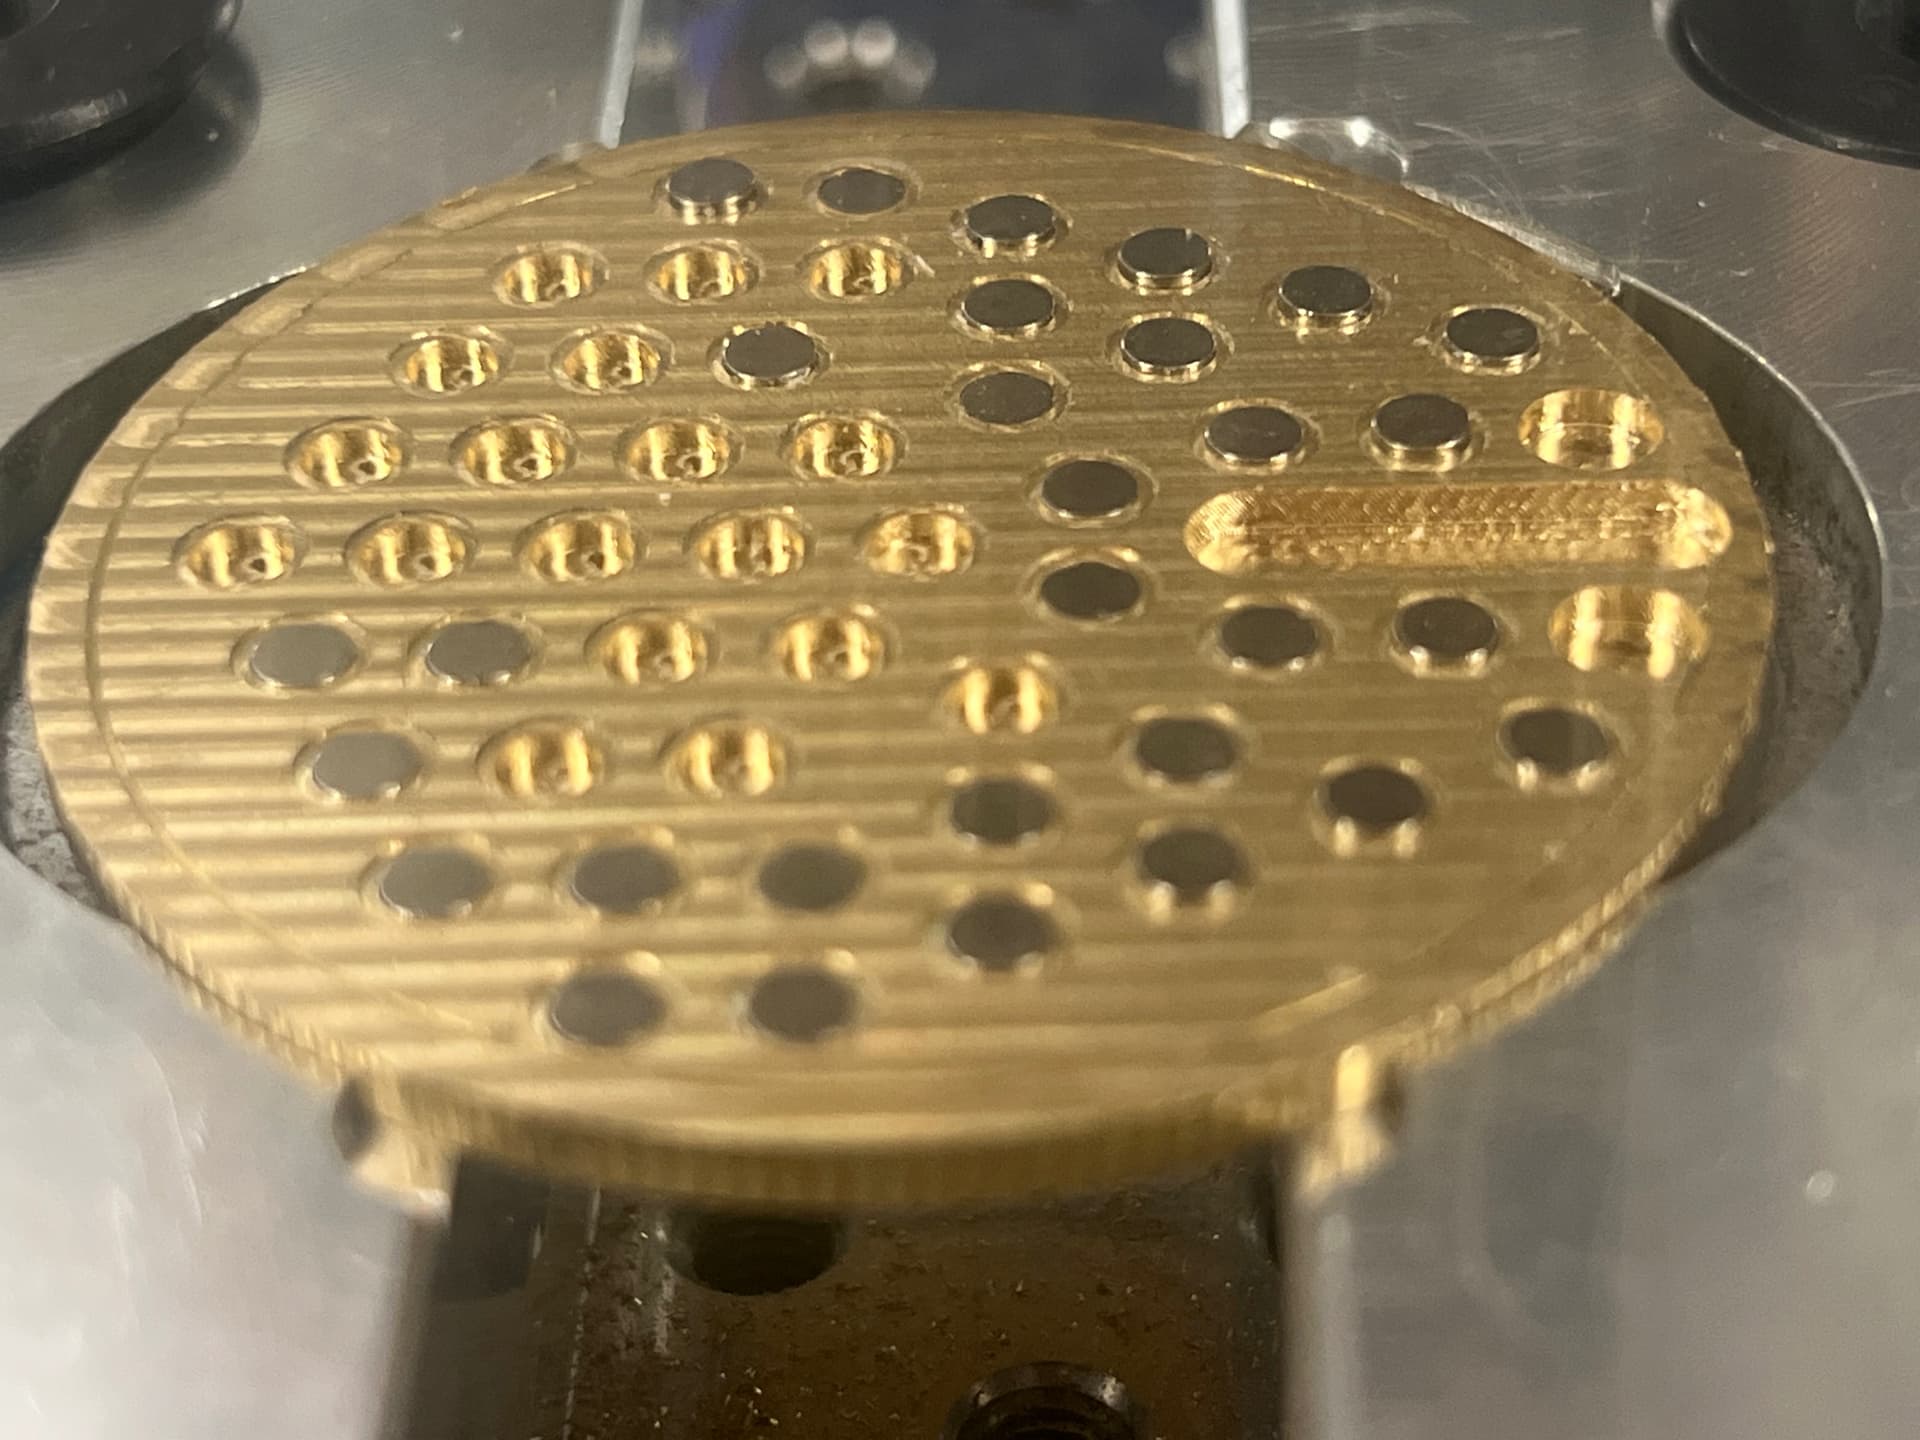
I chose a stock to leave of 0.08mm for the test, figuring this is a good midpoint between the loosest and tightest holes, it would give the best chance to work with any variation of the magnet diameters.
Based on the feeds and speeds feedback from @No_Soup_For_You I took another look at the recipe and tooling I was using. When this project first started, I picked up some 3 flute 2mm diameter end mills. These things are small enough to define every feature comfortably but they have the advantage of a much thicker cross section. (They’re also only a few bucks a piece so I feel better about pushing them to the breaking point in testing ![]() )
)
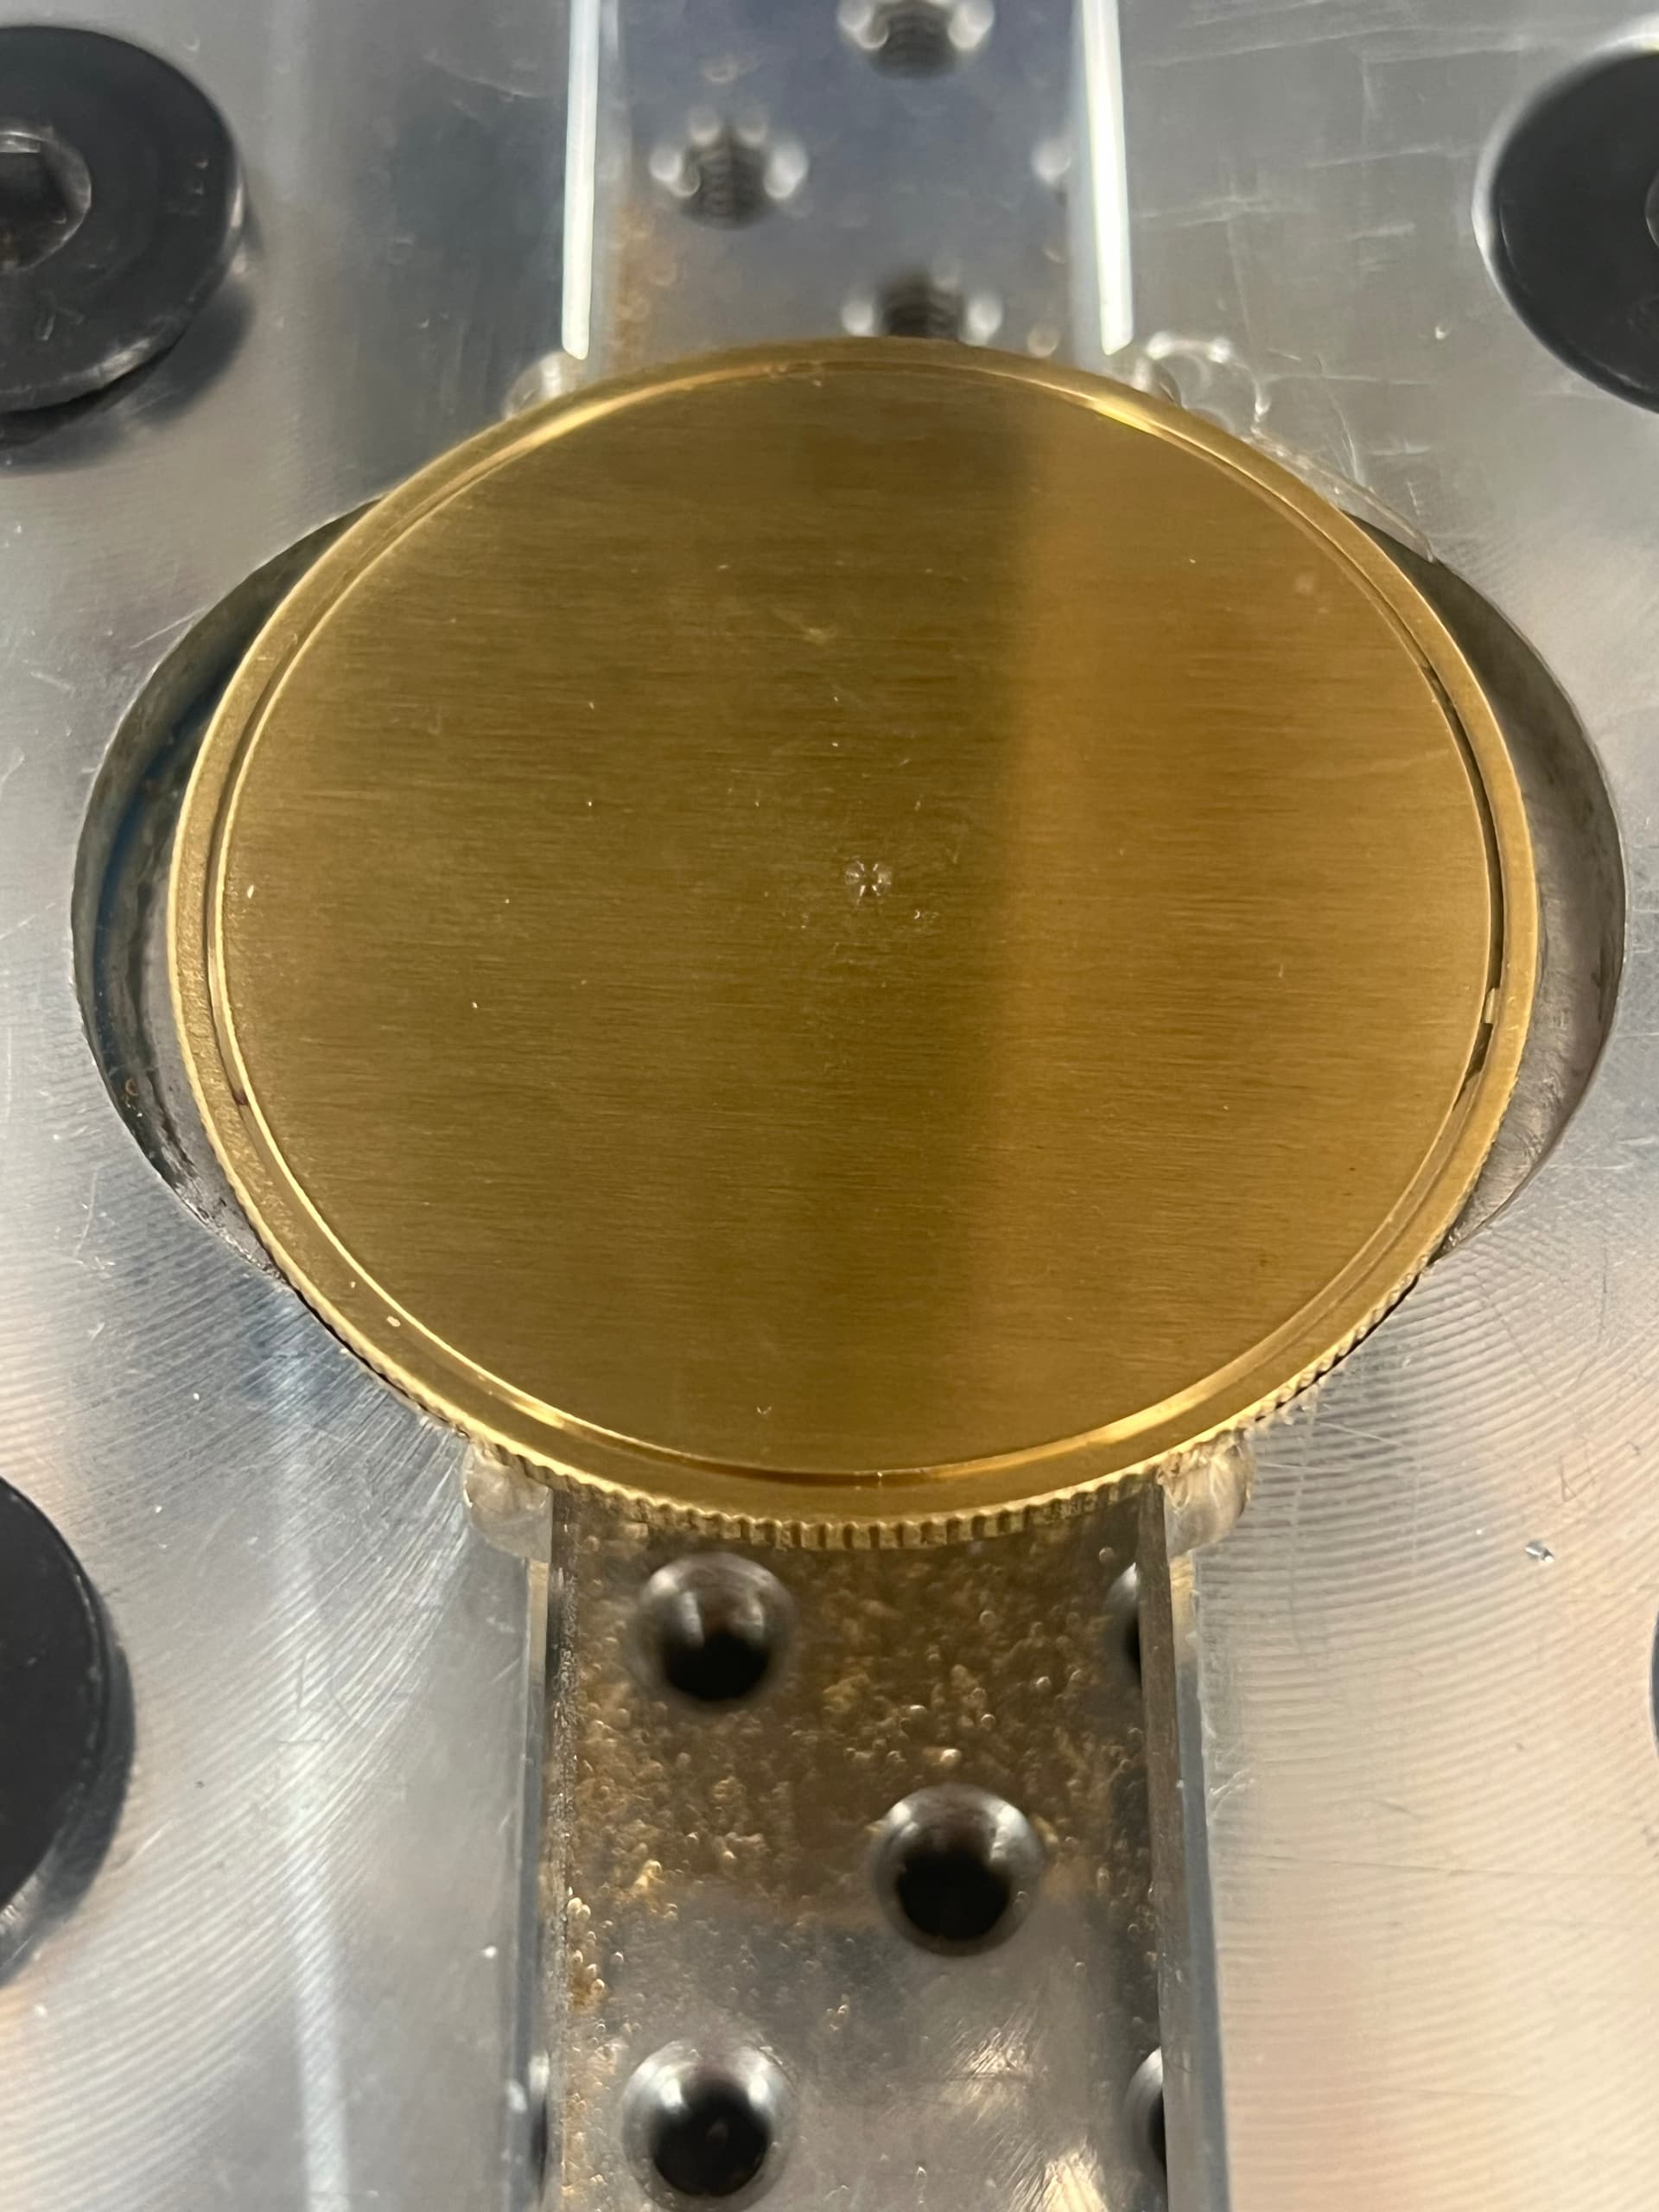
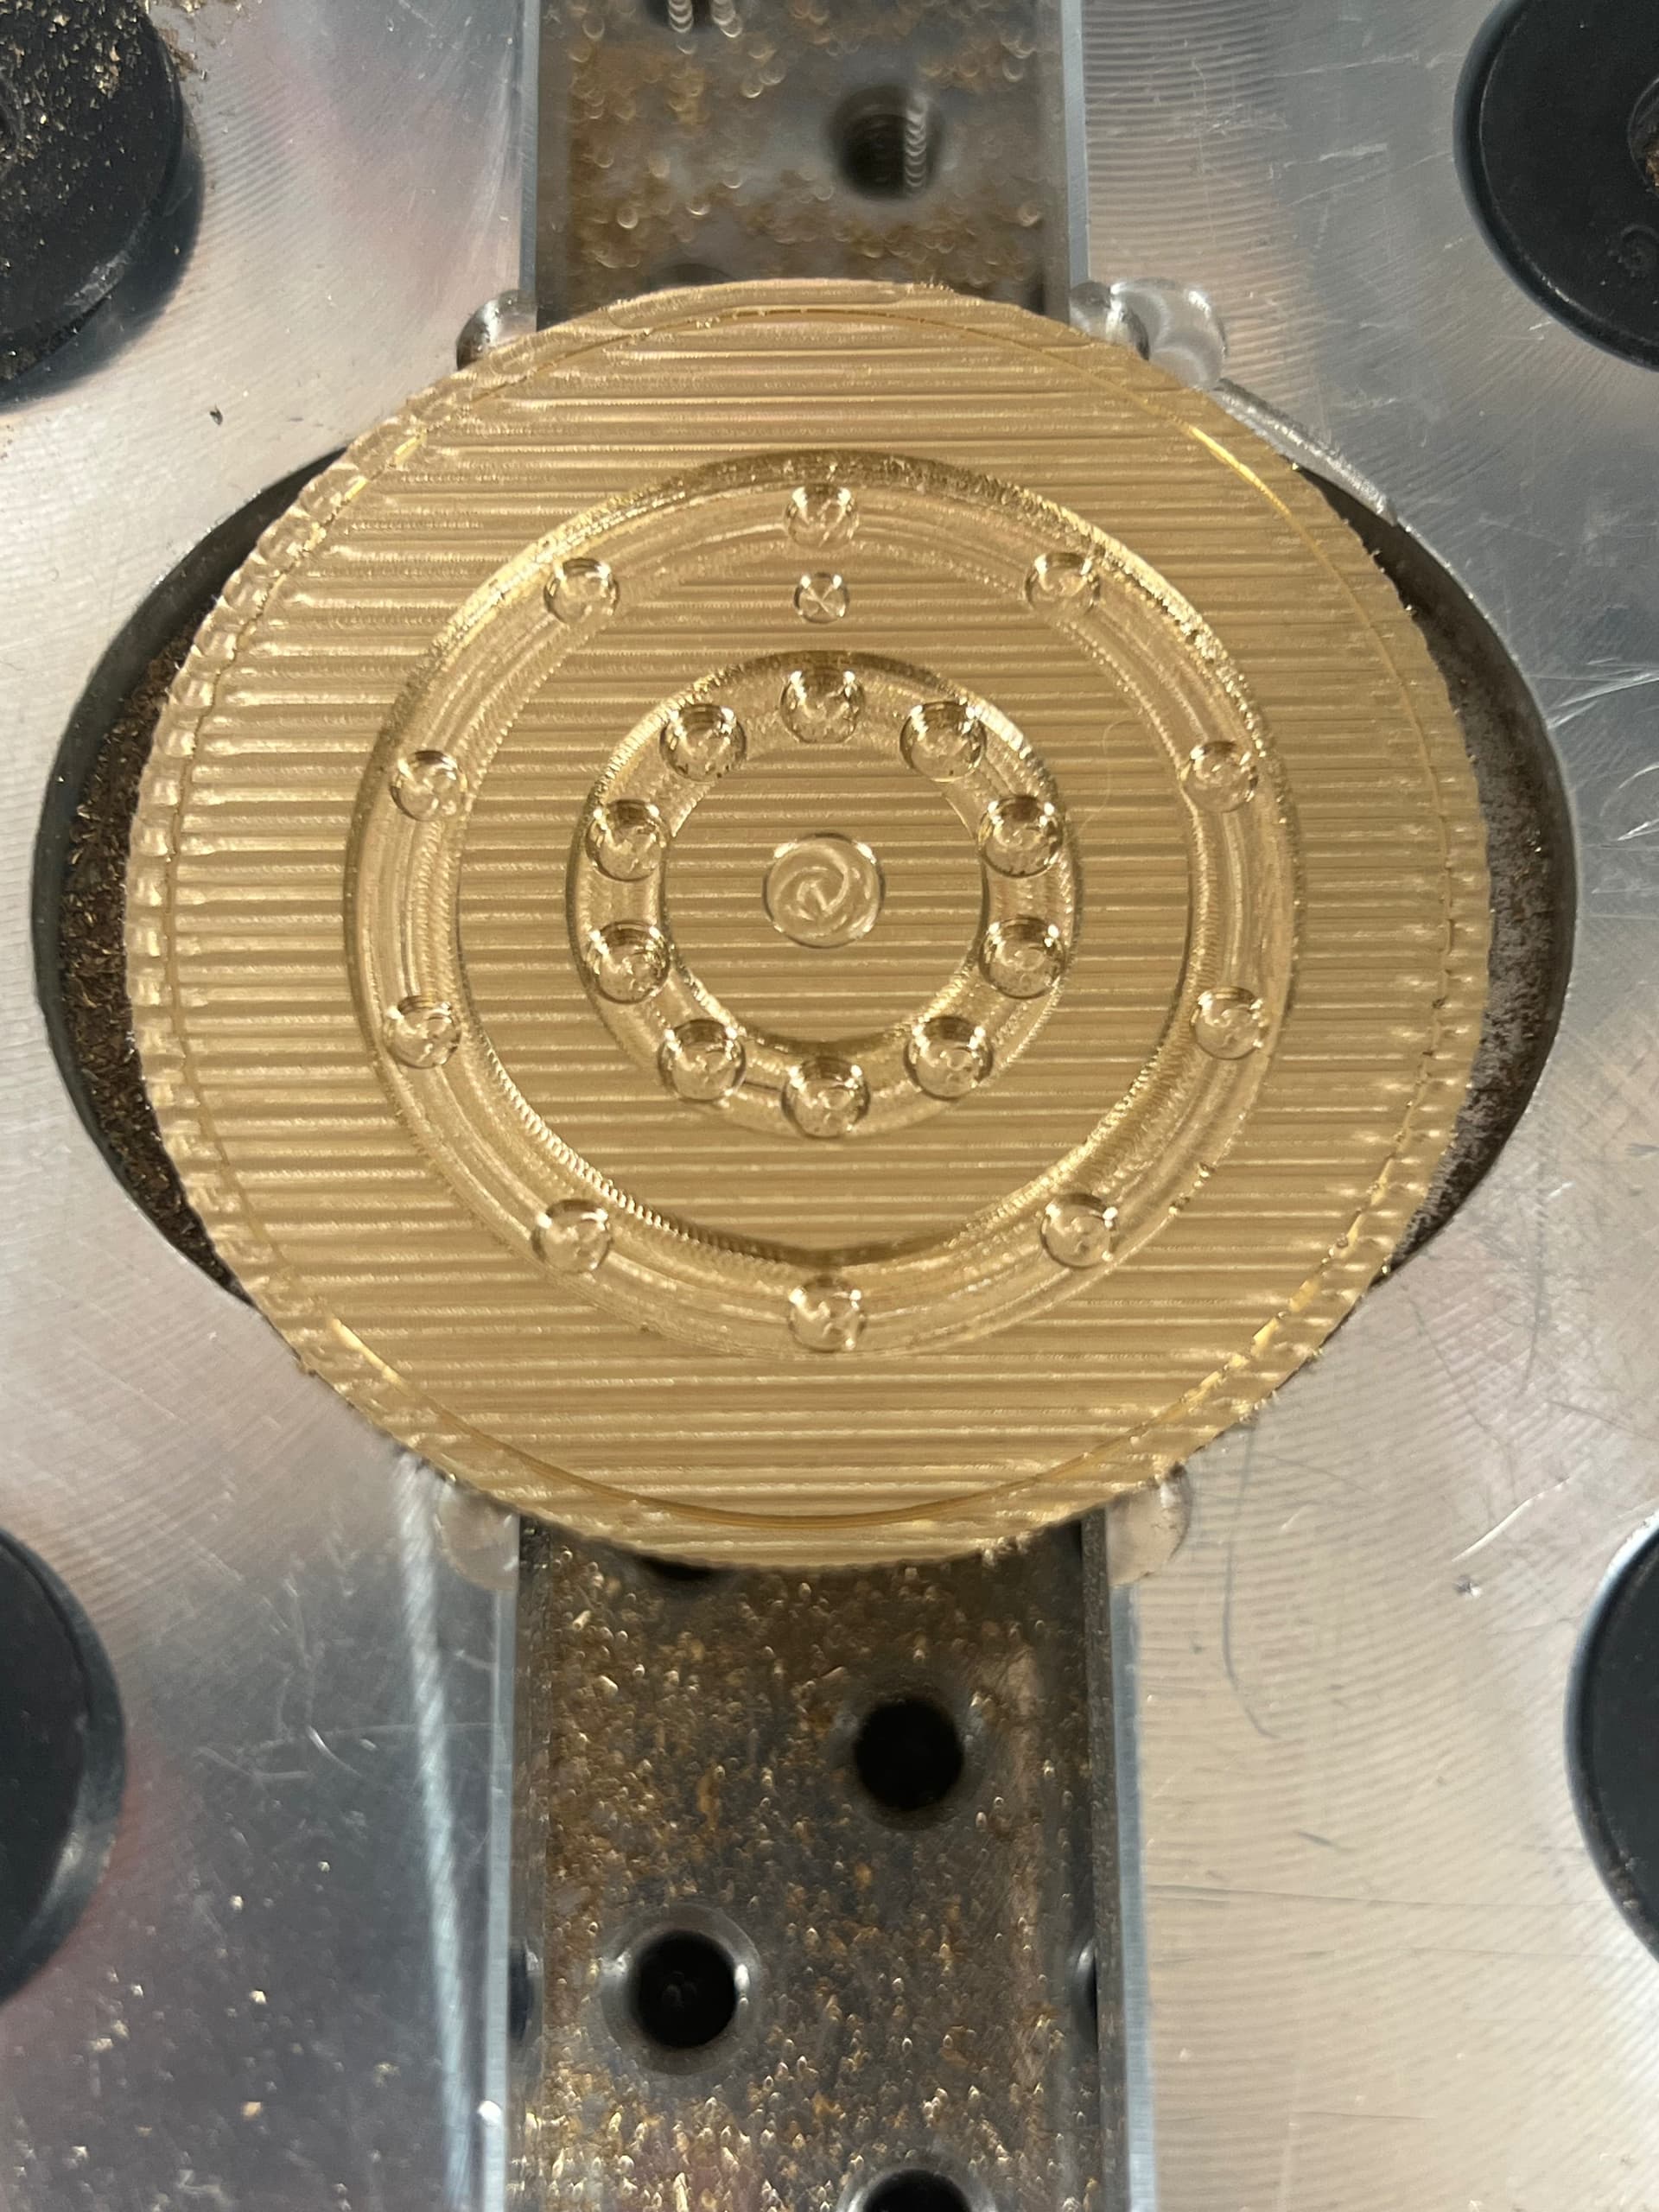
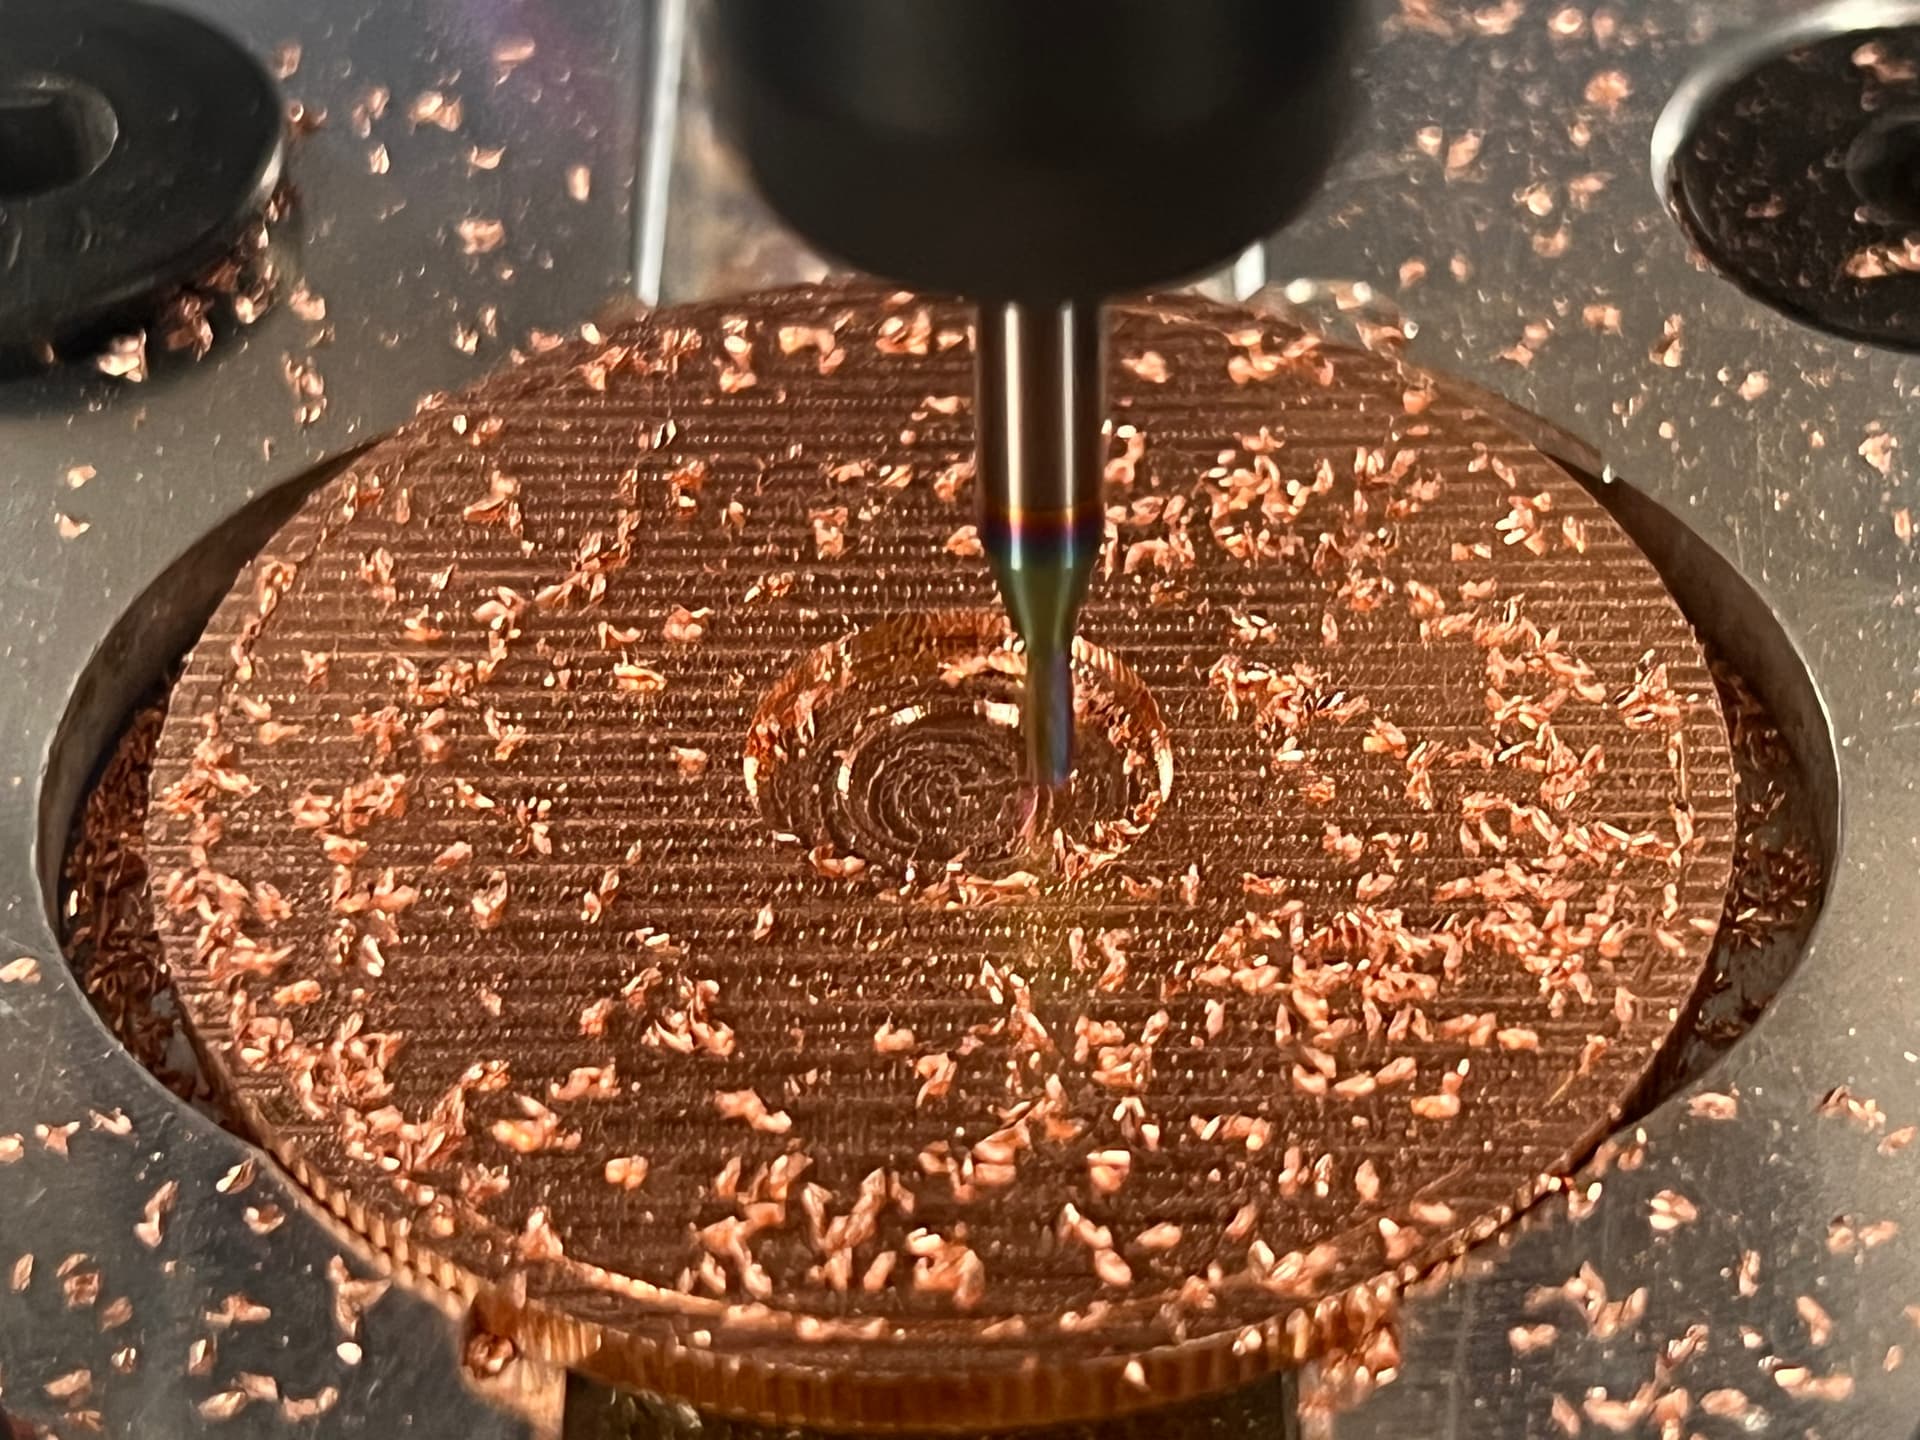
This entire coin took something like 4 minutes:
Before:
After:
Some really important notes on feeds and speeds for small bores, you have to apply a correction factor or you’ll be feeding way too fast. This brought my “ideal” feedrate down from ~70in/min to ~20in/min. [1]
I’m still not really confident that I’m doing any of this correctly but the machine didn’t seem to mind at all given a 0.3mm depth of cut.
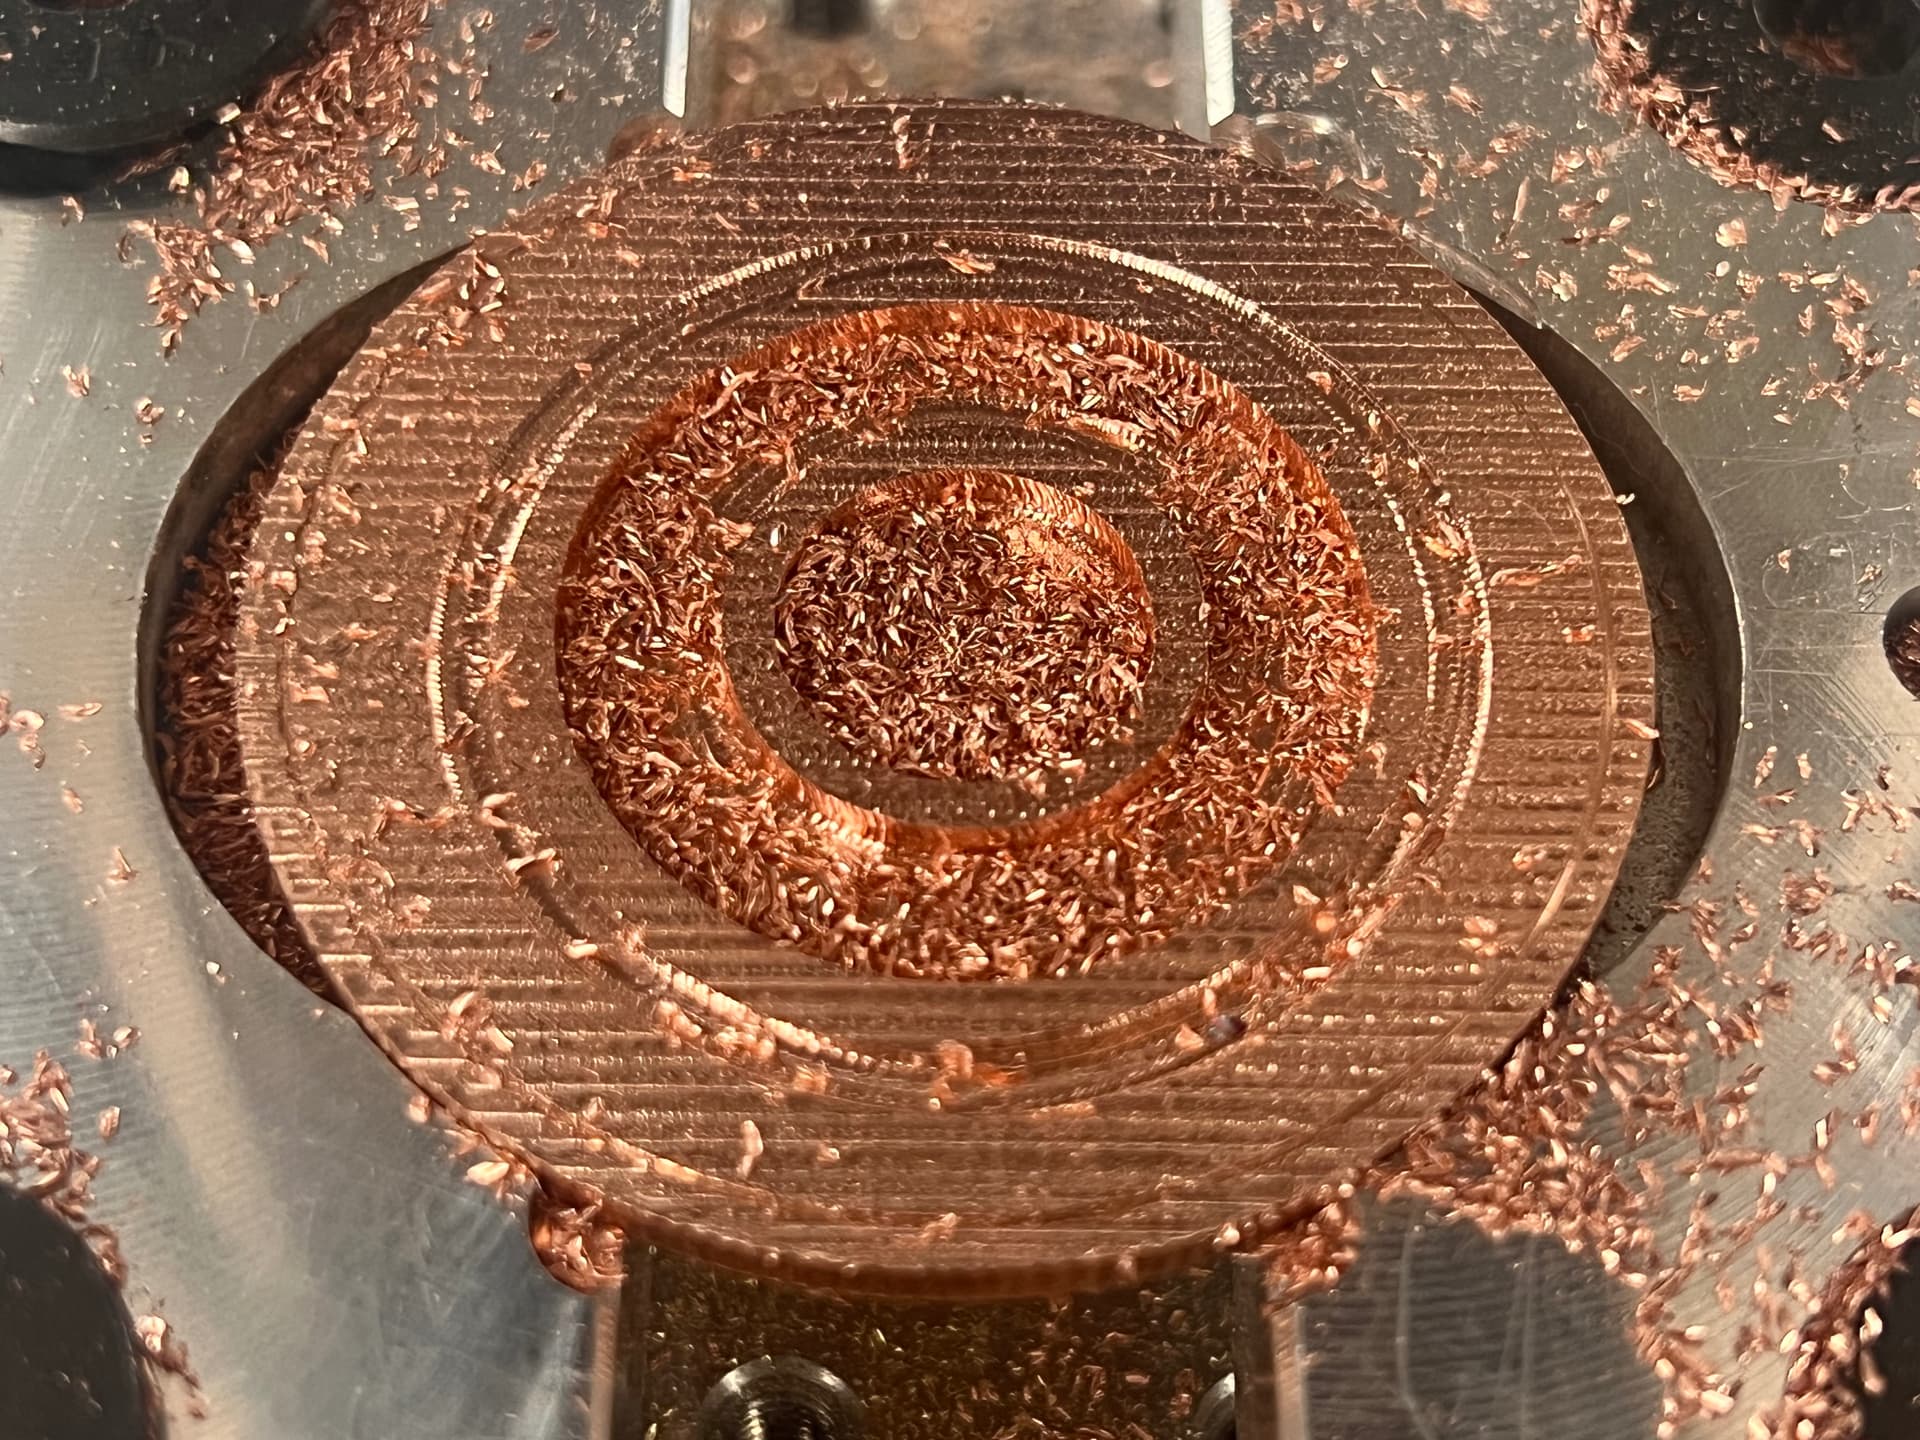
With this new found confidence, I went head first into machining a quick copper press attachment for pushing the magnets in gently and evenly. I think this is nearly pure copper which has historically been my nemesis. That said, another look at the Harvey chipload recommendations for copper provided a fantastic starting point:
Look at those chips! For a nomad this was pretty startling…clearly I’m doing something wrong ![]()
And here we are just a bit further along…which leads nicely to the next section of the post
So…what went wrong in all this testing? Surely it wasn’t all victories!? Yeah, it wasn’t ![]()
Let’s start with the magnets and how unit testing falls short compared to integration testing ![]()
I did the press fit testing at the top of a freshly faces piece of brass. Notably, this is not where the magnets will sit in the final product. I probably should have tested the fits in the bottom of a slot to get a better idea of the press fit in the context of the product.
Care to guess why this matters before I show the issue?
I have a soft requirement to use off the shelf coin blanks so I can’t just beef things up. That said, the 3mm magnets probably hold too strong anyways. We can go smaller and thinner to give more material on the bottom of the slots while also making the rings a bit easier to spin.
I’m glad I went this route because I was able to source some 2.5mm by 0.7mm magnets from K&J magnetics AND they have an actual tolerance rating listed! (0.1mm±) I can work with that.
These magnets are more than double the cost of the hobby 3mm but this thing isn’t being built to a price regardless.
This tier of the product will cost what it costs and that’s the end of that. [2]
Oh, the copper pusher. Right…so I snapped the end mill off in it ![]()
Copper is still a pain, still my nemesis, and I still need to dial in the recipes.
That said, historically when I’ve worked with copper it has always been a little warm to the touch after working. This was cold to the touch and the sound was ok until it suddenly snapped.
I interpret that as:
- I’ve always erred on the side of too high an rpm, essentially trading more rubbing for a lesser chance to “grab” the end mill.
- These feeds and speeds are closer to “ideal” than I’ve ever run before. I was only cutting at 12,000rpm which, I imagine, puts it in a less than ideal place on the motors power curve. Going forward I’ll trend towards the higher ends of the rpms and maybe that’ll buy me some more wiggle room.
So there’s my update. Before doing any more testing I’ll wait to get the smaller magnets from K&J. In the meantime, I’ll likely spend some time figuring out how I am going to productionize this process. If these trials have taught me anything, it’s that I really enjoy this stupid coin thingy and I’ll certainly be making it a reality…eventually ![]()
Ideal chipload based on a similar tool from Harvey is .0096in/tooth. At 24,000rpm this is a feed of 72in/min. Correcting for the small bore is (3mm-2mm)/3*72=24in/min…sorry if the units gives anyone an eye twitch
 ↩︎
↩︎I want to explore a full range of price points in the future, leveraging all of the disciplines I’ve built over the years. The different constraints imposed by each price point should be a lot of fun to work with. This tier is meant to by my masterclass though. For example, I plan on plating these in precious metals and cutting the large central gems myself…the magnets are an awfully small percentage of the cost here
 ↩︎
↩︎
4 Likes
New magnets arrived. This is what 760(!) 1/10” x 1/32” magnets looks like.
These should be an absolute joy to work with…if I say that enough times, maybe it’ll be true ![]()
1 Like
This topic was automatically closed 30 days after the last reply. New replies are no longer allowed.