Hey Guys, hoping to get a few tips on best practices for setting zero. I’m trying to cut some shapes out of some .064 thick aluminum sheet using double sided tape to hold down the aluminum. In a perfect world, id like to cut deep enough to fully cut out the part without leaving an onion skin but not so deep that i hit the tape which gums up the endmill. I have achieved this a few times but it seems to be pretty hit or miss. I’ve been setting my zero top corner using a piece of paper. I lower the z axis until the endmill is gripping the paper but still slightly movable. I also set my stock bottom in CC as .066 to make sure the part gets fully cut out. Any thoughts on how I can repeatedly set my zero a little more accurately?
That’s definitely a case for “use stock bottom as the Z zero reference”.
It goes like this:
- in Carbide Create (or whichever CAM tool you are using), set Z zero reference to “stock bottom”
- also make sure to measure (with a caliper) and input your actual stock height in the CAM project
- generate your G-code normally.
- now, zero X and Y as you would normally do on the lower left top corner of the stock
- then set Z zero (only) the following way: put a little piece of the same double-side tape you used to secure your piece, somewhere near your stock. Keep the protective film on the sticky part facing up. Jog manually over that piece of test tape, and set Z (only) manually with the paper method as you are currently doing. The top of that piece of double-sided tape matches the bottom of your stock. And zeroing there will ensure that whatever happens, the machine will not go below that Z level, which pretty much guarantees that you will cut through your stock but not through the tape.
I made it sound complicated, but it’s the simplest thing. I don’t know for double-sided tape (which I never use), but when using tape and glue (close enough), it works like a charm and I regularly get perfect through-cuts barely scratching the tape if at all.
I think many use the following strategies:
- If cutting all the way through your stock set Z=0 at the wasteboard level and make sure this is also reflected in your CAM.
- If machining the material but not all the way through set Z=0 at the top of your stock.
Lastly if you get onion skin in certain areas and cut all the way through in other areas make sure you’ve surfaced your wasteboard.
Thanks for the advice, I will definitely give this a try!
I should mention that this only works perfectly IF you surfaced your wasteboard, and the bottom of your stock is actually flat (but that’s also true when zeroing off stock top!)
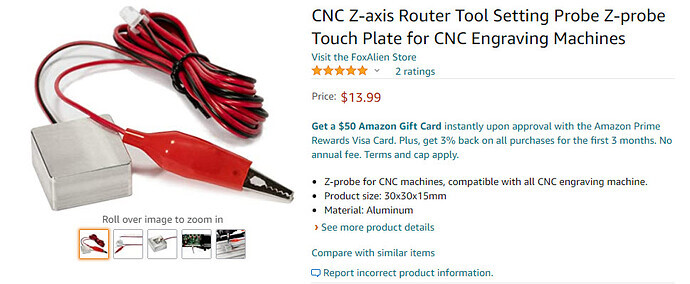
I bought one of these and hooked it up to a small plus in 5 volt power supply i had laying around with an led and resister. Its 15mm tall so i just move z down till the light comes down then remove the plate down 15mm and zero x y and out. It works great for me

See my original post under CNC Machines, Shapeoke Pro, My Cheap and Dirty Probe. It gives all the details
FYI I always use Center to set my X, Y, and Z. Its much easier for me than trying to center the bit over the corner of the work piece. Especially when using smaller bits
This topic was automatically closed 30 days after the last reply. New replies are no longer allowed.