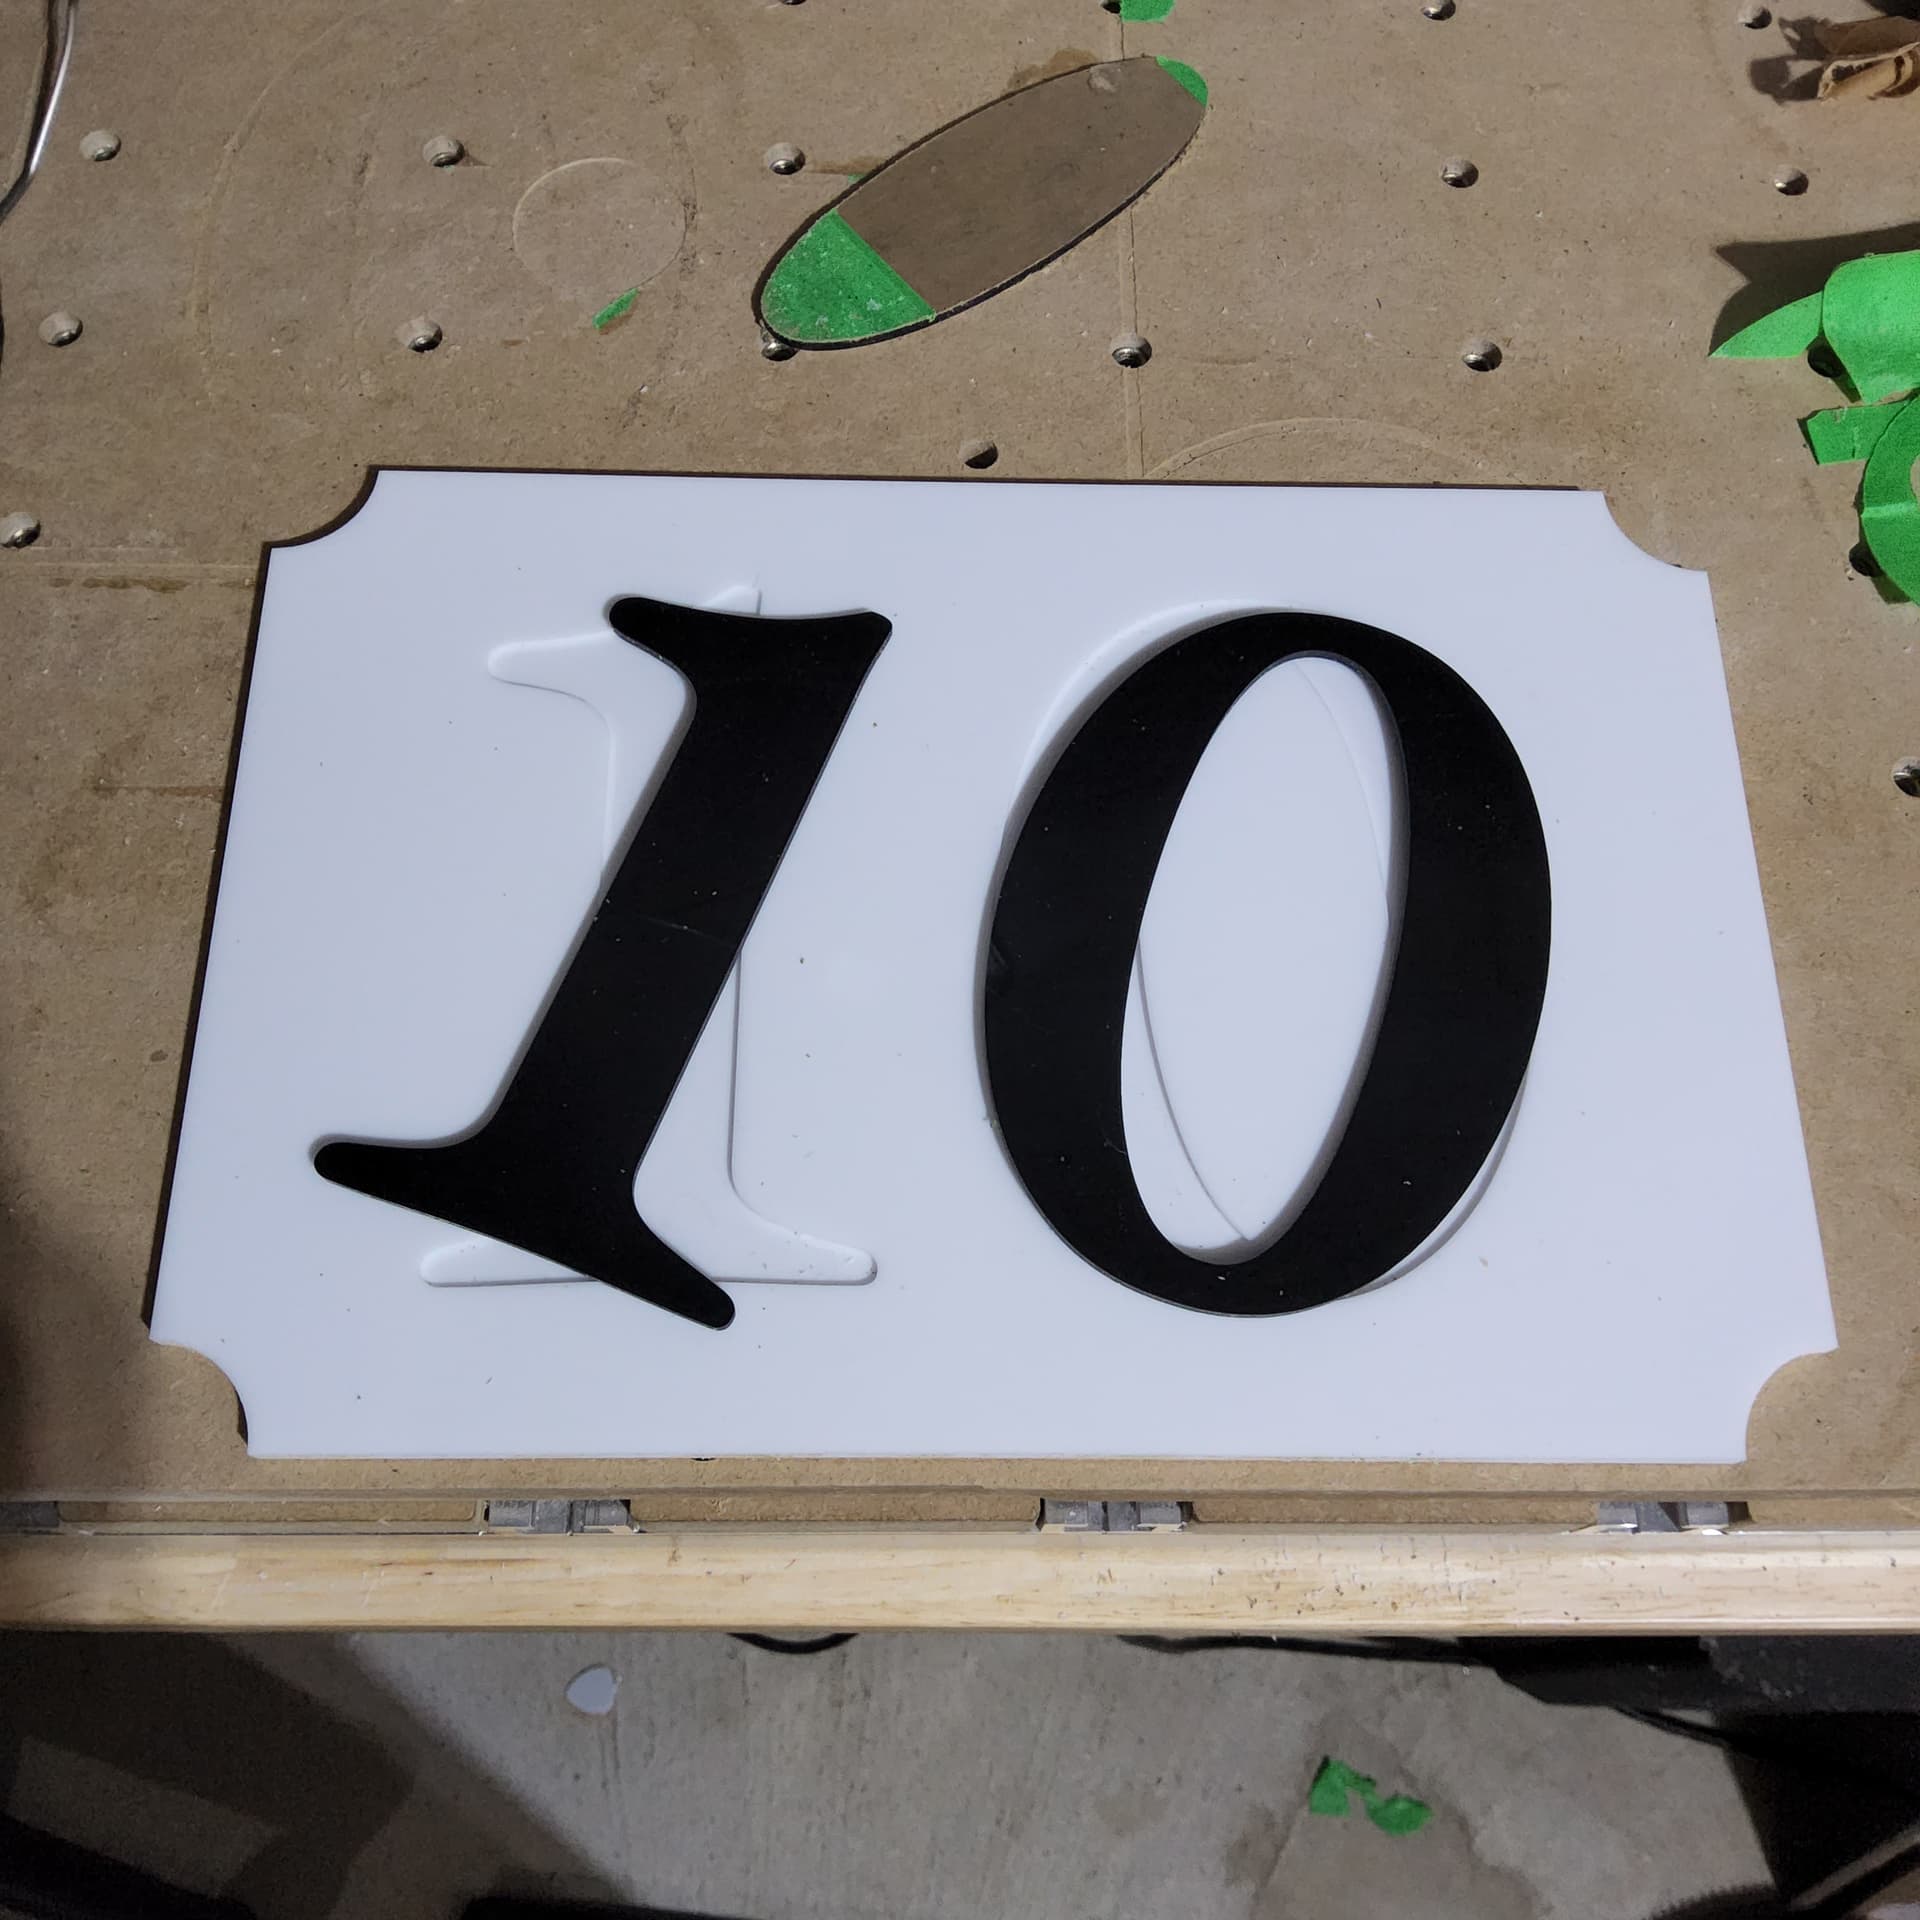
Im trying to make some house numbers out of acrylic sheet and i came up with what i thought was a clever idea to avoid painting. I used .25 thick white acrylic and pocketed the numbers down to .05. Then i used the same files with an outside contour cut to cut the the numbers out of black acrylc and glue them into my pockets. My problem is im not having much luck getting the numbers to fit in the pockets i made. Im guessing i need to make the numbers slightly smaller to get a better fit? Or make the pockets slighty larger?
2 Likes
Measure how things don’t fit while the base is still on the machine, then offset by half that amount rounding up and run an inner contour — repeat until it fits.
Probably you can still make this work by shaving off the numbers on the back along the edges, then securing them in place.
2 Likes
You could also try the inlay procedure. You use the advanced vcarve and an end mill and vee bit and your numbers would fit in. Even if the numbers are not flush with the surface it would still work. You could also flatten the tops of your numbers if you wanted but from the road no one will ever know that the numbers are not quite flush and if anyone says anything you just say it is a feature. The old way of making inlay was to cut your female pocket and then using the same tools just start the male inlay at .1" instead of the top of the material. The old way basically made the inlay slightly smaller than the female pocket so it would seat down into the female inlay. C3D has added an inlay mode and I have not tried that yet. I have a project for a prototype by Saturday and I will be trying the new inlay method. My project is maple with a purple heart inlay. I will use a piece of oak and something else for a trial run because I only have one piece of maple that is usable without doing a lot of work to get a second piece of material ready. I will post if my inlay works with the new method by C3D.
I do tons of standard inlay, none of the V-carve stuff. I think that’s appropriate here especially since you have no sharp corners. The pockets need to be larger than the inlay. There are two ways, I know of, to accomplish this. My method is to create a fake tool based on one I use by claiming it to be somewhat smaller than it really is. That will cause CC to move the tool closer to the contour line such that the bit will actually cut outside the line. For my work this diameter exaggeration is usually on the order of 0.05 mm but this may vary depending on the size of the inlay, the material and your gluing method. Most of my work is less than 120 mm in size. You may want to do some trials for the perfect fit.
Another method is to, within CC, create an outline of the pocket with an offset.
1 Like
I tried cutting out another set of numbers, this time creating a .01 inside offset in CC and that yeilded a perfect fit for the existing pocket. Thanks for everyones advice.
3 Likes
The real question to ask yourself before you start figuring out what “fit” is, “How fit do these parts need to be?”
Being precise isn’t really necessary in your project (or many other projects.) No one will ever notice even a 1/16", and that will make a big difference in the assembly process.
This topic was automatically closed after 30 days. New replies are no longer allowed.