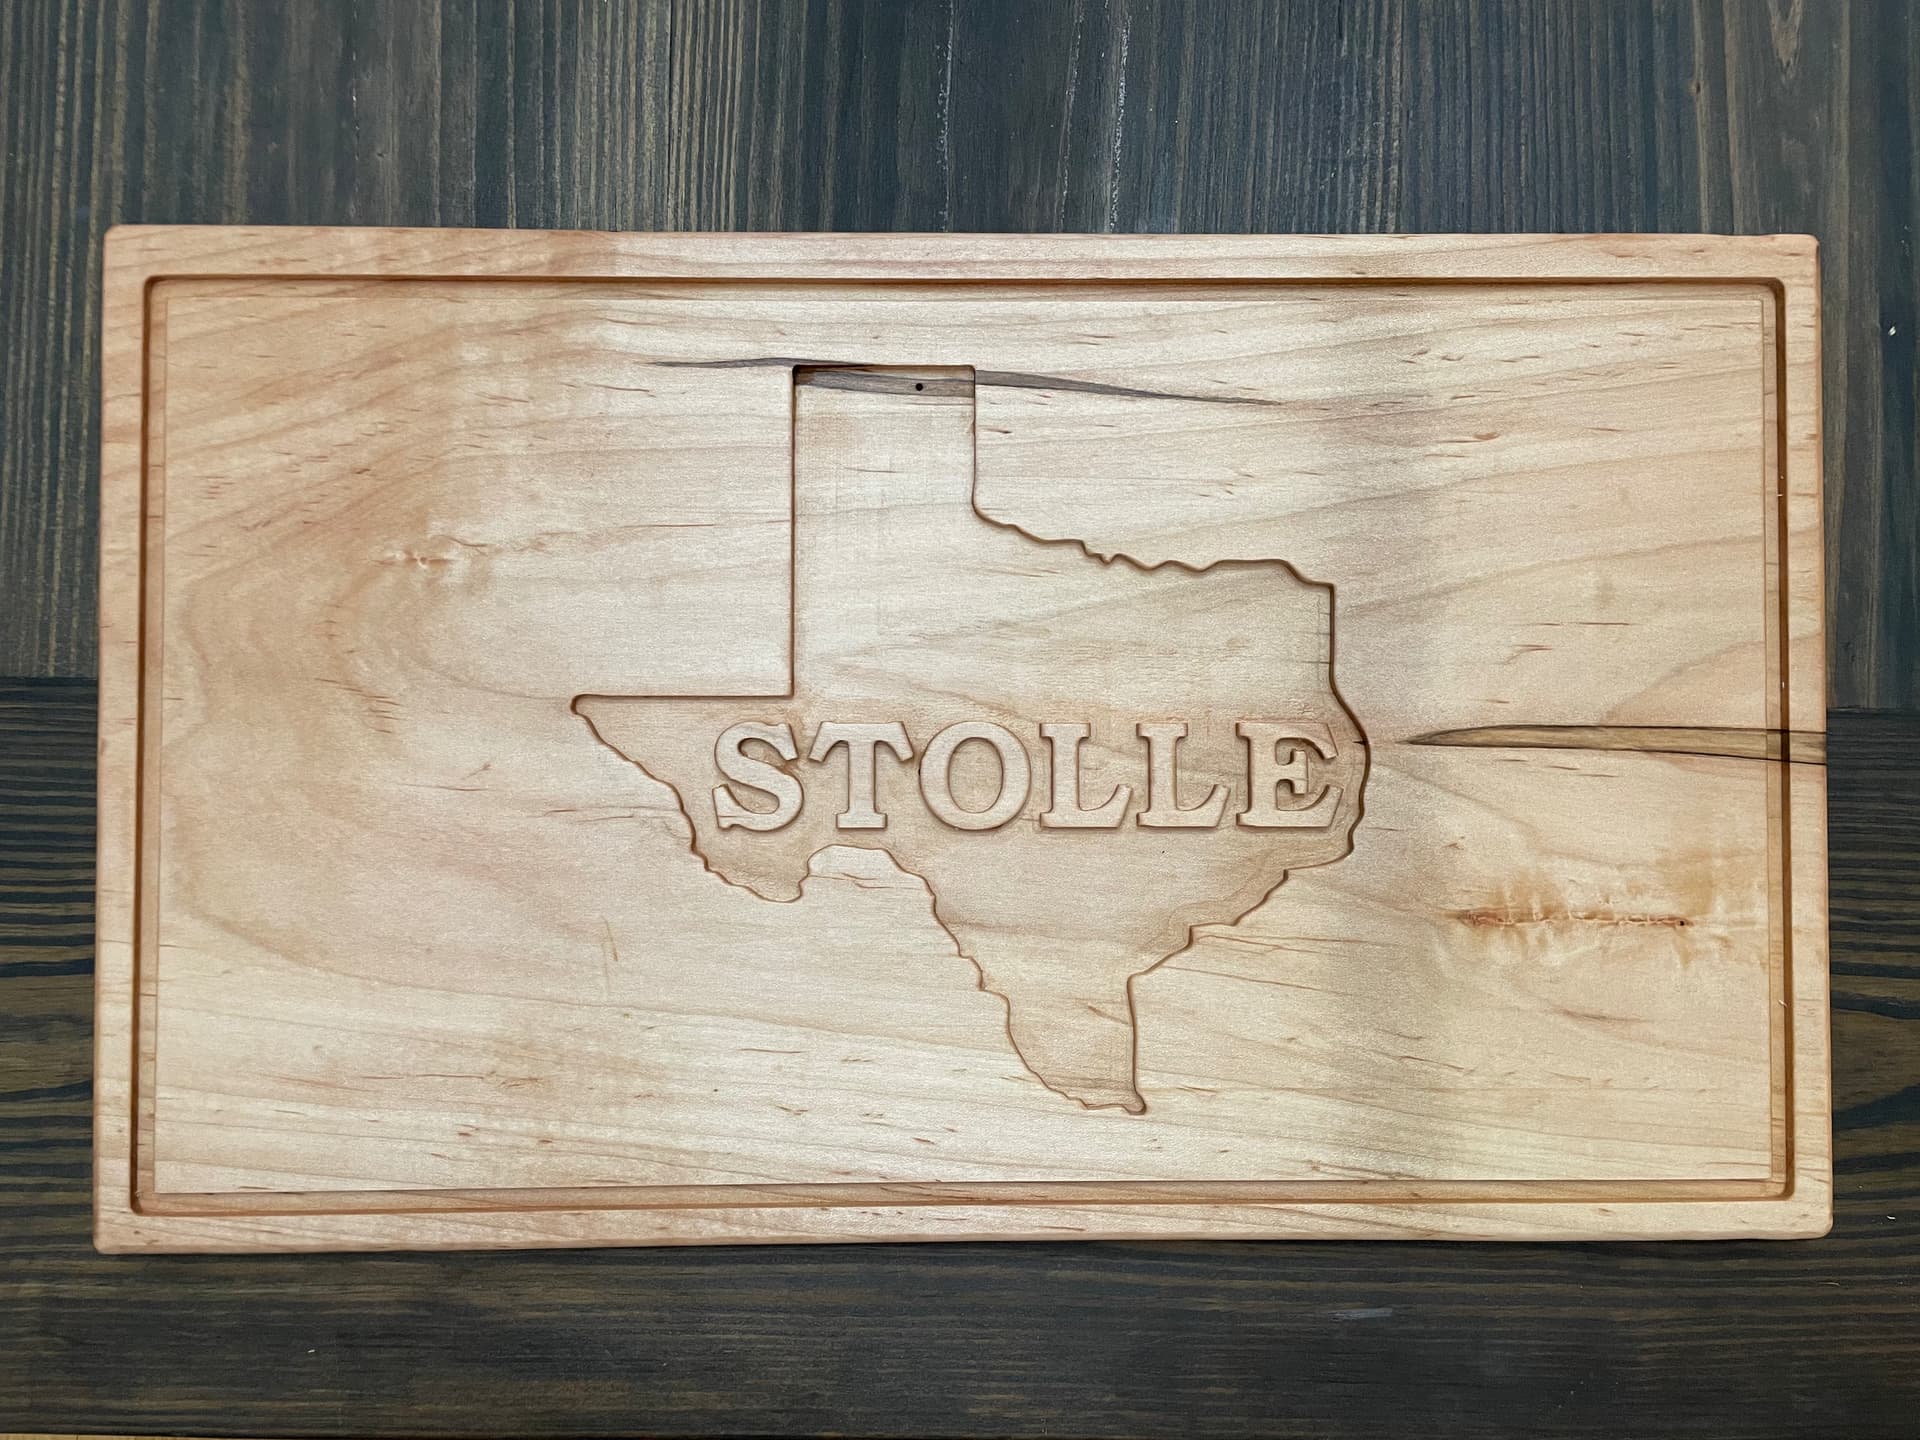
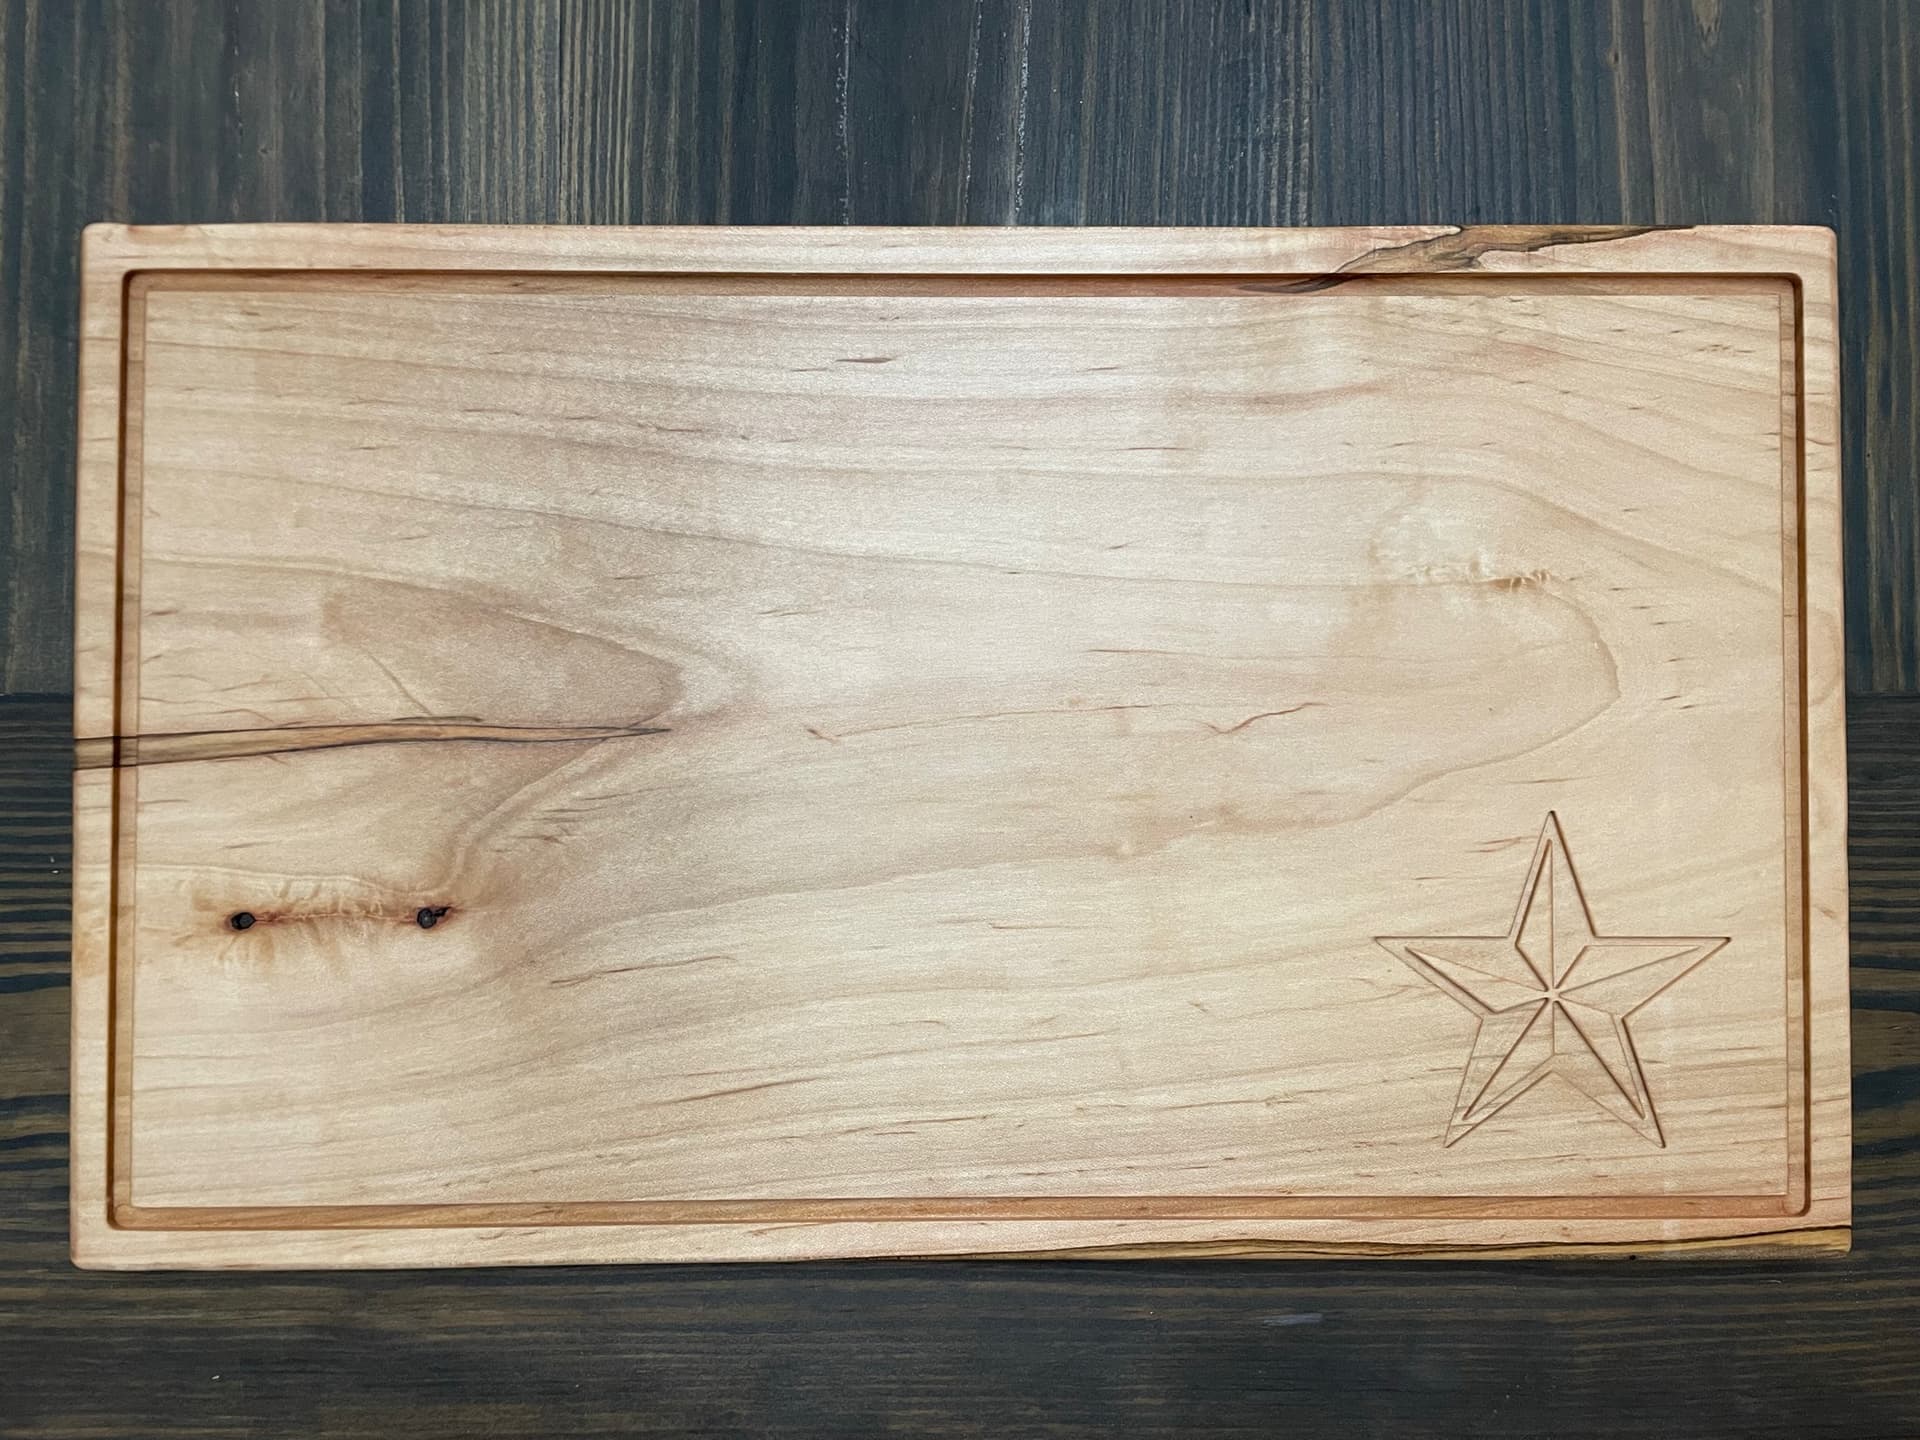
I recently made this cutting board for my brother. I’ve never made a cutting board before, and it’s nothing too fancy, but I think it turned out pretty well. One side is more decorative, and the other side is for cutting. I finished it with cutting board oil and conditioner, which worked out well. My question is: should I have filled it with epoxy? If so, what precautions should be taken (if any) on the cutting side? Thoughts?
There are pluses and minus for epoxy on a cutting board.
Plus: You can use color to make your board pop. Epoxy is food safe when cured.
Minus: The epoxy is cut easily and is scared for the life of the board.
Obviously I did not go deeply on the plus and minus of epoxy of a cutting board. Frankly I would not use epoxy on the cutting board side. The purpose of a cutting board is to cut. So the very act it was designed for slowly destroys the cutting board. There are 3 types of cutting boards:
Face Grain. This is the least practical because the face grain is most beautiful but also the most delicate.
Side Grain. This is better but still not best. You cut the board into strips and glue them together with the side grain showing.
End Grain. This is the best. You cut your boards into strips, glue the larger board up and then cut it cross grain exposing the end grain and then turn that and glue it together with the end grain facing up. This end grain is best for cutting on and not showing every knife mark. That does not meas that deep cuts disappear but there are less noticeable and the end grain tends to somewhat self heal.
Your board looks like a face grain type so it is most likely to get marked up by the knife. If you use epoxy it will also get marked up.
Likely you already know but be sure to inform the receiver to never put a wooden cutting board in the dishwasher. The dishwasher hot water and drying cycle will destroy a wooden cutting board. Also supply the oil you used on the board so they can renew the finish. If you dont give them the oil with the cutting board it will never get reapplied and your cutting board will end up ugly and hidden in a bottom cabinet. There are several methods to clean a cutting board. You can use a diluted vinegar solution, you can use diluted bleach but that tends to bleach the surface, you can use hydrogen peroxide diluted as well. It is important that the wooden cutting board is sanitized after every use.
I agree with the others for the same reasons they stated and would not add epoxy.
Maybe you would want to consider cutting a wood insert for the TX state and “STOLLE” text. Not sure how well or easily the current raised letters would fit through as you position the insert, so you might need to mill those off and create new ones to insert into your insert.
Probably overcomplicates and adds more time than you were planning, but to add some ‘pop’ and have a level surface without epoxy that’s one way.
. It turned out ok, not totally happy with it but both the board and the inlay are end grain and should wear pretty much the same (other than the difference in hardness between maple and walnut).
This is now my go to method though, I will still use epoxy for some stuff but not cutting boards.
See above.
But if you want to make your cutting board more decorative, carve a design along the edge, outside of the normal cutting area. For Texas, maybe a line of stars to help frame the main cutting area. It would add some color while not affect the usefulness. Besides, every piece you make is just the last piece you made. There is always the next one.
This info would’ve probably been helpful when I originally posted my question: Texas was big and centered because my brother wanted one side of the board to be used solely for decoration (it will be side up when not in use) and one side that would actually be used (the star side that has much more usable area).
Firstly, very nice board!
I do a lot of acrylic “serving/charcuterie” boards, they are not cutting boards and I warn my customers about that. I am sure we all have a plastic cutting board of some sort, they get to looking horrible after awhile. I would not use acrylic on a “cutting” board even though it is completely food safe. As mentioned, it would look great on the back side and then an inlay on the front to fill in the void, unless that is the “juice tray”!
I used the advanced Vcarve, 1/8 spiral downcut for roughing and a 30 deg v bit for the finish. Same with the male portion, simply mirror horizontally create an offset outside the image ( With the detail in this is just made a rectangle around it) to use as a bounding box. If I did that one again I would edit the image a bit to bring the detail down a little. Garrett Fromme has a pretty good video on his channel to show how it is done. AE Timber & Pine also has one as well that I believe uses CC.