I have the BitSetter on my Pro XXL and have gotten into a habit of using the pendant to disable the spindle when changing blades.
About 4 hours into a cut I needed to replace the 1/4” end mill with the Vee bit. Stupidly I forgot to re-enable the spindle. My dust collector is pretty loud so I didn’t notice for about 15 seconds. I turned it on at that point instead of killing the job. I took note of the line of gcode it was on figuring I would go back and re-run the lines between the bit change and where I turned on the spindle and hope.
Once the job was finished I realized that wouldn’t work. I can only assume that when the bit lowered and started in the Y direction without actually spinning that it created some slippage in Y. The effect was sort of cool in spots but definitely not what I was going for.
I flattened the board after this so that I can start again. Other than a tramming issue I need to take care of it all worked Ok so no permanent damage I think.
I just made this same error no more then 15 min ago changed bit like always and I decided to change dust boot from the brushed boot to the funnel boot threw off my whole groove and forgot to turn it on noticed it pretty quick luckily! Lol
Yes, a very welcome feature would be a “Resume Job From” location that could raise the bit to the z travel height and then start cutting from there. I had this in previous software because redoing the gCode was difficult to get perfect.
There have been numerous requests for this feature, with no response from Carbide, other than to just edit your gcode file to start where you need it to, and re run it.
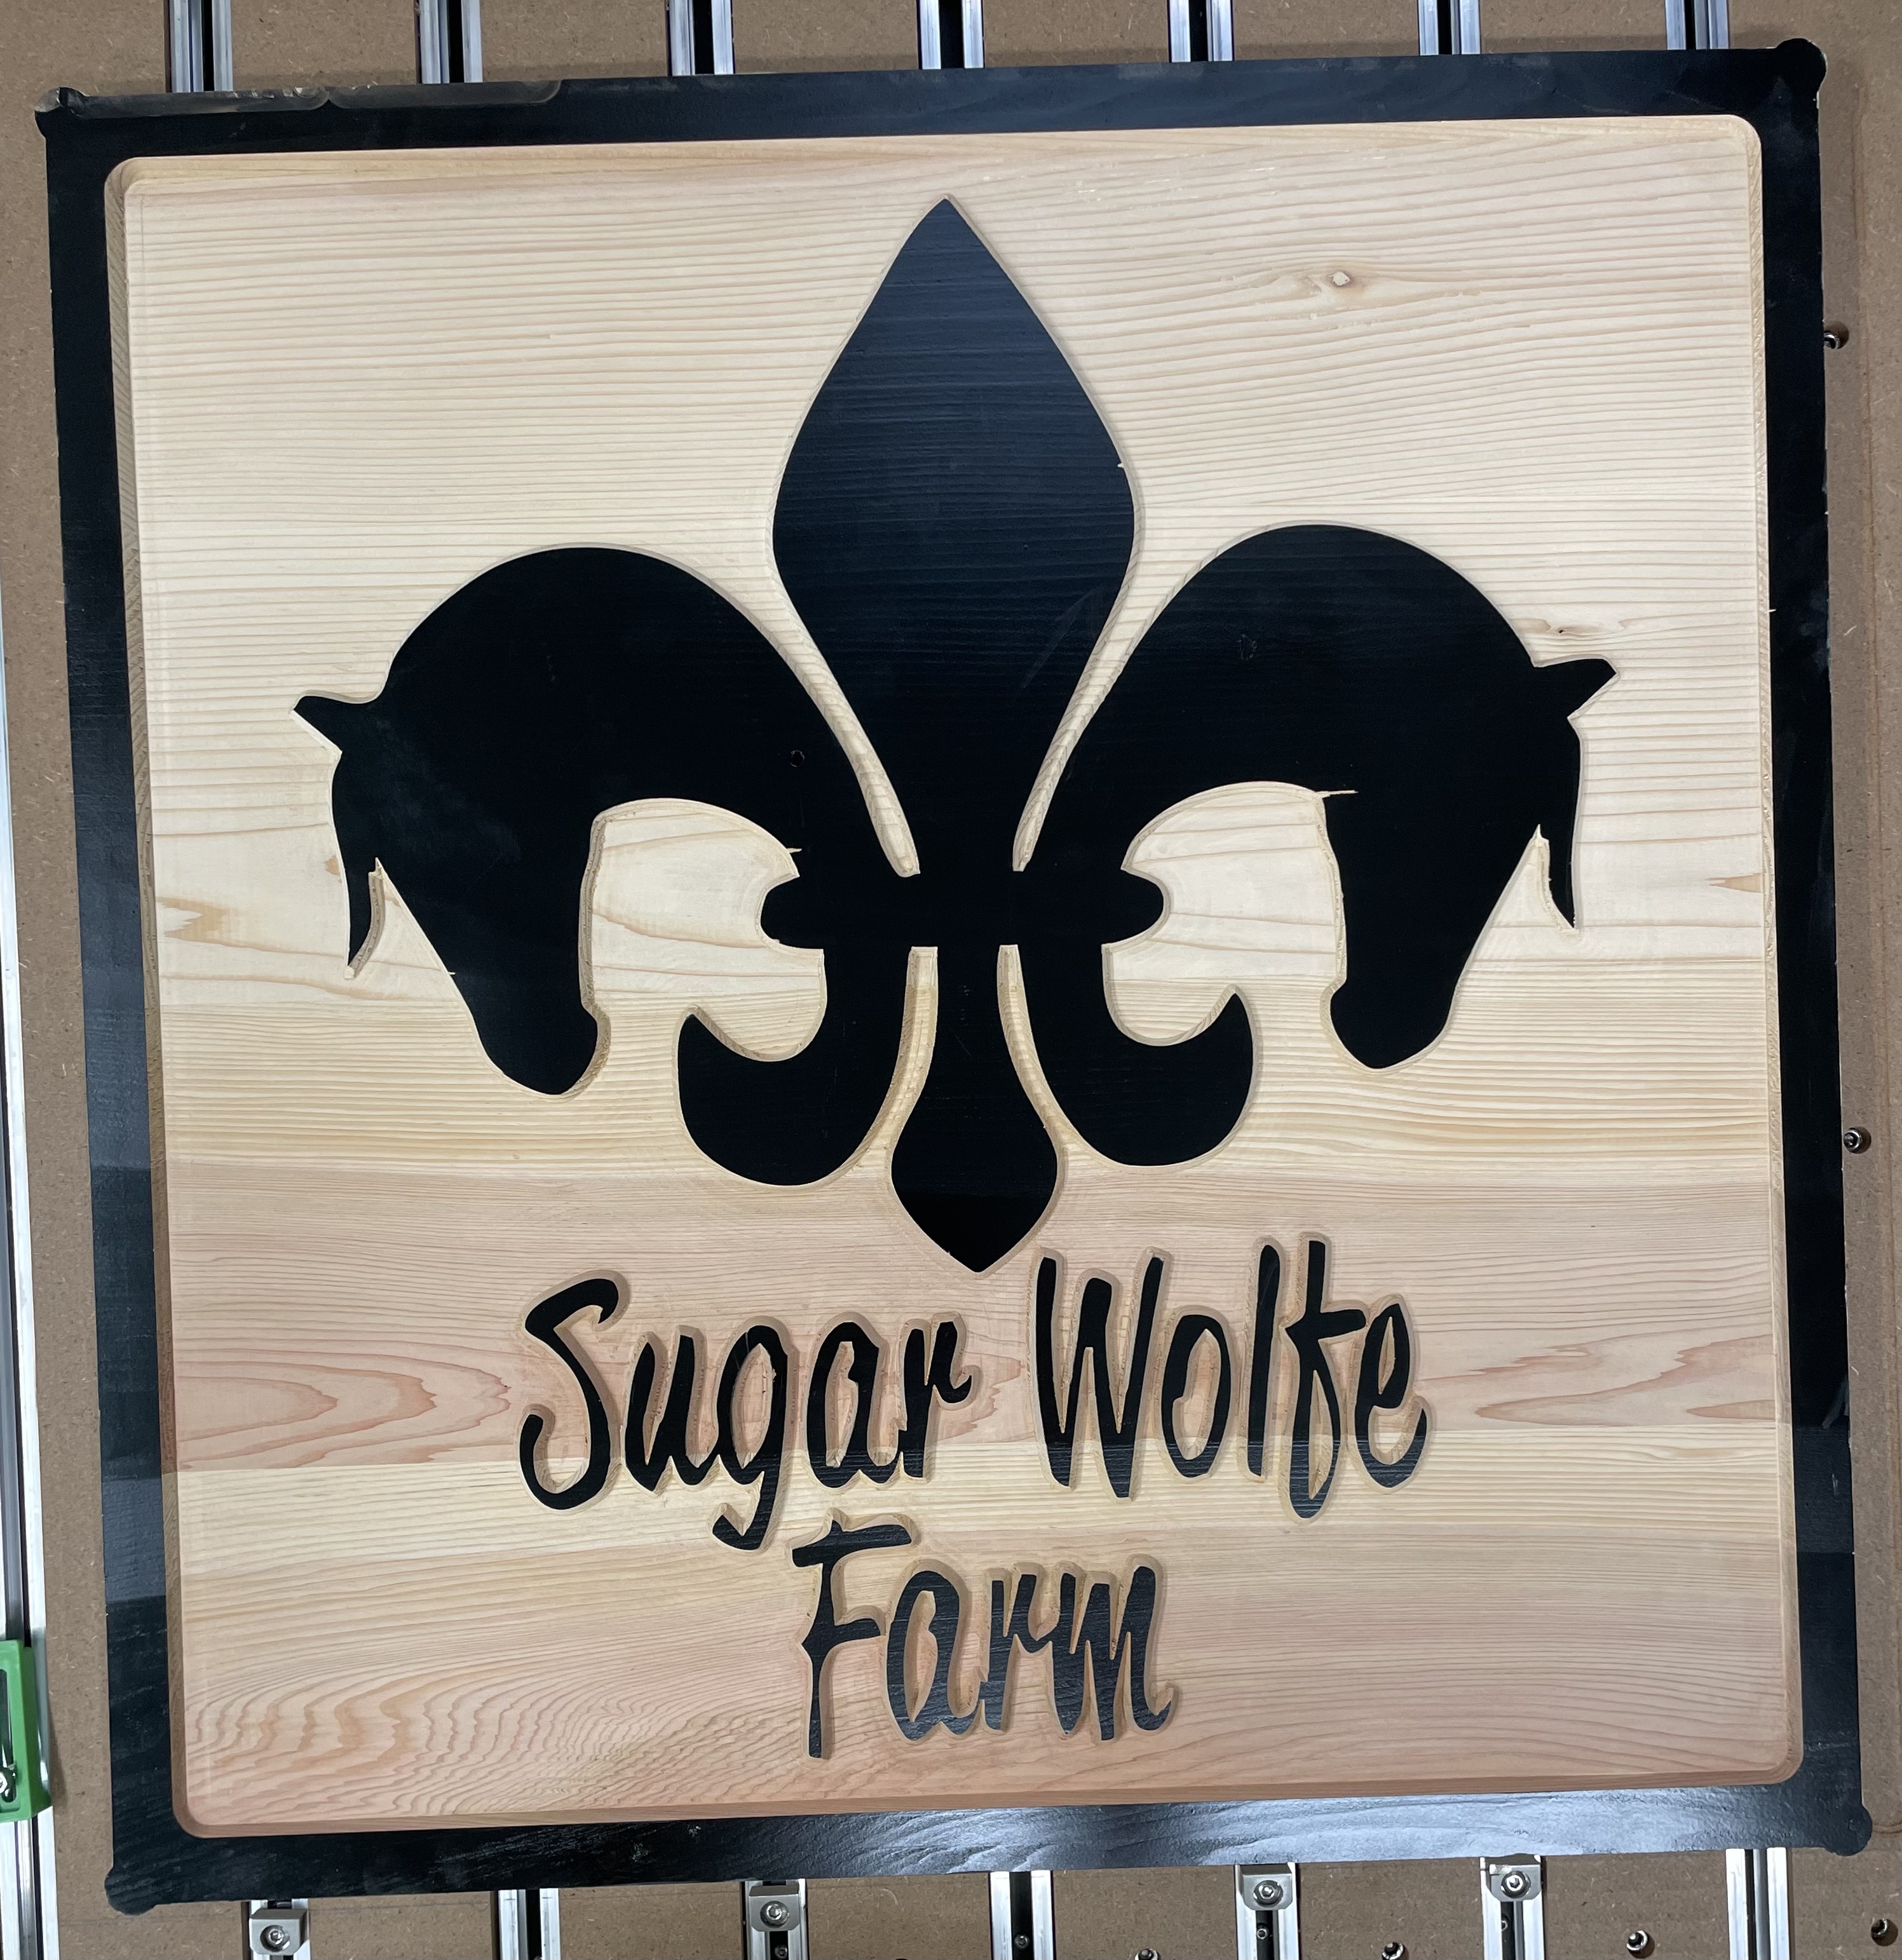
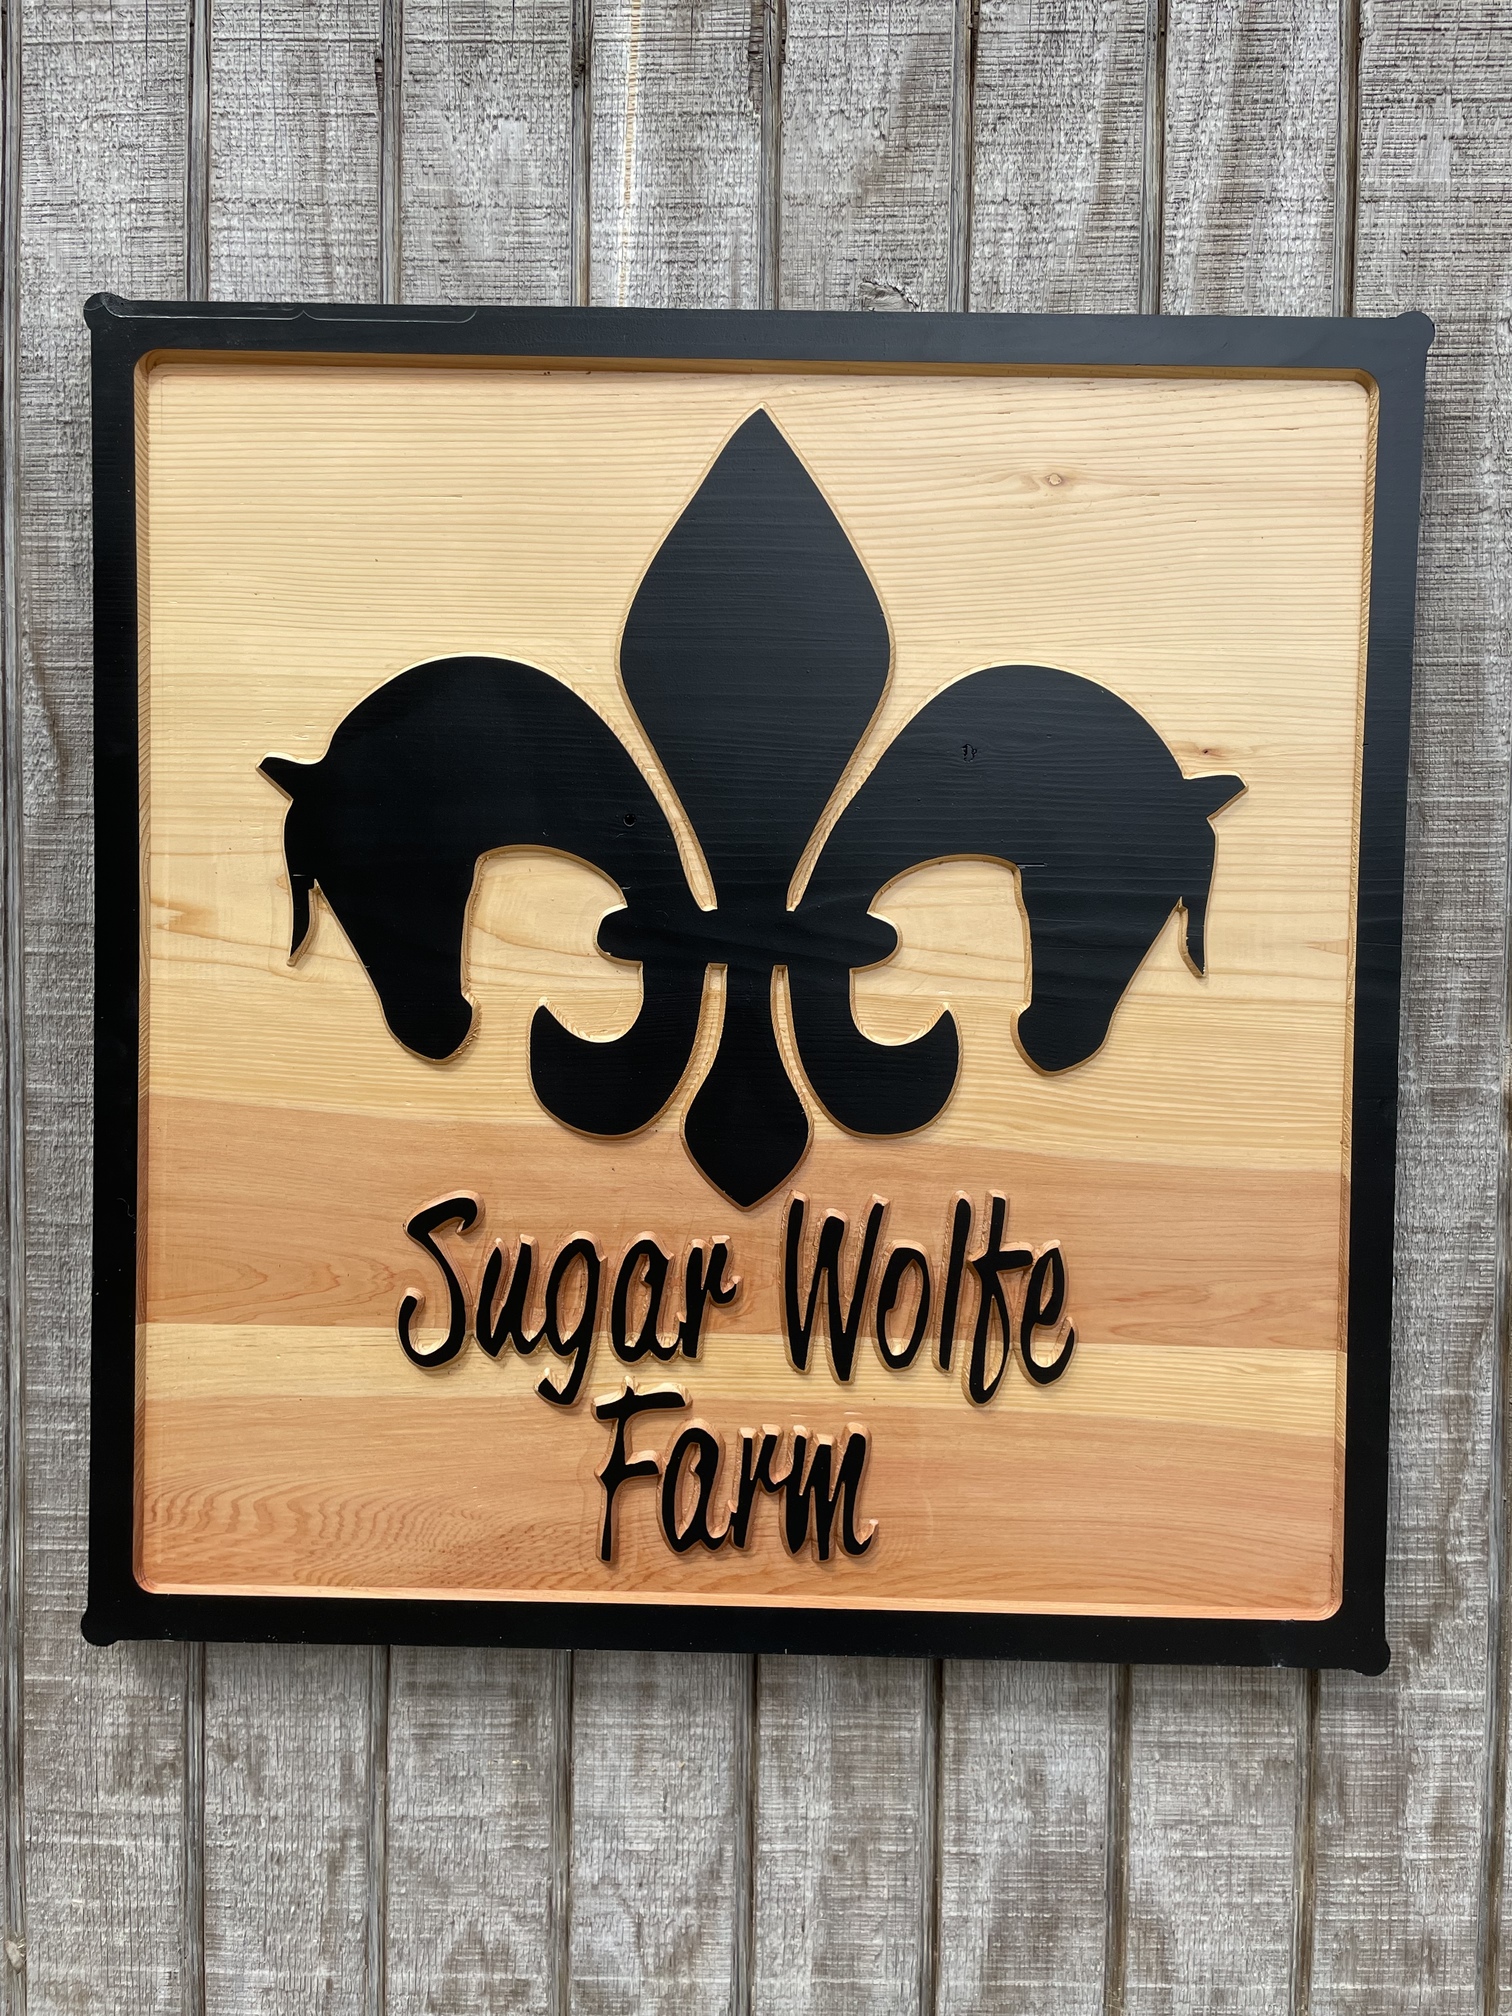
After the mess up I showed above which was on a 29x29” bit of cedar that I glued up I recovered by flattening the board again. But then it was too thin to work so I glued it to a piece of 1/2” exterior plywood and flattened again.
Then, before cutting I decided to re-tram, tune the belts and flatten the spoilboard. I tried my home made tramming gauge and was t happy with the results. So I bought the SST and then a piece of supposedly dead flat glass. I adjusted it and then did it again a few days later. I think it is as close as I can get. I know you guys say not to chase the tramming but I don’t know what to expect so I don’t know if I am good enough.
I still see very slight matching marks when doing the spoilboard. In the redo of that sign I can see the machine marks from the 1/4 end mill (201). I was able to sand them out reasonably with some 220, but that was tough in the detail areas.
I am sure that the marks are only really an issue in large flat pockets. I just don’t know if there is more I can do or if it’s just the way it is.
I included pics before and after the sanding. Still a little touch up to do and then some clear coat.
I finished the clear coat and mounted it at the barn. The owner is super happy, of course it was free and a surprise for her that I was doing it.
It’s been a good learning experience. The second time I did the v-carve I didn’t bother with the liner over the painted surface. I thought it would help protect the paint while cutting but it ended up peeling all over the place the first time. I did have a couple of small spots to touch up but not too bad.
I feel the need for a detail sander of some sort now but haven’t found a good candidate.
I tried inlay coasters with their logo on Walnut with maple but could not get the finer details to stay with the maple. Going to try an epoxy fill instead.