Well after all the issues ive had with the z-axis ive decided to just bite the bullet and go with something more sturdy. I believe I ordered the one with new switches and mounts for my dust boot. My question is is there any other upgrades I should consider while im at it. I know the obvious is a spindle but I honestly have no interest in this. But if there is anything else that can help insure good quality repeatable results I am all ears.
1 Like
You’ll love it. You probably shouldn’t bother with other upgrades until you know what you need / what your “next” problem/limitation is going to be ?
I guess you know already, but you’ll have to forget using Carbide Motion (not compatible with HDZ settings, at least last time I checked) and move on to another G-code sender, which is an upgrade in itself, at least in the workflow (I was never a huge fan of CM over-constrained workflow, though it has its benefits)
A probe is another possible upgrade to the workflow, I hear Carbide3d’is excellent if you can get (and afford) one, but since you’ll be using something else than Carbide Motion, all other probes are options (hint: MrBeaver’s)
The upgrade that was the most impactful for me was replacing the MDF bed with an aluminium one, and removing the Shapeoko’s feet. But that is not a cheap upgrade.
The upgrade to steel-core belts is cheap and easy, though the added value is still unclear if you do not intend to push speed/accel beyond defaults.
6 Likes
What gcode sender would you recommend
1 Like
I use Universal G-code Sender, it looks a bit dated but suits my needs really well, the other popular option with a nicer UI is CNCjs.
There are many others, but if you pick one of these two, you will put yourself in a position to get god support from this community, as many members use them.
2 Likes
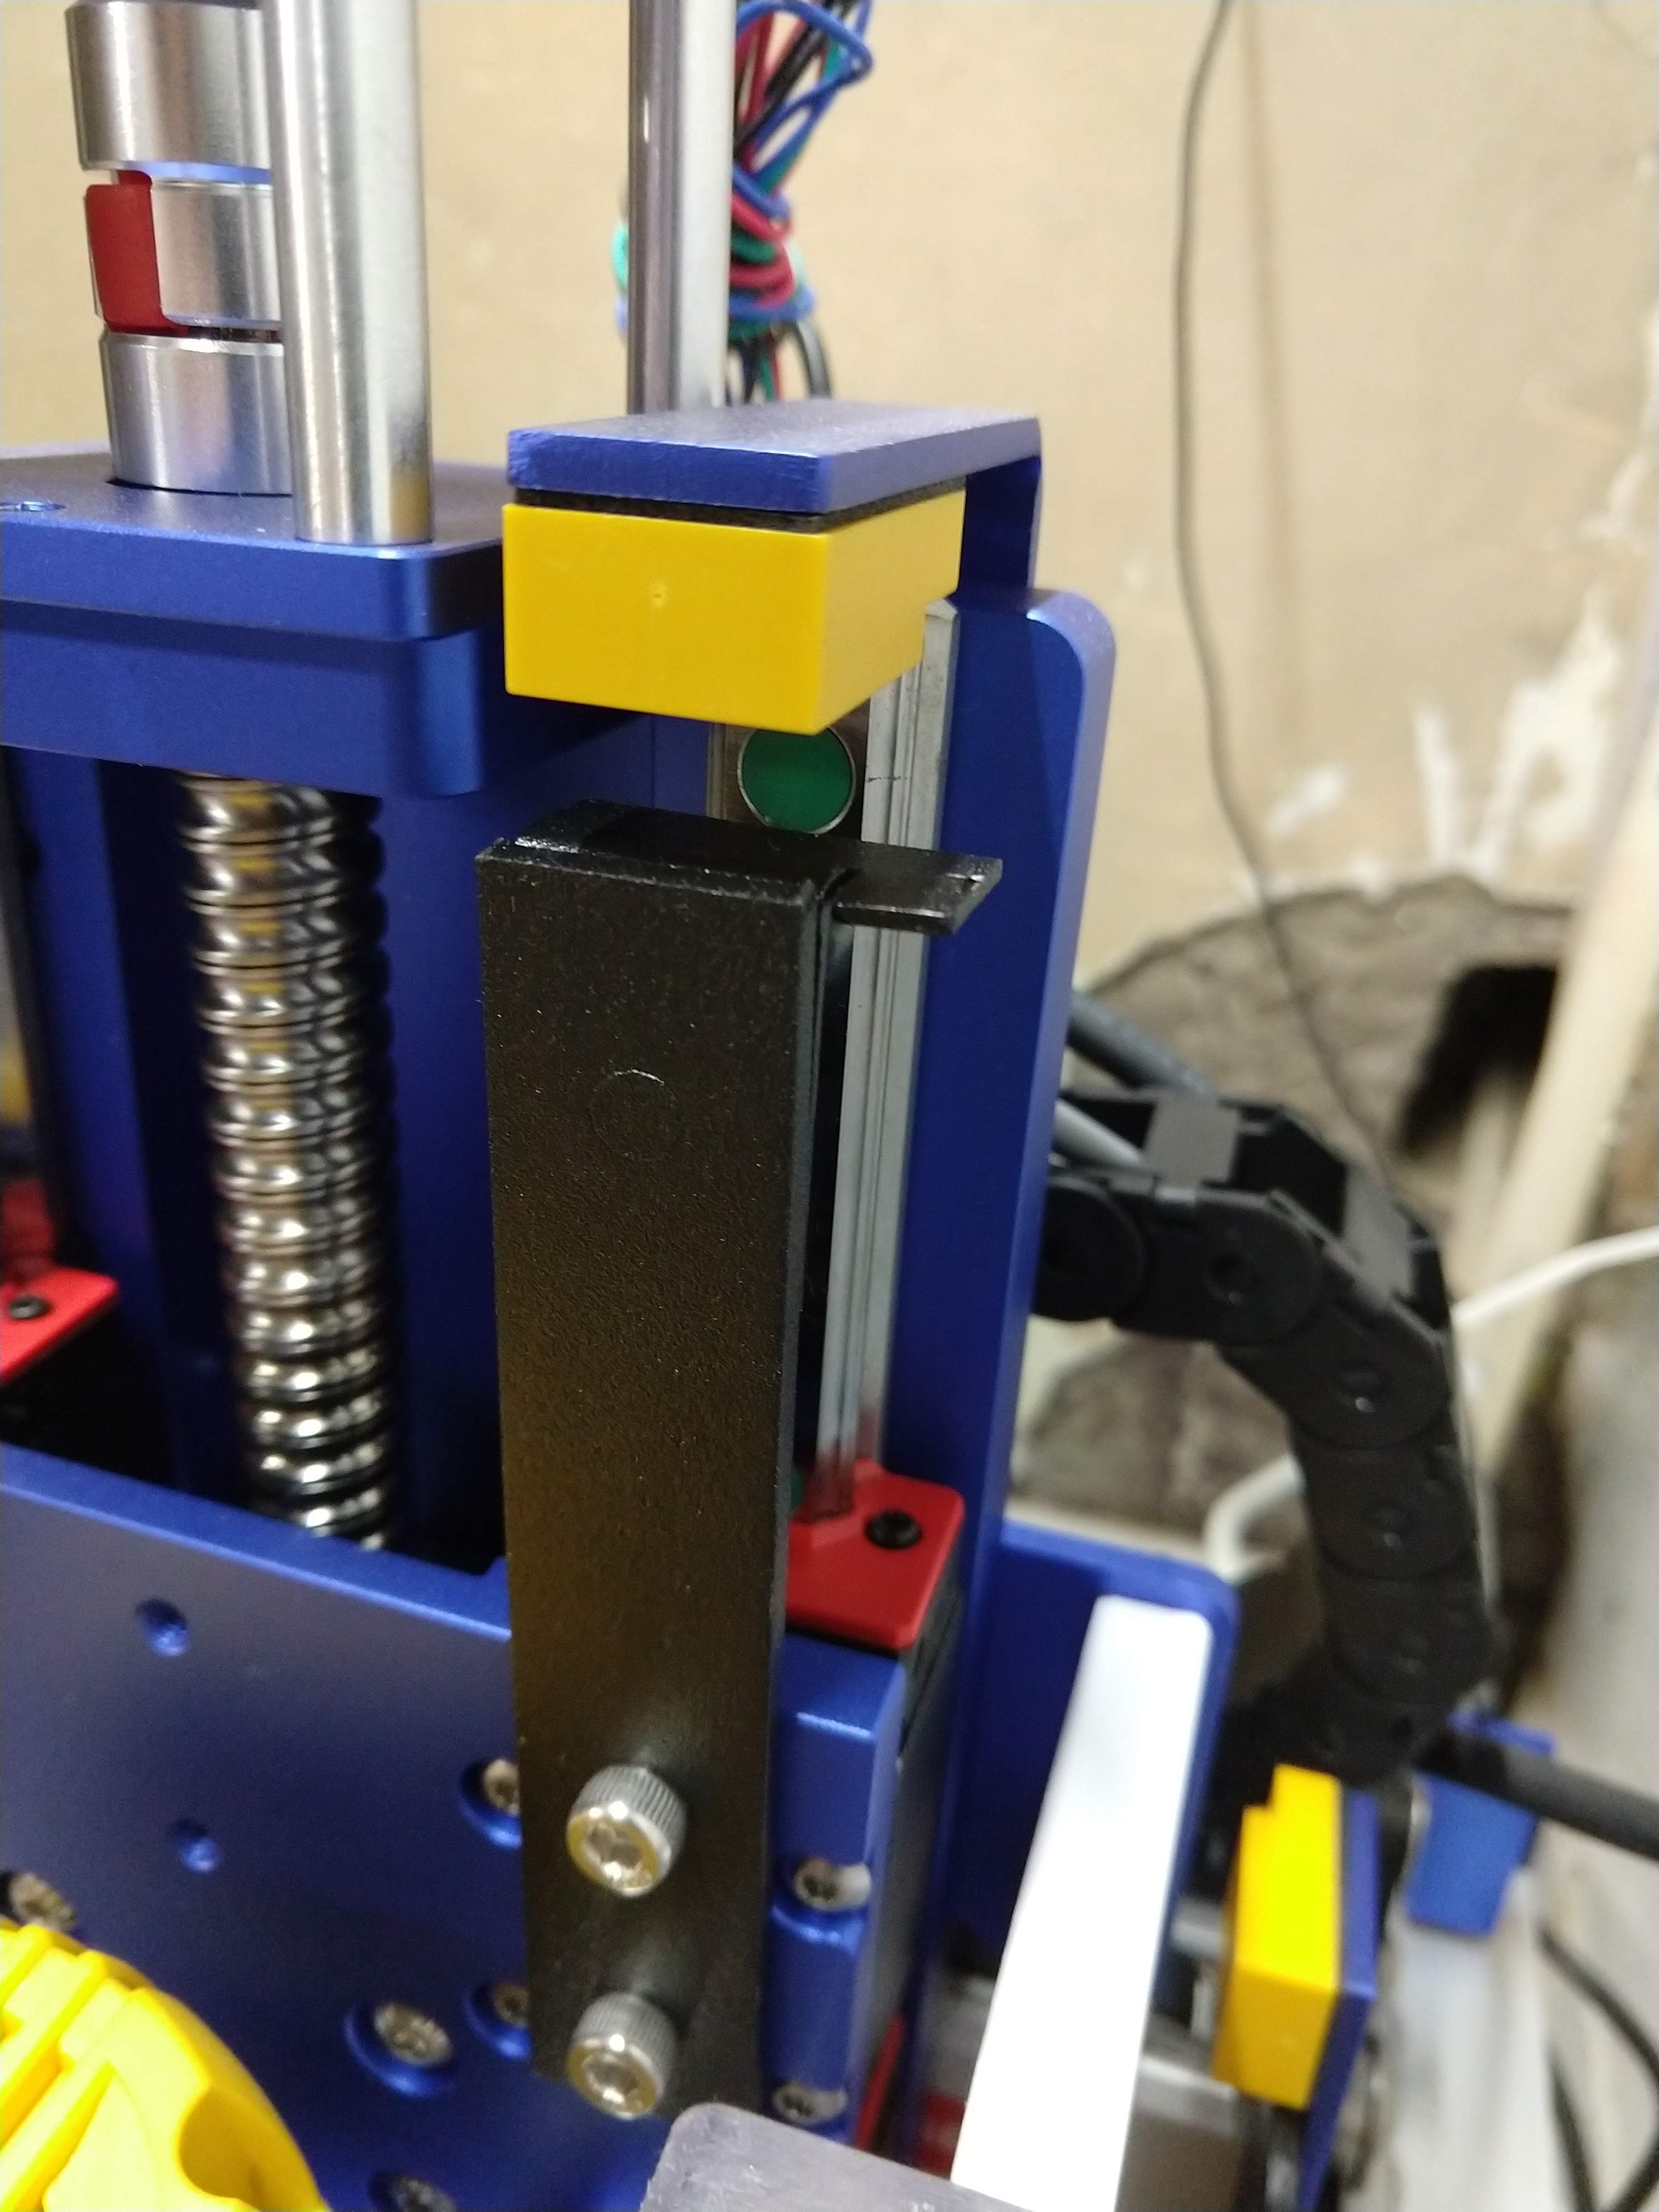
I’m using HDZ with Carbide Motion. You just have to install a spacer (a simple bracket) to activate the Z limit switch since CM’s restricted in Z height.
How much travel do you loose ?
Would you mind sharing a picture of that please
Note: I ordered my HDZ with the proximity switches and this works with the Z proximity switch. I don’t know if it works the same with the standard Z limit switch, which is what I believe you get if you don’t order the proximity switches.
You lose the additional travel that you would’ve gained by using the HDZ and an alternative sender. With the bracket it’s the same as stock.
See below. I laser cut these at my regular job. The top image is the bracket powder coated & installed; the bottom image is raw & loose.
In the Beaver CNC community section, somebody made a 3D printed bracket with a nut on the top. You just need metal up there for the proximity switch - you could rig up something pretty janky and as long as there’s metal up there, it would work.

2 Likes
Awesome thanks for the help
I too took the plunge and ordered the HDZ and some extra stuff to beef up the Y Axis last night.
I had a workpiece come loose cutting earlier in the day and my X & Z Axis wheels self-destructed then everything jammed up. The #201 bit was the strongest thing in the system and didn’t break
3 Likes
Hey guys tried digging through the hdz threads to find this piece of info, what is the required height for the hdz to work in an enclosure?
In the words of @Luke,the top (of the Z-stepper) is “268mm from the base of the top V wheel (X extrusion)”.
My enclosure is just high enough to accomodate the HDZ + Z stepper on top, and I have 520mm from the base of the shapeoko bed to the top of the enclosure. I removed the shapeokofeet too, so the required height is more likely around 540mm / 21".
And then add some margin / maintenance /ease of access.
1 Like
This topic was automatically closed 30 days after the last reply. New replies are no longer allowed.