Finally tackled a project I’ve had on my mind for about 5 years, ever since I got a laser cutter/engraver. Funnily, the Shapeoko beat the laser to the punch.
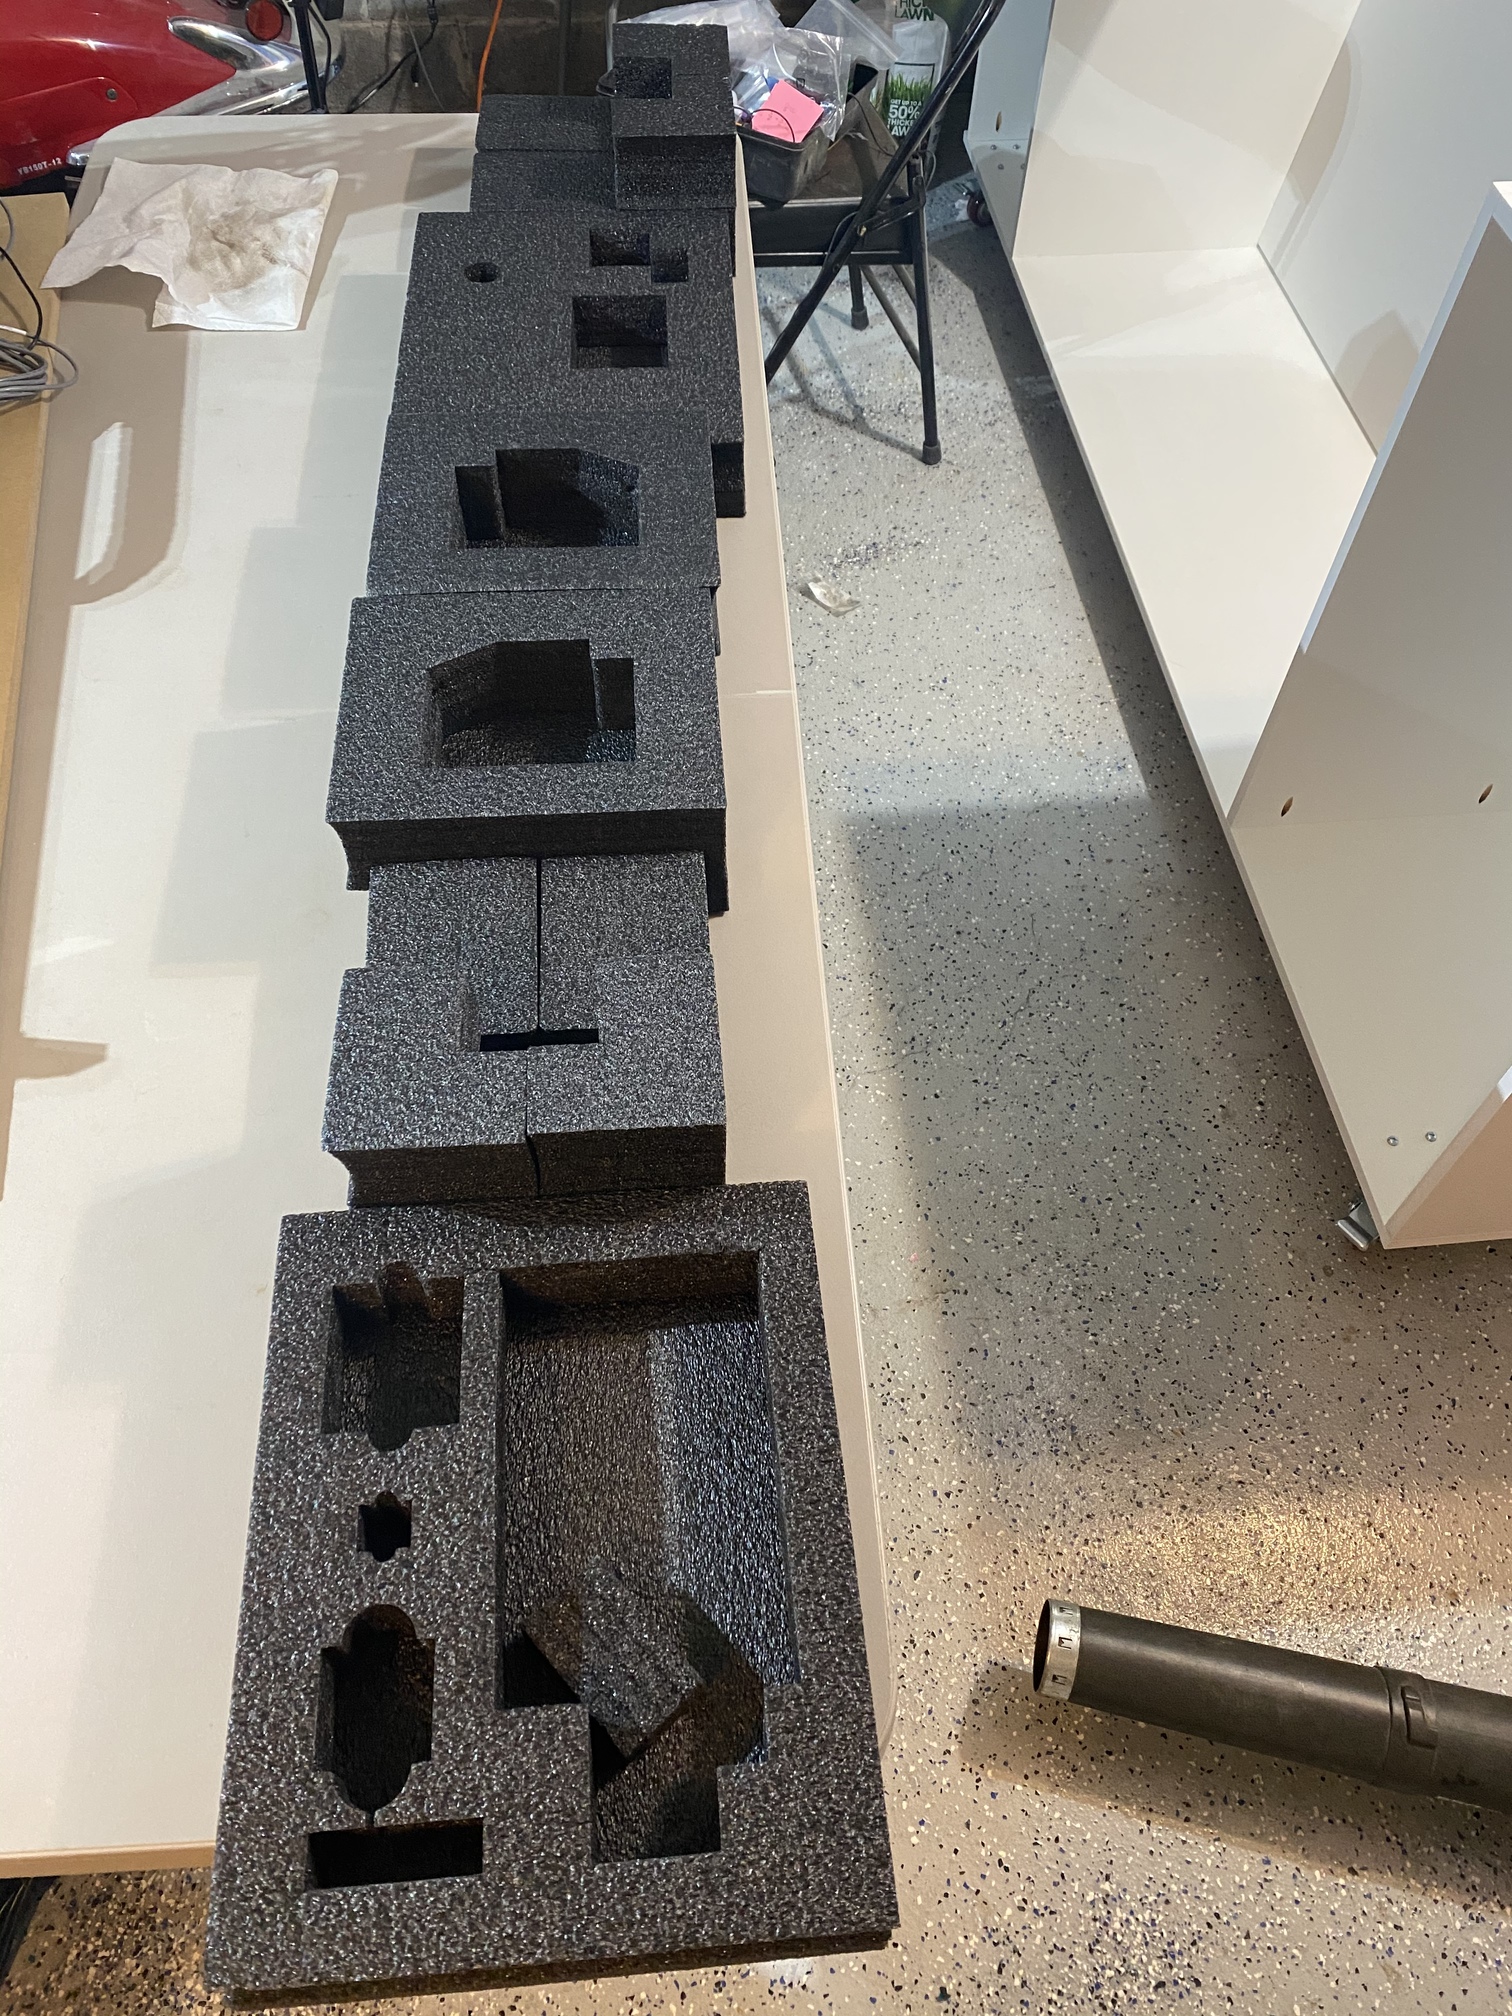
Bought some 1.7pcf 1" thick foam sheets (arrive flat, not rolled), and stuck them down to the bed with double sided foam after cutting to size with a box knife. I ran my router near the top of the RPM range, and tried a few different feedrates though didn’t notice a huge difference.
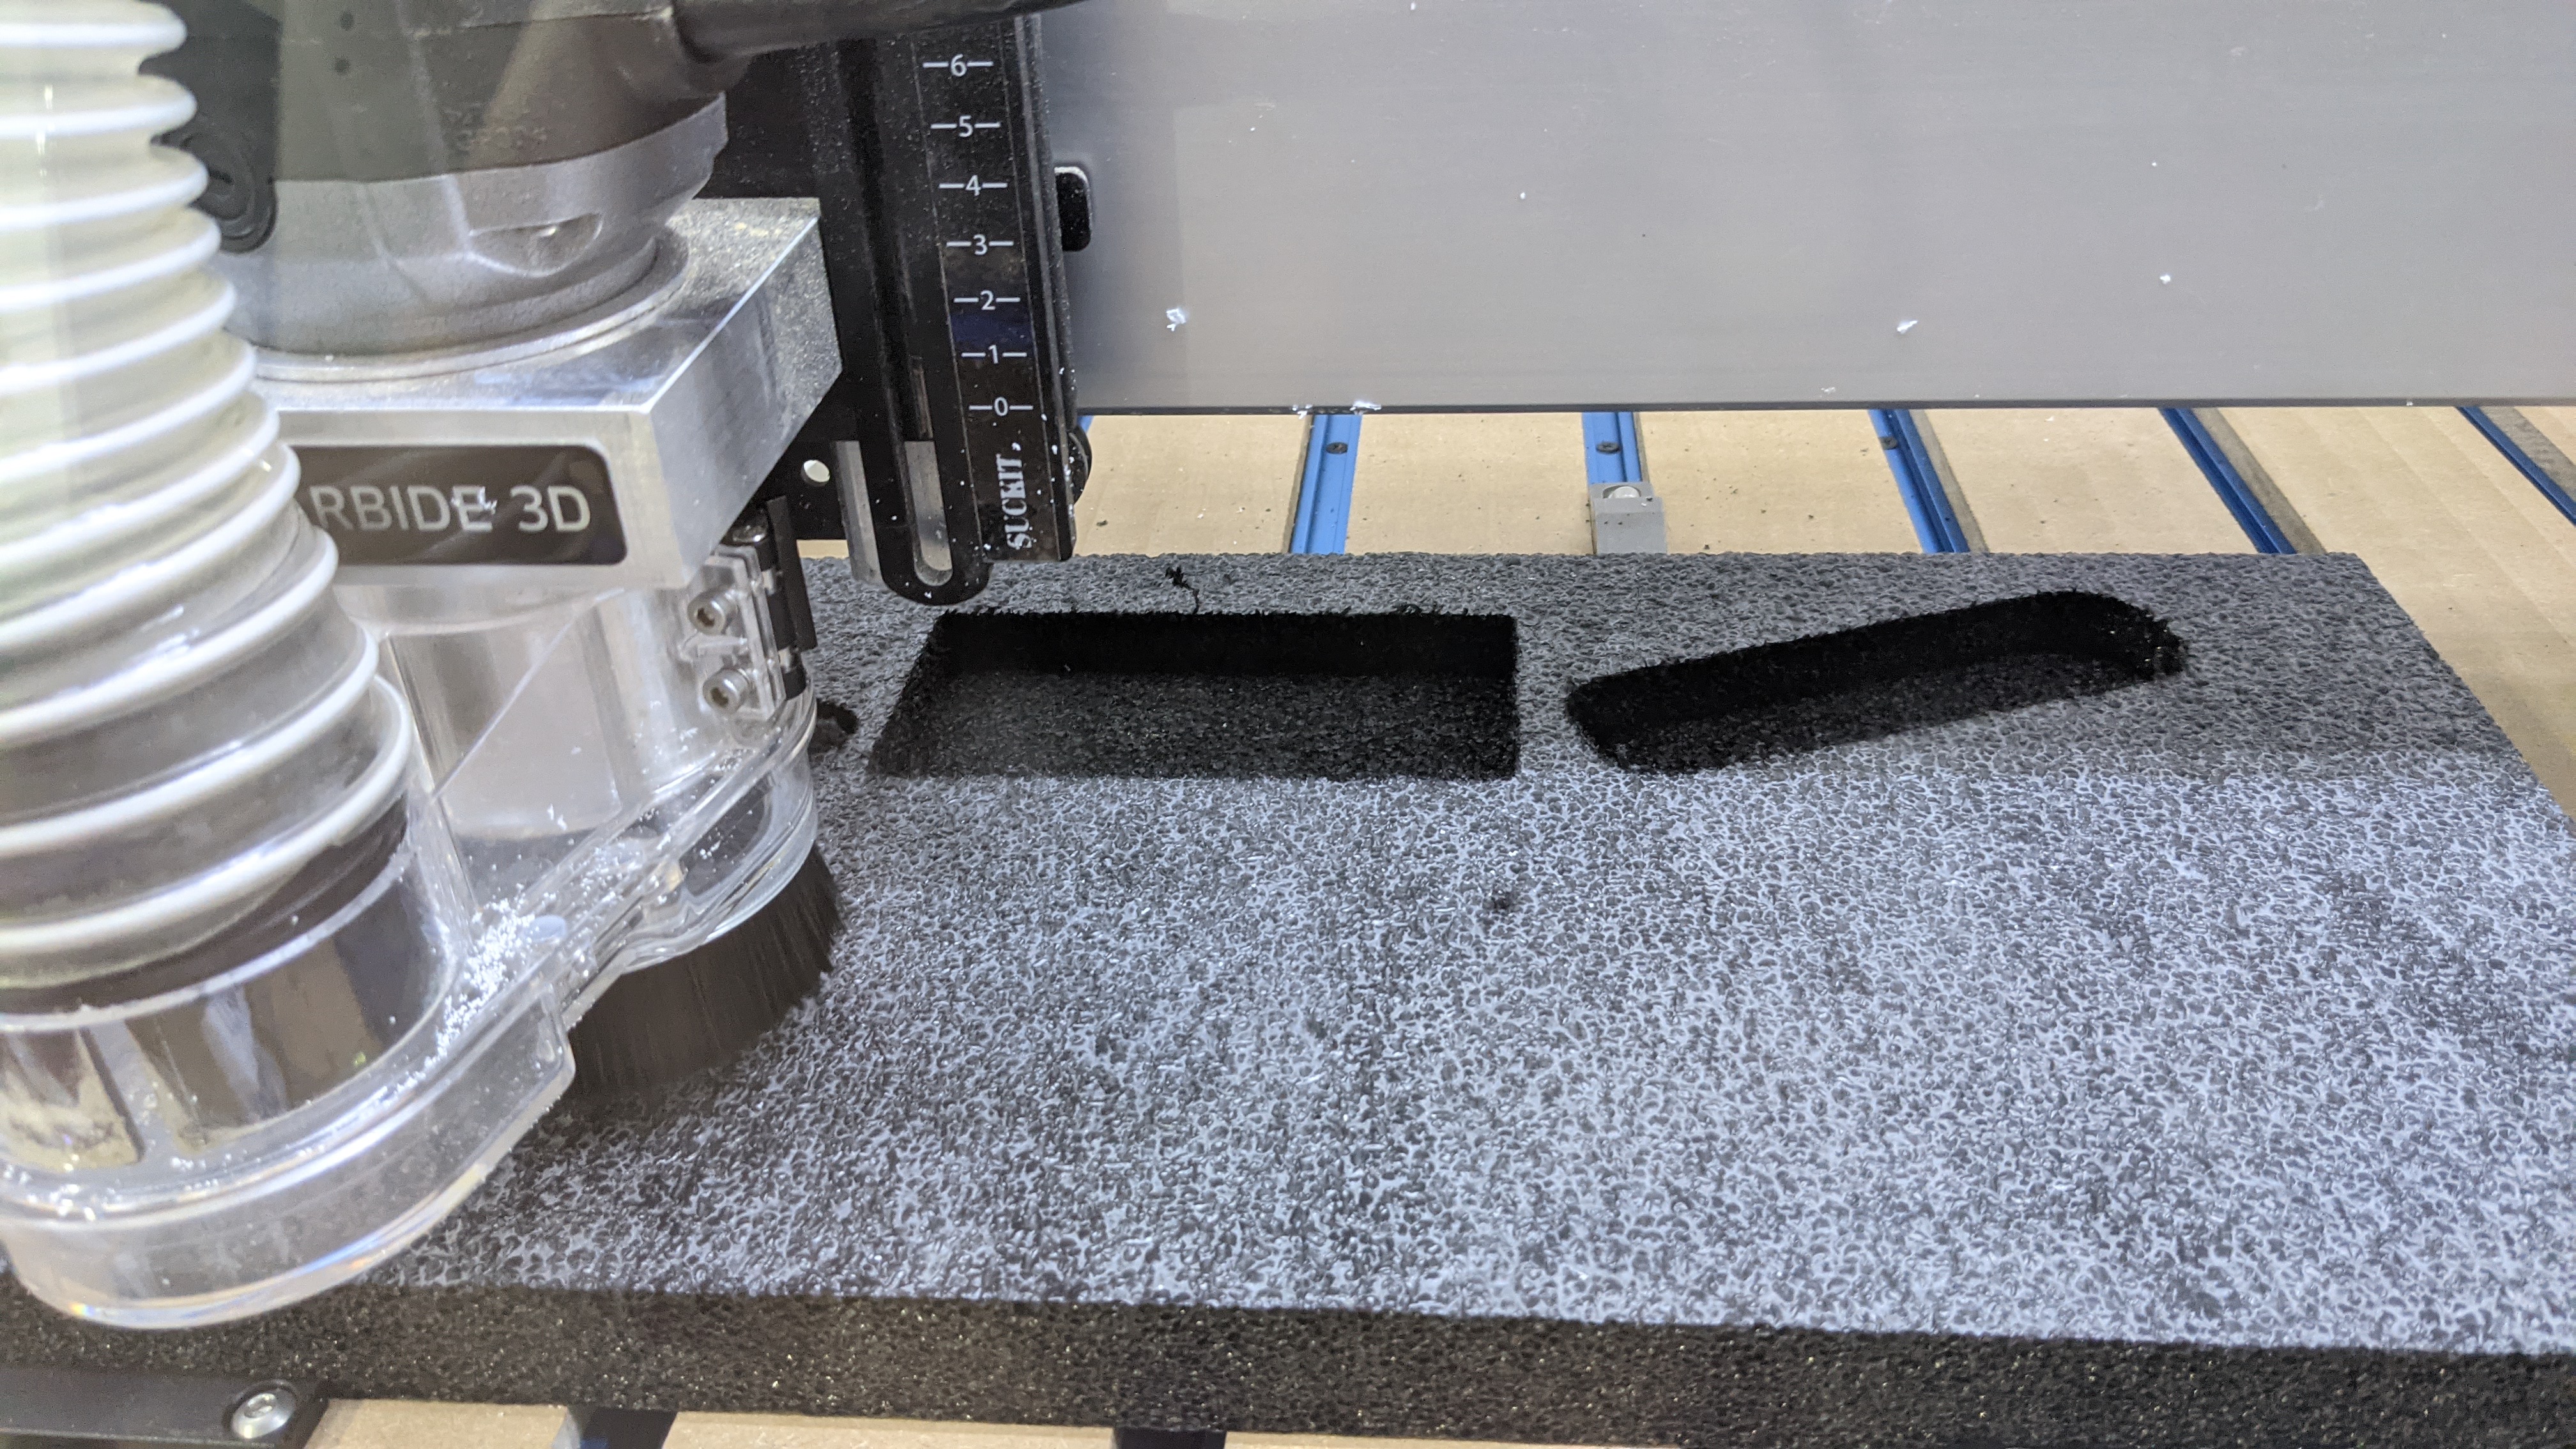
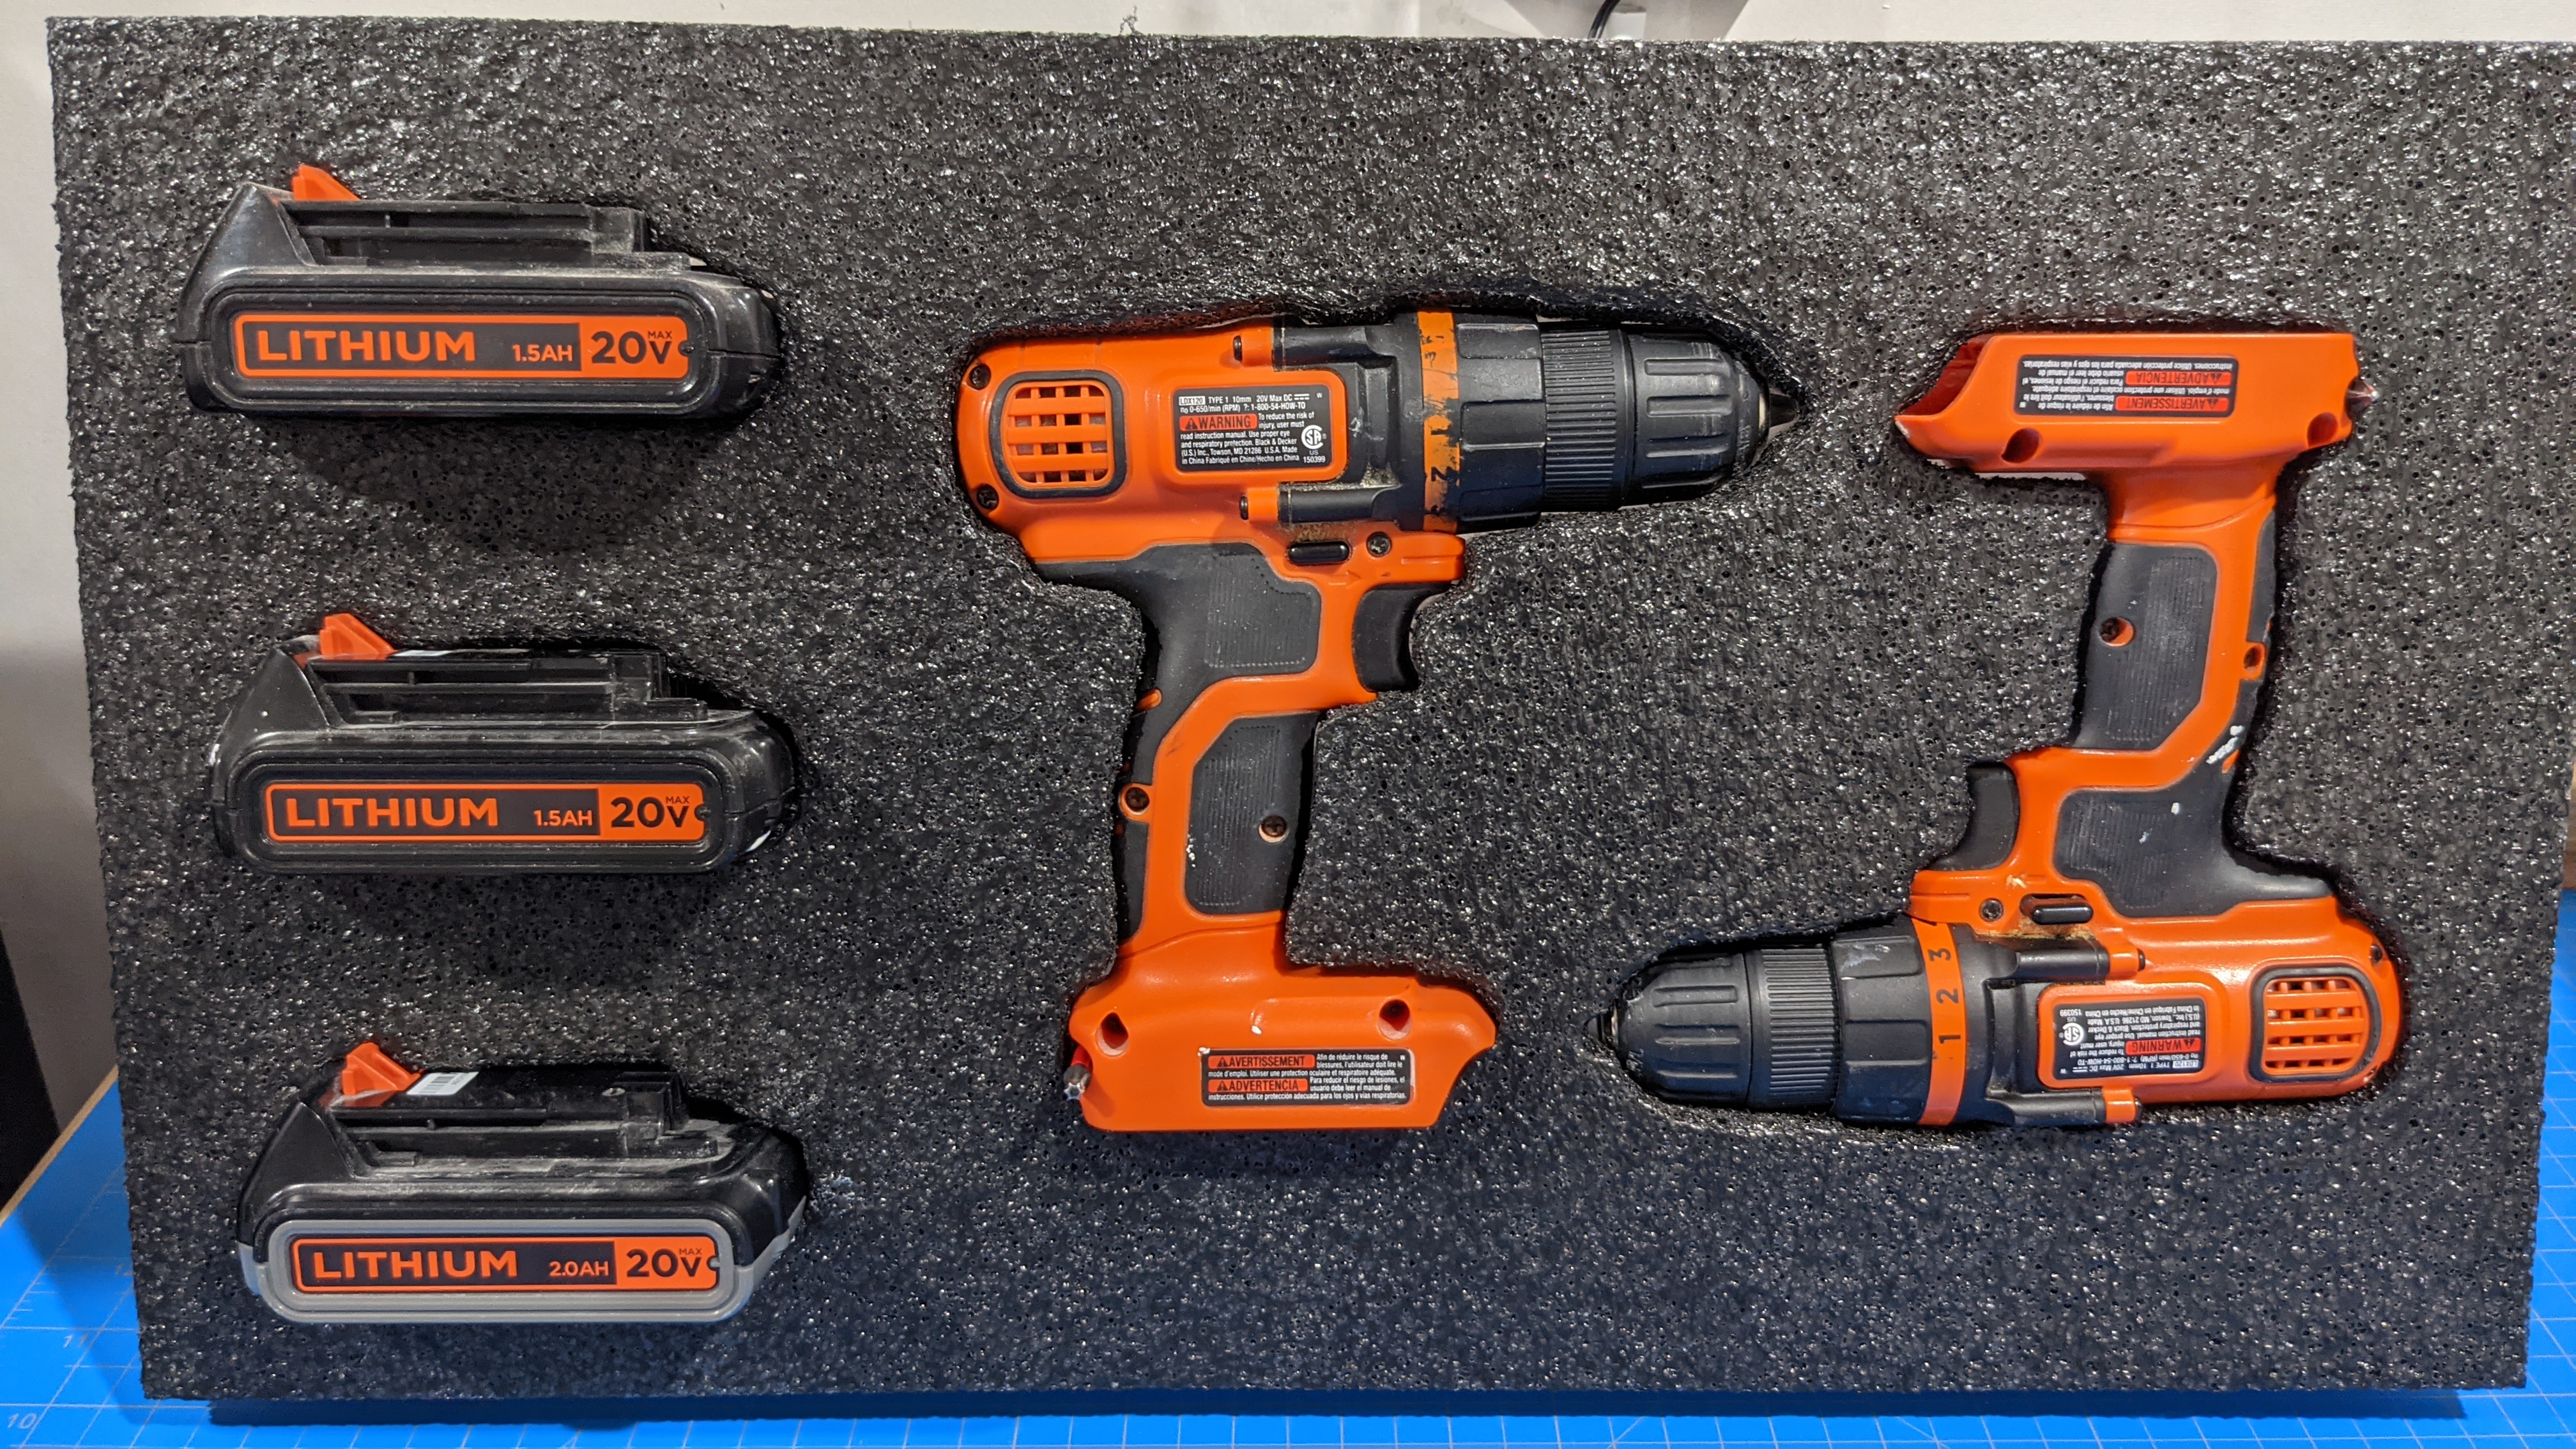
Got the best results using a 201 for large pocket clearing, with dust collection always running to suck up the threads. I then switched to an 1/8" upcut for contouring and the smaller wrench pockets. This seemed to work ok even though it was climb milled, which seems to be against recommendations.
As always, Winston had a video that was helpful, though a lot more experimentation is needed to dial things on my my setup.
If I reproduced this on the laser I would need to laminate foam layers together or cross my fingers and hope dialing the power settings would give fine enough depth control (unlikely). This could offer cool opportunities like a different color for the bottom solid layer(s), but would require more work to achieve different pocket depths like I used here.
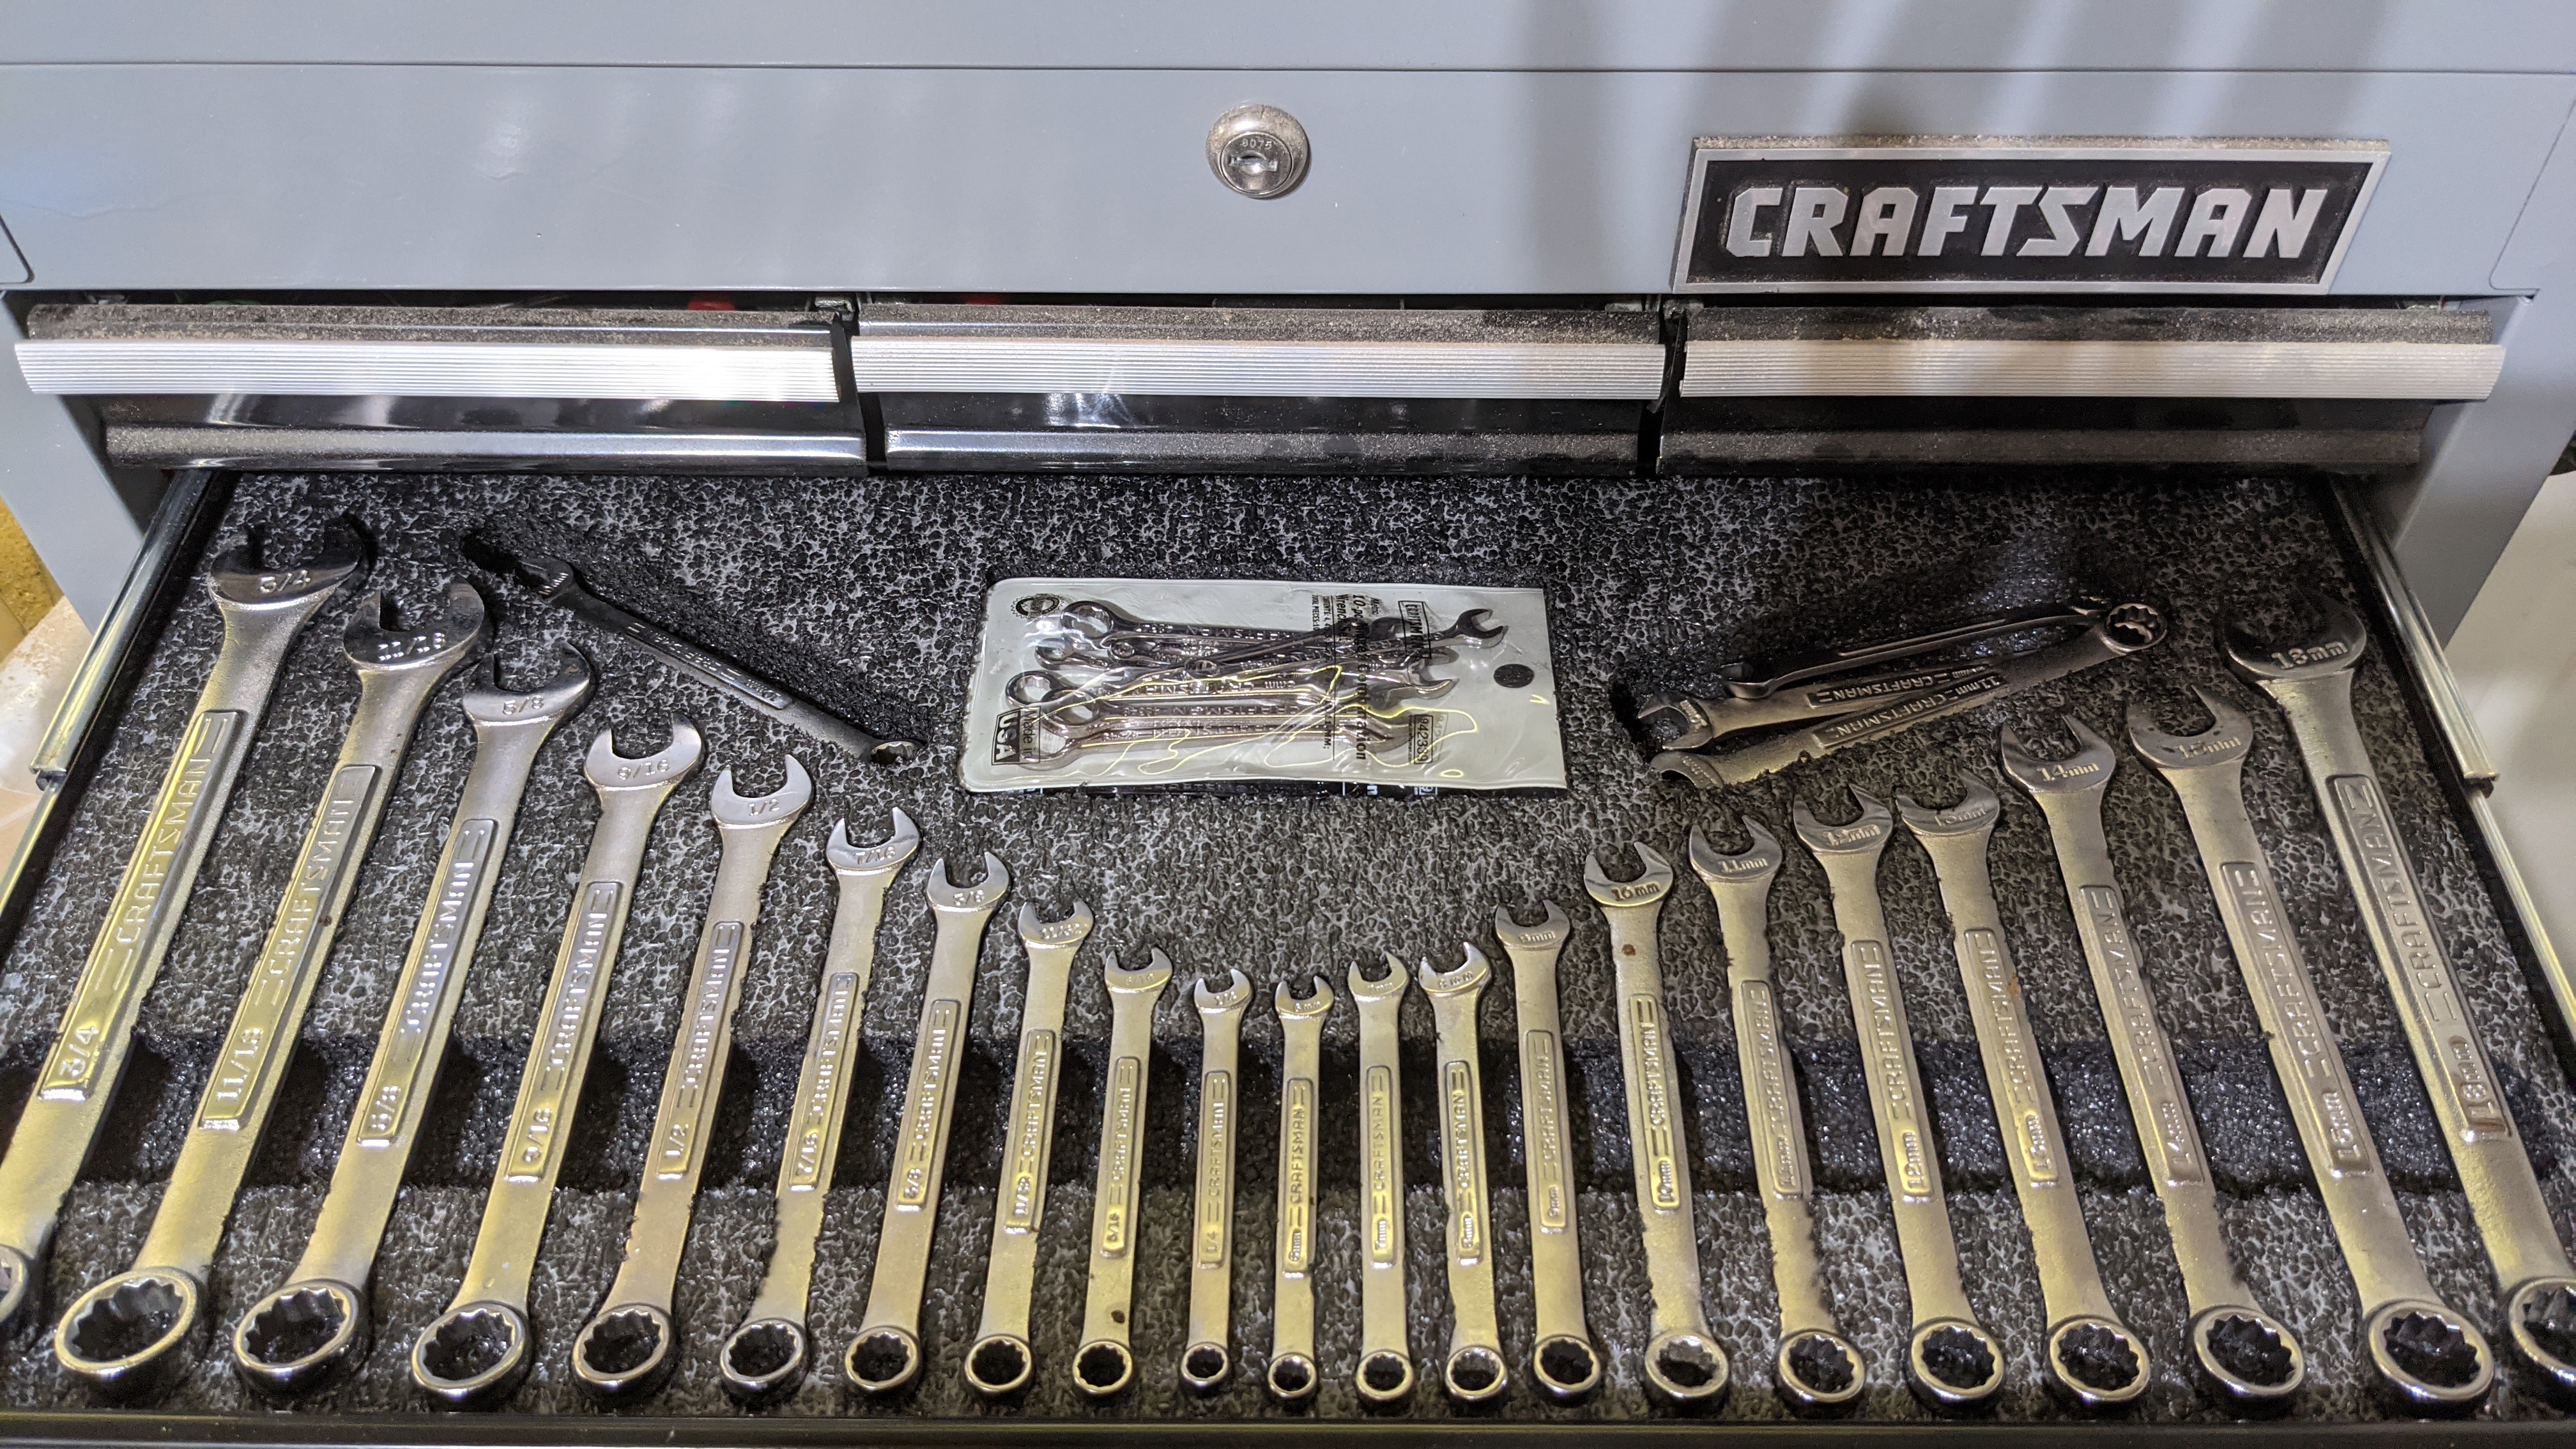
Thanks! I took a picture from about 3ft above to minimize distortion, then used Photoshop to paint in the areas to be machined. The paint brush alone is good enough for this, or a combination of fancier features like object detection/masking and vector shapes. I did the quick and dirty option since the foam would hide imperfections, and the vectorization step would smooth out any jagged edges.
Once I had an image I turned it into vectors in InkScape, cleaned it up a little in Carbide Create (straightened wrenches and aligned all the bottom edges), and set my toolpaths.
(if I had a full set of the 6-point wrenches I’d find the time to model them all accurately as to size/shape/proportion — really regret not picking up a complete set before Sears ceased having Craftsman tools made in the U.S.)
I’ve had these for about 15 years, I believe they came as part of a larger toolset in a blow-molded case.
They are definitely 12pt as you mention, and angled at the box end. Other that that I don’t see any useful markings (like forged, datecode, etc). The bag of midget wrenches was purchased from the same set and says “Made in USA” fwiw.
Pretty specific to my set, but here’s the corrected outlines. I wouldn’t machine these in anything rigid since I didn’t trace them 100% accurately. My go-to method for that is a flatbed scanner.
Made me go look at the last set I purchased, 189 piece Craftsman S.A.E./Metric…made in china,
purchased at a NAPA store
meh… I have plenty of the Drop Forged ones in the garage though.
Yeah, I’m seriously considering getting the Festool installers set — if I do start in on Systainers (thinking about getting a Mafell jigsaw and drill/driver) I probably will.
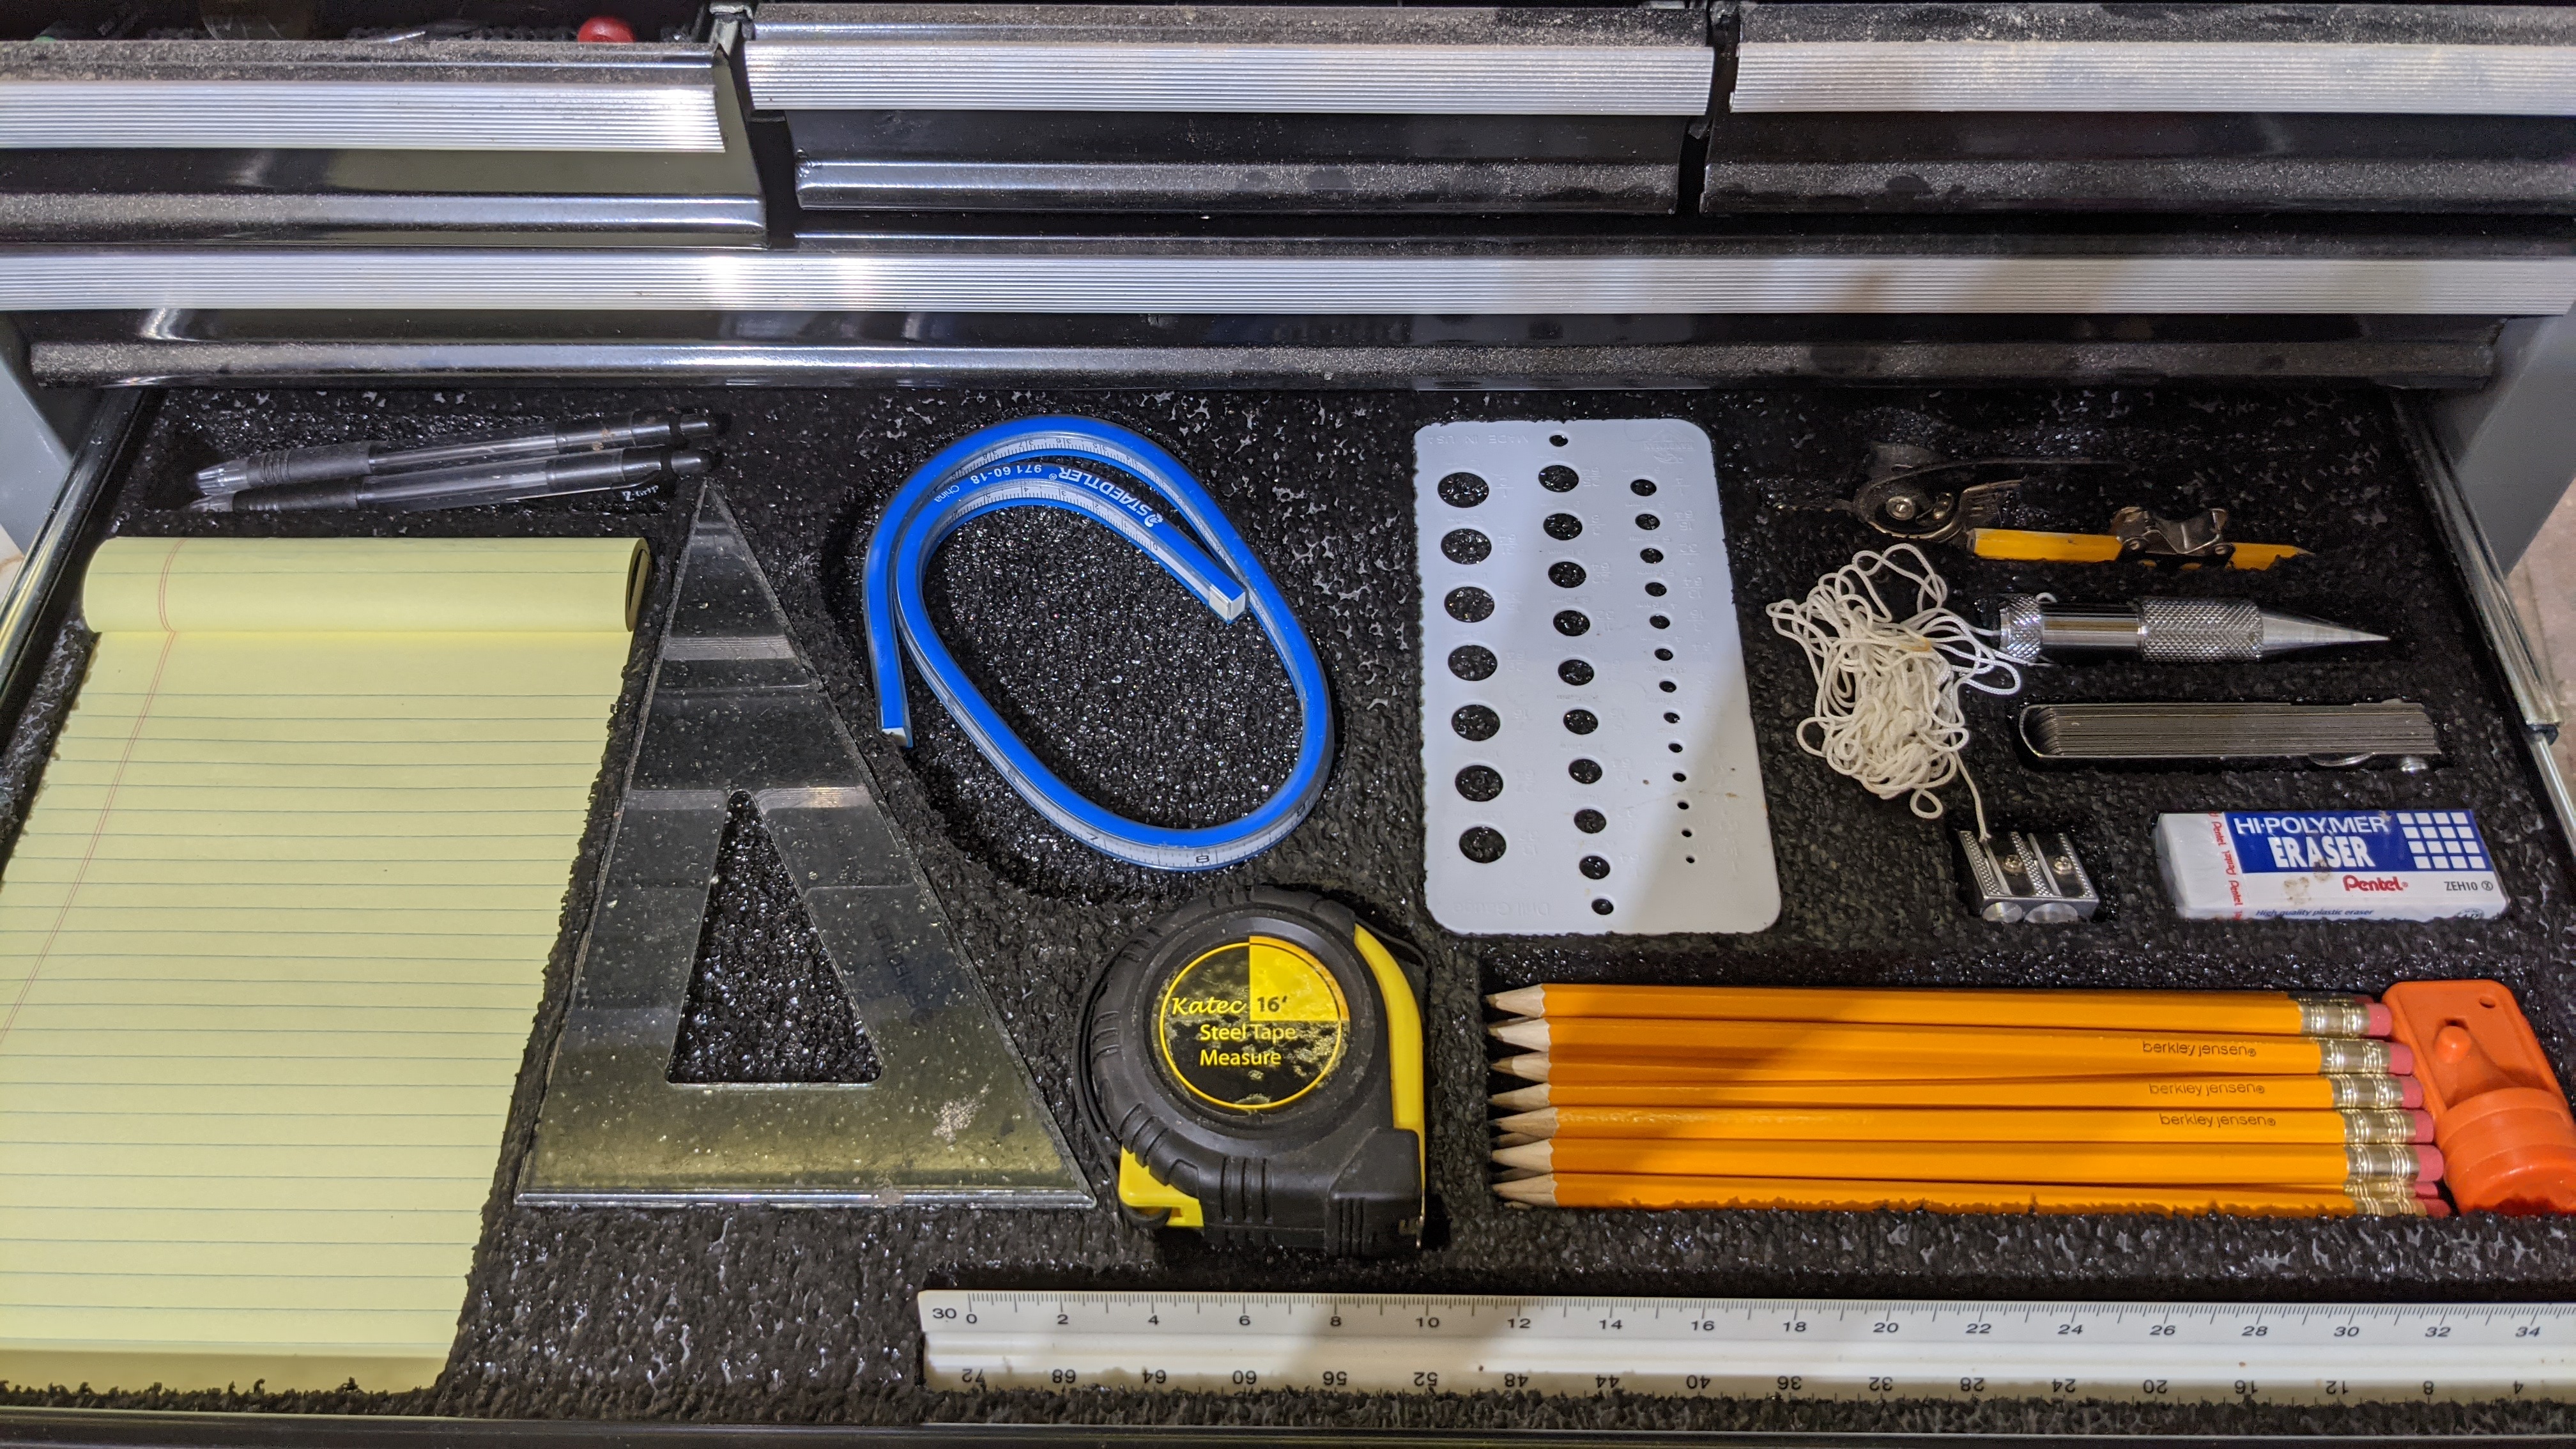
These are actually fun to make - though I’m going to have to leave the last drawer in this toolbox un-foamed because there are leftovers from all the organized drawers. Is that like sweeping the dust under the rug?
Dialed in settings a bit more today, I’m very happy with cut quality at this point, even through laminated foam layers. The pockets here are line to line (no purposeful offset from real measurements) which gives just enough hold for a vertical foam wall. Still need to build a frame around it, and make more panels now that a process is in place.
I bought the black foam from eBay (search 1.7pcf foam in your desired sizes) and the white foam I had salvaged from received packaging. I’ll have to look for a source for that if I need more, the density is very similar to the black.
Polyethylene (PE) foam is usually closed cell and can be exposed to elements. It is the material used in pool noodles, to give you a point of reference and should be mold resistant. No clue on the saltwater impacts, but you can probably research that specifically. I’m also not 100% sure on UV resistance, and the stuff I bought didn’t come with a datasheet.
The material I have appears to be open cell, so I’d be more concerned about that if you can’t let it air out for ample time before cycling the wet equipment again.
Can I assume that this foam the shapeoko pro came in is the same type of foam that you used (pic below)? If so, need to figure out exactly how to upcycle this.
Not sure - it looks more like closed cell but could be PU or PE. either way you should definitely be able to cut it on your machine, might just need to play around with feeds and speeds a little.


 this.
this.