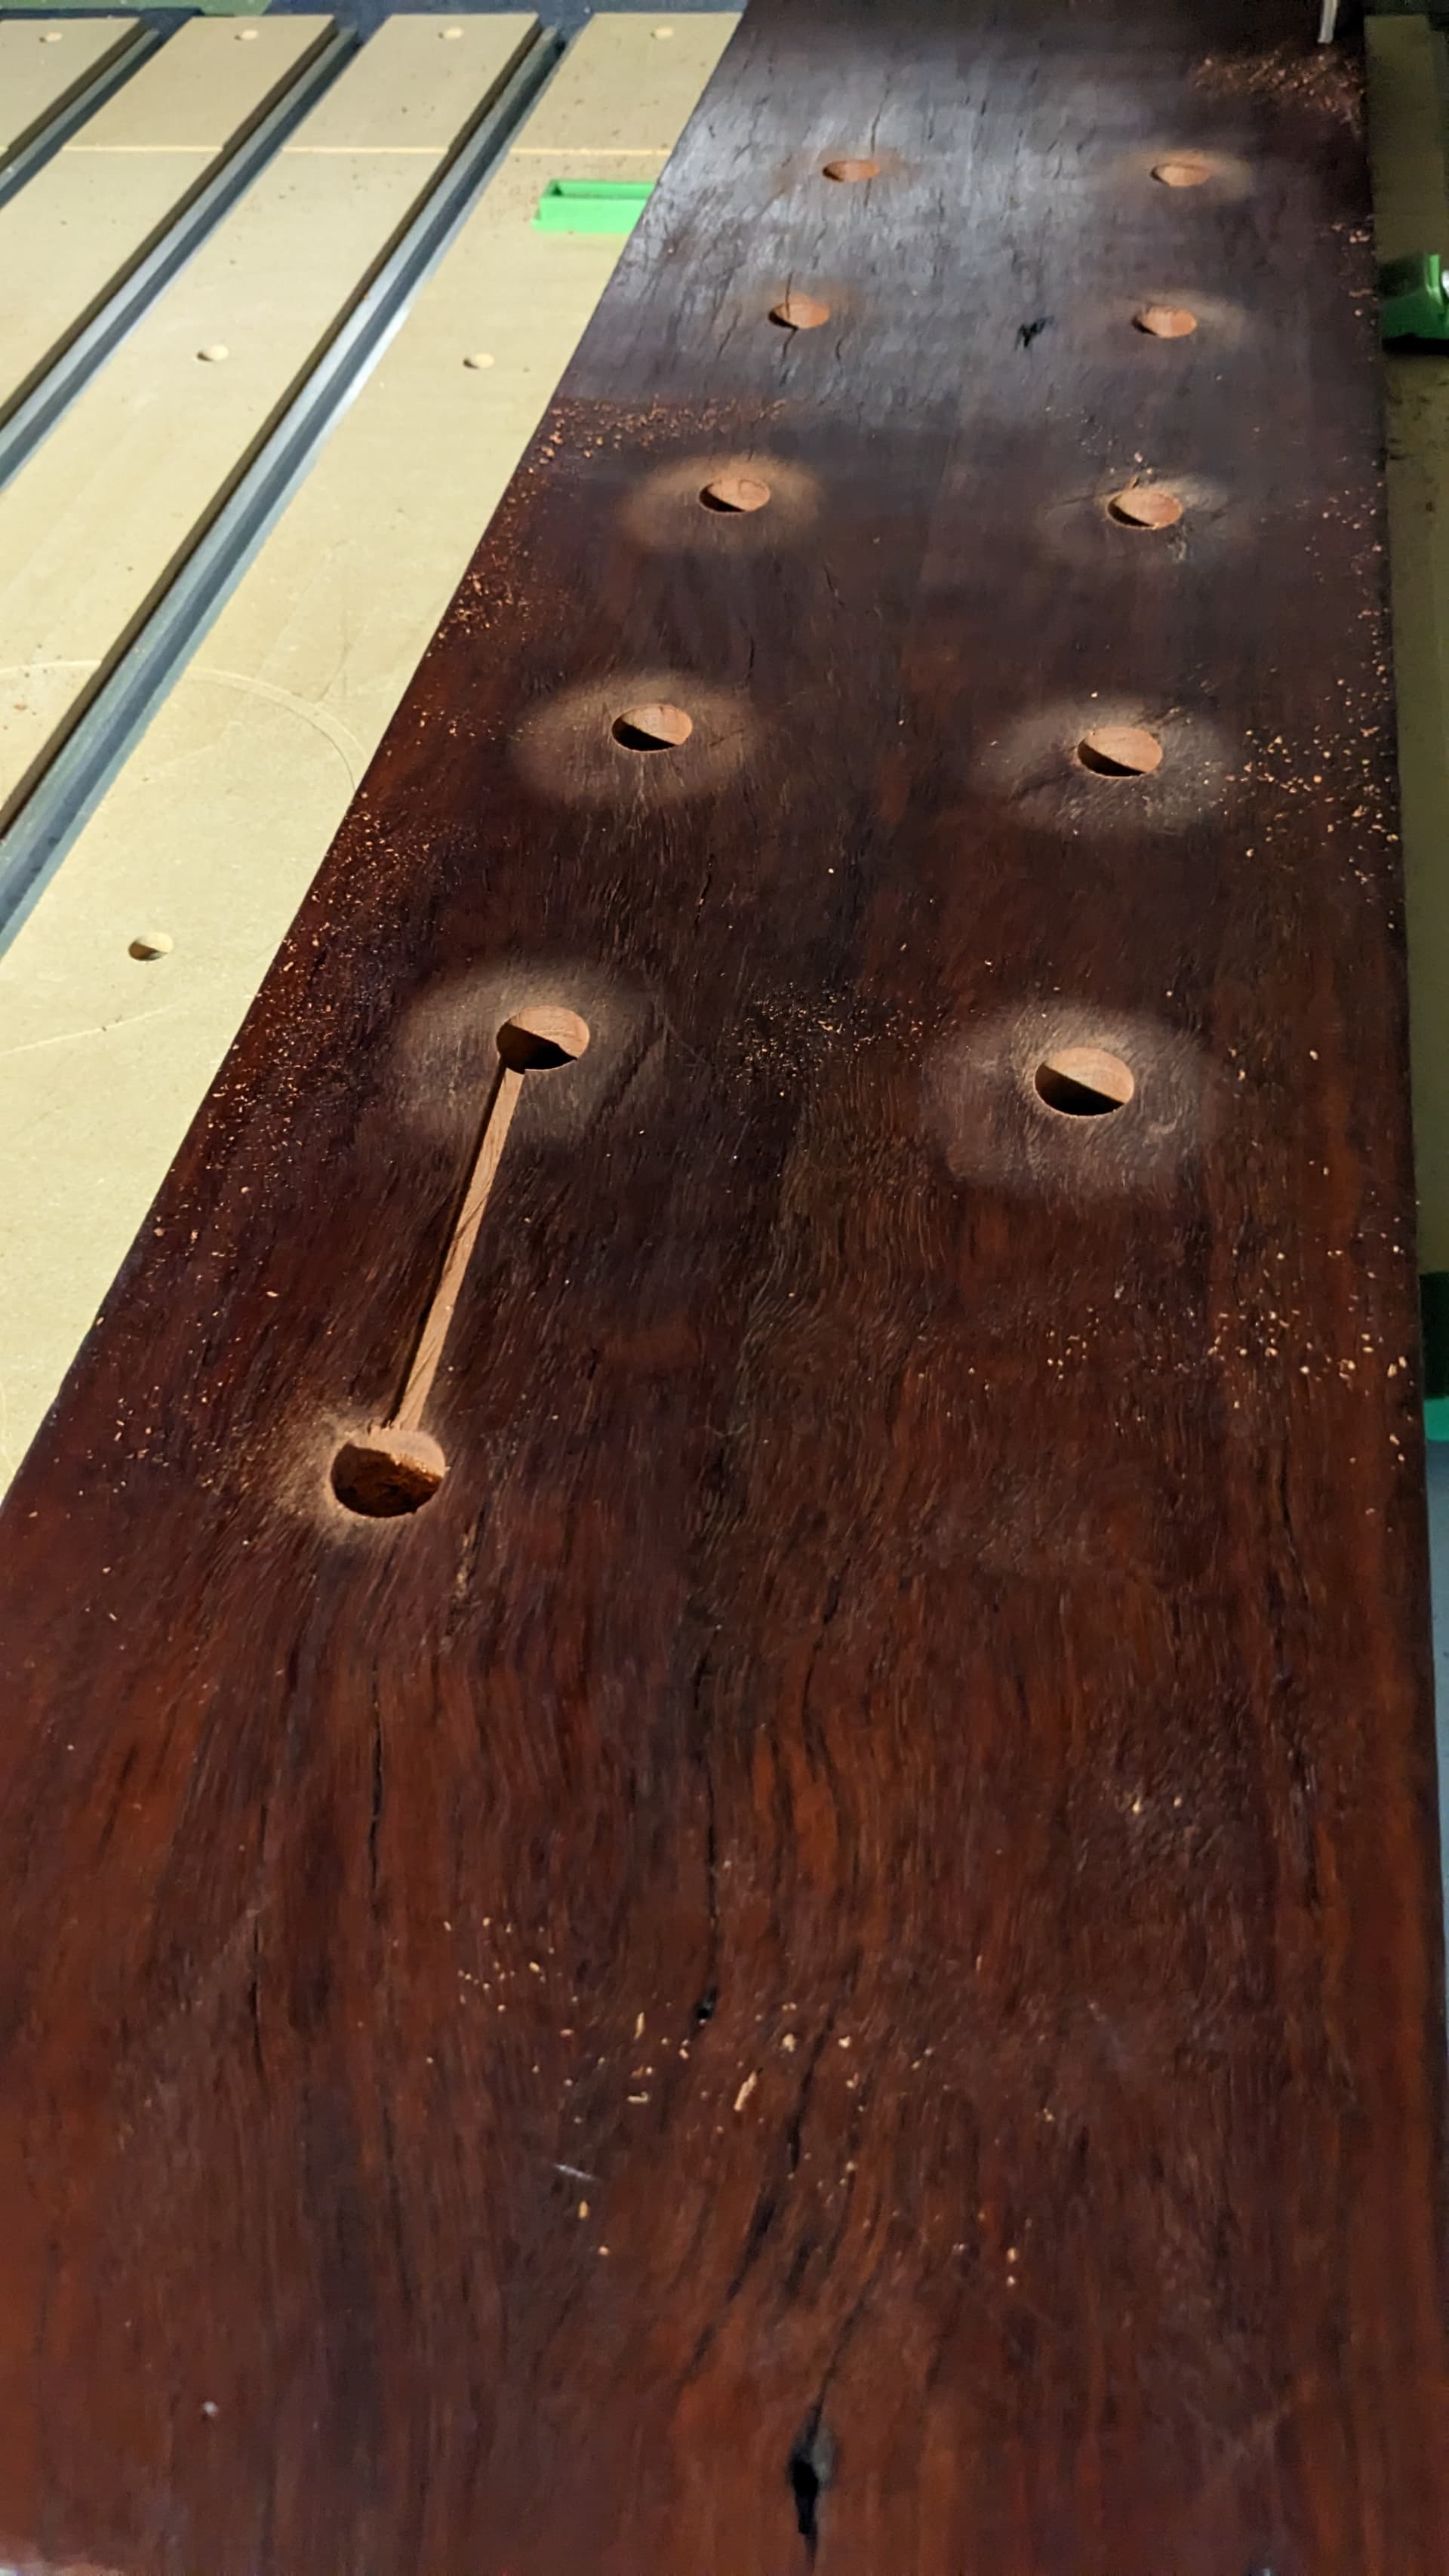
I was drilling out dog holes on a beautiful thick hardwood slab I’m turning into a bench. I’ve been lovingly hand planing and scraping and oiling this wood for weeks… It’s all going swimmingly until all of a sudden it just decides to cut a move a couple of mm right into my material.
W.T.F?! WTF?! W.T.A.F?!
I’m laying on the floor ugly crying.
I don’t understand why this has happened. The preview seems fine. All the holes are the same operation.
And how come after probing for all 3 axis (using the probe), I start my cut and it asks me to change the tool (which I don’t do because I just measured it so I hit ok) then re-measures the Z using the bit setter at the front of the machine?
Doesn’t this edit the z I just found with the probe?
What is the purpose of this? It already measured the length when the machine initiated. Then again when I probed my stock.
If it’s assuming the bit changed length then that’s a problem, and what length is it assuming my default bit is when I first start up the machine?
Possible reasons are:
Work lifted from work holding temporarily.
Cutter loose in collet and dropped.
Z axis needs servicing and didn’t move the required number of steps.
Sorry for your loss, we all feel the frustration from time to time.
The bit setter doesn’t change Z, it changes the internal (to CM) tool-length. As the tool-length changes, CM will add (or subtract) the difference in tool-length to Z values. If you don’t have to change the tool, then the bit-setter measured tool-length doesn’t change. The initialization cycle sets the tool-length the first time for that session, and each tool change goes to the bit-setter to update the tool-length.
The job always starts with a tool-change because CM doesn’t ‘know’ what tool is in the machine right then. Maybe you did the probe with a dowel, and needs to change to the actual bit.
Also. Is there a way to have the job automatically stop if the z endstop is triggered? I wonder if maybe it was grazing with each lift? And that was resulting in slipping steps… Or something?
But I’ve also had trouble with running into the z end before, and then having the head plunge too deep.
CM accounts for the zero probes (dowels) that come with the machine. If you zero with a dowel you would then need to change the tool to your first tool. If you zero with your first tool, it measures it twice.
Look at the Z value before you hit OK to measure the tool. It should be the same (within 0.001) after it measures the same tool again.
If you are using a down cutting bit there could be a build up of chips under the material when you reach the spoil board. I see from the picture the clamps are on the side and being clamped like that there is no or not enough down pressure to keep the material down.
If the Z axis skipped steps I would check the wiring and connections for problems.
The bit could have slipped in the collet. check for a build up of sawdust in the slots of the collet and in the router shaft.
I would also give the machine a mechanical check and verify all fasteners are tight.
There is a very slight chance the supports for the gantry or the Z assembly could be lose and shifted in the last move.
All the above and more could be the issue. Check for chips under the material, do a mechanical check and use the jog function to move the machine without the router running and listen to the sounds of the motors for any changes.
I agree with Anthony about the clips being at the side instead of flipped to hold down the wood. Might not have been the issue but I learned this very early on as well. Downward pressure is mandatory when cutting! You can use some at the side for alignment but make sure you have plenty to hold the piece flat. Also, maybe check retract height in initial settings? Check if the bit slipped as well. If not tightened enough this can happen. Losses at some point happen and are great learning experiences as sad as the outcome may be.
The stock didn’t budge. I was using a straight cut, and it’s well secure. It’s also some of the heaviest wood in existence, picture that in bricks, and the bottom isn’t smooth. I can shove my body weight against it from front to back (where there are no clamps) and she doesn’t budge.
The bit likewise is well secure.
Each hole is progressively deeper so I reckon maybe it was grinding on the hard end stop just a tad with each retraction and that built up over time until disaster.
Is there a way to tell the shapoko to stop any job if a soft end stop is triggered? It’s honestly always baffled me why it even will run a job that tries to send the machine outside the build volume… But yeah. What’s the point of having end stops if they don’t trigger the job to stop?
Mine seems to only register the end stops being triggered when homing.
Ultimately, you need to have the retract/safe height set correctly. You only need to set it high enough to clear any workholding, if any is above the stock. If I’m side clamping then I’ll set it for like 1/8"… less if I know the material is dead flat and level.
Multi-million machining centers can’t make up for programing issues. They will bury an endmill into things hard enough to let the neighborhood know if you program or set them up wrong enough.
The switches are just homing, not limit. The existing ones would only work for one way. Soft limits can be enabled in grbl, but often don’t work like you may think and cause more issues than they solve.
I had set the retract to 3mm, so the same as you suggest. It’s not dead flat, I hand planed it.
Homing is a process that uses limit switches. They are limit switches. They’re just not being used to pause a job if they’re triggered. Which is a damn shame given issues exactly like this.
It’s also weird to me that carbide create/control will allow a job to run that doesn’t fit in the limits of the machine.
When this error happened did the bit plunge into the spoil board. Did you stop the machine when you noticed the problem?
My first thought still is an issue with the Z axis and it was skipping steps/losing steps. Can you operate the machine without the router running and move the spindle in all directions and wiggle the connections while doing this and see if the machine skips steps or the motor changes sound when doing this.
I stopped the job, it didn’t plunge through dunno if it would have, but it did seem like each hole was deeper (they didn’t go all the way through) so I think my “barely grinding on the hard z endstop with each Z hop” hypothesis makes sense.
I’ll give it a wiggle tomorrow (I’m Aussie) and see what seems to be happening! Thanks for the help!
I have a lot of empathy for you…I’ve made every mistake in the book a few times over…some more expensive (in money and time)) than others. That is a beautiful piece of wood you’ve put a lot of effort into. With my experiences, if I have a high value piece of material that I’m running a new program on, I run the program on a piece of scrap or MDF before I run the actual material. I’ll even stack MDF if I need to simulate the height. This is true if I’m running a piece of hardwood on my Shapeoko, or when I was in aerospace machining running a large chunk of PEEK or titanium.
I guess I’m used to industry terminology. The switch itself is called a proximity sensor. Not a limit switch, not a homing switch. It doesn’t have limit nor homing applied until it gets a use. And if the switch is used to establish a home location, it is a homing switch. If it is used as a hardware/software stop, then it is a limit switch. So they are just homing switches as used on a Shapeoko and many other machines.
Taking a closer look at your picture, the material is short enough that 3mm is not enough to hit the Z homing switch. It has a good 4" of Z travel, and judging by the heights of the clamps, it looks to be 2"-ish. If that’s the case, then 2" x 3mm is under the amount of travel that it should hit the Z. Unless you had a lot of endmill stickout and didn’t reposition your router upwards in the mount to account for the long tool.
If you are running close to limits on things and a low retract/safe height, then your material needs to be flat. That’s just the math of things.