I’d like to add surfacing bits in Carbide Create as a new category.
Can this be done?
Speaking of surfacing, I assume to do this operation it is just a shallow pocket?
I just add them as end mills. I don’t see a way to add another category. Maybe @WillAdams can answer that.
Correct, I just do a shallow pocket to surface the board. Usually I have it go a little larger than the board so it ensures it covers the whole surface. Just make sure your work holding is below the new surface.
1 Like
Also be sure to either disable BitSetter or add a supplementary “button” on it that is wide enough for the surfacing cutter to depress the BitSetter.
What if you place a wide washer on the BitSetter to get it to complete that task and then set your Z zero. Wouldn’t that compensate?
Adding a new tool is easy in latest versions of CC.
-
Open Carbide Create.
-
Under Edit Menu “Show Tool Database”.
-
That opens Tool Database
-
Click on “New Library”
-
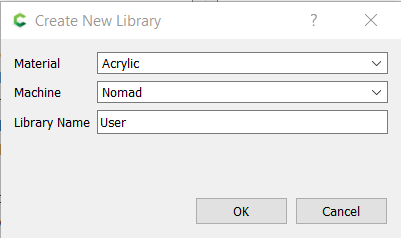
That opens “Create New Library Dialog Box” Select your material, machine and name of database.

-
Then hit “OK”
-
In the “Show Tool Database” your new library appears.
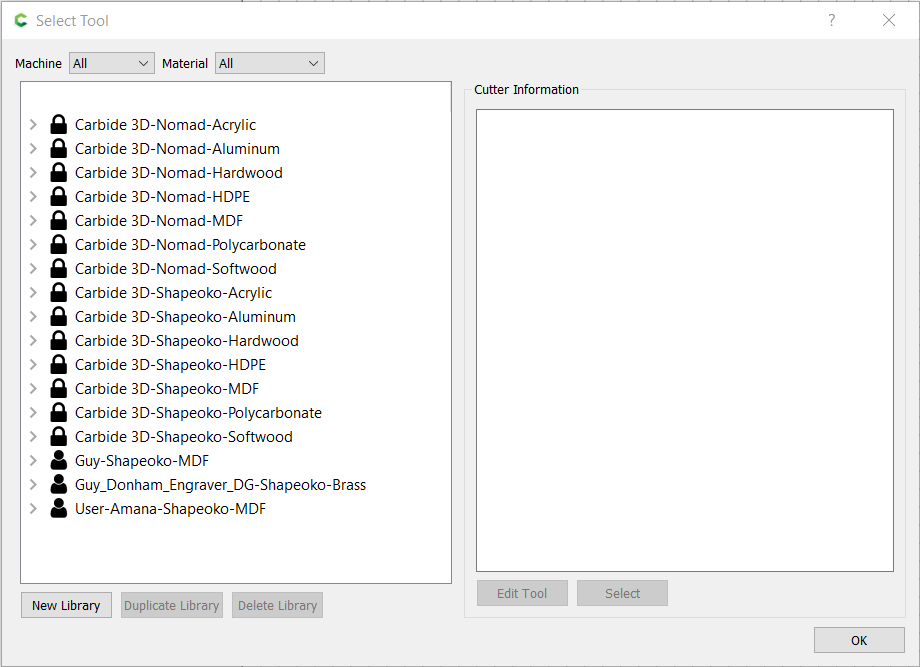
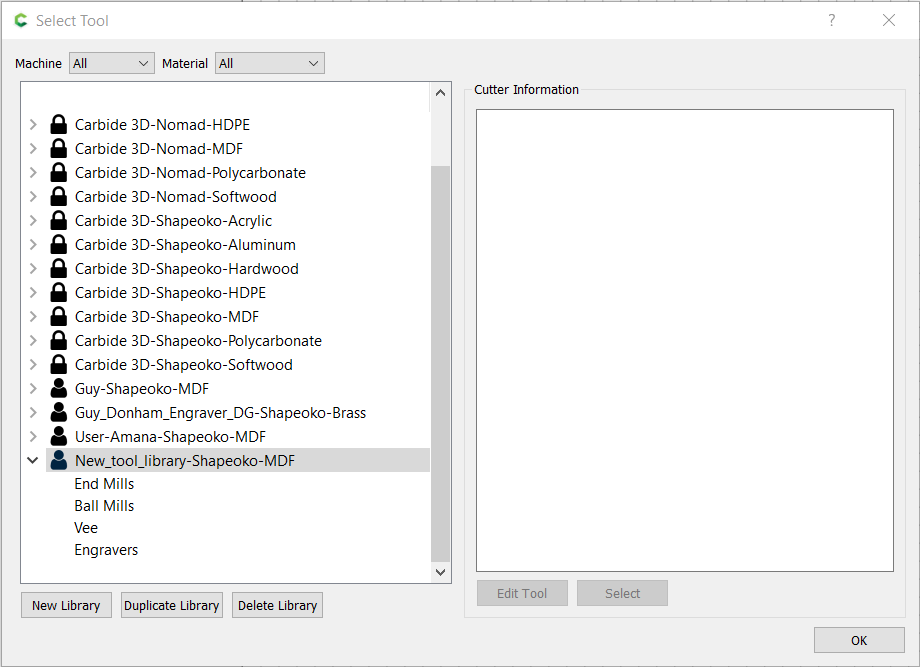
- Right click on new library to “Add Tool”
- Set the parameters of the new tool.
Also if you want to manually edit a tool then in the “Help” menu you can open the data directory. Choose your new library and open it in a spreadsheet and edit it and save it as a cvs file. The tool database must be created as above before you can edit it. This only works for user added tool databases. You cannot edit the included c3d tools this way.
3 Likes
I would think that would work; the BitSetter measures relative distance so if you were changing cutters, as long as you had the washer through initialization and all of the tool changes, I would think you would be fine.
This would have to be the most detailed answer I have received as of yet.
Thank you for the reply.
After using the washer, you wouldn’t have to keep using it with multiple tools as long as the next tool used the Z height is Zeroed to the material. Any tool changes on the project from this point should be fine.
If you wanted to run a separate surfacing operation at the beginning and then load a new file. That works too.
I was thinking more along the lines of having one file for an entire project; but if you aren’t going to flatten your work piece each time or you’re just flattening your spoilboard, then you would want separate files.
I know some users have “permanently” attached larger buttons on their BitSetters. I might go that route, but until then, I just disable the BitSetter and remove it to hit my whole spoilboard when surfacing. If the work piece is not that big for a particular project, I just use a #201.
1 Like
I use a thin business card when using the bitsetter and one of my bits that are wider or seem to attract the magnet. Putting the card over the button is enough to allow the bit to press the button and do a proper measure but does not have it pull the magnet up or miss the button. It is a little annoying to remember all the time but is a simple enough fix.
2 Likes
This topic was automatically closed after 30 days. New replies are no longer allowed.