I want to make some fixture plate plugs for my SMW nomad 3 metric fixture plate.
The rough idea is to have grub threads that screw in to block the holes and protect the threads. This would be driven with an inset hex…which I realize will also collect chips BUT I that’s fine. It still protects the threads and it’s much easier to vacuum out than the open holes. (This might turn out to be really annoying, in which case I’ll pivot to snap fit/disposable caps.)
Requirements:
- Injection moldable or resin castable (depending on final material)
- Resistant to most cutting fluids, including wd40 and tap magic.
- Keeps chips out of holes/off of fixture plate threads
- Stays in place while cleaning(vacuuming and air blasting)
- One piece construction
To start with, I grabbed the fixture pin drawings from Saunders. SMW does provide a step of the fixture plate but it is missing some critical dimensions like the chamfer angle. The pin drawing has most of the critical dimensions we would need for a plug and it’s easy enough to guesstimate the rest.
Designing the shape:
Regardless of end material, the shape of the plug will be ~unchanged. This means we can define and test the shape quickly without worrying too much about the final production materials/methods.
Let’s start out in fusion and knock up a quick model of a single plug:

(Notice the threads are not modeled. It is nicer to work in fusion without the thread geometry modeled…but that’s going to bite me if/when I go to 3d print it!)
The plug is probably too long but I’d rather it be a little too long for testing than too short so I’ll leave it for now.
Creating the prototype:
I have two quick/easy ways to produce the prototype for test fit:
- Resin 3d printing
- Machinable wax
(I do not have an fdm 3d printer at the moment, even if I did I probably would not use it considering the tolerances I’d like to keep)
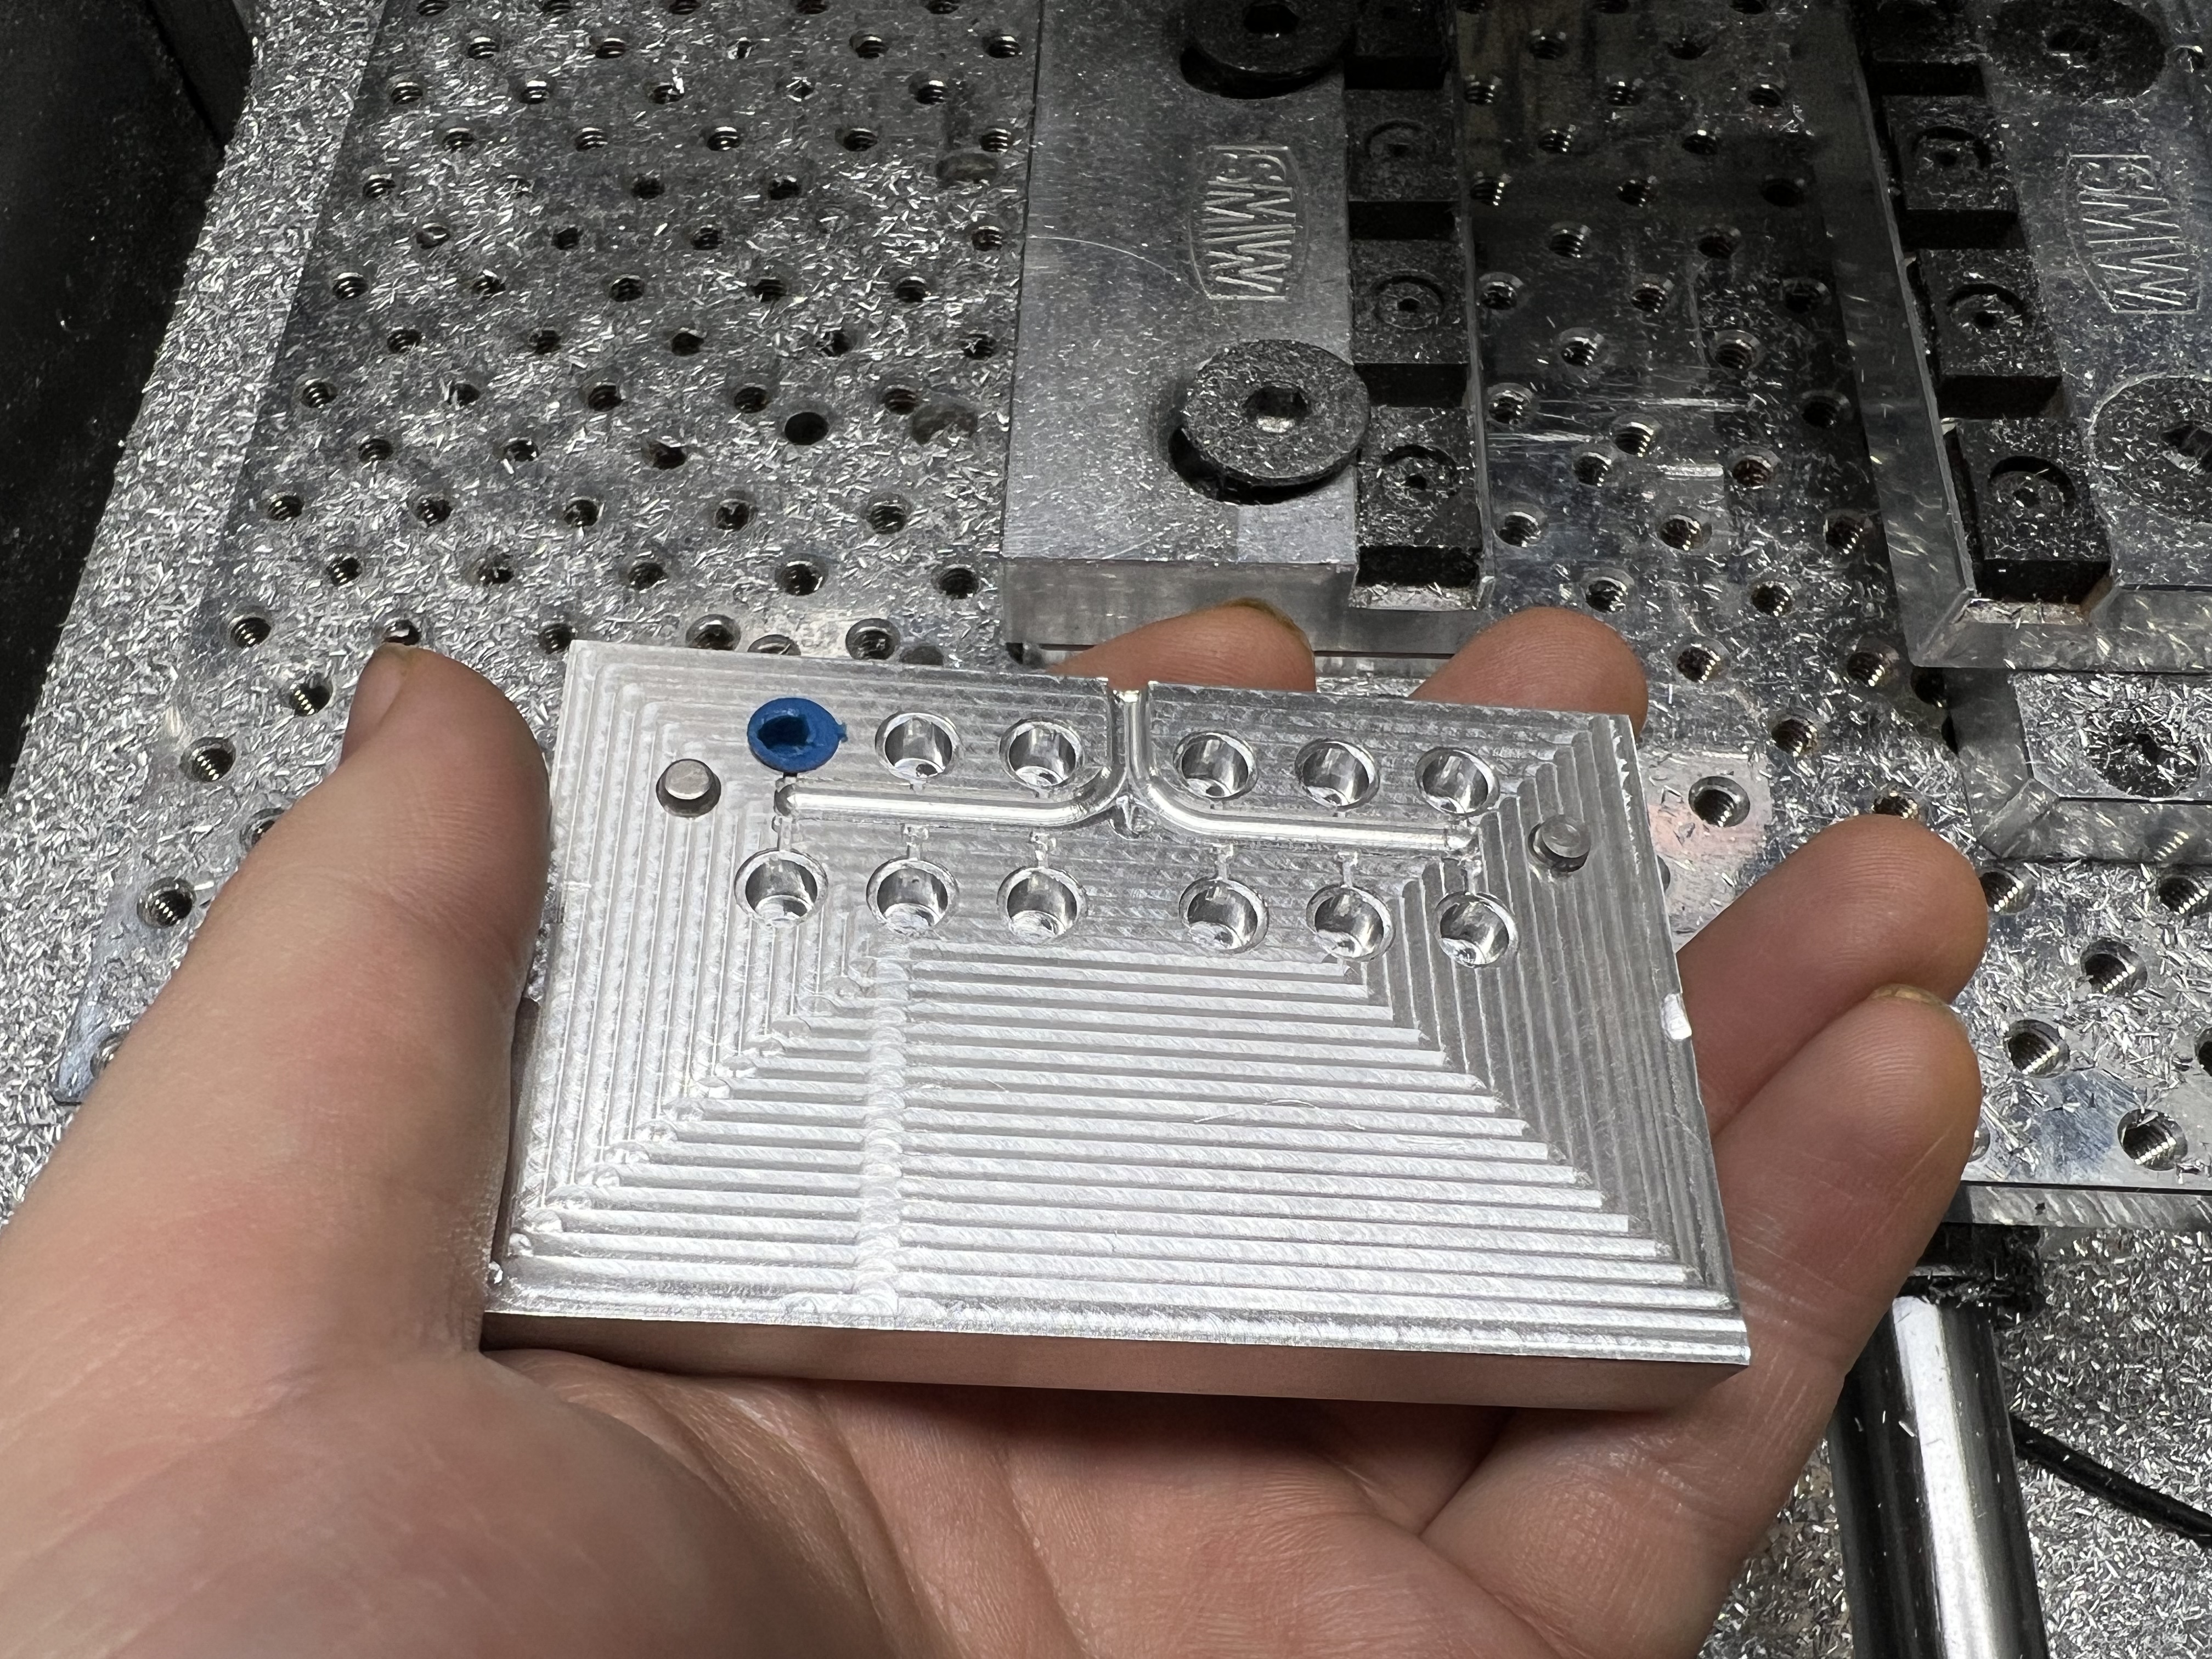
Machinable wax:
I freaking love machinable wax. If you’ve never used it, get some just to play with.
The wax keeps incredible detail, can be milled incredibly quickly, and is recyclable with some patience. The best part though, is that most epoxies/resins can be cast directly into wax without the need for mold release or sealing.
This is very valuable for quick prototyping because we can keep incredible accuracy by milling and we can use various resins that have similar mechanical properties to our final part. Many resins have virtually no shrinkage which means we can cast the final shape directly without needing to scale up/down to account for it.
Here is a cross section of what I plan to do with the wax/resin prototype:
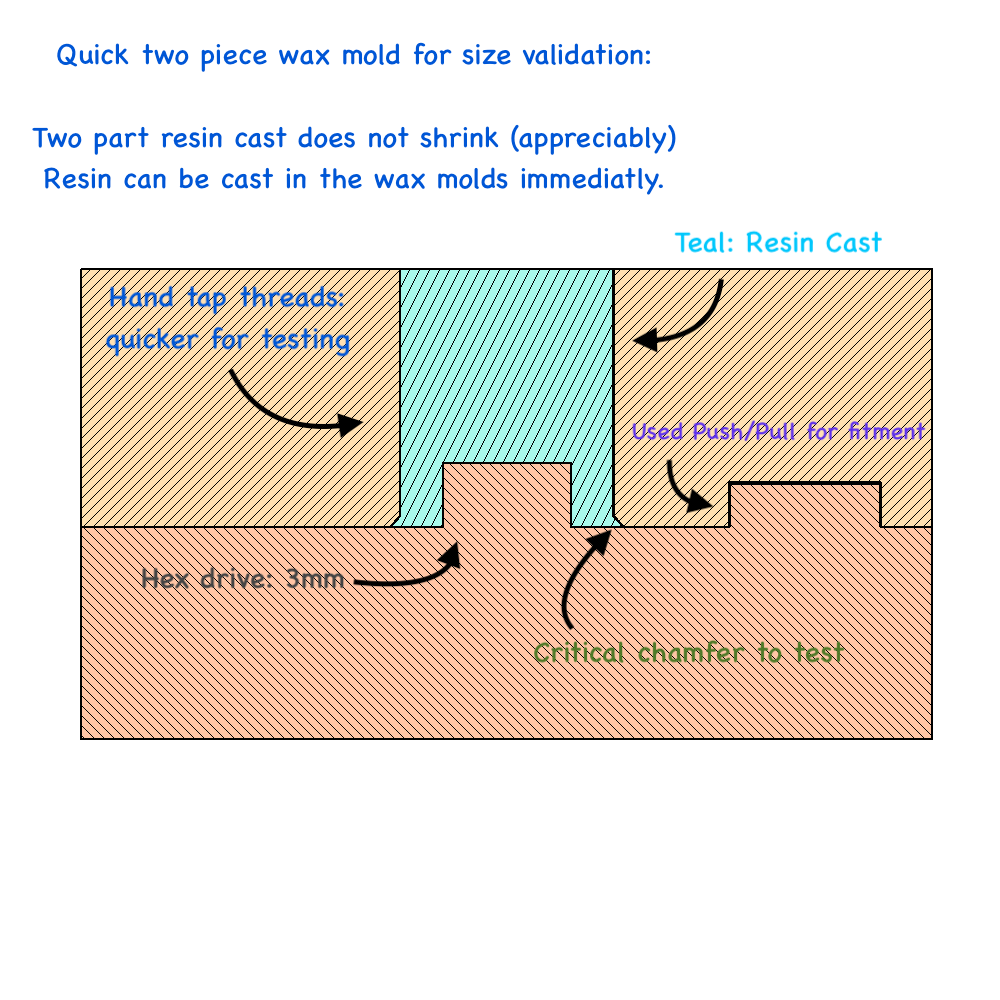
Alignment features for the mold halves are milled directly since it’s quick enough to remove material and will not require a tool change regardless. Some slop is built into those alignment features because I don’t want to deal with any hand finishing and it won’t hurt the testing.
The threads on the mold are not modeled here either. I will bore the hole to the requisite size and hand tap before casting the part. I’ve not tapped in machinable wax before but I expect it will work just fine. (I’d think a form tap would be best but I don’t have one…yet)
The bottom of the plug will be open, allowing us to pour the quick setting resin easily. I’ll likely cure it in a pressure pot at ~40psi but that’s not entirely necessary.
Resin 3d printing:
Resin printing can have incredible accuracy as well and the wide material availability means you can probably print your part directly in a material with similar mechanical properties to your final product.
(There are a lot of considerations when testing mechanical properties of your part…we’re not going to cover that here since the shape is all we really care about)
That said, I tend to avoid resin printing if I can help it. It’s just an annoying process which involves dealing with chemicals, fumes, and post processing that takes more time than you’d think.
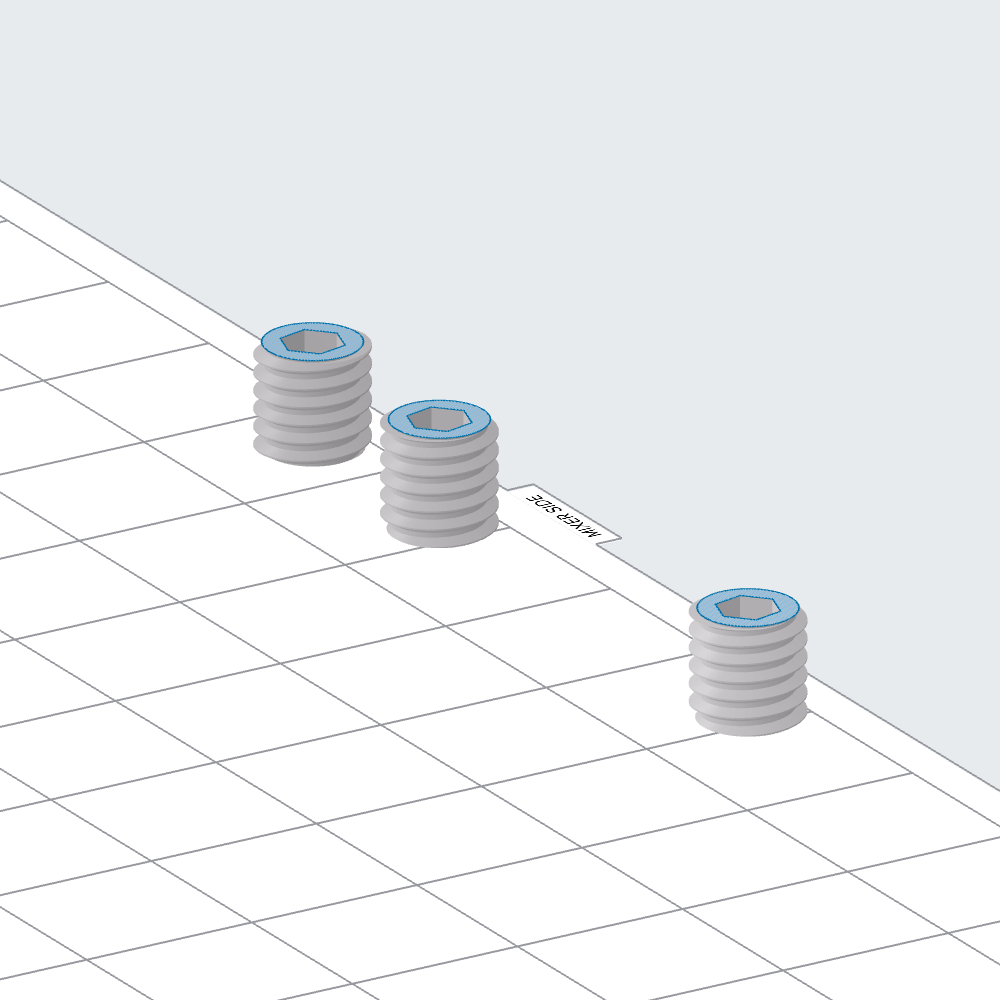
For the purpose of demonstration I’ll print a few while I mill the wax molds.
I need to start by “modeling” the thread geometry on the plug. This will actually create the geometry of the threads. Then I can export the plug to my slicer for preparing the print.
Estimate is 19 minutes to print a few of these plugs. In theory, I could fill this build plate and print a hefty number in one go. If I were making like 100 of these and I had the correct resin already, I would likely just 3d print the final product…but that’s no fun at all.
That’s it for now. I’ll get in-progress shots as I produce these prototypes and refine the shape.
I expect a few big updates to this thread over the course of the next week, likely in this order:
- Evaluating user experience, refining shape, finalizing material selection
- Milling the final production molds
- Production runs of the final part