While I know Carbide Create doesn’t support tapered ballnose bits in general (from what I have read), and definitely doesn’t support them for vcarve inlays, I have tinkered around with the advanced vcarve toolpath in v8 (currently using 813), and successfully figured out a good method for setting the top gap and glue gap to get a good tight fitting inlay.
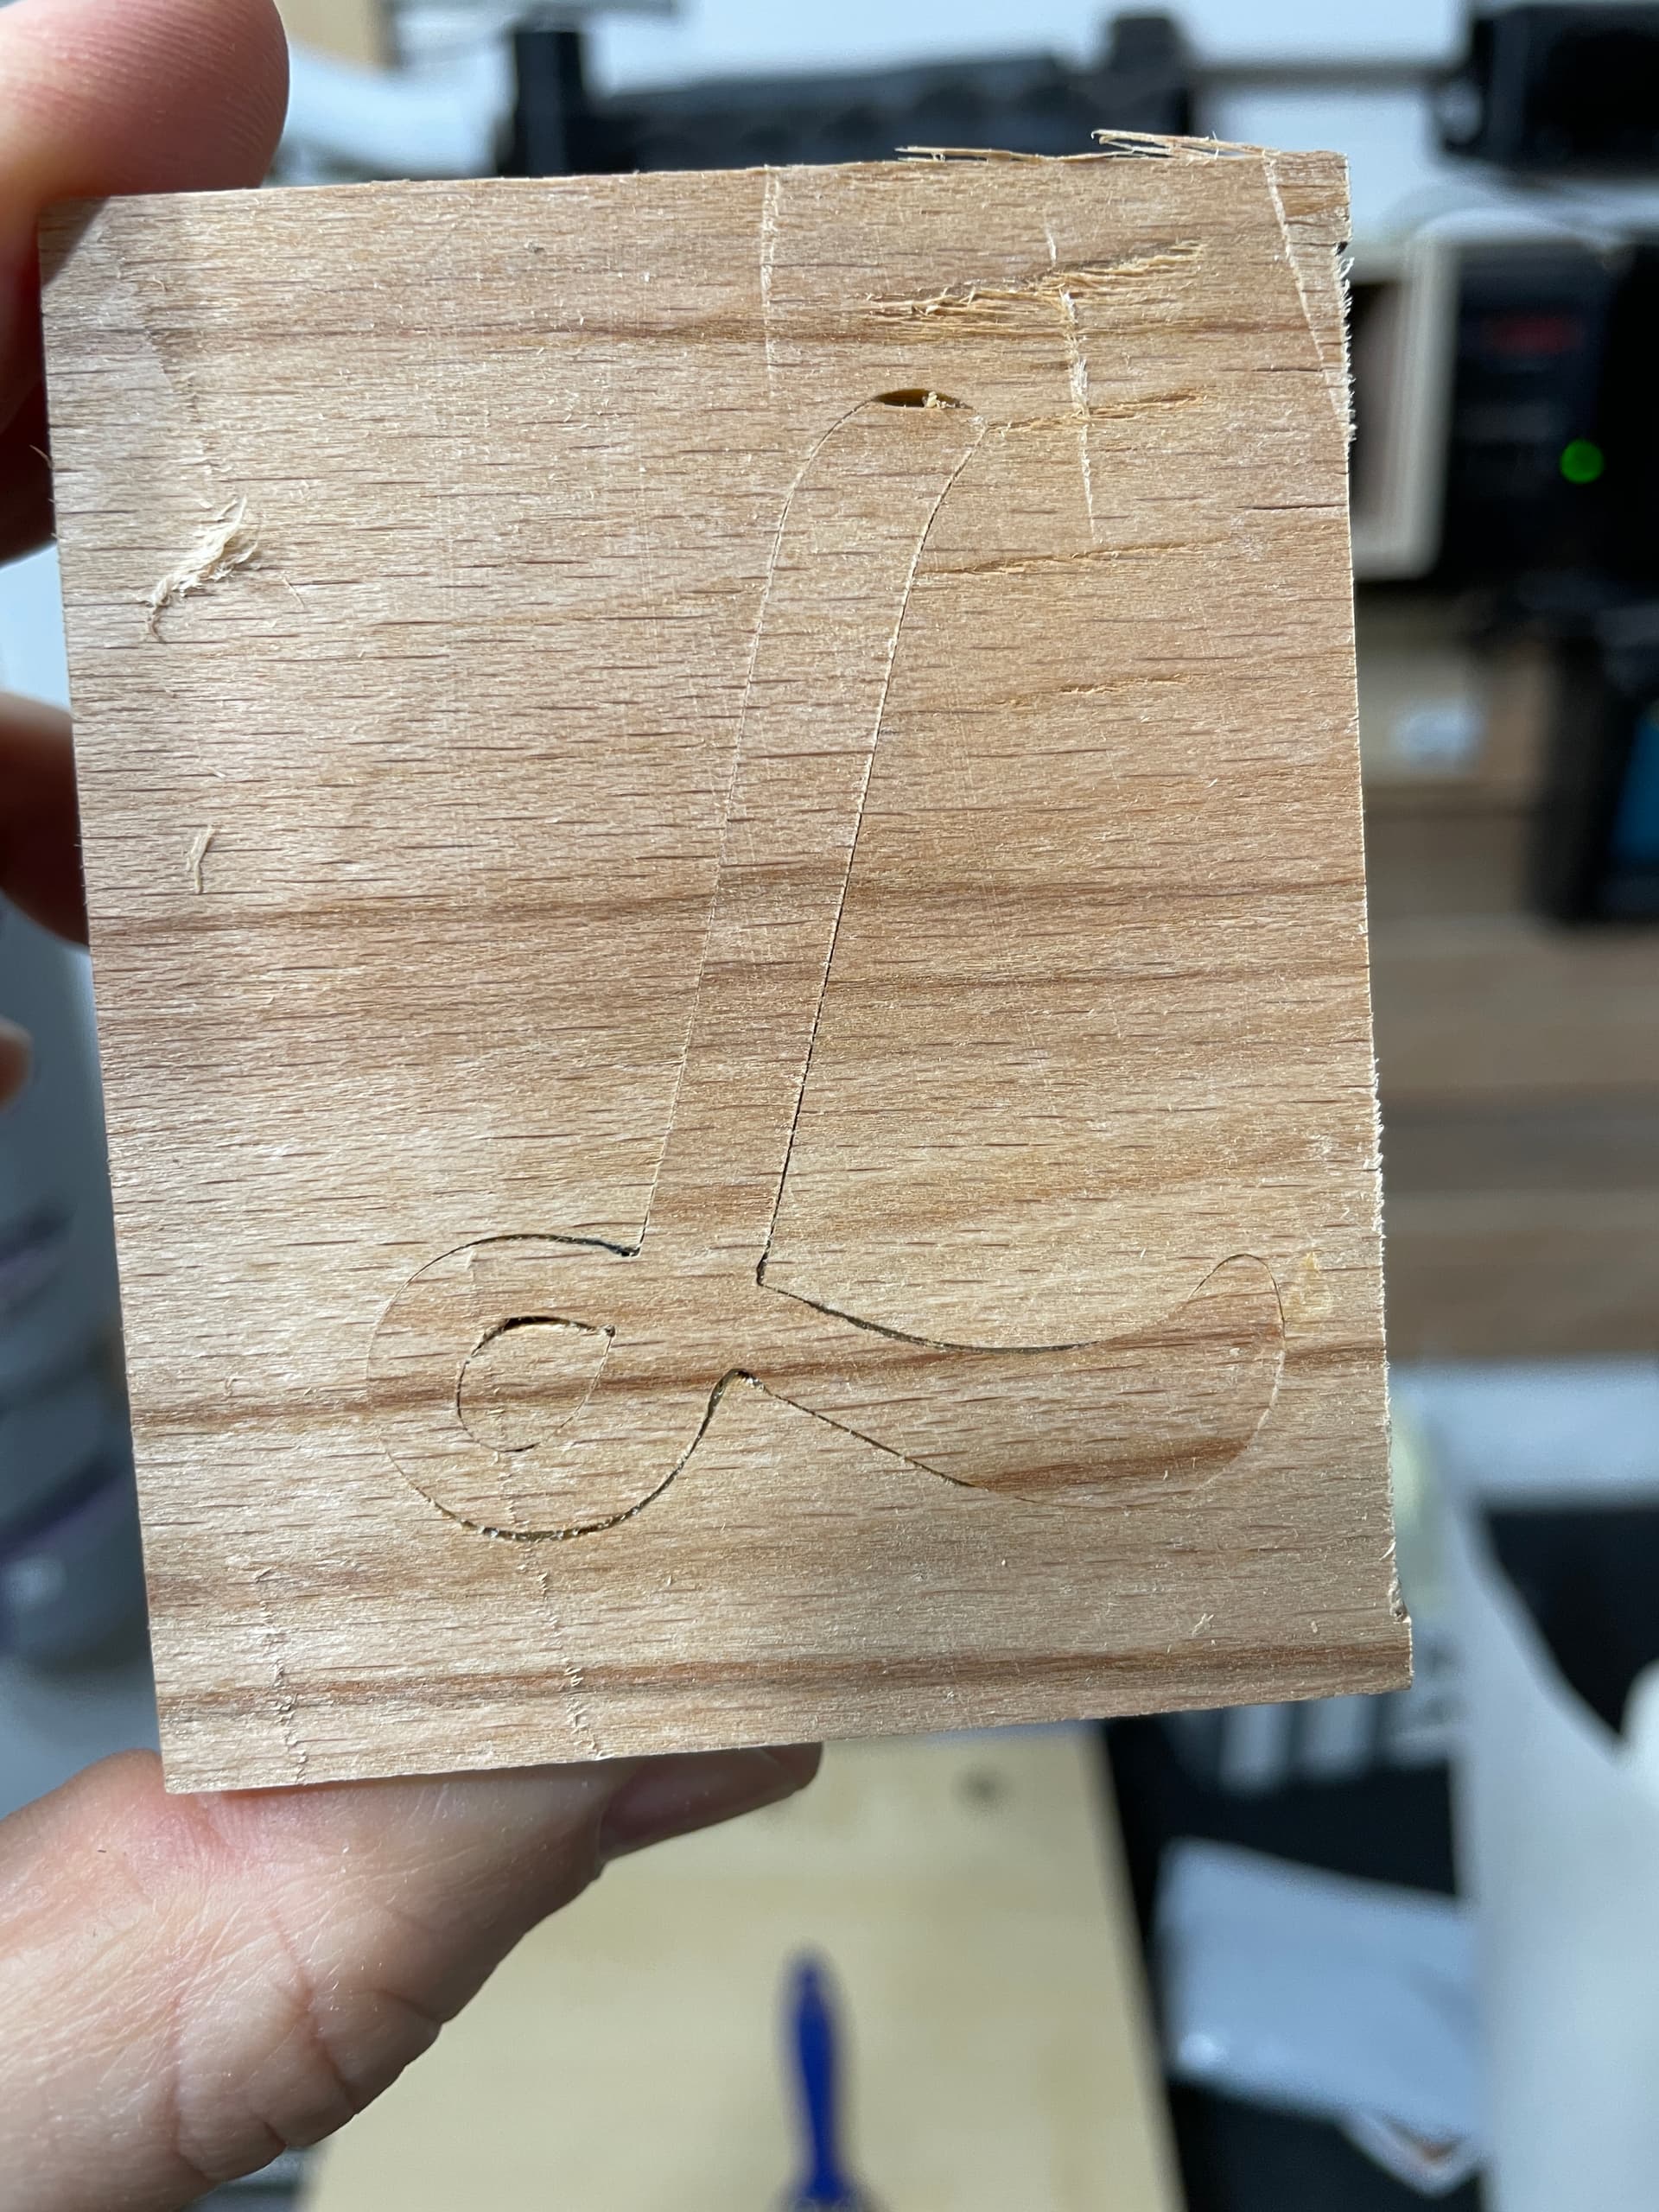
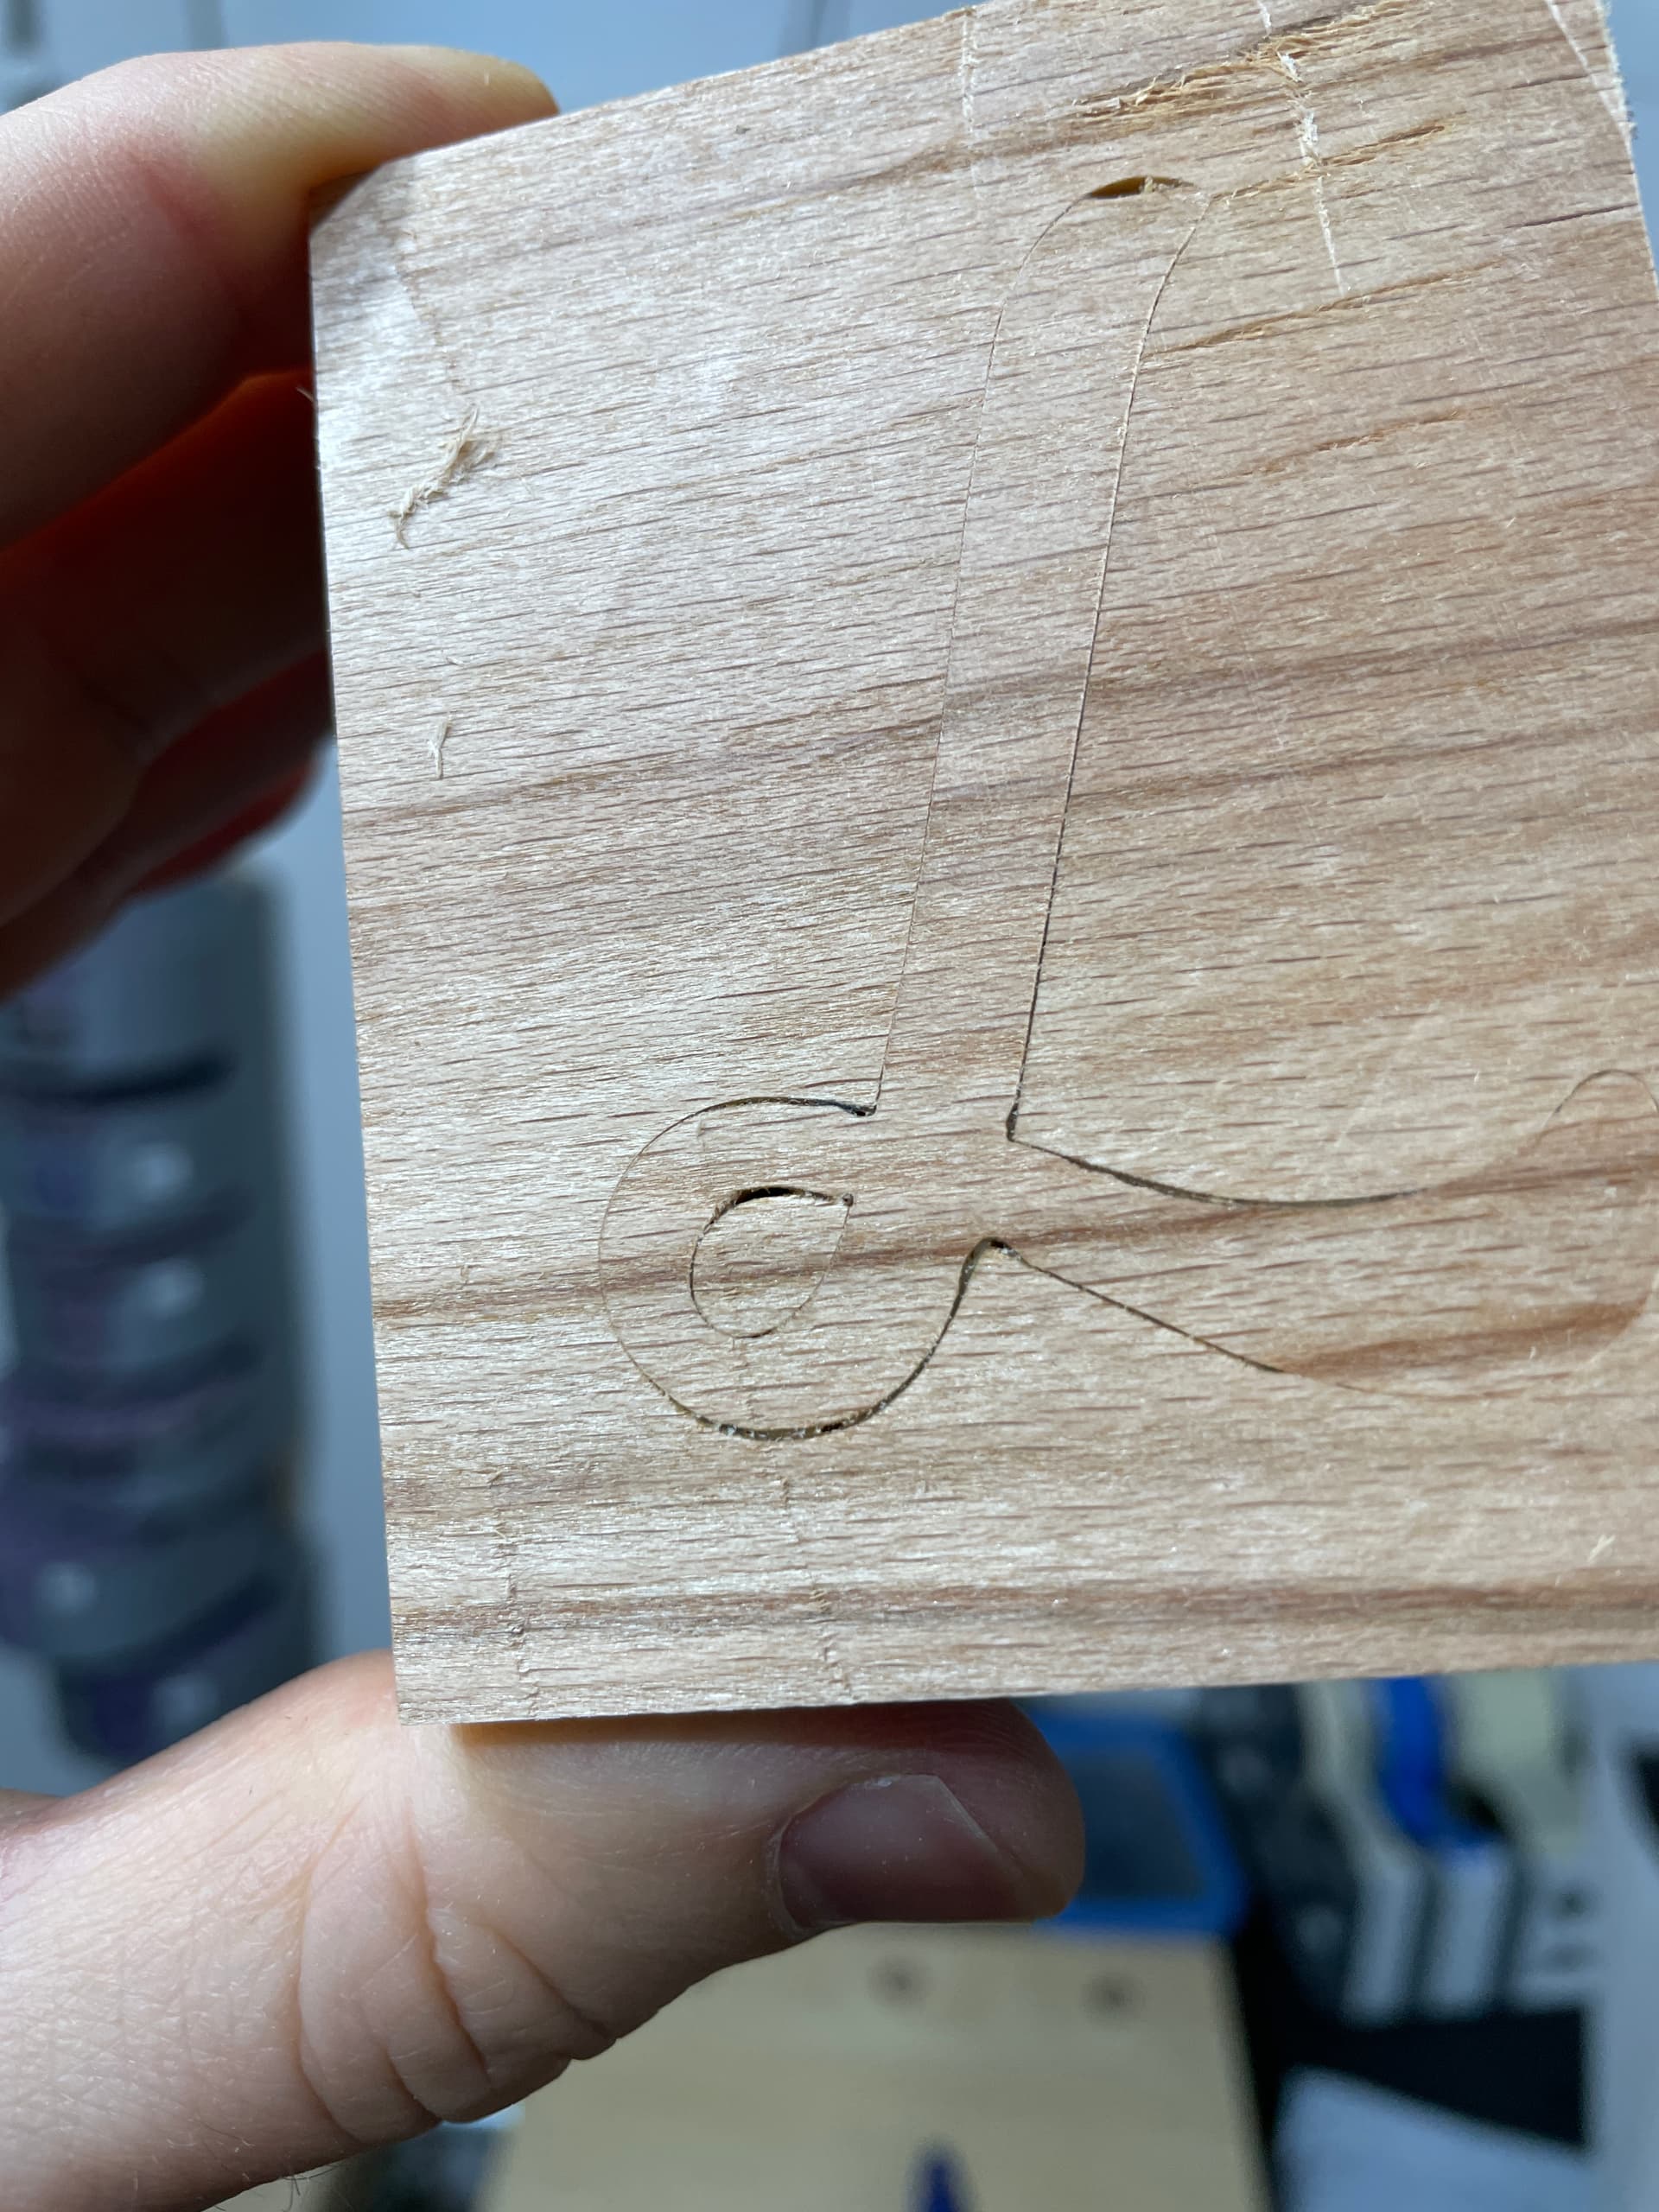
Hi Thomas, thank you for this video! It was very helpful for me. I have some problems and I’m not sure what I should be adjusting to fix it. As you can see in the pictures, there are still some small gaps between the inlay and the pocket. I also noticed when I cut it in half that there is no gap at the bottom, so, it couldn’t be pushed further down. What setting do I adjust to create a pocket for the glue at the bottom?
For the pocket I used:
Starting Depth (S) - 0
Max Depth (D) - 6mm
For the inlay I used:
Plug Depth (D) - 1.250mm
Top Gap (S) - 5.750mm
A couple of things. Can you tell me what bit you used for your inlay? I noticed you used the settings that I came up with for my bit in the video. Those settings work for me, using that particular bit (from the video) in end-grain. Also, are you cutting full depth on the face grain?
From your pictures, it looks like the plug is still bottoming out, and there also appears to be some chip-out.
For the chip out, it is recommended to run the TBN toolpath first, and then the clear out toolpath. That should reduce the possibility of chip-out. Face grain is a little more susceptible to chip out.
To rectify the plug bottoming out, Increase Top Gap and decrease Plug Depth. It should still be a total number of combined 7mm. So for example, change the plug depth to 0.75mm, and increase the top gap to 6.25 (.75 + 6.25 = 6 + 1)
The formula I used for determining the settings is:
Too loose: Increase Top Gap, Decrease Plug Depth = Pocket Depth + 1mm
Too Tight: Decrease Top Gap, Increase Plug Depth = Pocket Depth + 1 mm
The most important thing, is you cannot necessarily use the exact same settings, even if you have the same machine as I and use the same bit. The bits can have variances and tolerances, even within the same manufacturer.
I will play around with it some on face grain and see if I can come up with better setting specifically for face grain (I hate face grain inlays, LOL). Let me know what you come up with, and I will also try a couple of inlays on face grain and post results.
Thanks for the prompt reply Thomas. I actually am just using face grain to test because it’s easier than glueing up endgrain and then it fails, but the ultimate goal is to use it on end grain, so, maybe I need to test directly on end grain?
With regards to the settings and the bit, I actually did 2 different settings, the first was too loose and then this one felt pretty snug, but, obviously not good enough. So, although the same as yours, I did attempt other settings too
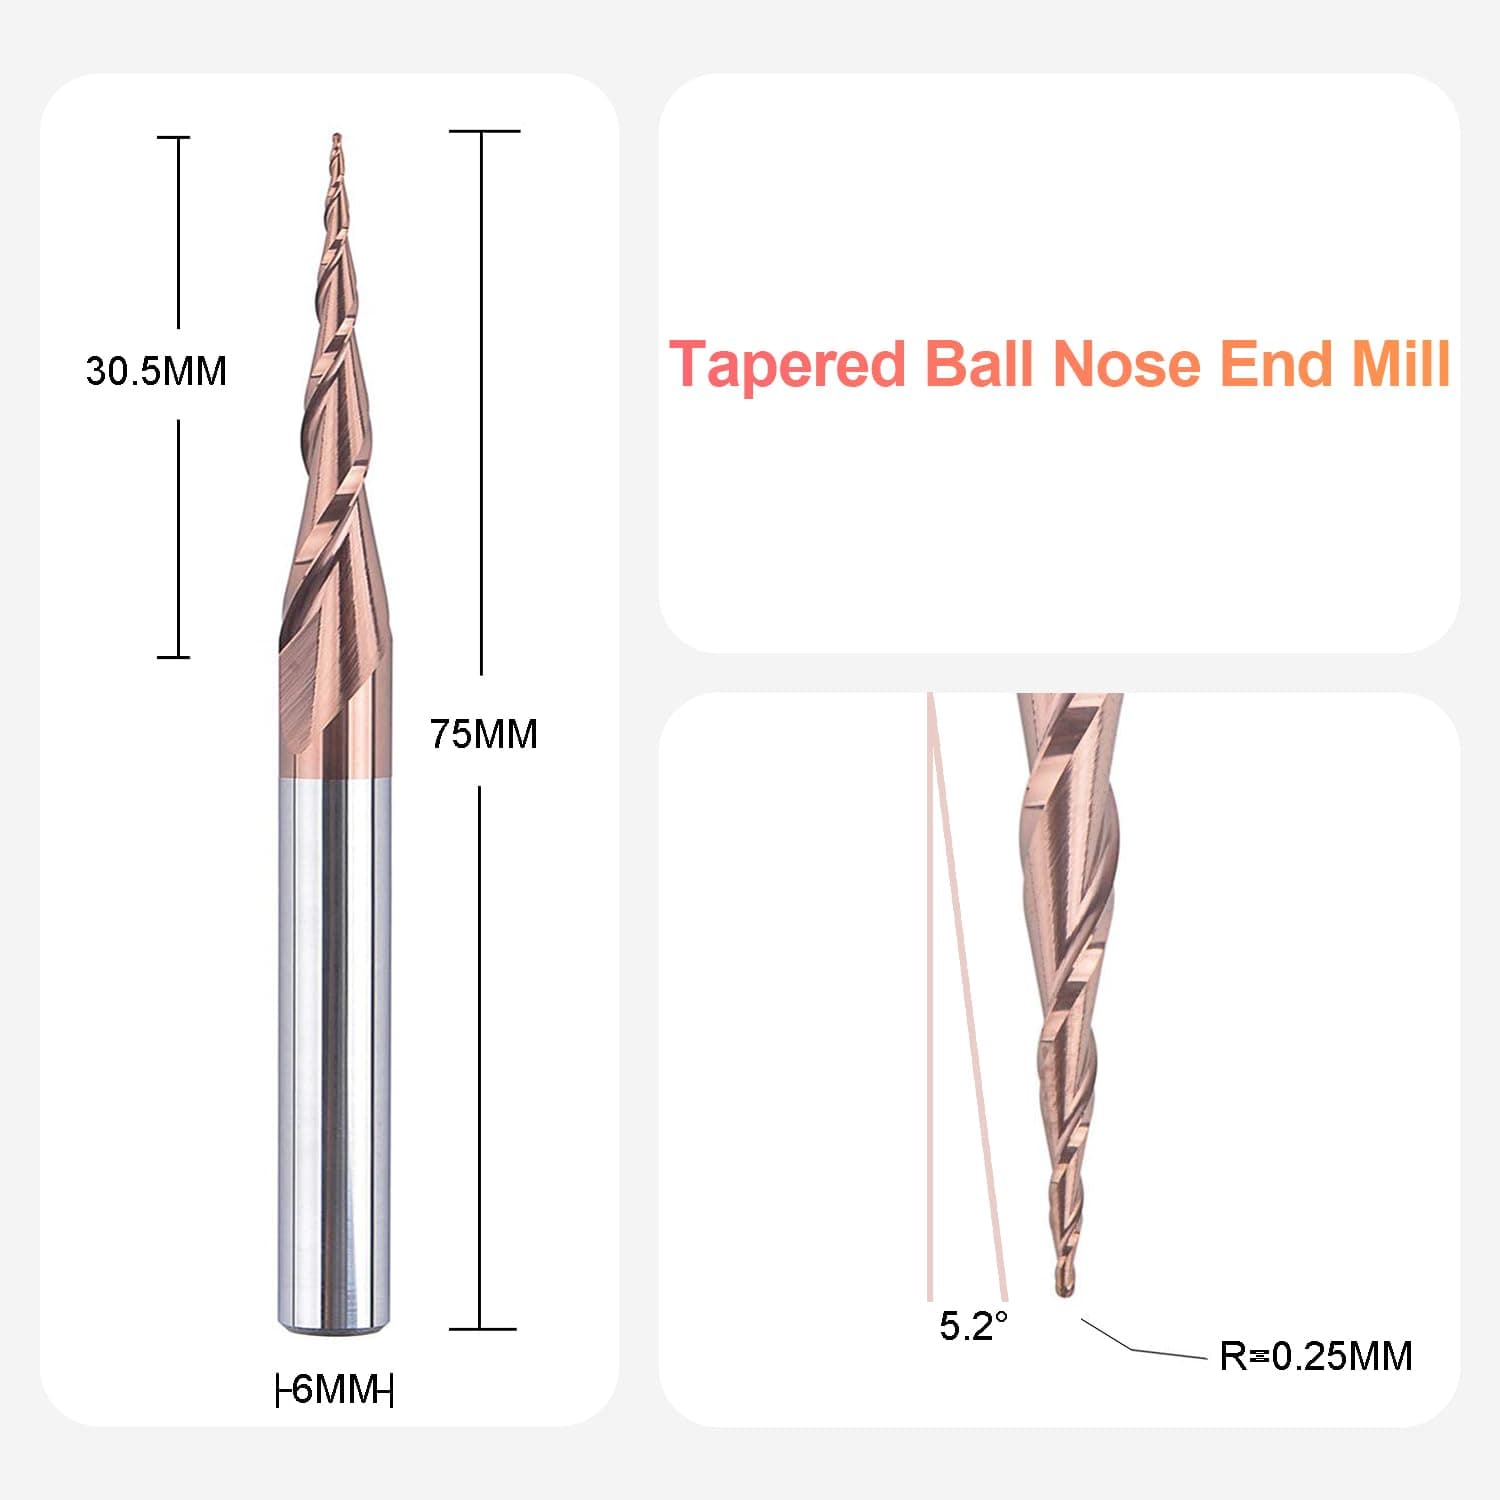
That looks to be a metric equivalent to the exact bit that I use (SpeTool W01005). By TBN toolpath, I should have said your inlay toolpath for the plug.
A little tip for end-grain. If you have some 8/4 lumber (~44mm) you can just cross-cut it at about 20mm, and that will give you a 44mm end-grain piece that you can make test cuts in. I did that for this test, because I didn’t have scraps of end-grain available either.
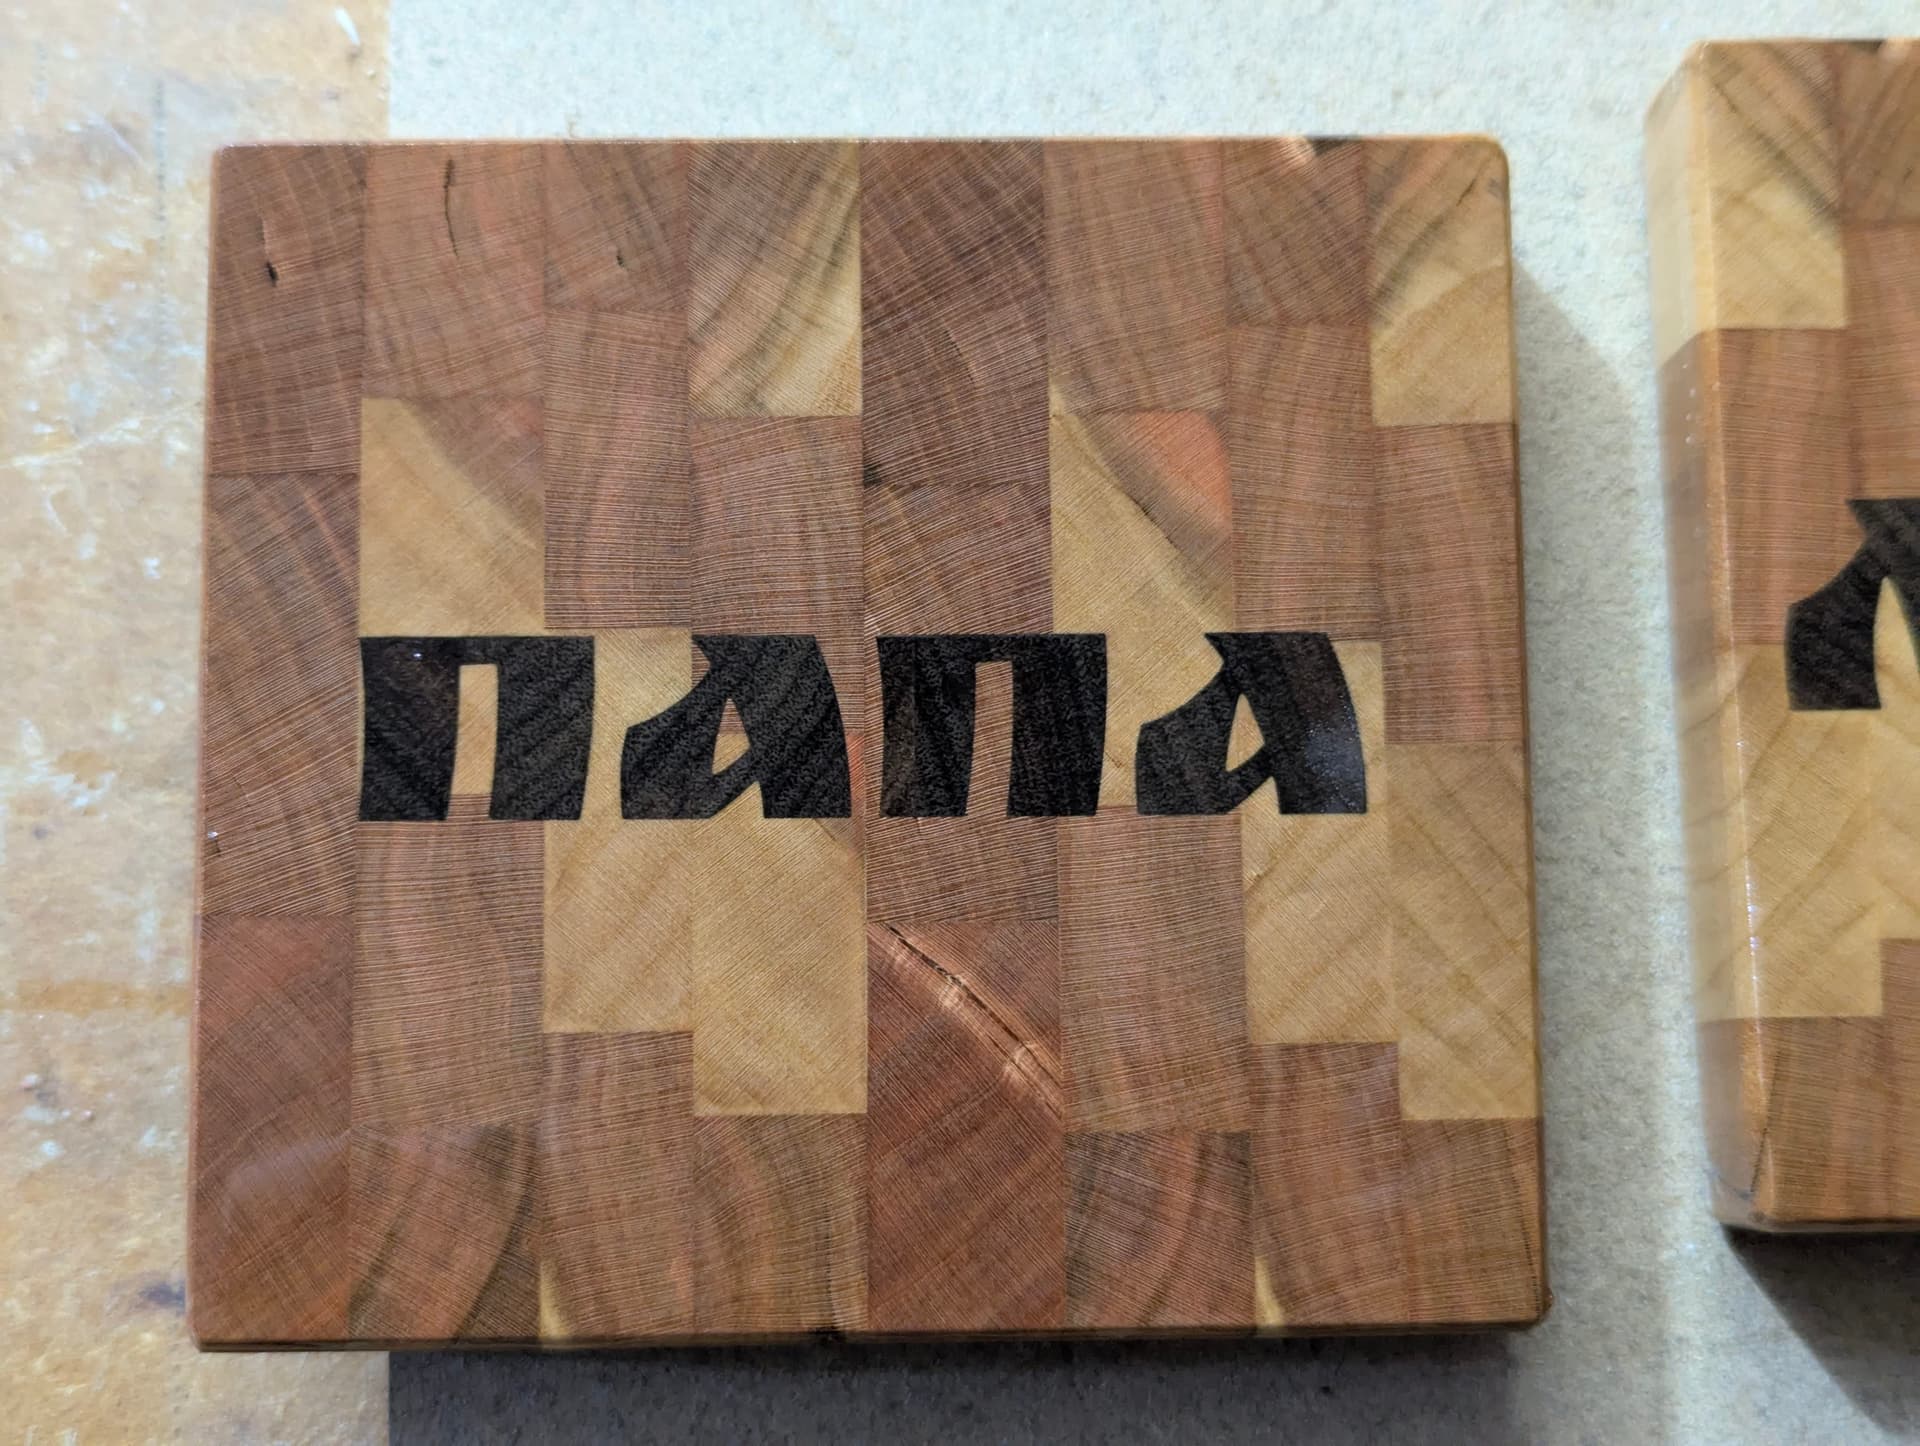
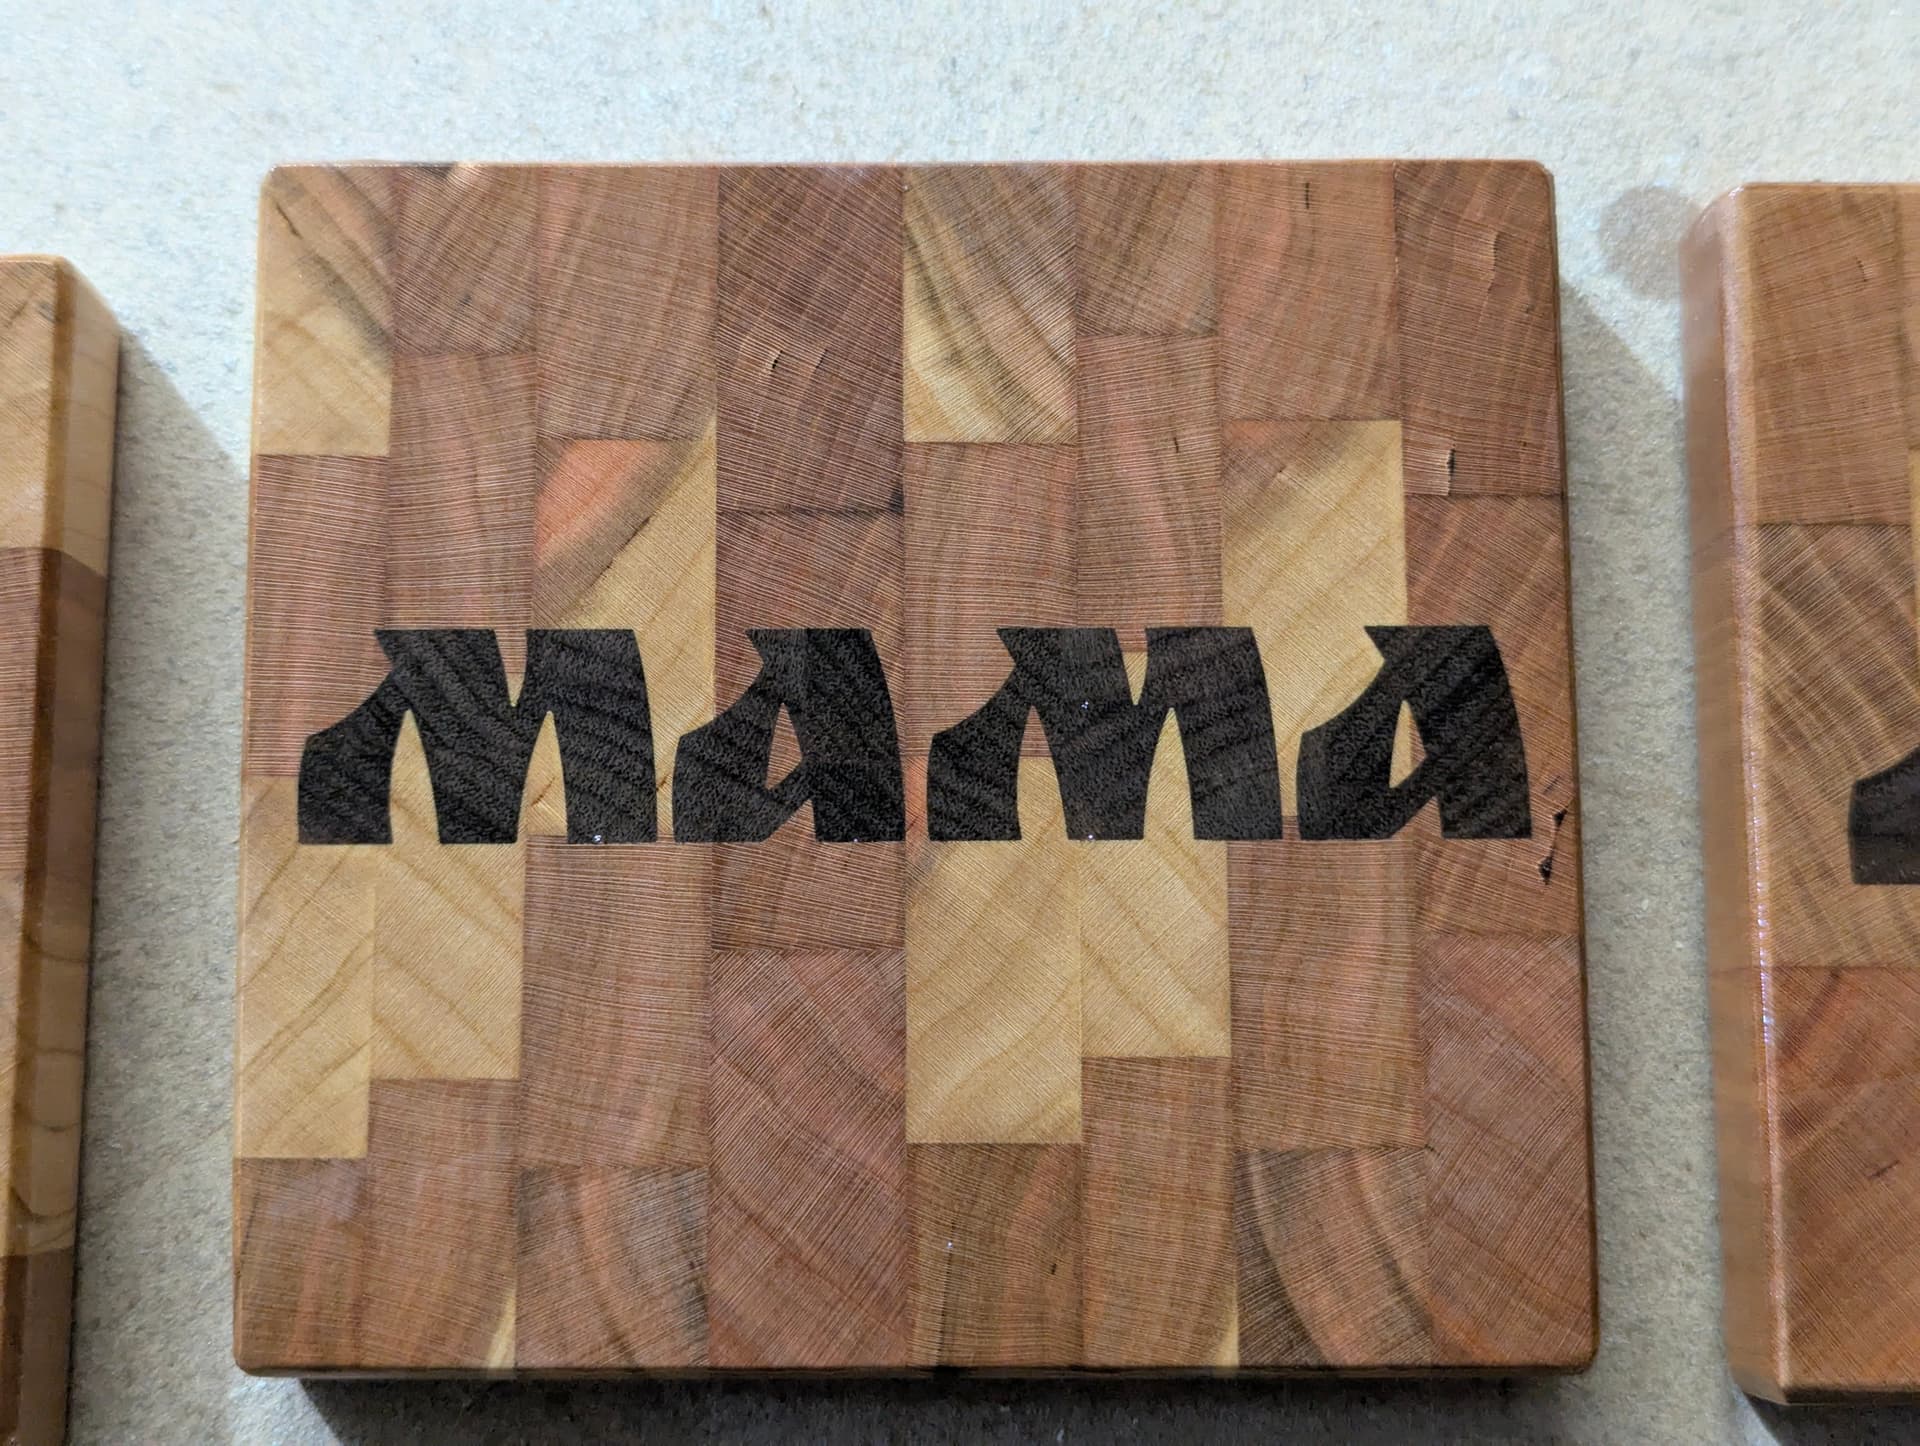
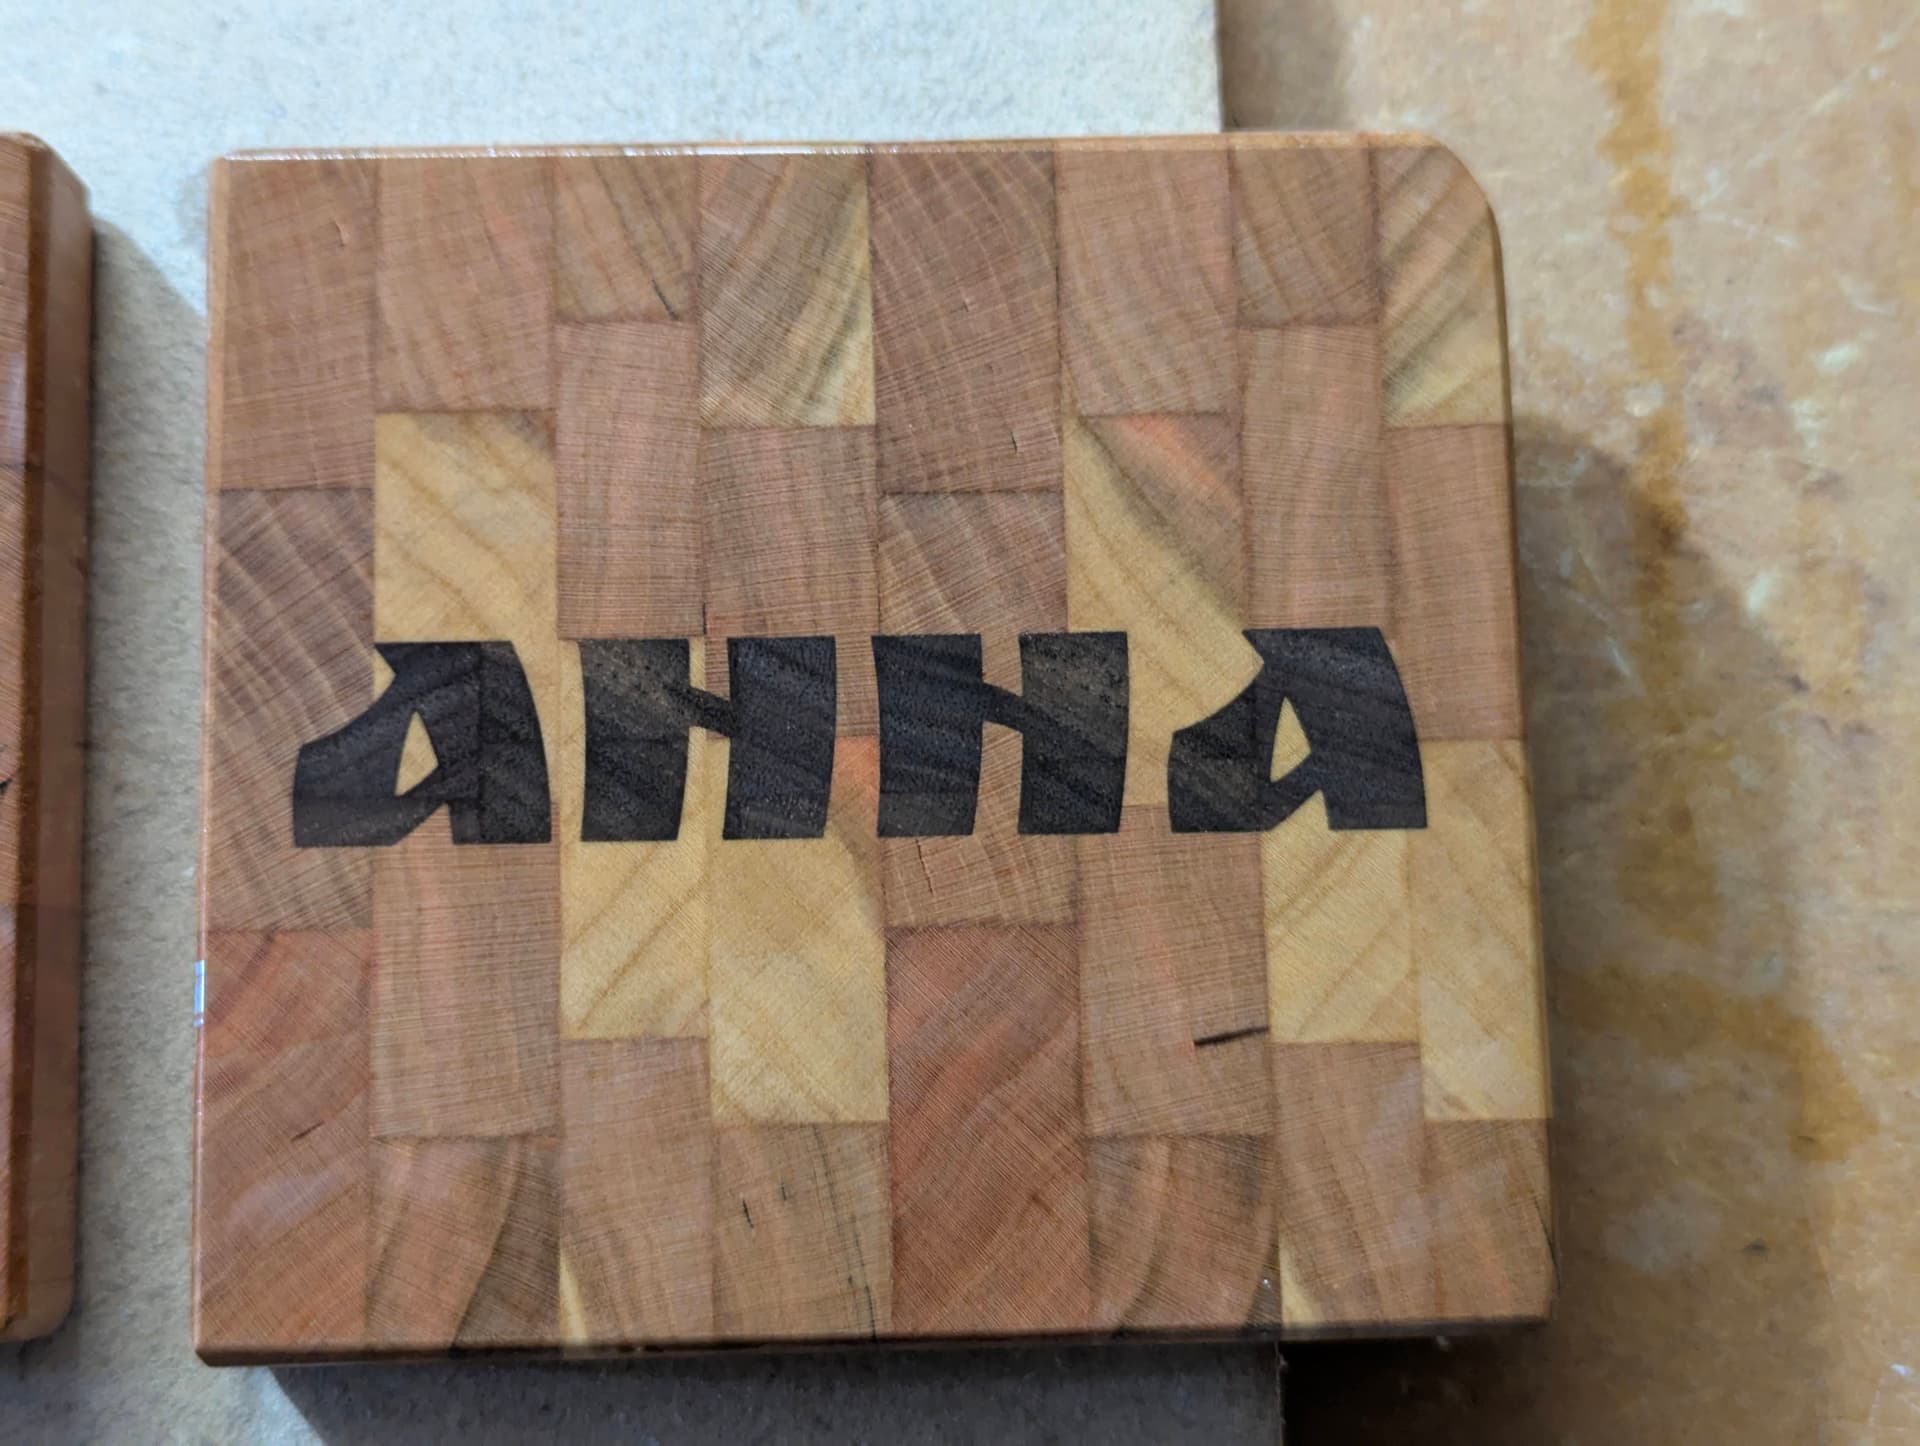
Thanks for your video, that was much needed help. After running a series of tests incrementing the Plug Depths and Top Depths, I was able to produce these inlays on some test end grain coasters. The pocket was 1/4 inches deep and I used 0.2696 as my plug size for the calculations of Plug Depth (D) 0.0498, and Top Depth (S) 0.2198.
I initially used a plug size of +1mm, but I was still bottoming out after decreasing the plug depth and increasing the top depth all the way.
I think I might still be close to bottoming out on these tests but it clamped together fine and there were no gaps. I’m going to try the bits you recommended to see if there’s a difference.
These were done in the free version of Carbide Create 8. Do you think Vectric VcarvePro handles these bit geometries better? I’m thinking of purchasing VCarvePro for doing inlays and for some other features I want.
Hi Jay. I did the test with the free version 813. I also posted up a follow up video to this one to show how I better addressed using face-grain for inlays.
Personally, I use Vectric VCarve Pro, and I use very similar techniques to dial the bits in for both regular vcarve toolpaths, and their new vcarve inlay toolpath. I have MANY videos of those techniques (LOL)
That being said, I created the video I linked here because many folks don’t want to drop the expense for Vectric Vcarve, and being the type to tinker, I wanted to see if I could use the free version of Carbide Create to give people workable options.
Ultimately, if you intend to purchase software, you have to decide if the features it has are worth the cost. Hope that helps!
Greeting again Everyone! I did an updated follow on video to address how to get better face-grain inlays using the method layed out in this post, and adding steps specifically for face-grain. Here is the link to the face-grain update:
Questions or comments can certainly be posted here, or on the video.