Maybe I was lucky but the very first try with a company logo coaster went perfect. After that I only had problems. The pocket not deep enough, edges snapped off during carving, the inlay plug too small, the inlay plug unable to go into the pocket deep enough etc.
So now, I can see that during the pocket pass, not enough material is carved away at the bottom.
At first glance it looks like that 1/8" tool is to big to fit where it needs to clean up the pocket. you’ll need to go with a smaller tool or adjust the pocket. If you post your .c2d I’m sure someone will chime in with an idea.
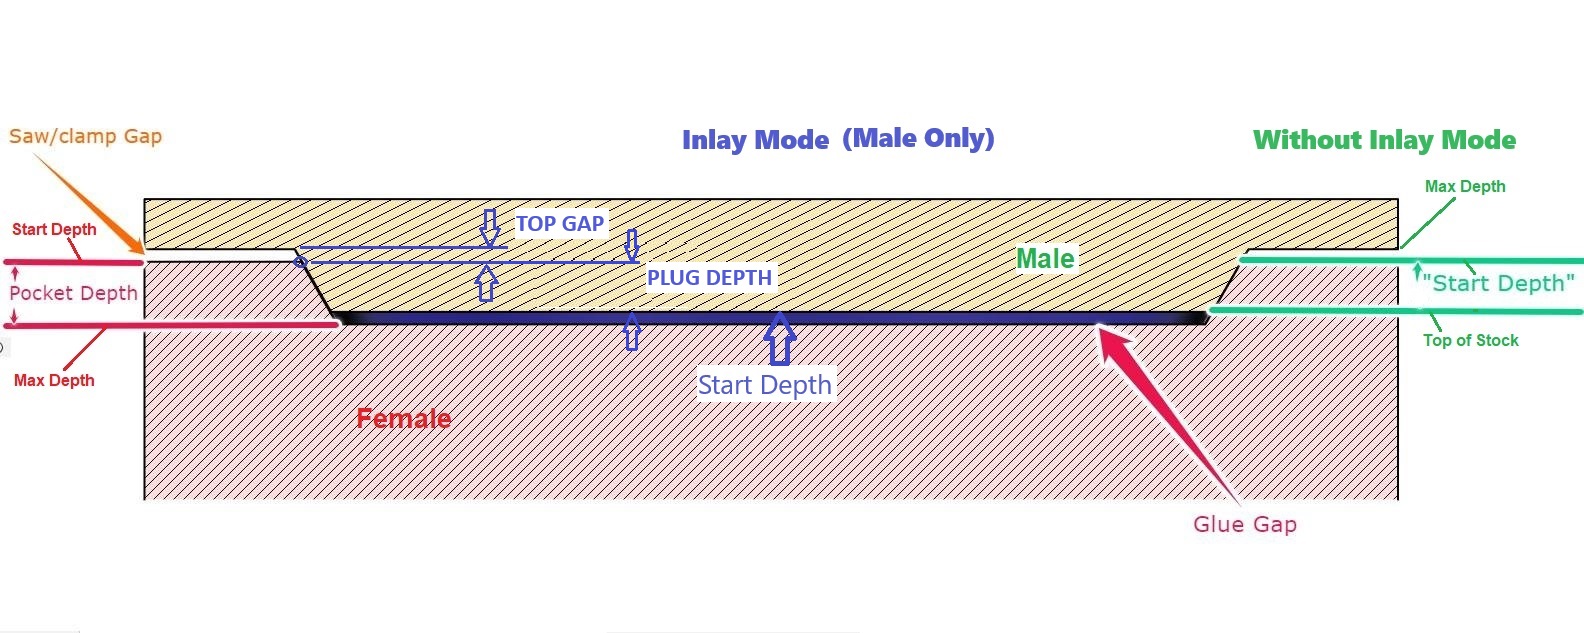
As @Ed.E notes, those regions are too small to admit the tool used for pocket clearing, so a V tool is being used for them — so long as what is left uncut/uncompressible in those regions is smaller than the Top Gap distance it should work fine.
I see. But when I switch it to for example the #122 end mill 1/32", I notice that the corners are still not completely being carved. Besides, now it takes the pocket pass 289 minutes to finish…
My cutting depth is 5mm. I guess the frizzies left are 0.5mm max. So this would basically just get squashed when pressing in the inlay plug? In other words; nothing to worry about?
A toothbrush will take care of the fuzzies but looking at your settings, the socket is pretty deep. A shallower pocket would be a lot cleaner. Load the attached file and see if that helps any.
When clearing & v-carving, the V bit will clear what the endmill can’t reach. Since it’s a V-bit, the stepover will result in the serrated (frizzies). The stepover should be small enough that those should be in the “glue gap” & not interfere.
I would say yes, but to a point. The sharper V-bit will let your clearing tool get a better shot at cleaning up the bottom of the socket but, once the depth of your socket exceeds the tool diameter you’ll have another problem.
FWIW, The file I uploaded it basically my inlay job template. I add my designs, assign the tool paths only tweaking those settings if I need too, then rename it.
To circle back on this after some time… I have tried numerous inlays again but EVERY time the plug part(s) end up too small. As in, too much loose space around the plug, thus the plug not fitting snug in the socket. I think there’s about 1mm around all edges carved too much (so when I hold against a corner, the gap is about 2mm).
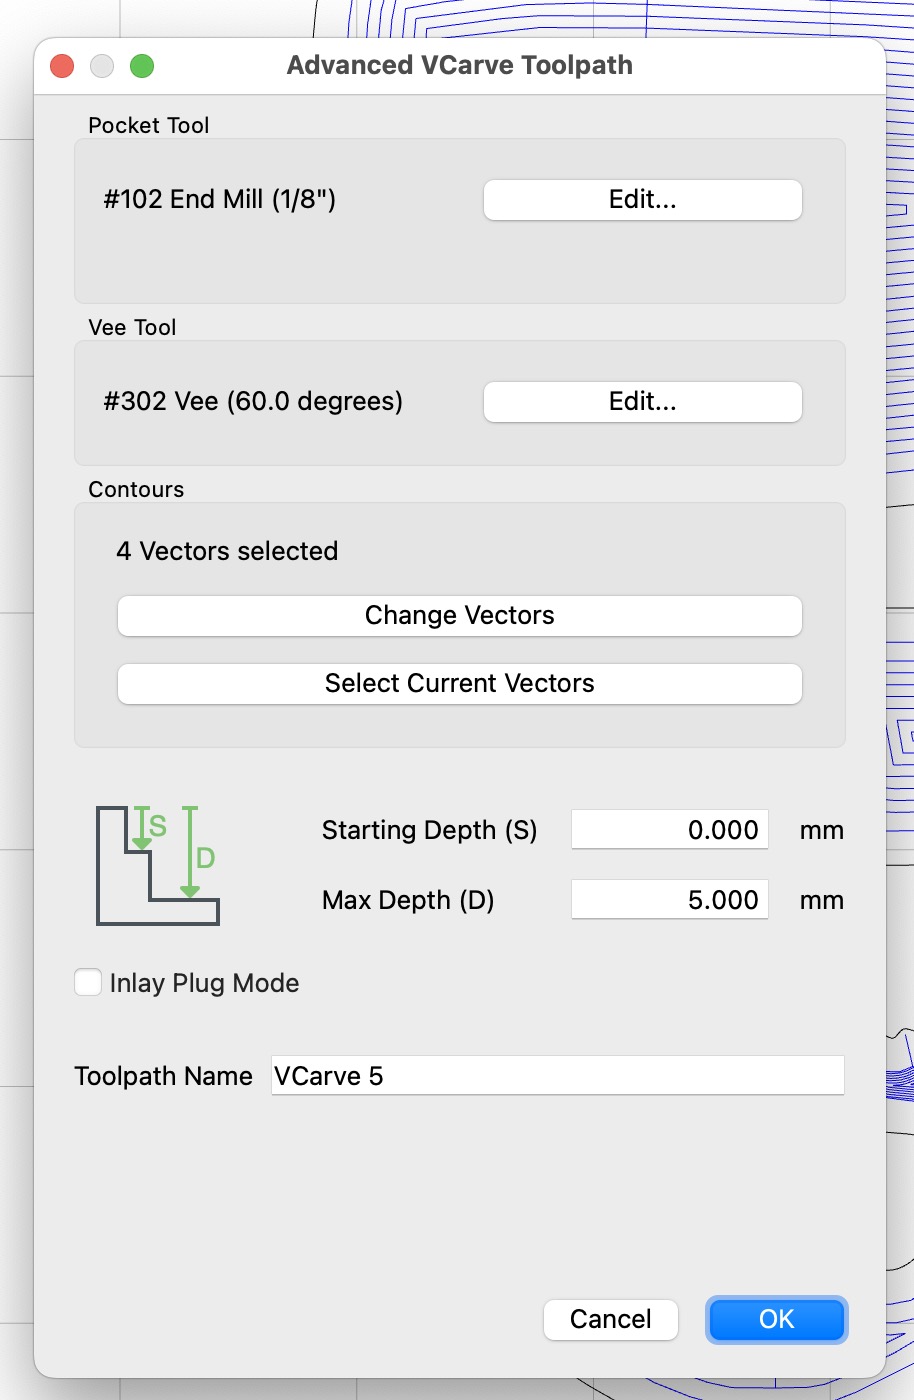
Below two screenshots of respectively the socket and plug settings.
This is with CC 815 and CM 644. I use a 20 degree V-bit.
Do a test part and on the plug use: Plug Depth - 0.0, Top Gap - 4.0
Now assemble them & measure the actual top gap.
It may turn out you don’t have enough room for adjustment with a 20° vee bit. That’s only 10° per side. To adjust for a 1mm gap, you would need to correct it by 5.67 depth. (1mm / Tan 10 = 5.67mm). With a 90° Vee bit you would adjust 1mm depth to close a 1mm gap.