I have gone through so many posts in the community regarding inlays but I’m not seeing my issue.
I’m using a 30 degree V-Bit for the female and male parts. After hours and hours of testing different settings the one that fit the best was the following.
Female max depth : 4mm
Male plug depth : 0mm
Male top gap : 4.5mm
After watching so many videos and that one from Winston I assumed that the male plug depth was meant to be a little less than pocket to allow for glue and that the top gap was to make room to run a bandsaw through. But for me reducing the depth and increasing the top gap helped create a tighter fit somehow.
Can some please explain how this can be? When I use the settings from Winston’s video the plug has about 3mm of play.
I’ve currently got the latest one glued up now so tomorrow I will cut off the plug and see if there’s any gaps.
When you assemble with those settings, what does the top gap actually measure?
There are several variables at play, slop, runout, backlash, machine calibration, wood compression when clamping the two parts together…
I think the first thing I’d check is the tip of the V-bit. Does it have a perfectly sharp point? or is it rounded or flat on the bottom?
Hey Tod, the actual gap from the plug to the surface of the base piece when clamped down is about 1-2mm.
The 30 degree vbit I am using has a 0.3mm flat spot on the tip so it’s not perfectly pointy.
Have you ever come across the settings I mentioned? I’ve watched a heap videos trying to learn inlays and I’ve never seen anyone have a 0mm depth for their plug.
I’ll be curious to see tomorrow morning when I surface the plug if there any gaps. I’ll also slice the piece down the middle to see if there’s any gap under the plug too.
A 0.3mm flat spot will result in a 0.3mm gap between the pocket & plug if using the desired depths, I assume something like plug depth 3.5mm, top gap 1mm.
To adjust, the depth needs to be padded by about 1.2mm, and that’s just for the tool.
Take into account any slop, runout, deflection, clamping compression… your 0.0 plug depth is a good place to start.
After you cut it, subtract the difference between your desired glue gap and the actual glue gap.
So you may program plug depth 1mm, top gap 3.5mm…???
I know your pain. Regardless of how many YT videos I watched, I could not wrap my head around V Carve inlays. This was the only video that finally worked for me.
It’s setup for Vectric software, but I am guessing that CC uses the same concepts, (i.e. female/male, start depth/flat depth, etc.). He uses a very simple formula where you start with the female flat depth and set the male start depth to 2/3 of that, and the male flat depth to 1/3 of that.
Vectric software has a ton of other settings, but I just focus on those three and it’s been working.
Good luck, and maybe some CC users also have software-specific solutions.
When making inlays you can use a 30 degree. However I think a 45 degree one gives you more area to seat your inlay. If your inlay is done right only the edges are holding it in. Plus with the less steep sides you can get good clamping pressure and force your inlay so you dont get gaps. The 30 degree will work but try a 45 degree. I use 15 and 20 degree vee bits for almost all of my advanced vcarve bits.
Having a rounded nose vee bit will cause problems. When the software calculates tool paths it assumes a sharp point. When you have a rounded/broken point the BitSetter is fooled because it is expecting a sharp point. Sometimes you can break the point off a vee bit or maybe they make some with a rounded tip. Either way you need to get a sharp pointed vee bit so the design/toolpath line up as expected.
Cheers Tod, I appreciate the help mate. I tried many variations of depth for the plug and top gap but they were all loose. I have no idea why a VBit would even come with a flat spot at the tip and I never really took notice until yesterday that it even had a flat spot.
I’ll have to buy a few new bits and do more testing. I originally started with a 60 degree but my one has 10mm width and when the pocket goes deep like in the font I am using it made the top of the pockets so wide and the letters of the plug way too thin.
Cheers mate, yeah this vbit actually came with 0.3mm flat bottom. I had no idea until yesterday. I’m going to need to buy a few different Vbits and keep playing around with it.
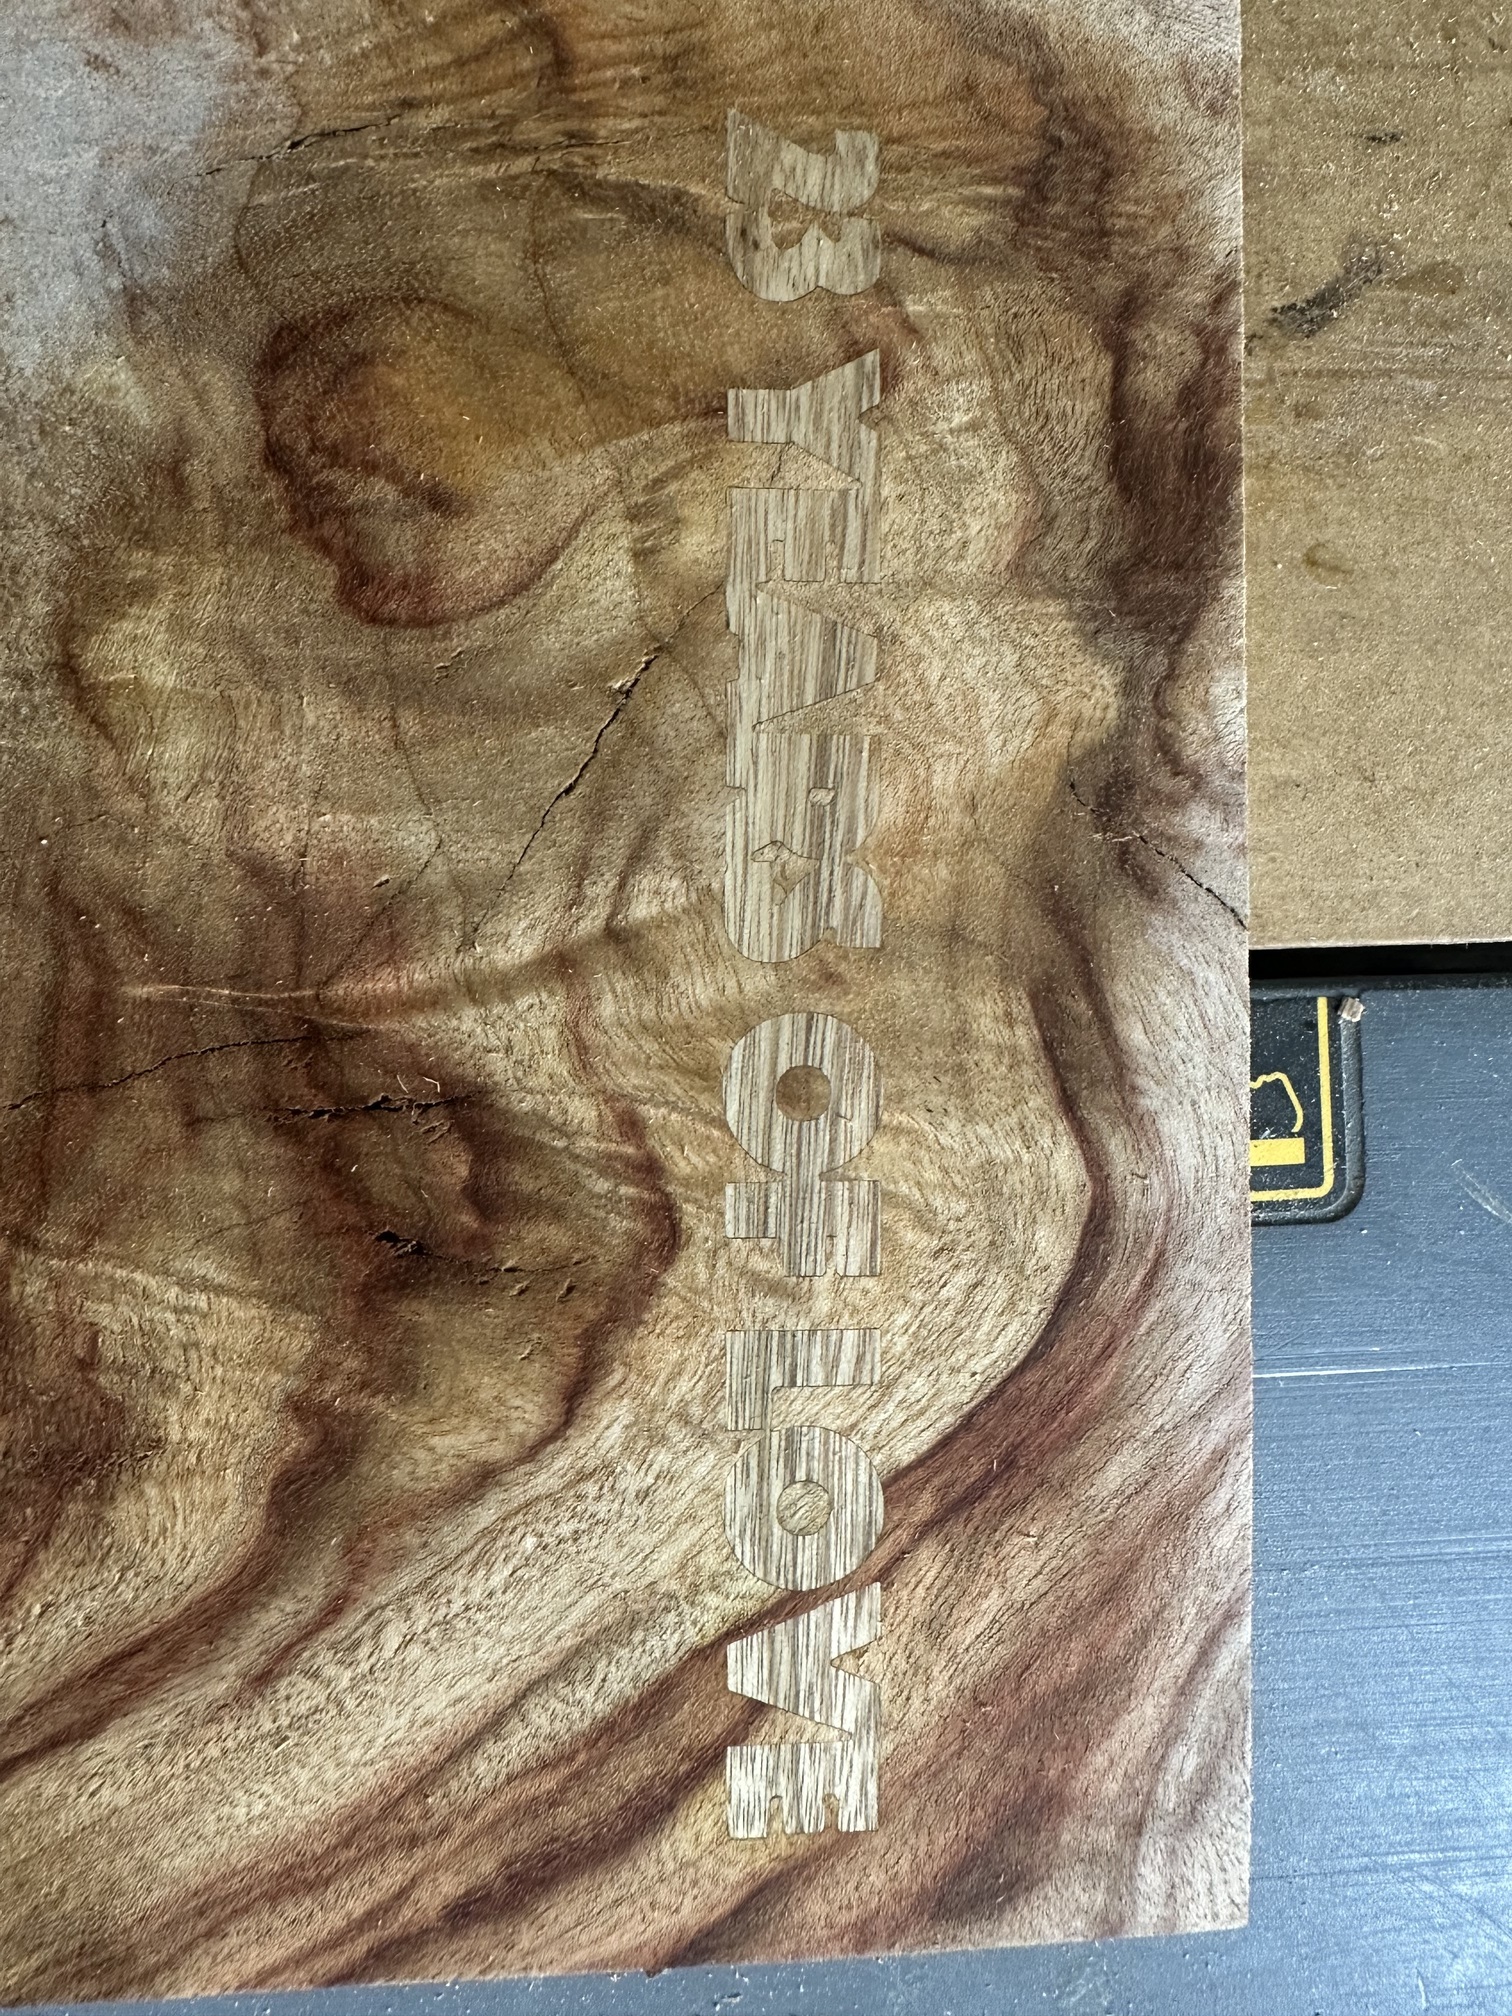
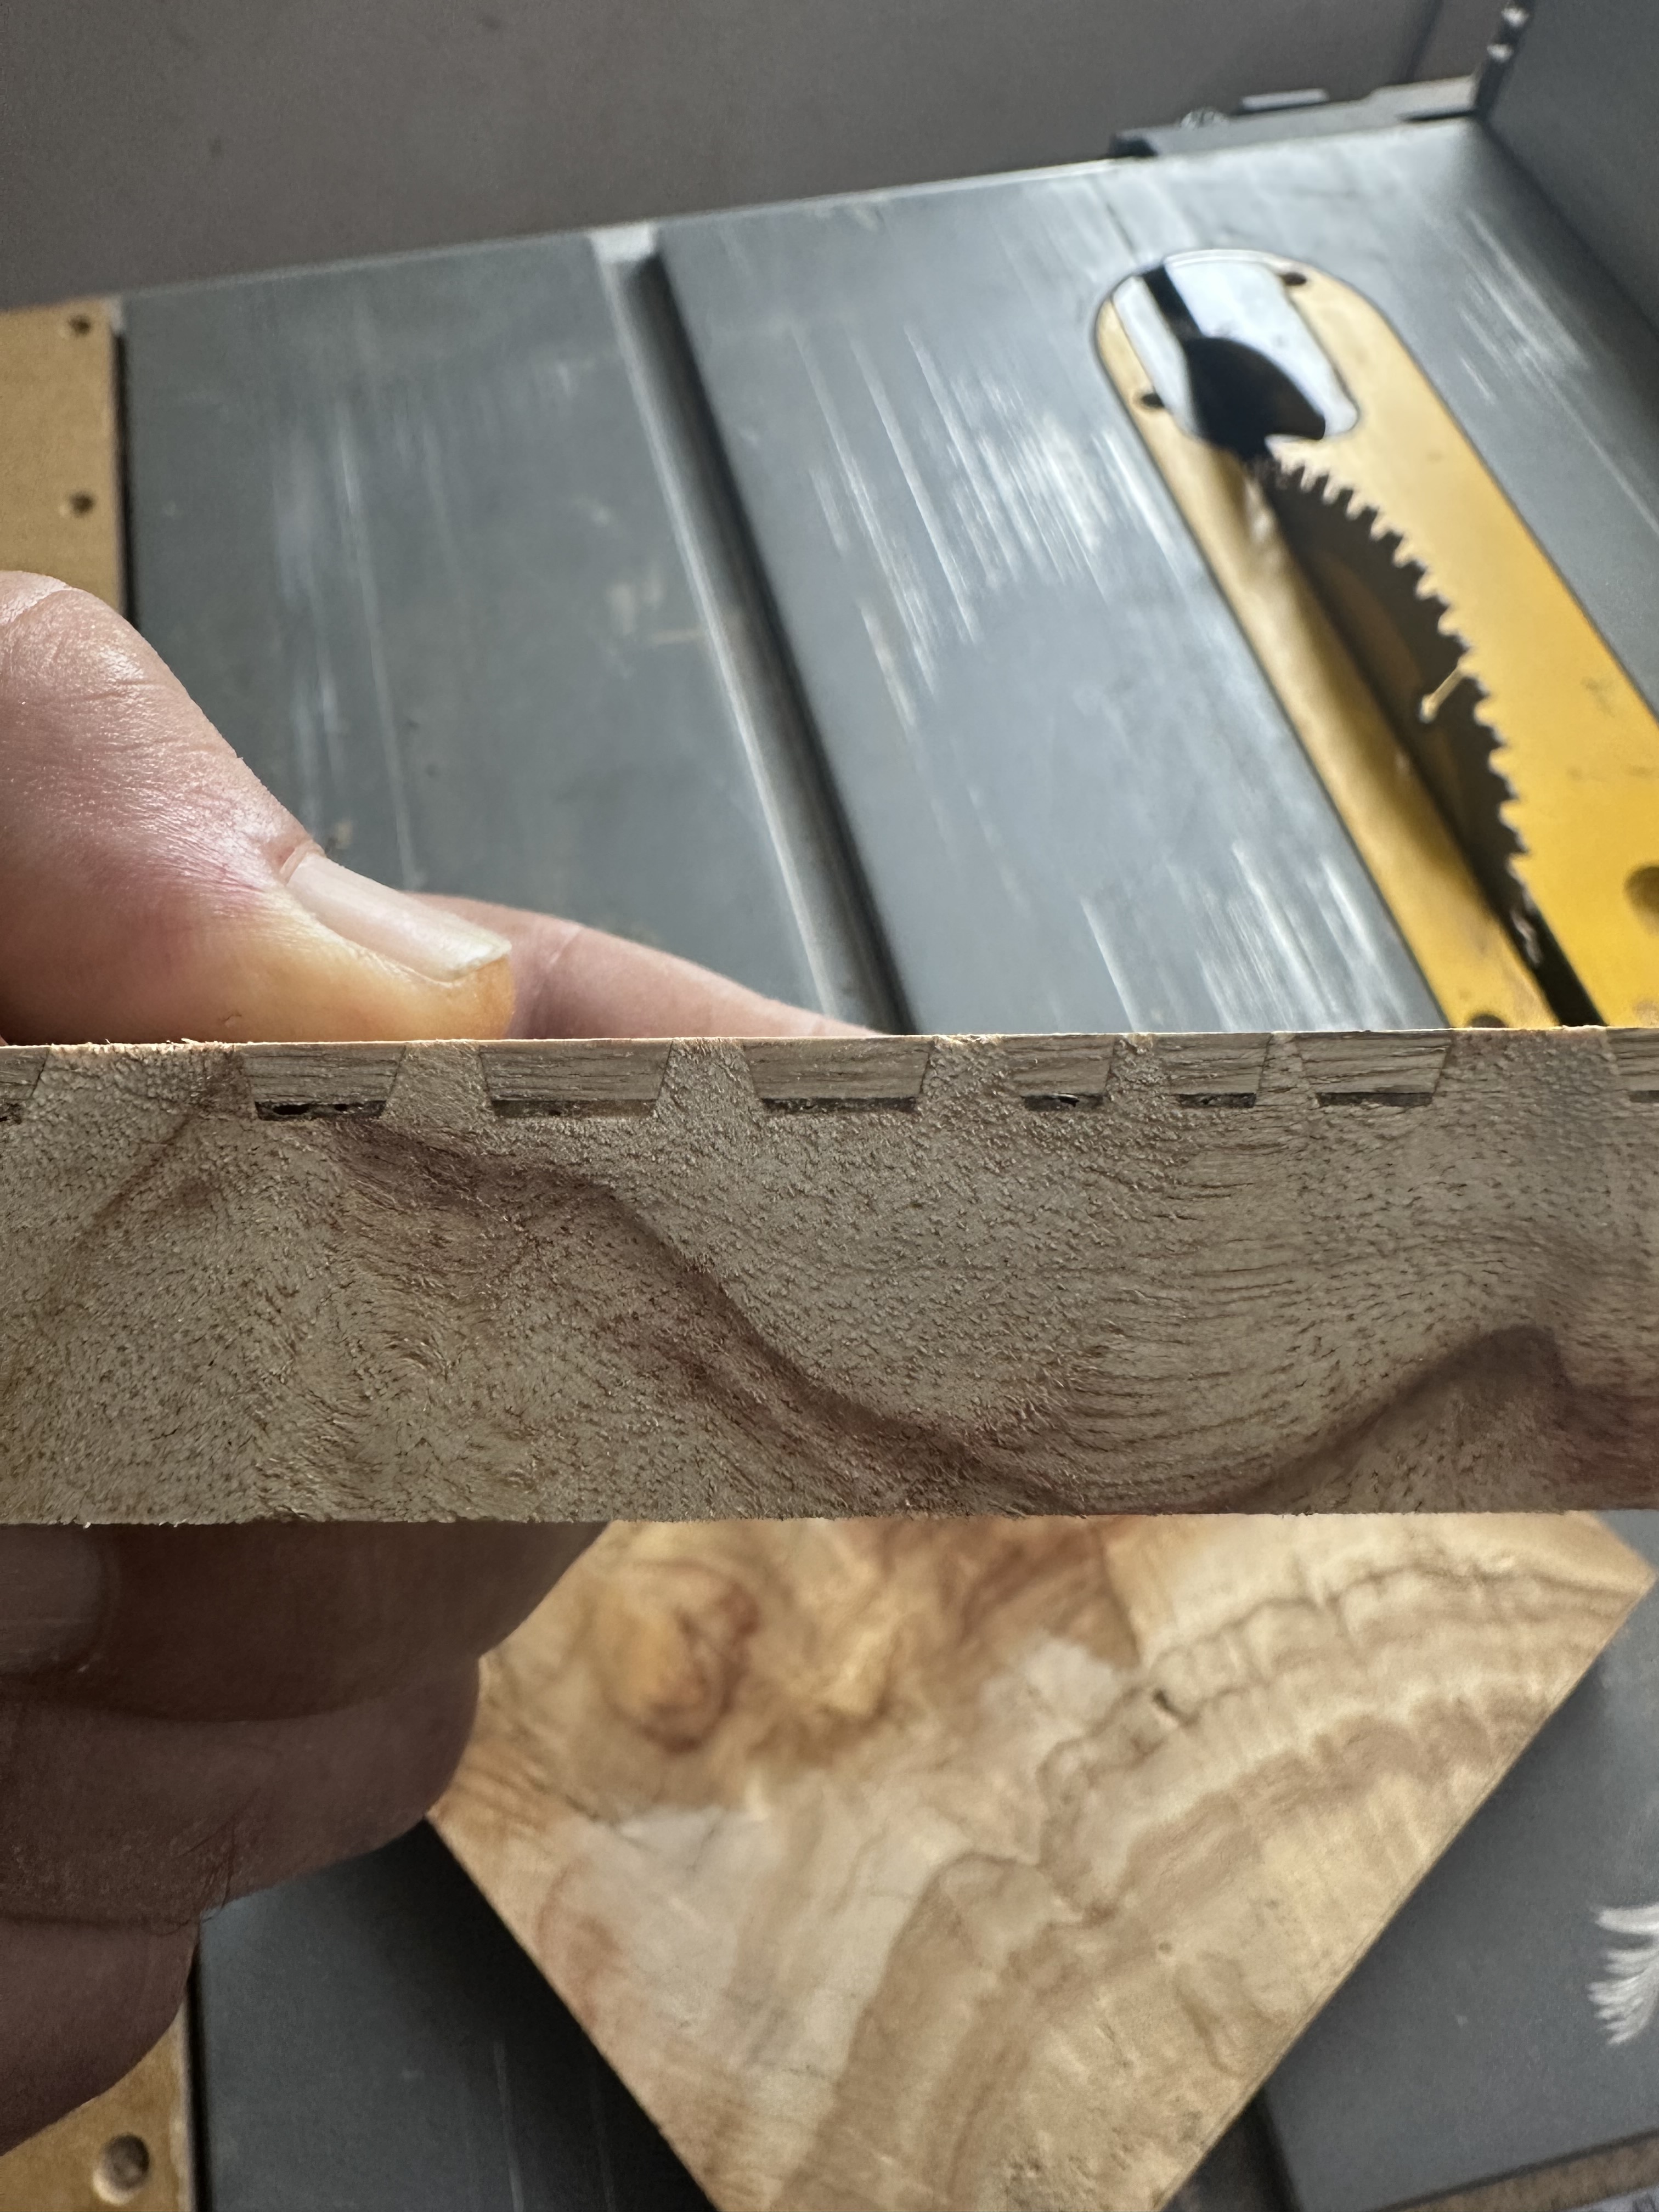
UPDATE: I cut the plug off this morning and it actually sits really good no gaps that I can see. I also sliced it down the centre to see the bottom gap and it appears to be about 1mm of glue gap. Pics attached.
I don’t know how it worked, but it seems to have worked.
Now fingers crossed the these settings will work for the main piece because I have til tomorrow to make my wife’s wedding anniversary gift