I have a plaque to make out of walnut with an epoxy pour over the wording to make it pop. I set each letter size to its own tool path and set each to 3/8” deep so I get enough depth to pour and sand epoxy. I ran the program in Mdf to make sure it all looks good but some of the lettering is only 1mm thick!
Why won’t it carve to the depth I set in the tool path?
The depth for a VCarve specified in the Toolpath is a maximum, not the value it gets carved to. The depth of the VCarve is calculated so that the cutter touches the enclosing lines. If the lines are close together, the cutter will not cut very deep.
If you want to carve to constant depth, the best solution would be to use a ‘stick’ font, then carve a no-offset contour.
None of the built-in Windows fonts are ‘stick’ fonts, perhaps someone here could suggest something.
One font you could try is the oddly named " ZnikoSL-SVGinOT" font, here:
It’s not actually a ‘stick’ font, but it is extremely thin. I have used it with endmills successfully, a V bit might work as well. The toolpath would be No Offset Contour, set to the depth you like.
the big thing is you want deeper letters is … to use a bit with a sharper angle (so lower number of degrees)… since for the same width (which is defined by your letters after all), a sharper point will go deeper. Agreed with Will on ALWAYS using advanced v-carve
I don’t know if you were using a 90 degree bit, but even going to 60 is a big difference… but for very fine details or small fonts I sometimes go all the way to a 20 degree bit. (those are less sturdy by the nature of the sharper point, so cutting is at lower speed/feed)
Actually, the first vector fonts for Windows were such, Modern and Roman, which were the subject of a Trademark suit from Linotype (they were aliased as “Helv” and “Tms Rmn” respectively) and they are still present in Windows:
A simple vcarve with the depth limited has unexpected results. A simple vcarve the vee bit plunges to the point where the bit touches both sides of the line/lines. The simple vcarve simply goes down the middle of the line/lines and repeats until both sides of the line are touched. When doing a simple vcarve always set bottom of material and/or “t”. The simple vcarve will get the maximum depth required to touch both sides of the line.
An advanced vcarve is different. The flat bit cuts out where the space allows to a specified depth. Then the vee bit comes in and goes around the outside of the objects. Where the space is too small for a flat endmill to fit the vee bit does the clearing. You can pick advanced vcarve and not use the end mill by not checking and only the vee bit will be used. On some advanced vcarve files even when the end mill is checked if the space is too small the tool is not called. For instance if the space between the vcarving is 1/8" and you choose a 1/4" end mill the 1/4" bit will not be called for only the vee bit.
As @fenrus suggested using a 15-30 degree vee bit will yield a deeper cut if the “t” is used because the vee bit will try to touch both sides of the line/lines. Use of a 15 degree bit will yield a deeper cut but can also cut through thin material trying to touch both sides of the line/lines. Limiting a simple vcarve depth usually has unintended results. For thick lines a 60 or 90 degree vee bit works best. For thin lines a 15-30 degree vee bit works better.
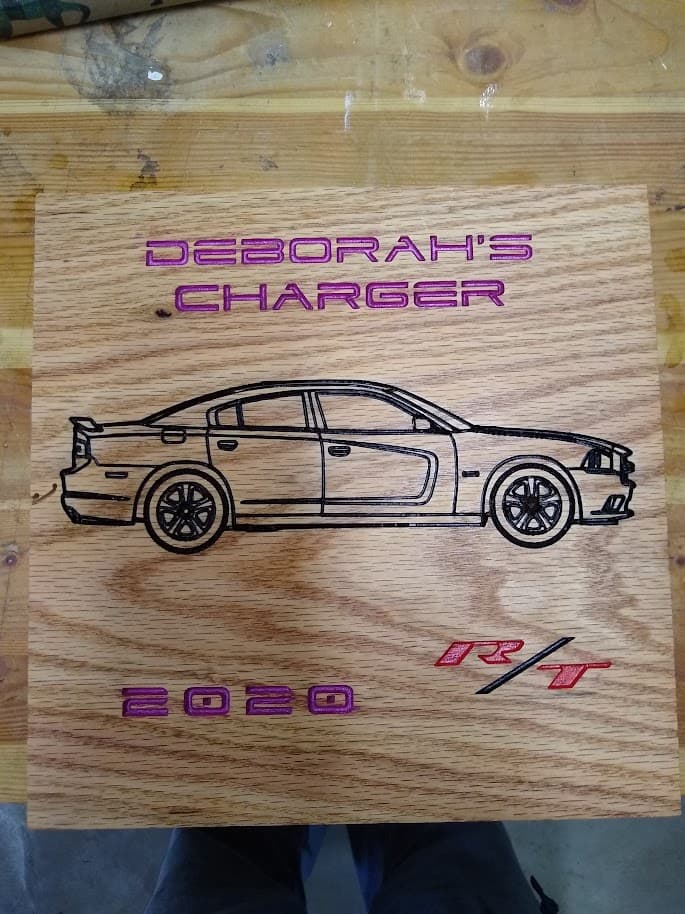
Here is an example of a 15 degree vee bit carving out a car I made for a Christmas present. When I choose the 60 degree bit the simulation was barely visible.
The car outline was very thin lines. However the text was cut with a 60 degree vee bit.