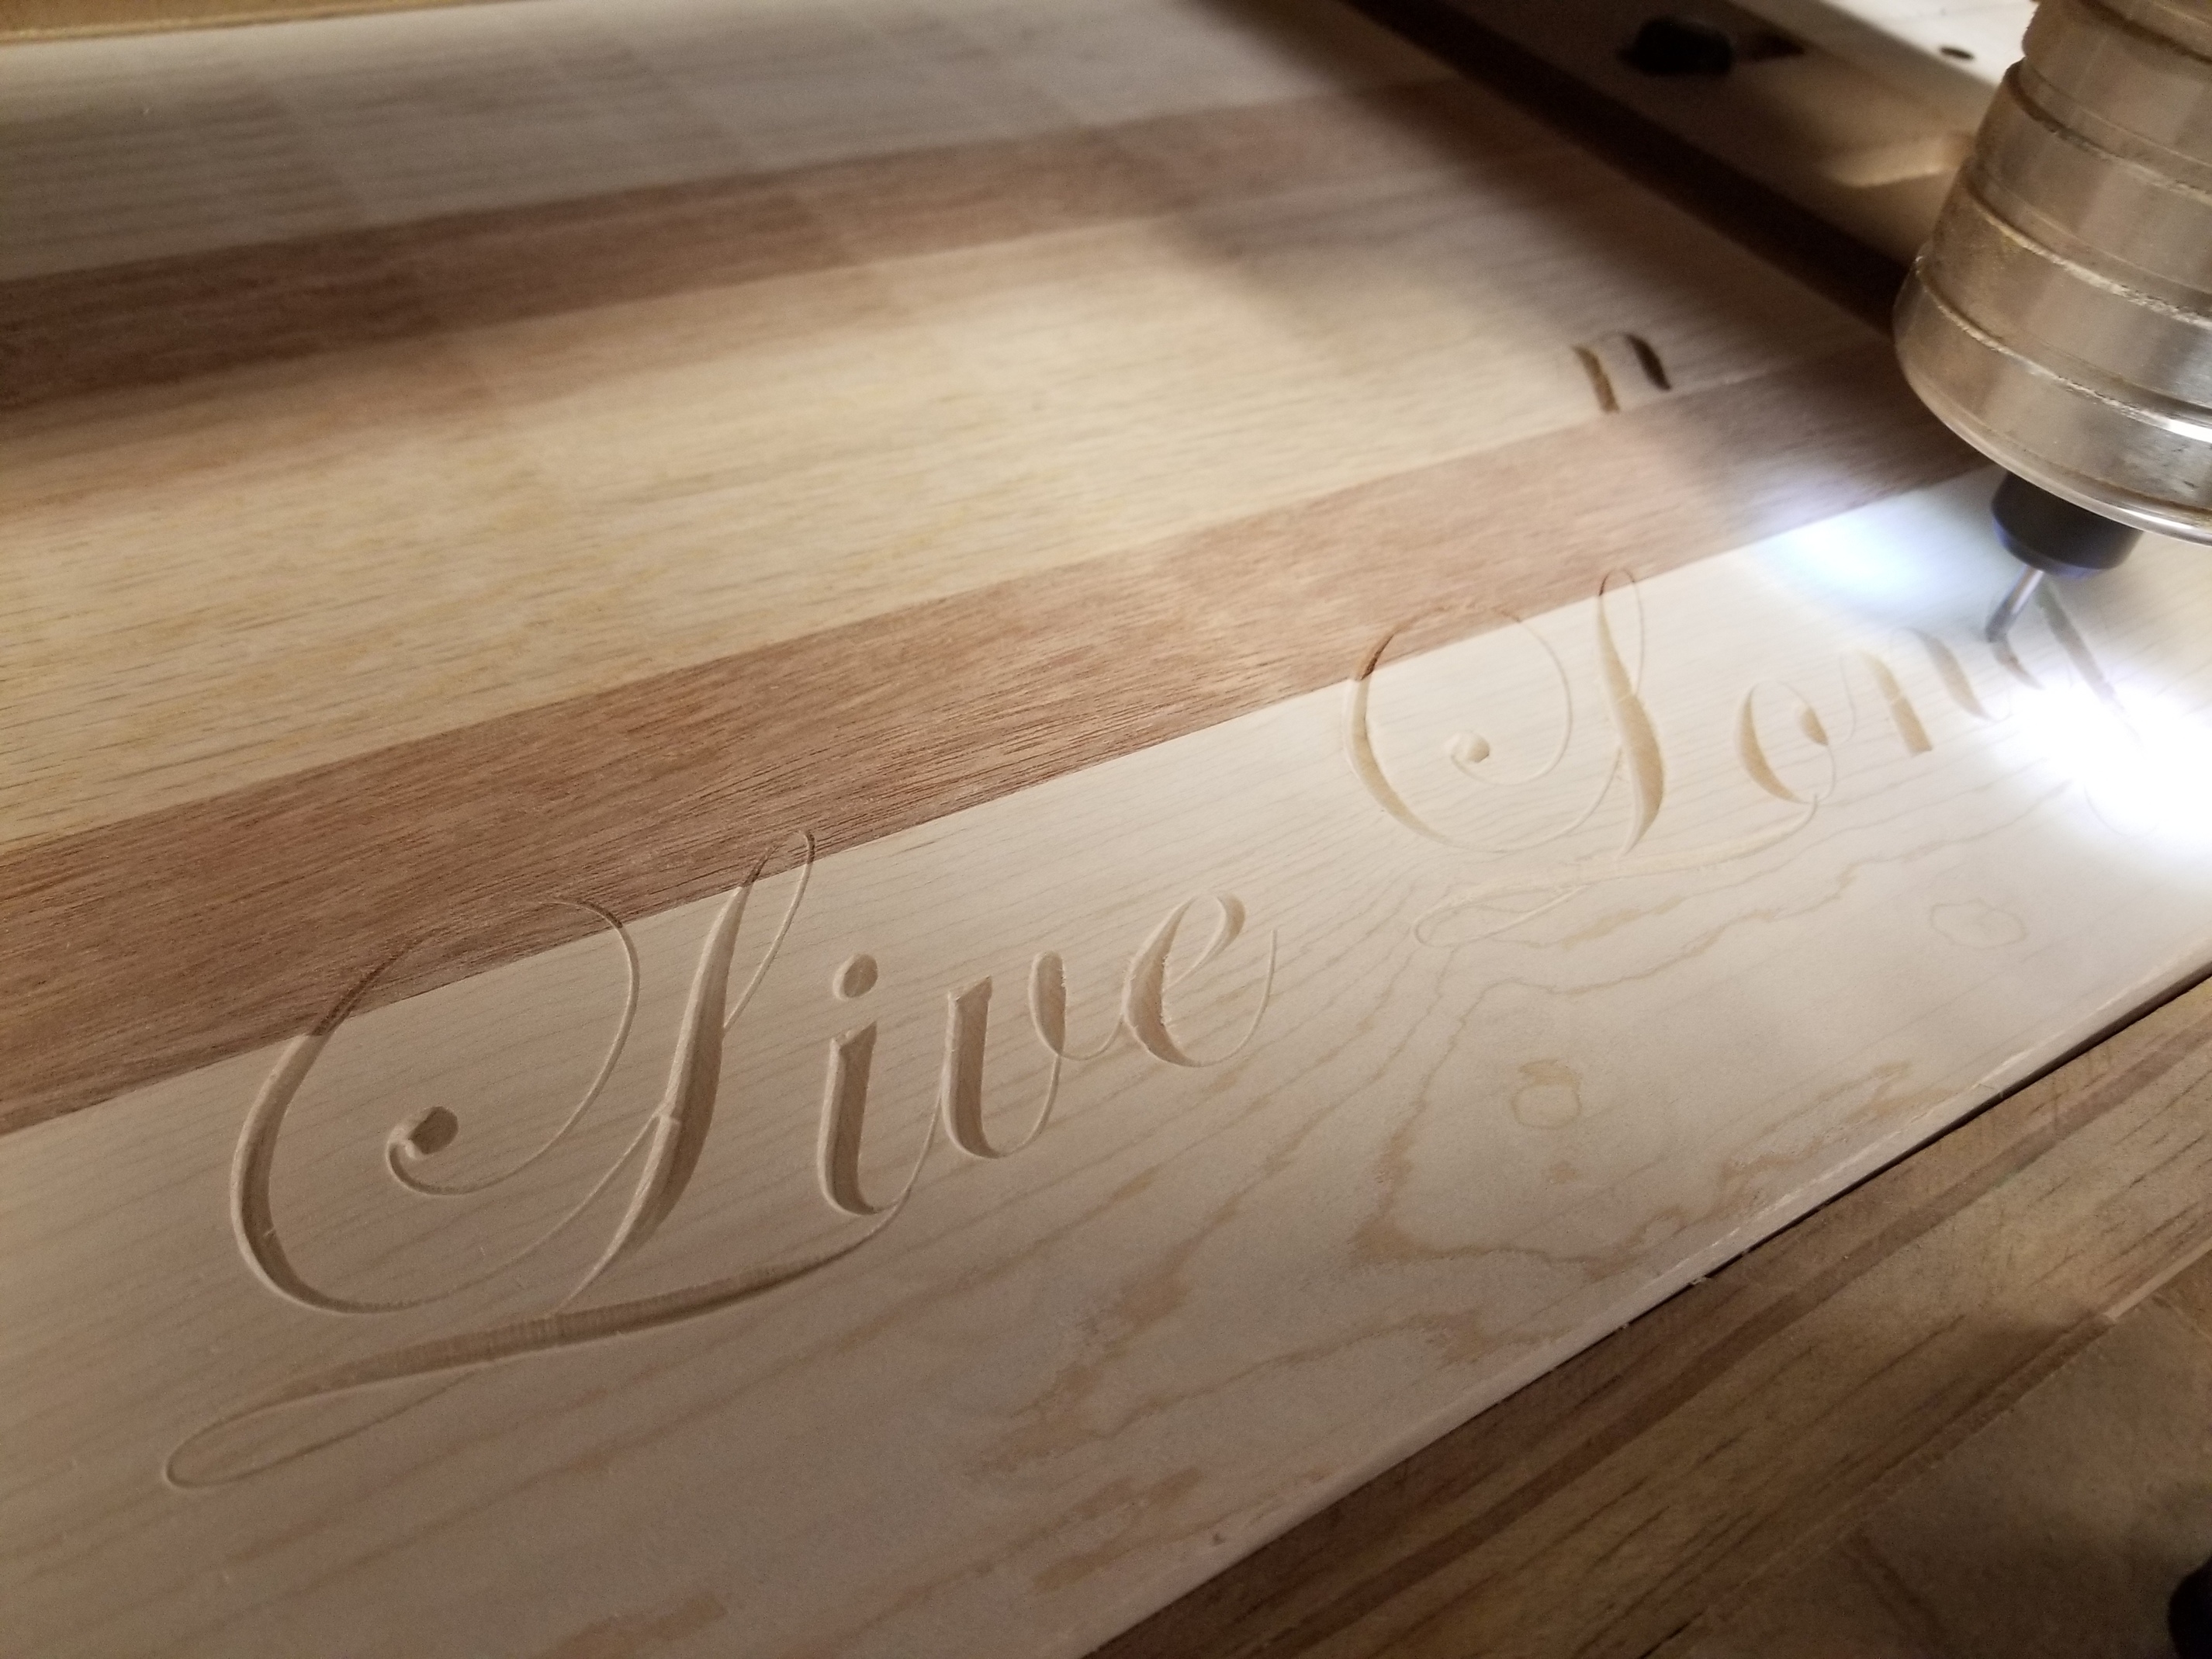
Looking for some guidance w/ vCarve Pro and lettering. It seems no matter what I have my settings at, the letters are engraved too deep in to the wood - I forgot to measure the depth but it looks like the bit is going in a half inch. See attached. I’m using a 60 degree bit, and set the depth to 1/16th.
Where is your zero? Top of the work piece or top of the table. Looks like you might have the vcarve software set for top of the work piece, but your actual zero is set on the machine as the table top.
1 Like
Both are the working surface of the material. I only have an issue with depth when using the lettering tools.
Please check the tool definitions — I think Vectric uses nominal angle, not taper angle.
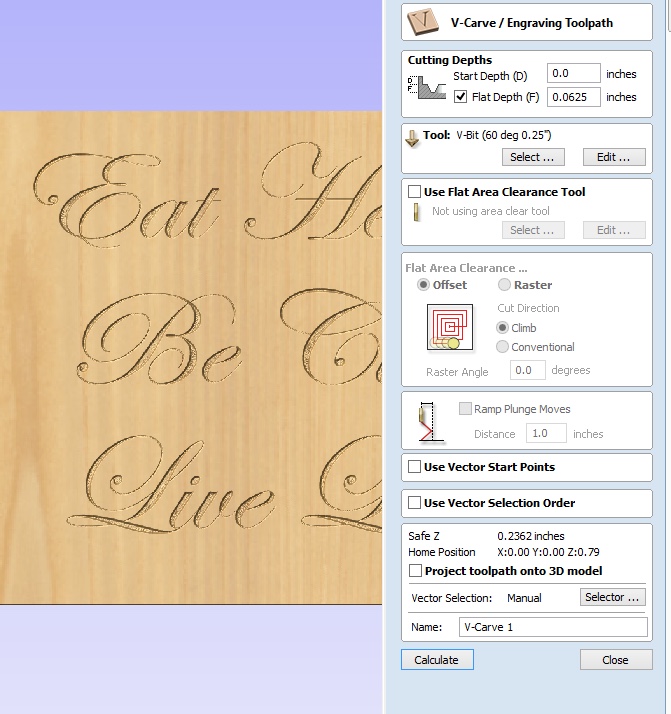
You’ve got a flat depth set, which is not needed for traditional letter vCarving. Depth will vary based on the width of the line, it’s why vcarving is vcarving 
Absolutely make sure the angle is set correctly too. vCarve uses the “correct” angle for the tool (unlike CC, ehem), so use the angle specified with the cutter.
2 Likes
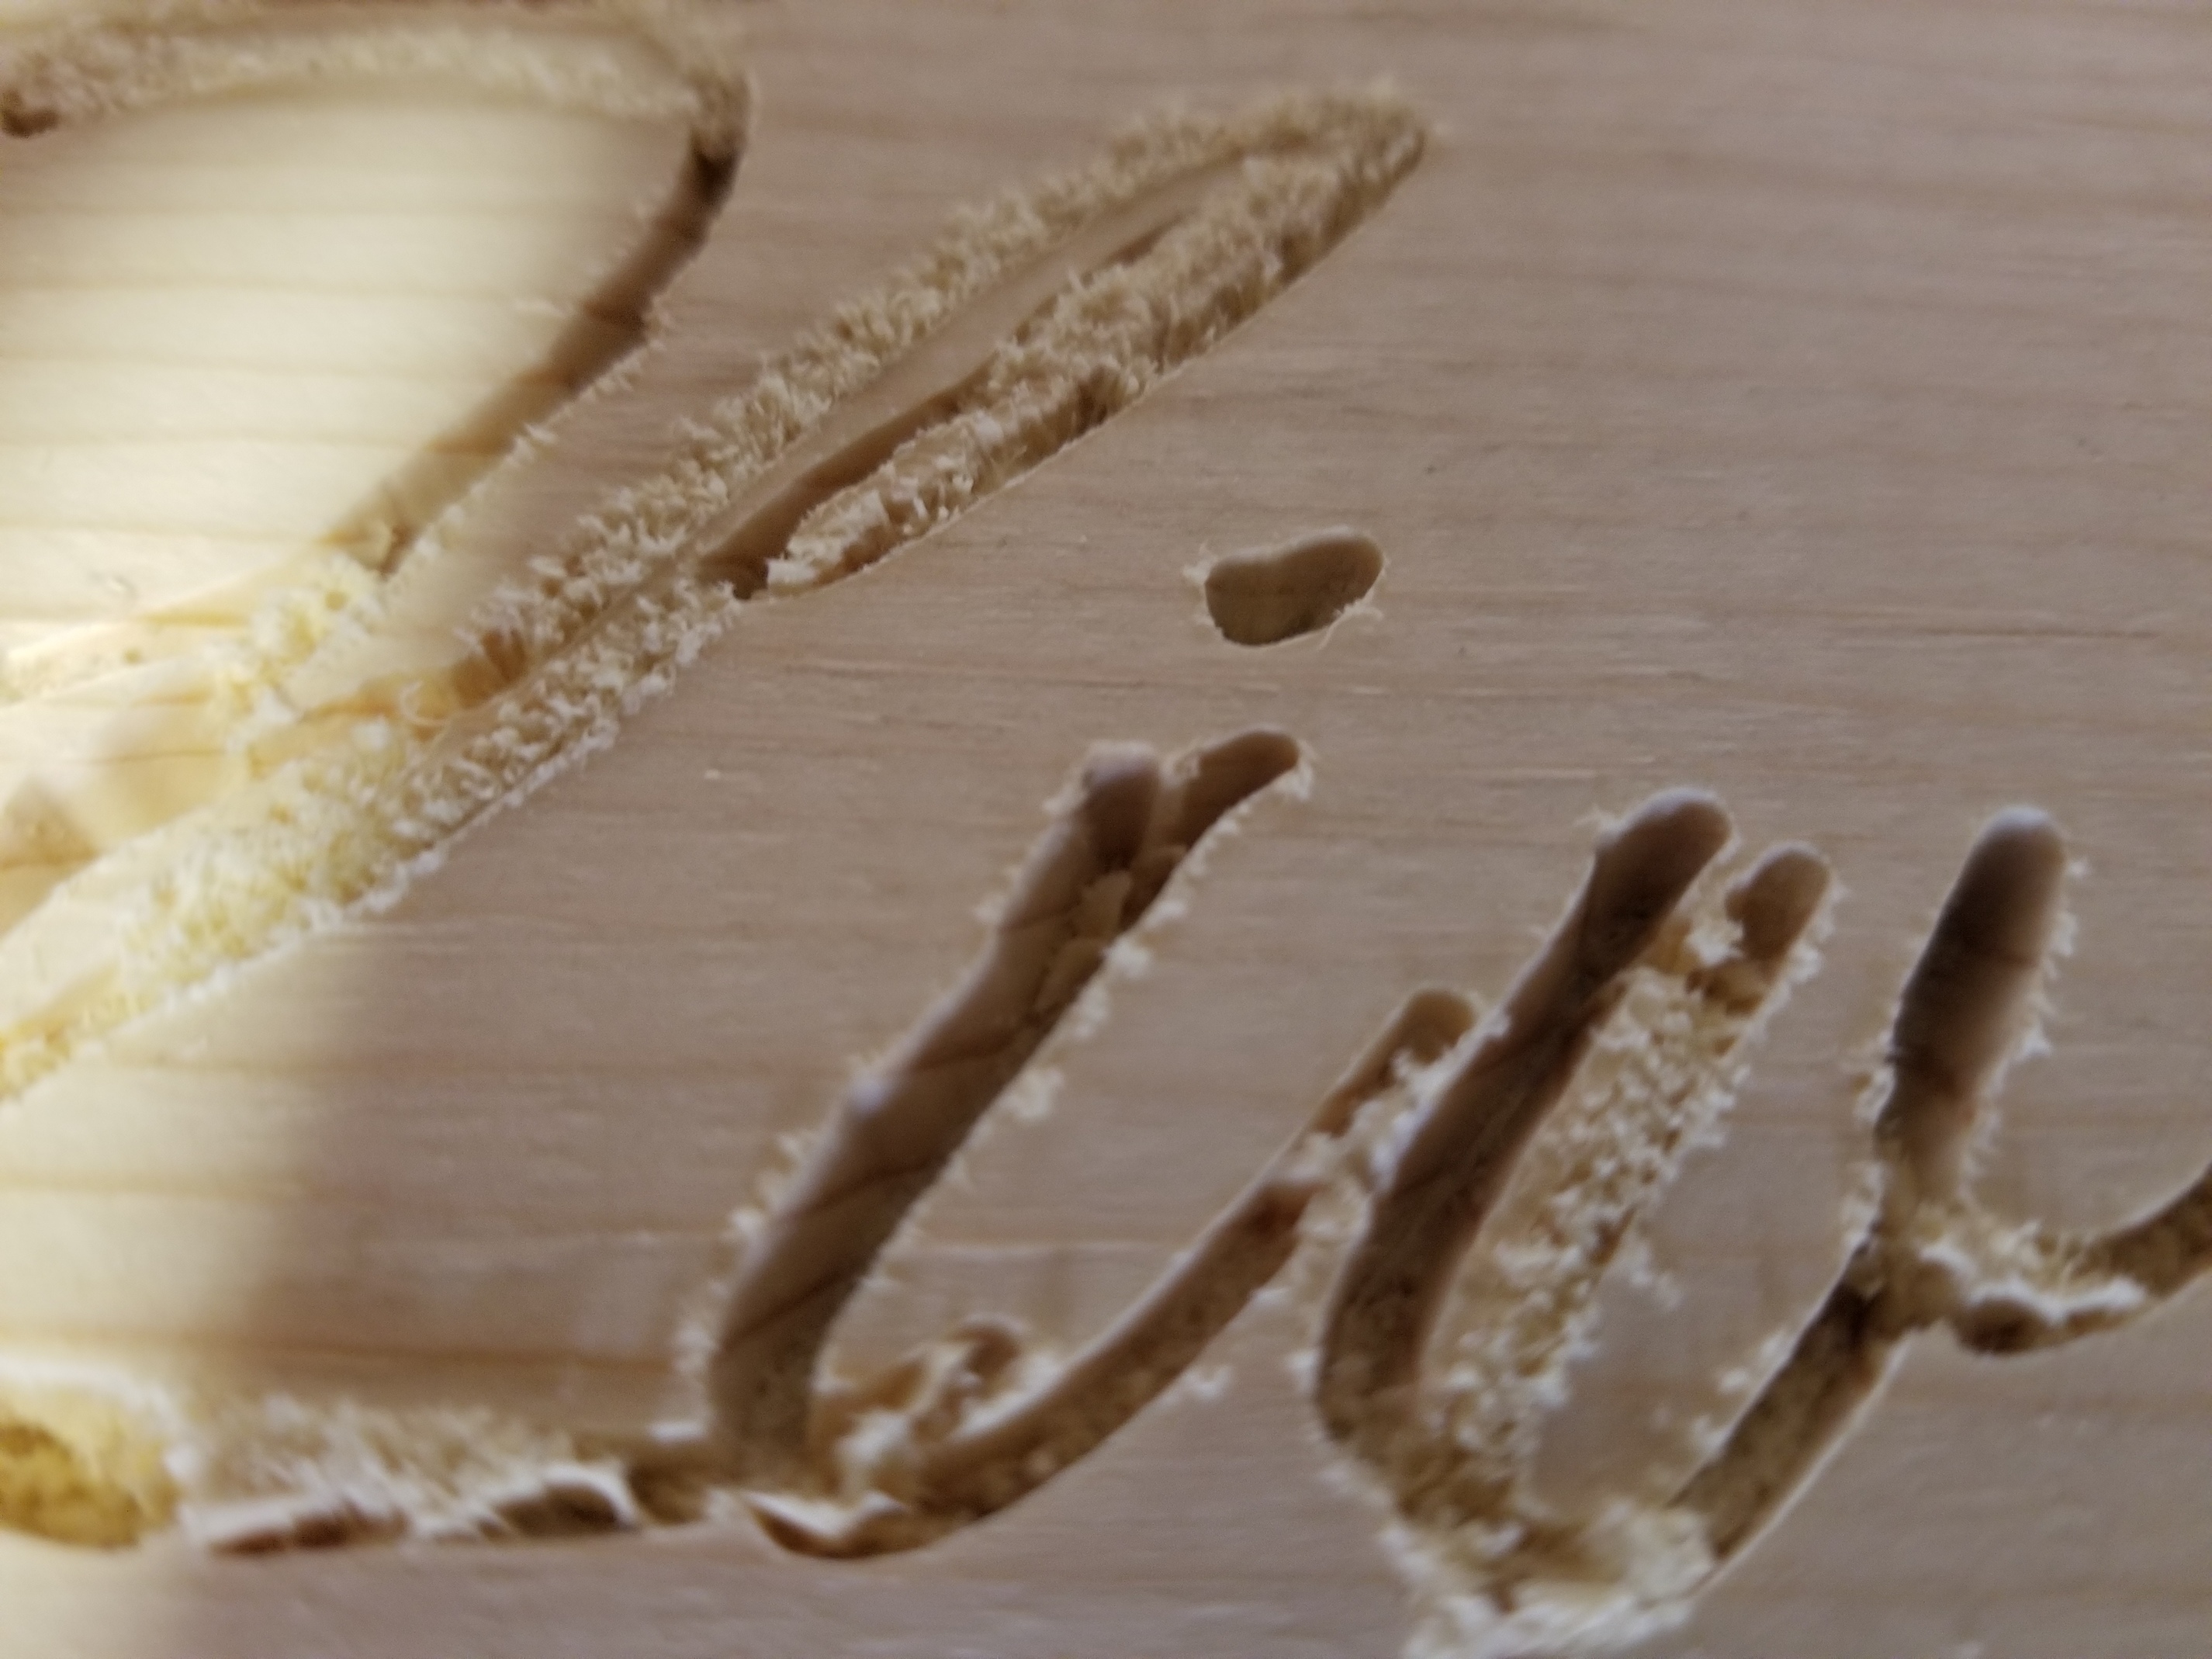
This is odd. Looks like it was cut with an end mill and not a vbit. Check your tool configuration. Is it possible the tool configuration is corrupted? Perhaps build a new vbit tool in the tool library and try that.
You may also want to try unchecking the flat depth and let the software calculate the depth and see what happens.
1 Like
hmmmmm I’m confused.
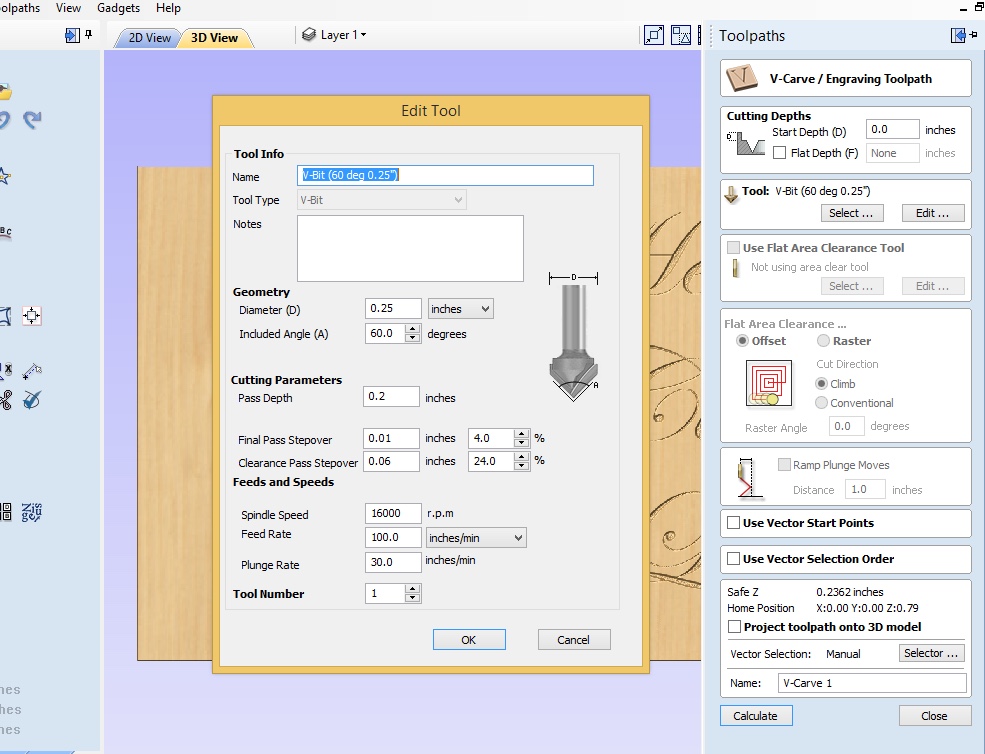
Ok I unchecked the flat settings… here’s what the defaults settings are for the tool. What is wrong, or needs to be changed? These are the defaults.
BTW… thanks in advance for the assistance. 
1 Like
Tool setup looks pretty good, though I’d half that feed rate to 50, at most. Depends on material.
Clear and re-sim the job without a flat depth specified. Having that field set will screw up what (I think) you’re trying to accomplish.
If your vCarve job is set up to use work surface zero (which it is by default), make sure you zero out your machine at work surface right before you start your job.
1 Like
Is the “D” dimension the diameter of the shaft or is it the diameter of the cutting head? Looking at the diagram I would guess cutting head.
“D” Is the diameter of the cutting portion of the head, or technically, the largest portion of the cutting surface. vCarve is using this diameter, along with the angle, to calculate how long the cutter is and what it’s cut path will look like.
If you link to the vbit you’re using, I can help with the parameters.
1 Like
hmmmmm after looking at what it bought, it seems I’m using a 20 degree bit. I could have swore I bought a 60 degree. I know for a fact that I have 90 degree bits… going to try that on a junk piece of wood tonight. Here’s a link for the 90 degree. I just ordered a 60 degree that will be here Monday.
1 Like
I think one of the issues on that tool setup is the D… the bit is 1/8" shank, and the head’s max D is 1/8". Could be why it’s cutting so deep (other than it thinks it’s a 60 and I was using a 20 by mistake), the D in this example is 1/4".
No, Vectric actually has a feature to depth-limit, and can use a 1/8" endmill just fine — the problem is the incorrectly entered angle.
Thanks Will… I’ll report back.
BTW… I found this article. http://support.vectric.com/aspire-questions/item/how-to-set-cut-depth-when-v-carving
It appears the steeper the angle, the deeper it engraves. This strikes me as odd. If I wanted a super thin cursive letter, I would use something more pointed and thin, right? But in doing so, it would cut deeper.
What should I use if I want 1/16" depth, and tight crisp letters? If you have some reading for a beginner, like myself, I would appreciate any links. Video links work too
This is very odd, as there is a Vectric tutorial on using a v-bit for an inlay (about 10:00 minutes in), and they set the Flat Depth to prevent the cutter from going full depth during an engraving toolpath.
If this truly doesn’t work as described, what if you try a pocket cut with the v-bit? Then, you should be able to set the maximum depth. Preview it in the simulation before you waste any wood.
There’s some discussion of matching V-bit angle to text / feature size at:
https://www.shapeoko.com/wiki/index.php/Endmills#V-bits
If you want 1/16" depth, just set that as a limit, or use an endmill w/ a shallow enough angle to only cut to that depth — you’ll get crisper letterforms and a more traditional appearance if the program can cut as deeply as it needs though for an appropriately angled endmill.
1 Like
Now that I look at this a bit more, I think there might be a terminology difference on their website (i.e. it is poorly worded). This link you posted for the article How do I set the Cut Depth when v-carving? says:
The V-carved Toolpath is unique because there is no way to set the Cut Depth.
Yet, at the very bottom of that article is a related article titled How can I adjust the depth of my v-carving when it is too deep or too shallow?. That article says:
Easiest solution is the use the Flat Depth option near the top of the V-Carve / Engraving Toolpath form.
So while there may be no way to set the depth that a v-carve will cut to reach it’s full “V channel” look, you can limit the depth that it will cut into your work piece.
You look to be on the right track. Hopefully the video I posted above helps. If not, maybe Vectric support can lend some insight?
3 Likes
Thanks fellas…I’m in a meeting at work… and can only think about making sawdust. I’ll report back soon. I leave work @ 4PM CST. Too bad you guys weren’t closer, I’d buy ya a beer.
1 Like