I’m new to CNC/Shapeoko and this is my first post.
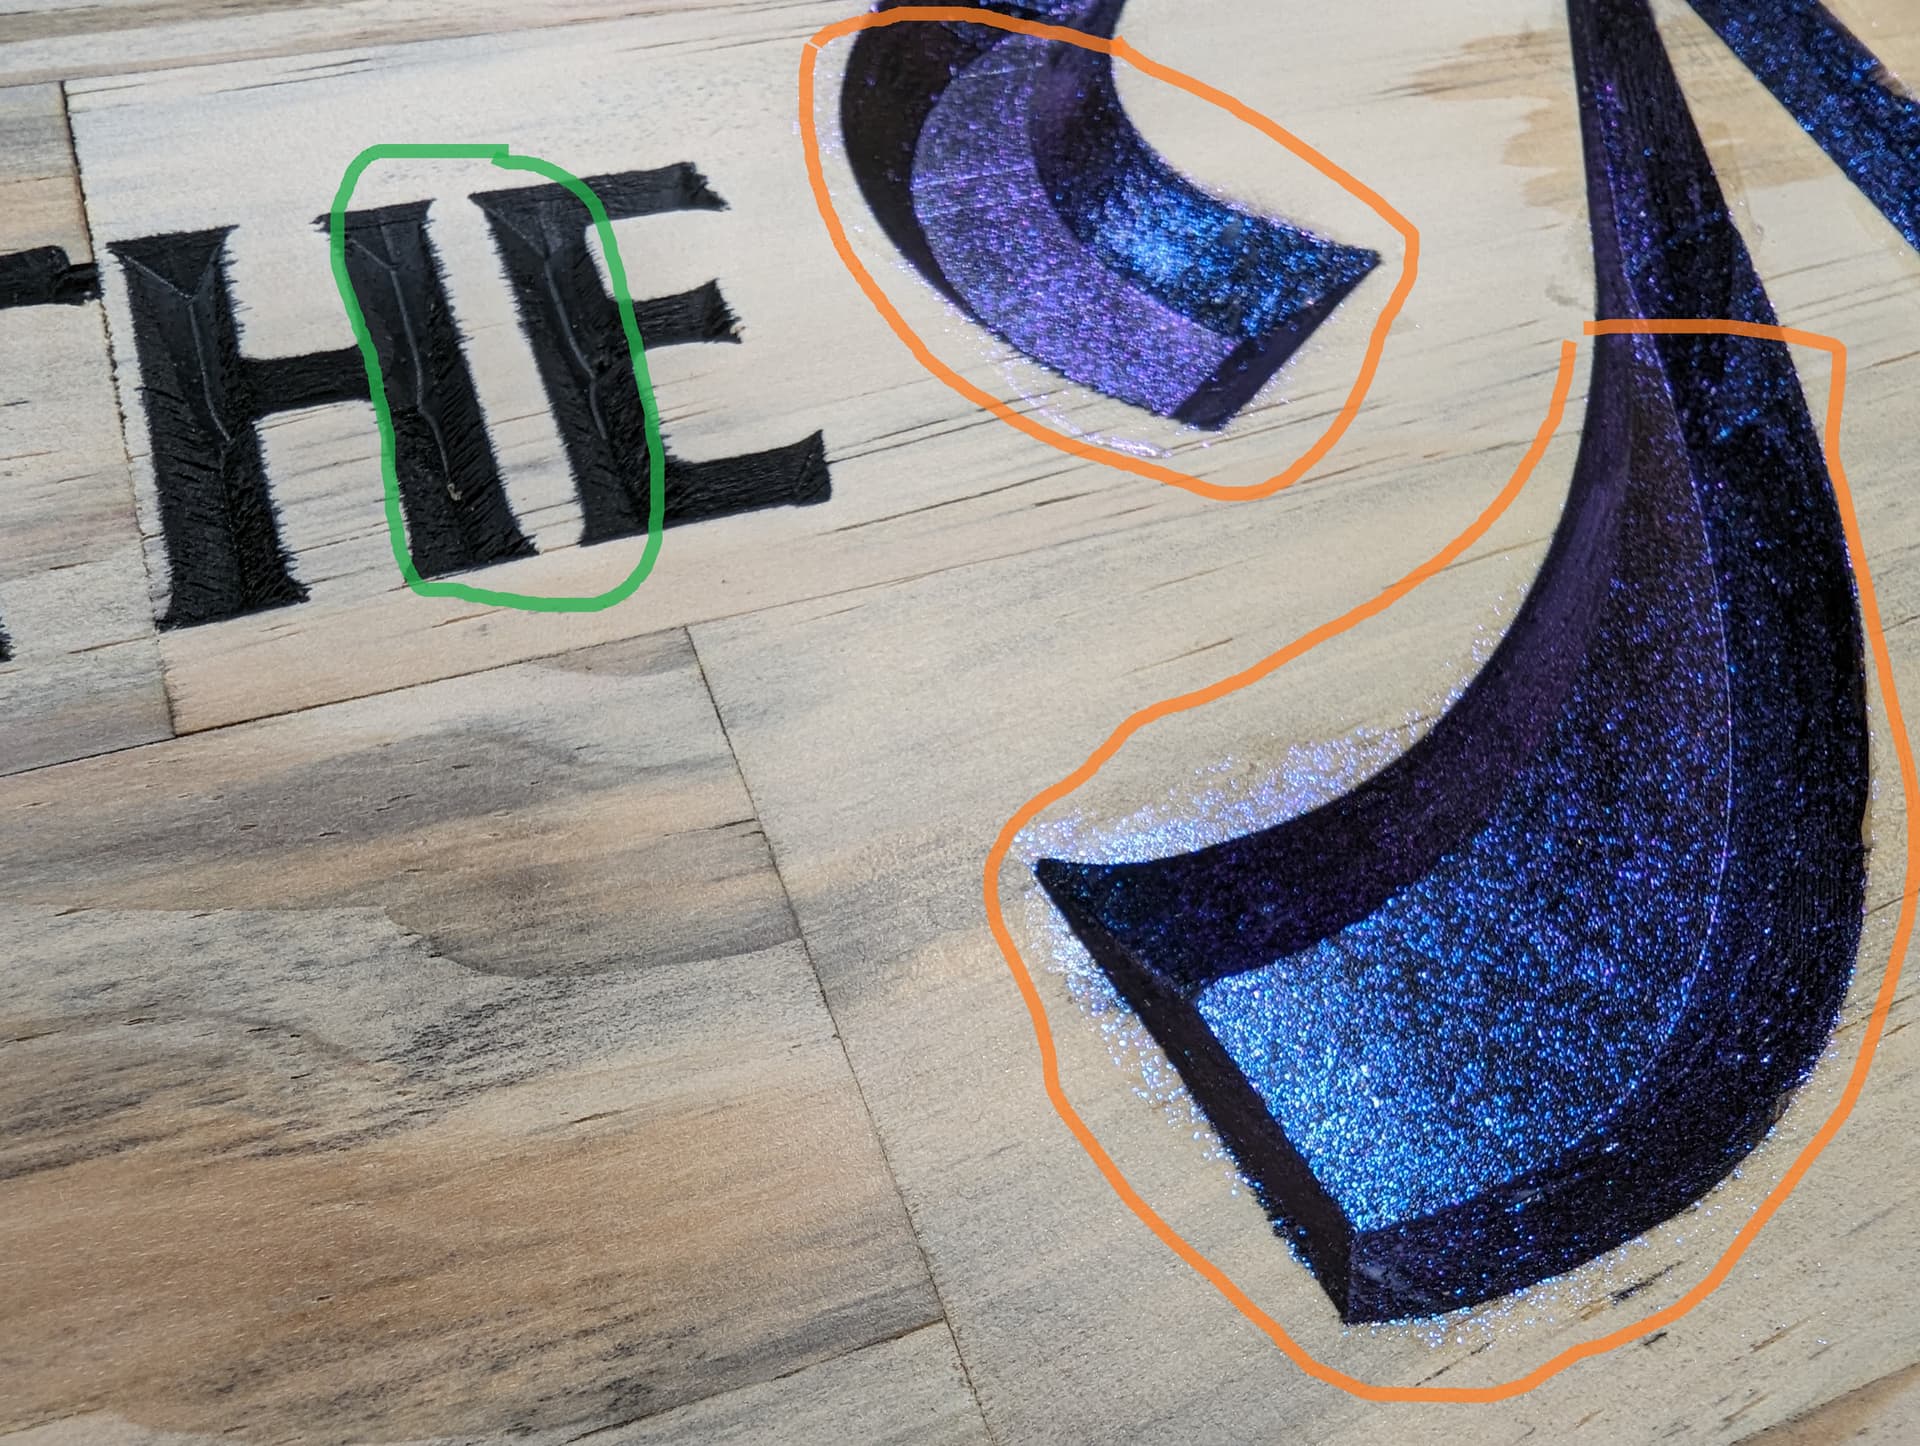
I had an issue yesterday with some vcarve cuts, both regular and advanced. I first did a test on some scrap material and it came out beautifully (see first image below). The orange circled areas show the advanced vcarve cuts, while the green circle is a regular vcarve.
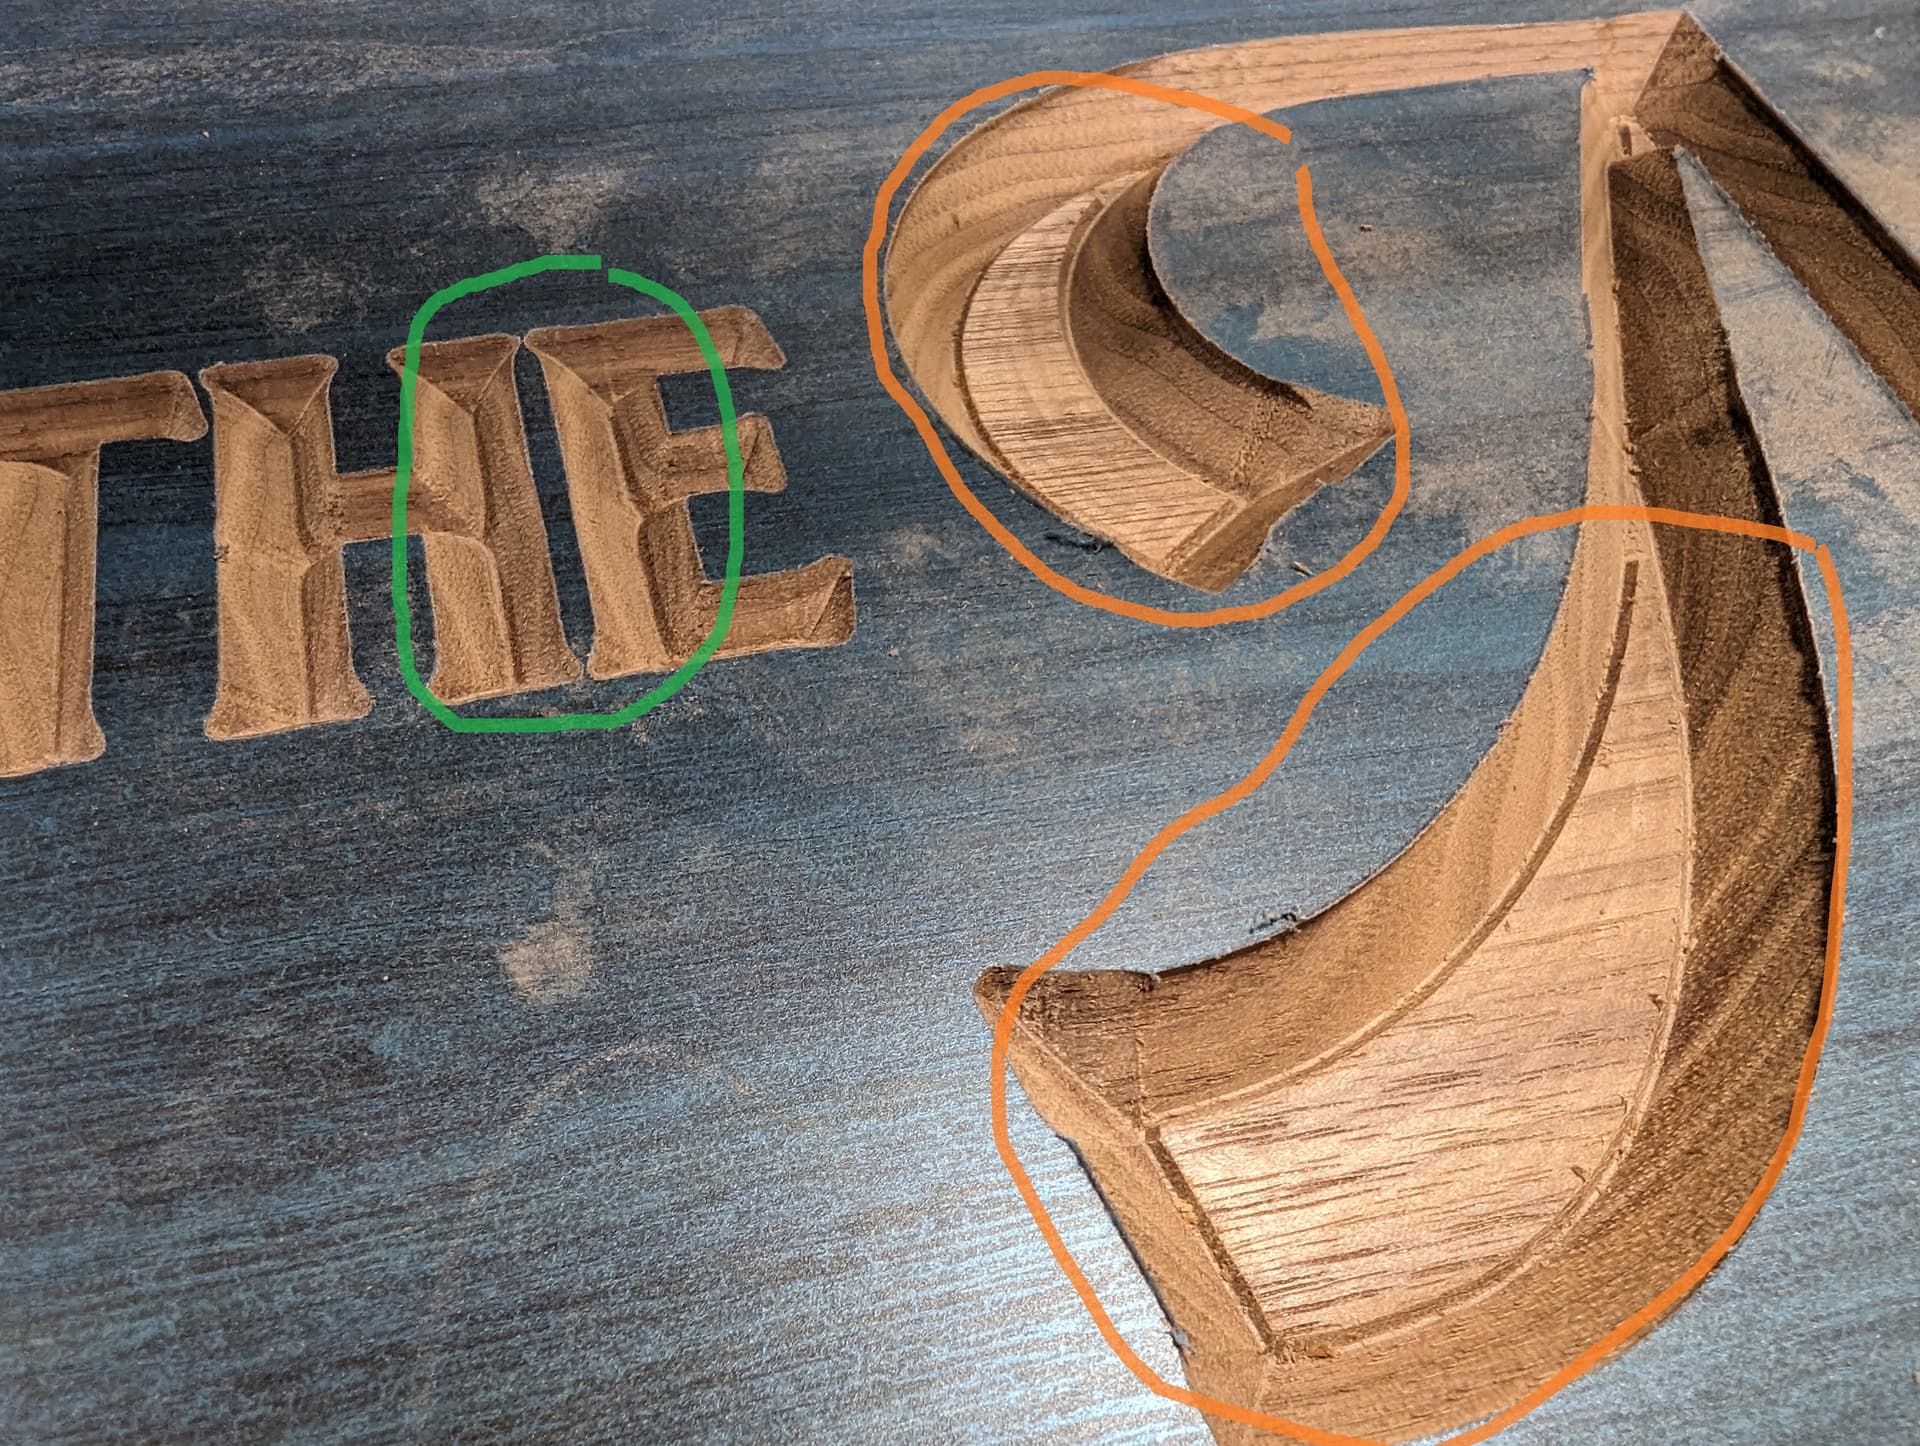
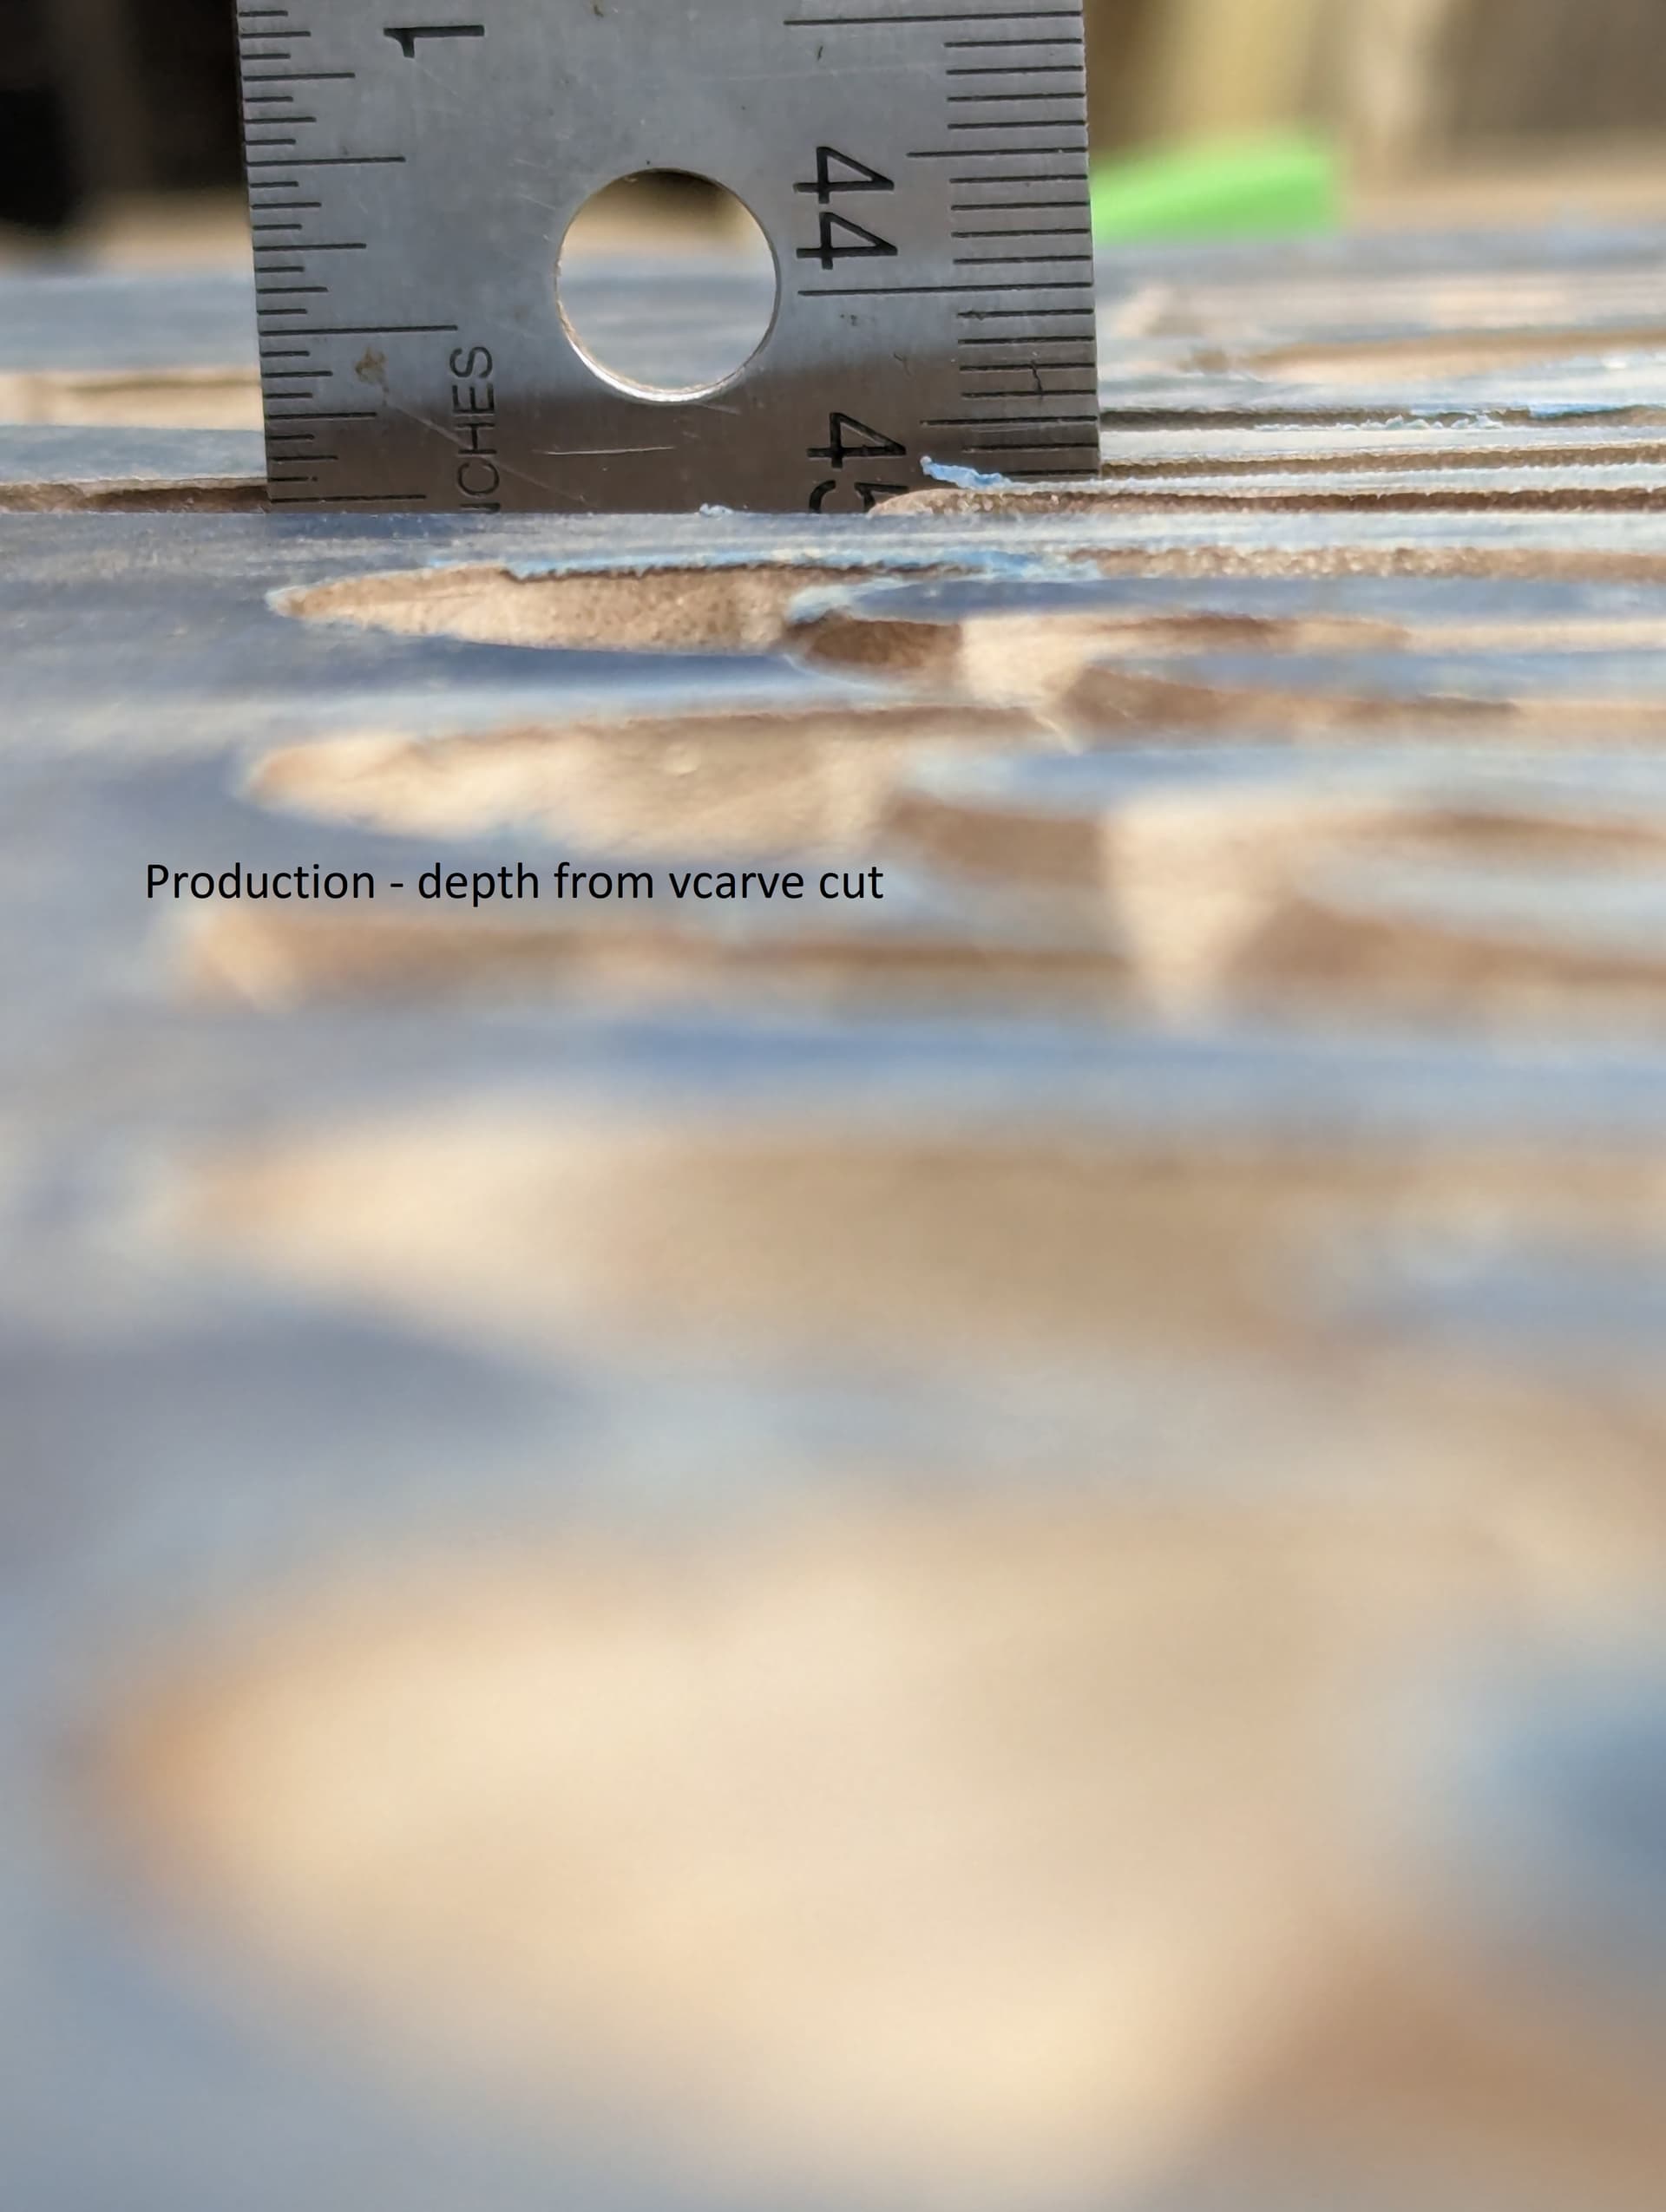
Since that turned out so well, I tried a “production” cut. This one seemed to have a problem. The pocketing of the advanced vcarve was done first and that went fine. When I changed the bit to do the vcarve, it seemed to plunge deeper than expected and created raised areas in the pockets, as well as make the regular vcarve cuts run closer together (see below, orange and green circles same as above).
I’m not sure what happened here. It seems like the vcarve bit was lower or something, but I don’t know how that would happen with a BitSetter. I made sure the bit was secure during the tool change, so I don’t think it moved in the collet. I’m always worried that during a tool change, I’m going to move the gantry and change the location of the spindle, but I’m not sure if that is a concern or not.
Here are a few additional details:
I made one change to the project file for the test cut - I disabled a contour toolpath that cut an outside shape, since I was only concerned about testing the vcarve parts. For the production run, I just re-enabled that toolpath, saved the file, and reloaded it in Carbide Motion.
I used the same bits for both cuts - #102 and #301 for pocketing and vcarving, respectively.
The materials used are different in several ways. The test is pine and is 1" thick. The production piece is walnut and is a little over 3/4" thick. I kept the material thickness the same in the project, at .75", and set zero to the top of the material. I also left the project set to “hardwood” for both runs.
I didn’t upload the saved project file because it has personal names and details in it, but I’m happy to answer questions or provide other data if anyone has thoughts on what I did wrong.
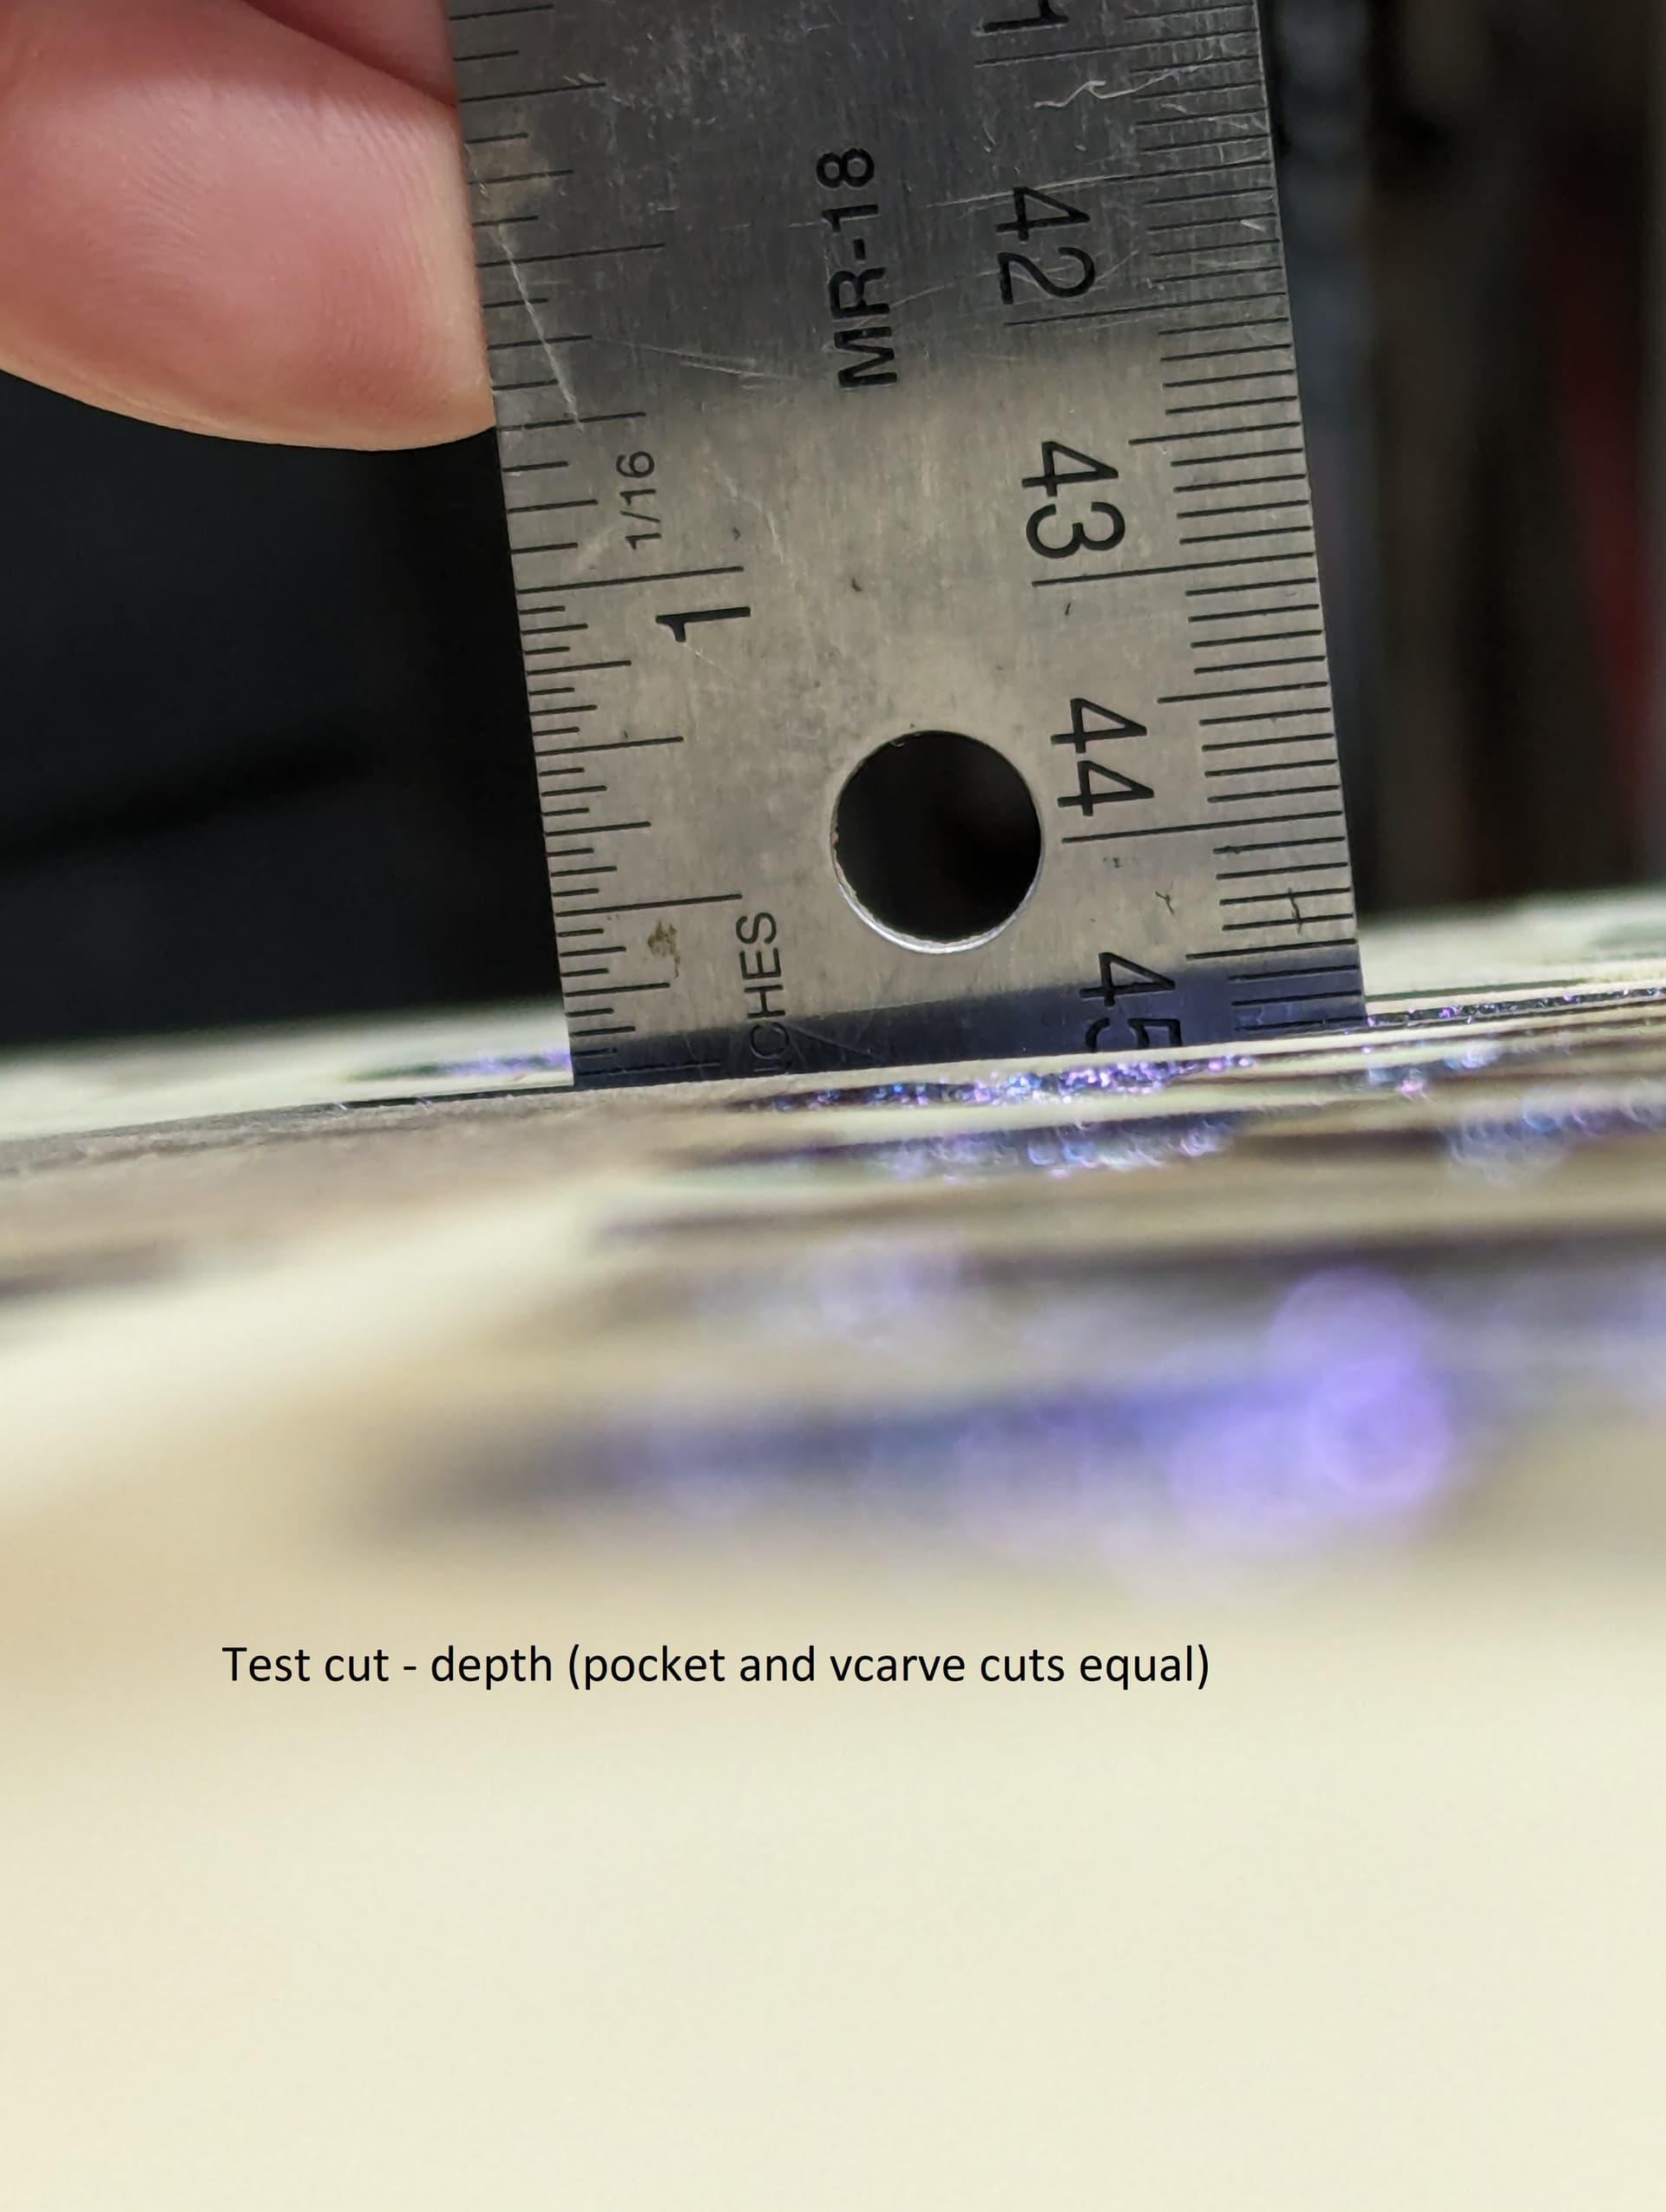
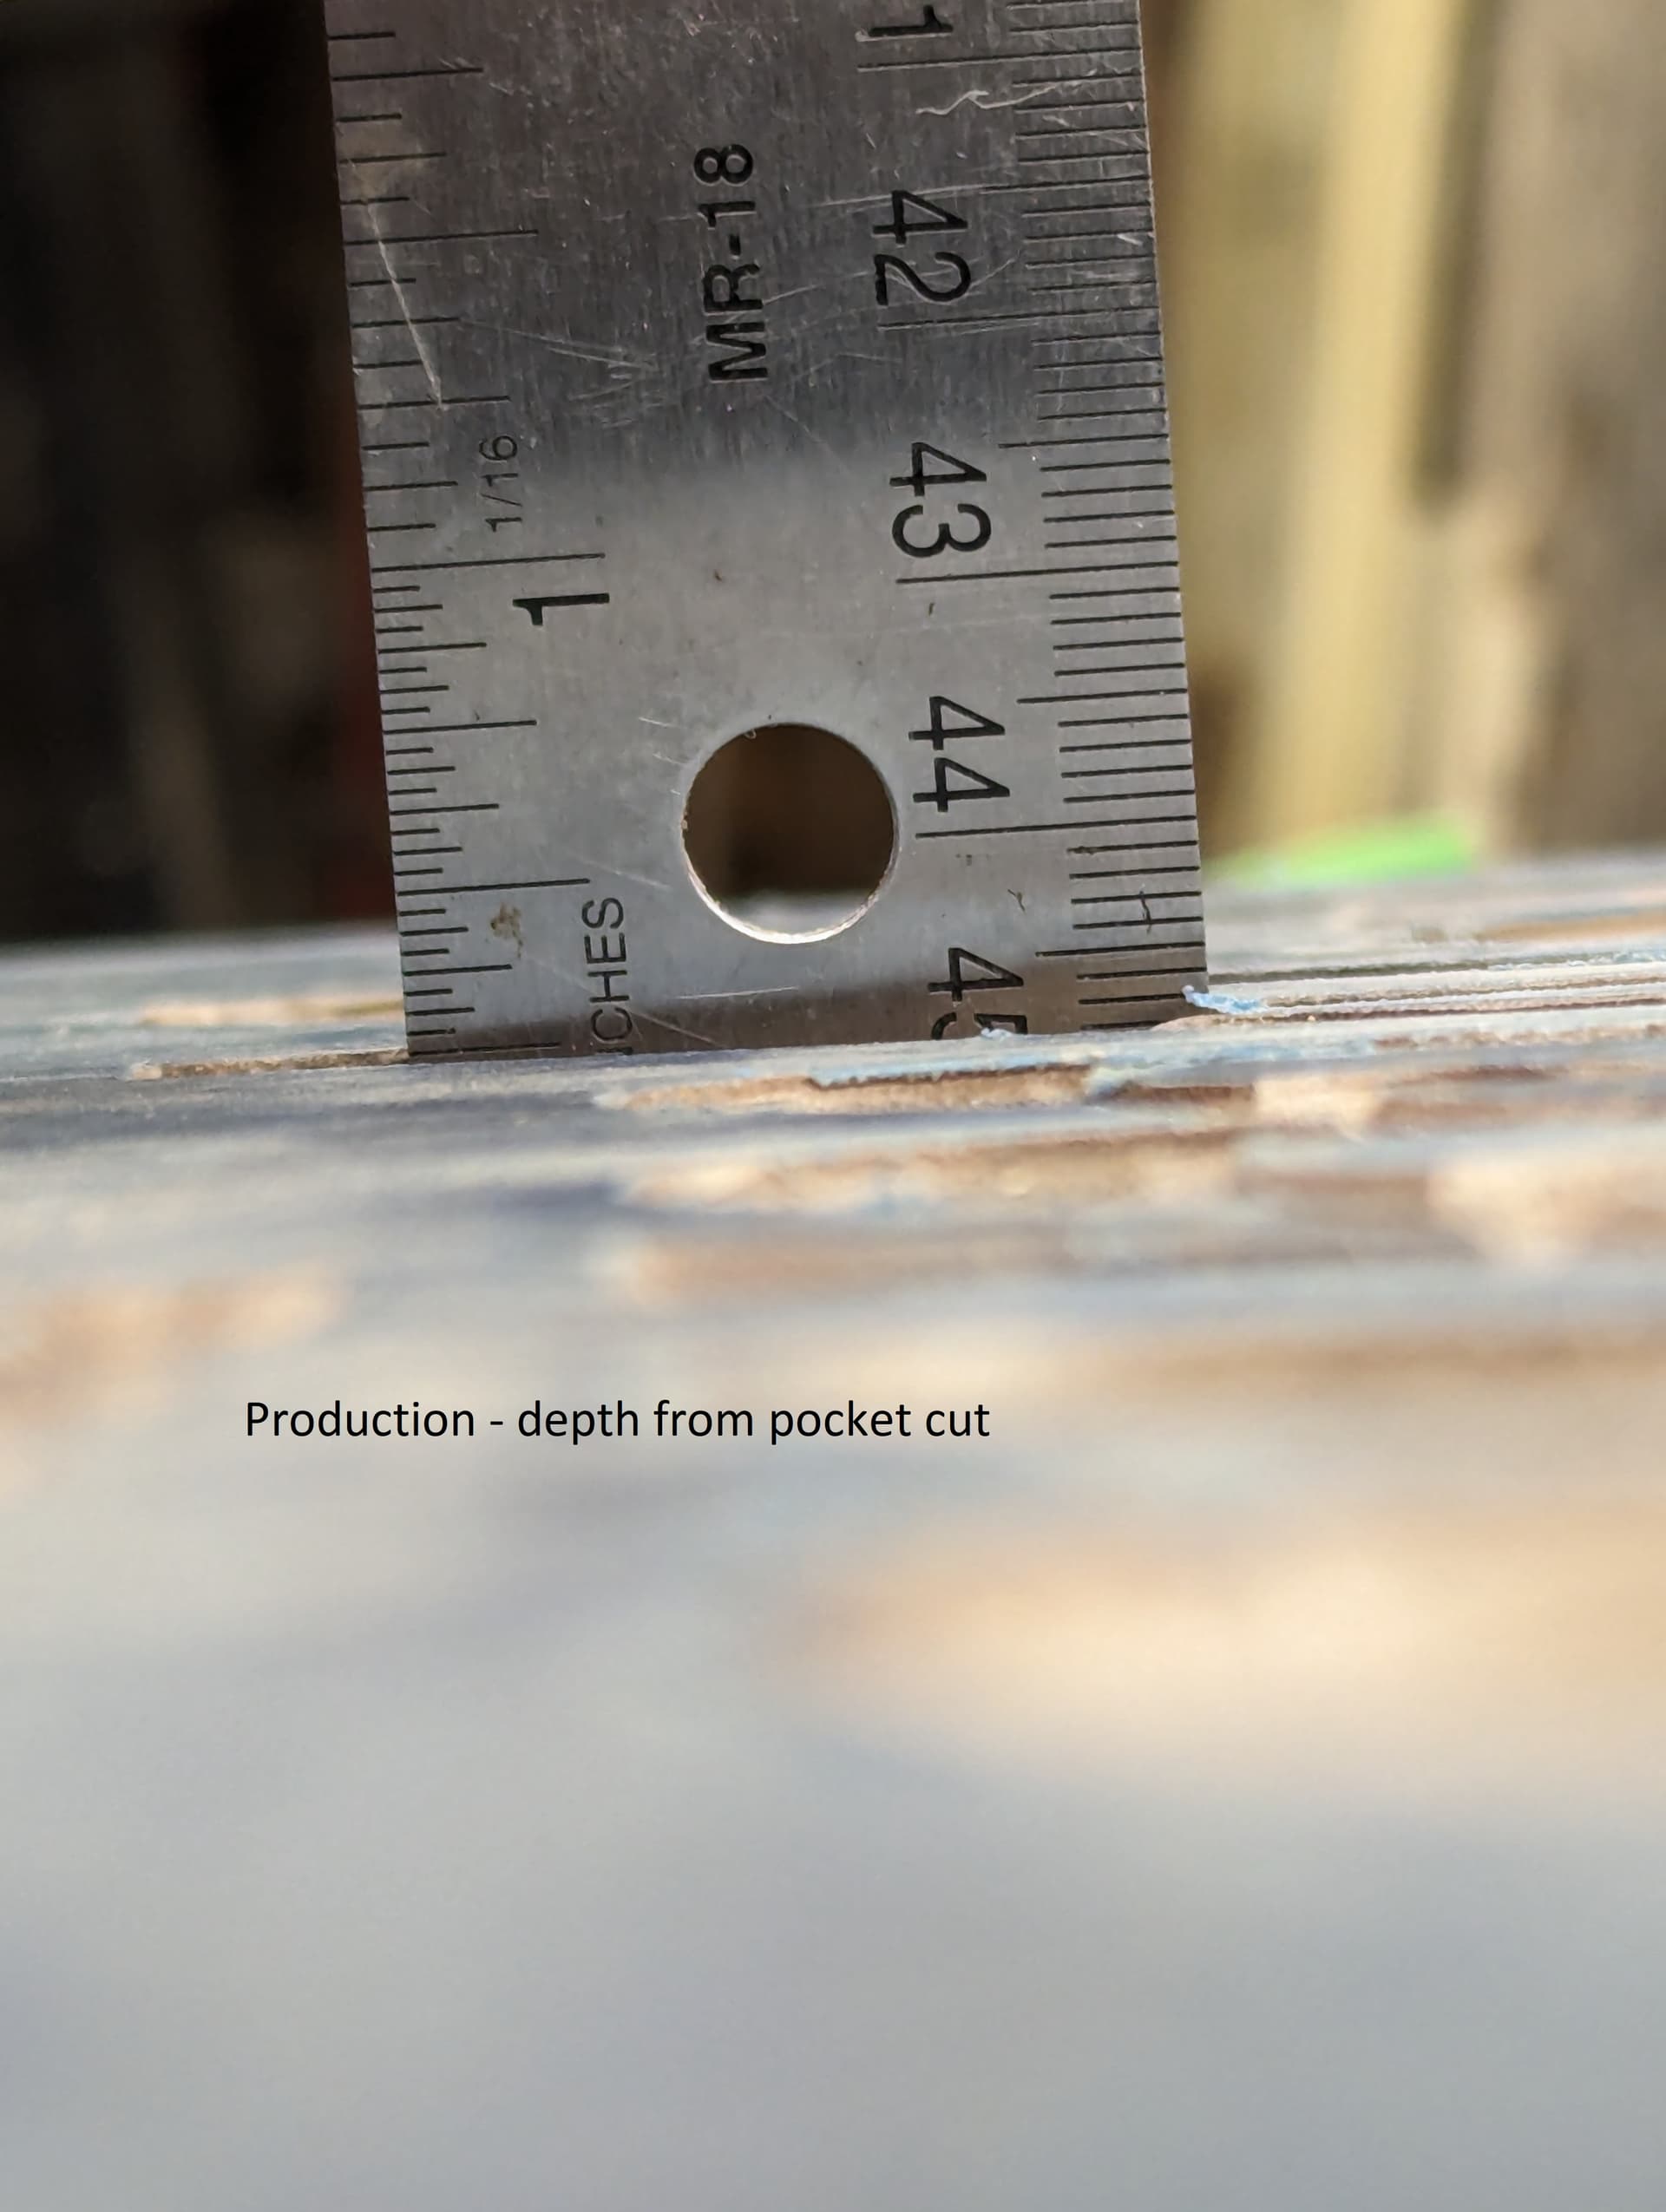
Sorry for the photo quality; I didn’t have anyone to help so I had to try to get those shots myself. On the production one, the pocket cut looks pretty close to the test one, but it goes quite a bit deeper for the vcarve cuts.
The tool slipping in the collet is the only thing I can think of, too. It was in there as tightly as I could get it by hand with the wrenches but I can’t guarantee that it didn’t slip. Is there anything I can do to avoid that? I tightened the tool down as much as I could but I think I’ll mark the tool with a Sharpie next time to see if that depth changes at all. I would also think that if the tool was going to move, it would go the other way. There must be some pressure when it contacts the material and I’d think it would go further into the collet, resulting in shallower cuts, not deeper ones. Just my thought.
Check your vee bit with a magnifier and verify your bit has a sharp point and not rounded or broken. If the point is not pointed the vee bit will cut deeper than expected. When setting with BitSetter the vee bit is expected to come to a sharp point. If the bit is rounded or broken the actual point of the bit would be further down from where the BitSetter thinks it is.
Some 3rd party bits are rounded to start with. If you dropped your bit the carbide could be broken off.
Thanks for all of the advice, everyone. I did check the v-bit and the tip looks good, not broken, so I’m ok there. I realized that I have two 1/4" collets that are slightly different and I’m not sure which one I used, but I don’t think that is the issue.
I do think I know what part of the problem was: I was setting up for another cut and changing tools, when one of the rubber wheels that rides along the bottom of the gantry behind the spindle housing fell completely off the machine onto the deck. Apparently it was so loose that just changing a tool knocked it the rest of the way out. I’m wondering if since that was so loose, maybe the whole z-axis chassis was moving while the cut was going on. I didn’t see it because it faces the back and I don’t usually check back there, but I’ll make sure to add that to the pre-flight checklist from now on.
I suppose you have an SO4 if you have v-wheels. When the v-wheel fell off when you put it back together there is a small washer between the mount and the v-wheel. If you dont put that back on the v-wheel will bind against the wall.
To adjust a v-wheel loosen the bolt and use a wrench to get the v-wheel tight by turning the eccentric (newer machines use a 10MM wrench). When tightening the bolt hold the wrench in place. Otherwise the torque of tightening the bolt will tighten the v-wheel too tight. When properly adjusted with the power off you should be able to move the z assembly by pushing on the v-wheel. You only need to tighten it enough to move the z axis but not so tight you distort the v-wheel. Since this one was loose I would check all the other v-wheels on the sides of the gantry. There are a total of 6 v-wheels to adjust/check. Two on the Z axis and 4 on the gantry. The top v-wheels are fixed in position but maybe check their tightness.
Thanks for the refresher. I remember doing all this during assembly. You’re right, we do have a Shapeoko 4 XXL. The washer was there with the v-wheel and we put that back on, as well. We tightened it down just enough so it doesn’t spin freely, but instead will move the z-axis assembly if turned. It’s not so tight that it’s warped. We also checked all of the other wheels. The other lower one was loose but only a little, while the others were still tight.
I’ll definitely make sure to check those wheels, among other things, before starting a job. We did another cut last night and it came out great, so I think after resolving that problem, the machine is working better.