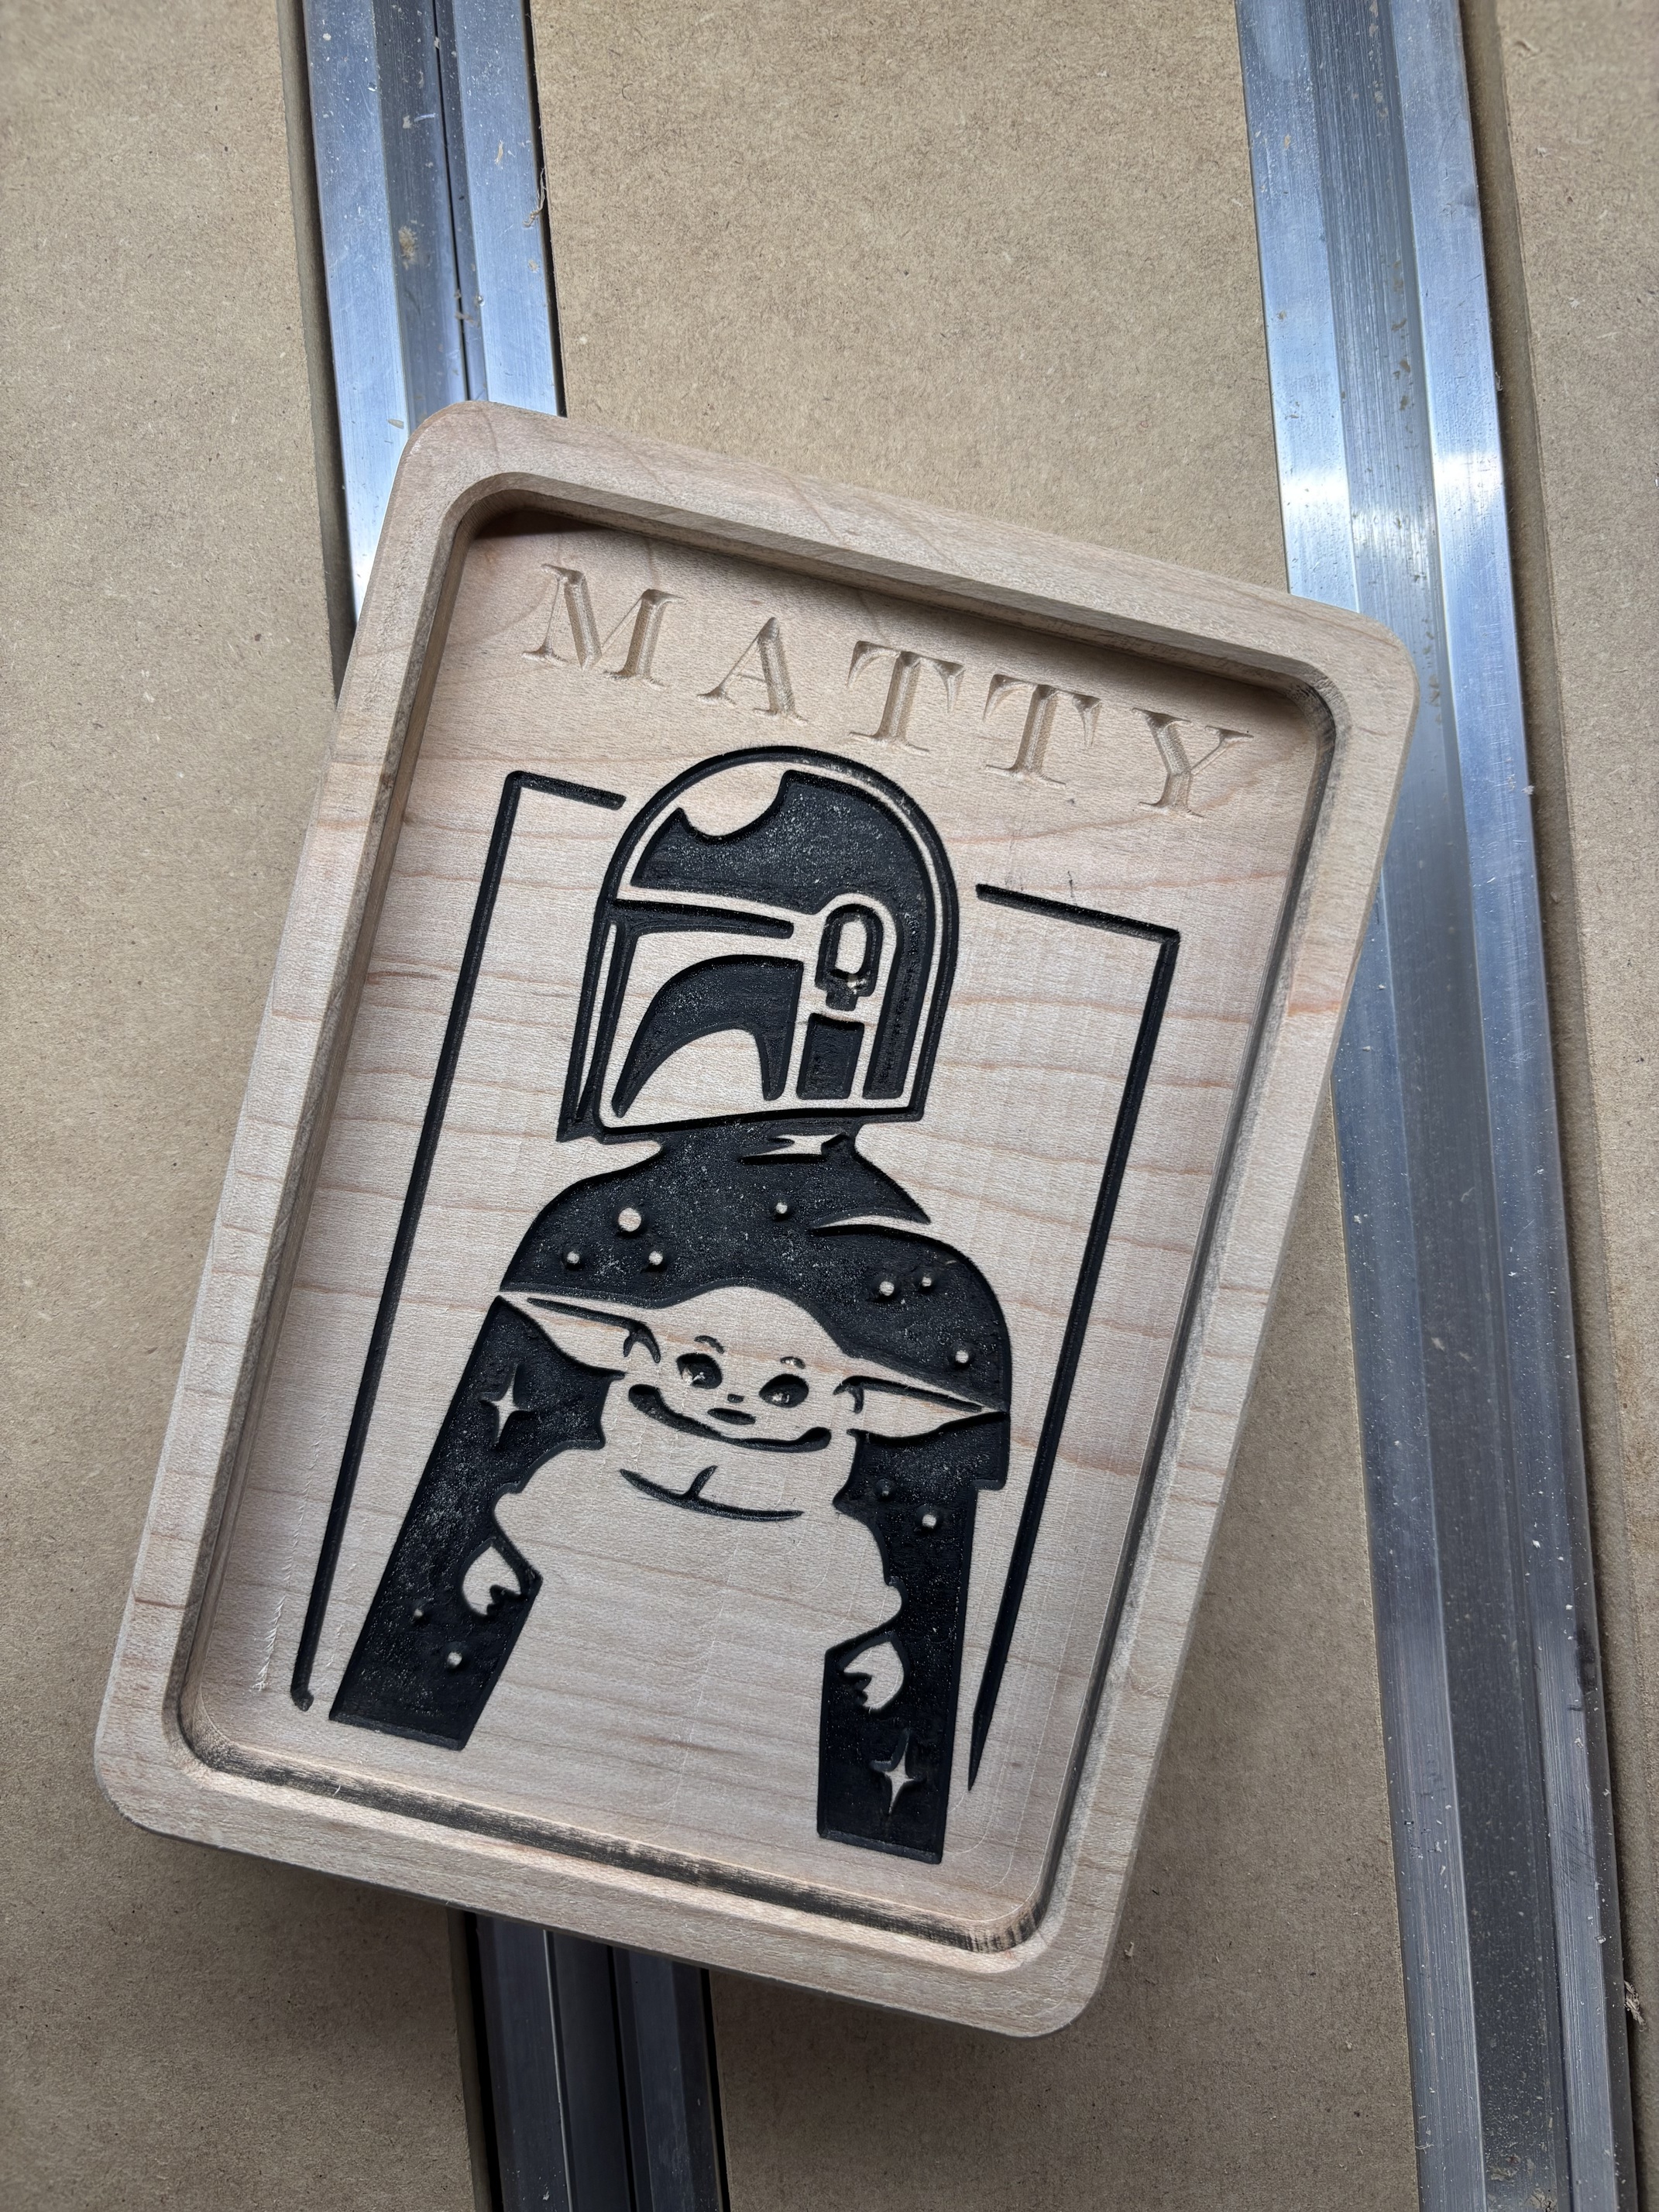
Hey guys I’m looking for some tips, whats the ideal way to get this done? If I highlight the entire image and choose vcarve is that generally the best way to go? Or should I de-link the image and then selectively try to choose specific areas?
Trying to get the cleanest result possible. Using 1/8" vbit.
Advance Vcarve with a 60° Vee groove bit and either 1/4" or 1/8" Endmill works great for me.
One method I used with success for the darker color is black paint. Carve the image out (assuming your doing a vcarve of the image), spray the paint and let it dry and then take a mm or less off the surface. I would do it on a trial piece to see if you like it. I did that in this project:
BTW, some people use a “sanding sealer” like Zinsser, which I believe is a dewaxed shellac, prior to painting and resurfacing as it will stop the paint from bleeding into the wood grain.
The Zinsser Universal Sanding Sealer is dewaxed shellac. The good thing about this product is you can use it with water or oil based top coats. On very light colored wood like maple it tends to give it a slight yellow (warm) tint which I like. However if you dont want any change in wood color use Polyurethane Polycrylic sanding sealer which is water based. It does not change the color of the wood. If using water based plan on the grain raising so you usually apply a coat, let dry, then sand and apply a second coat of water based sealer. With the shellac it does not seem to raise the grain.
The sanding sealers do tend to keep paint from soaking into the wood grain. Around the edges where the grain has been opened is where the paint can soak up inside the grain and make your project look muddy. By sealing up the capillaries of the wood grain you help prevent the paint from soaking up inside.
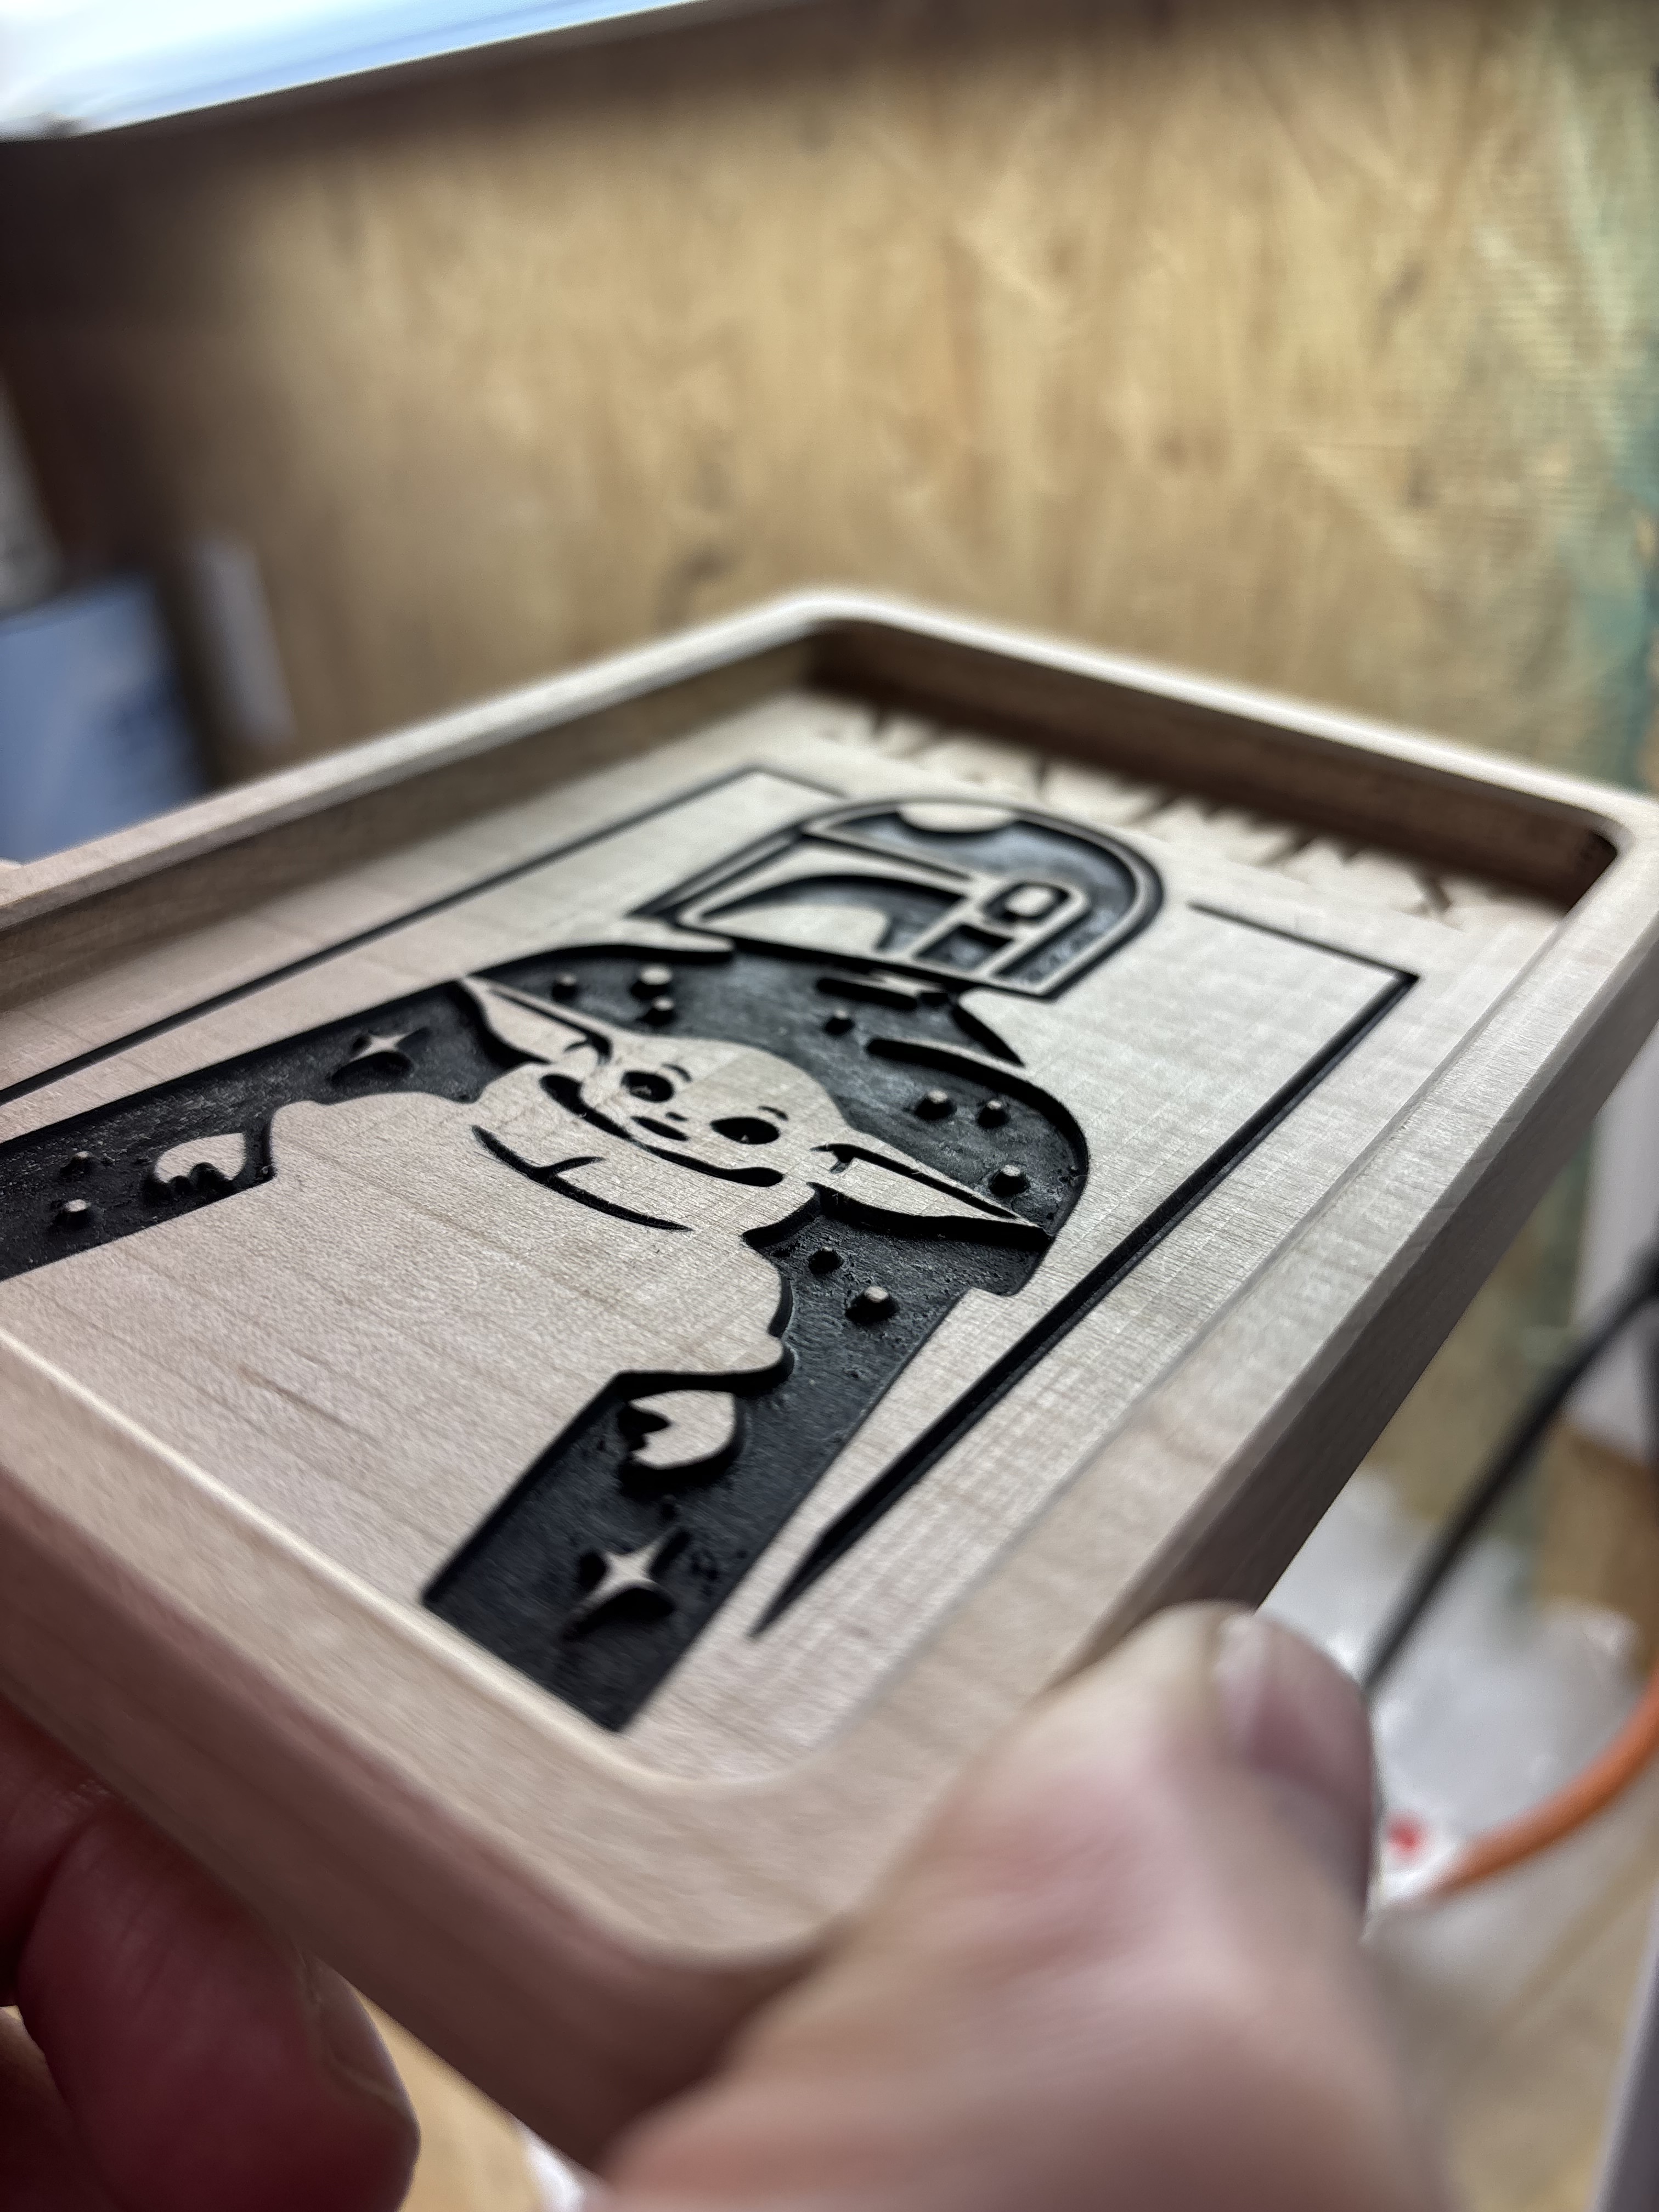
Just for clarification. All areas of the original image that are BLACK must be carved out, that’s all I want. If you look at the result and the project file it’s not doing that.
It looks like your stock is quite coarse grained, possibly not smooth, almost certainly not in-plane with the movement of the machine, and it may be that you are having some difficulty setting zero accurately relative to it (possibly due to the un-evenness).
Try a fine-grained hardwood, prepared so as to be equal in thickness and smooth at the top surface and ensure that it is in-plane with the machine motion, then set zero relative to that surface.
It’s a piece of walnut that was surfaced with high step over, it’s perfectly flat and then I zero’d off that. It should be alright on that end. From my perspective there are 2 possible issues:
When I’m loading the image into carbide create I’m not doing something right and it’s creating bad pathing and traces from the image (I tried inverse but doesn’t work either)
I’m supposed to manually choose areas to pocket and contour