Hi,
I’m new to CNC, i live in France and received my Nomad 3 this summer. I want to engrave very fine patterns and texts on to brass with 0.2mm to 0.4mm end mills. (0.0079 to 0.0157 inch)
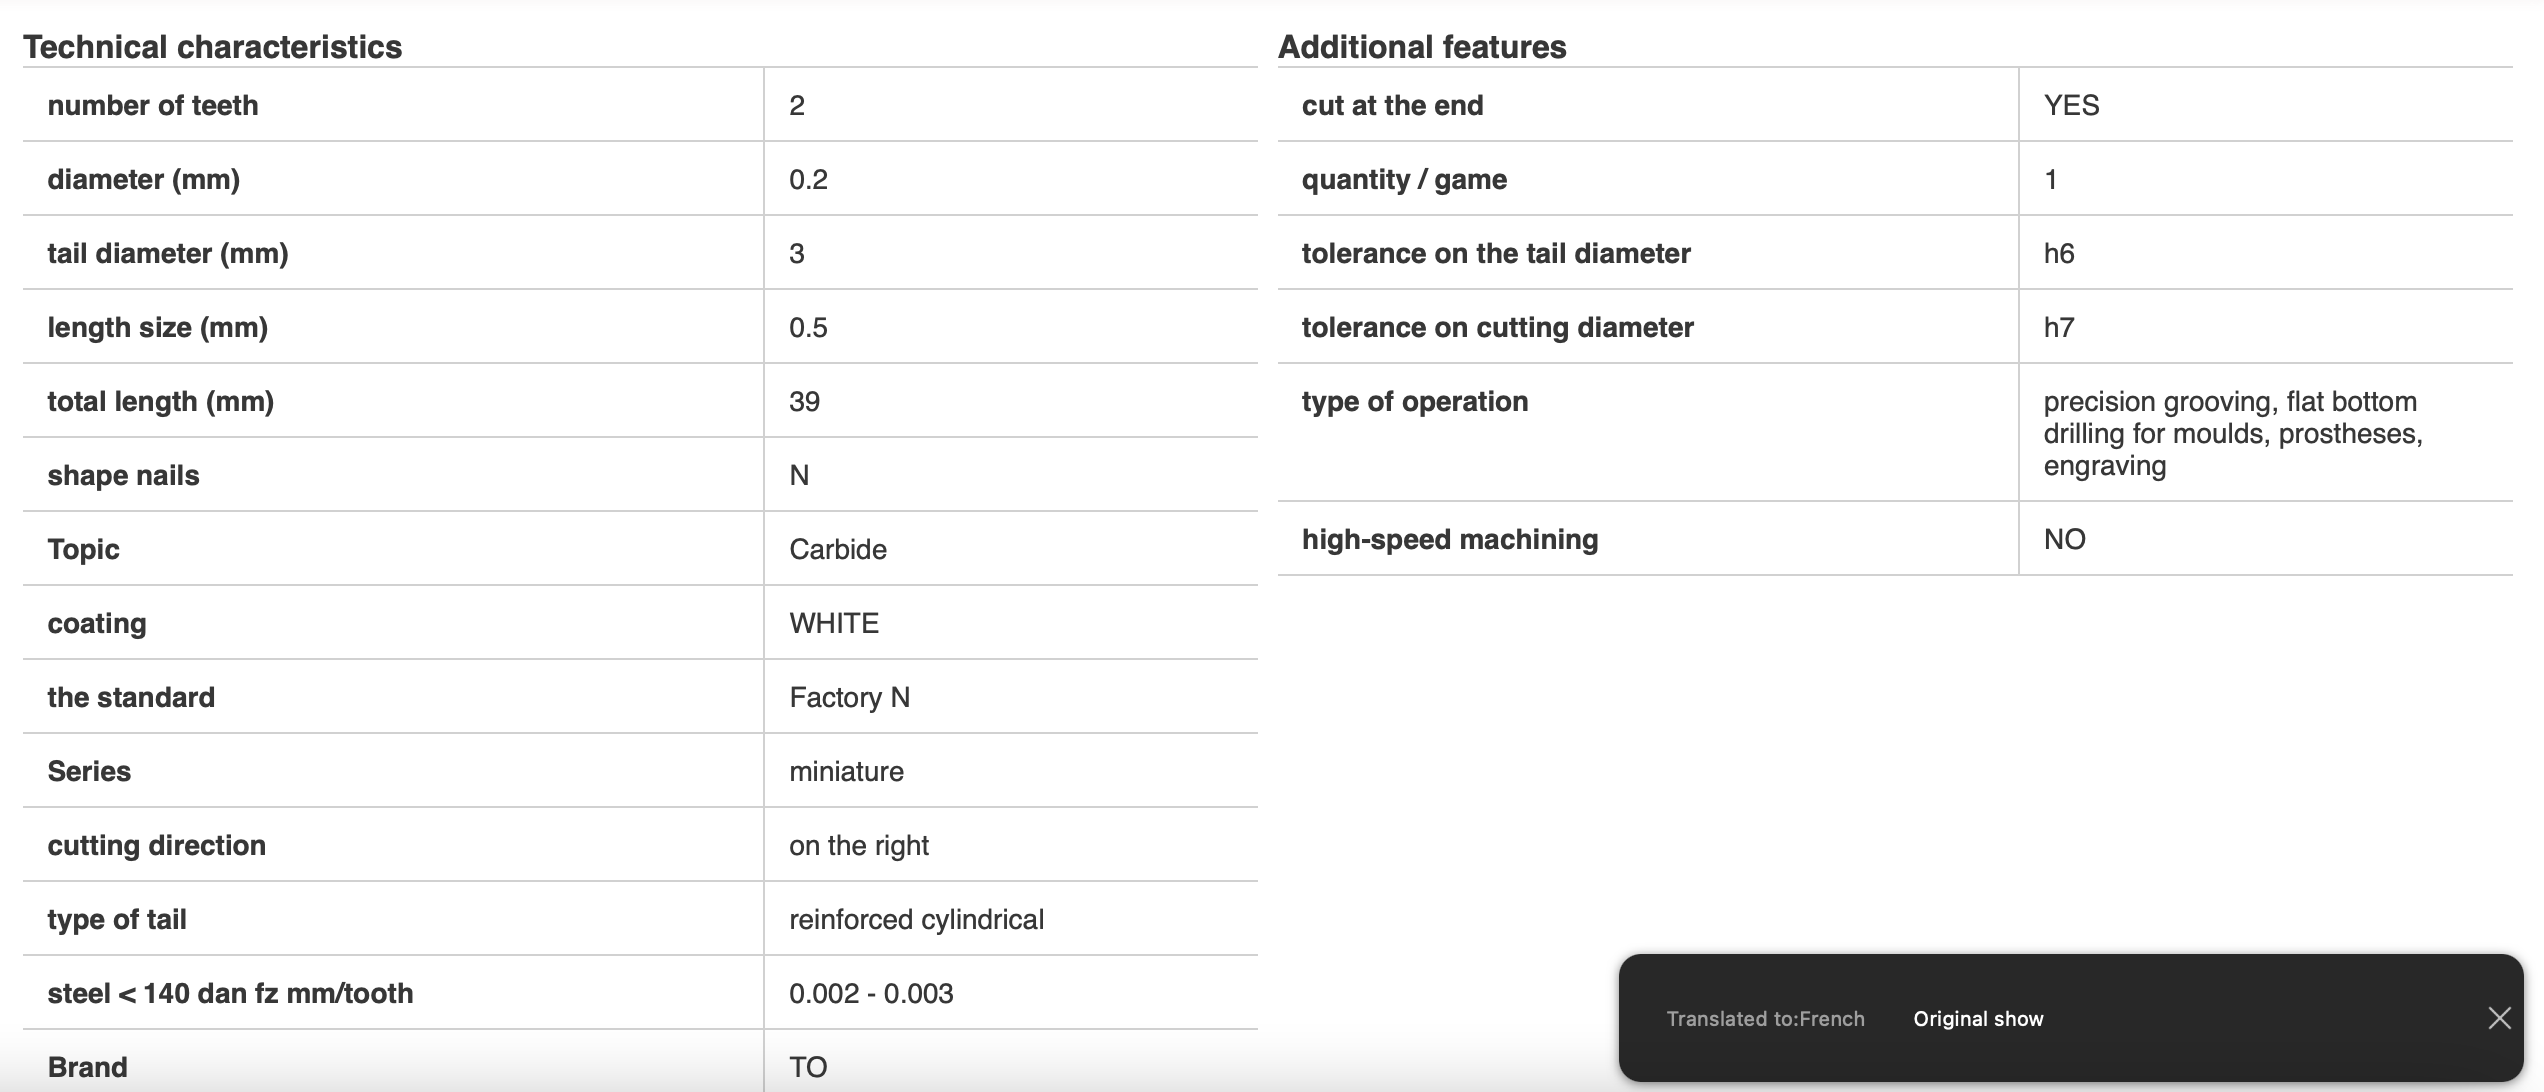
I chose these end millshttps://www.otelo.fr/fraises-miniatures-2-dents-serie-normale-queue-cylindrique-coupe-au-centre-helice-30-carbure-micrograin/t-o-22055020/SF-ID-00040908/ref-11407.html
Could you advise me on the optimal settings with this kind of tool in Carbide Create?
thanks in advance
Francis
I have not used a tool like that for engraving, but I don’t see why it wouldn’t work. Typically I use a single flute engraving/chamfer mill. 30 degree for most work. .01" is quite reliable, .005" can be rather fragile. Engraving/trace paths usually require a straight plunge, which can be difficult for the small tip diameter. The surface to be engraved should be as flat as possible. Final depth is dependent on your requirements and material flatness. I tend you cut very shallow passes, feeding as fast as I can. I use a very minimal feed per rev plunge. On very small engravings, you will find that you are often speed limited by your accelerations. I am not familiar with Nomad and its motion capabilities.
Some people use drag bits for this work, but I don’t find the result satisfactory. Occasionally I use a spring loaded engraving mill, but it is capable of powered rotation operation. Still, I find a regular mill to provide the most consistent results, assuming a flat surface.
1 Like
I summon the wise and mighty @Julien! He can provide some good starting points and his Shapeoko eBook that has all this. I’m pretty sure you’re outside his standard range though. Also @wmoy has done some tiny engraving and would be able to chime in.
I would just use the manufacturer recommendations since at this point, the Nomad is much stronger than the endmill so you can handle exactly what they recommend. It looks like you could start with a chipload of 0.01 mm/(rev*flute) and a depth of cut of around 0.10 mm or less and increase as you feel confident. The surface speed they recommend is insane, you would have to have a 60k RPM spindle to hit those surface speeds.
2 Likes
@The_real_janderson beat me to it.
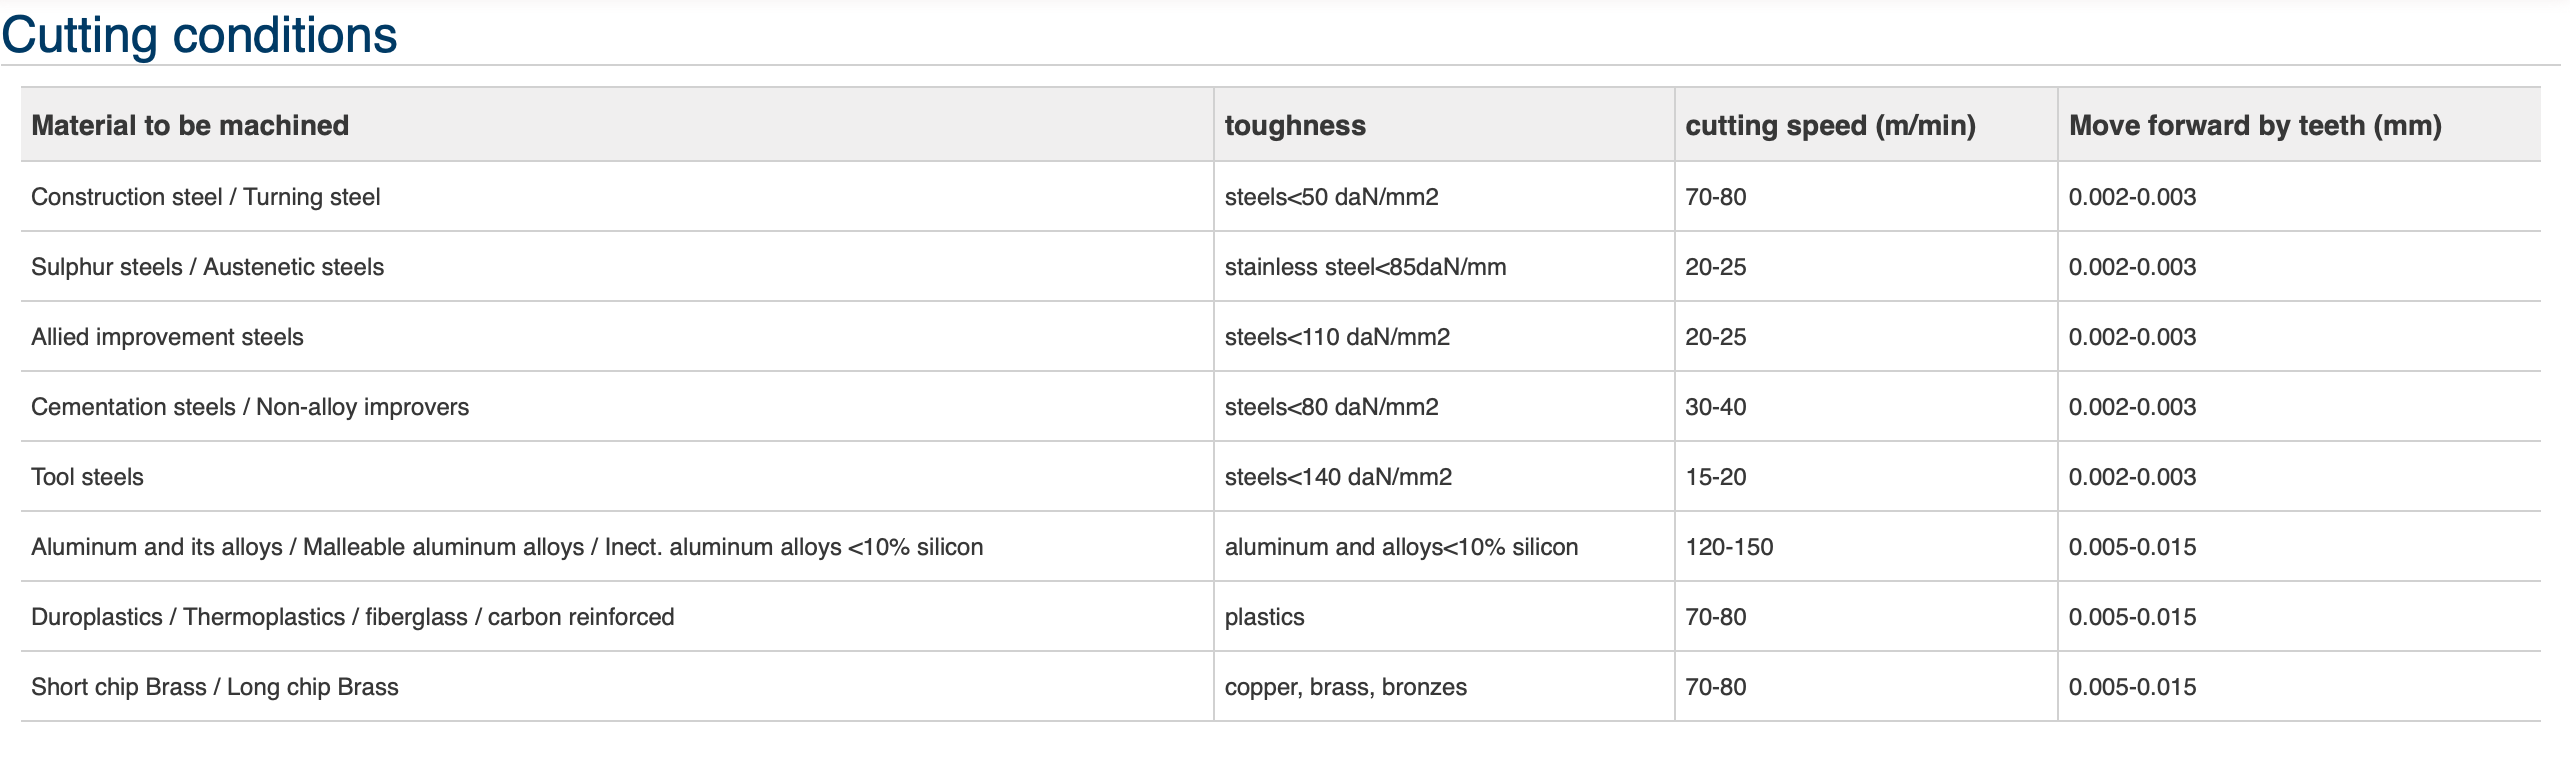
I would only consider their “avance par dent” for brass of 0.005 to 0.015mm (0.0002" to 0.0006")
Theoretically speaking, if I pick the lower end of the middle of that range at 0.01mm per tooth, and considering this is a 2 flute endmill, and assuming you will run your Nomad3 at max RPM of 24000, that would call for a feedrate of
FR = 0.01 x 2 x 24 000 = 480mm/min (19ipm)
This is such a fragile bit that I would use super shallow passes indeed. A 0.2mm enmill is well into micro-machining territory that I’m not familiar with, but if I was to use my usual rule of thumb to use 50% of the cutter diameter or less for depth per pass, that would mean 0.1mm per pass or less.
EDIT: and after typing this I realize this is…exactly what @The_real_janderson said, so there’s hope it’s not complete BS ![]()
I would also zero Z a little bit above the brass surface, even it this means cutting air for a few passes, because any uneveness in the stock flatness would translate to a brutal change in depth per pass if you start on the surface and there happens to be a small area nearby that is higher…recipe for a broken endmill.
Finally: I’m French too so, si tu souhaites en parler dans notre langue maternelle n’hésite pas à me faire un message privé ![]()
EDIT2: while not related to brass, this video from Winston about using a Nomad for micro-machining is quite interesting:

2 Likes
I do fine engraving of text, patterns and filigree on brass on a regular basis. My preferred tool for this is one of these tapered ball endmills.
They last for ages and are not expensive.
DOC is 0.05mm, speed is 200-400mm, spindle is at 10K (on a Nomad 883 Pro).
4 Likes
Just to be sure, are you absolutely set on using tiny endmills?
Usually for engraving, people use tools with a point like this. The geometry results in a bit of a more resilient tool and the ability to vary the width of the engraving by varying the depth. Helps that it’s about a third the cost of your tiny endmill too.
3 Likes
Thanks for the advice. I want the sides of the engraving to be closest to 90º, like this: I_I and the bottom to be as flat as possible, and above all I don’t want a U-shape. Do you think I can achieve this with this tool ?
Thanks for the advice but my engraving should not be deeper than 0.5mm and the stroke width should not exceed 0.4mm and sometimes 0.2mm. I’m not sure this tool allows it. In addition I want the sides of the engraving to be closest to 90º, like that : I_I
1 Like
Thank you Julien for all this valuable information. I think I’ll write to you a message privé in French !
The video seems interesting but Winston speaks too fast for me to understand perfectly, my English is not good enough …
2 Likes
The U shape will usually be imperceptible at 0.2mm deep and 0.05-0.1mm wide.
Thanks Gerry, is it also valid with these dimensions?
I guess that depends… perhaps it is different if you have bons yeux?
If you have a particular reason for the square groove, such as filling it with lacquer, the perhaps it might make a small difference.
My “expérience personnelle” with smaller than 1mm endmills is that they snap very easily. The tapered ball is much stronger, and for very small depths is effectively the the same.
2 Likes
This topic was automatically closed 30 days after the last reply. New replies are no longer allowed.