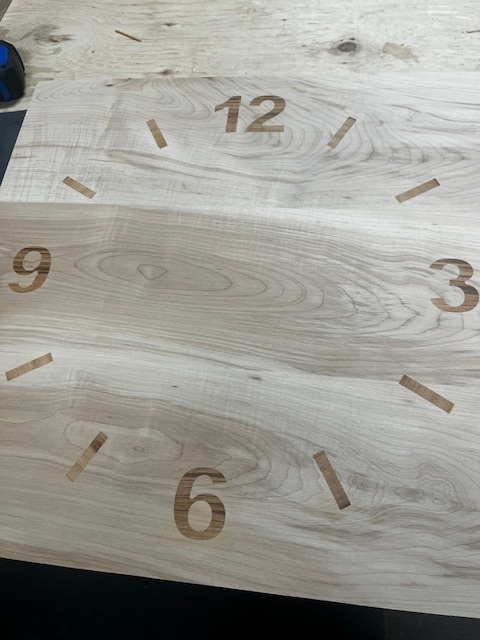
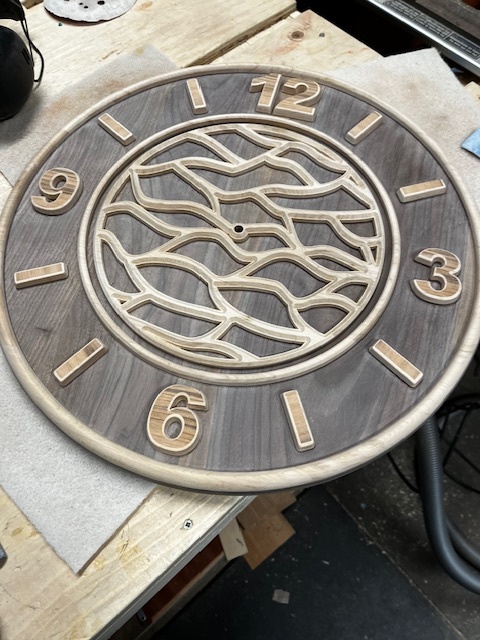
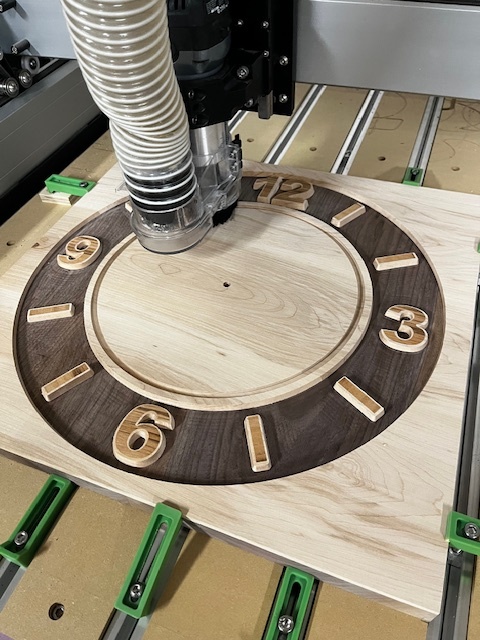
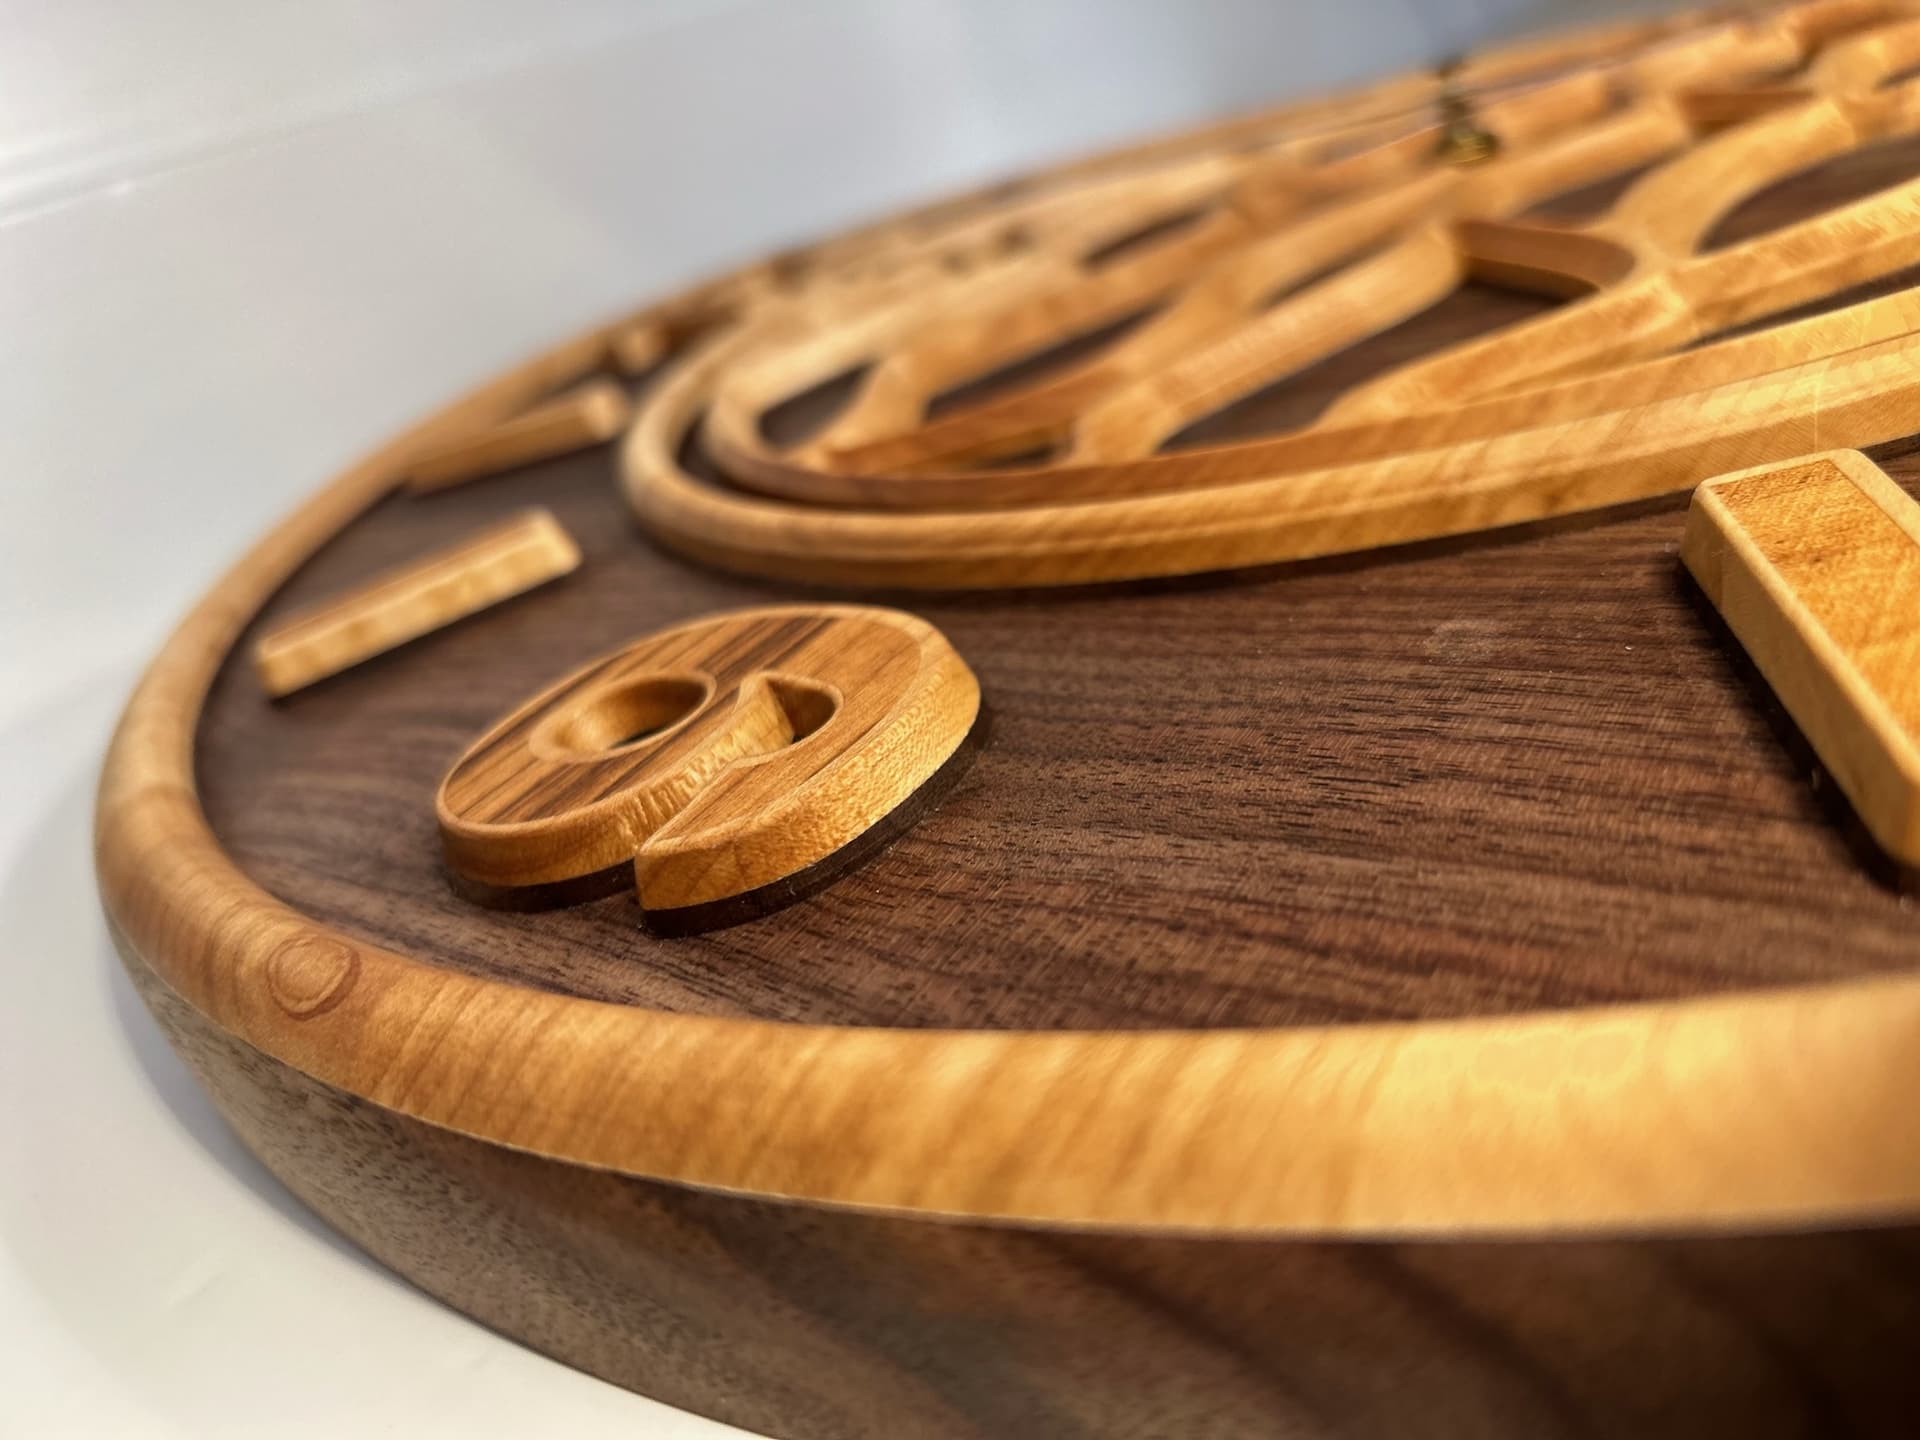
I’ve been trying some different techniques in my work pieces. I wanted to make a clock that has a lot more 3D components without using a Pro version of CC. I decided to laminate some hard maple onto a walnut base then cut away the maple to reveal the walnut underneath. I inlayed the numbers and markers with some leftover Tigerwood that I had laying around.
For the middle, I used a scale design someone on the forum here designed (sorry I looked back and couldn’t find it or I would of tagged the creator) and modified it to fit the centre and reworked some of the shapes to fit the v-bits. I also used a contour path, using a 90 degree v-bit, on the scales to create a roundover effect. Overall, I think the experiment turned out quite well!
I completed the inlay first. I performed some necessary maintenance on my machine (added rigid insulation under it, trammed my router and flattened my wasteboards) and it shows in the results. Got perfect results from my inlay.
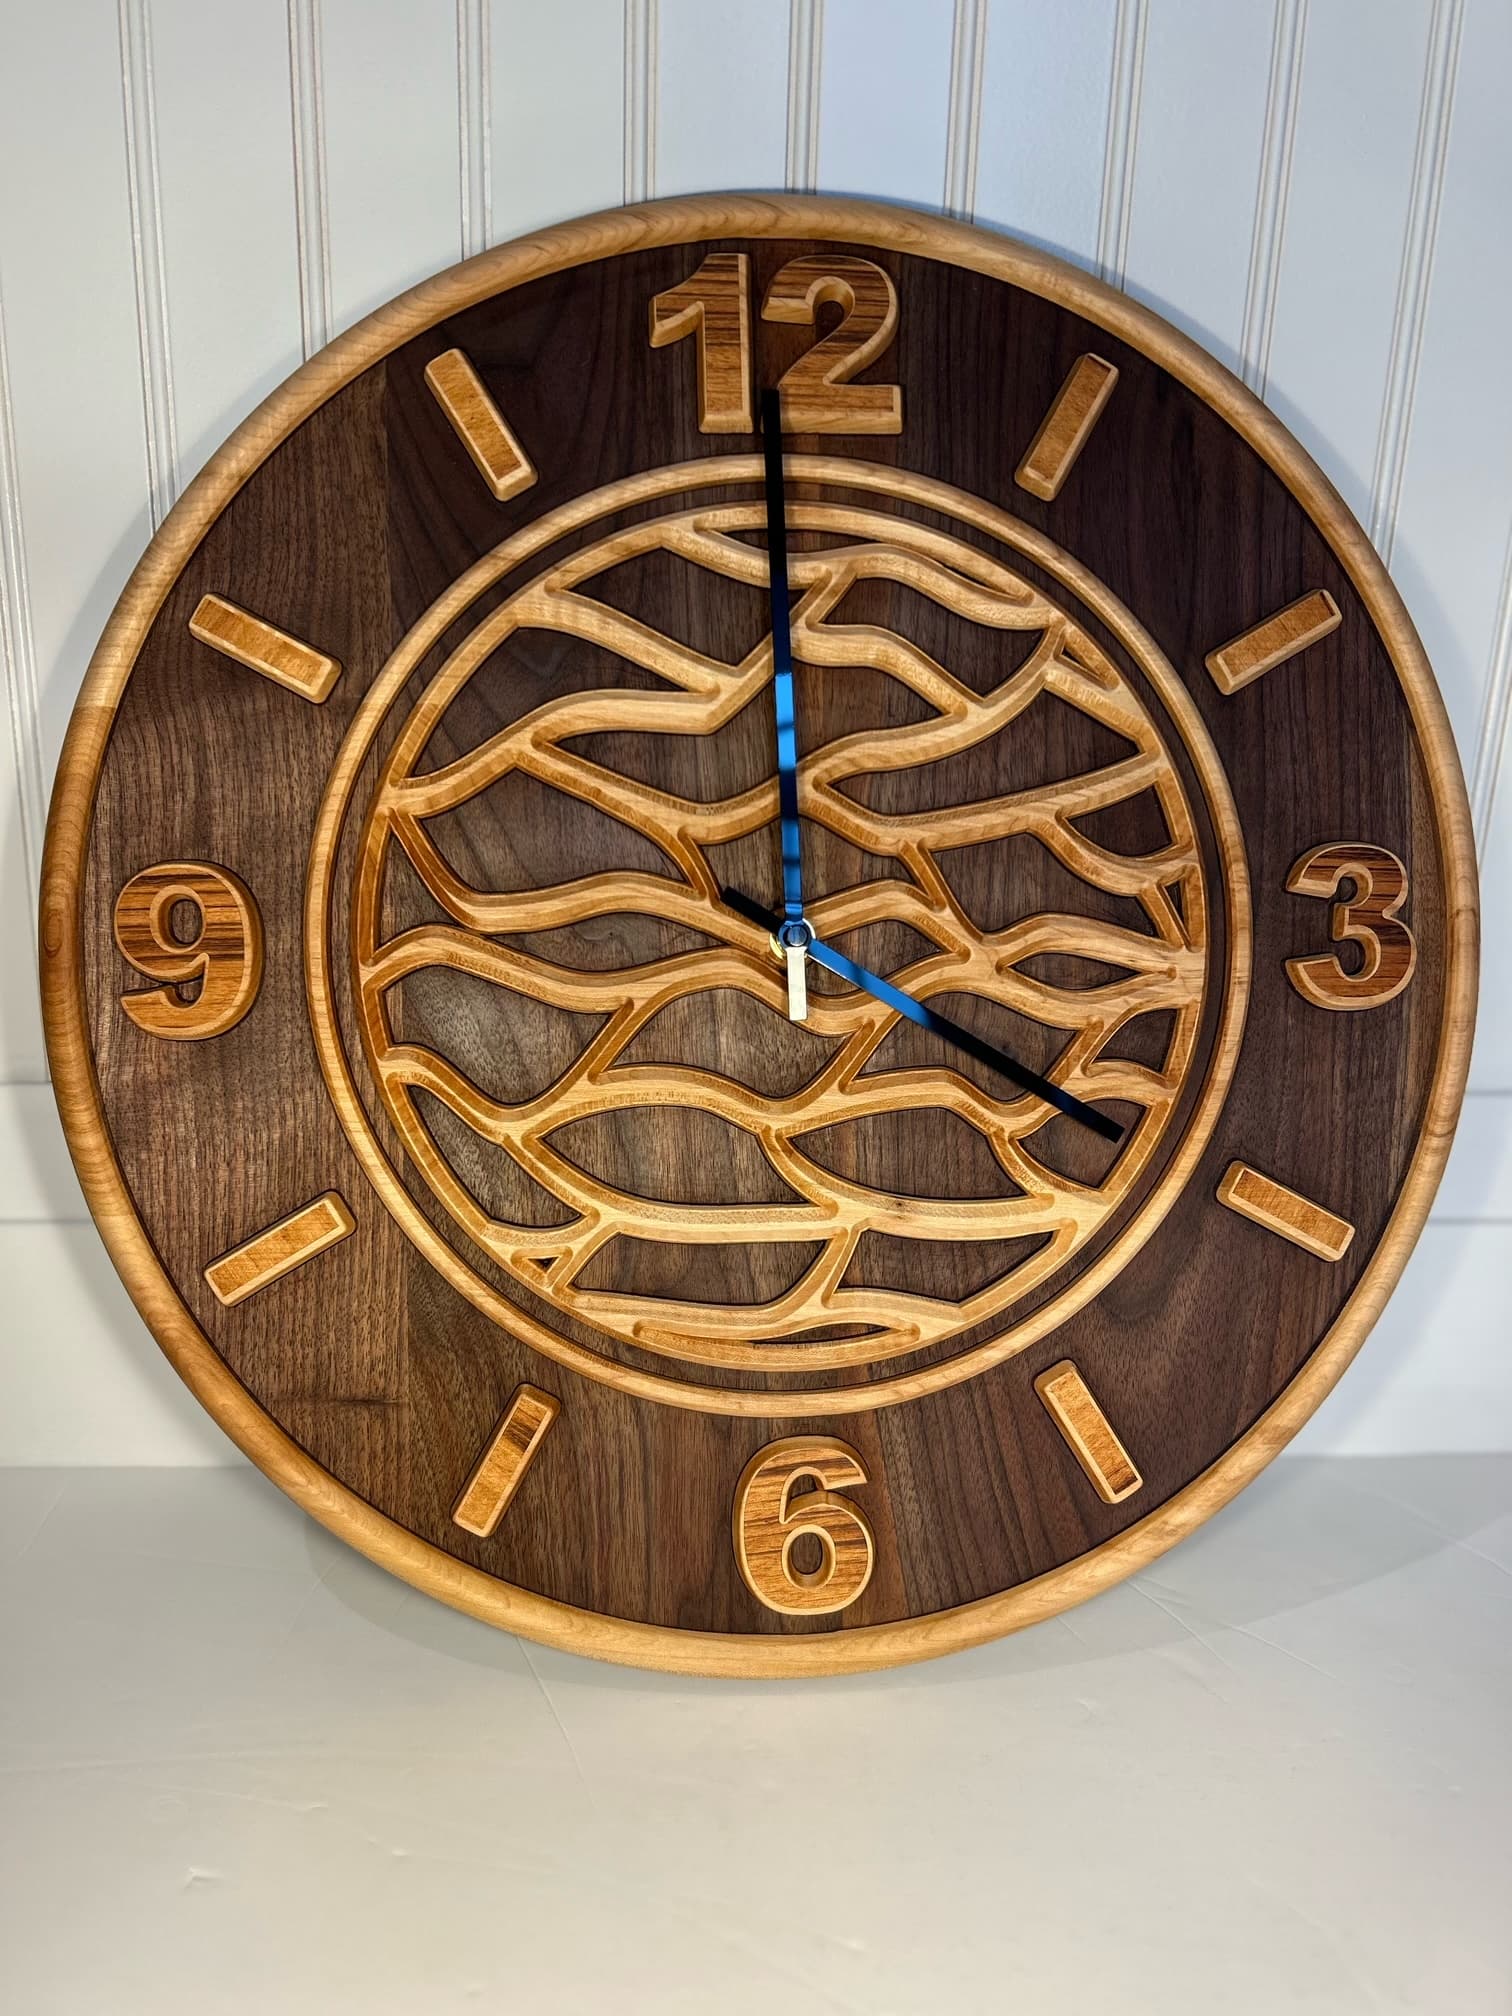
My plan for the next one is to utilize the same design but epoxy in the scaling different colours. I will cut the maple centre separately then glue it on top once the epoxy is cured and surfaced.
First your clock is beautiful. Very inventive to create your layers.
My only critique is a clocks first purpose is to tell time. In a dark room it might be hard to tell the time. Maybe white hands would aid in seeing the clock in low light. The hands on the clock are nice looking but only time and placement of the clock will tell if lighter colored hands will be necessary.
Thanks! Appreciate the feedback. I have some thicker clock hands which would definitely show up better in dimmer lighting but wanted to highlight the design of the clock for photos. I will be switching them over for sure when it goes up for sale.
For the inlay, I do use the inlay mode in CC. I use a glue gap of .02" for the plug and I like to use a depth of 0.2". I use a 30 degree VBit for the inlay.