I am making a wedding gift box for a friend. The box is walnut and will be about 14" x 12" when completed. I had previously build a similar box for my Grandson when he got married back in August 2023. The friend saw the picture and asked me to make him one for his daughter.
After the top is dry tomorrow I will cut it to size and do the vcarving. The box is assembled with a captured top and the bottom will be rabbeted out to accept a piece of plywood. The bottom will be covered with some purple material.
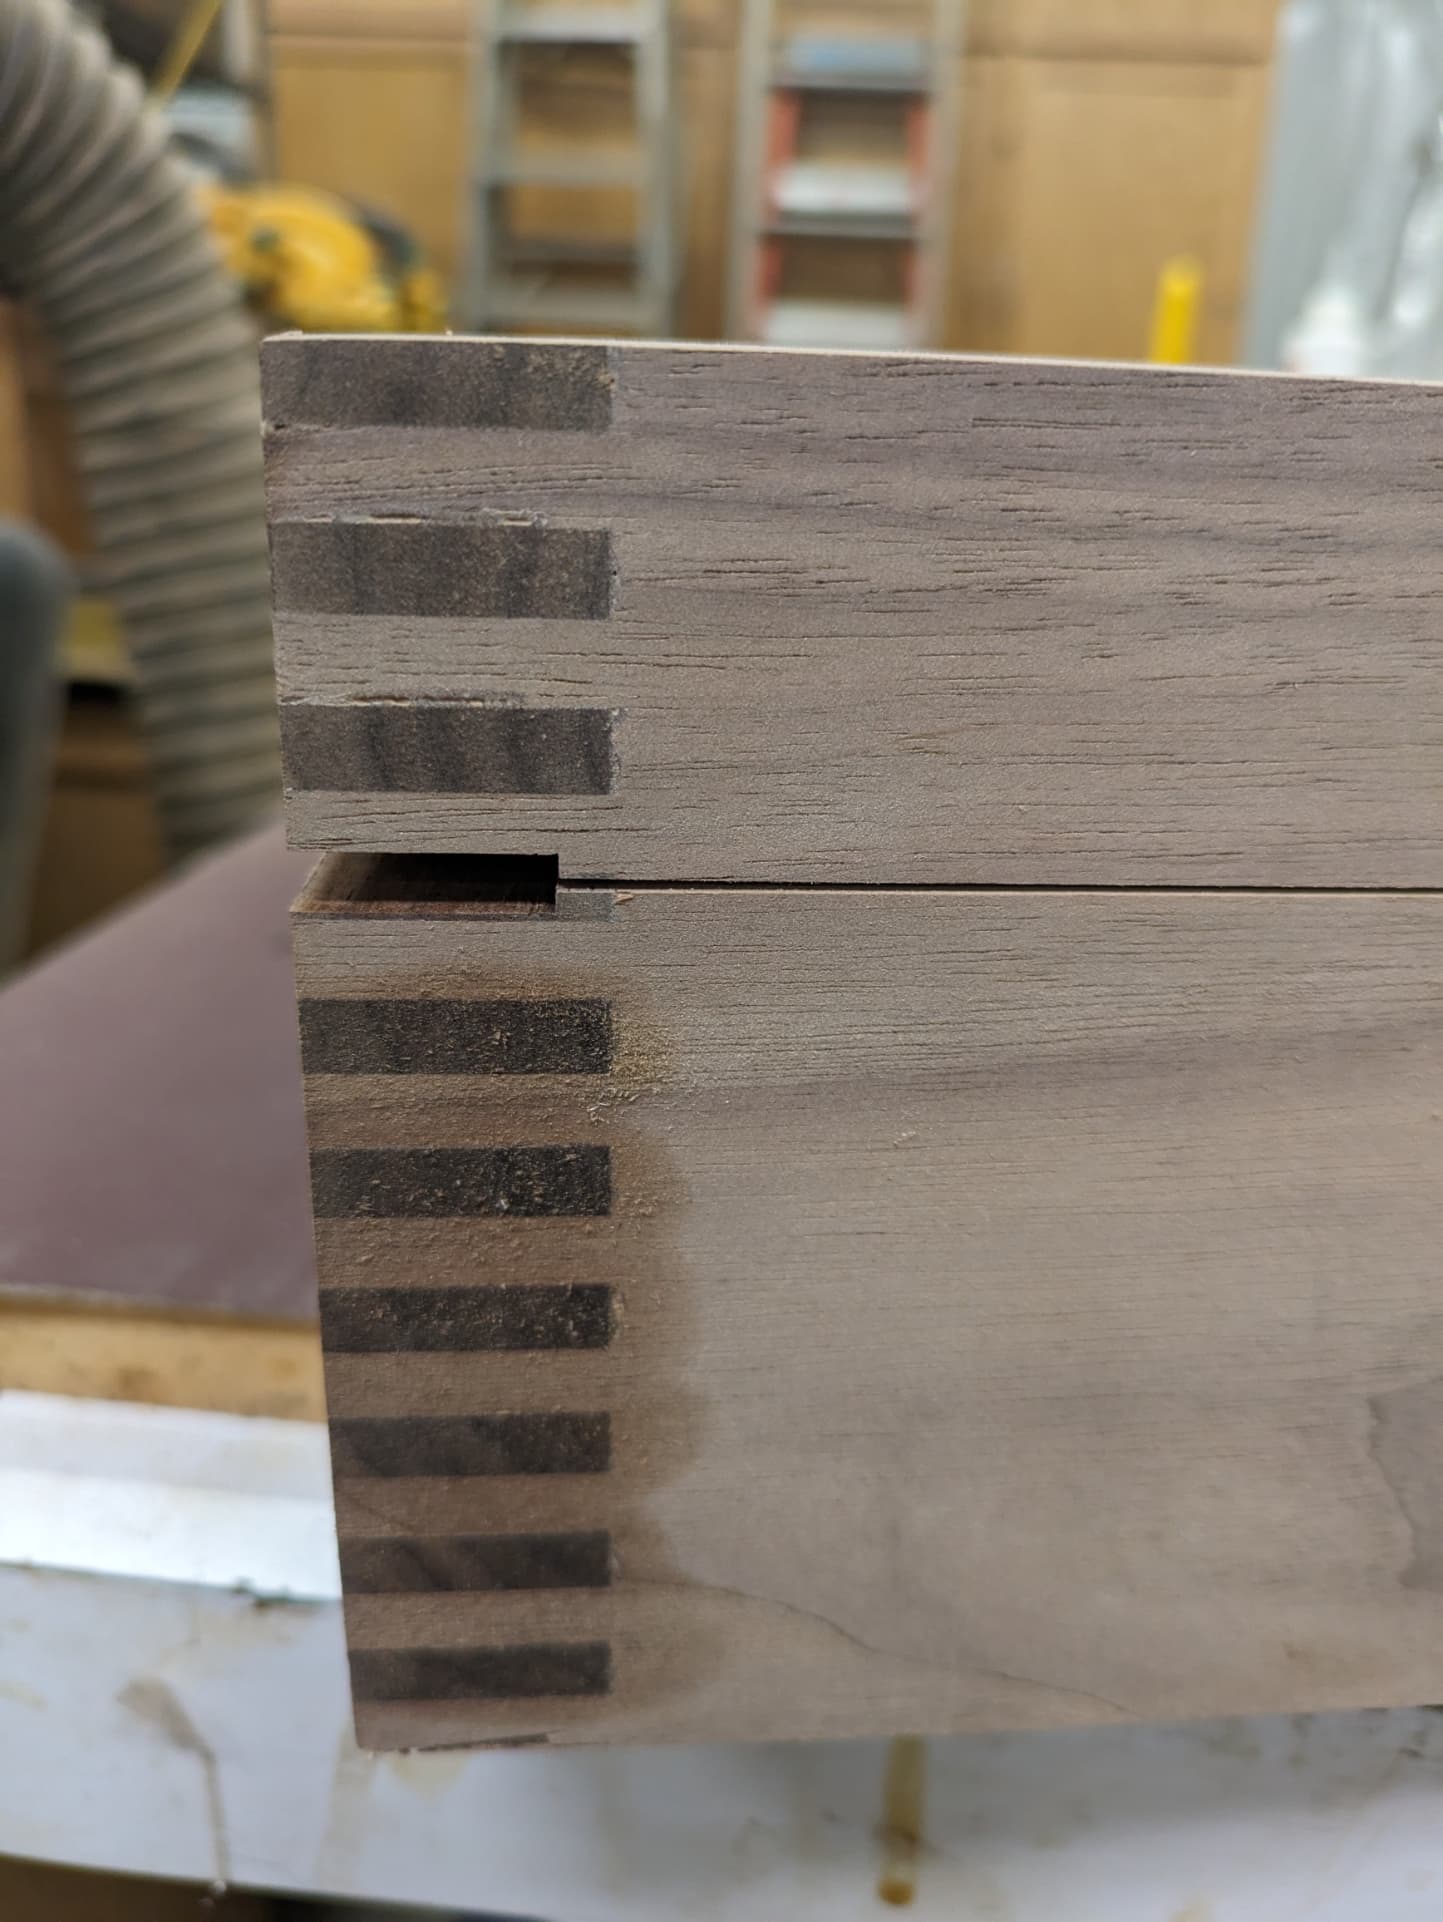
The one thing that about my Freud box blade is it is supposed to be 1/4" but really cuts 6MM. So I have an Rockler undersized plywood bit that I use to cut the dados in the box to accept the captured top. That bit cuts 6MM instead of 1/4". You want the top to fit well in the dado but not tight in the box top. That gives it room to move around. I am careful not to get PVA glue in or near the dado so the box top is not glued in place and has room to move.
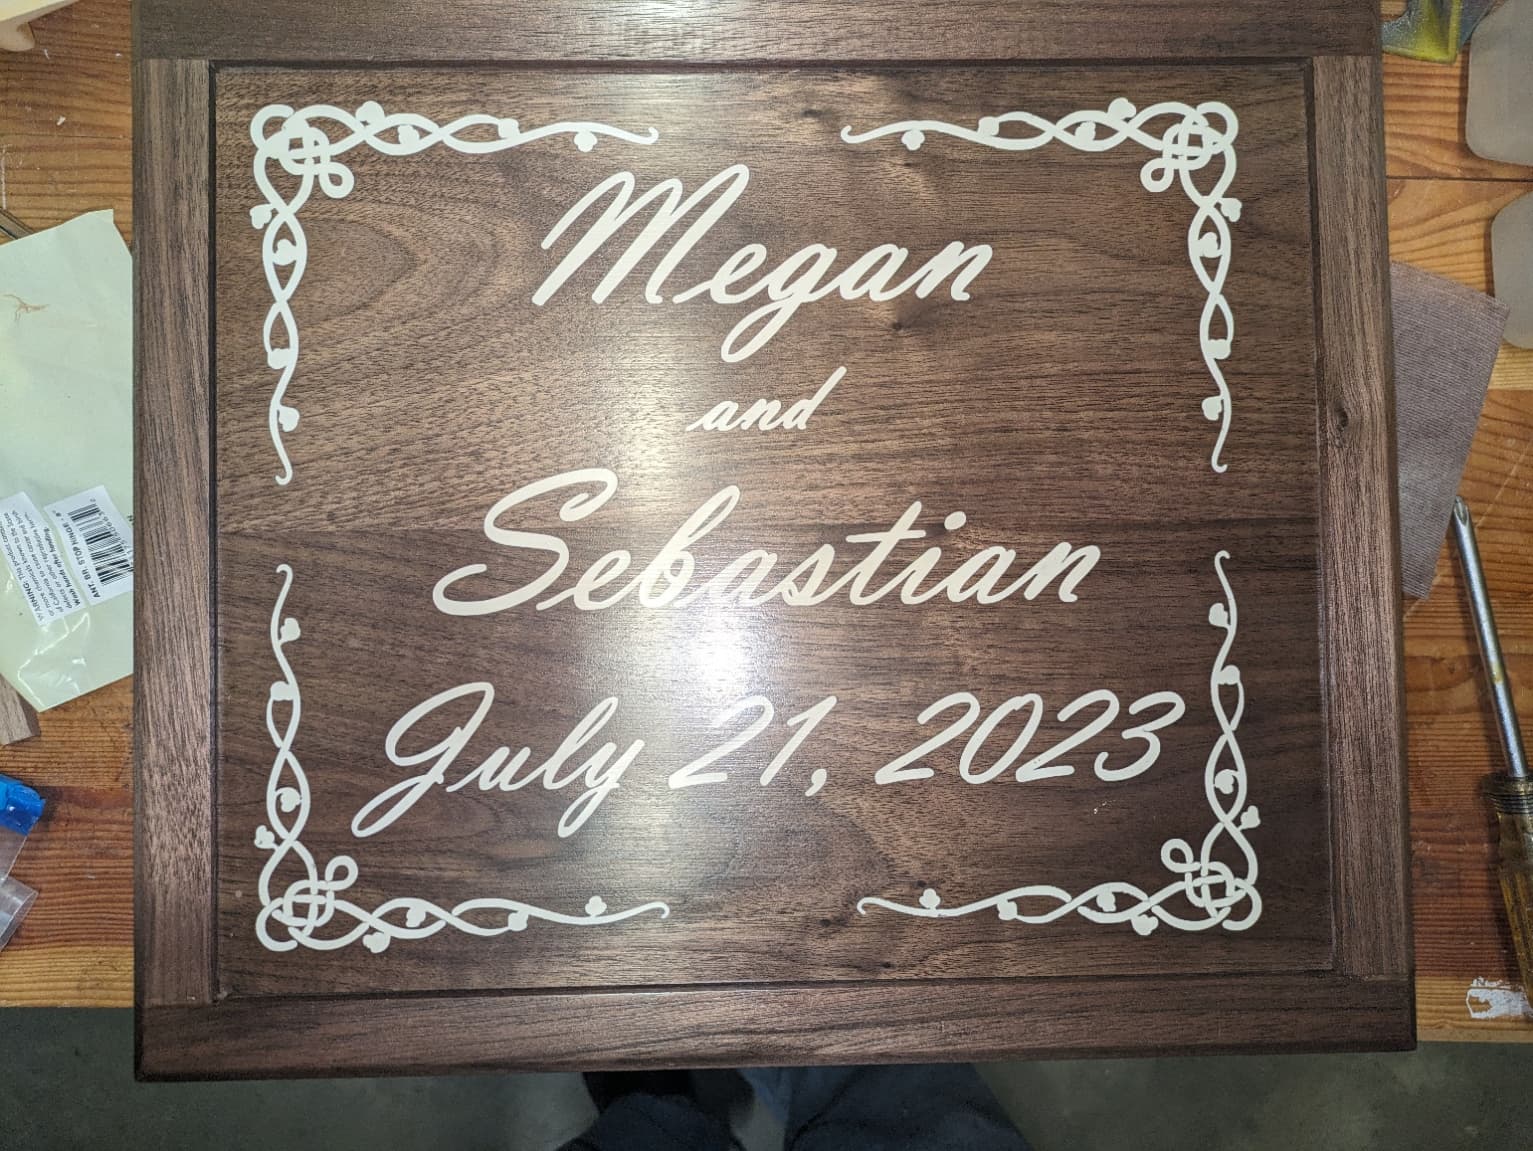
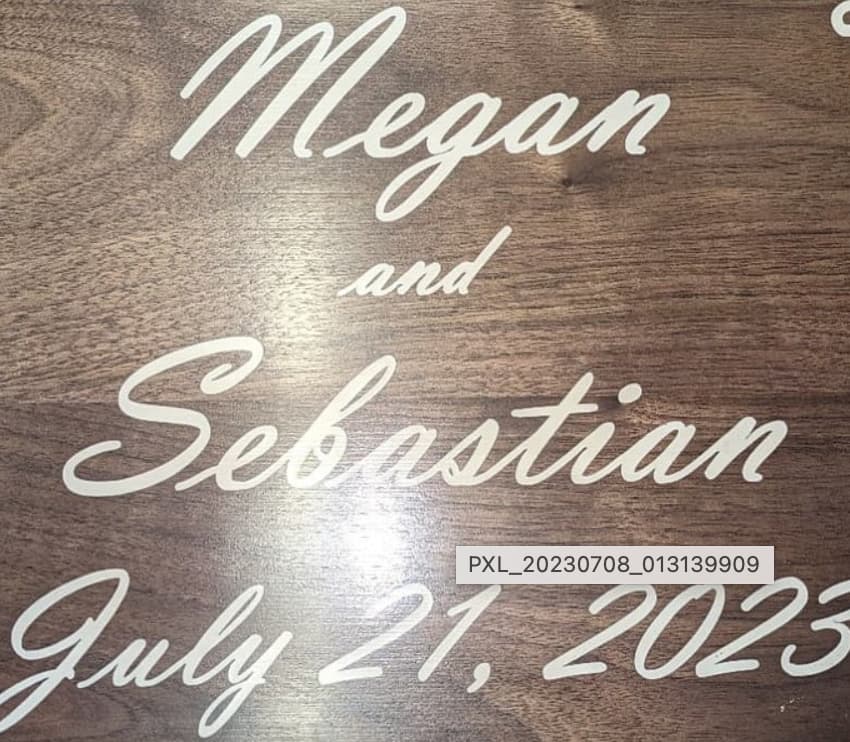
A waitress in a restaurant I frequent saw my picture of my Grandson’s and asked me to make a wall hanging for her. She had just got married. This one is made with South American Walnut.
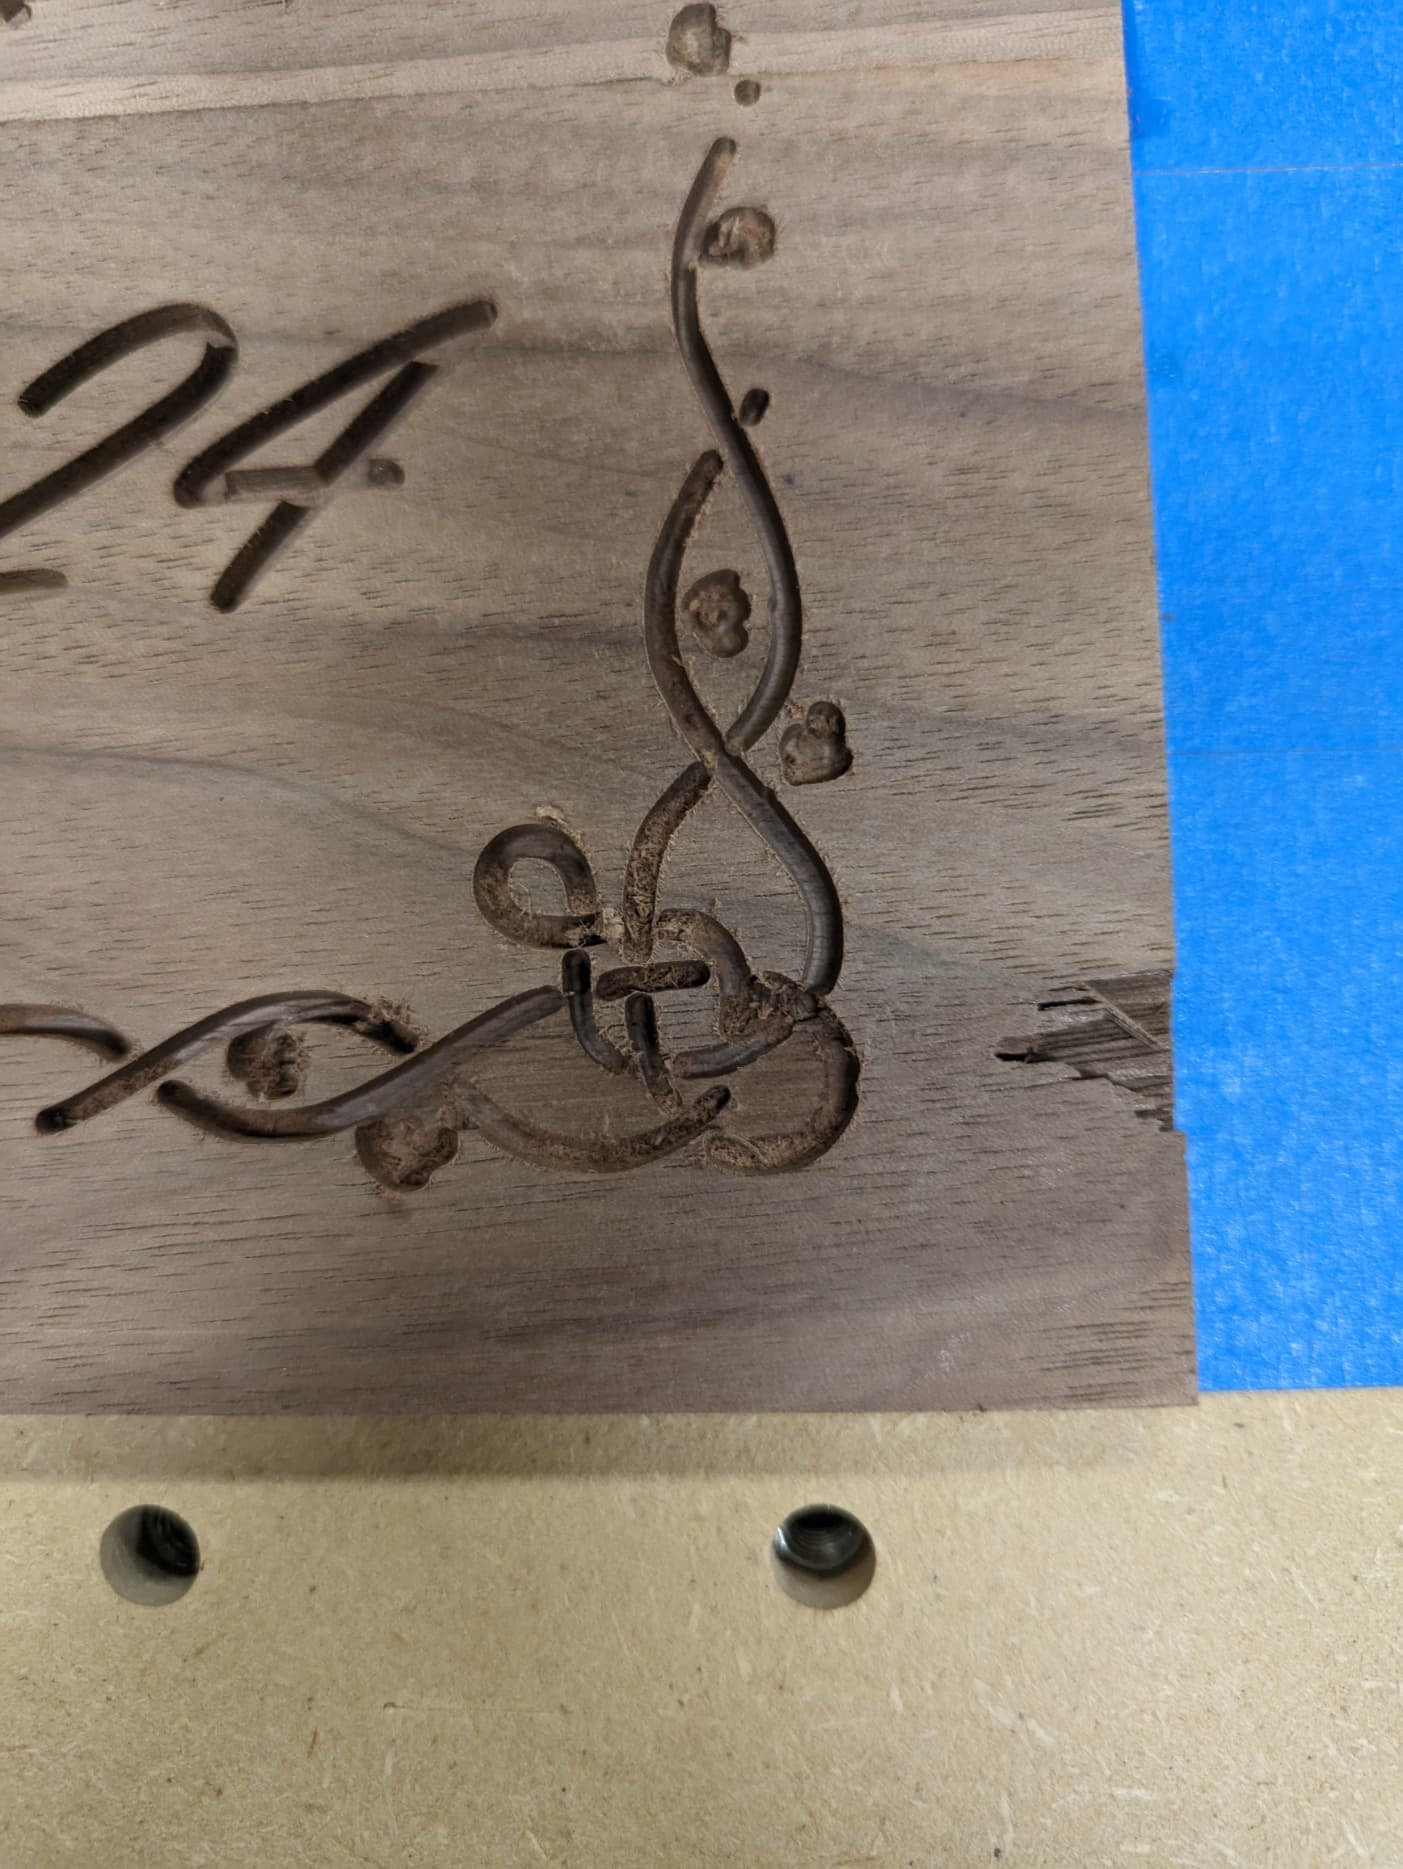
I have a problem on this advanced vcarve. I made this in 2 parts due to the time to carve. The first half went fine. The second half chipped out two big chunks. I am thinking about drawing a circle just smaller then the chip out and glue in some walnut and then machine only that quadrant again. What do you suggest to fix this.
Here is the problem and here is the other side which carved without chipout.
The carving will be filled with white epoxy. What is a suggestion to fix this? I could start over but everything else is good. Still machining the second half with about 3 hours left. So plenty of time to think it over.
You can see the defect in the corner that I was going to fill with brown epoxy. The big hunk of walnut I cut this from is still available.
I cut that into 1" boards and then the left over was about 3/8" so I planned it to 6MM and glued two pieces together to make the project. I could cut the circles out of the existing project and then cut the corresponding circles out about .25" deep and cut them out on the bandsaw and sand them to the .15" the carving is cut to depth and glue them in matching grain directions. When you cut plugs out to cover screw holes you do a similar thing and then remove the plugs by running them through the bandsaw to free the plugs.
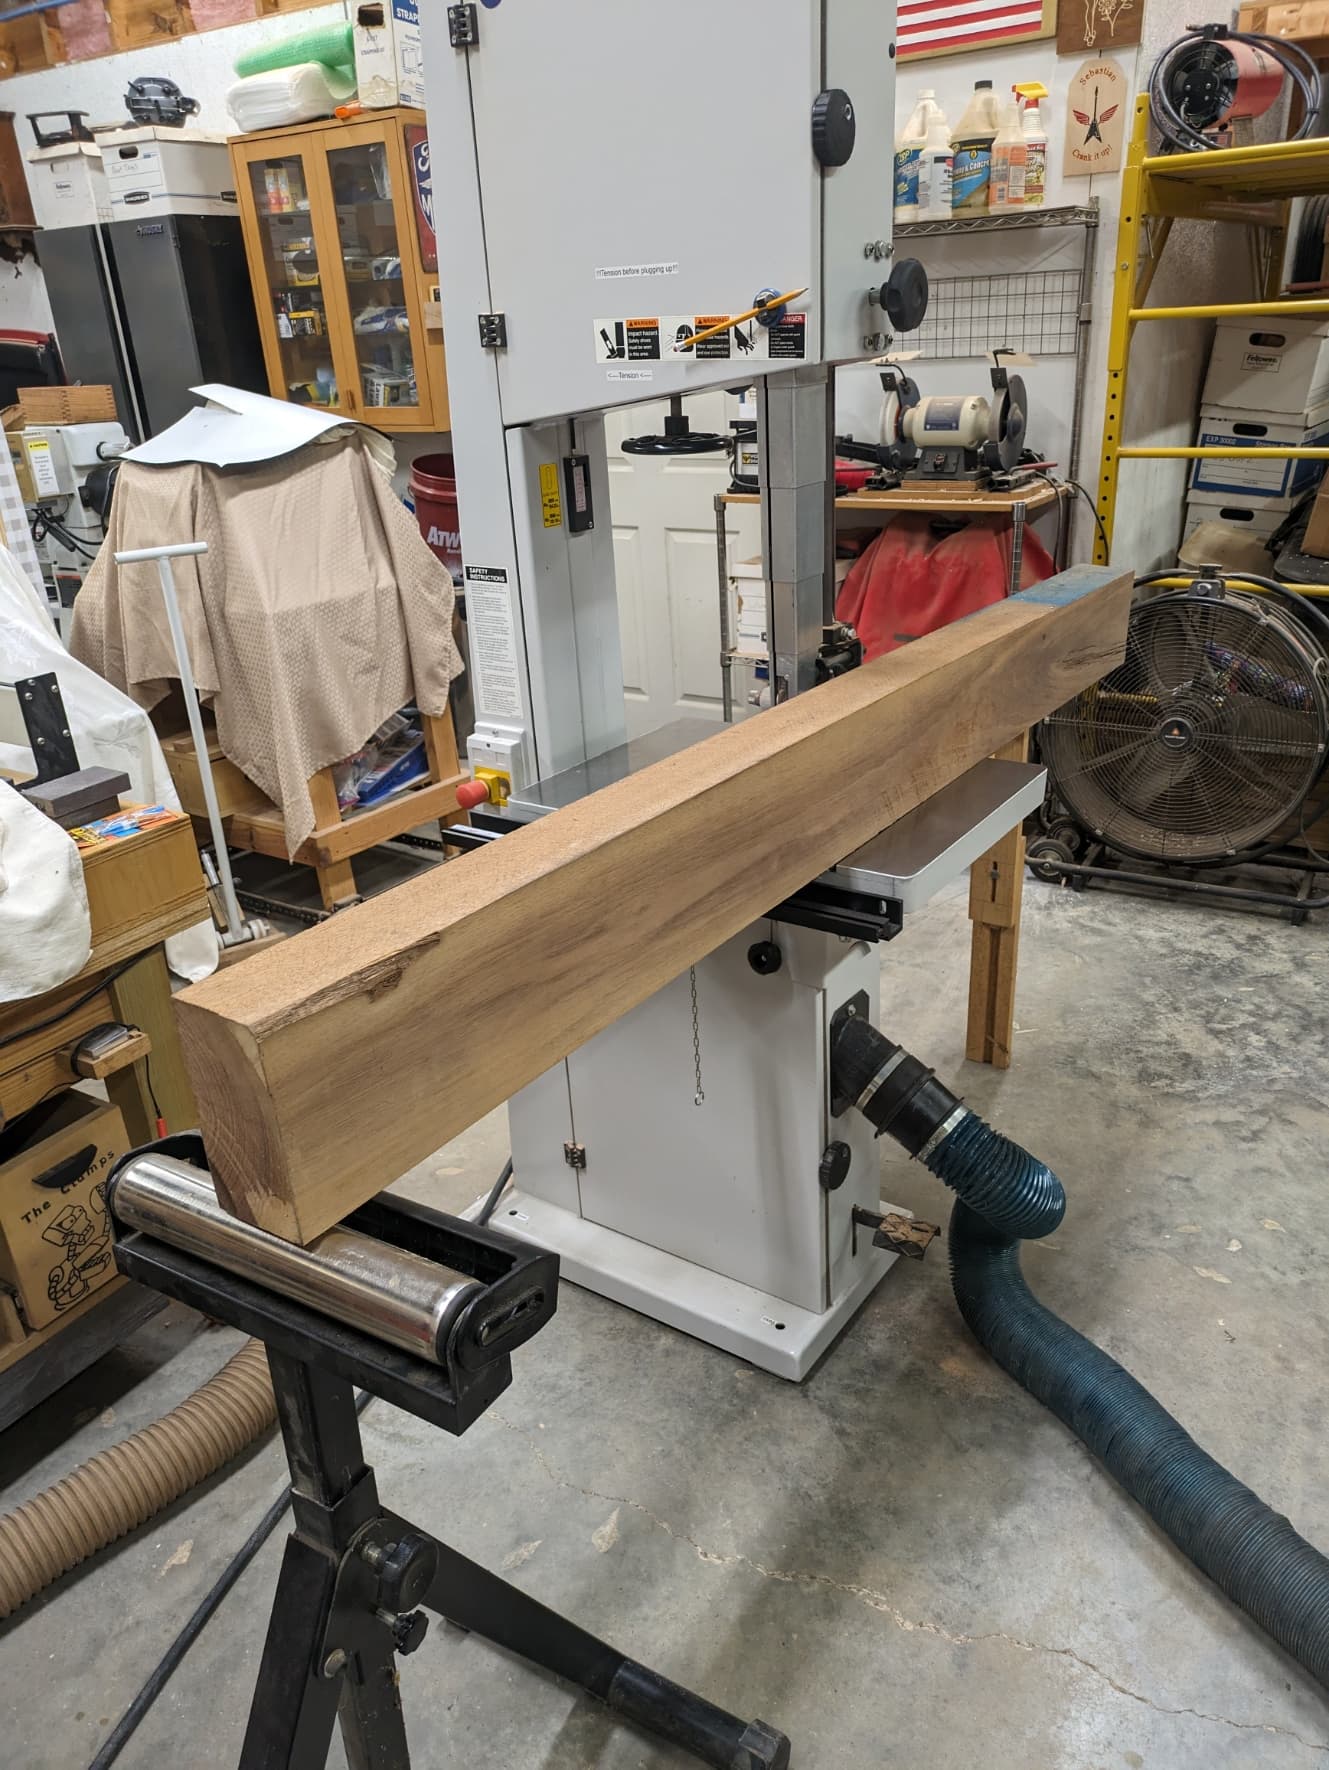
I gave up and just cut more walnut, glued it up and carved it this afternoon and evening. I got the epoxy poured and it will be ready tomorrow evening to sand down
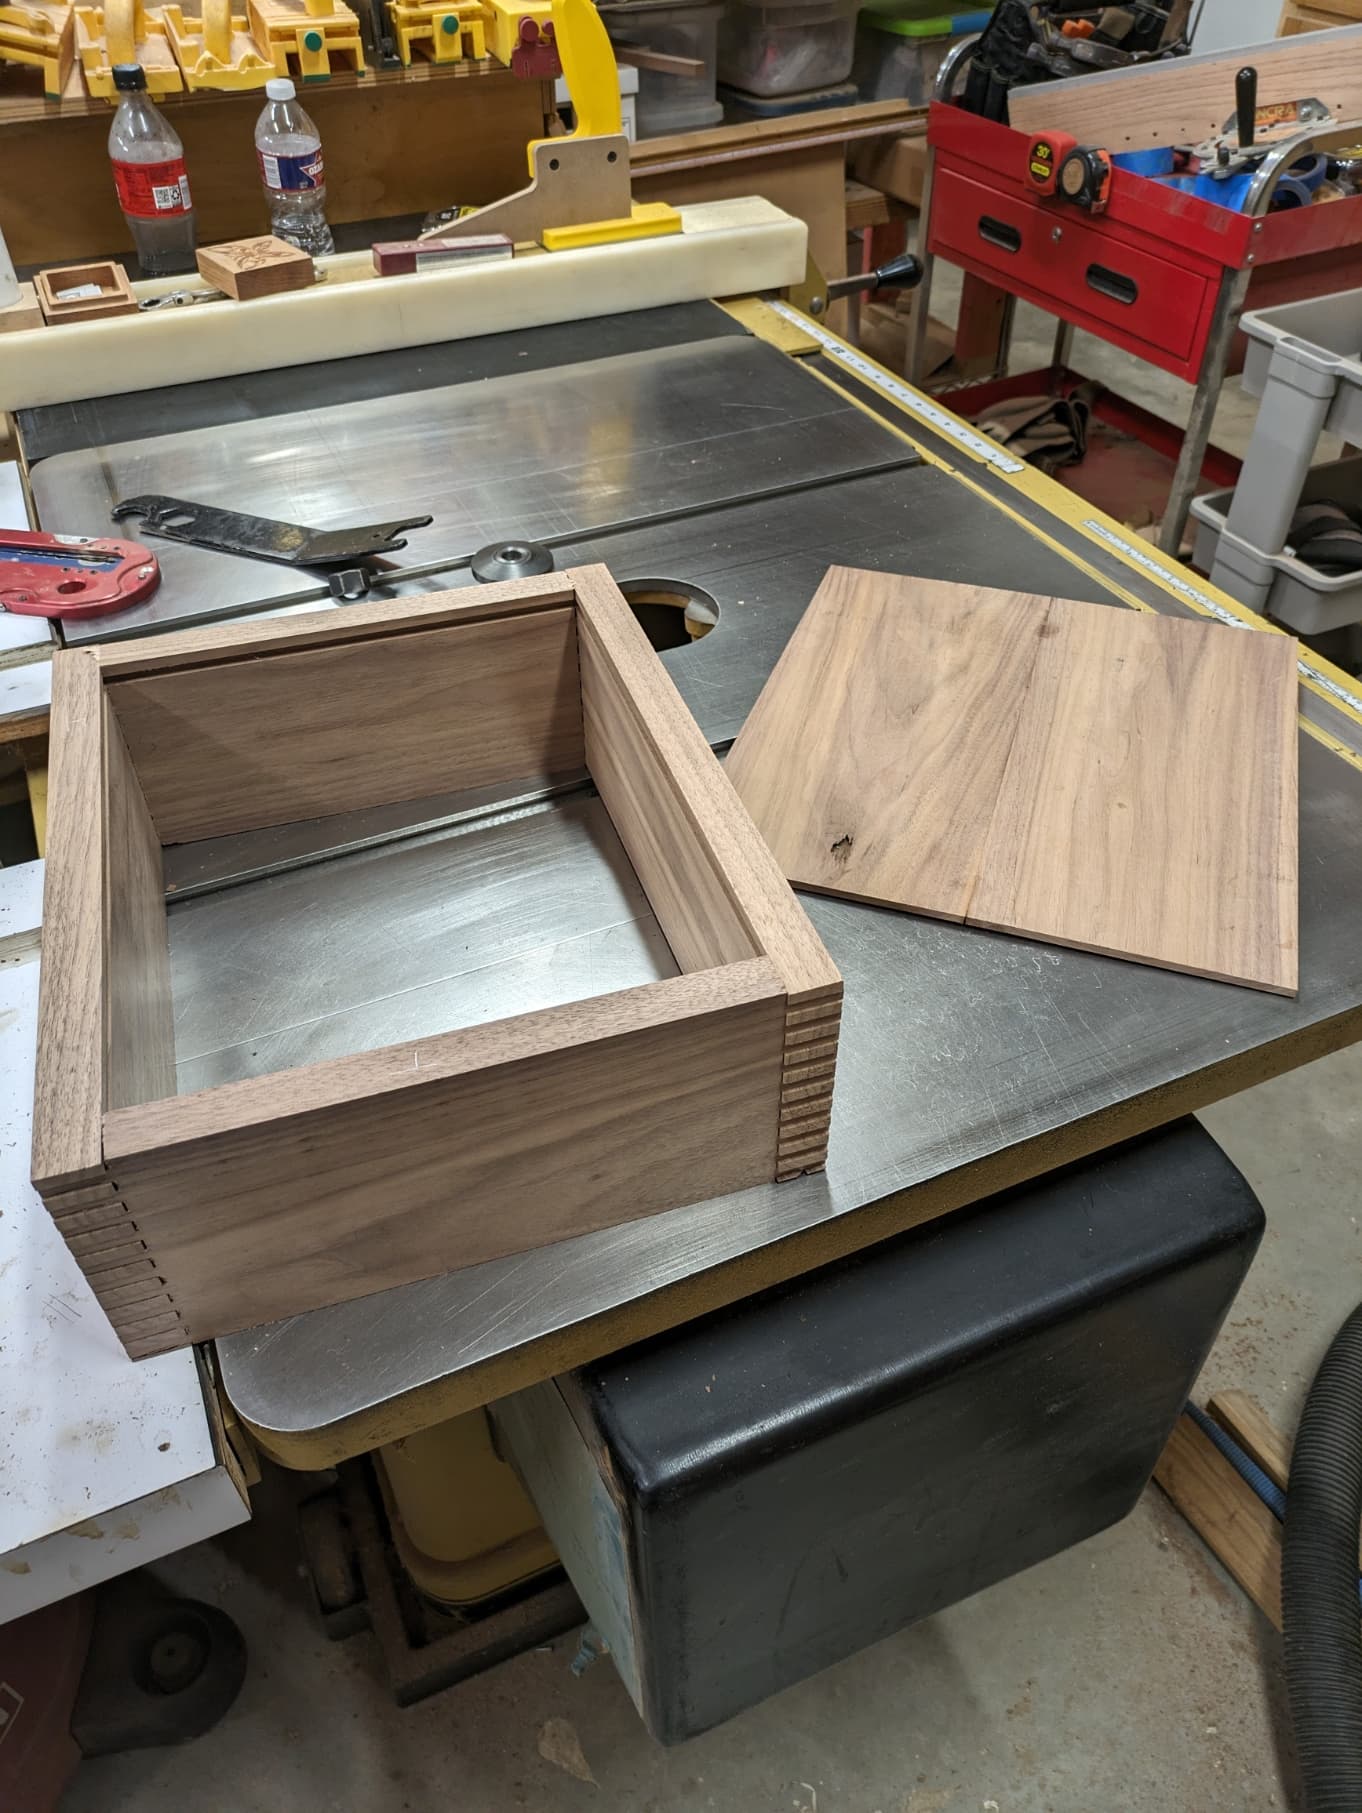
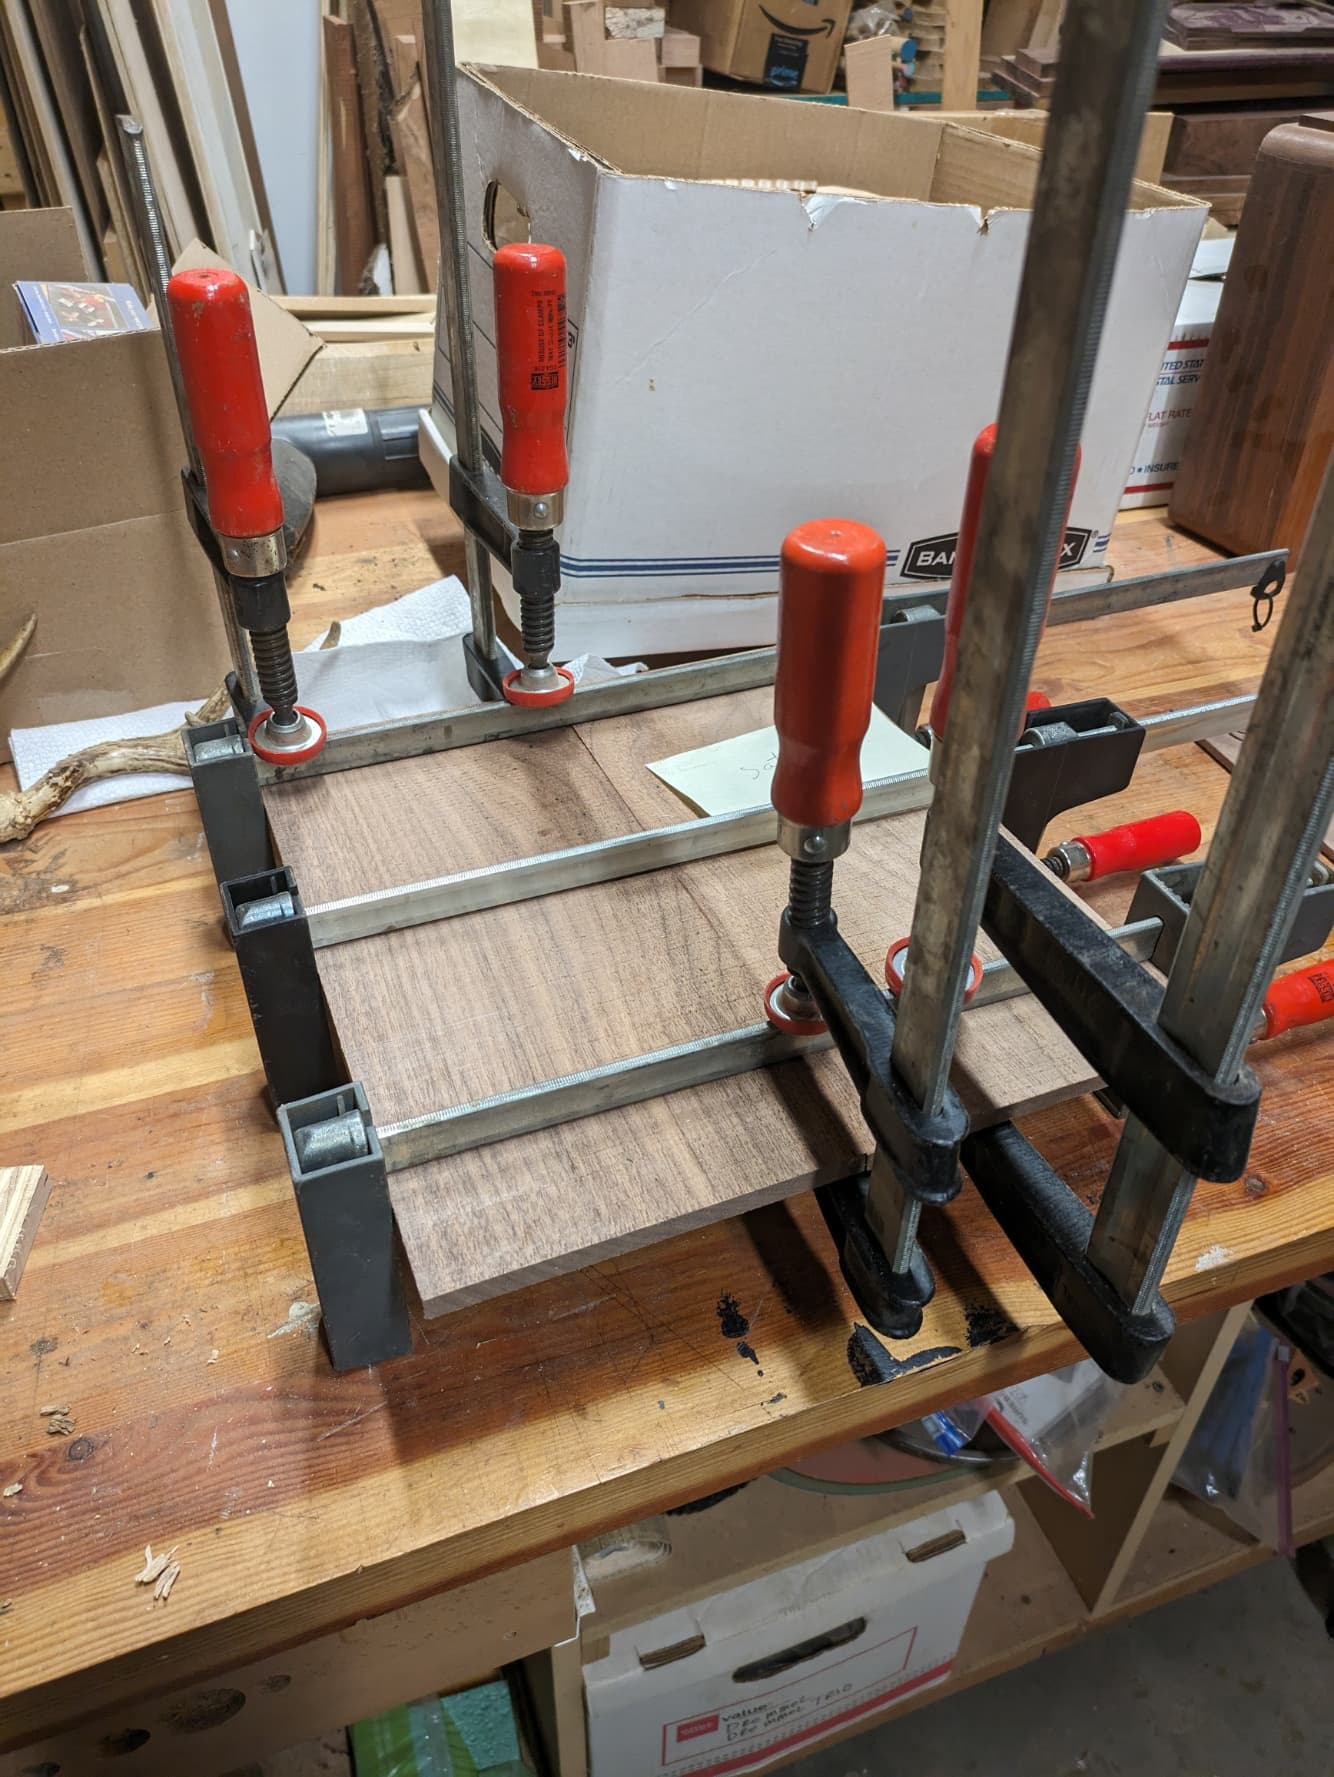
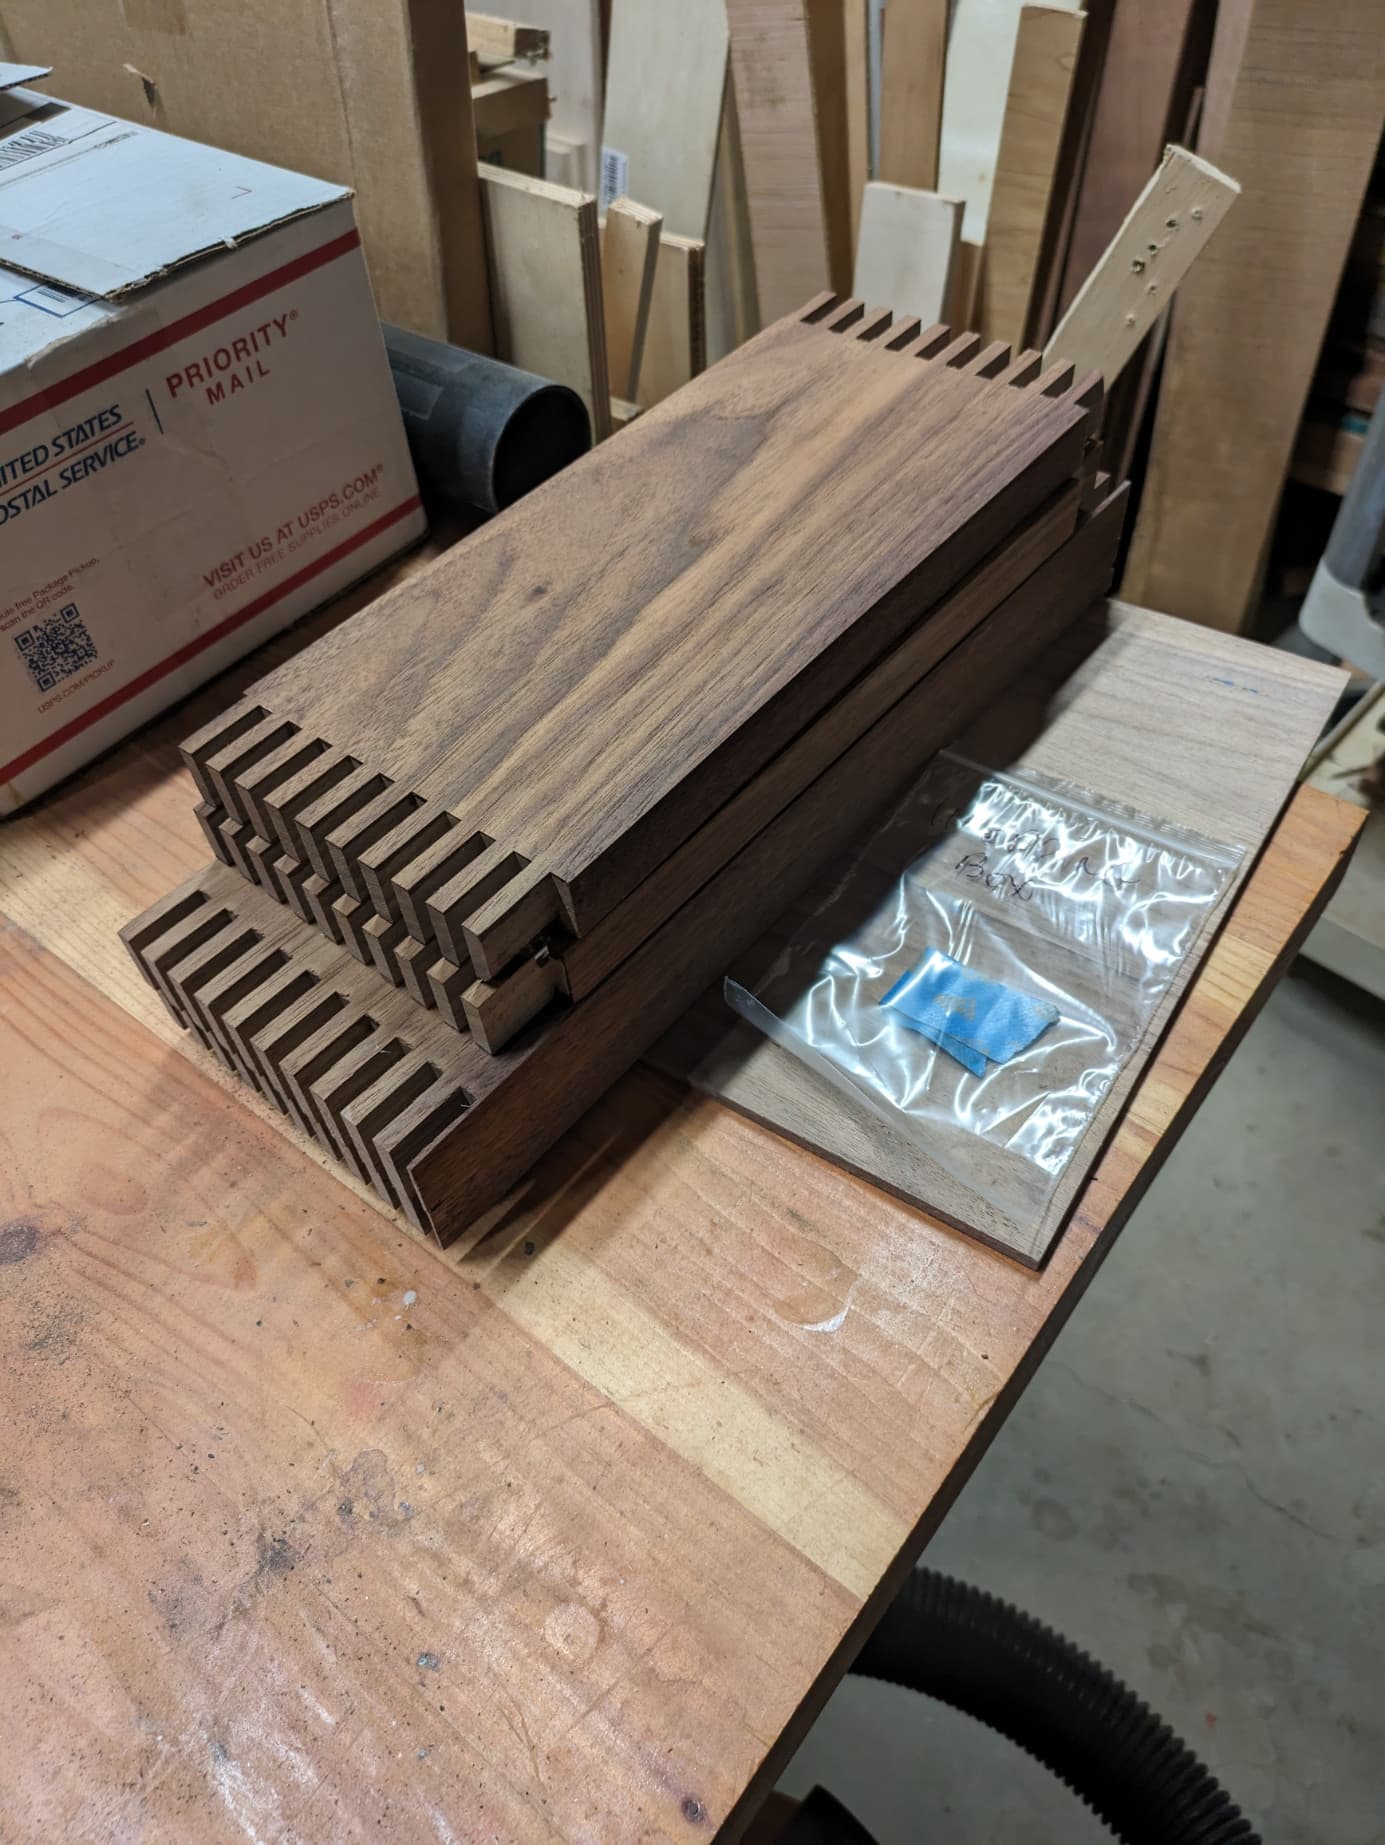
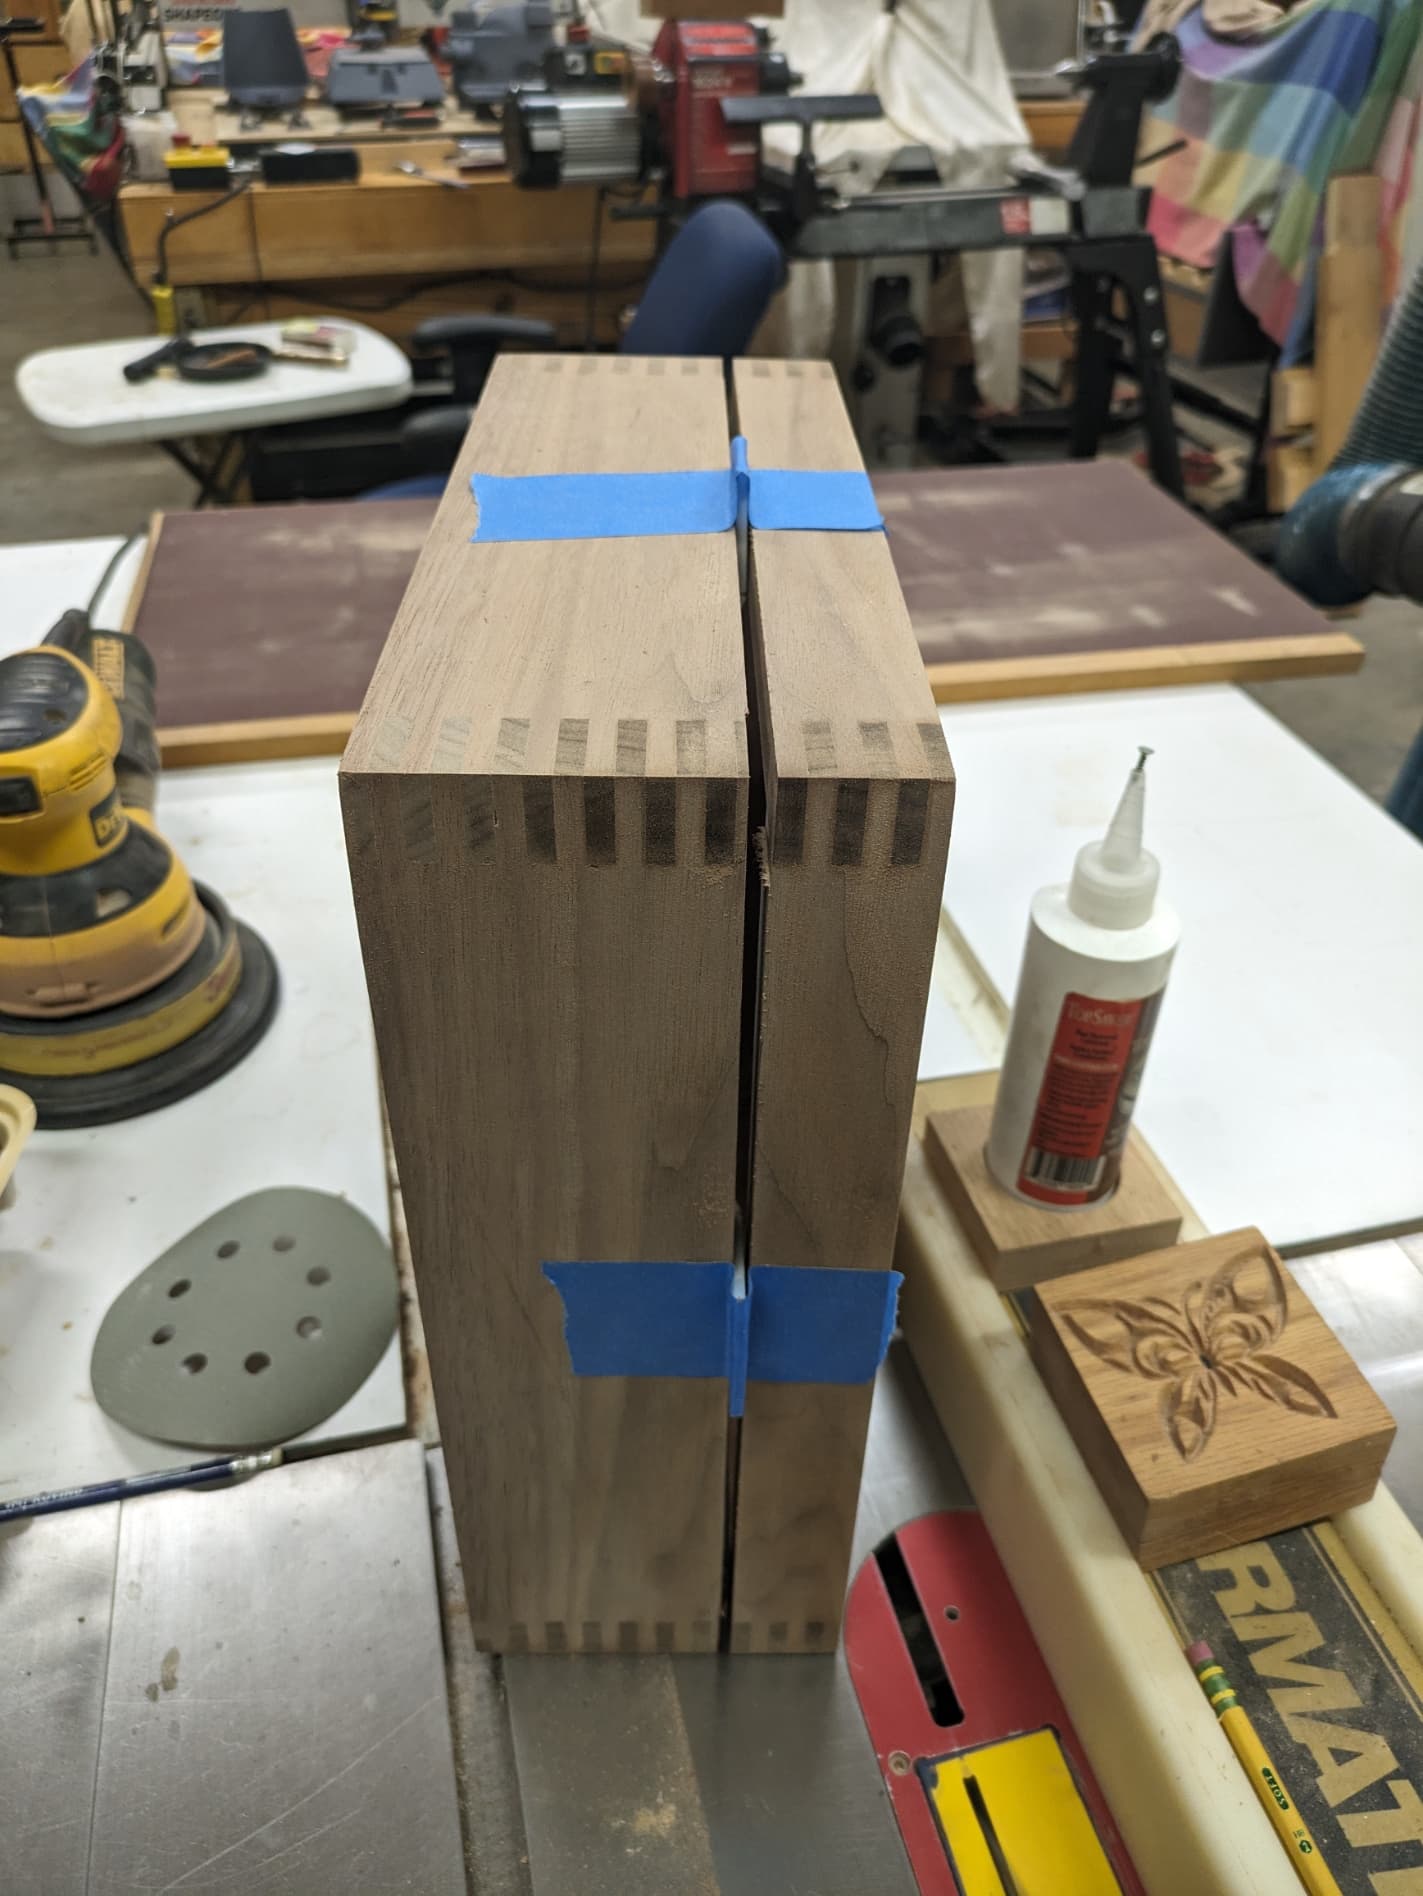
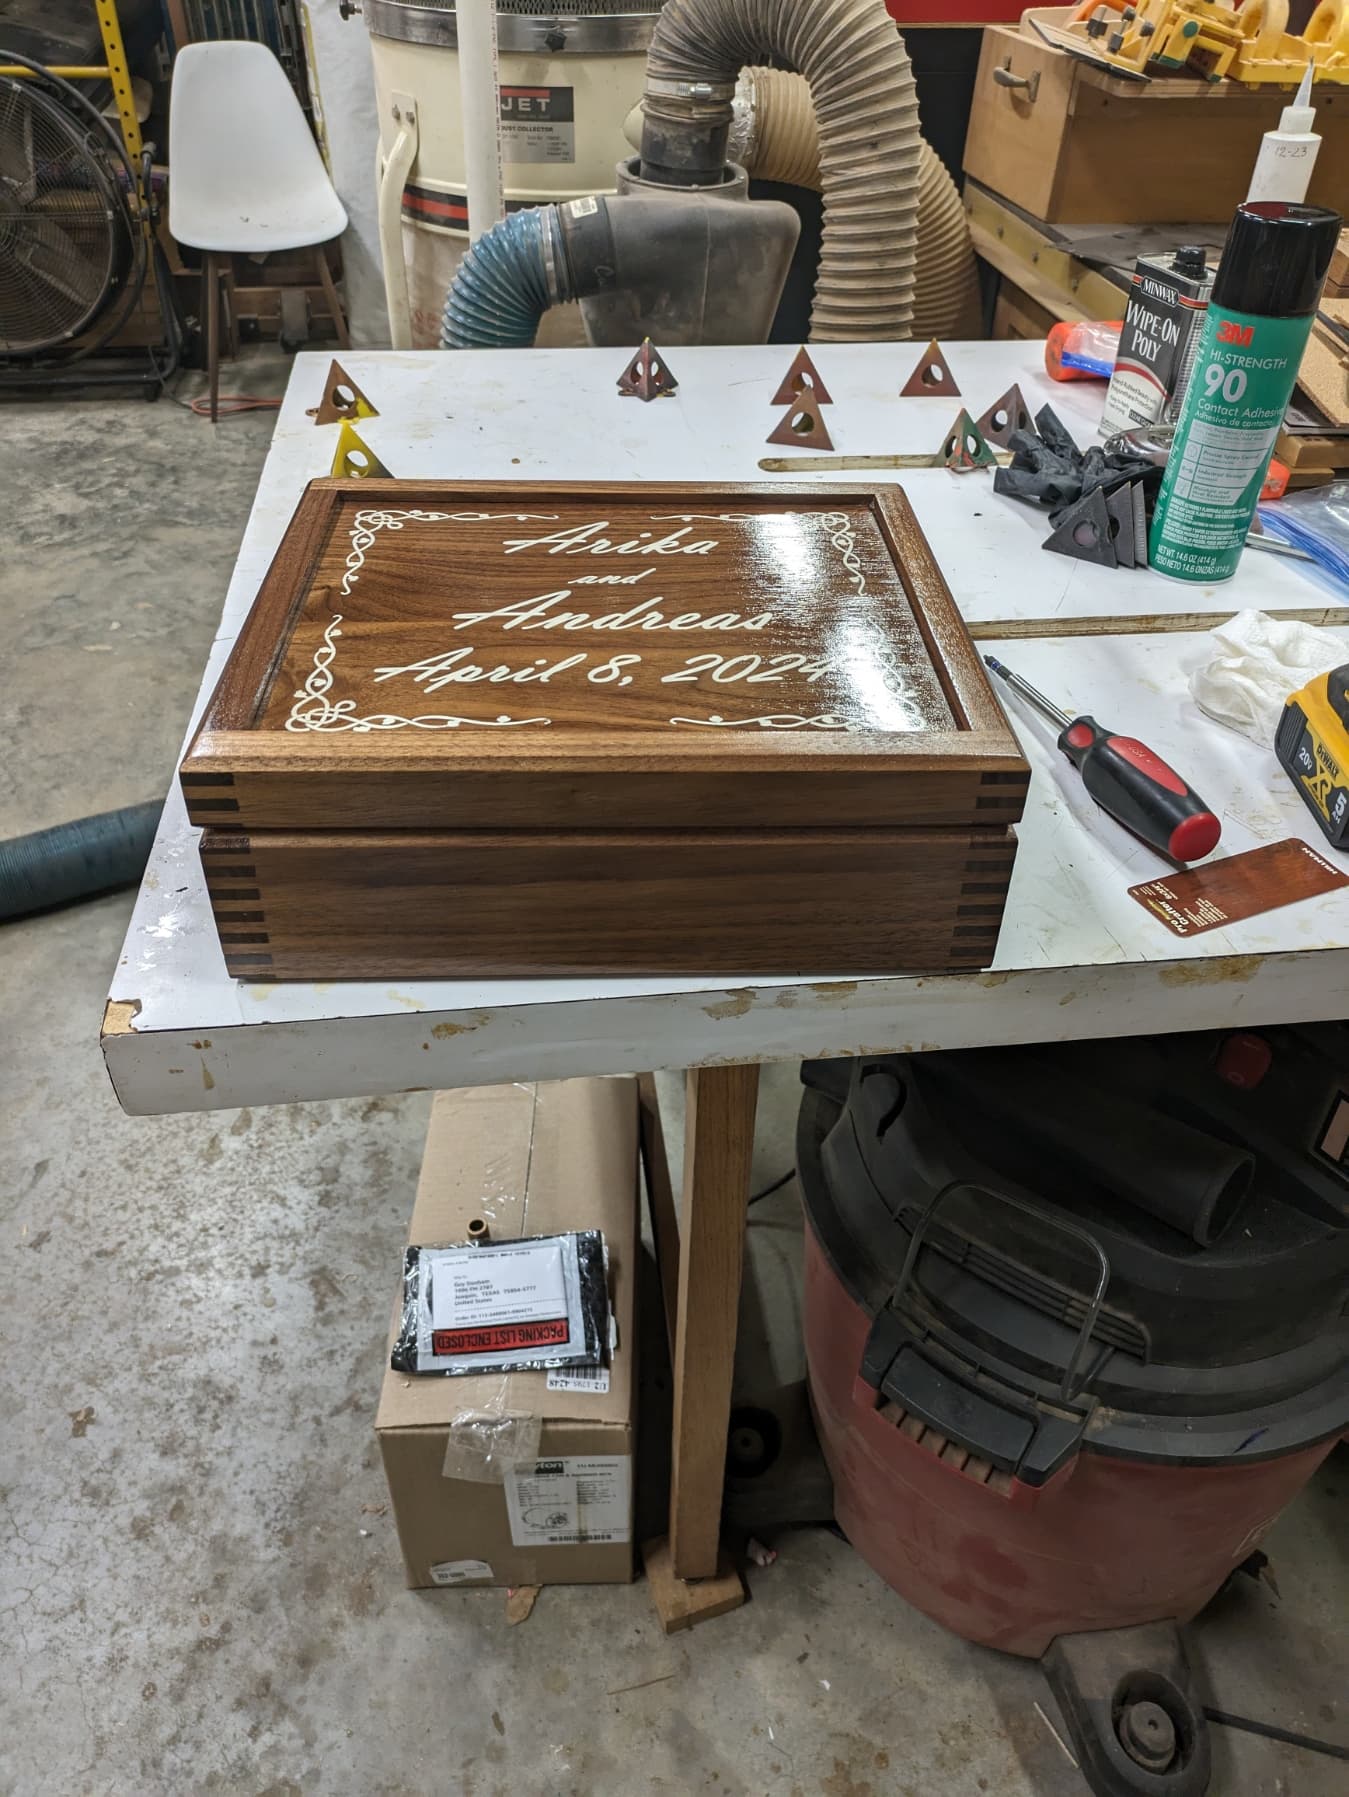
The box itself is all cut out and the finger joints applied,
I will prefinish the box top so when the captured top in installed it is partly finished. The reason is there is 1/4" dado hiding part of the top. If during seasonal changes that raw wood could be exposed. So after gluing and sanding the box I will apply dewaxed shellac to the outside and then 3-4 coats of wipe on polyurethane. During the last coat or two I will also hit the box top. The inside will get a lemon flavored wax I got from Craft Supply USA. The reason for the was is with poly every time you open the box you get a strong odor of poly. I prefer to coat t he inside with wax.
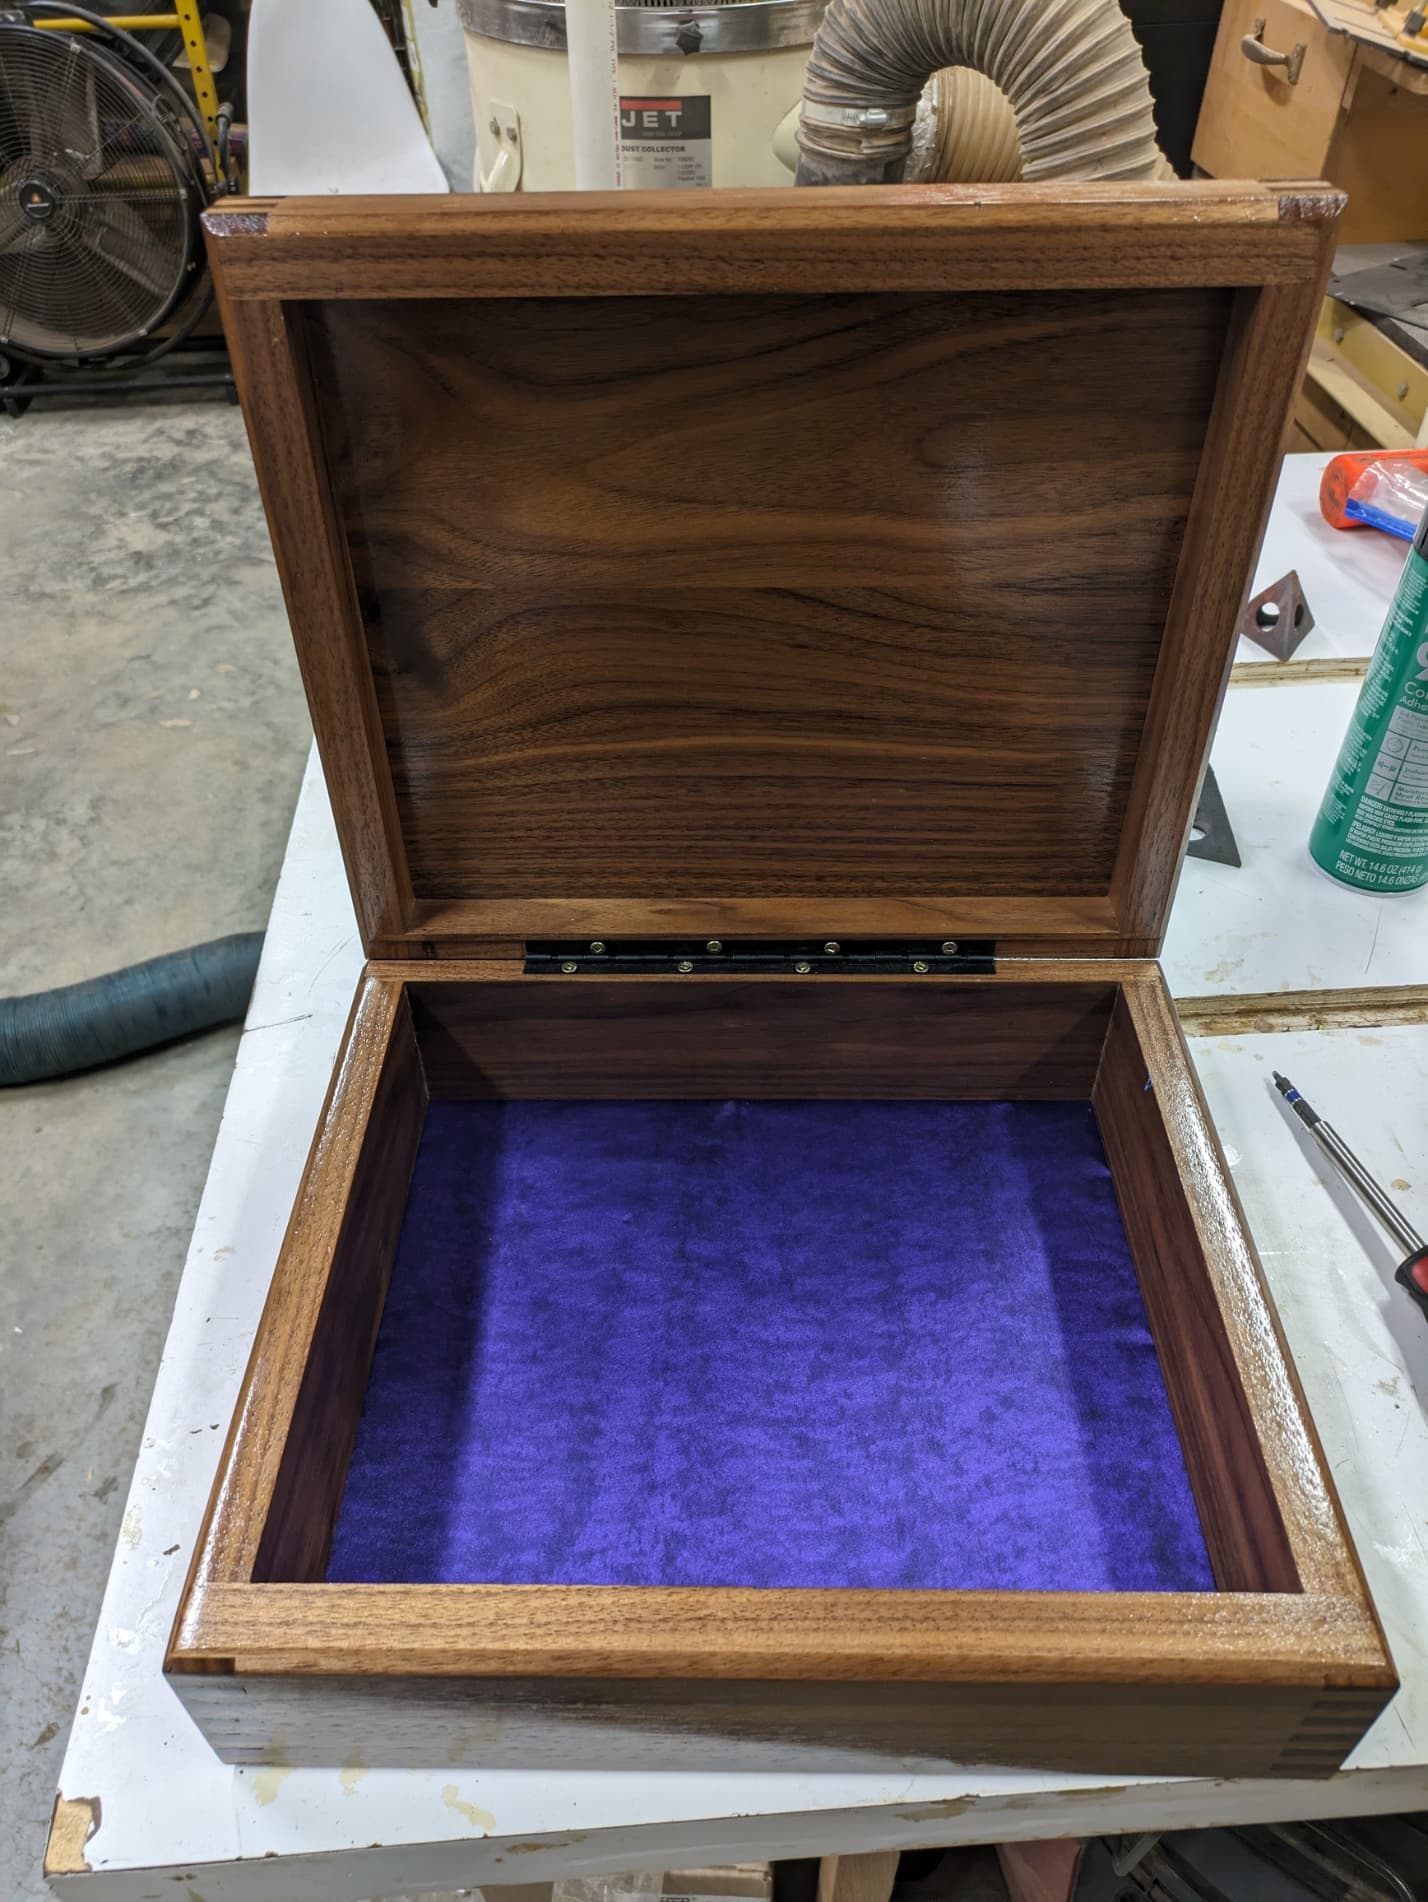
The bottom will get a 1/2" wide by 1/4" deep rabbet to accept a plywood bottom. I drill and countersink screws to hold the bottom on. The bottom will get some purple silk like material on the bottom which I will apply with 3M 77 contact cement. I have some batting that will also be applied before the material. If for some reason they ever want to change the material you just unscrew the bottom and remove the old material and put new back on and screw it in place.
Got back to work on wedding box. Here is the top. Applied one coat of dewaxed shellac and the first coat of gloss polyurethane. Will put a few coats of poly on before gluing in the captured box top.
The couple getting married are having the ceremony during the eclipse. The location is outside of Fredericksburg Texas which is in the path of the total eclipse.
Lets hope when the sun goes away it comes back.
Here is the box all cut out and finger joints machined.
The wedding box is finished and I cut down a box for it to fit into.
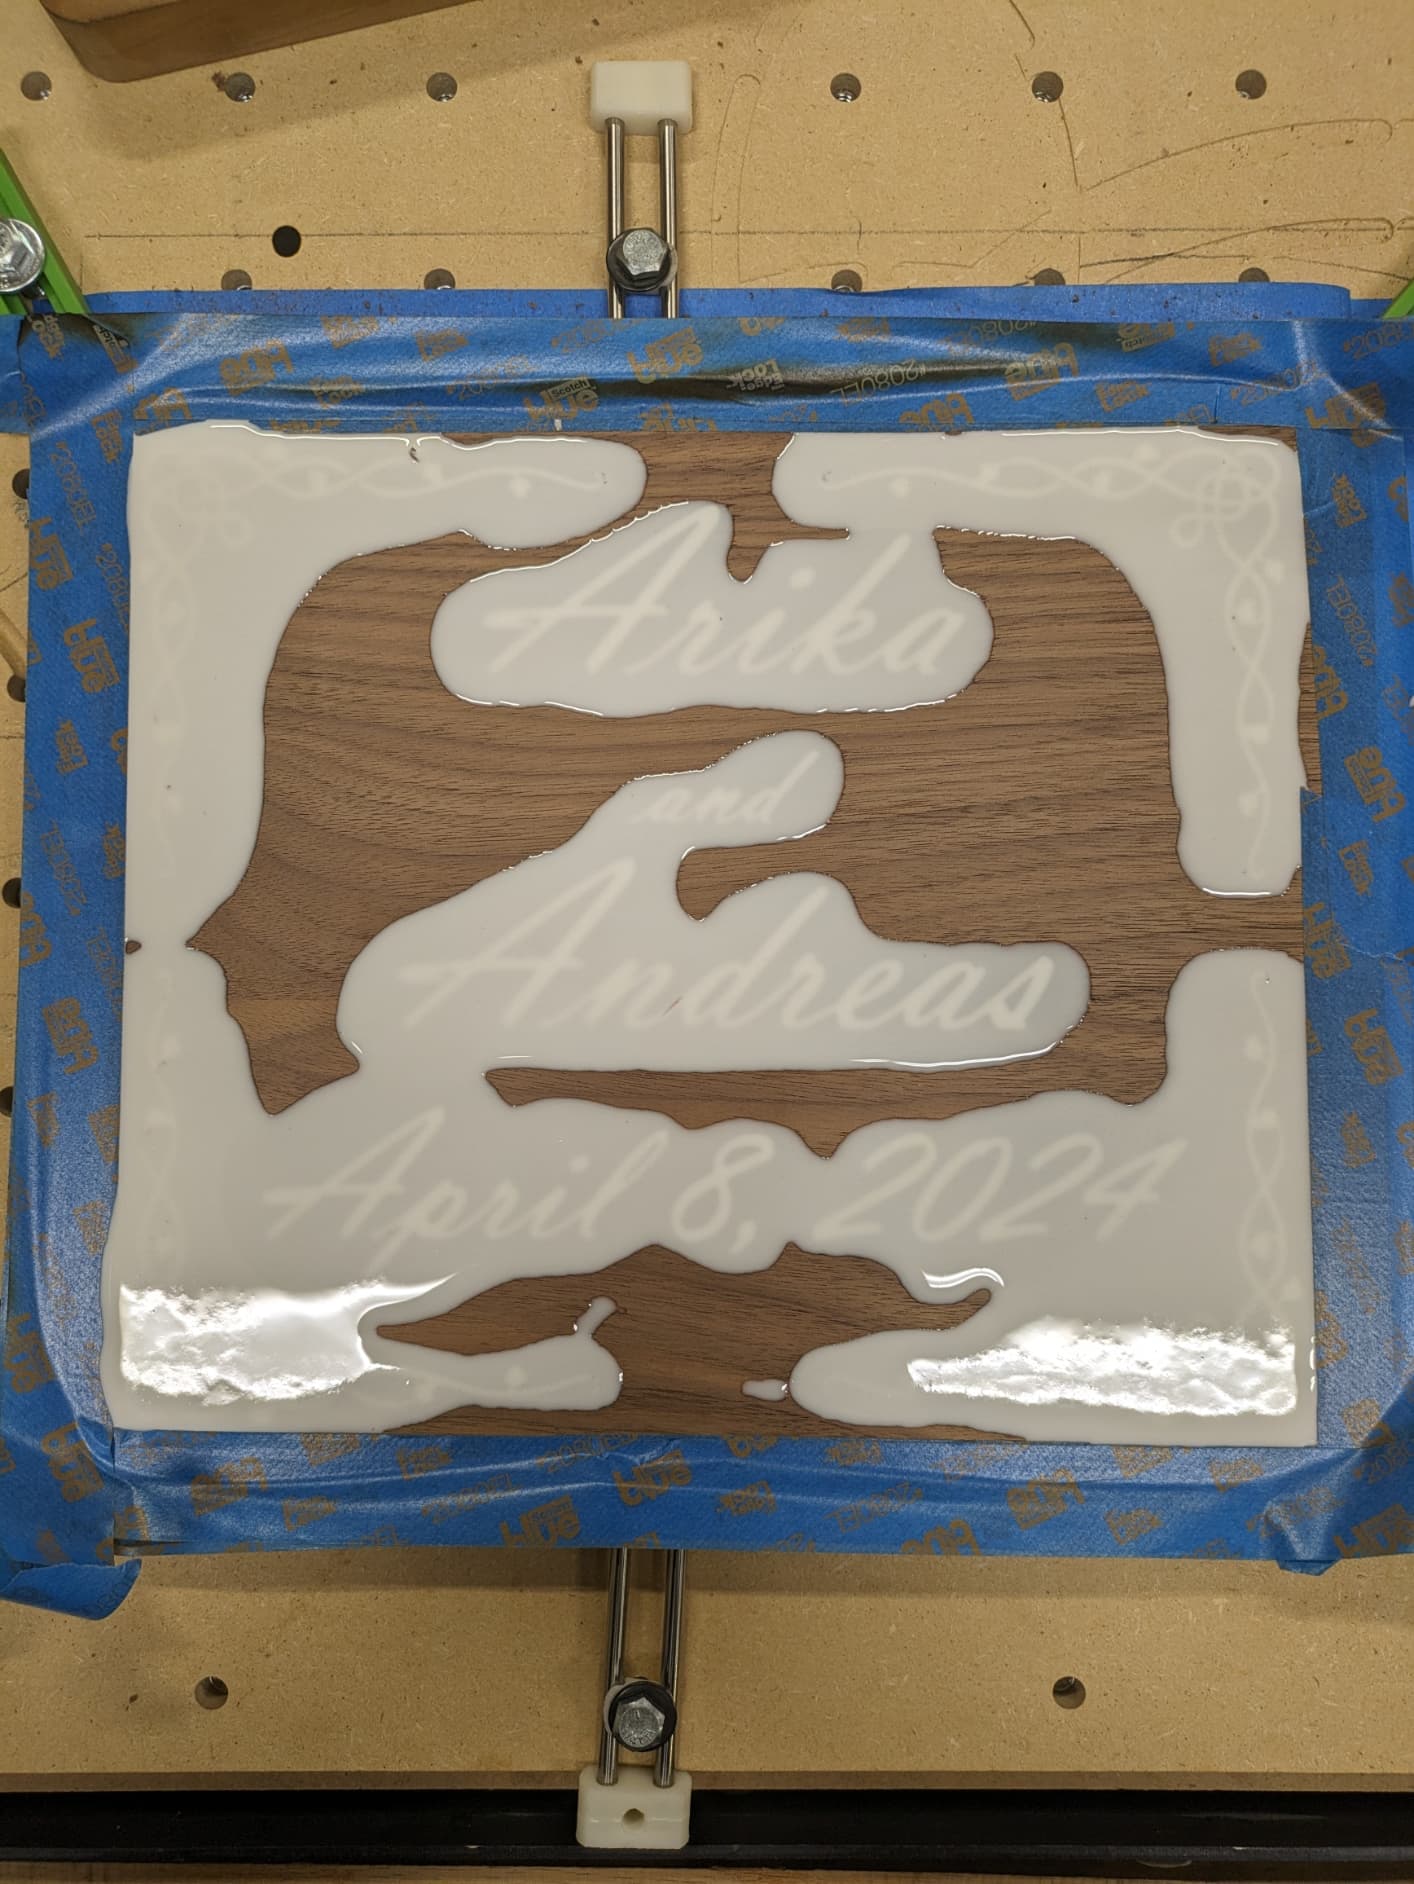
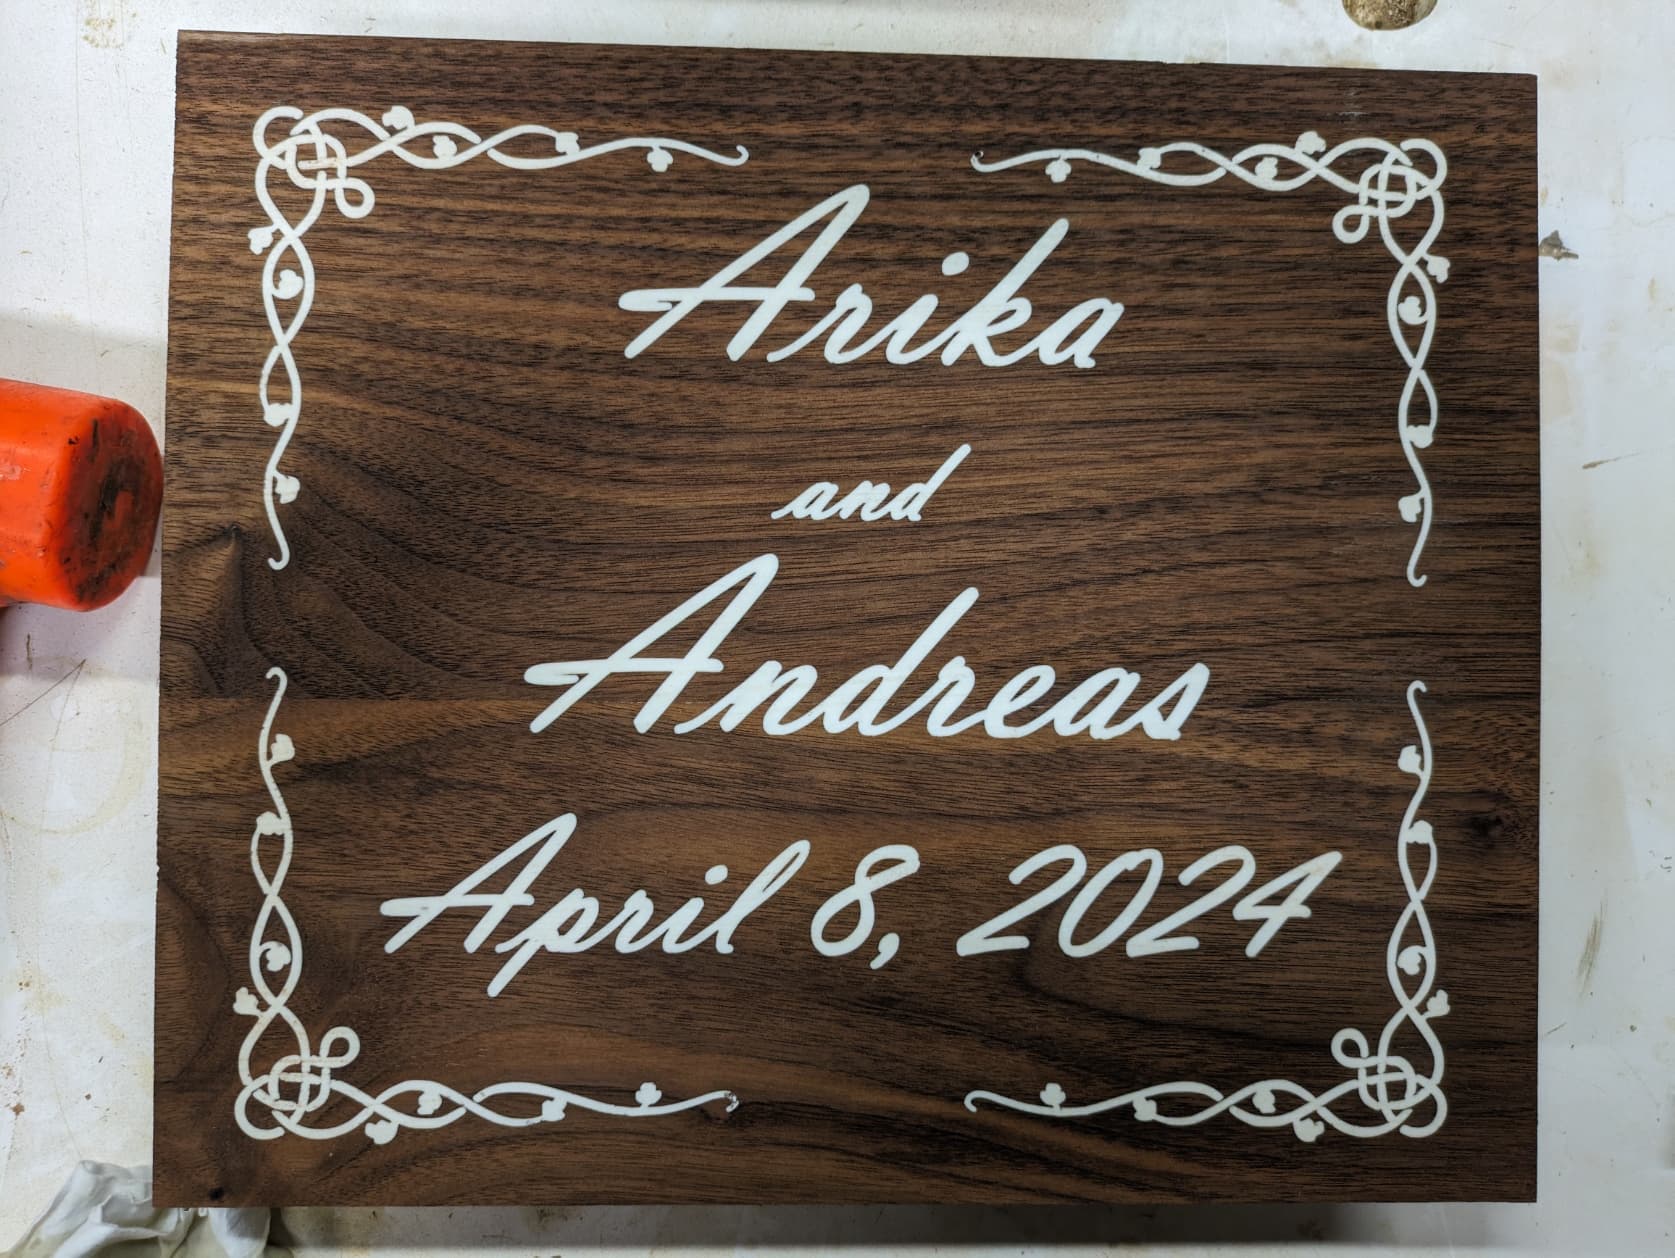
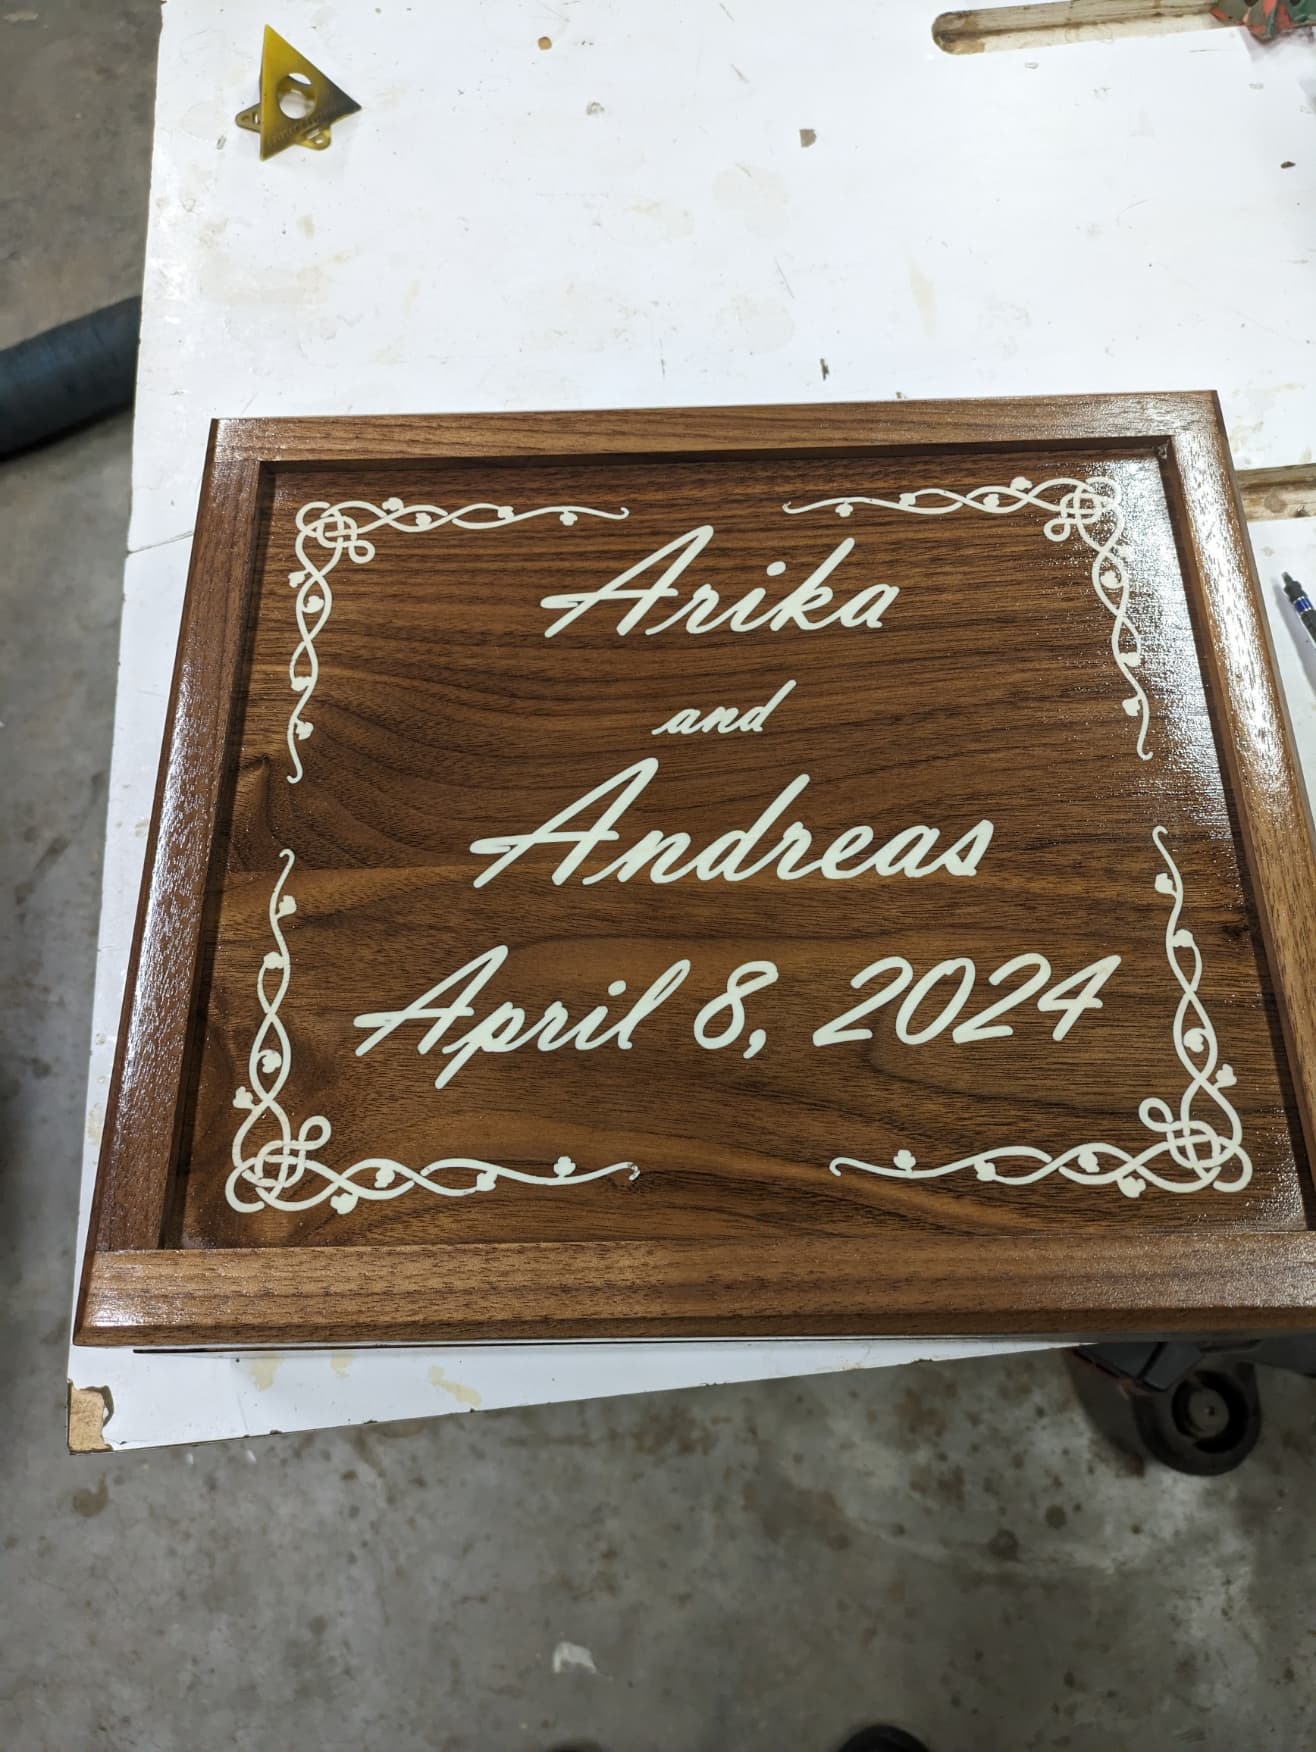
The top is advanced vcarve and took about 4 hours. It was filled with white colored MAS table top Pro epoxy. I sanded the excess off with my Jet 1632 drum sander. I prefinished the captured top with dewaxed shellac and 2 coats of wipe on gloss polyurethane. I glued the box together and had painters tape on the inside to help capture glue squeeze on the finger joints. I also put dewaxed shellac on the box itself and finished with wipe on polyurethane.
I cut the top off the box. This gives you good grain match. You can try and make a top and bottom separately but if one is out of square it never fits together well. I cut a dado on the back for a piano type hinge and was just a little less than half of the hinge height. This makes sure when the box closes it is all the way down in the front. The champher hides any irregularities. The back champher is slightly bigger than the sides and front. This makes a secondary stop for the 105 degree hinge. People can flick the box open and break the lid off the hinge.
I leave a little ledge in front of the dado to give me a positive stop to get the hinge on square to the box. I used vix bit to predrill the screw holes. There are 8 total holes in the hinge and I put 4 #6 5/8" screws to test the fit. When completed I put 8 #6 3/4" screws in to secure the hinge.
I also put in some purple silk like material in the bottom with some batting to give it a slight cushion. I had to get the iron out and knock the wrinkles out of the material. I used 3M 90 adhesive. I had not used that before and had used 3M 77. The 3M 90 sprayed out much better with less over spray. The bottom is applied by dadoing out a 1/2" wide 1/4" deep groove. I put a mark on one side of the box and one on the bottom. That is to index the holes I countersunk on the drill press.
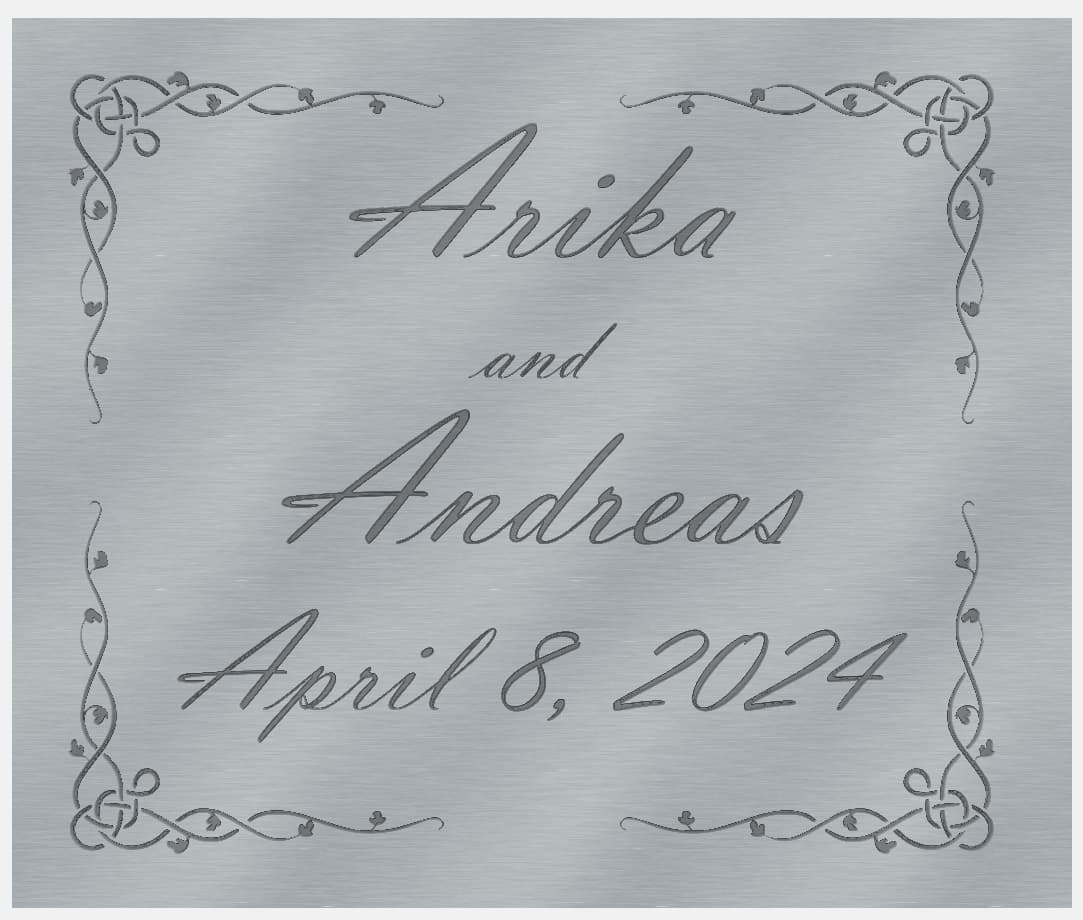
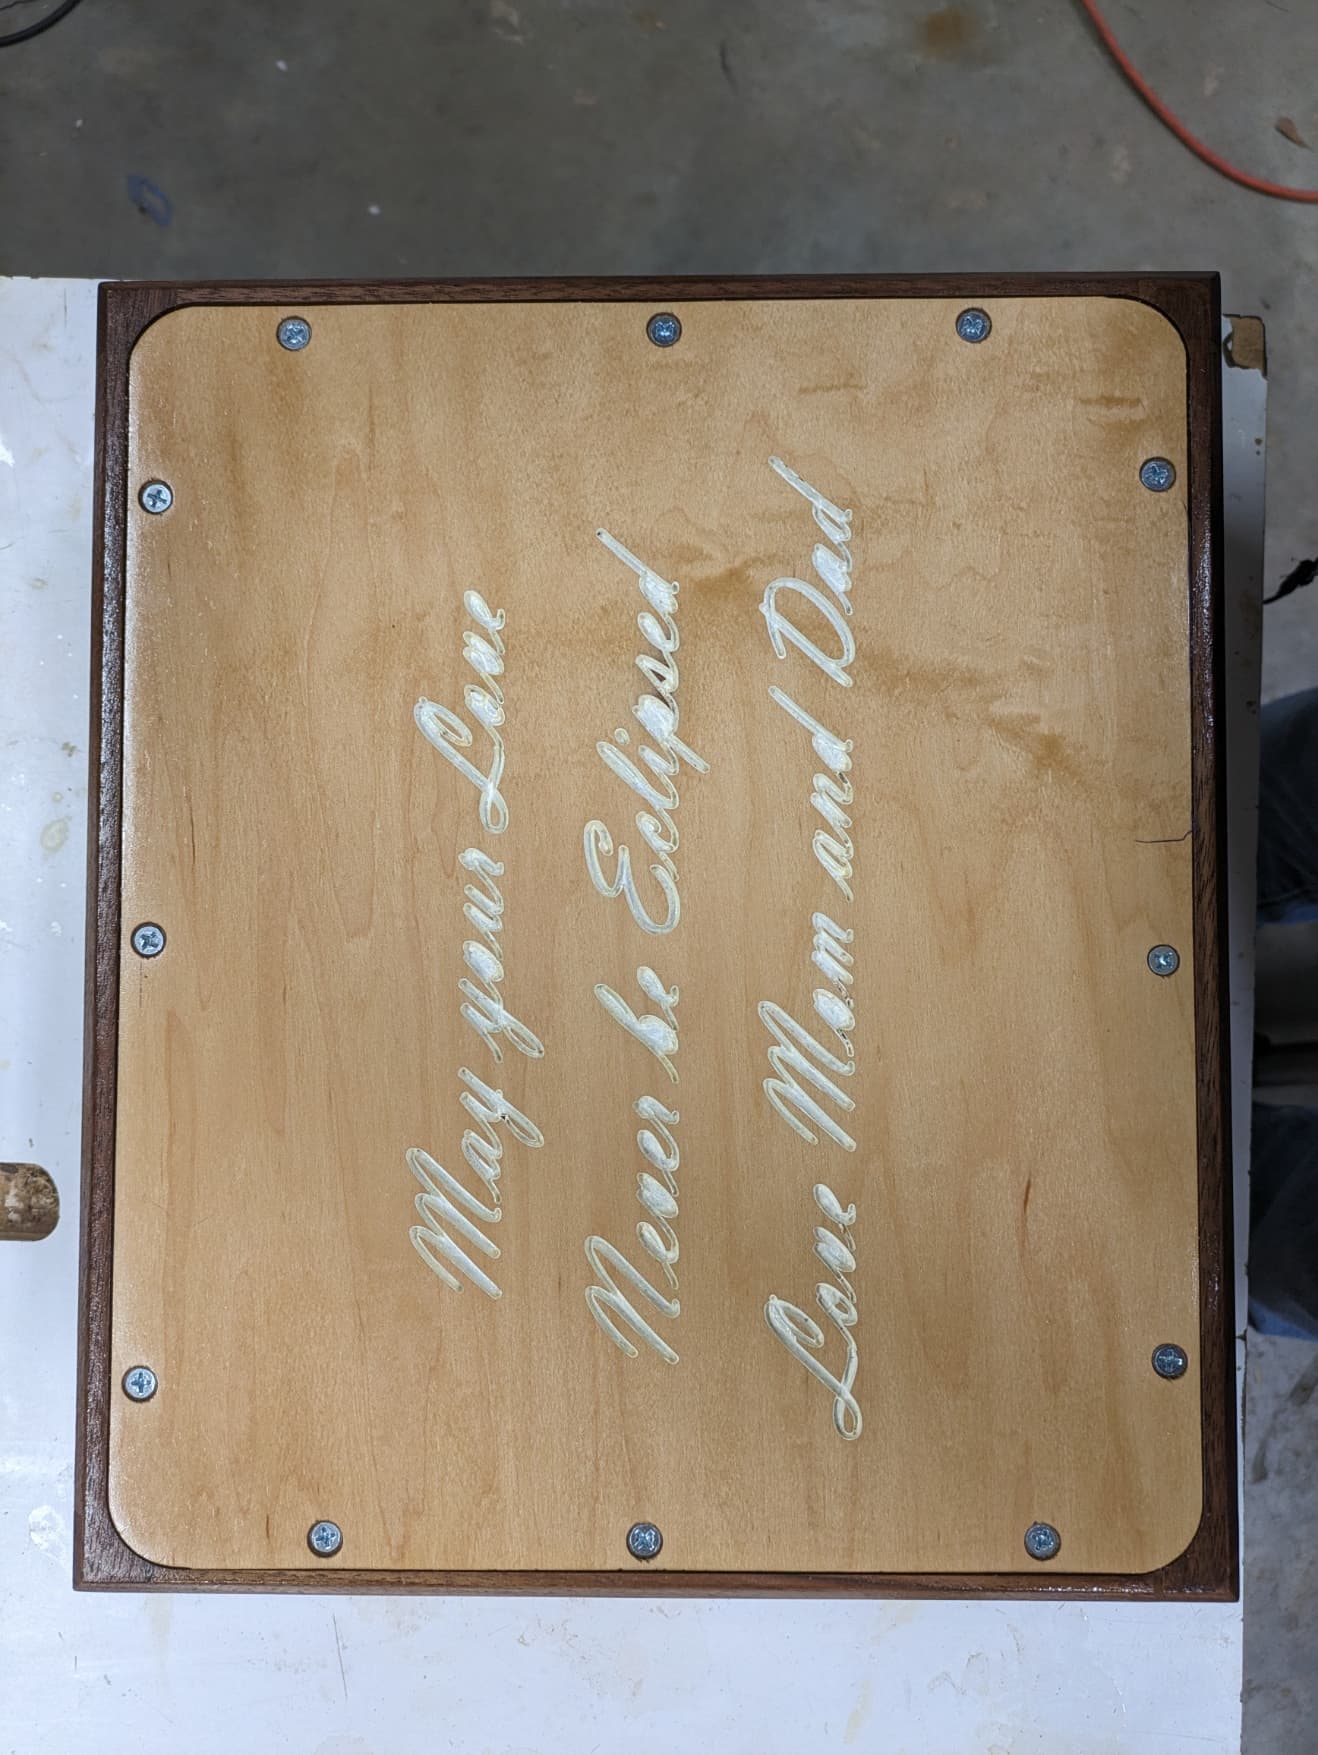
The commissioner asked me to carve on the bottom of the box an inscription. The couple are getting married during the April 8, 2024 eclipse.
I am always glad when a project is finished. I will deliver this week to the owner’s father. I am always enthusiastic to start a project and then it drags on. Just glad it is finished and I can move on to other things.
Nice work. Today I was asked to build a wedding box. I was thinking “inlay” until I saw this, but I haven’t tried inlays nor epoxy. Would it be practical/feasible to inlay names and dates, instead of using epoxy?
I have given up on CC inlays. Some people have been successful but not me. The MAS table top pro and white coloring were used and is quite easy compared to inlays. The trick with colored epoxy is to add a little color and add more until the shade is desired. Putting too much color in darker colors winds up appearing almost black. The table top epoxy is good to 1/4" and this carving was .15". I applied it about 10:00 PM and sanded it off about 5:00 PM the next day. If you have a deeper pour that type of epoxy takes up to a week to cure.
I had made inlays using the Vetric method which is to start the male inlay at .10" below the top of the material. That works because the inlay is slightly smaller than the pocket so the male inlay seats down well in the inlay. However it leave a very large air gap below the male inlay. The CC version works if the inlay is not too complicated. Partly that is because of the nature of wood. Wood tends to chip out and that can leave gaps along the edges of the inlay. Plus I dont think the CC inlay tool path is really ready for prime time. I have watched and followed fenrus’s user guide but still have not been successful with the CC method.
In a way an epoxy fill is faster and easier than the inlay. You dont have to cut the male inlay and the drying time is similar to the epoxy drying and the glue drying on a wooden inlay. So there is a net gain in time and energy making epoxy inlay.
So I have seen some beautiful inlays here on the forum so it is possible but frankly I dont have the patience to figure out the correct procedure for getting a good inlay that fits well. Maybe some day but any day soon.
A successful inlay in wood is made with a v-bit. It isn’t difficult, but has a procedure to follow when making the male and female parts. The procedure started out with the famous Zank method years ago, but now has even been simplified from that.
Which brings me to a question (not a criticism) for the epoxy filled method. I ran into this question in my mind when inlaying some Corian (plastic) into a four square inch item. I think it applies to epoxy fill as well since it becomes a hard plastic-like substance after curing.
Will the natural wood movement break the bond with the epoxy/plastic before the marriage is over?
What will the epoxy/plastic inlay look like in 10 years? For my project, I’ll have to wait and see.
That is an important consideration! My project is a wedding box time capsule, which will contain a bottle of red wine and personal notes from the wedding guests. It will be locked, to be opened on their 10th wedding anniversary. So I want it to look good in 10 years.
Wood movement does happen but not enough to break the bond of epoxy. If you get that wood movement I think even wood with PVA glue would break.
Check out this site about wood movement. Remember most of our work is in air conditioned spaces where the relative humidity is stable. That does depend on where you live. If you live in Arizona desert it is very low. If you live in Maui Hawaii by the ocean that is different. Places like Seatle Washington until recently did not have a lot of air conditioning in homes. It is becoming more standard but Seattle has a mild climate. So you have to take where the box will live into consideration but a wood inlay or epoxy is likely to last longer than the box itself.
The real key is the moisture level in the wood when you are making the project. Green wood will shift tremendously as it dries where kiln dried wood is more stable. The most stable wood is air dried wood. Wood goes through a lot of changes in its life after being cut down.
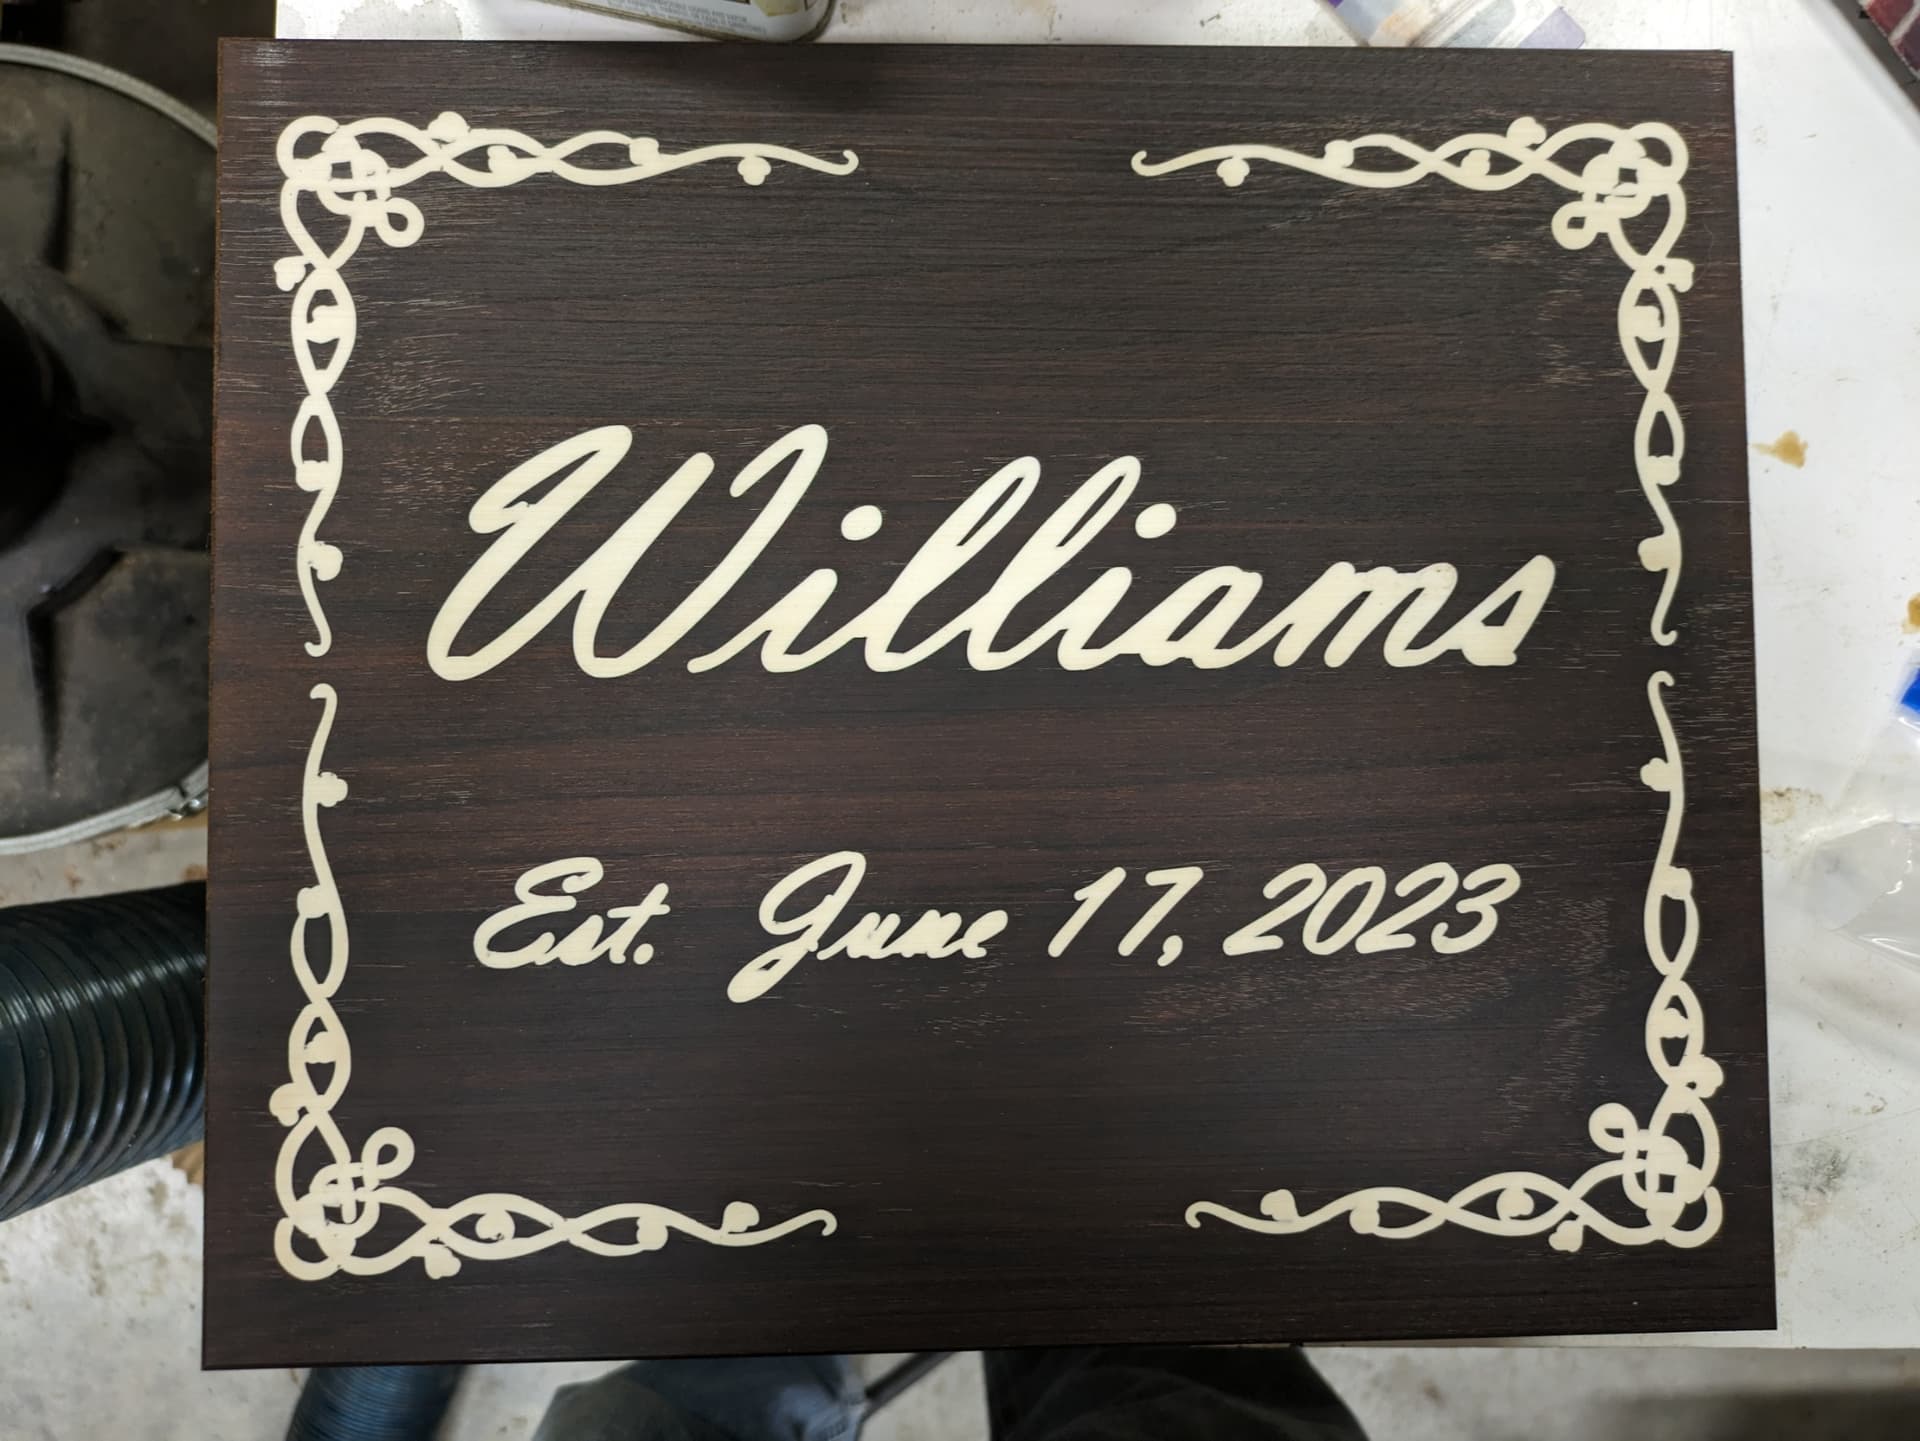
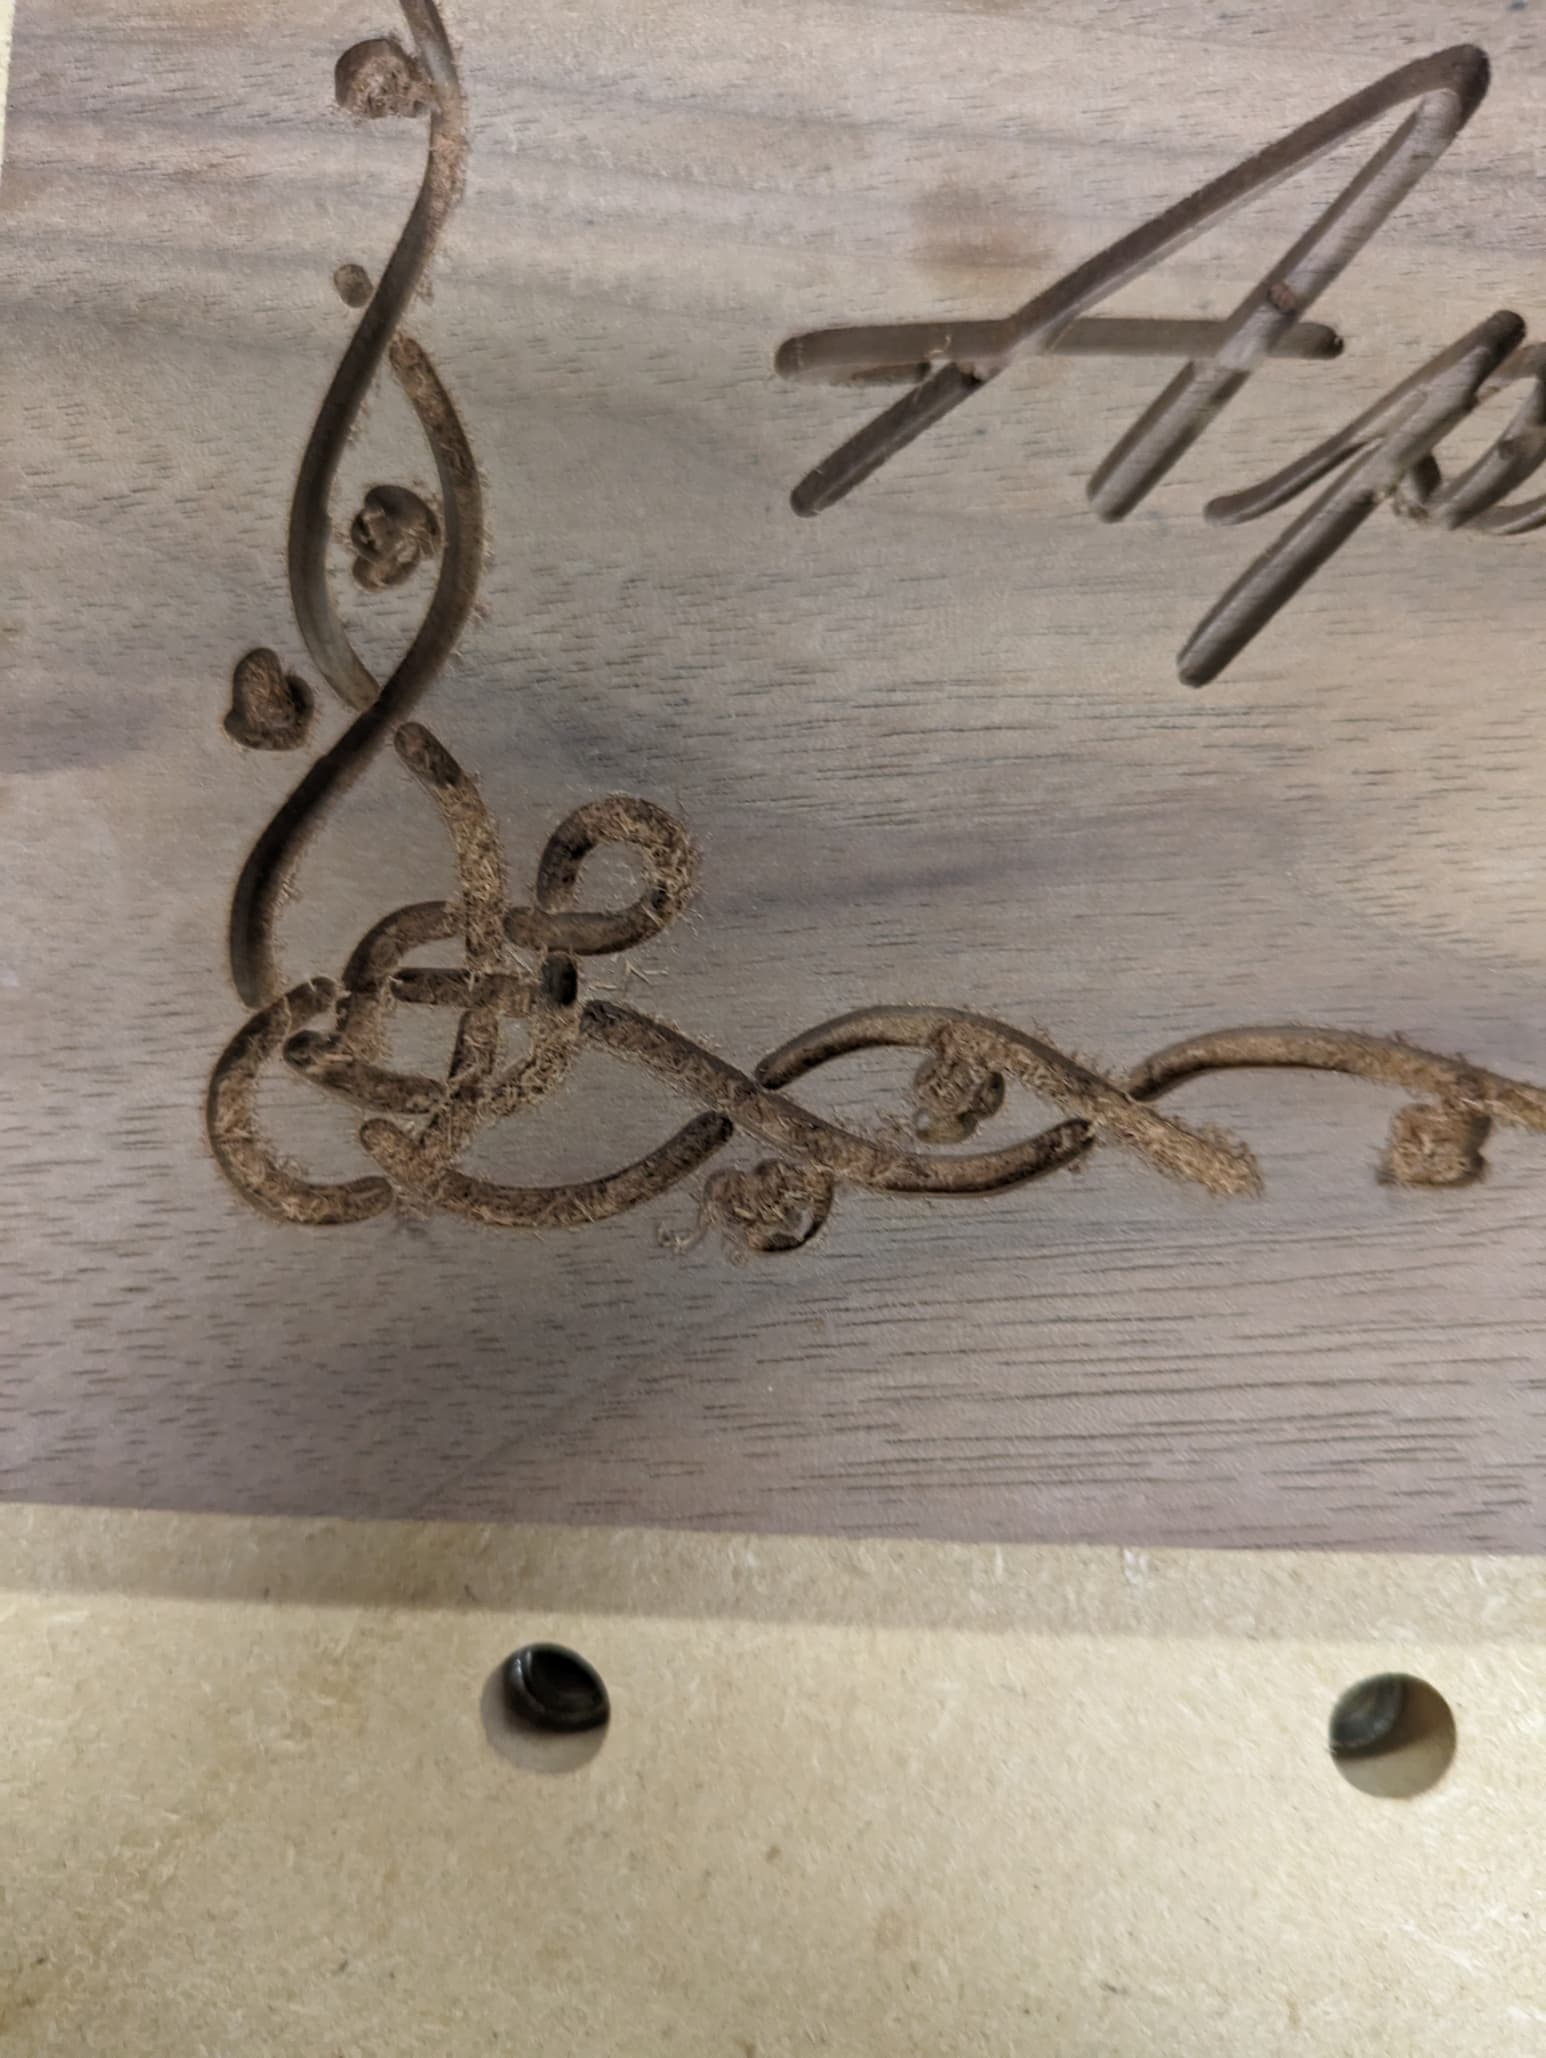
I recently did a project for a friend using the SignPainter font. He found it on his Mac and liked it. I found it online and was able to download for the PC. It looks similar to the one above.
We used the name “Paulson” and were cutting out the letters to hang on the wall. The P was disconnected and there was no join between the o and the n so I drew in some vectors to join them.
I think these came out beautiful, doesn’t appear that you stained the wood? did you varnish over the epoxy? I’m new and still trying to source some better wood than the BB stores offer. I have a few weddings this year and would love to do some boxes and plaques.
The Wood is walnut. I don’t stain most wood. The box got primed with dewaxed shellac and gloss wipe on poly. The person I made the box for asked for gloss but I prefer satin.
Between the shellac and oil based poly it warms the wood tone.
The epoxy fill was dull as dish water before poly.