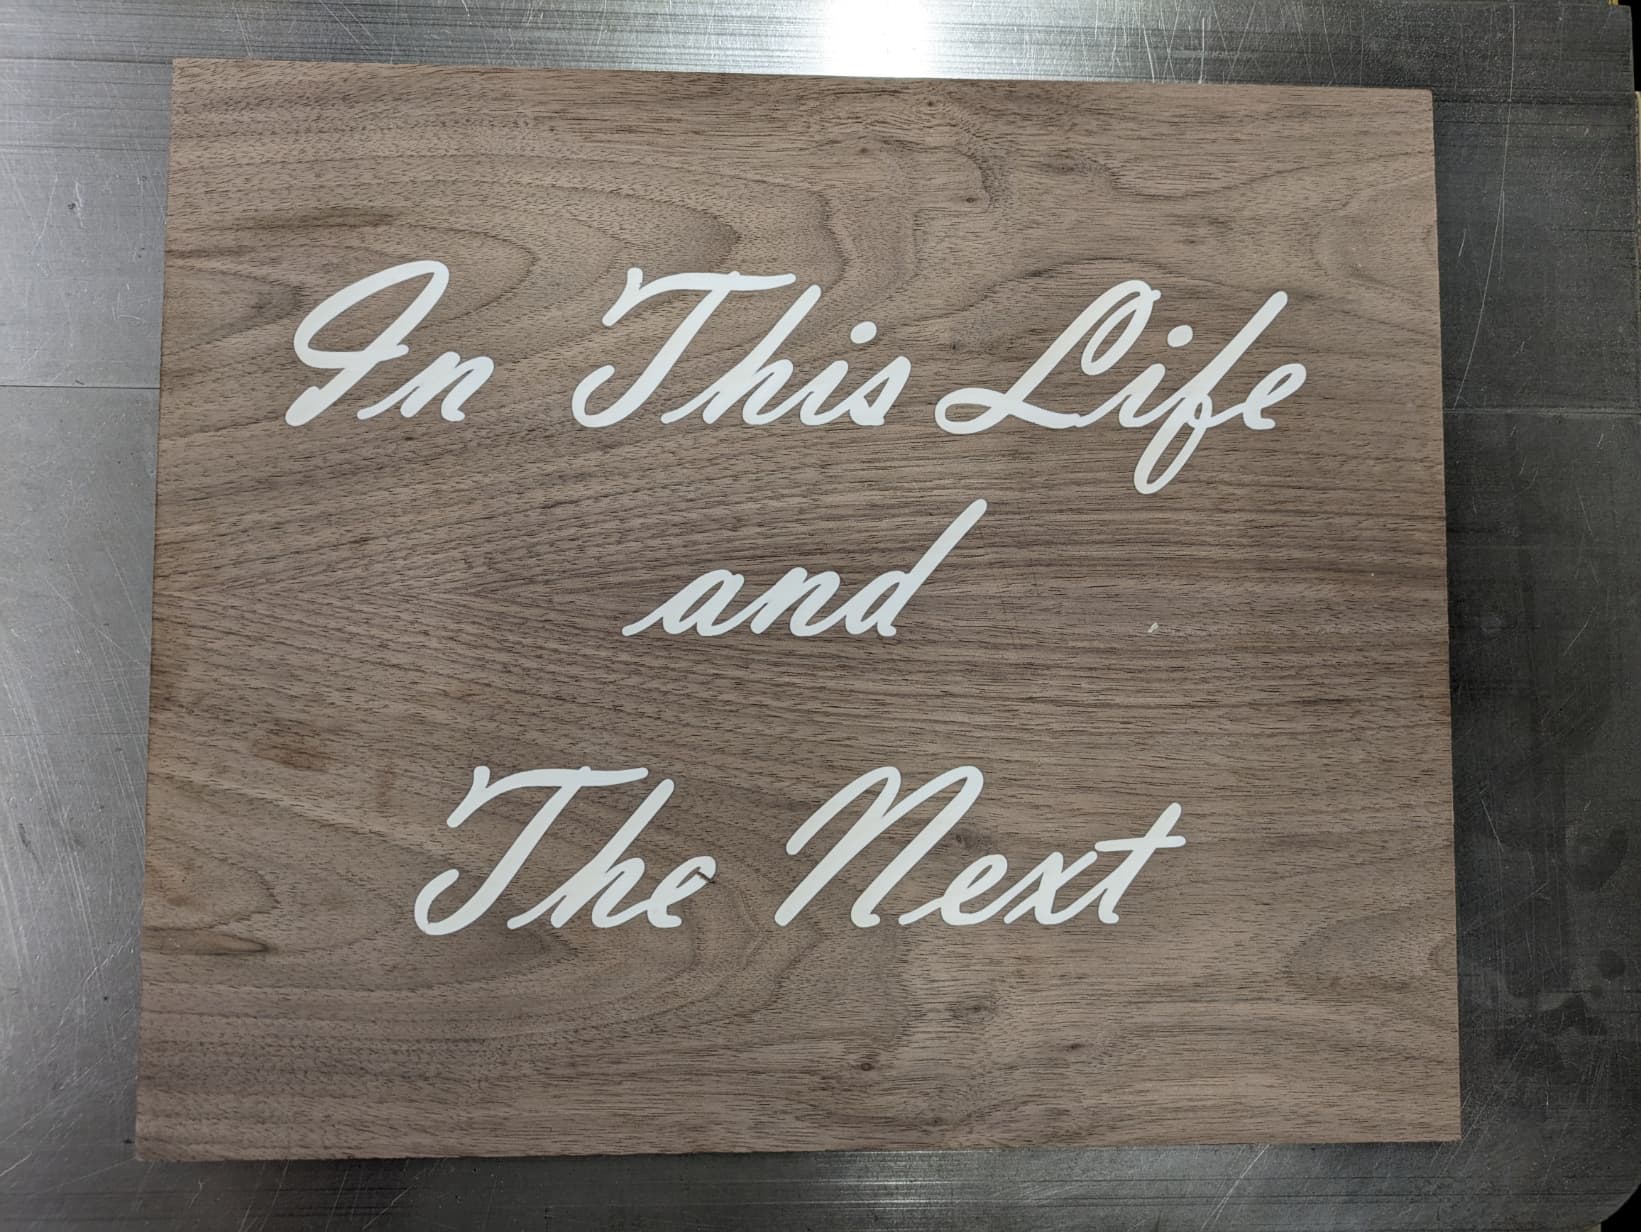
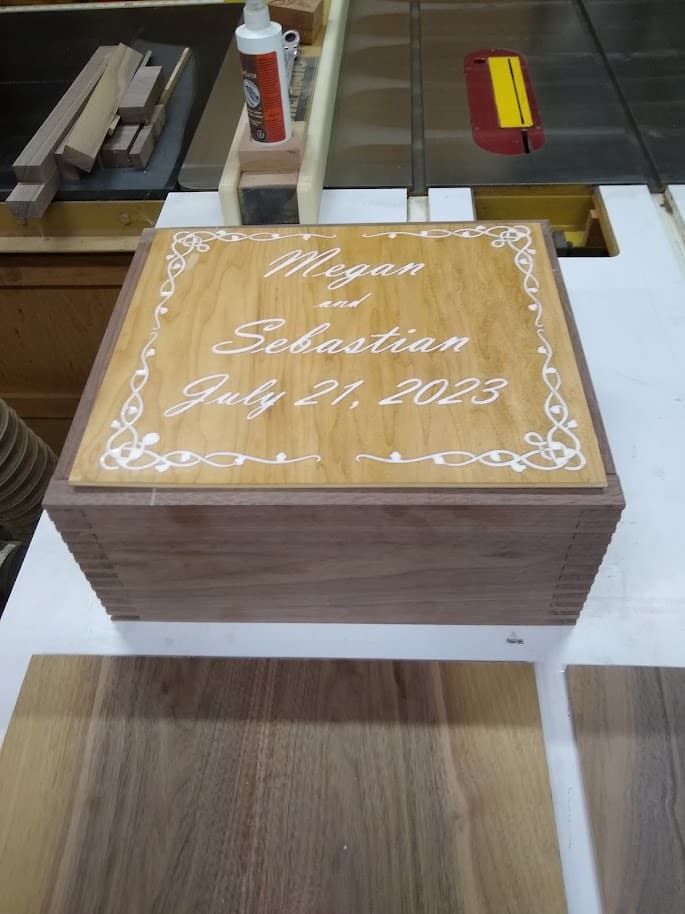
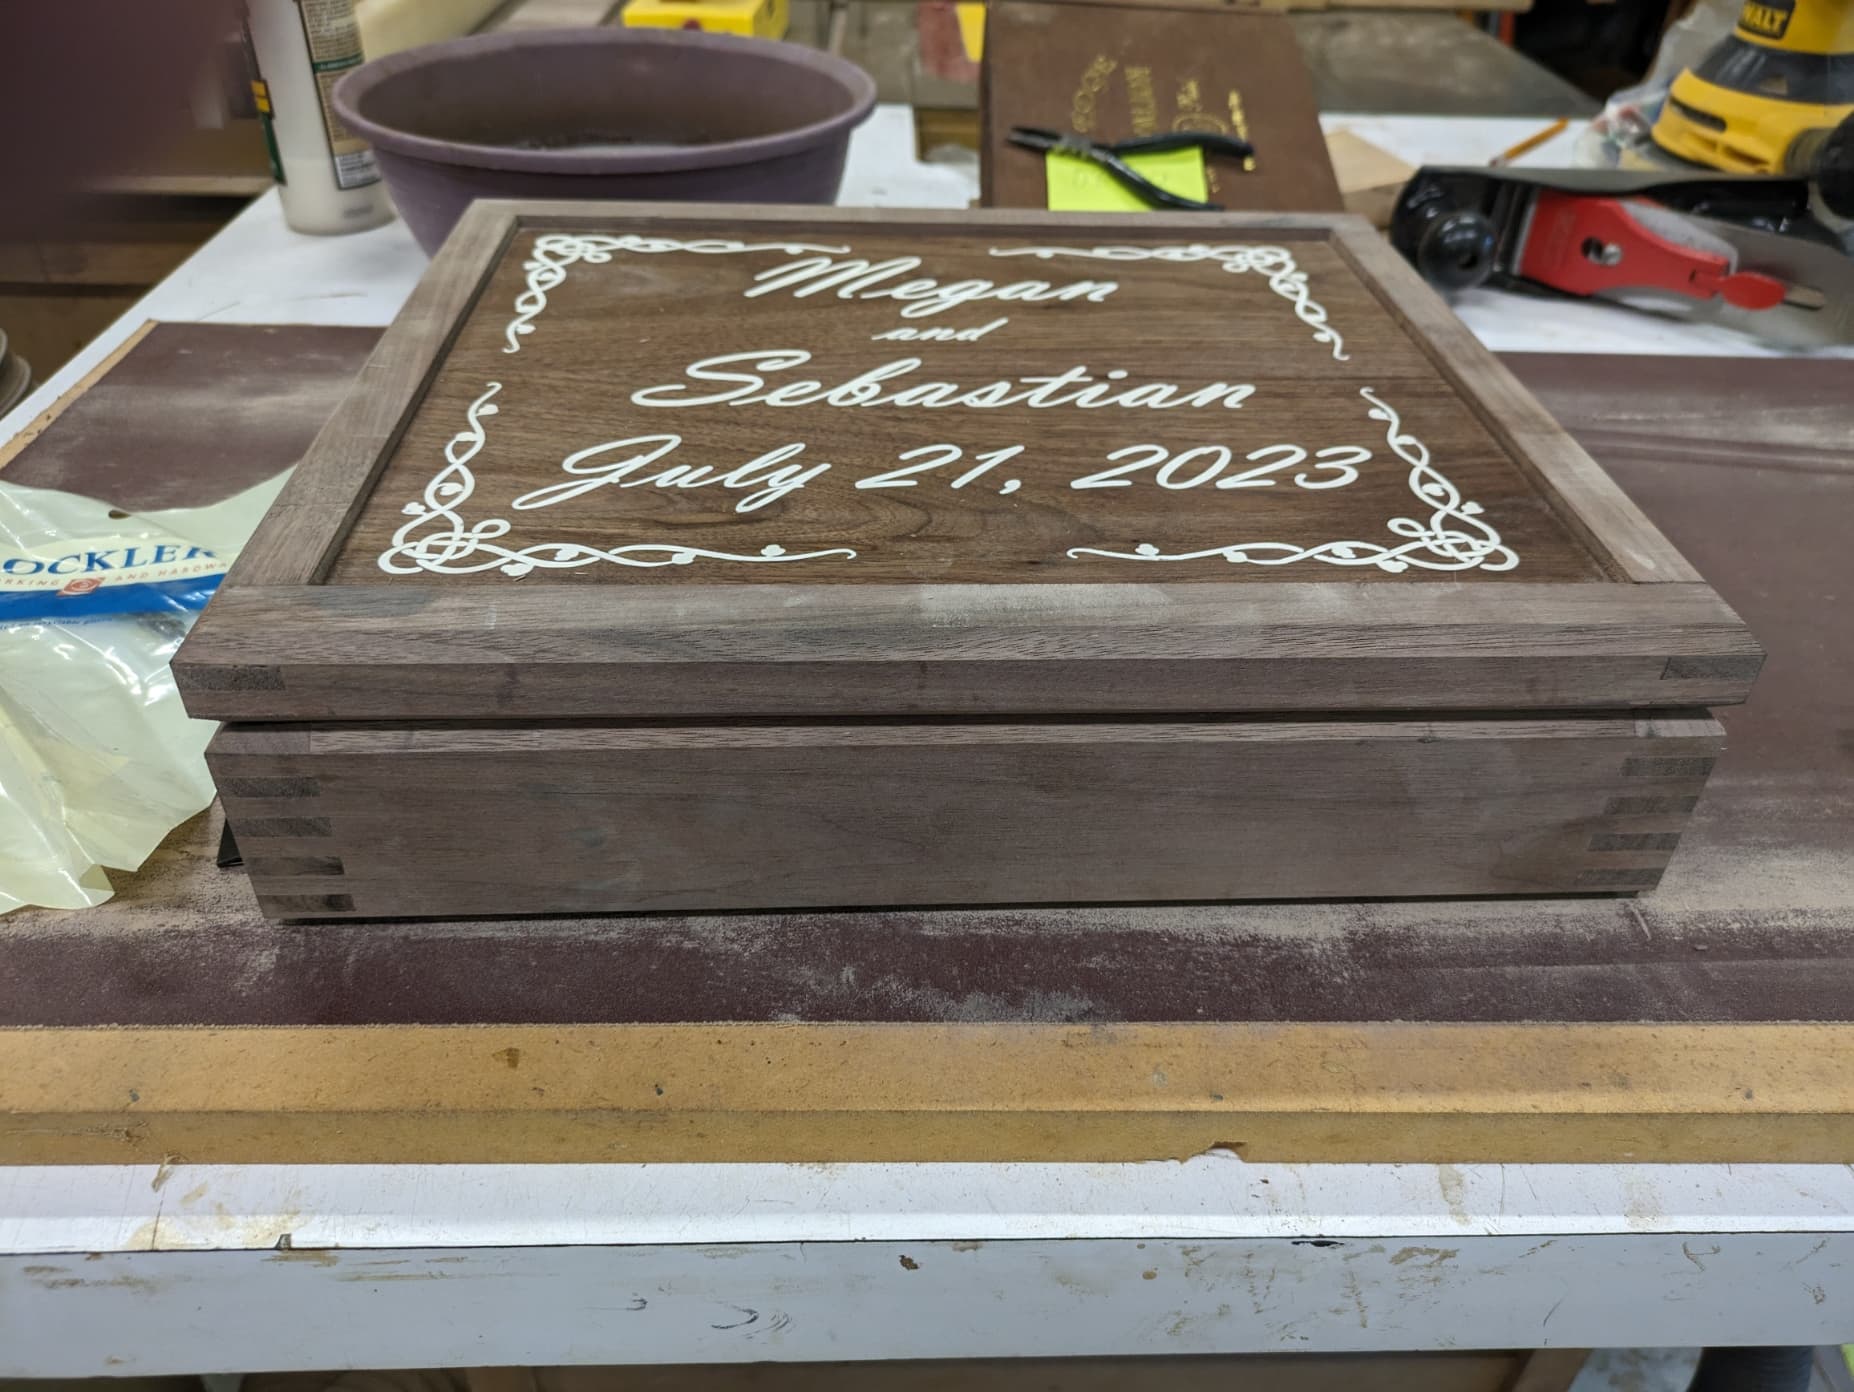
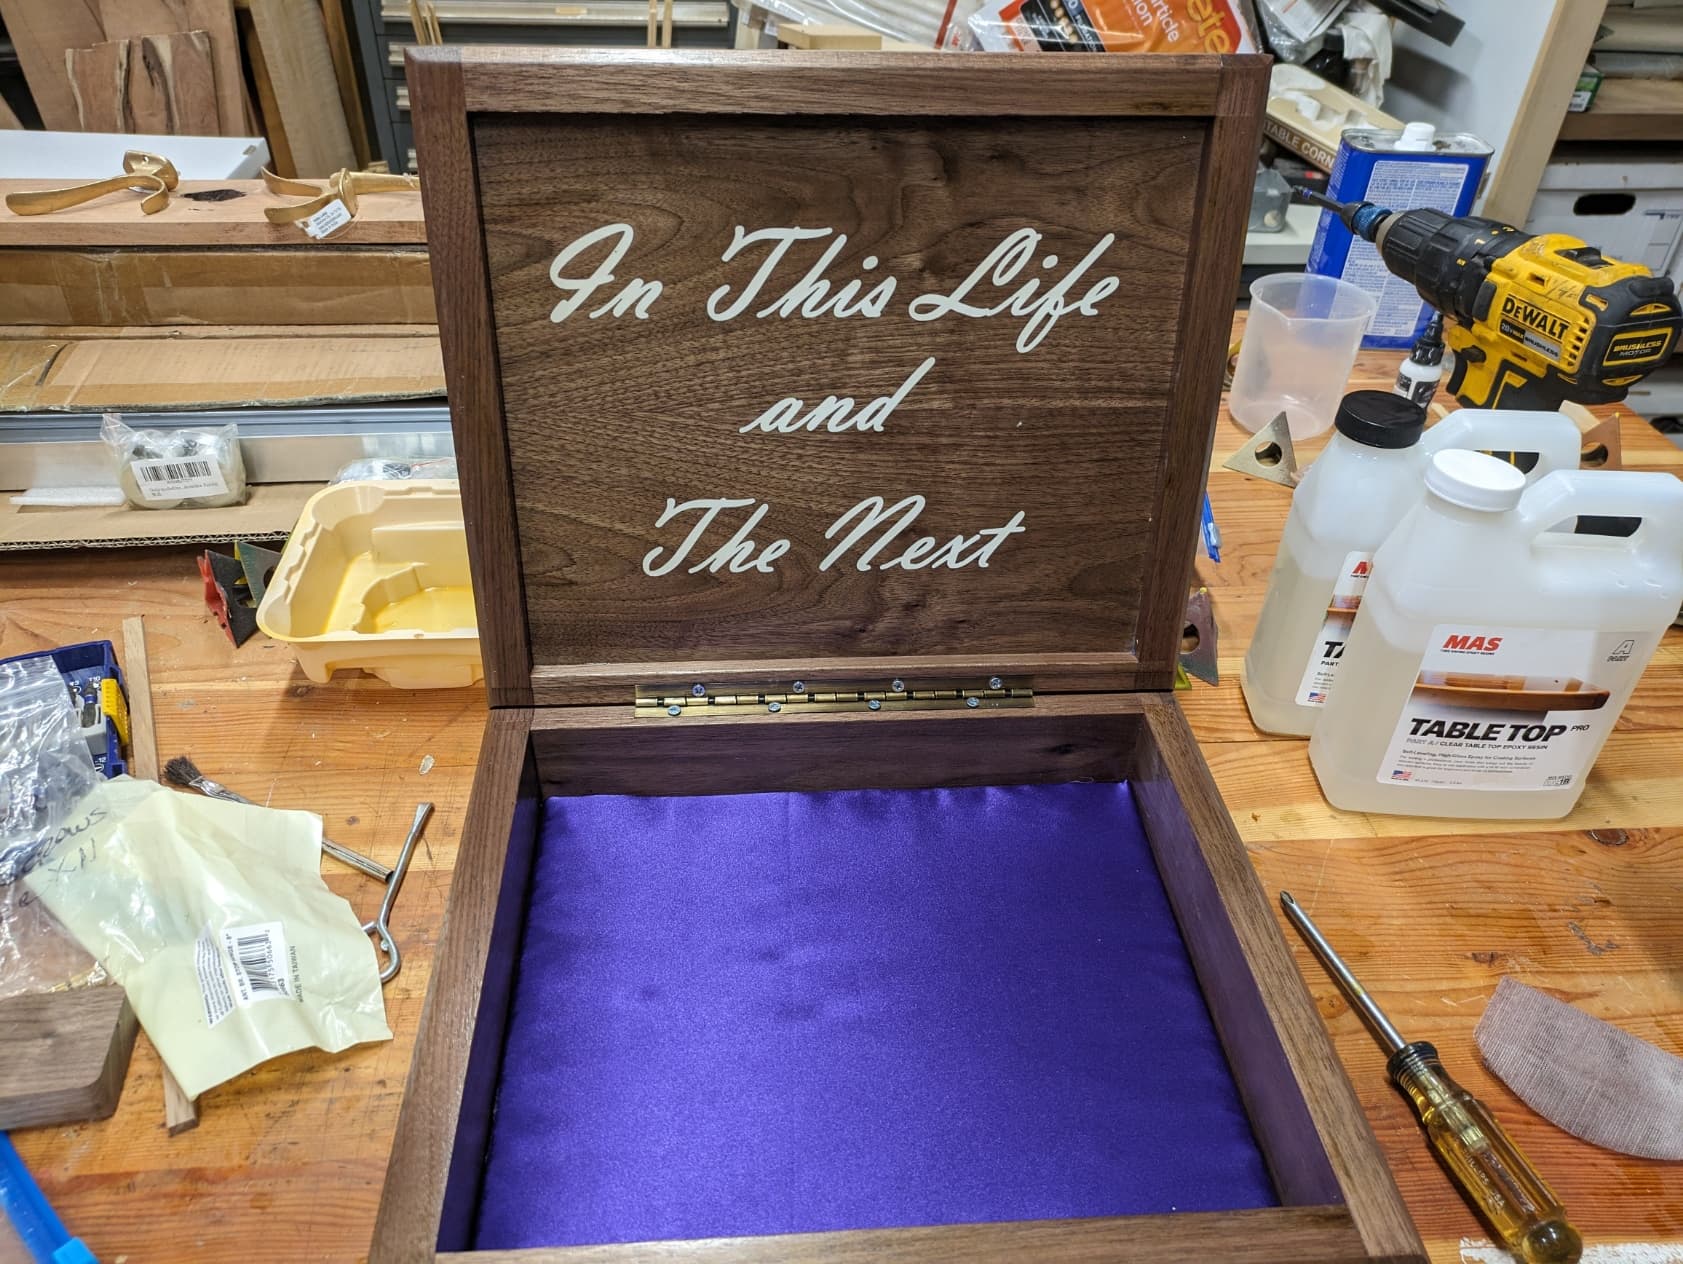
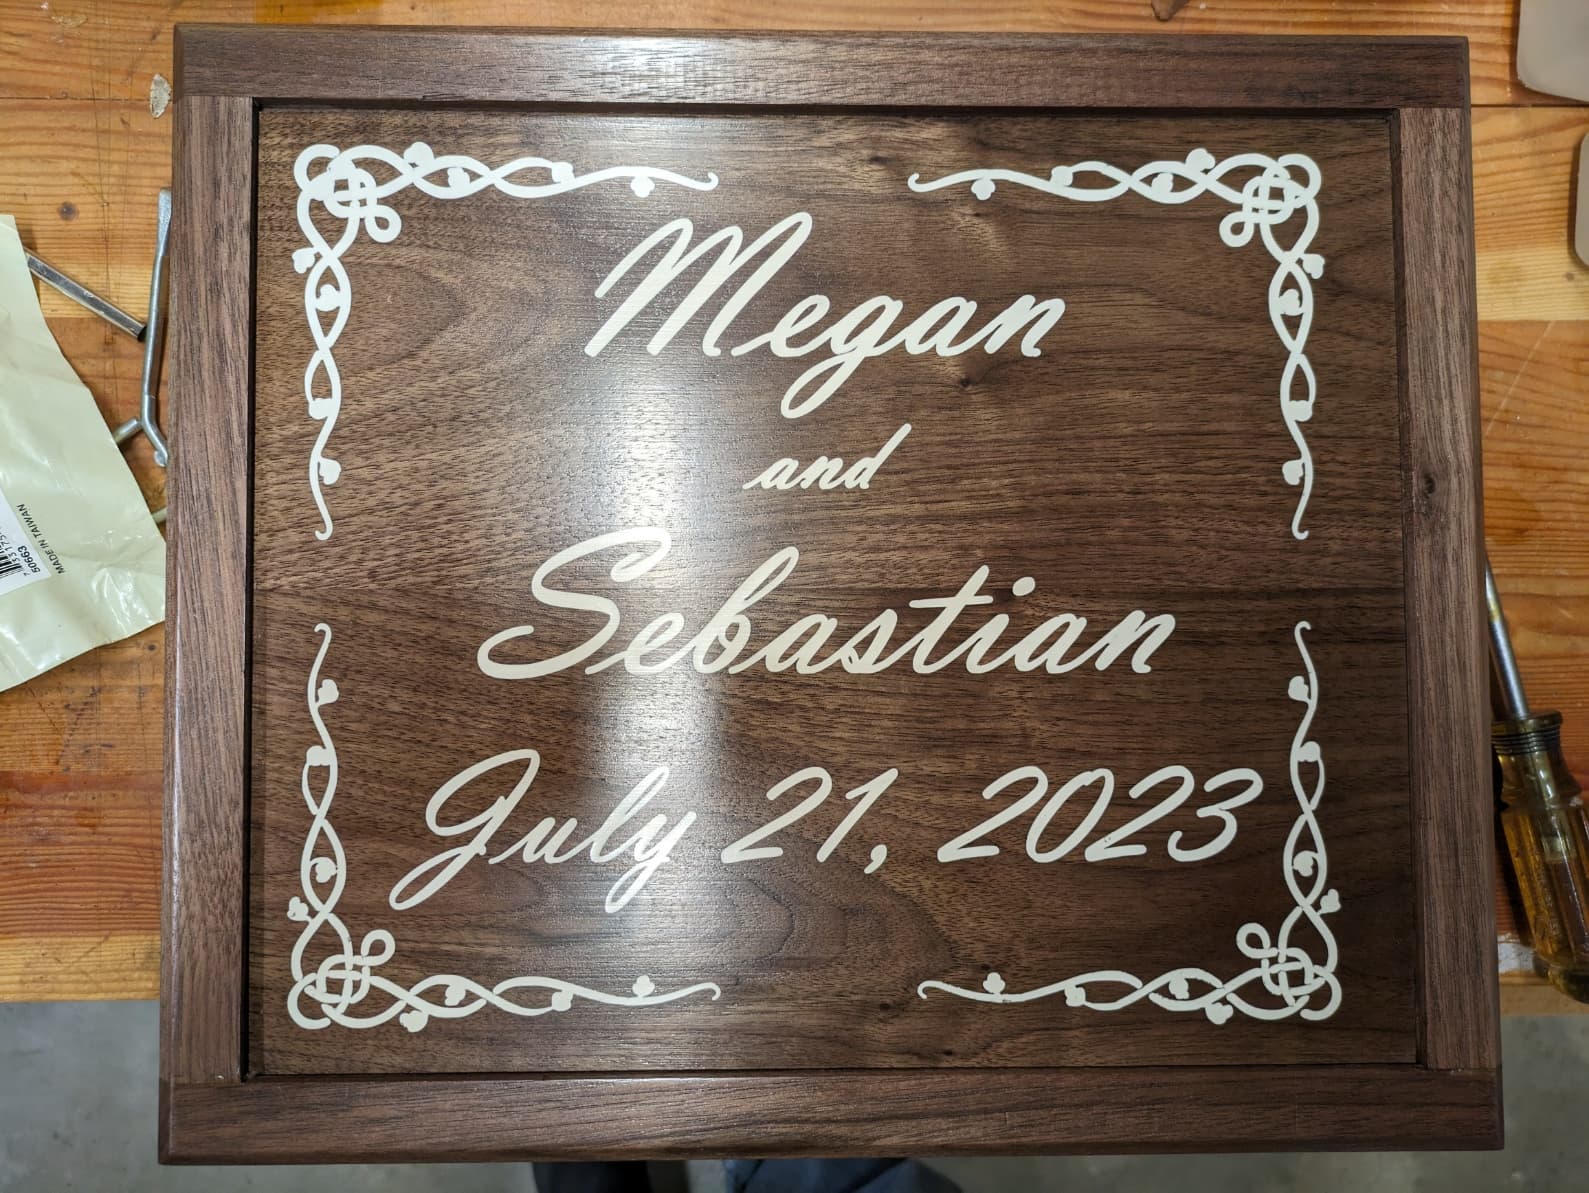
My grandson is getting married July 21, 2023. He requested I made a box to commemorate the event. I used Walnut for the box and made a lid that has the names and dates. He requested “In this life and the next” on the back side of the lid that will be visible when the box is open. I am also going to make a 2"x2" ring box to go inside the box. I have not started on that small box because he has not given me the ring size yet. The box is near completion. I got the captured box top machined and epoxy filled. I have two coats of polyurethane on the top and will glue up the box tomorrow.
The top was cut with a 15 Degree Vee Bit and a 1/32" #122 bit. The reverse was also cut with the same advanced vcarve bits.
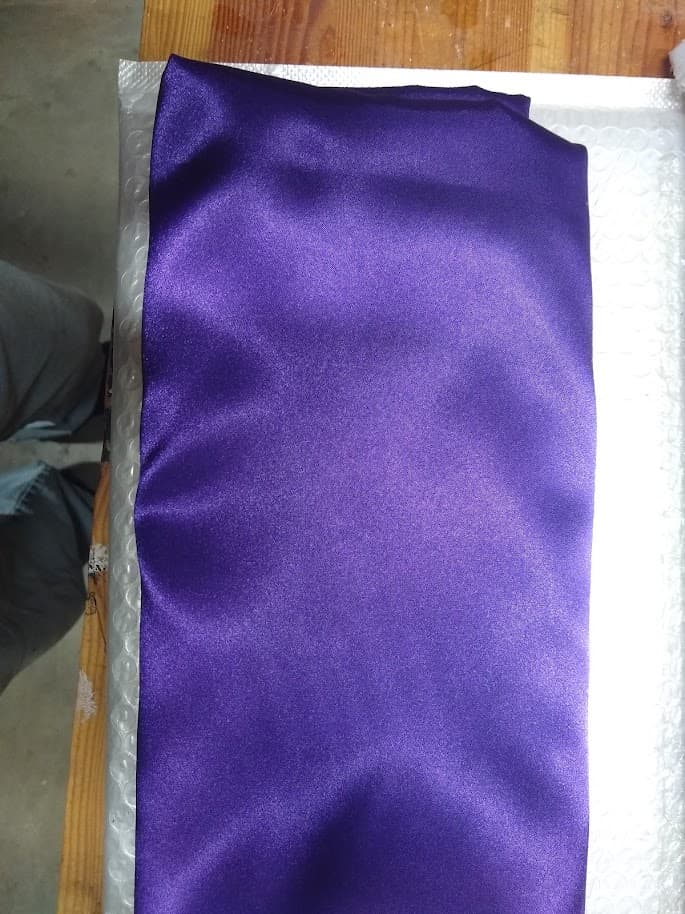
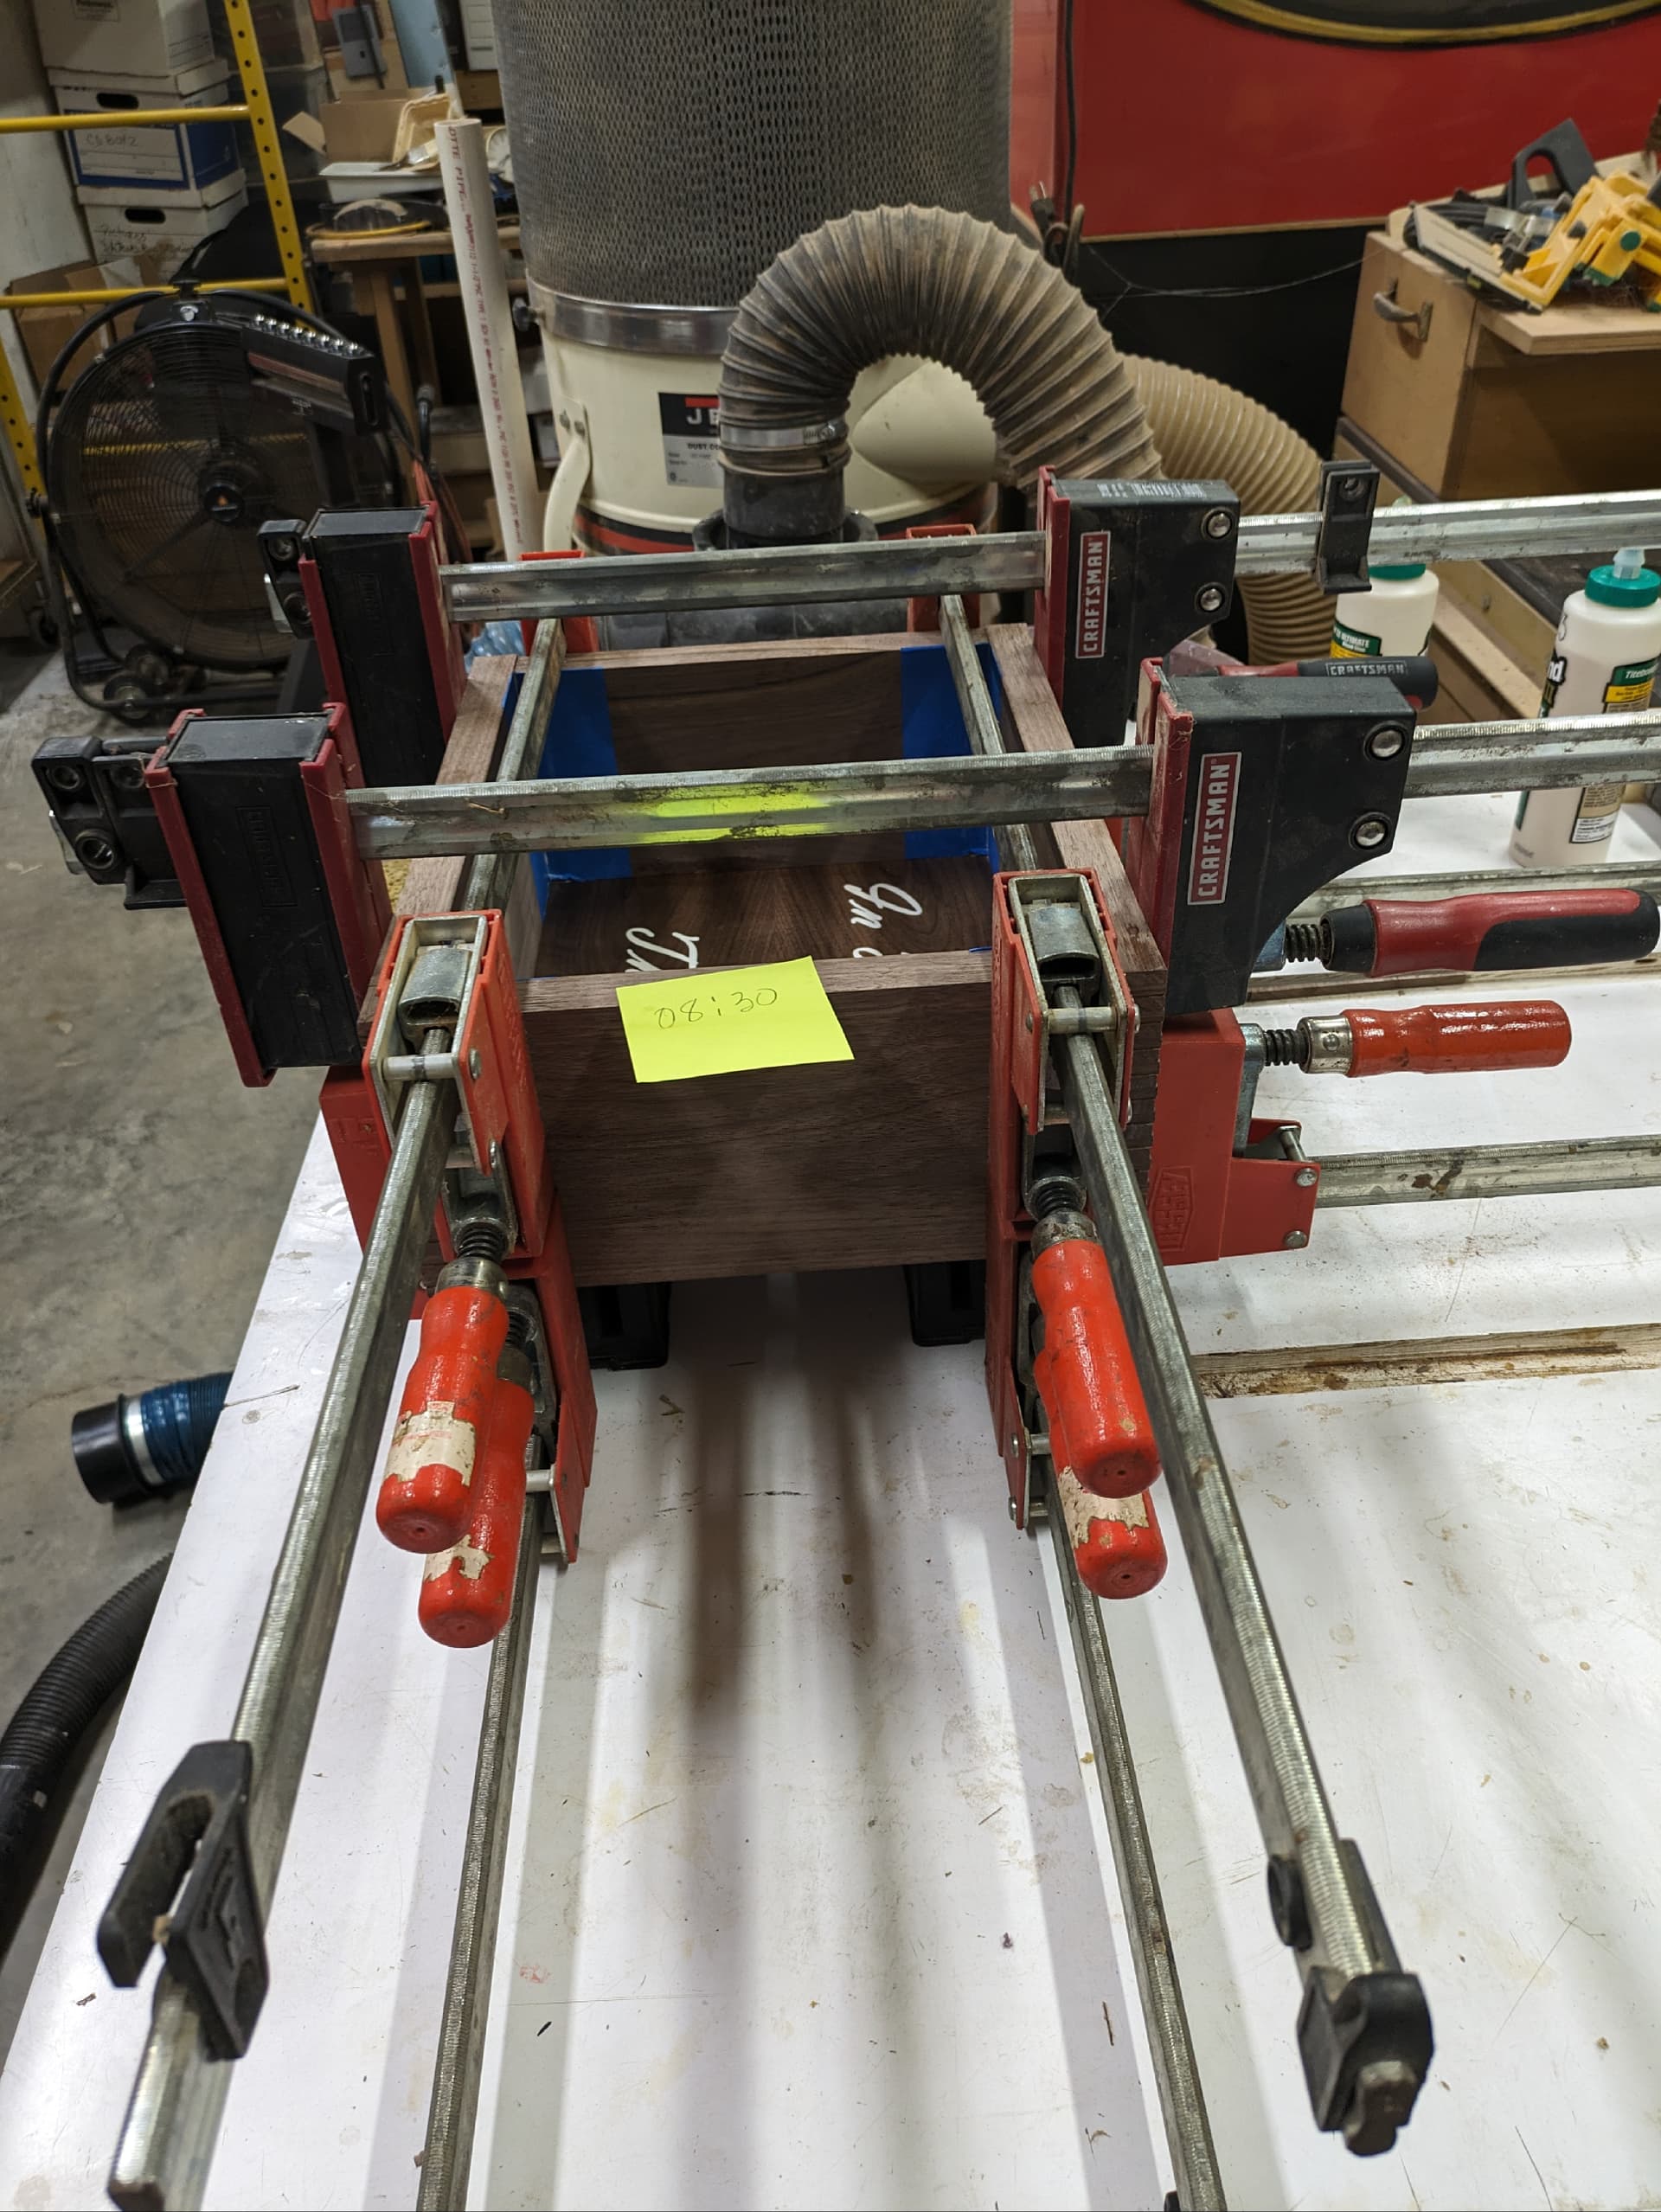
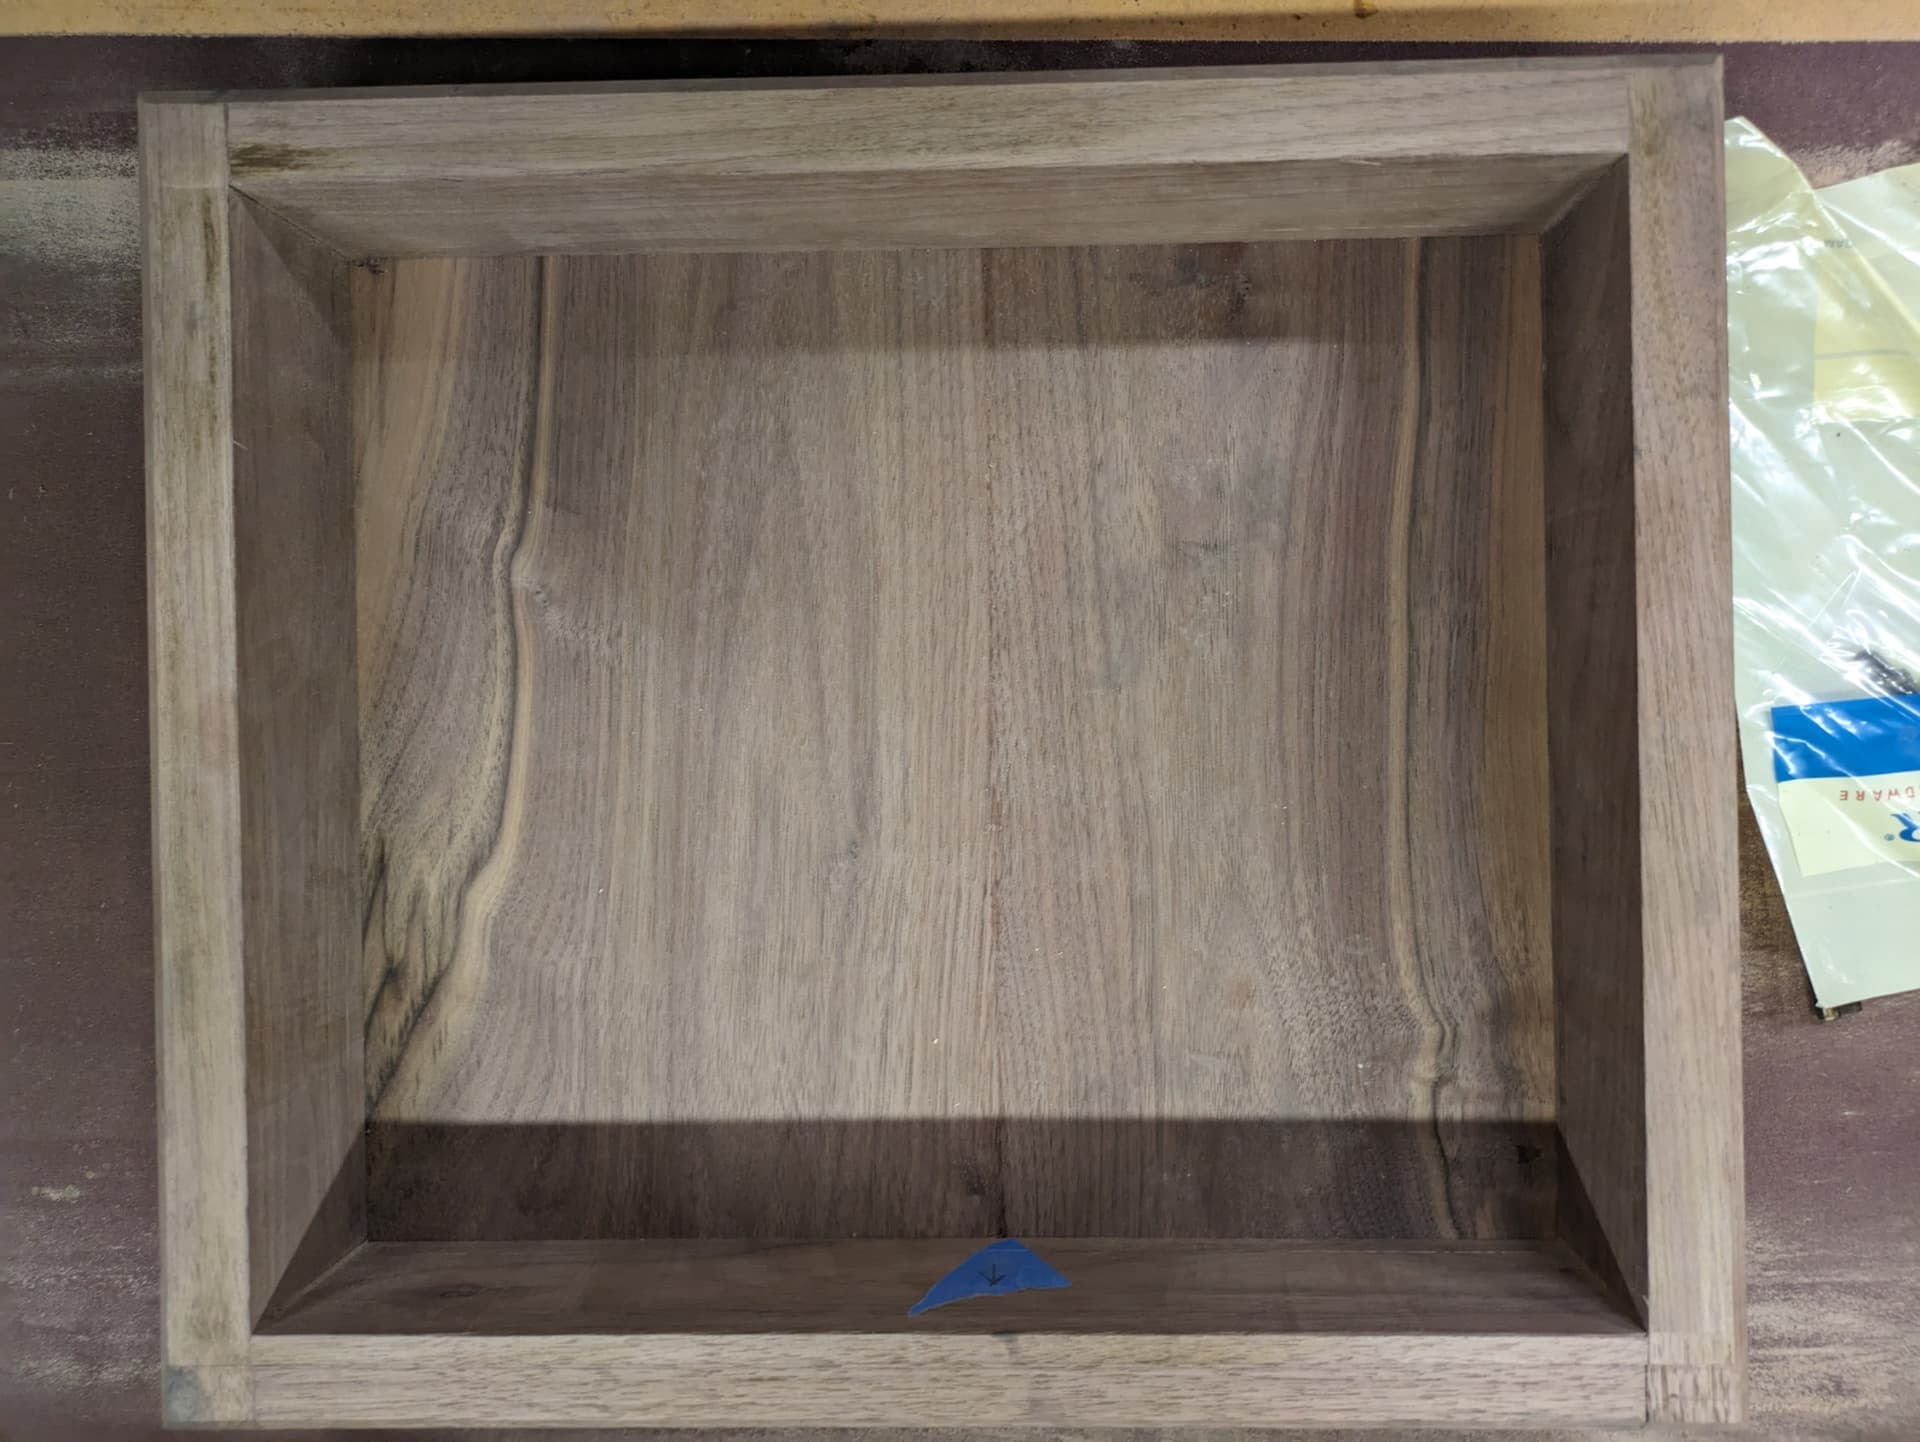
The box was cut with box joints on my Incra Box Joint Jig and the groove for the captured lid was cut on the router table. The top is 3/8" thick with a rabbet cut to it will fit into the 1/4" groove. The bottom will be cut with a 1/2" wide by 1/4" deep rabbet and the bottom will be screwed on after I apply the liner. He requested the liner be a purple satin material I bought over at Hobby Lobby.
Looks great! How deep of an epoxy fill did you do and what did you use to tint it? I have seen people poly the pocket and surrounding areas so the epoxy doesn’t seep into the grain, was this necessary for you? I’m about to do an epoxy project myself so im curious. Thanks for any help you can provide Guy.
I did advanced vcarve with depth of .15". I tried .1" but after sanding that was too thin. This is a one of and is important so a prototype was made to iron out the bugs.
I sealed with Zinnser universal sanding sealer (dewaxed shellac) with two coats and used an acid brush to get down inside the letters. That is so the epoxy does not seep into wood fibers. After epoxy dried I ran it through drum sander and finished with 5" ro sander.
Sealed with shellac after sanding and cleaning.
I put 2 coats of satin minmax poly on the box top. The reason for that is because after glue up it is not possible that get finish on the edges of the captured top.
I got a new Google Pixel 7a this week and it is HELPING me too much with typing. So sorry for any misspelling or words that do not make sense. It is HELPING me more than I need.
You did a great job on that, It will be treasured by you and them for many years ! What was the Font you used? I really like how it carved .
Thanks
Scott
I made a mistake when cutting the lid off the box. I cut the bottom of the box instead of the lid. I usually just use the size of wood I have available and the wood was oversized. So as soon as I stood back and looked I was really mad at myself. However the box had so much extra width it worked out. I went ahead and cut the lid off and the box is fine. I have enough experience not to do such a stupid thing but you live and learn. When I realized my mistake I took a break and thought about it. I decided to cut the lid off and either make another one or just see what it looked like. So my mistake was recoverable and will work just fine.
The box is just a little shorter than I had planned but it looks good and I wont tell the recipient if you dont.
I put a champher on all four edges of the box. For one thing it gives a shadow line if the lid does not fit perfectly. The other reason is I use a 105 degree stopped hinge but the rear champher gives a secondary stop so the lid will never get ripped off by opening it too quickly. The Rockler hinge comes with some #4 short screws and I replace them with #6 3/4" screws for belts and suspenders.
The other thing I do is to rabbet out the bottom 1/2" wide and 1/4" deep. I had glued up a walnut board to go into the bottom. The advantage to this is you have more room inside the box and it is much easier to put a lining in the bottom of the box. By screwing on the bottom the bottom covering can be replaced in the future if necessary and it is much easier to get the lining to fit perfectly because I have a 1/2" overhang. Since the rabbeting bit leaves a round corner I have a Rockler jig that you place on top of the bottom and with a flush trim bit I can get the board to have rounded corners. I will take the box and bottom over to the drill press and drill the holes for the screws and countersink the screw heads.
In the picture above you can see a little piece of blue tape. I put that on to let me know which side of the box is front and back. Once you cut the lid off you get the grain to match. There is another piece on the inside of the lid.
I have cut a rabbet in the back side of the box and lid for the hinge. I cut that with a dado blade and make it just a little bit less than the depth of the hinge. That way the box is a little high in the back so the lid closes properly. I have learned a few tricks over the years. The worst thing when you screw on the hinges is if the box does not close all the way in the front.
This champher and bottom rabbet aint my first rodeo and my method works quite well for me.
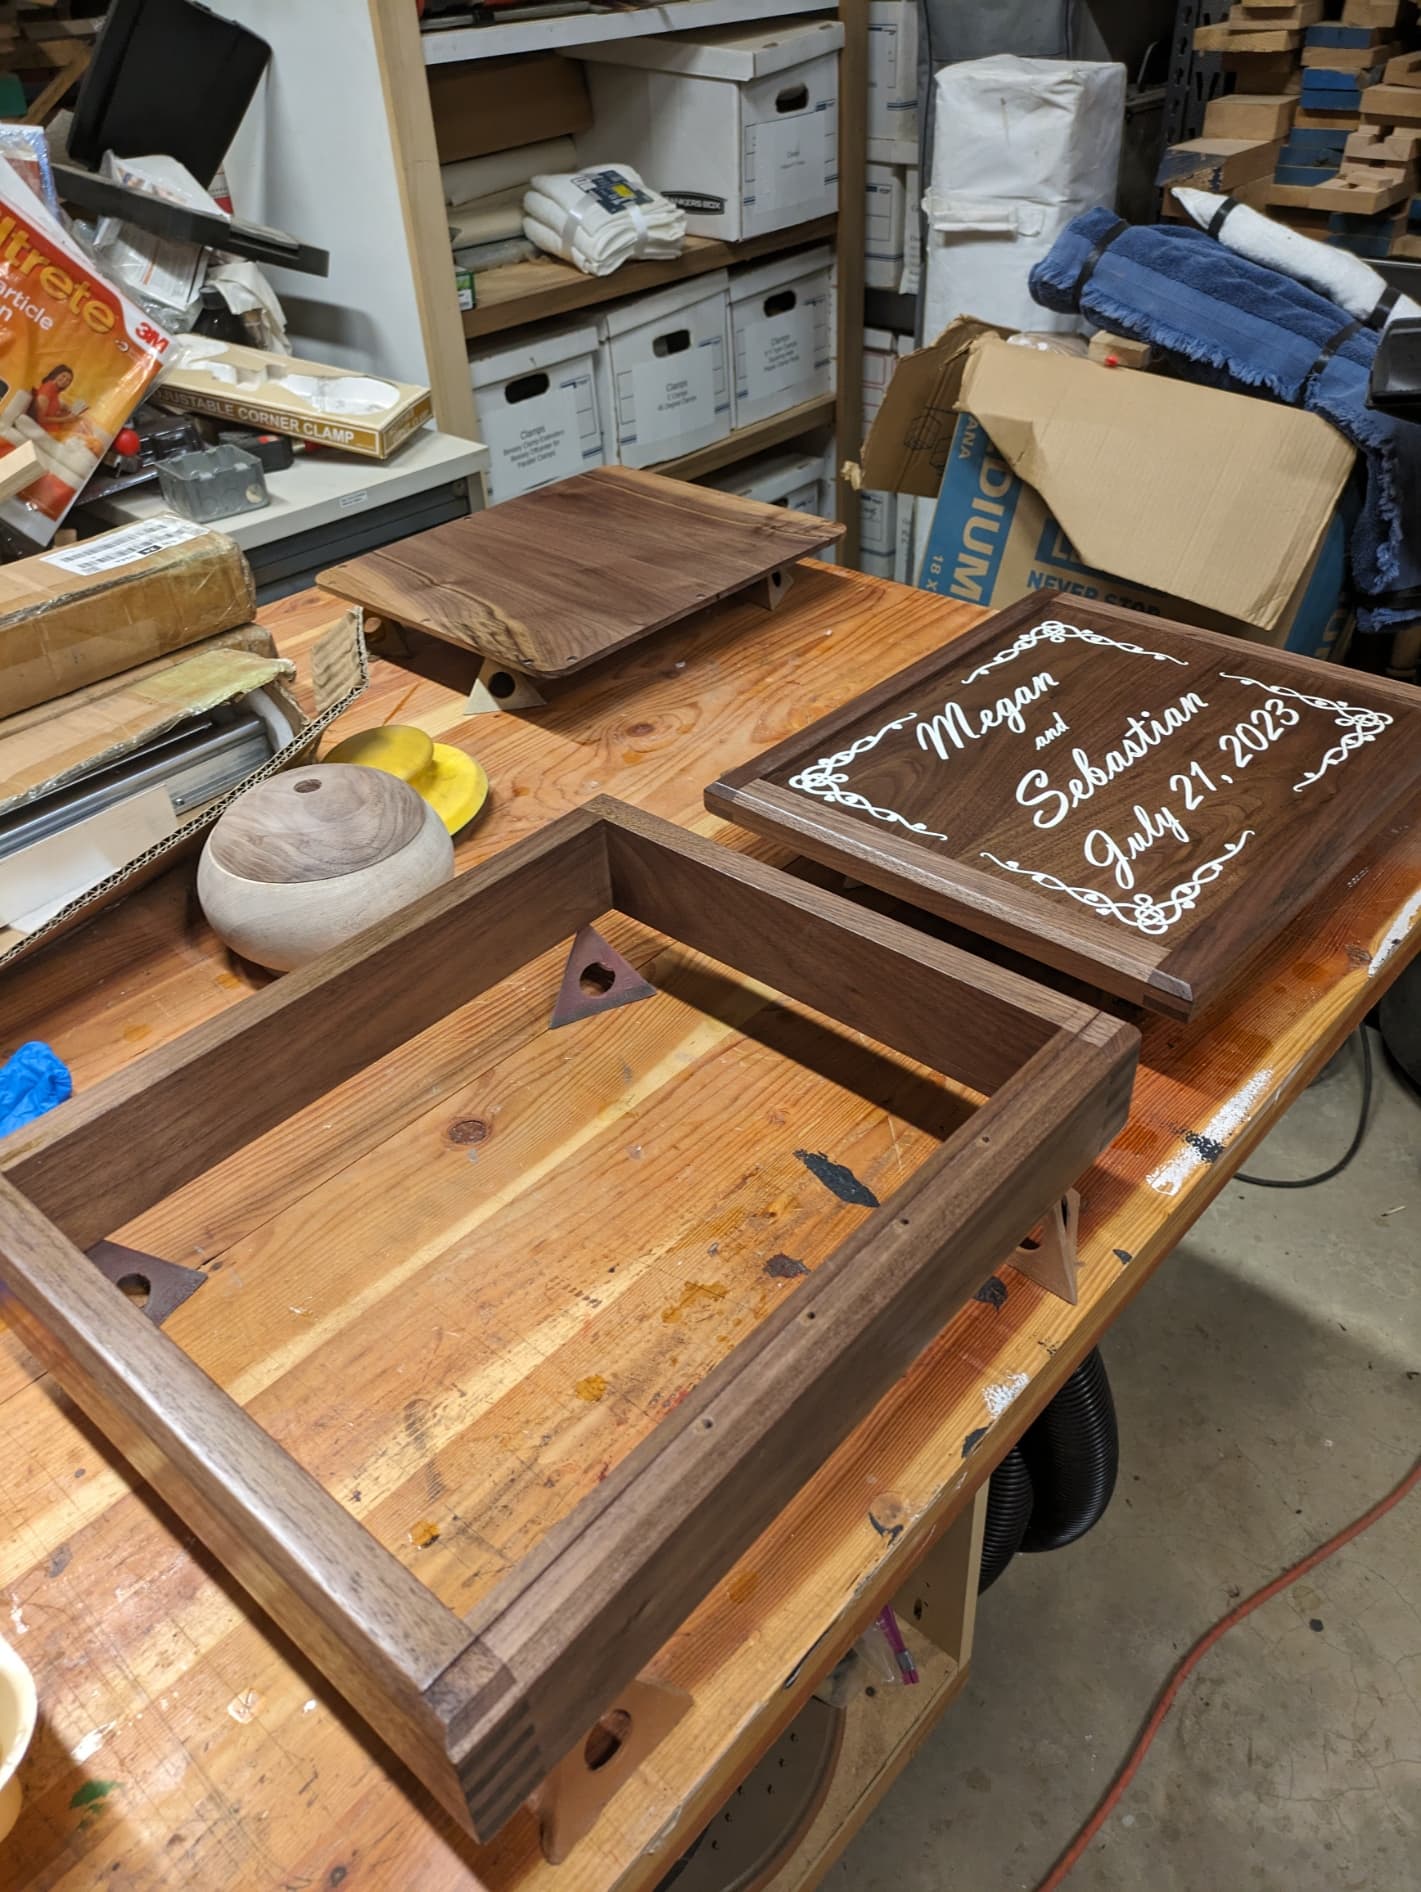
Made progress. I got the last coat of finish on. I will wait a few days and buff it and assemble. I am working on the interior and come back when finished.
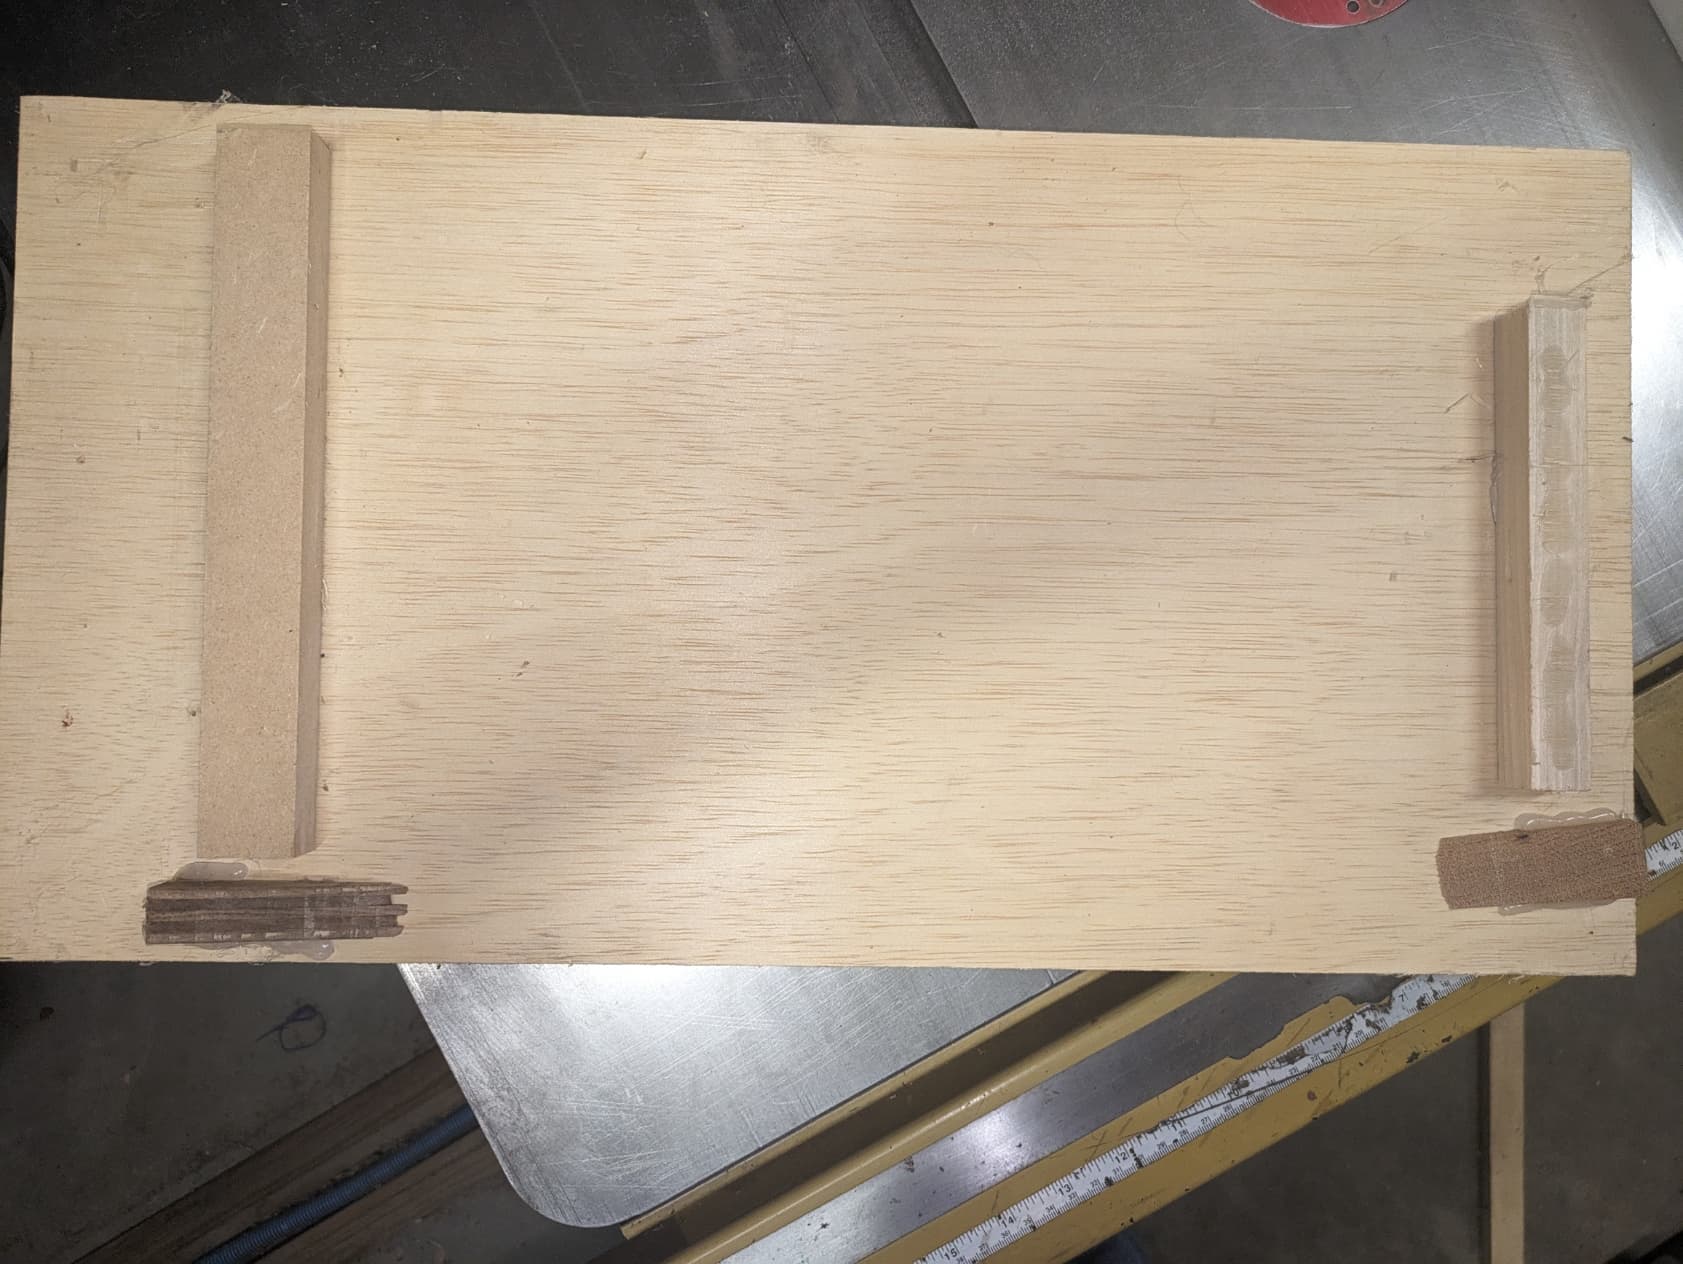
The bottom is an 1/8" piece of baltic birch. I put some padding on with 3M #77 adhesive and attached the fabric with thumb tacks. I then used hot glue to bond the material to the bottom of the 1/8" piece of plywood and removed the thumb tacks. I used a J roller to smooth out the hot glue. I have been using hot glue a lot lately for temporary holding.
i recently saw a youtube vid of someone using hot glue to tack shims for planing a board on a jig, but what was really interesting is they had a knock-off hot glue gun that runs off a milwalkee battery, instead of a cord. I’ve seen them for makita and dewalt batteries too, on Amazon. A nice convenience, if you are using hot glue often.
This is my planner sled. I just leave the last settings until I get ready to use it again. The two wedges and the end stops were applied with hot glue. When knocking off the stops and/or wedges you can chip out the plywood. If you put some denatured aclohol on hot glue it will come off easier and usually not pull the veneer off the plywood. The planner sled is an old trick used by many to help get a flat surface on a warped/cupped board.
My planner is a Dewalt 735 and is 13 inches wide. This piece of scrap plywood is exactly 13" wide. Technically you only need a stop on the back end but I like belts and suspenders with the wedges so the piece does not get airborne inside the planner.
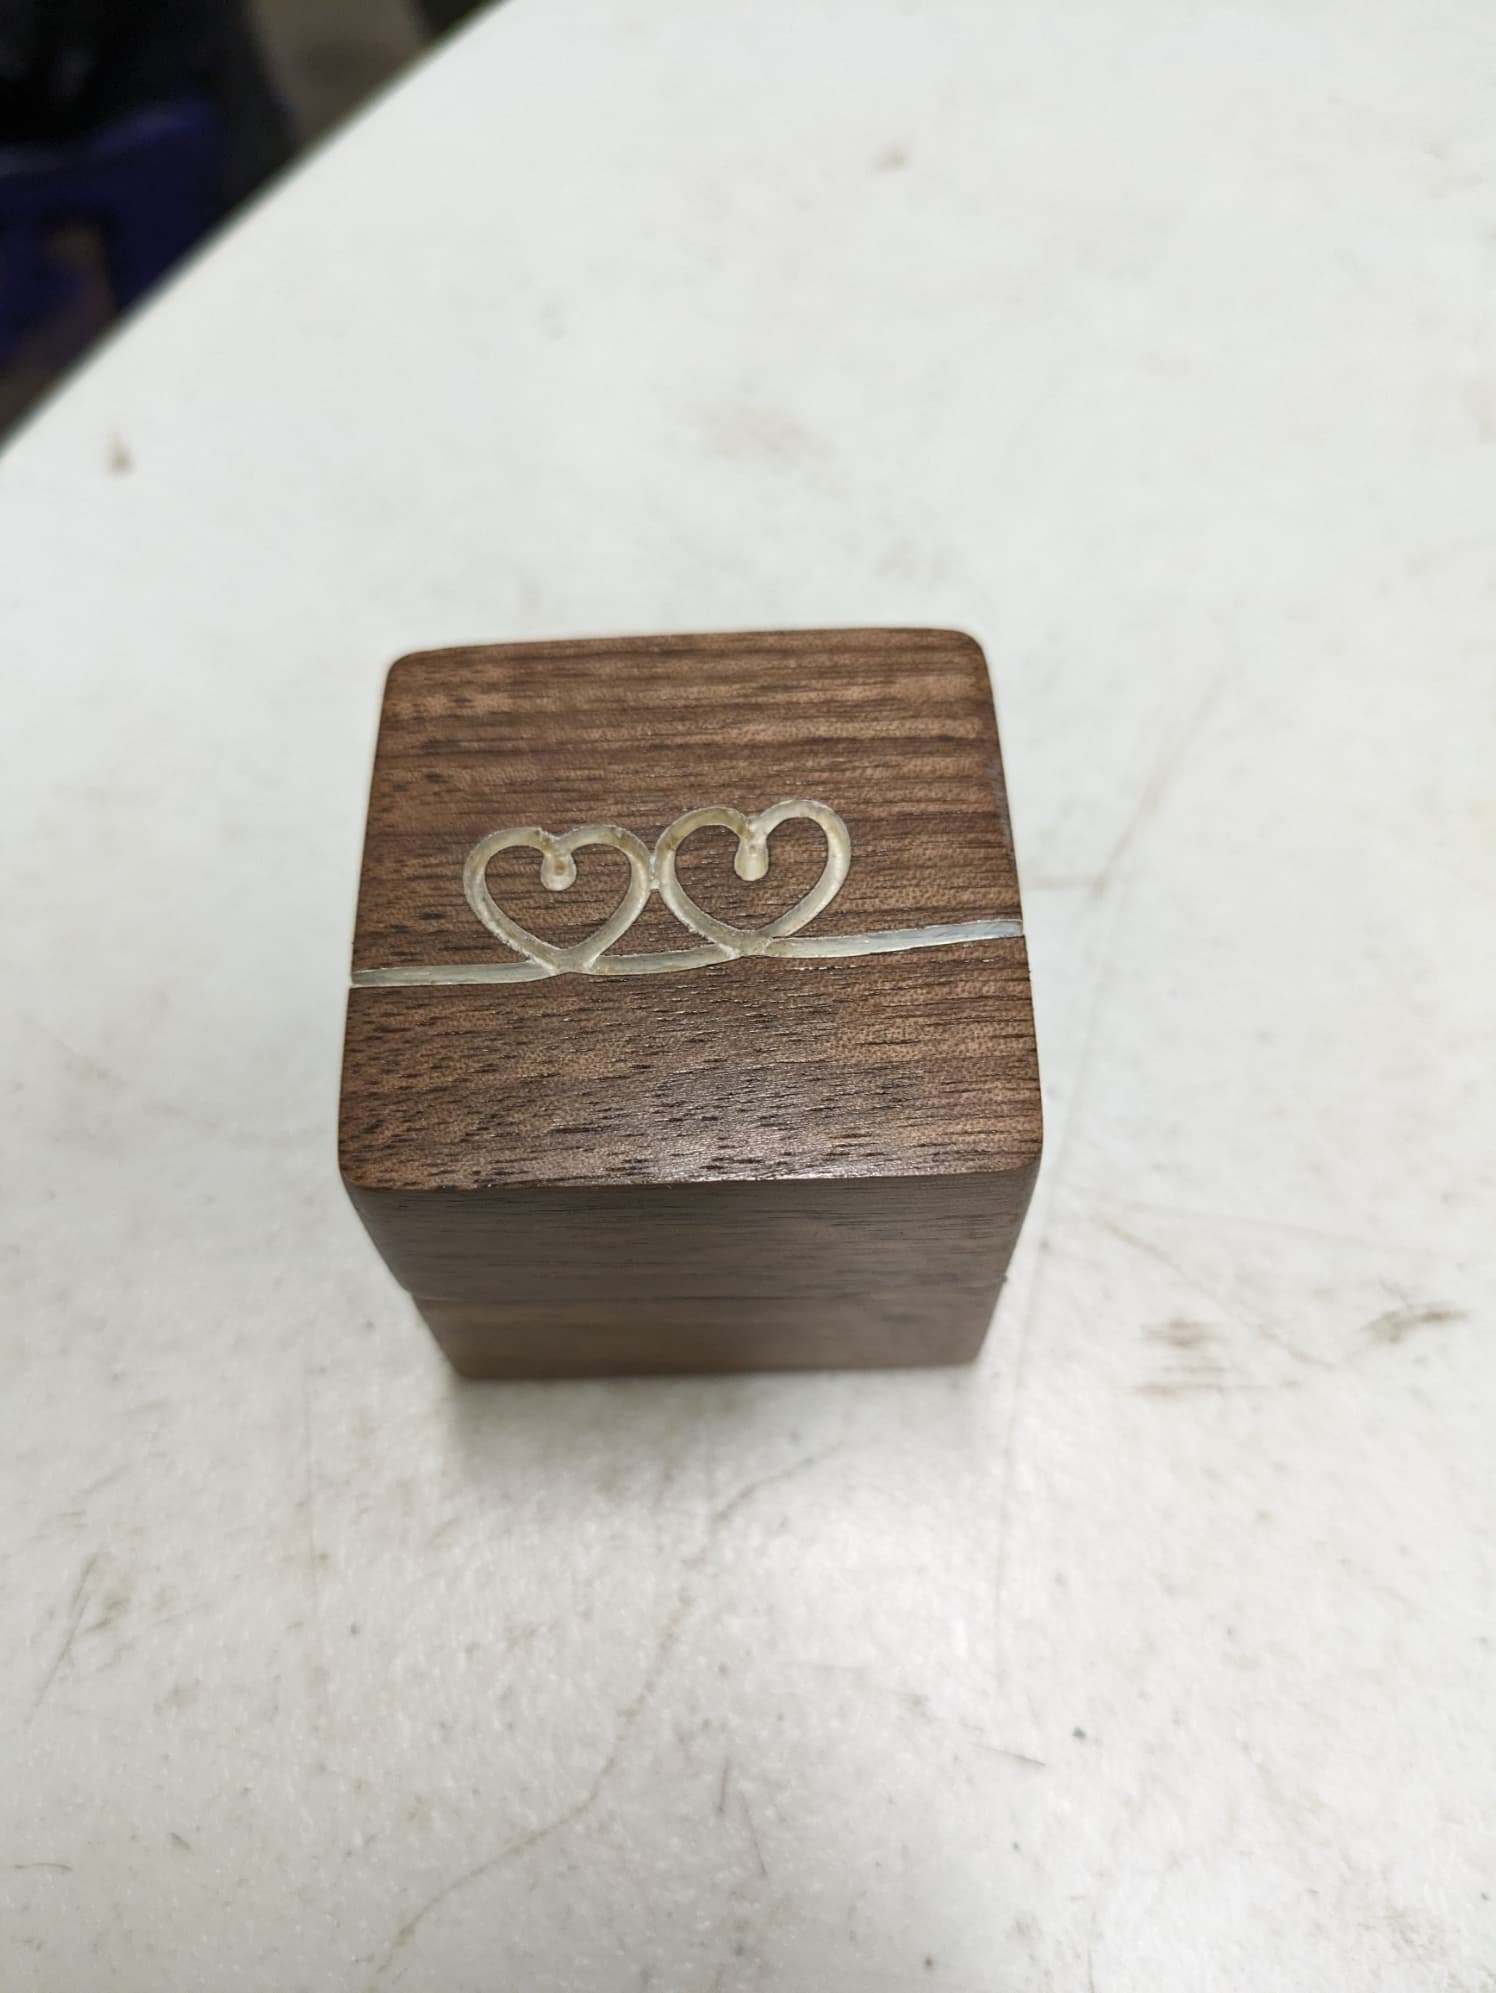
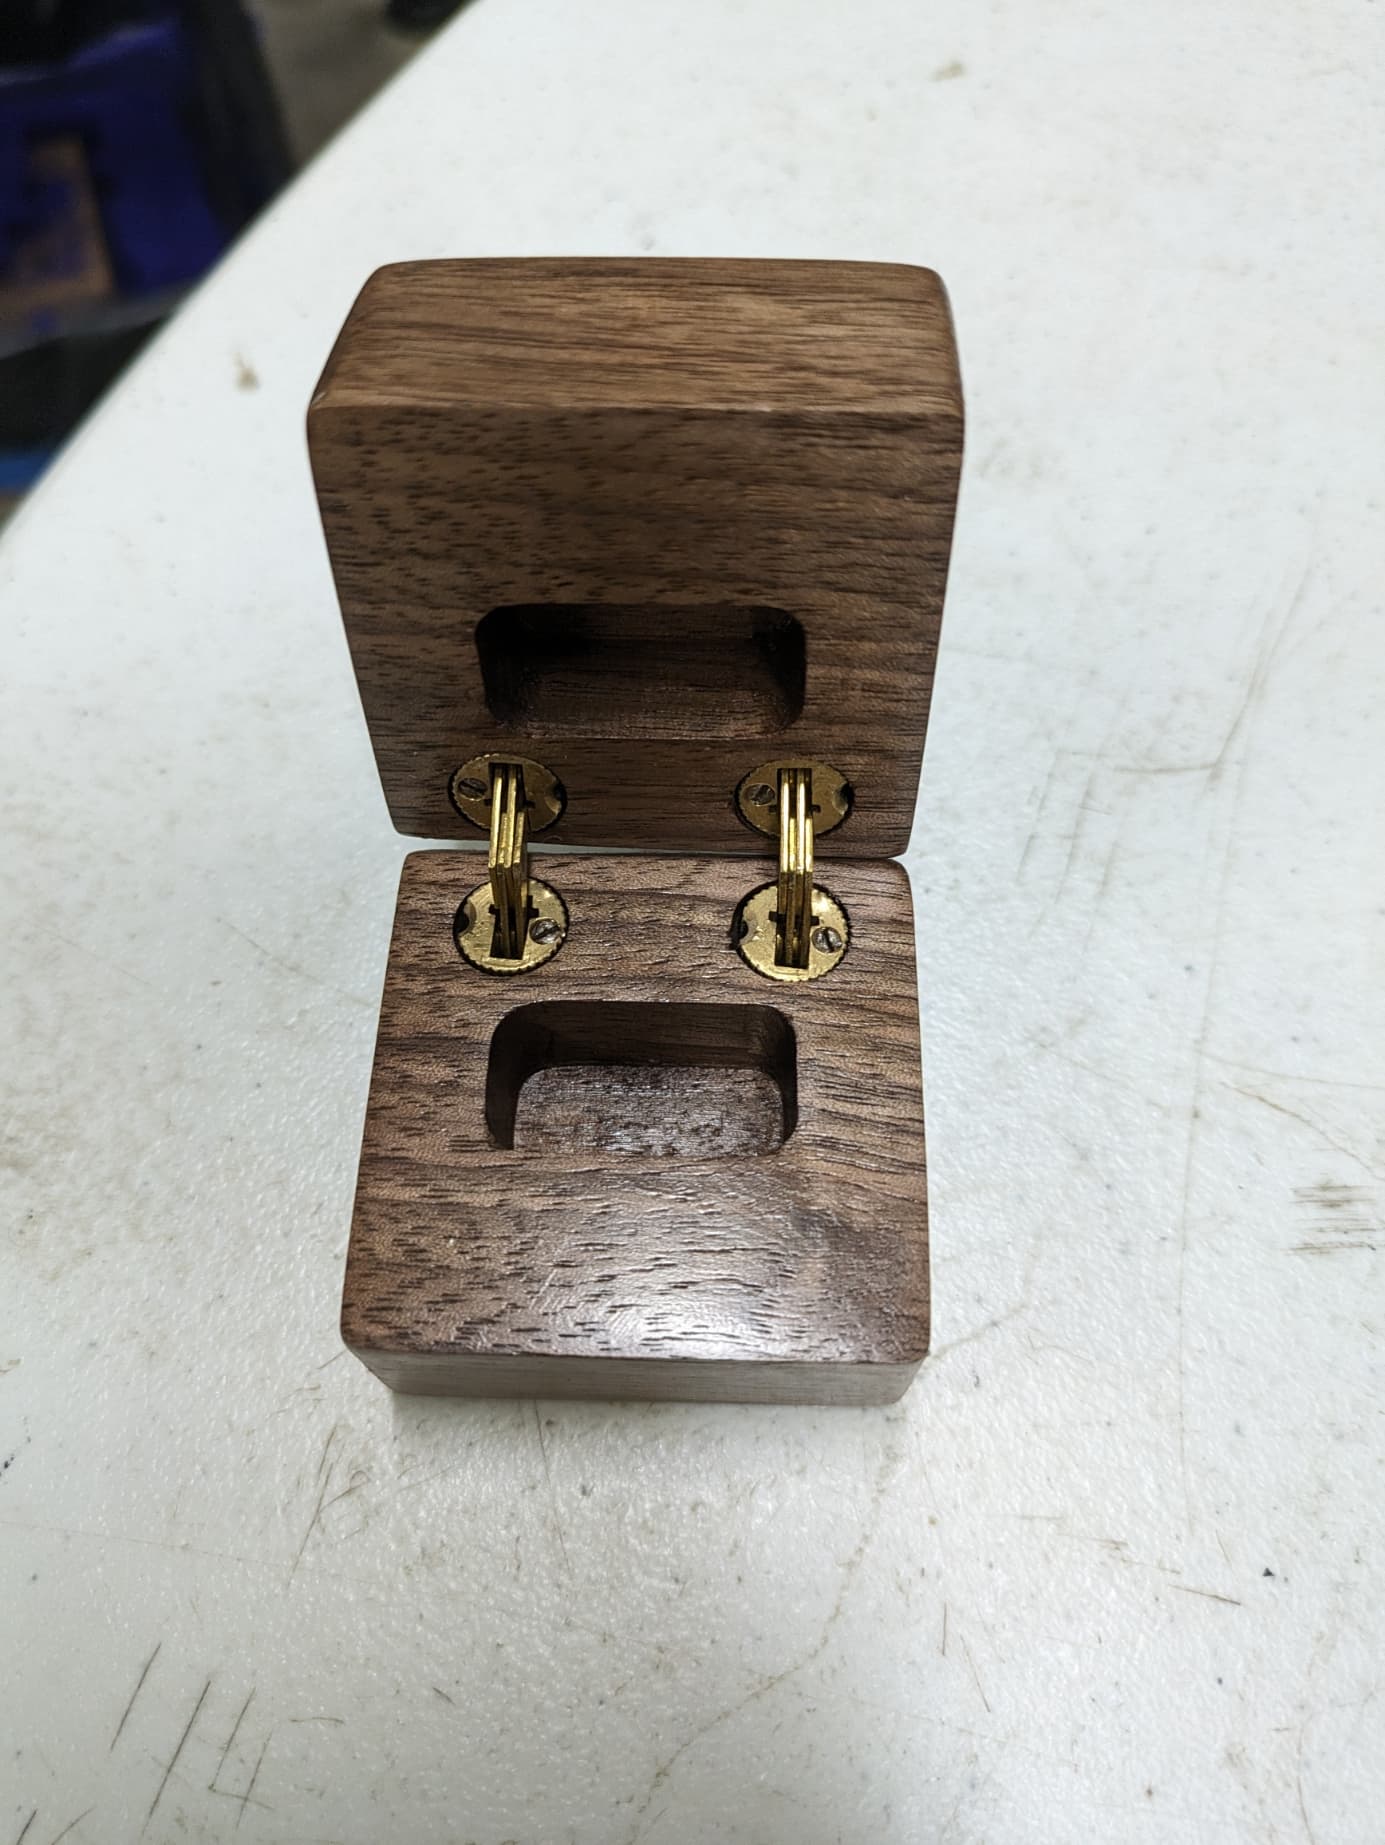
The final piece is finished. The ring box is finished and assembled. The box will be used during the wedding ceremony on July 21, 2023. The presentation box will be given to the bride by my grandson after the ceremony. Likely will hold the wedding memorabilia
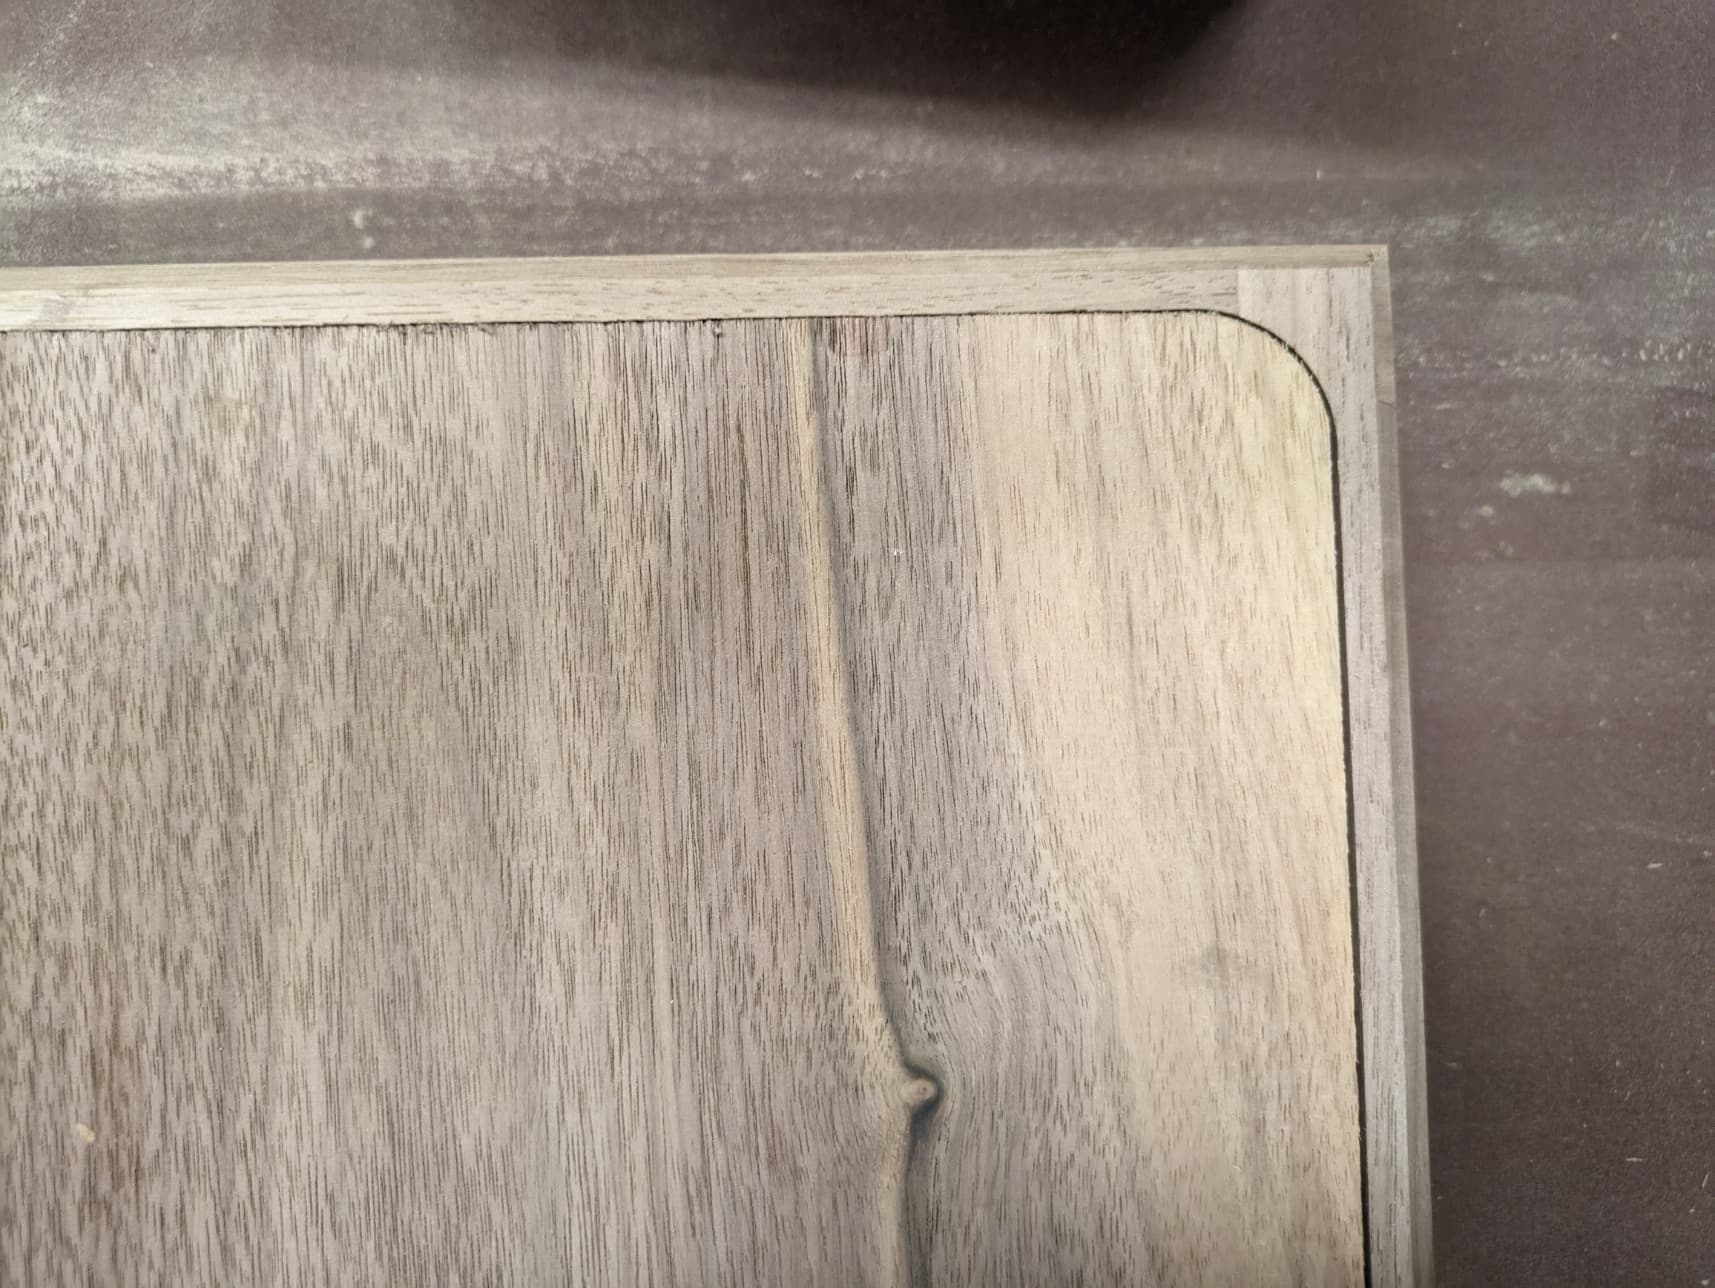
There is s 1/4" roundover done on the router table to allow clearance for the box to open without stressing the hinges by hitting at the back of the box.
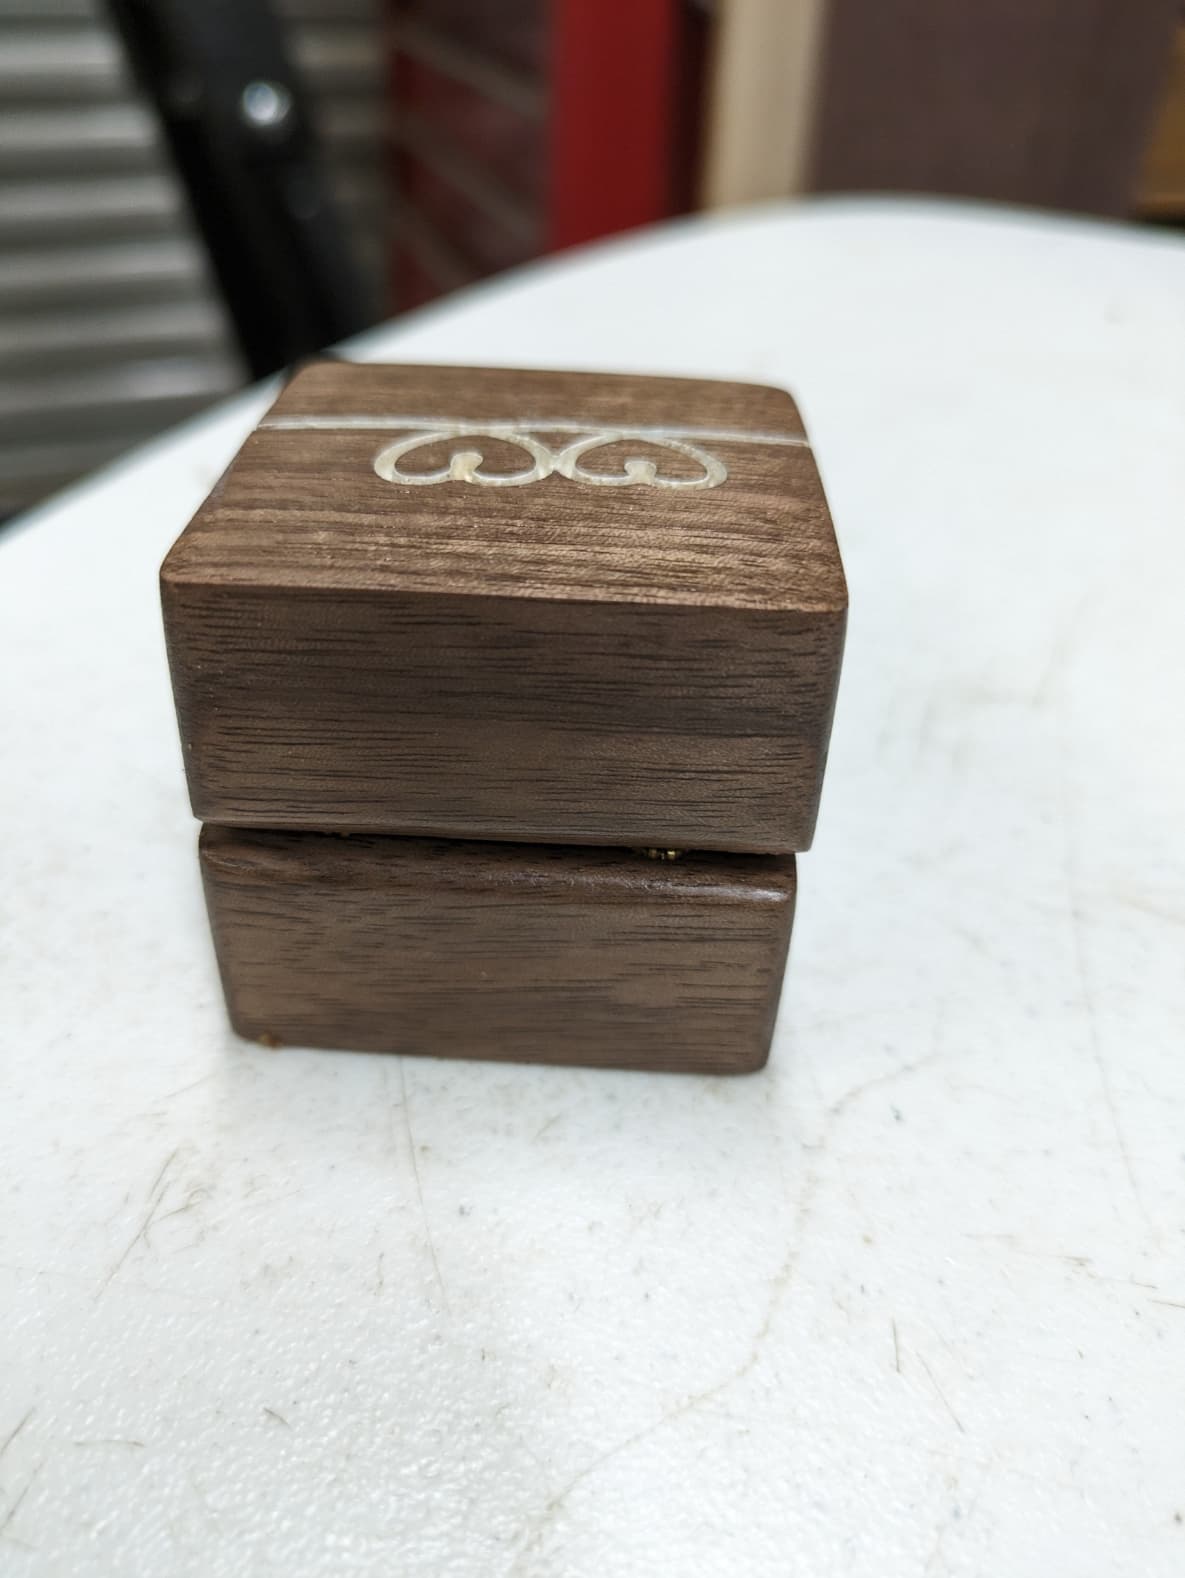
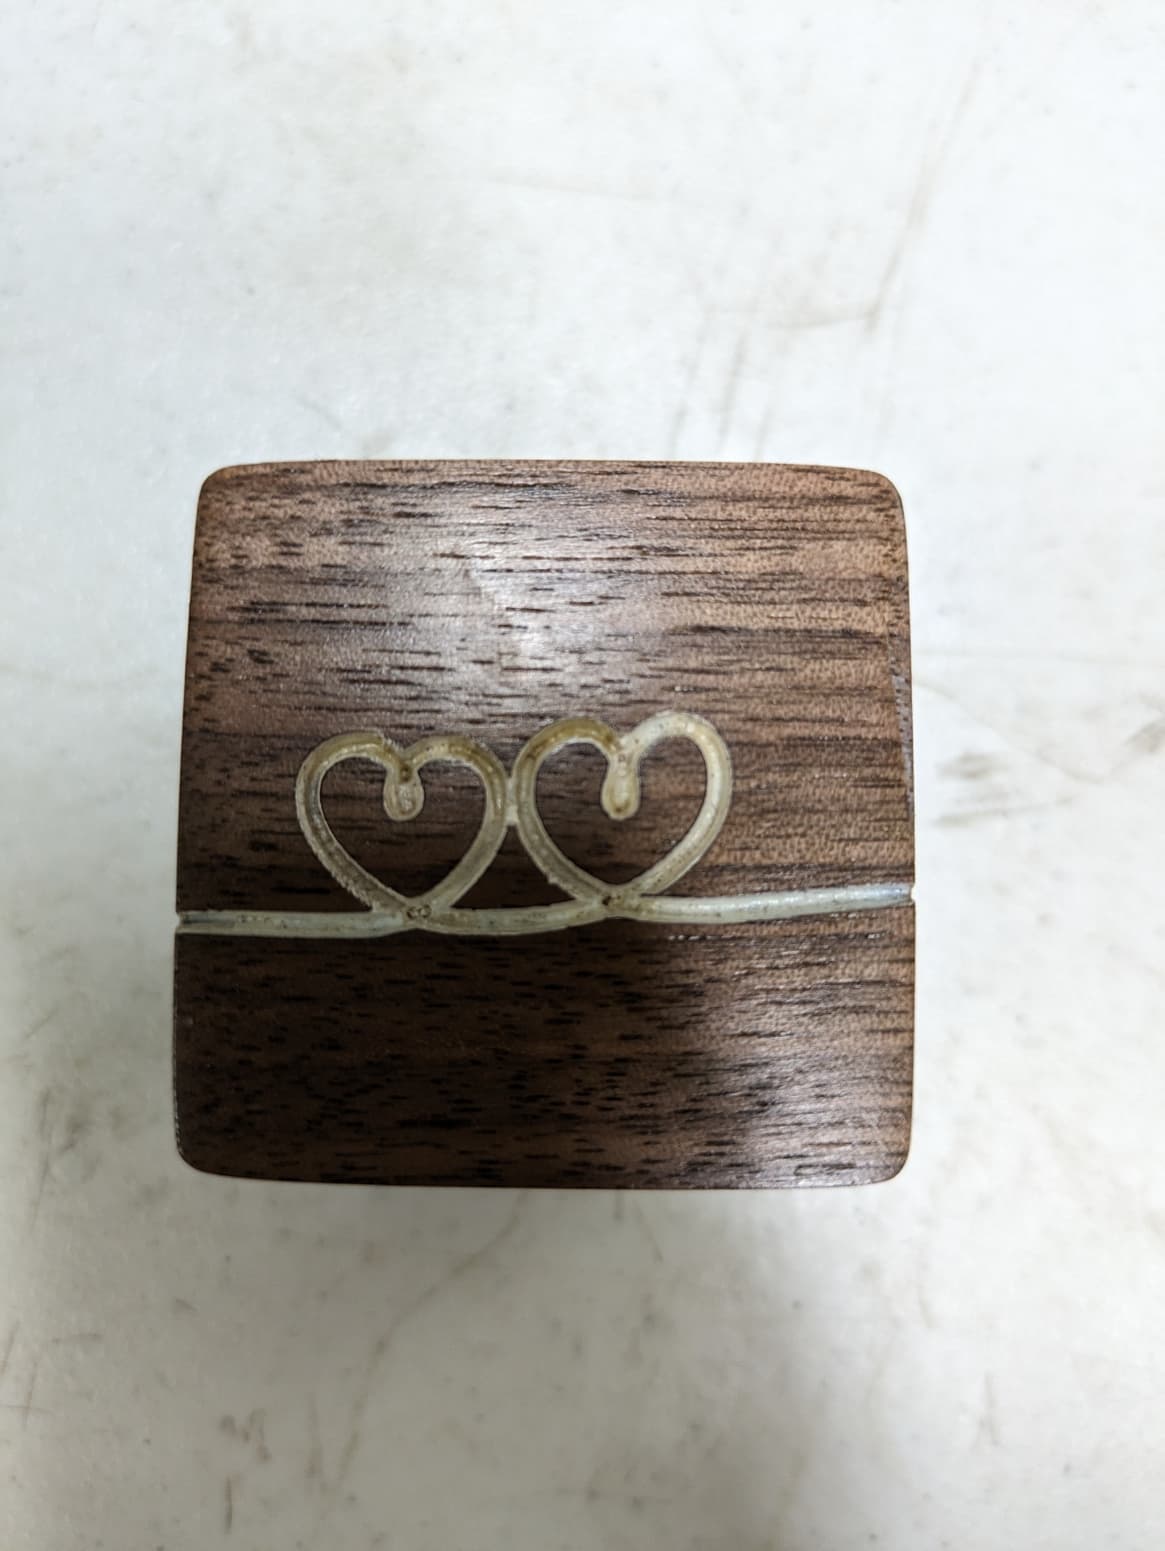
Here is the top of the box. I got the image off the internet, used Inkscape to convert it to svg and Carbide Create to make the carving with a 15 degree vee bit.
I thought the sanding would be a chore but turned out really simple. It likely took 15 minutes to sand 80, 120, 220 grit paper by hand. The little pocket for the ring I used a sanding stick to smooth out the bottom. For some reason there was a little ridge left in the center of the pocket which a chisel and the sanding stick took care of. I was going to use flocking in the pocket but after flocking some other things I decided the mess was not worth it. Likely this is a one time use item. Pretty but after the ceremony it will just be a keepsake and not used anymore.