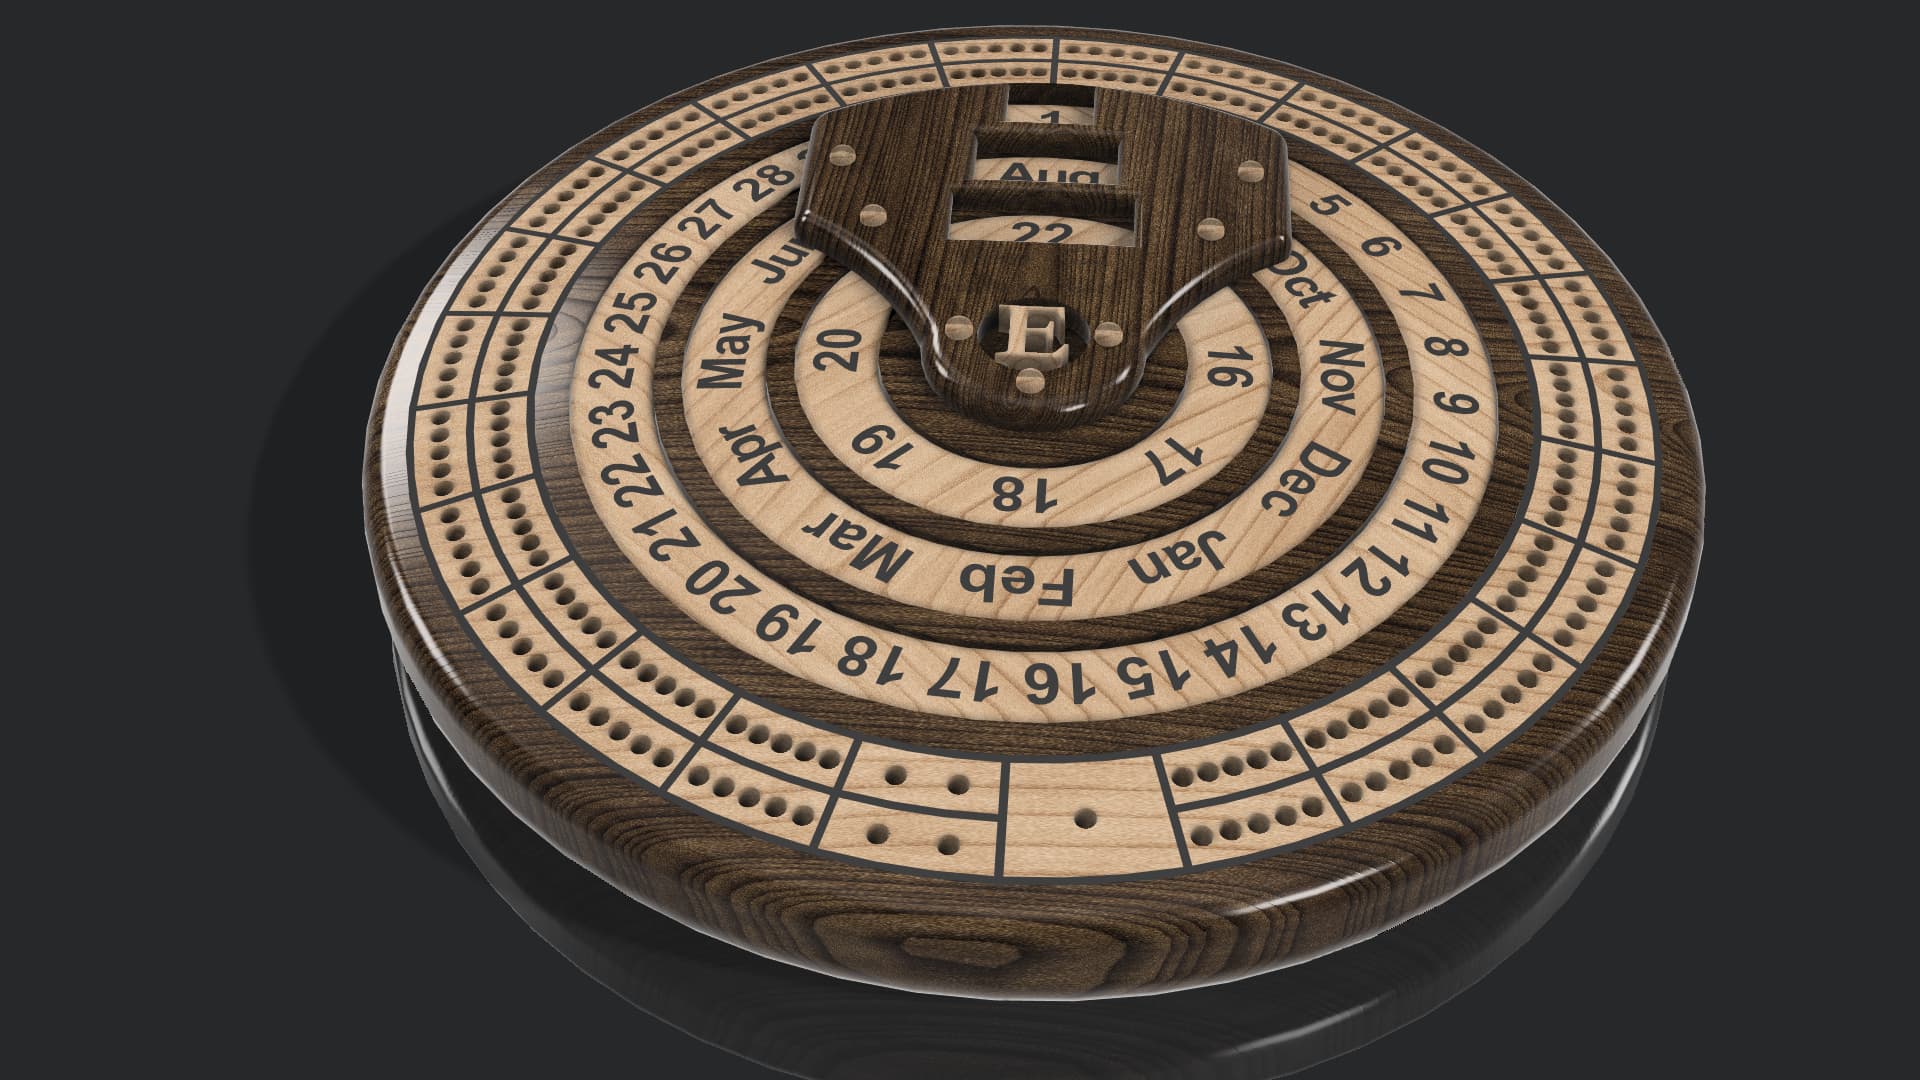
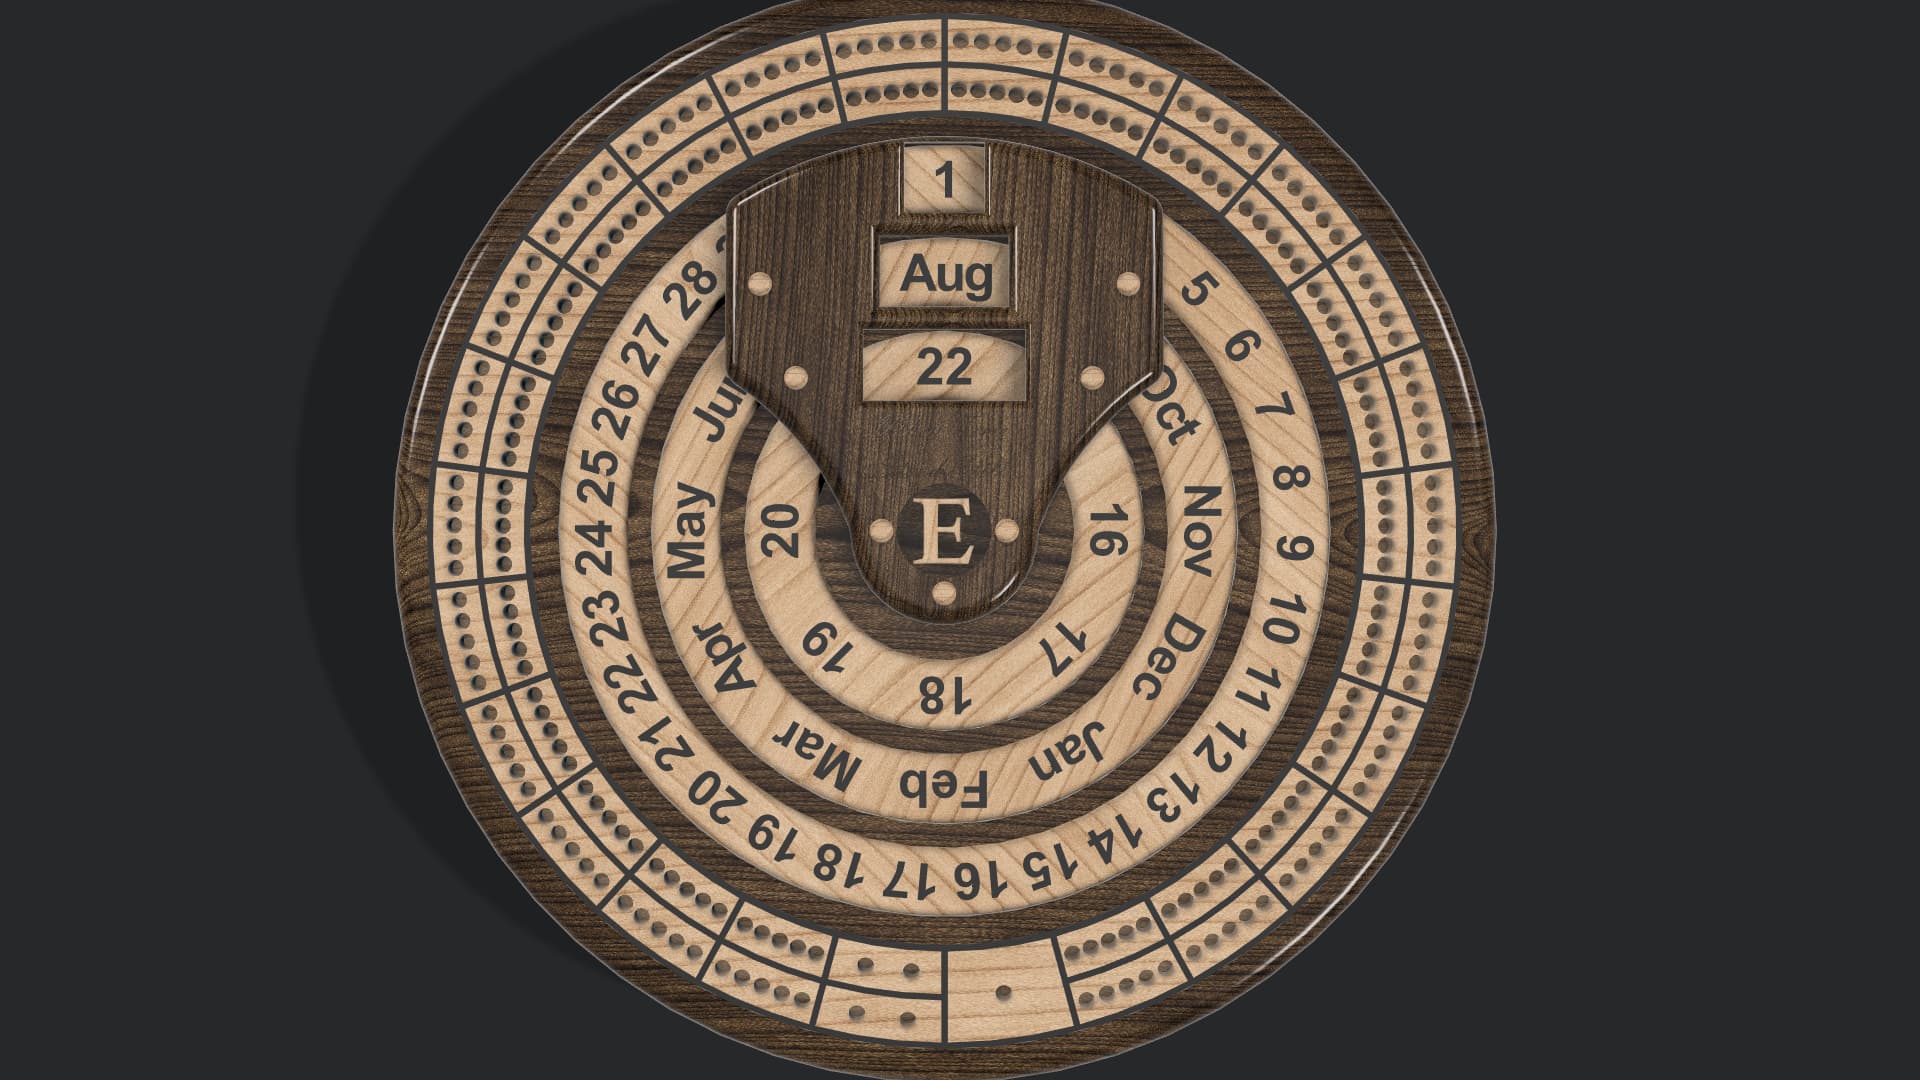
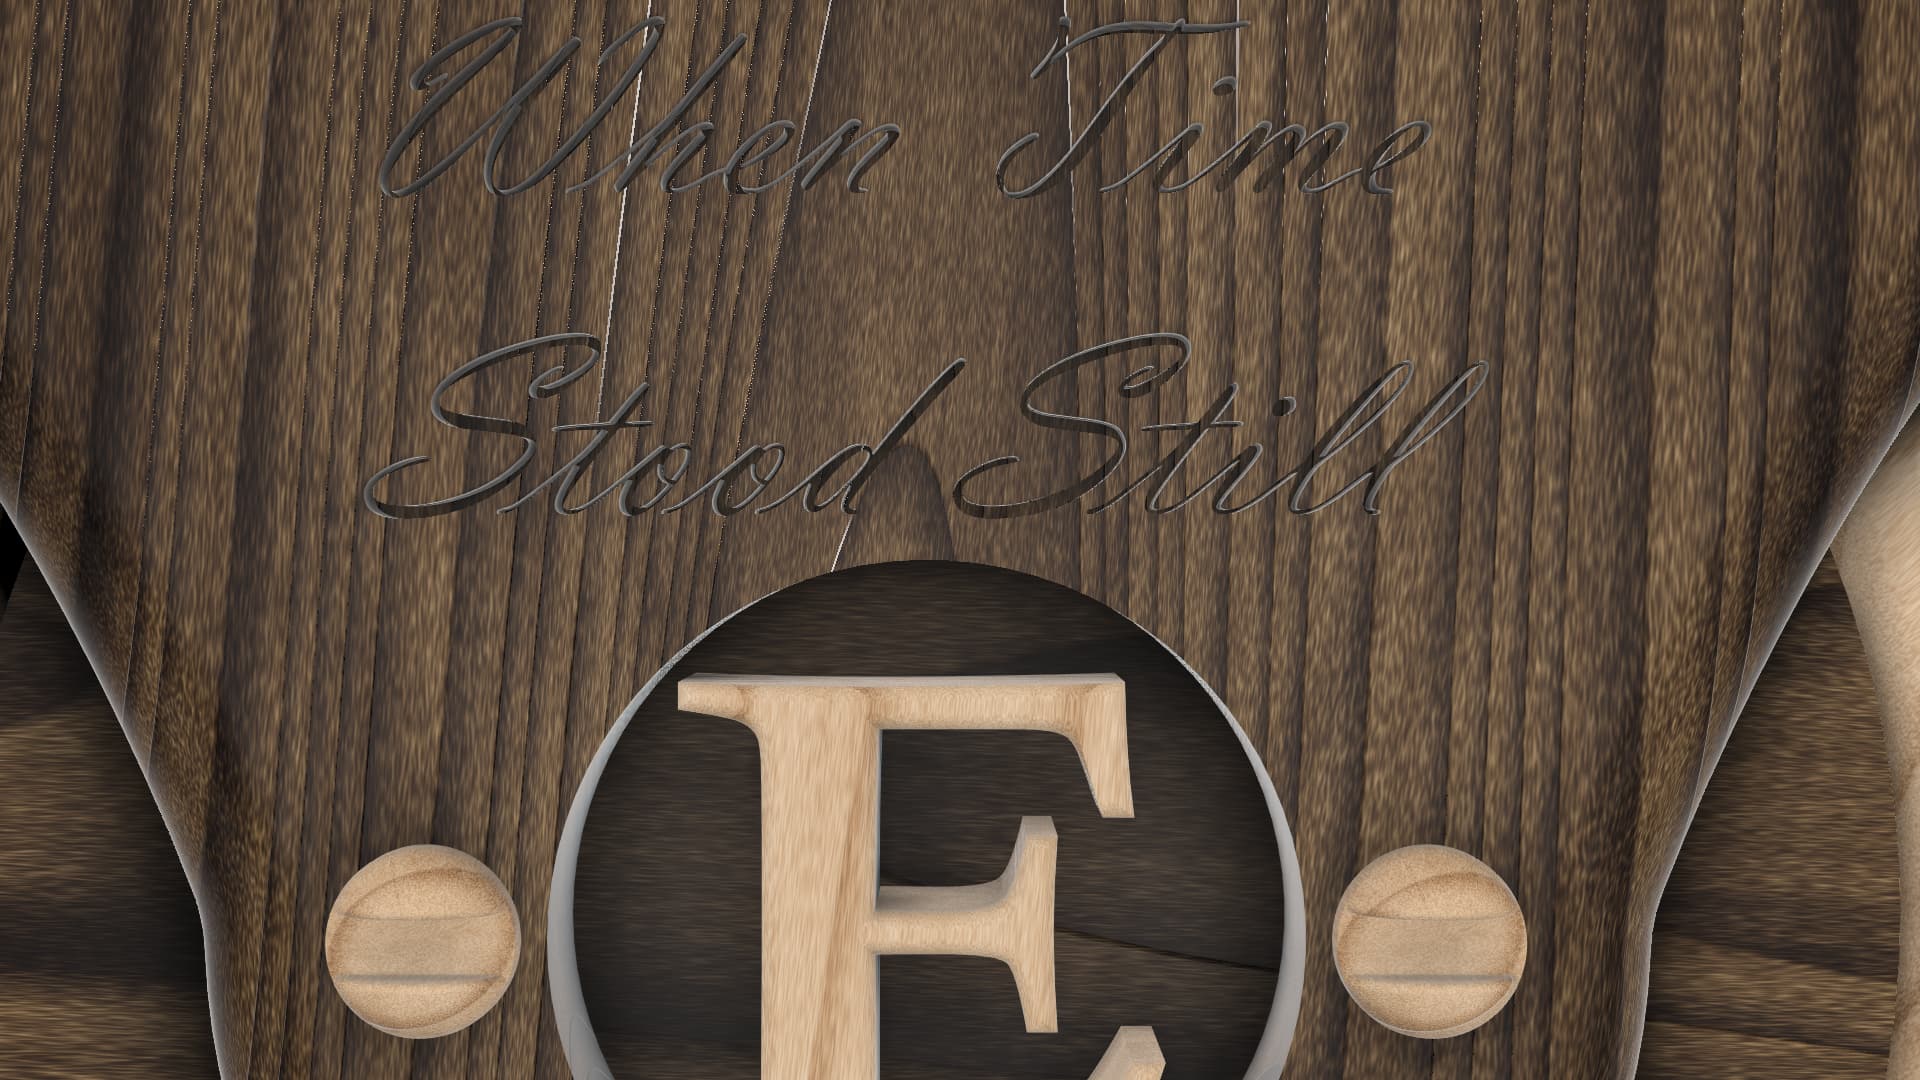
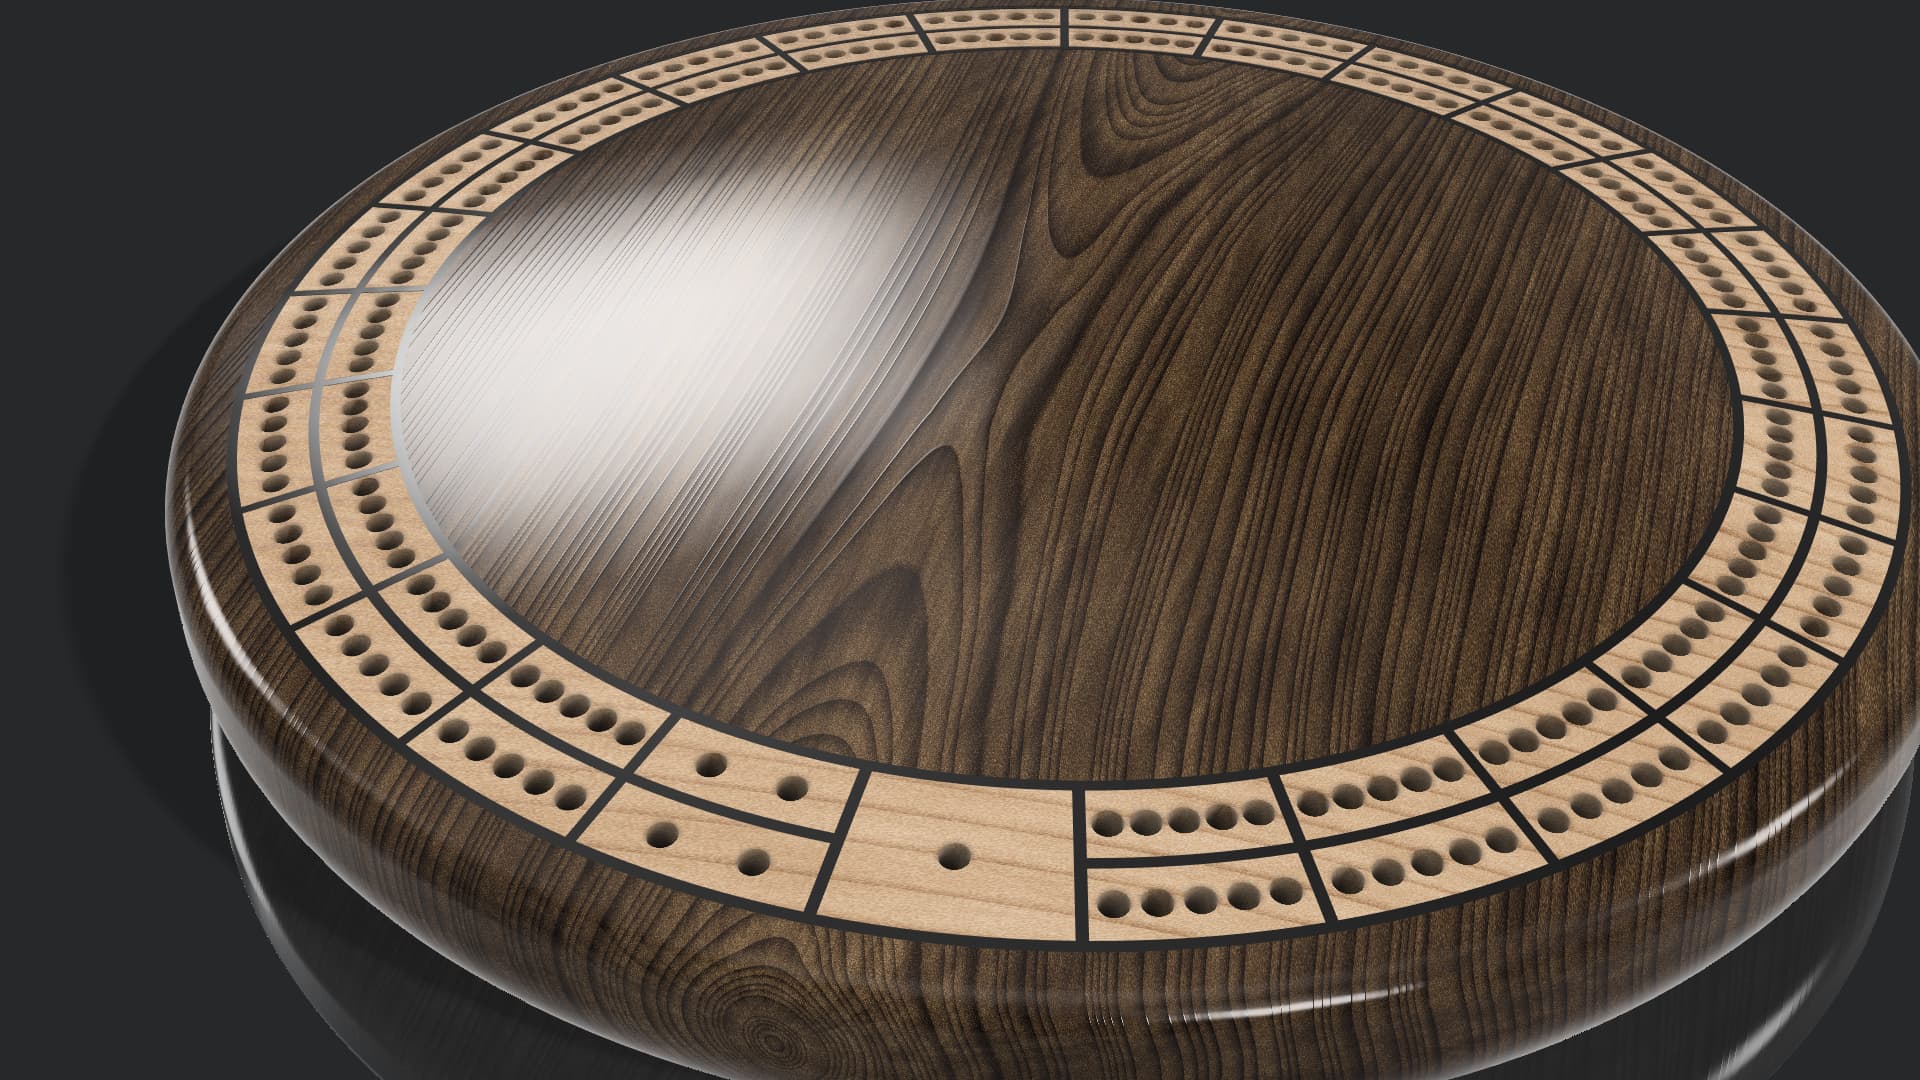
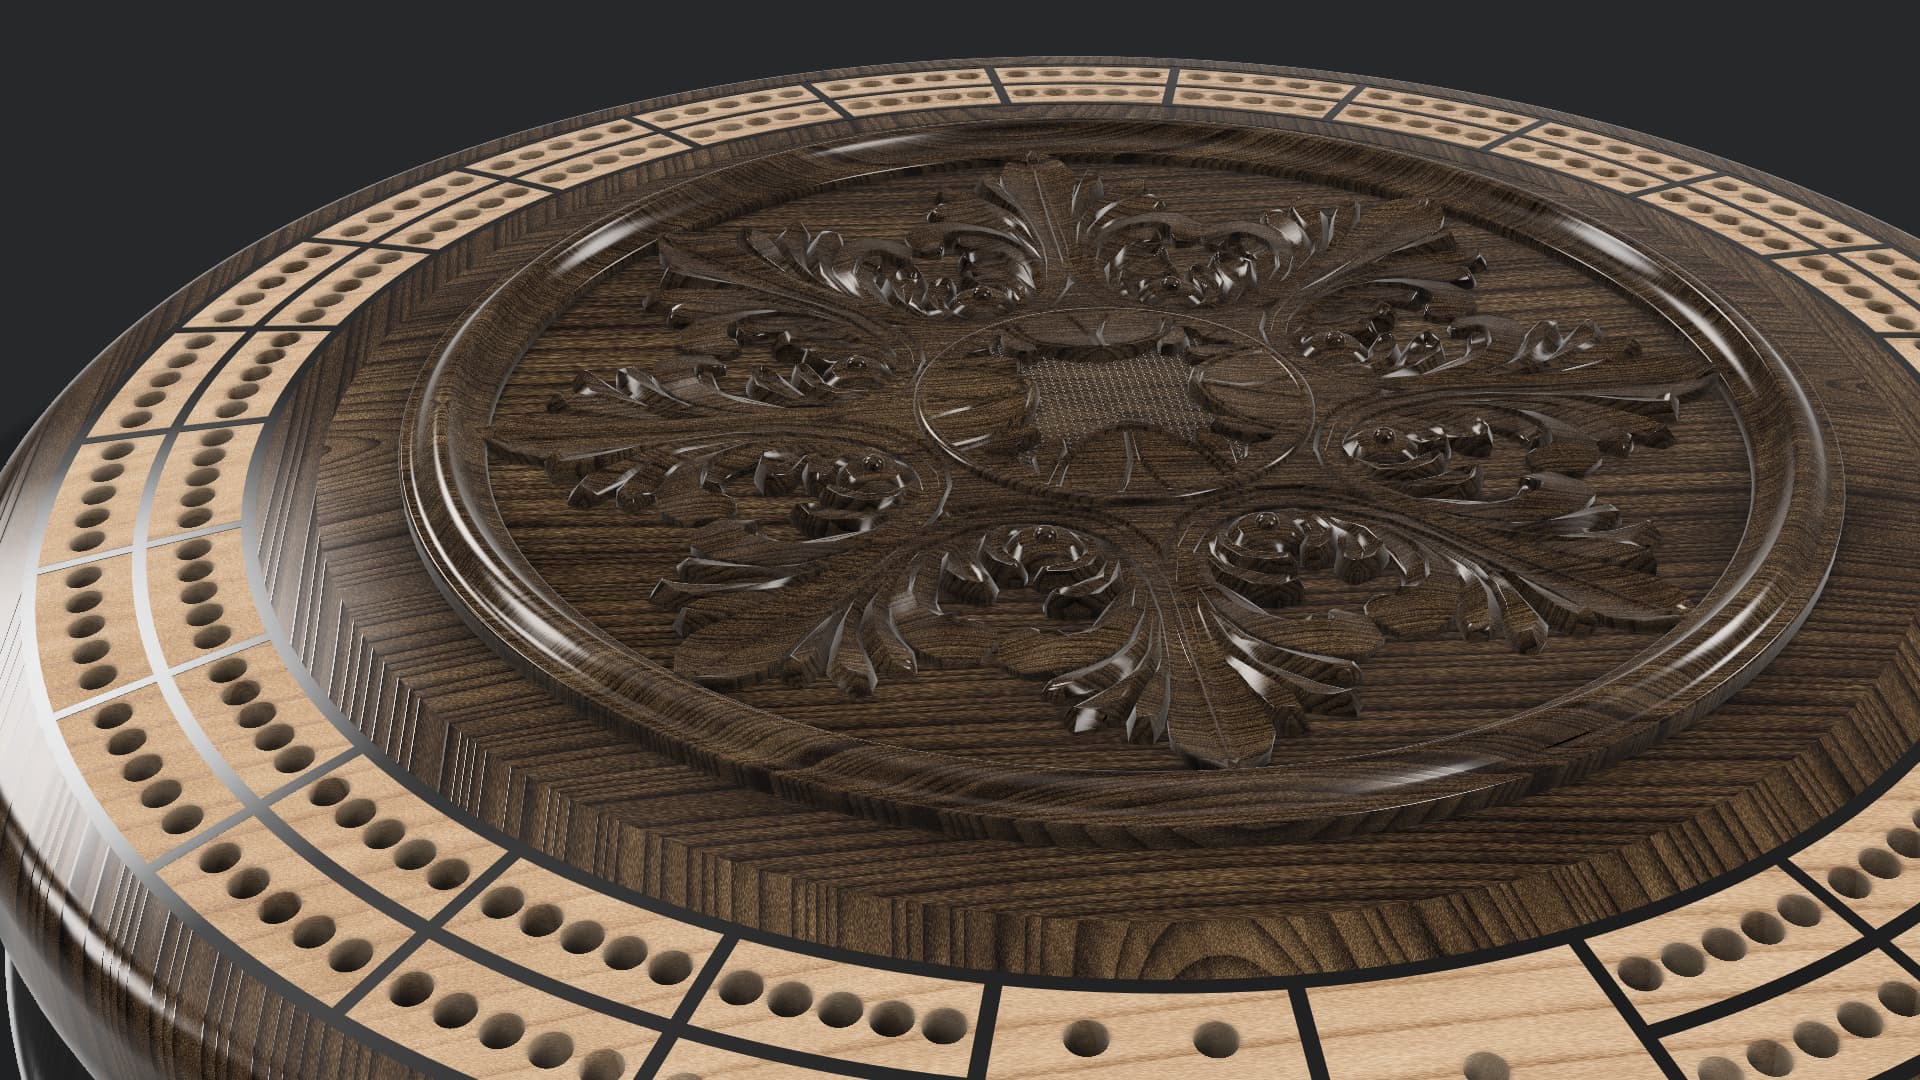
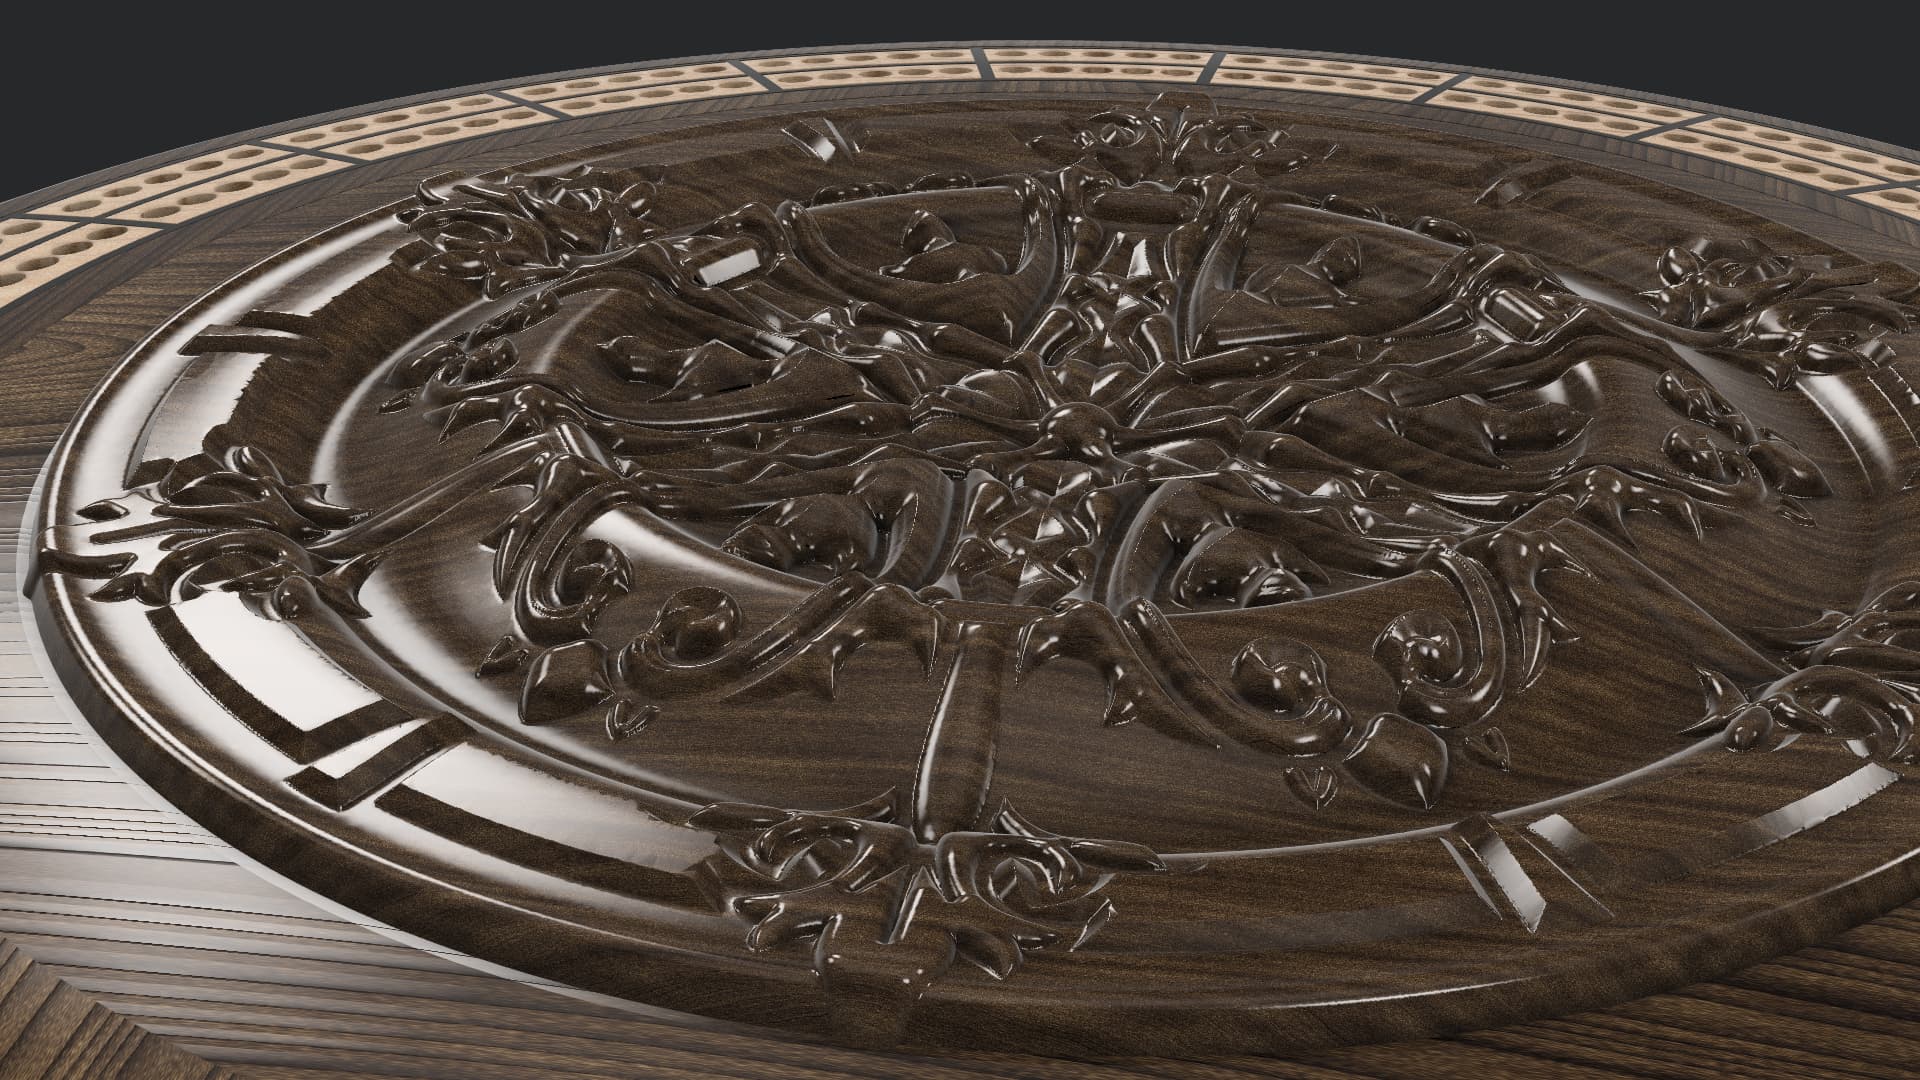
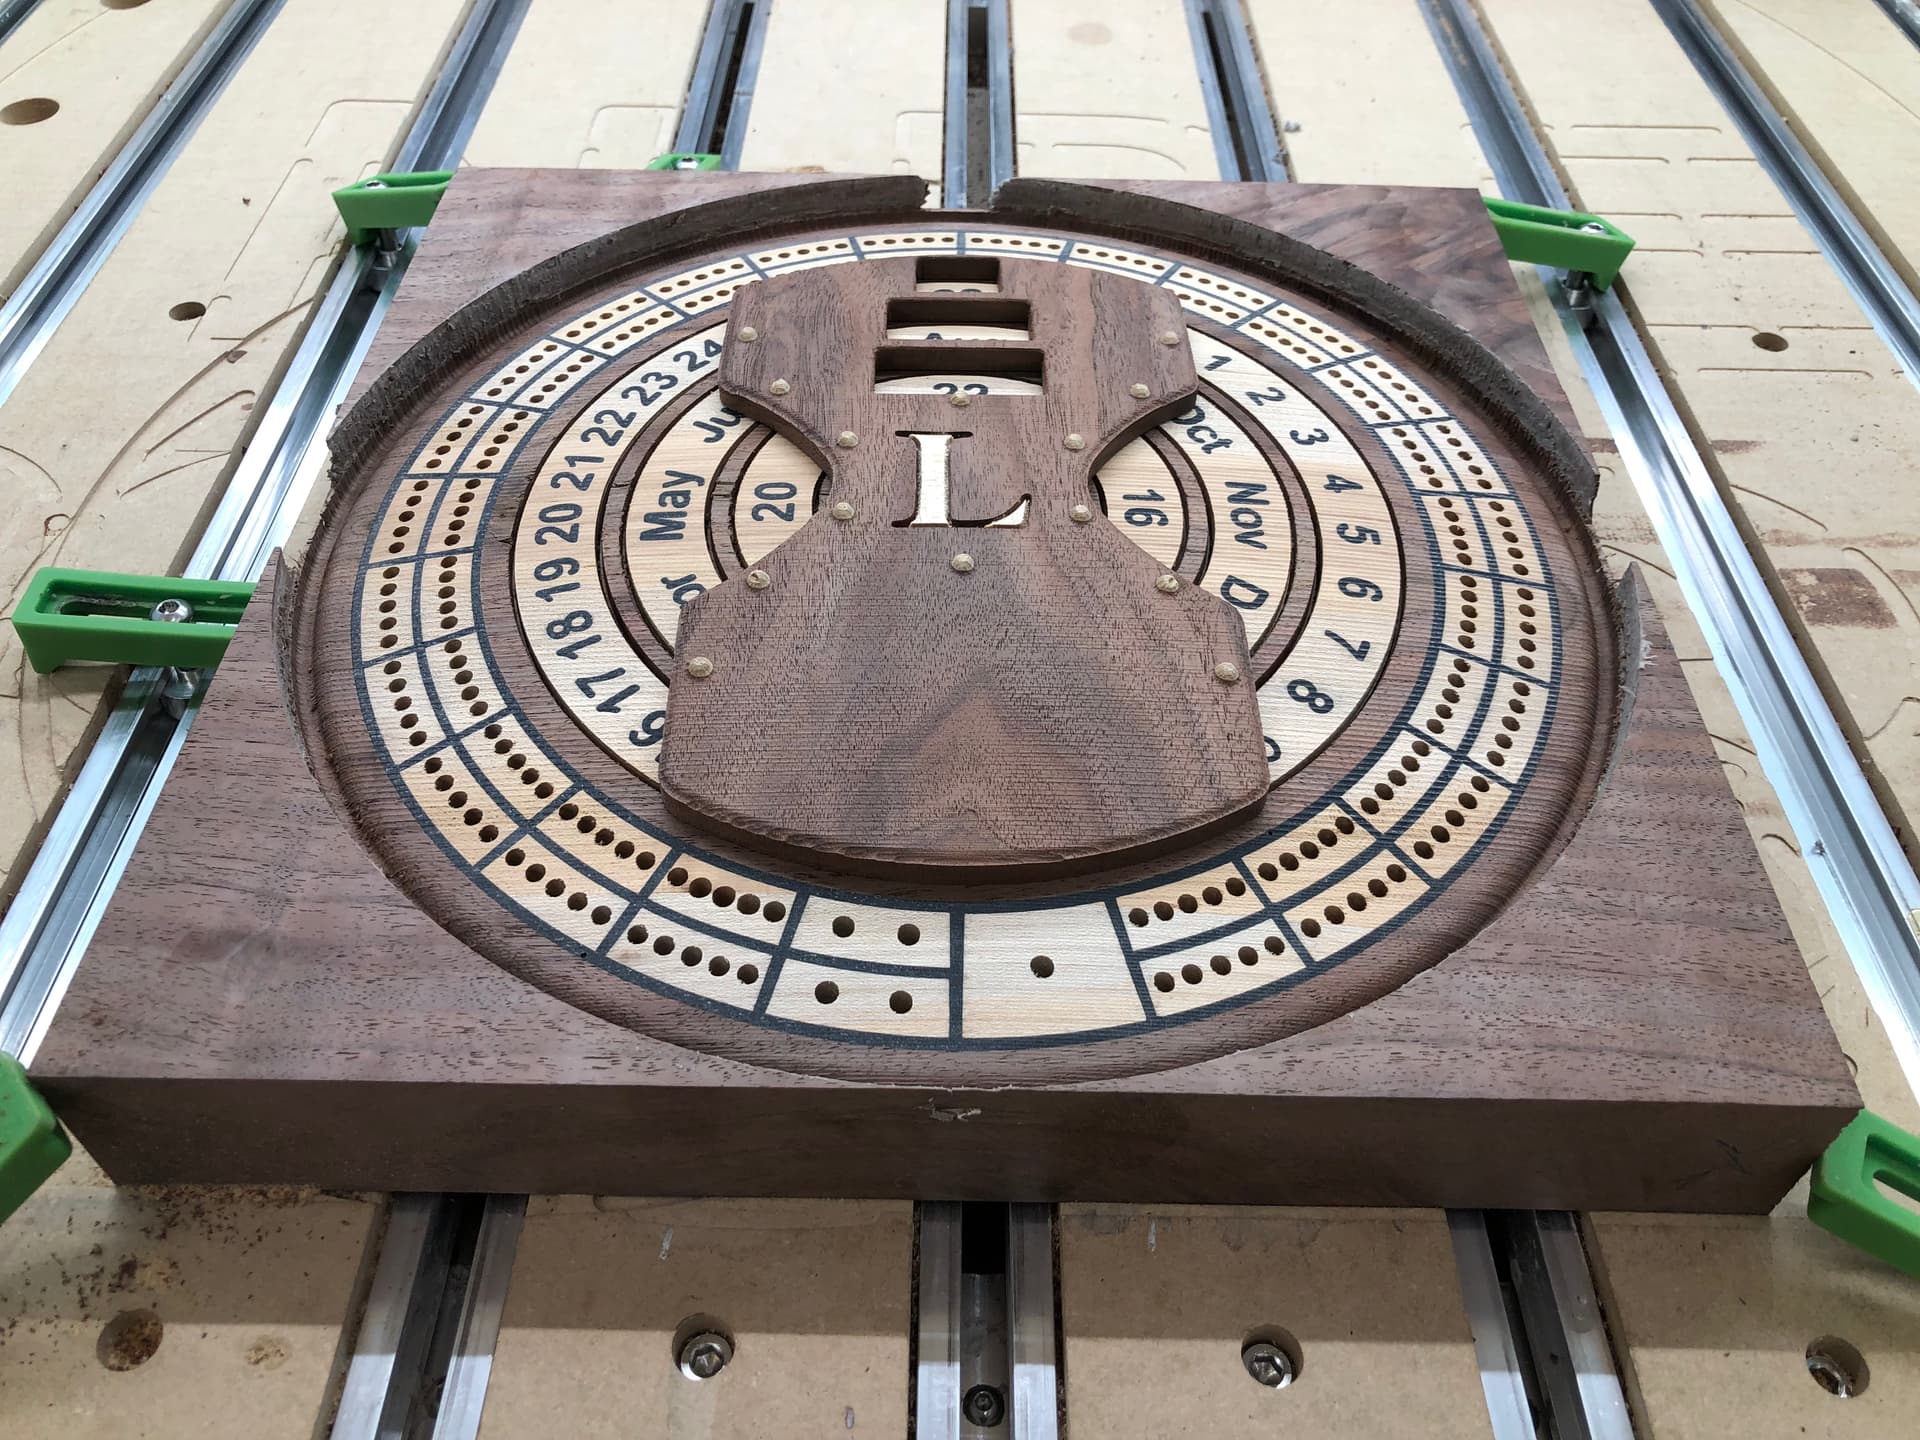
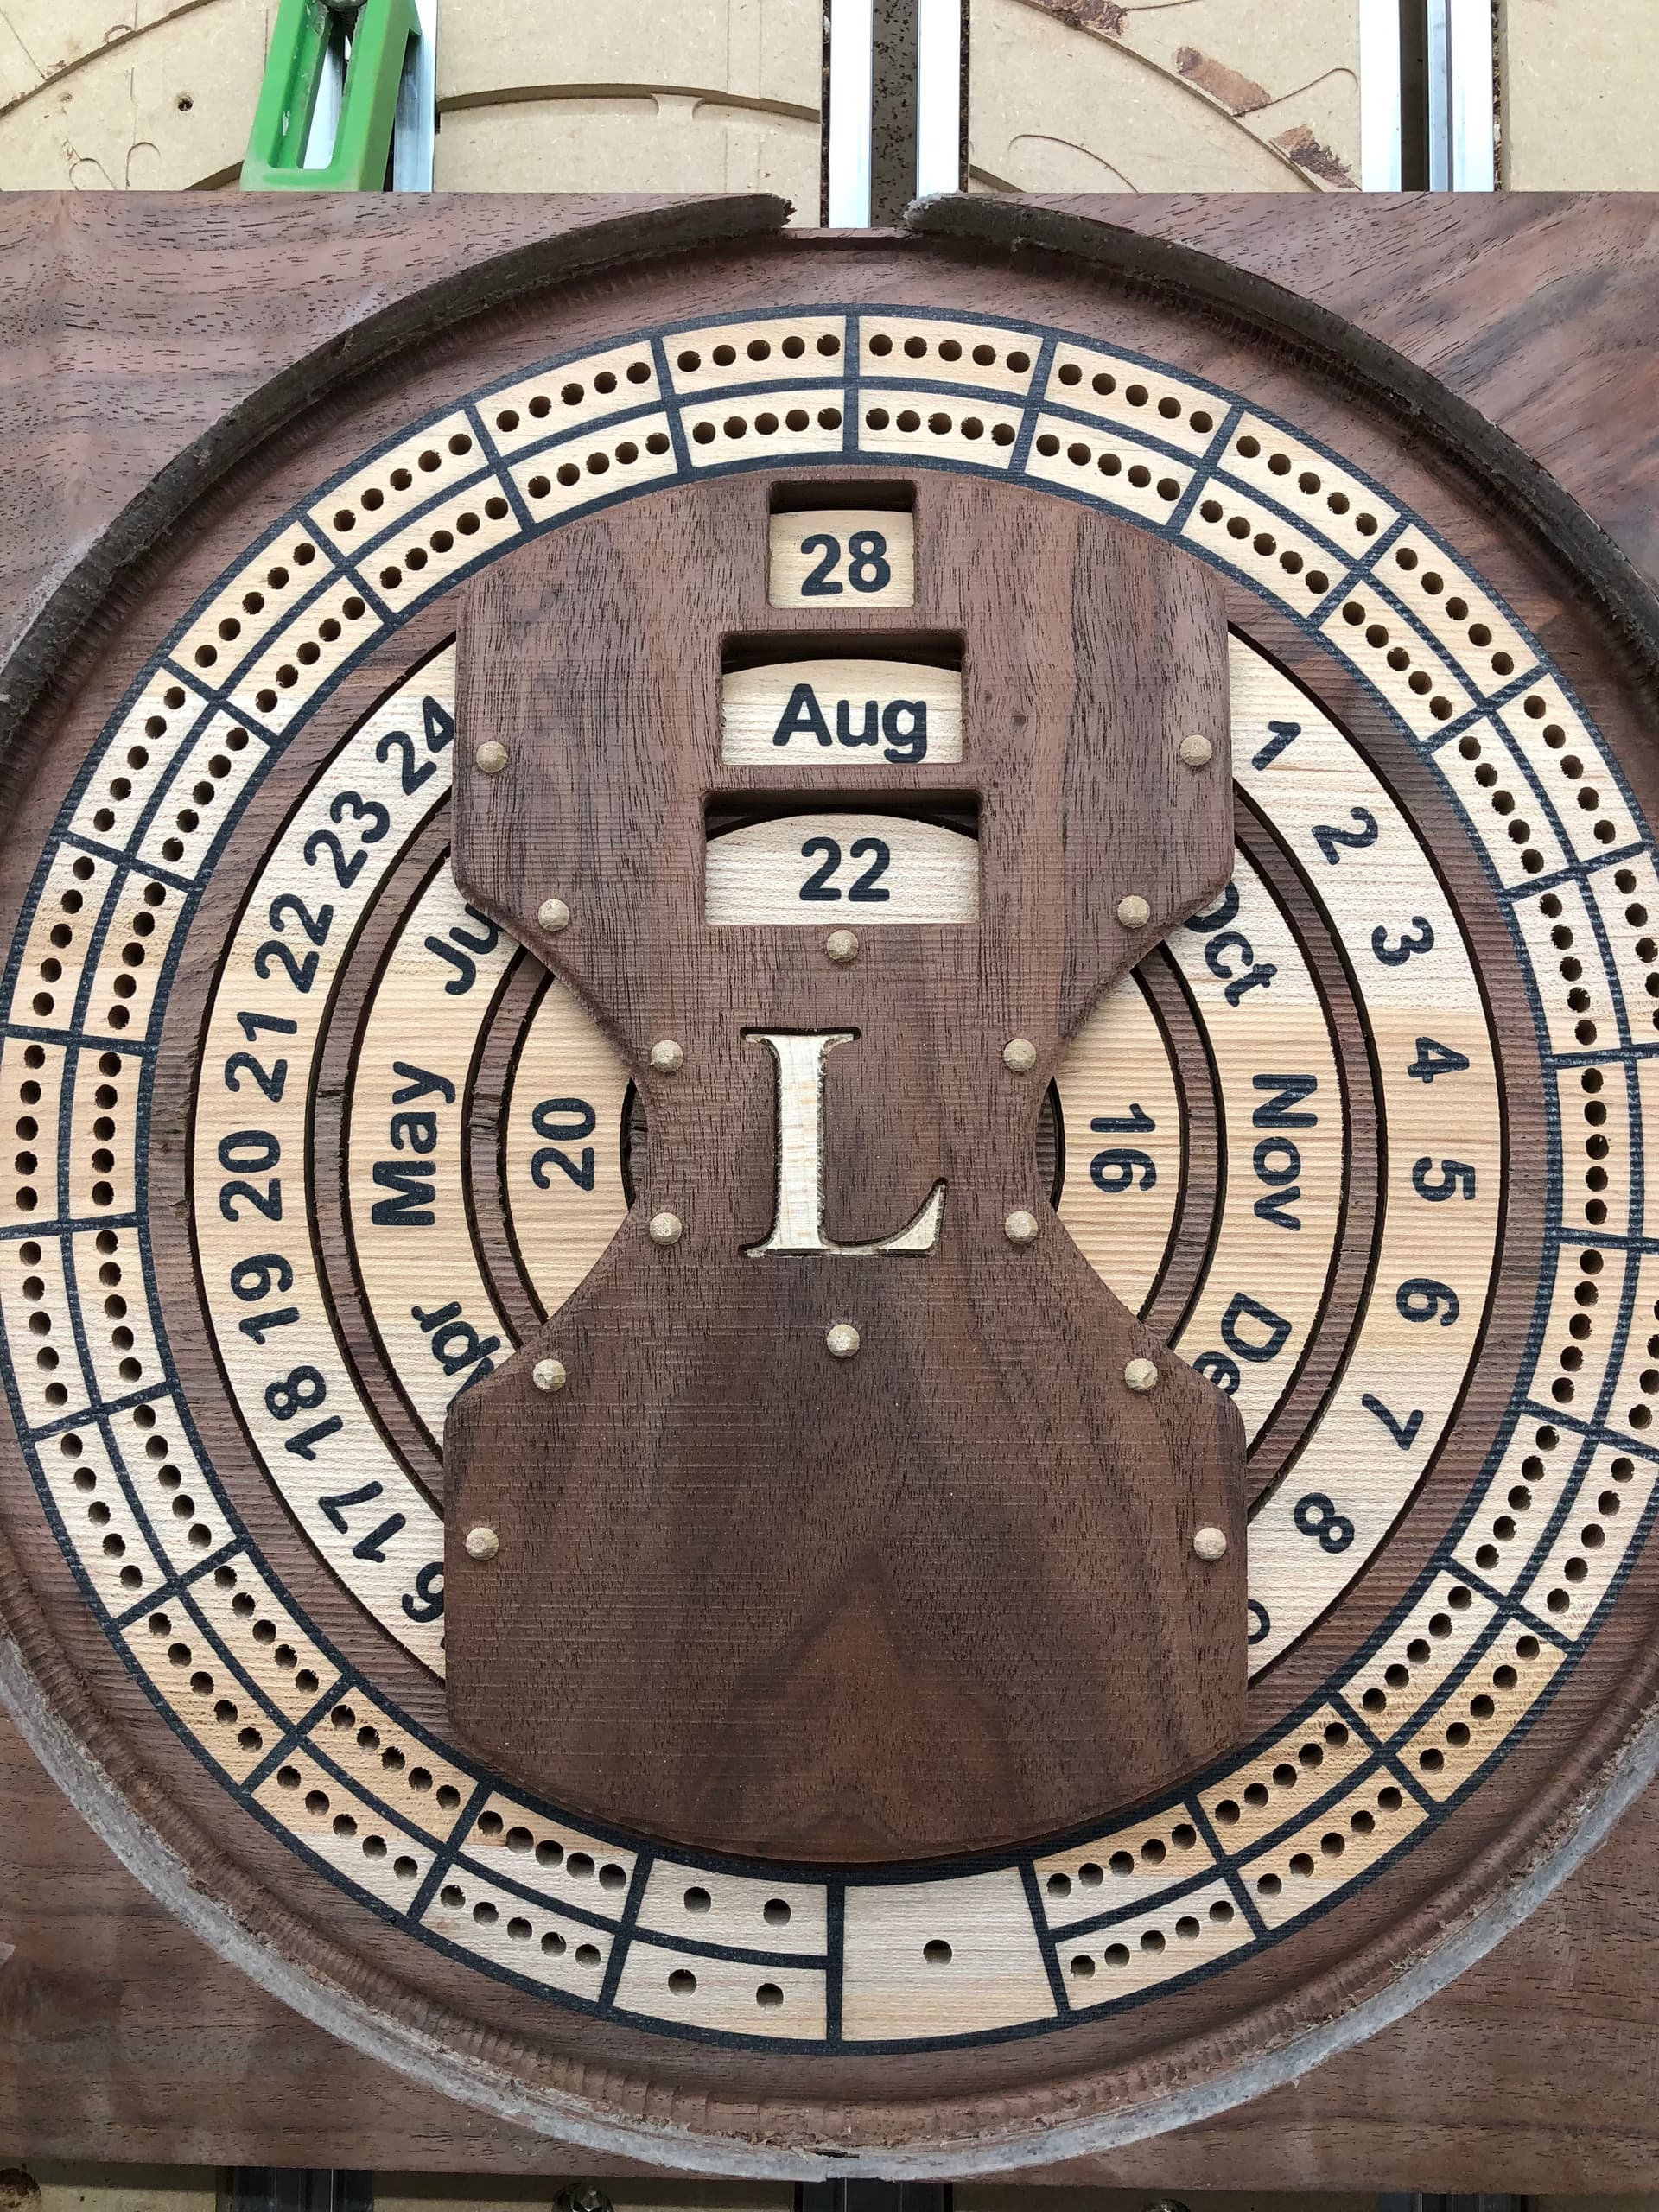
I had a co-worked hire me to make a cribbage board for a future wedding gift later next summer. He gave me free range on it. I have a couple of designs done and wanted to share this one with everyone. I think he will go with this one. Its titled “When Time Stood Still”.
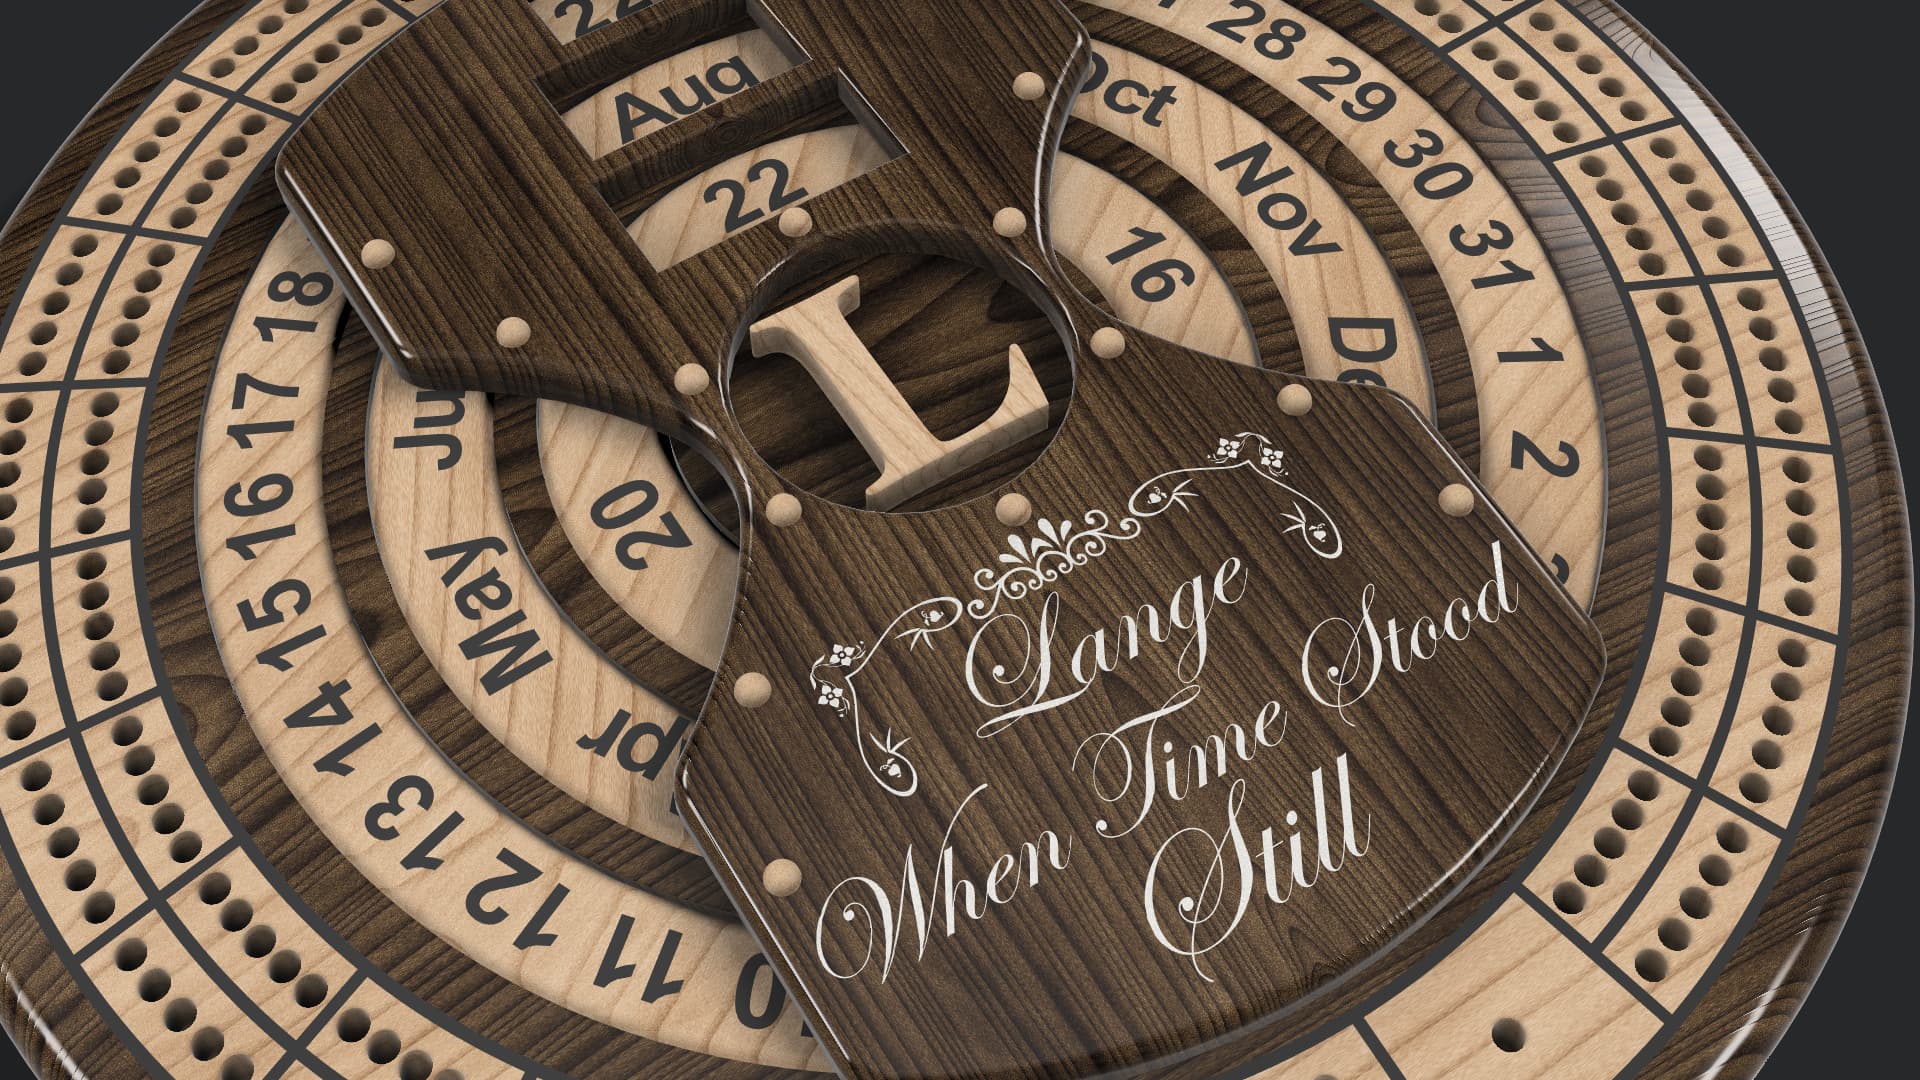
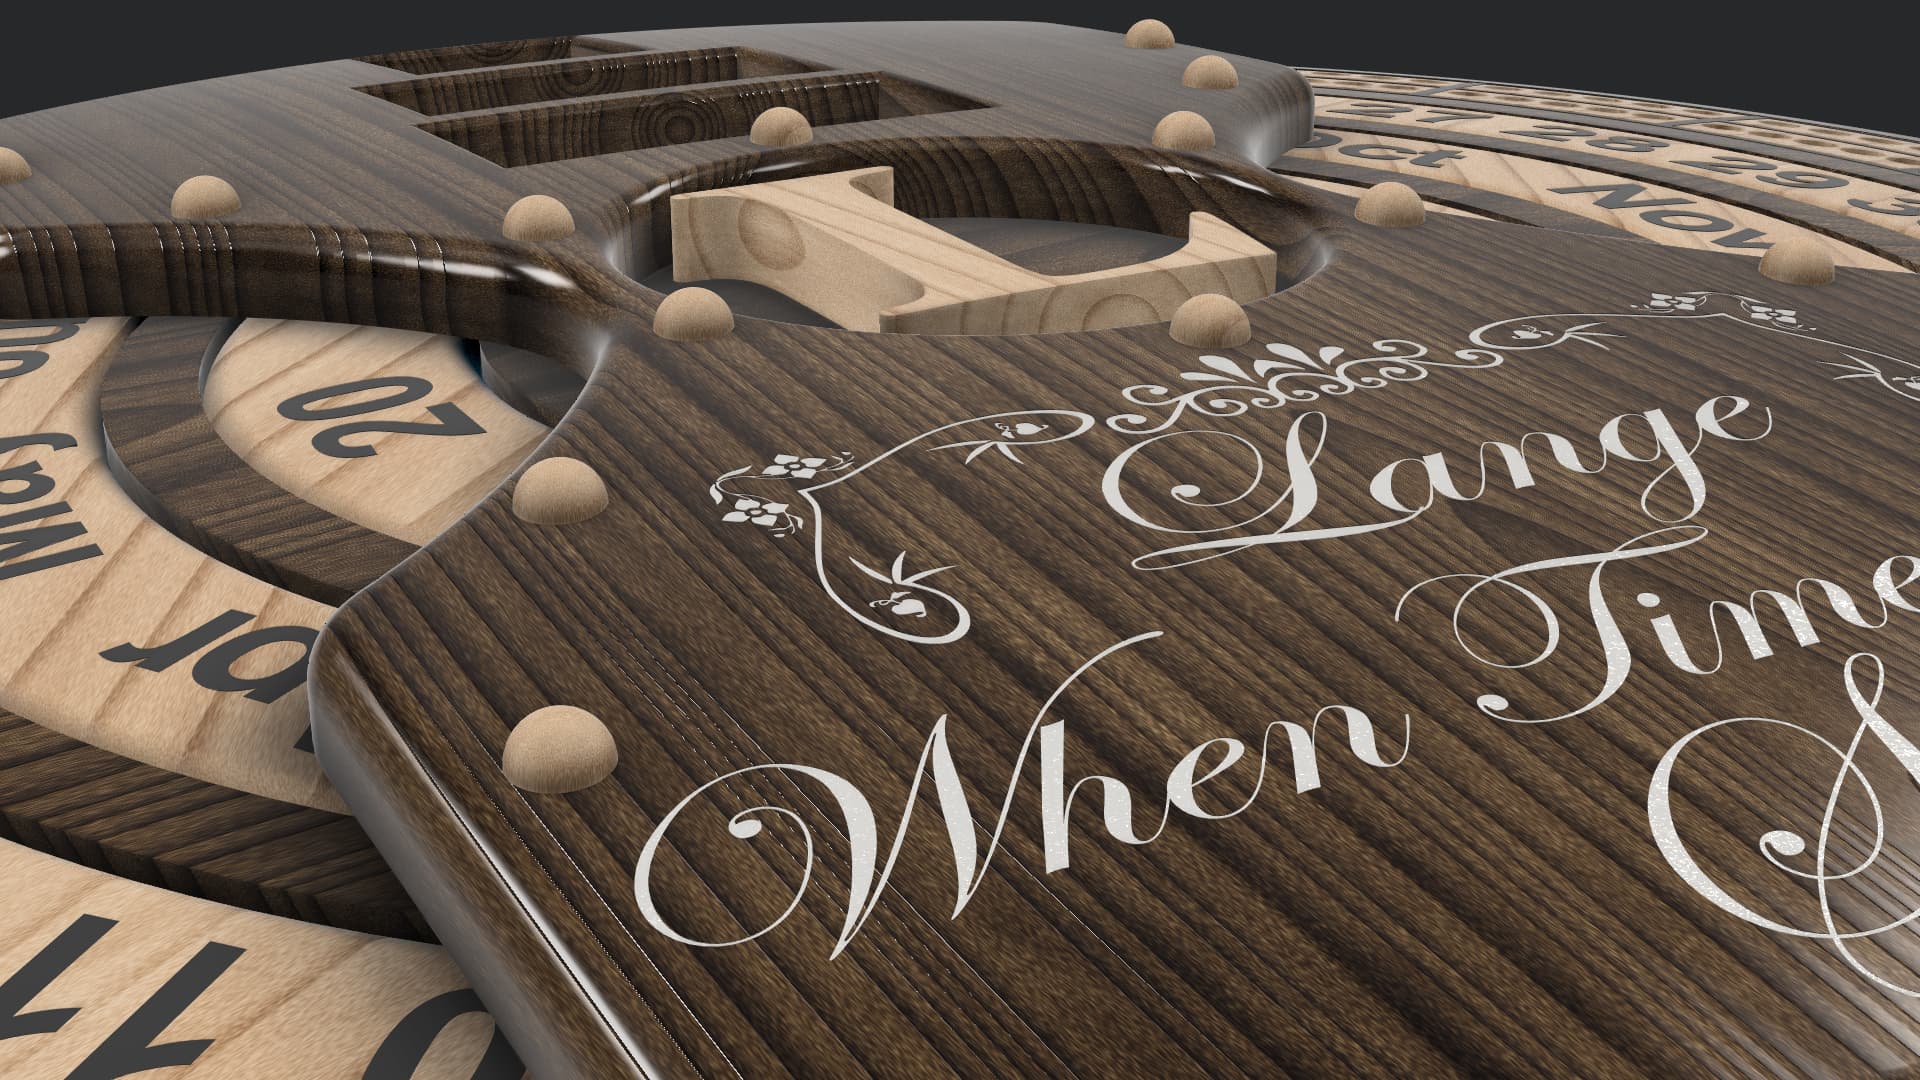
In the design sheet I’m sending him, he has the option for different style fonts for the center Last name initial and the specific wording he wants.
Right now, the overall materials/dimensions are:
Black Walnut w/ Maple Inlays and Epoxy Inlays
Diameter: 12"
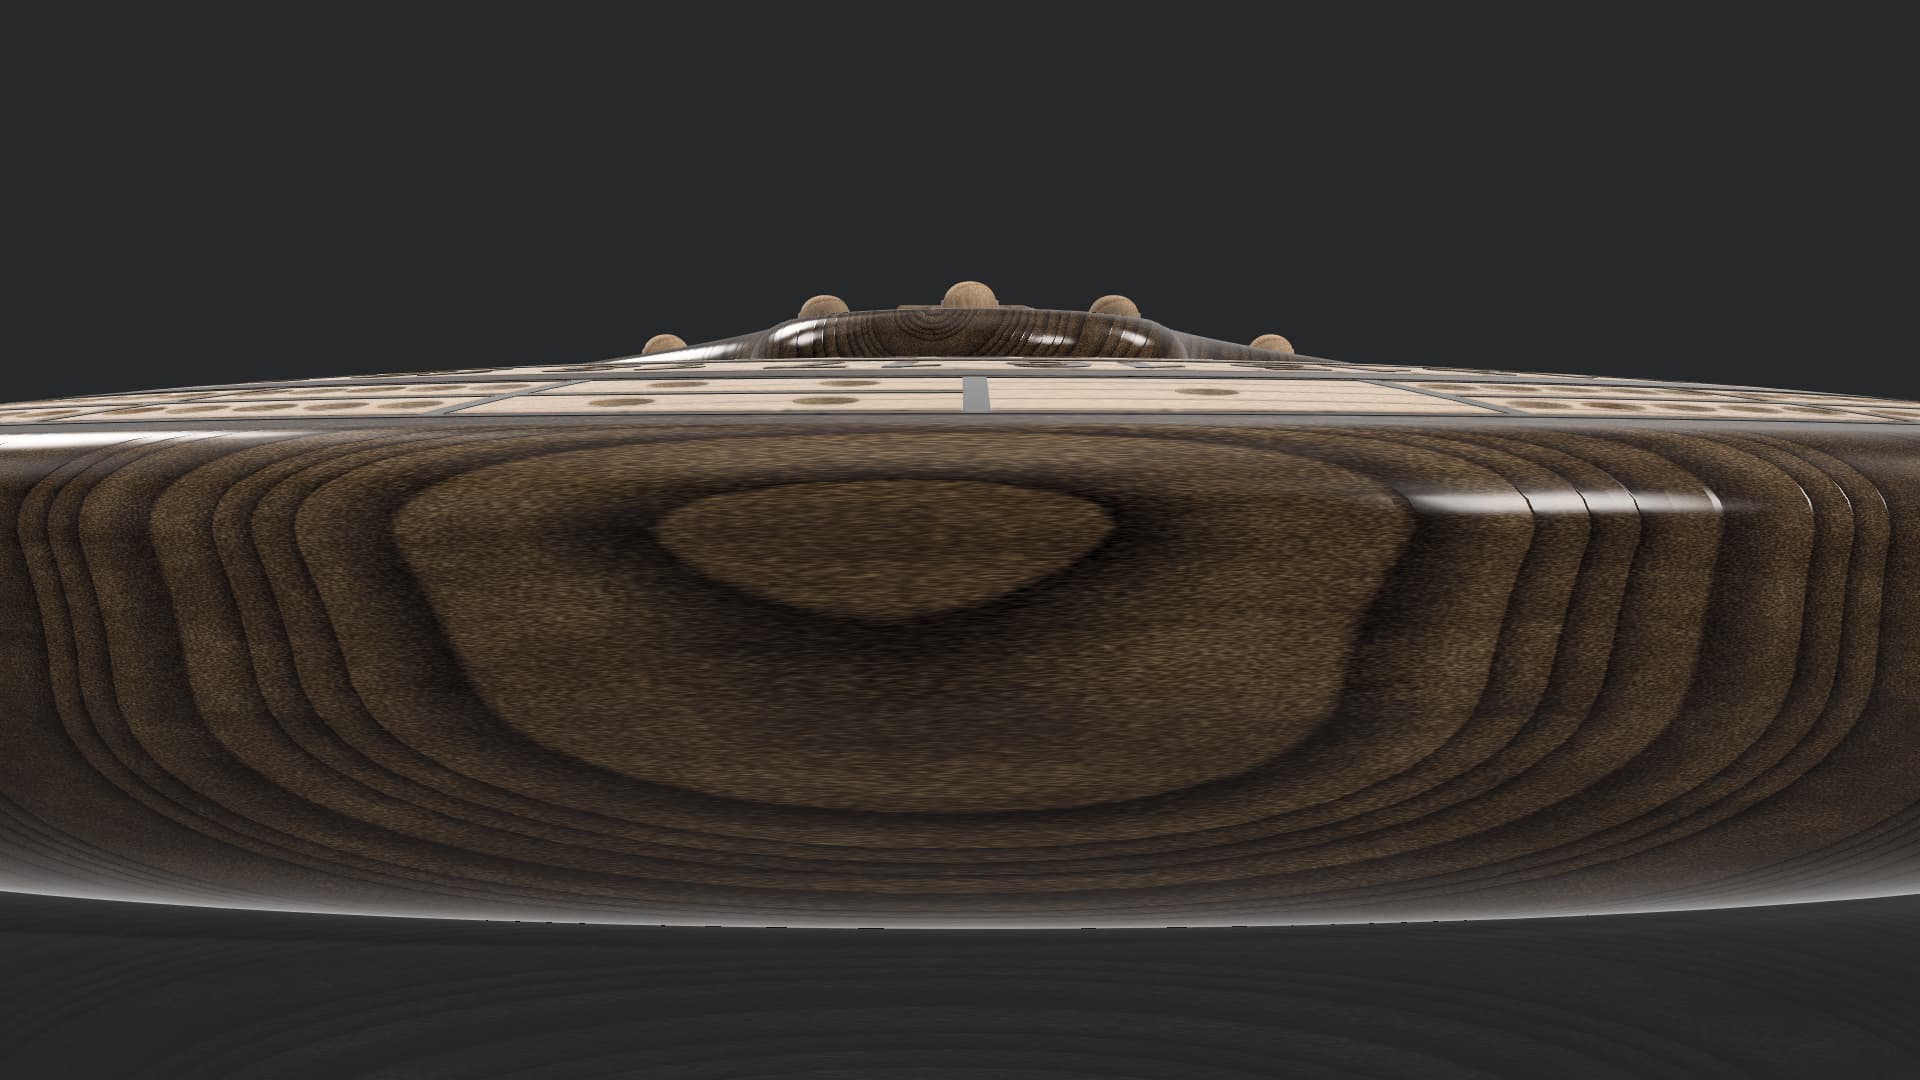
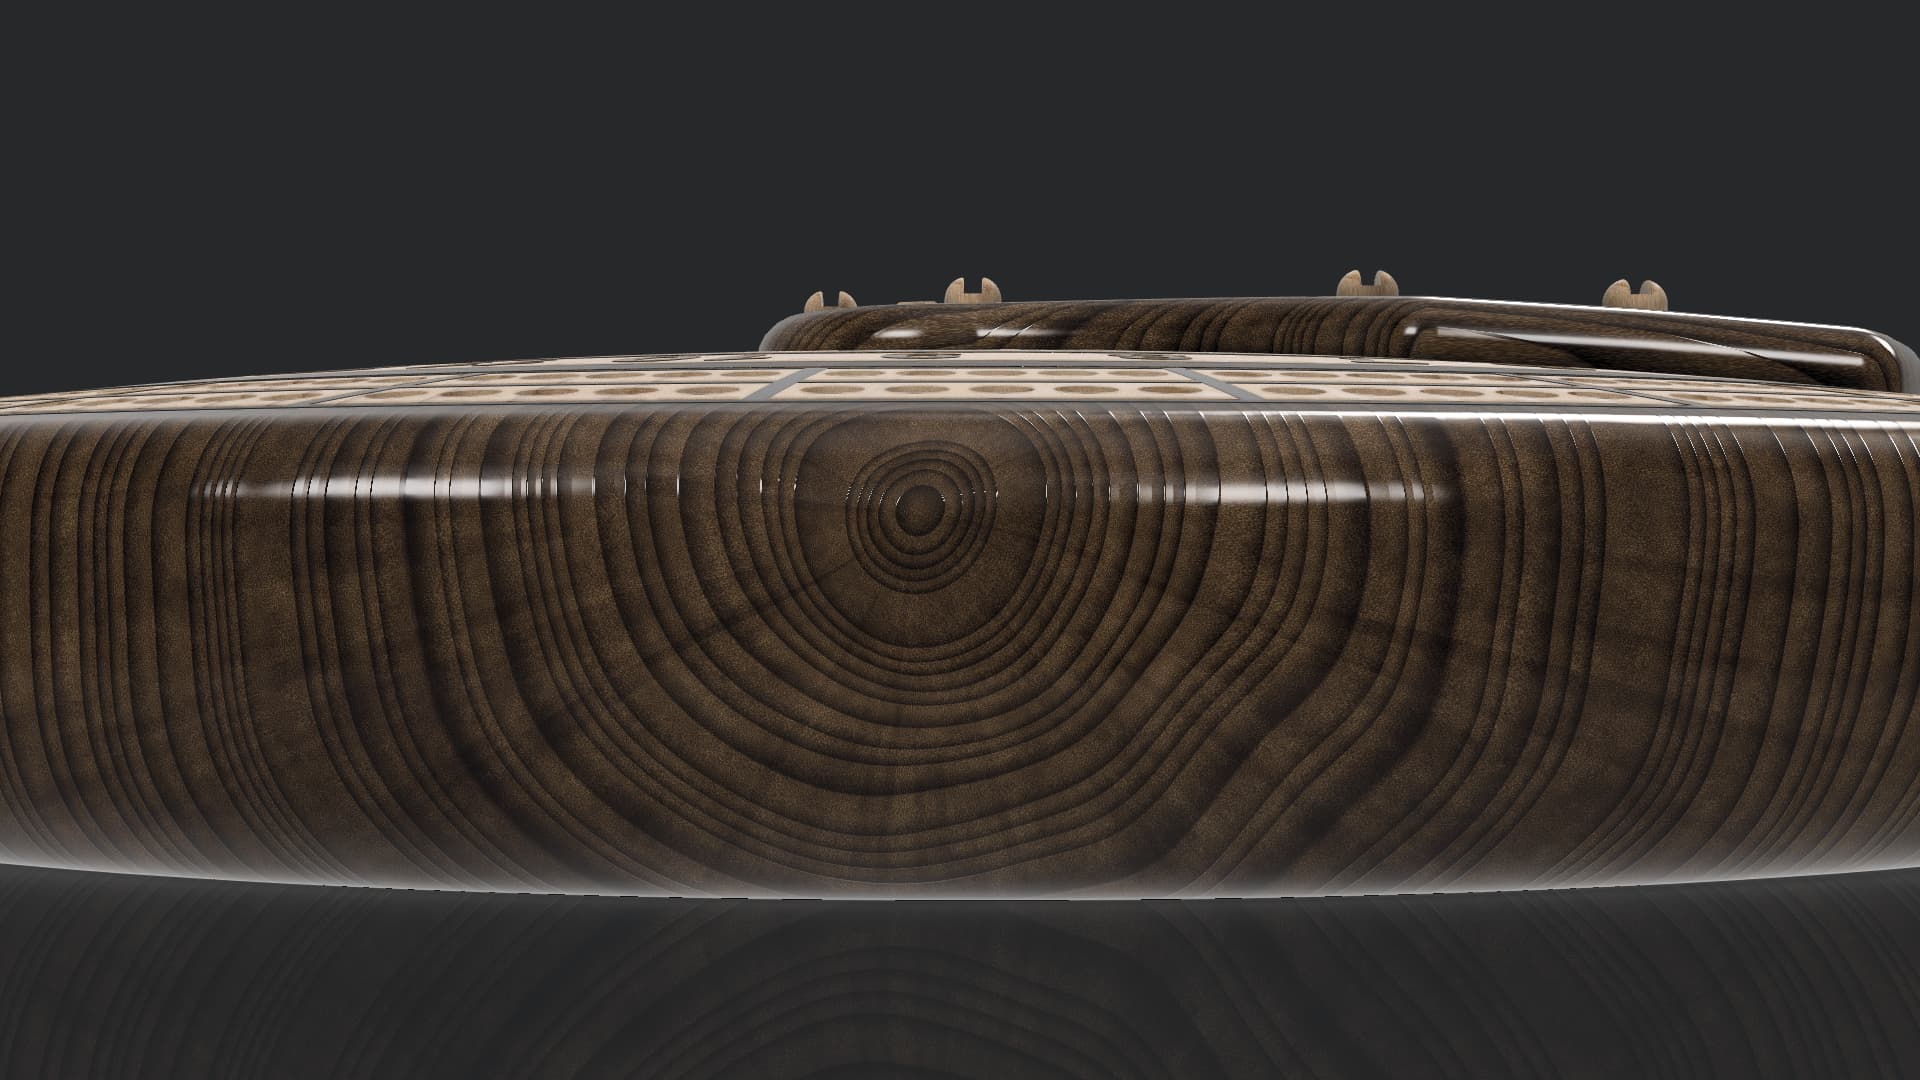
Thickness: 2.125" from the uppermost top and contours to 1.5" at the lowest point
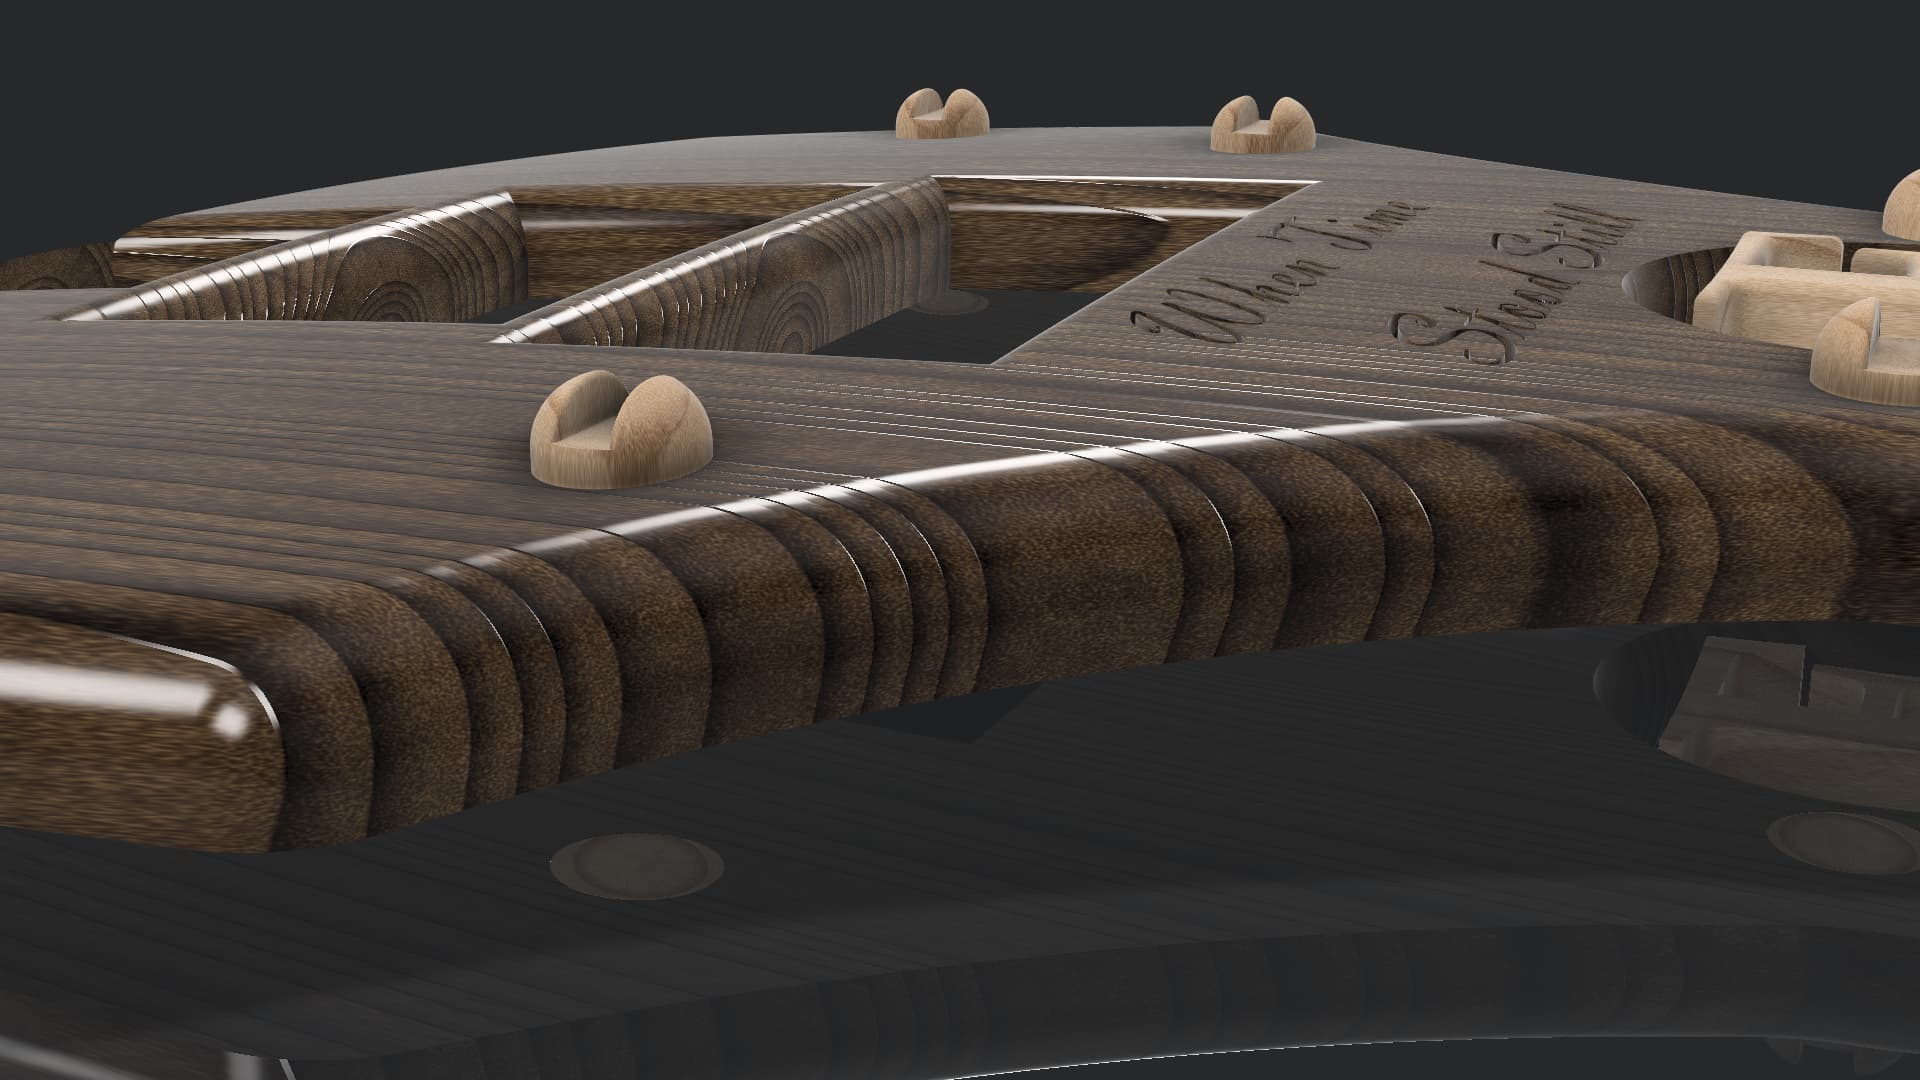
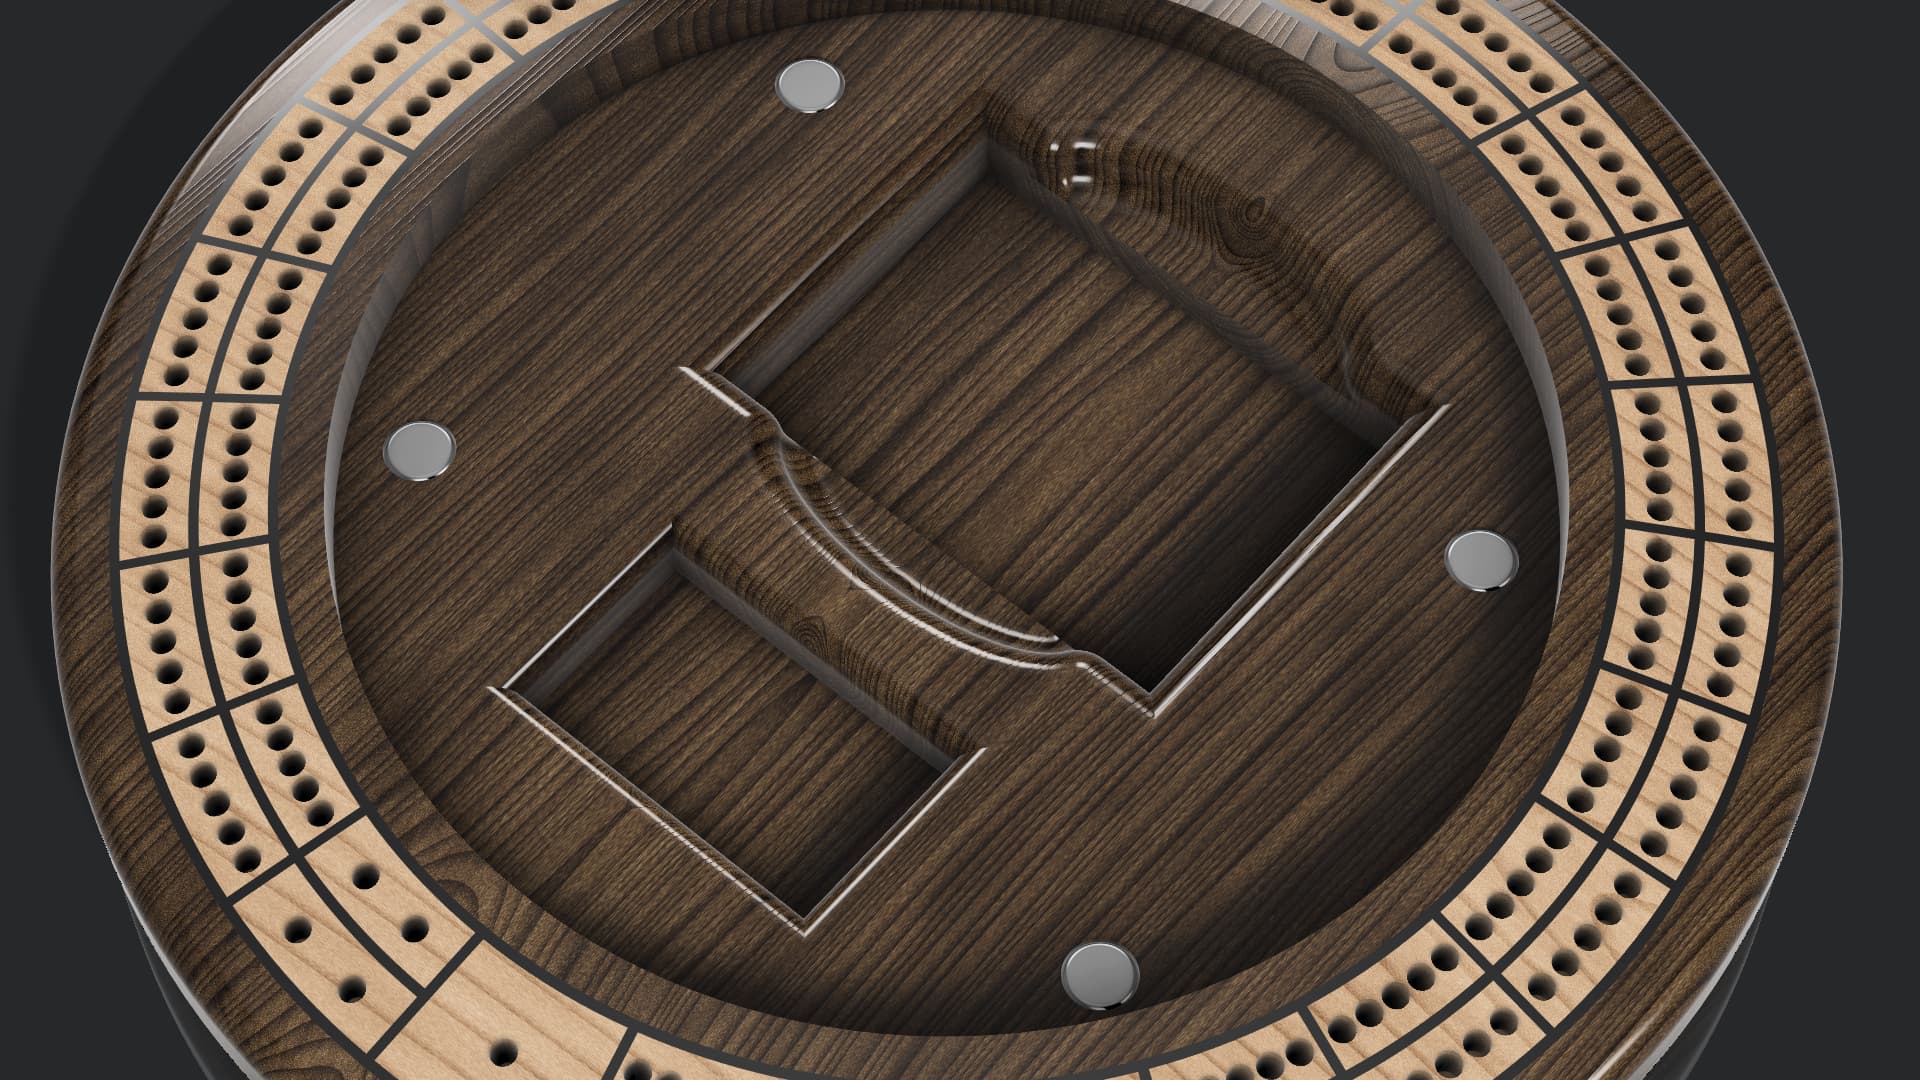
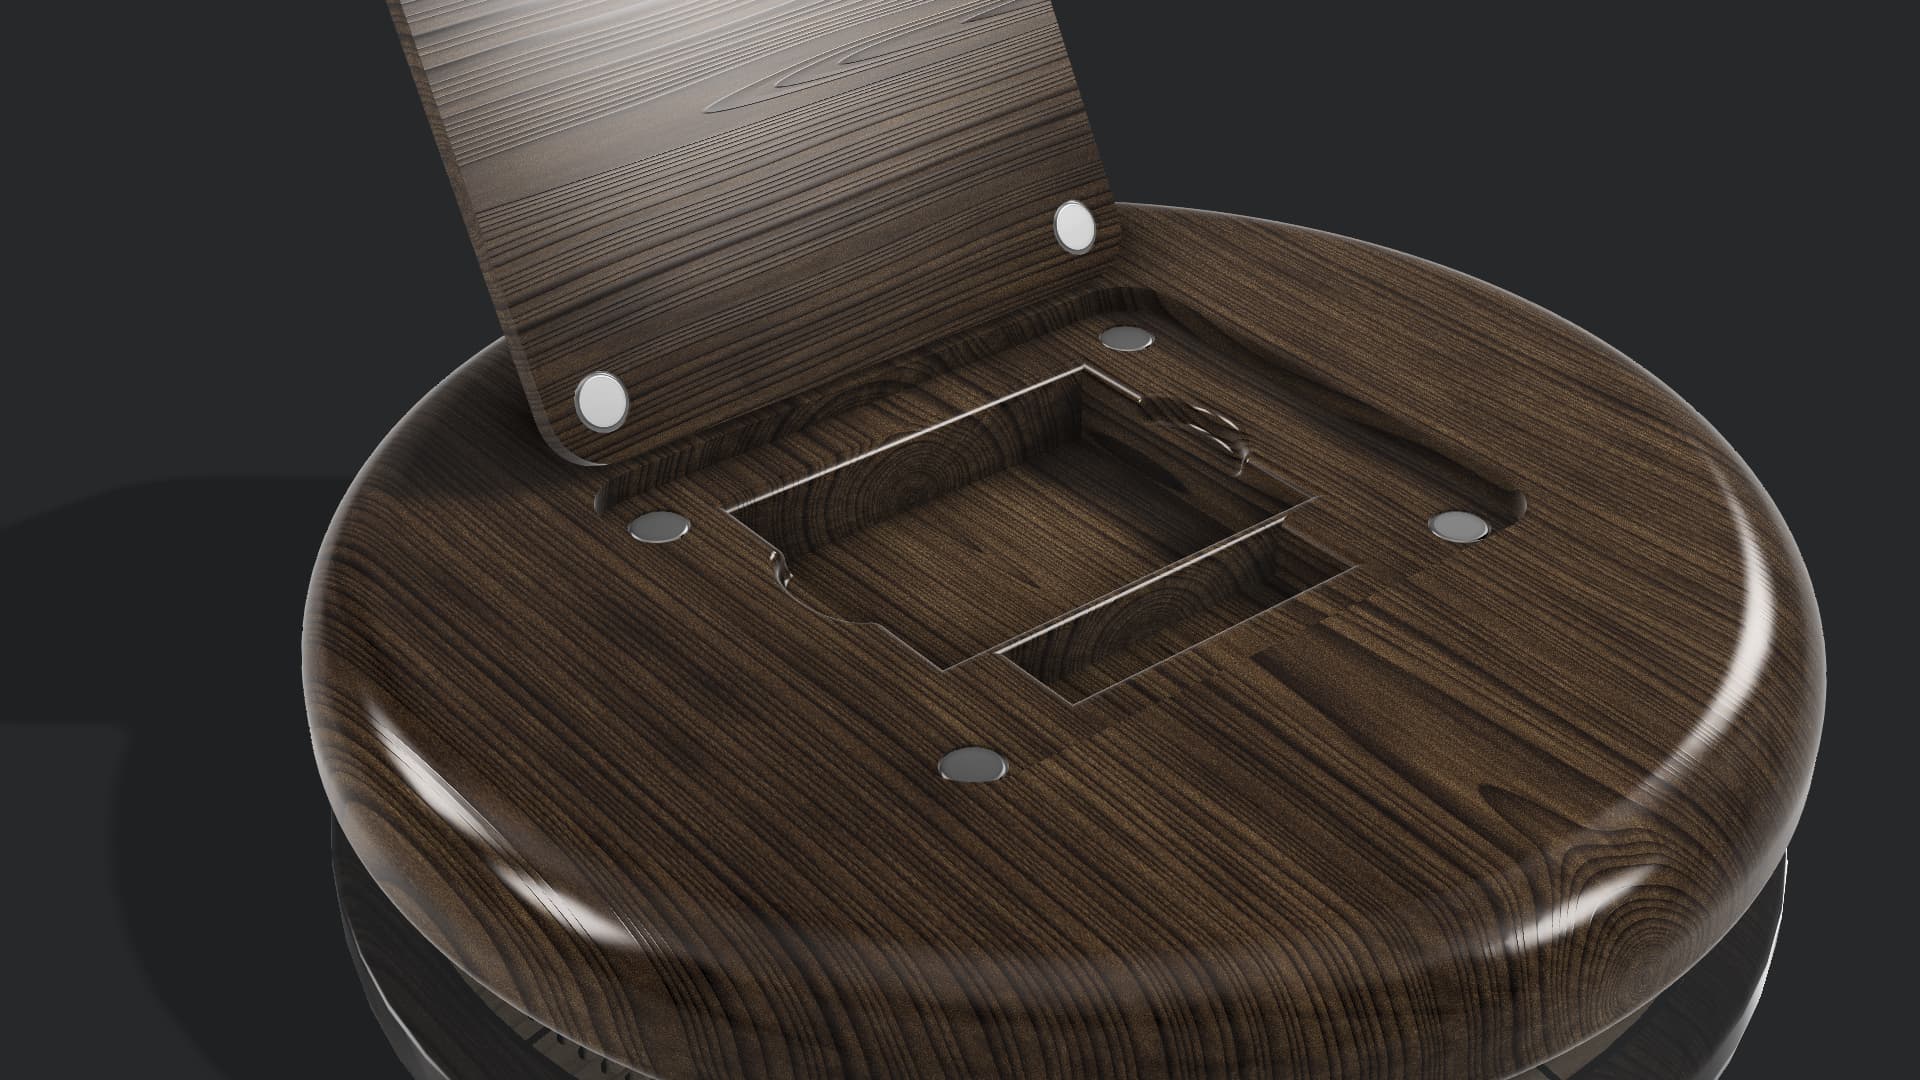
The bottom of the board has a hidden drawer for cards and pegs.
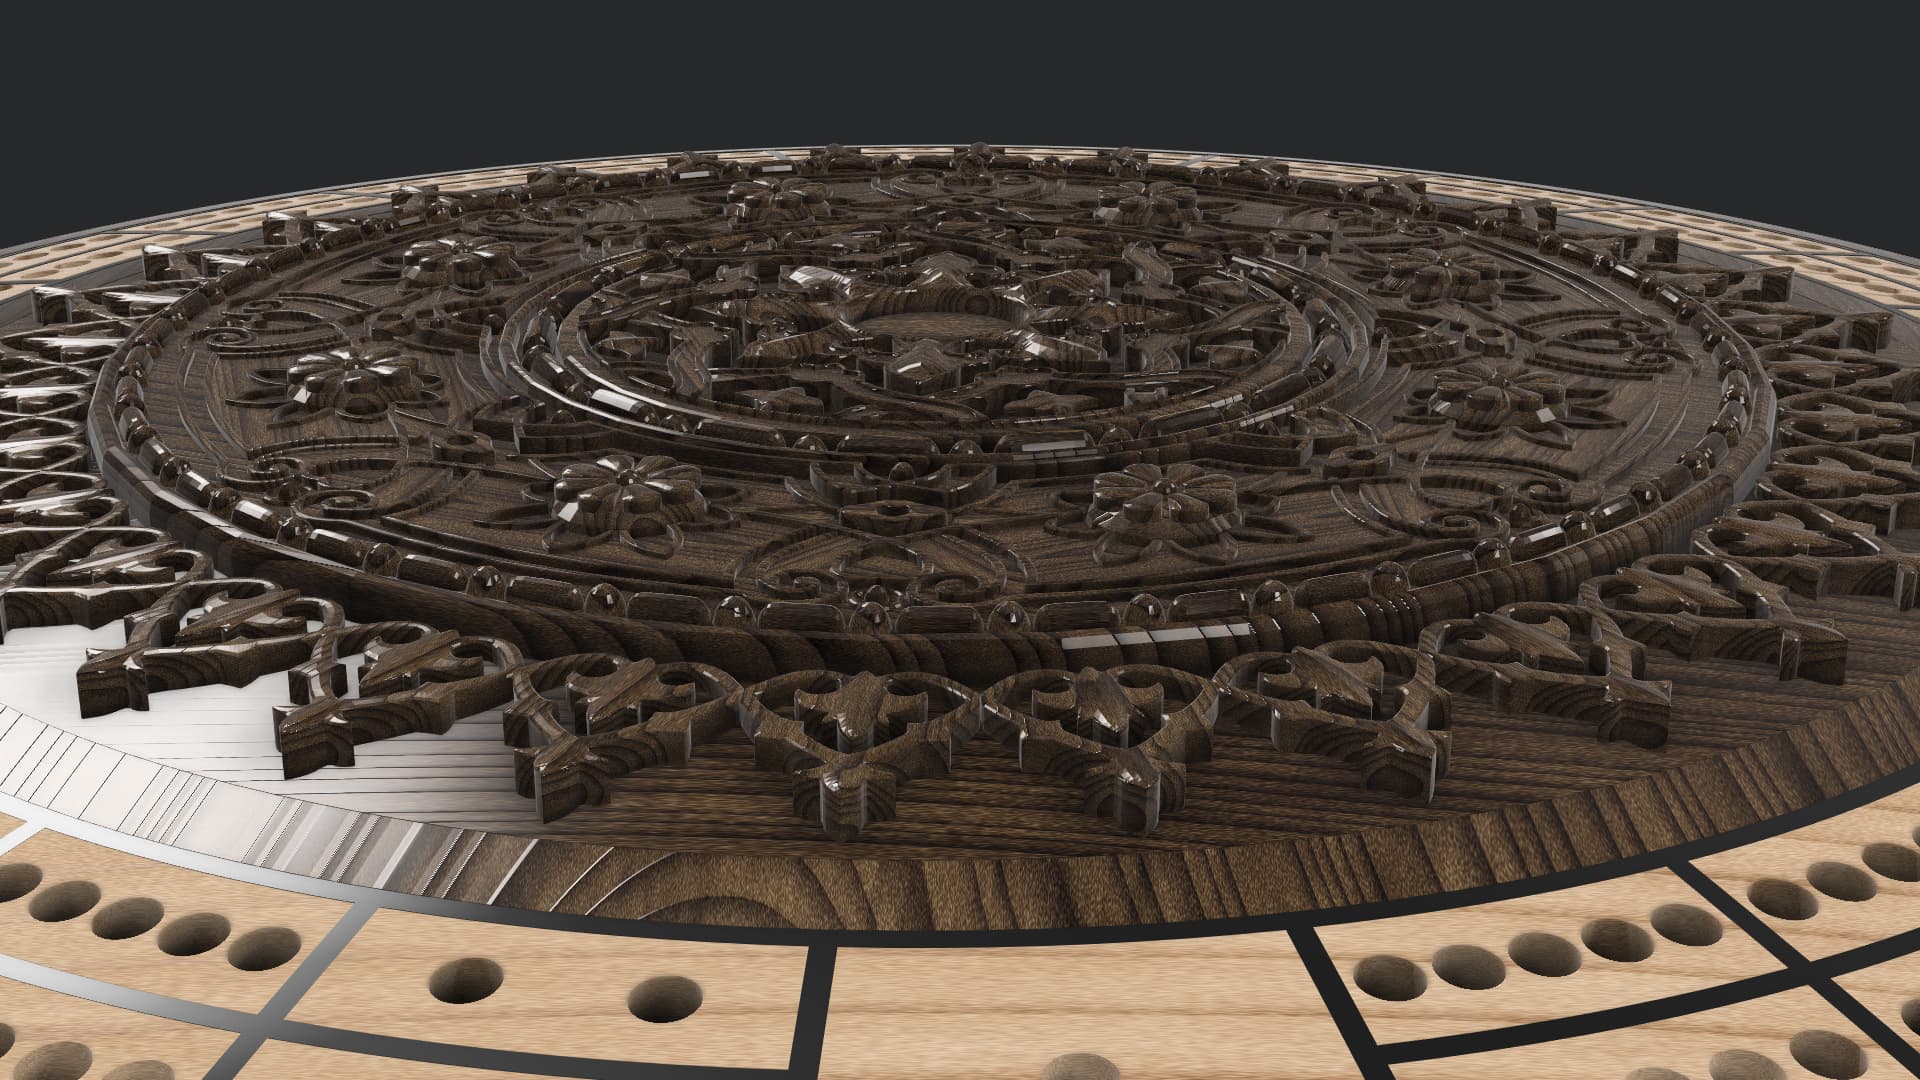
Attached are the low res renders. My computer is chugging through the final renders as I’m typing this hoping for the time to pass by faster.
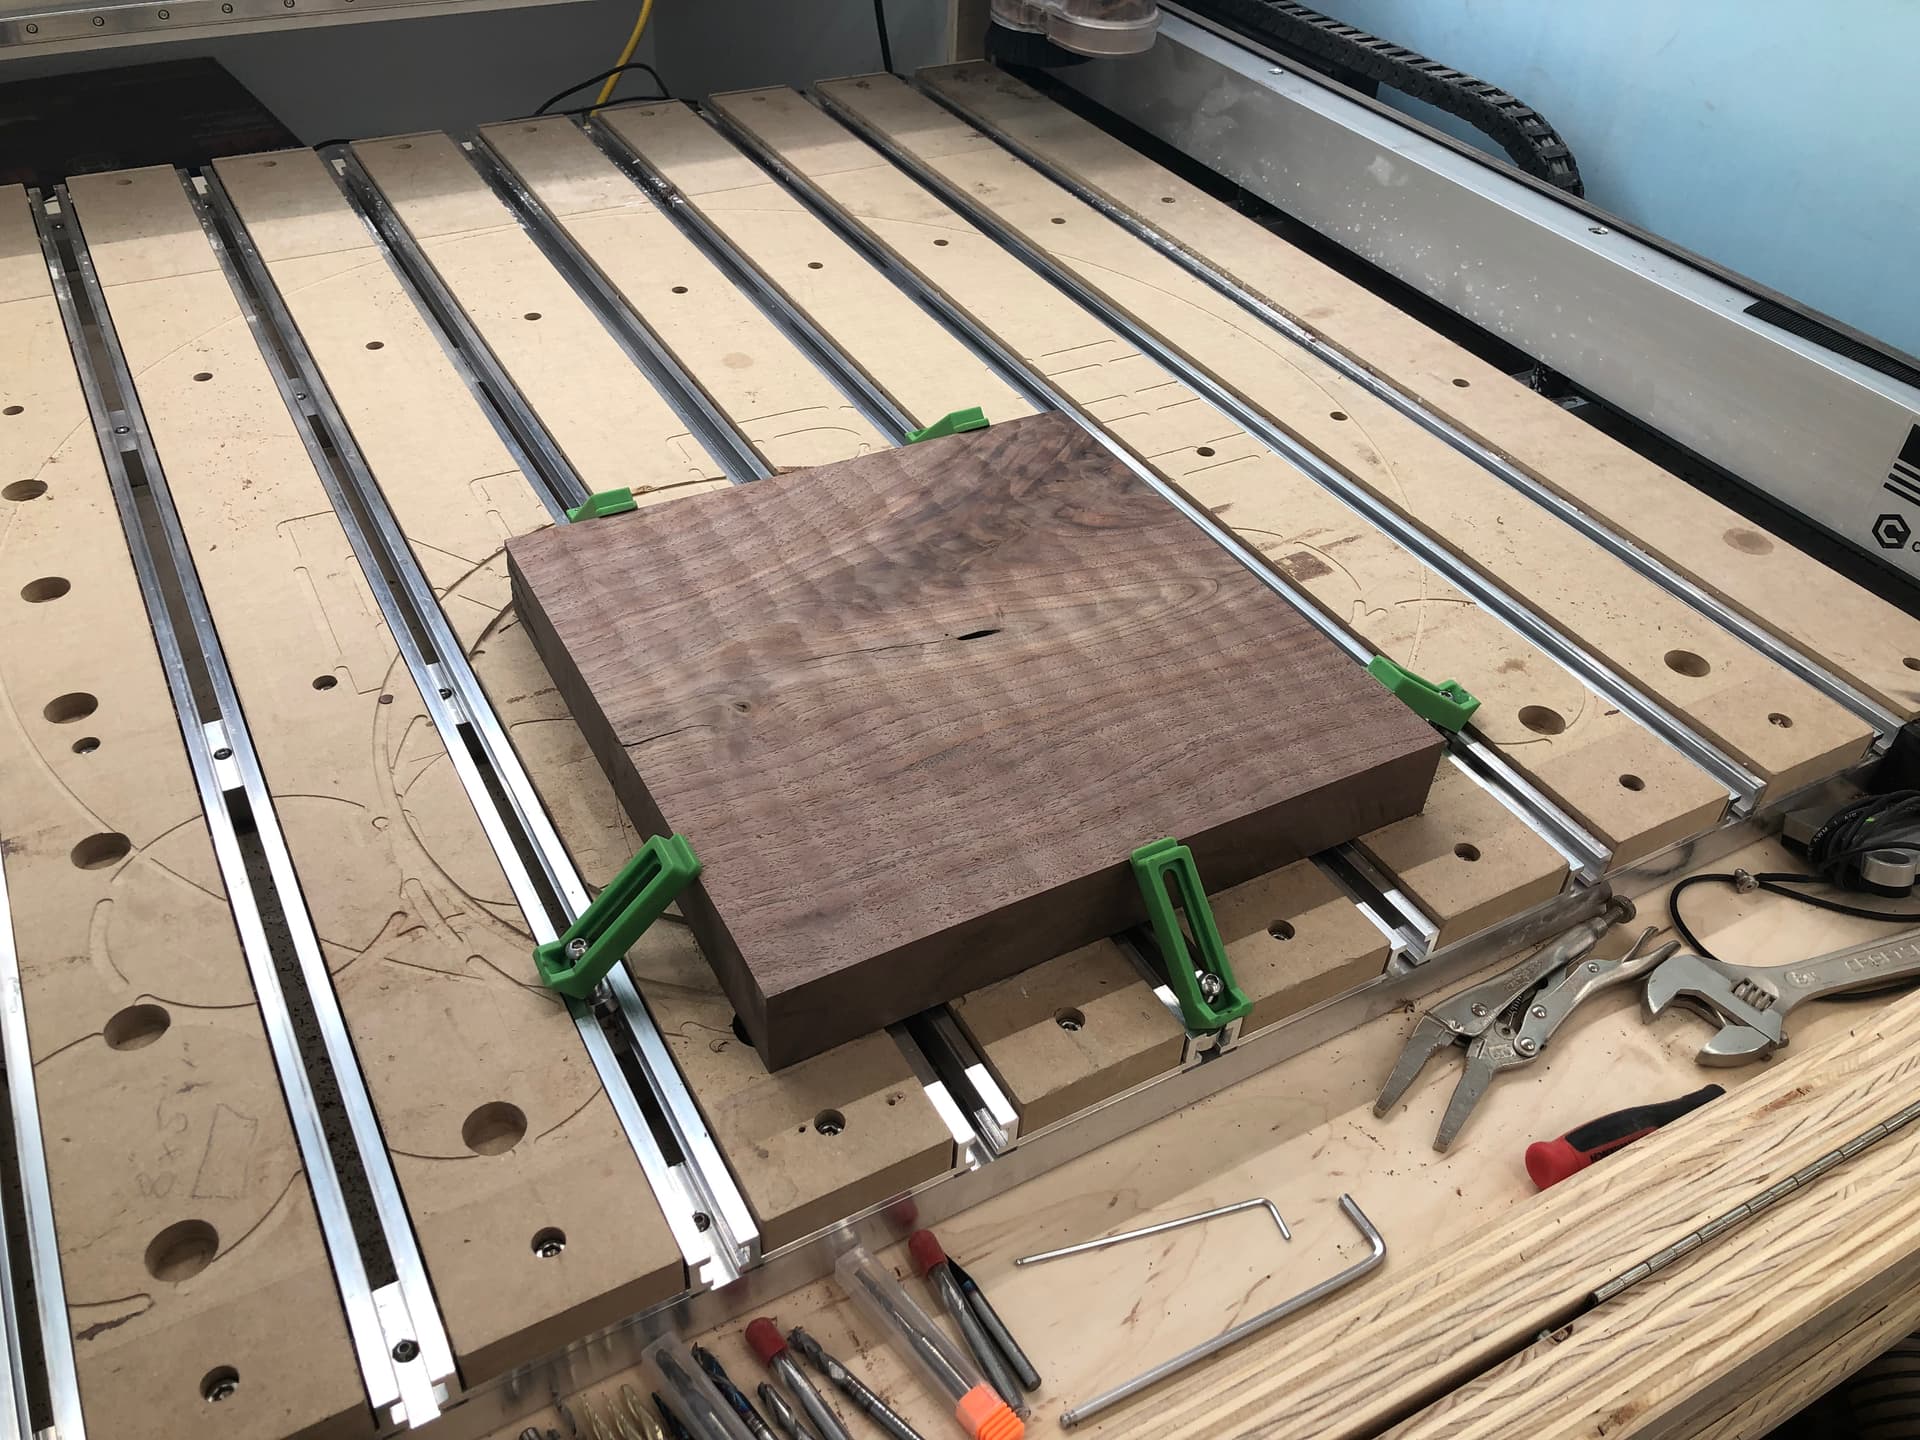
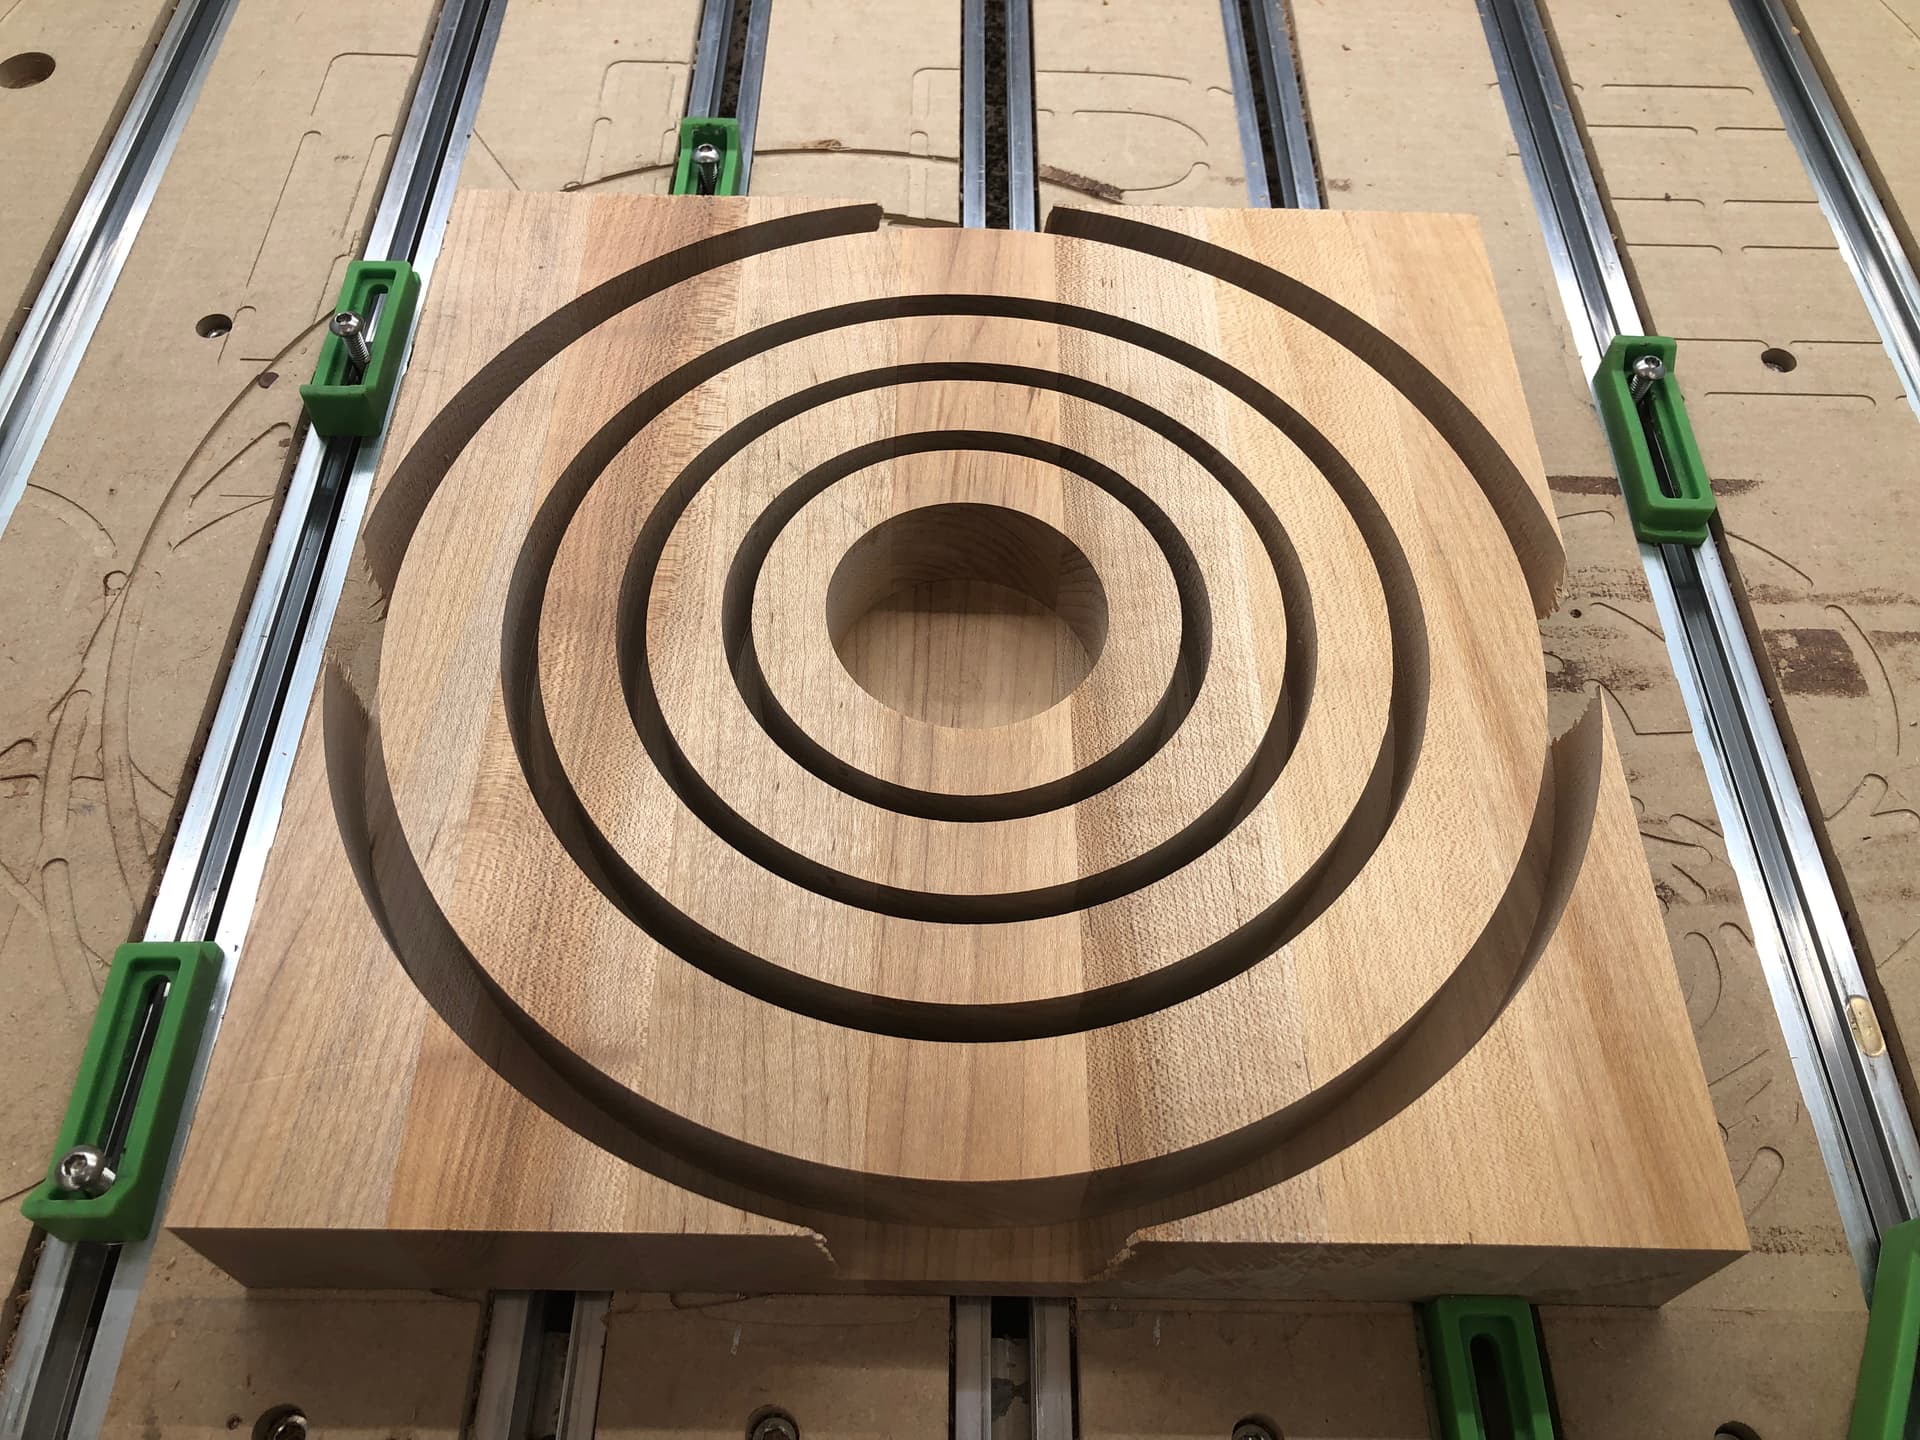
I would love to hear your thoughts, recommendations, and/or concerns. I’ve started my cut files on this one to make sure everything is doable on the machine. Everything right now passes the first look common sense approach my brain requires.
Thanks for looking! I should be starting the project in the next 2 weeks. I’ll post some status updates!!
If it’s as good as your previous one, your co-worker will be delighted with such a unique piece of art.
My only comment for now would be that if “When Time Stood Still” is the title, it may be interesting to have it show a little more, right now the black lettering on dark wood is hardly noticeable from afar. How about you use maple inlays for that title too, to make it stand out ?
You are absolutely spot on with that. I’ve been working a couple different designs to do that. I’m having a couple of issues with the cut file to machine it correctly for the inlay. I didn’t leave a lot of room to do a whole lot there.
This is tiny indeed, and with thin letters like those an inlay may be a challenge. How about using mother of pearl or similar “liquid” solution ? White epoxy if it comes to that? I would not do it on larger parts as it would ruin the overall “wood everywhere” look, but on those tiny letters…maybe. Way easier than an actual inlay.
Another approach could be to carve that text in a small brass or silver plate, and mill a pocket for that plate on the piece.
Epoxy was the other option I’m leaning into with and honestly the best and safest route.
I’ve kind of made my mind up with building this if he decides to go with this design. I’m going to cut deep for the inlays and keep it flat, then take a ball nose tip and carve the contour of the board for the radius. I’m not losing that much material in the grand scheme of things. I need it flat when I pour the epoxy, then cut down to my final depth.
@Julien Julien, you were right about the mother of pearl. This should be a great contrast to the black walnut. I added more area for customization. Starting to really come together.
The centre of the updated design is starting to resemble an hourglass, which would fit the message perfectly. Perhaps you might explore a more classical hourglass shape for that piece ?
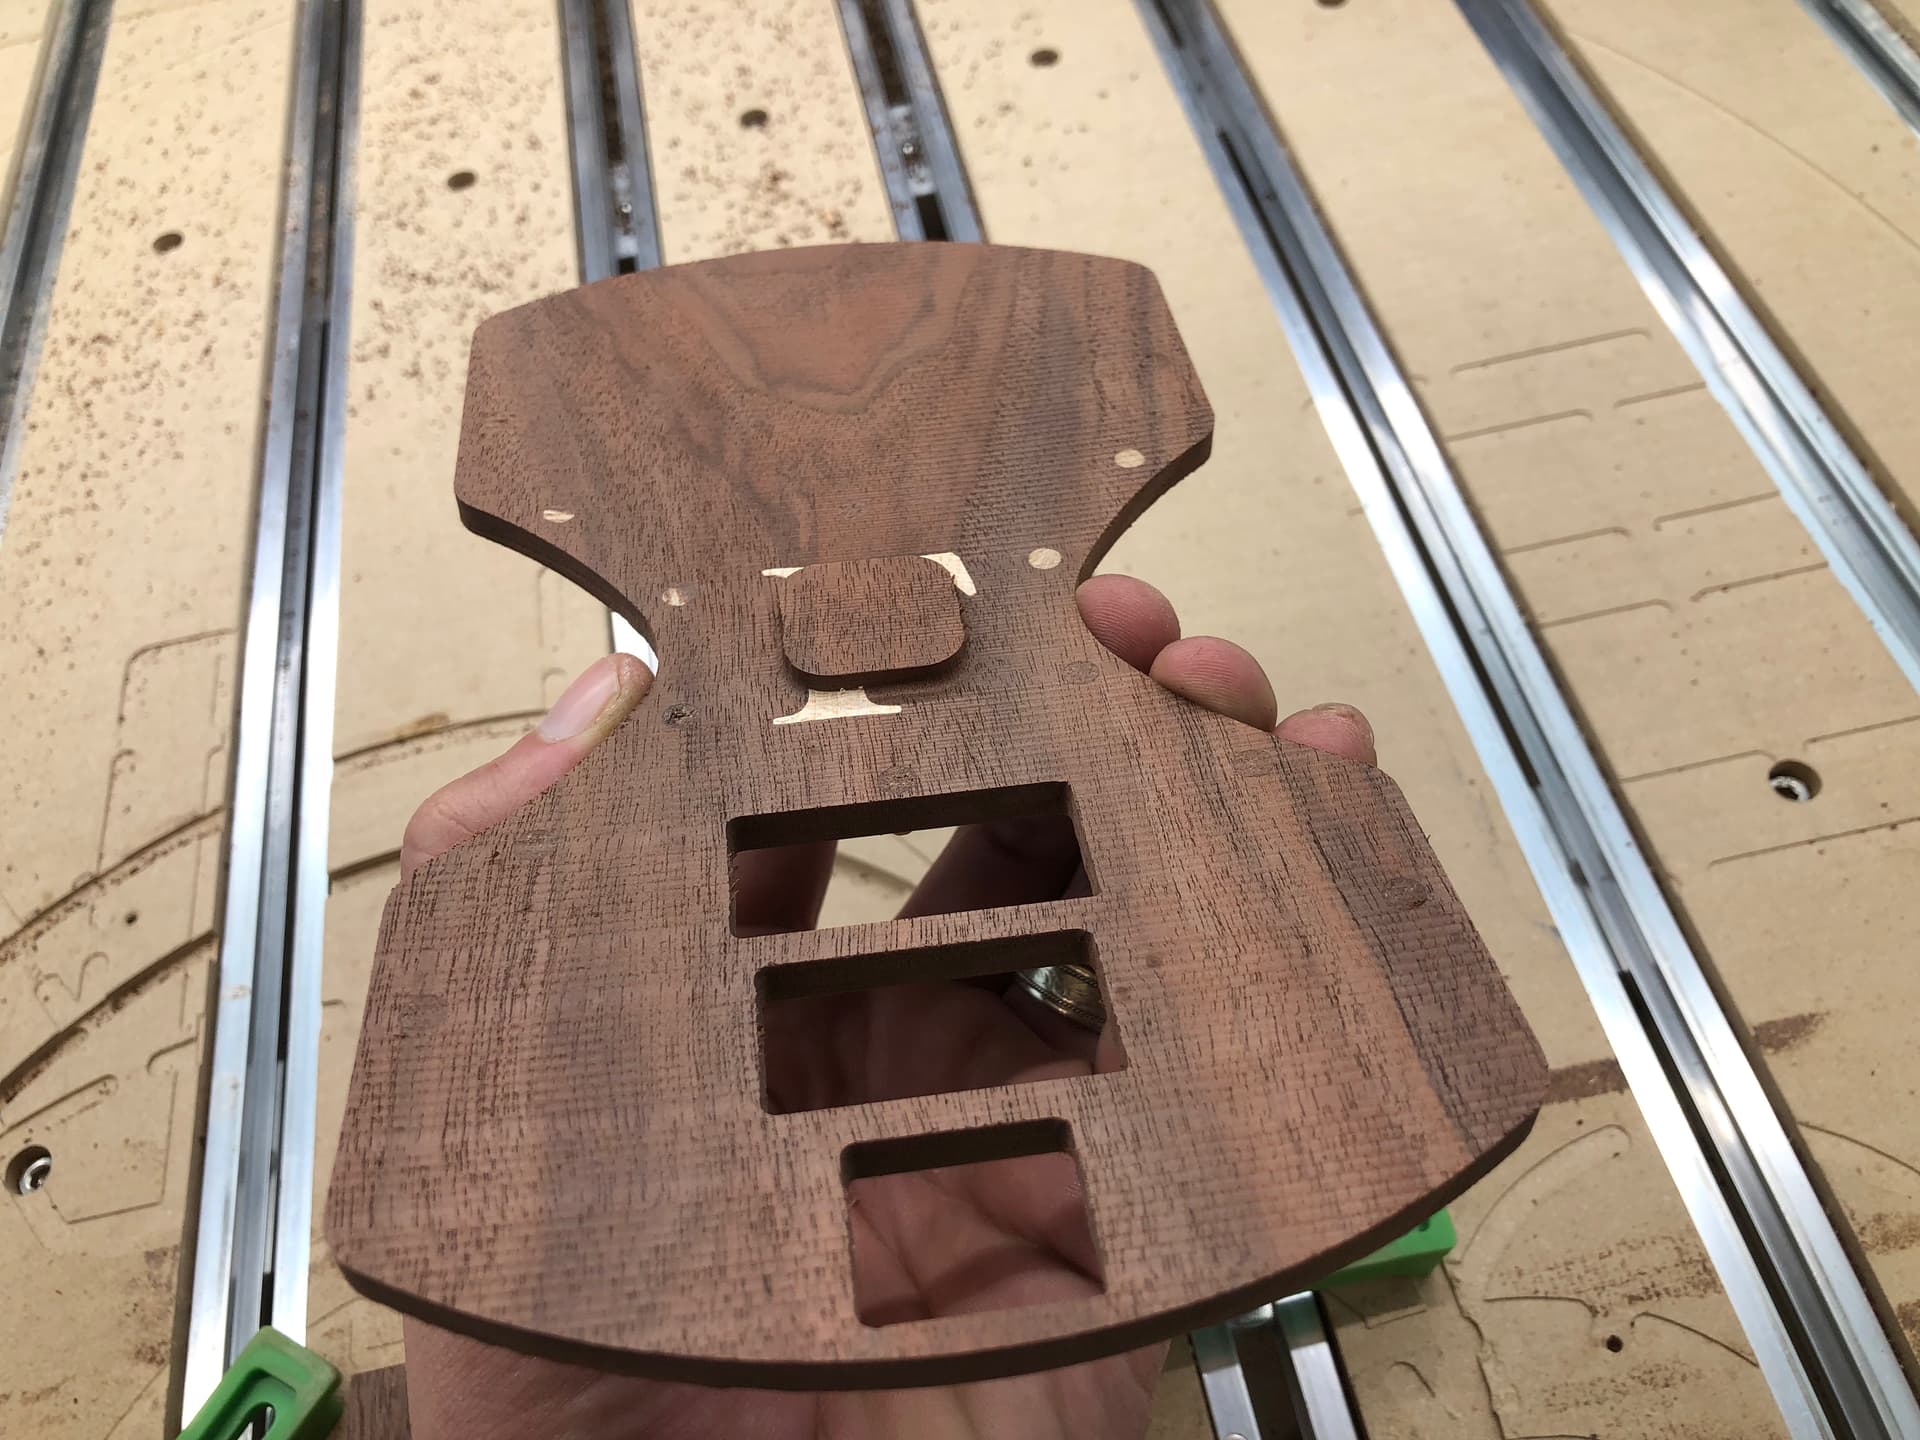
And then I started playing around with a couple different models. Not set on any of these so far, just playing around seeing different type of models I can manipulate.
You want the distal end of the clamp to be higher than the end which is clamped so as to have better leverage, and you want the clamp close to level so that it won’t by trying to pop the part out from under it.
Thanks for the heads up and best practices. I’m a big fan of Shurtape. Only issue I have with it, is it literally needs to be preyed off of the bed. I really only use the clamps to ensure no small lateral movements in the peice