The machine has made its move into the garage and onto the new workbench which is just awesome. Dead chuffed with it.
It was a struggle but with the wife’s help we managed to get it in there with only removing the z motor…
The bad news is I’m having issues. I spent along time looking at the mechanics and the electronics took a back burner… I’m paying the price now. Whilst everything works it doesn’t work together.
The arduino mega board is a great cheap replacement for a s3 board and there is no way a machine like this would run well from a shapeoko board due to the drivers and power supply.
Initially I started with a 24v power supply, but couldn’t get the speeds I wanted. So bought some Tb6600 drivers and moved away from a piggyback board better but still not great so I upgraded, whilst better it wasn’t enough so I upgraded again, a small improvement but limited by the motors. These then got an upgrade but the 40v power supply now seems too much for the motors to handle a program for a duration and they die off.
Now not only have I replaced the original board then upgraded to a mega, the power supply has been upgraded 3 times and the drivers are on the 3rd upgrade. I also had some issues running the spindle but hope this will be improved with a relay added.
I can jog the machine around but running a job seems a few weeks away. The worst bit is the shapeoko is now removed from the garage.
I hear your struggles, but it still looks great!!!
As I mentioned I’ve been toying with the idea of an XXXL myself to handle a 48"x48" piece of stock (I’d love to get a fully sheet on there, but I’m out of garage space). I can totally “see” the mechanics of it, much like you, but I’m still researching the proper electrical(much like you). I am inspired by what you’ve been doing though, very impressive! Can’t wait to see where you end up!
Thanks guys, I sure appreciate it. It is frustrating as it seems like one thing after another with these electronics, and I was worried about milling the sheer quantity of aluminium
It’s good having it in the garage and nice that I can jog it about. Once the new drivers arrive they should be a quick install and boost the performance. I went all out and ordered leadshine DM856 which run up to 5.6a at 80v… I’m thinking that should future proof me.
@DanoInTx when you come to doing your machine I will give you full details of all electronics I settled on. It will likely save you quite some time.
As you will notice on my machine I have a MDF board base. I’m planning on upgrading this to aluminium but need to be in a working position first to justify the outlay.
As I mentioned before I found my new power supplies were too powerful. Yep thats a thing, whilst I could scale them down to a meare 48v this was not low enough. The drivers I had bought were rated to a max of 50v, however as I ran a program one by one they would over load and die off.
New drivers… roll on some Leadshine DM856 - whilst these have a price tag they are bitching. They run up to 80v so my 58v supplies are way lower than the threshold. In running at 1/16 mirco steps 5000mm a min with breeze… and I can go faster… I think this was a good investment.
Next thing that went was the ardunio board - I was having all kinds of issues although after changing it realise this might be interference from a power supply and too long an extension cable.
Now if that wasn’t bad when playing with my VFD it went pop today… no idea why but I can’t get it to start using any commands…
48x48” or more likely 50x50” to handle 1/2 sheet of plywood. I’ve most recently become interested in plywood furniture. Part of my inspiration is the IKEA “flat pack”, using as much of a piece of plywood as possible with very little waste. One of my designs is a small children’s stool. That design uses nearly every inch of a 24x24” piece of 3/4” plywood. I can cut one at a time on my XXL, but if it was just a little bigger I could do 4 at a time (48x48”). I also have some other designs that would need closer to a 48” envelope. Id love to be able to do a full sheet, but I’d have to find a good home for my motorcycle that shares shop space with my tools,…and that ain’t happenin’!
Side note: Last night my wife and I went for a drive. I bought a house last year on the edge of the city. We honestly haven’t explored much around the area yet. Well on one of these little service roads we came across a building that is nearly falling down, but it would be the perfect size and location for a small shop/storefront,…and it has a “For Sale” sign on the front! I’d be lying if I didn’t say my head immediately started dreaming of leaving my job and going into business. I’m nowhere retirement age, and my finances are far from huge, but I’m 14 years into a job that no longer spins my gears, I’m paid ok and I have great benefits though…so for now I dream
I was in the same spot. Started making $ with my machines on Amazon and Ebay, and now I make A LOT more than my decent paying job was paying.
I started while I was still working at my job. Just find a good niche, like special tools, etc.
I love this stuff
I love hearing things like this, it brings that “jumping off point” a little closer than “Dreamland” and more into the realm of achievable. Thanks for the little spurt of confidence!
There are some thoughts we can only dream of… just out of curiosity, what would that lot cost you over there?
Heres the latest update. I had been having a bunch of issues with my VFD. I put it down to the VFD possibly being faulty so ordered a replacement… thats being sent right back.
It turns out the control board bought allows for current to be drawn from the pwm pins when the enable pins were activated… this was trowing my speed out by about 7k rpm. I decided to try using the pwm to trigger a low power/low switch relay and guess what - I got a much better results.
I felt like I was ready to turn this thing on…
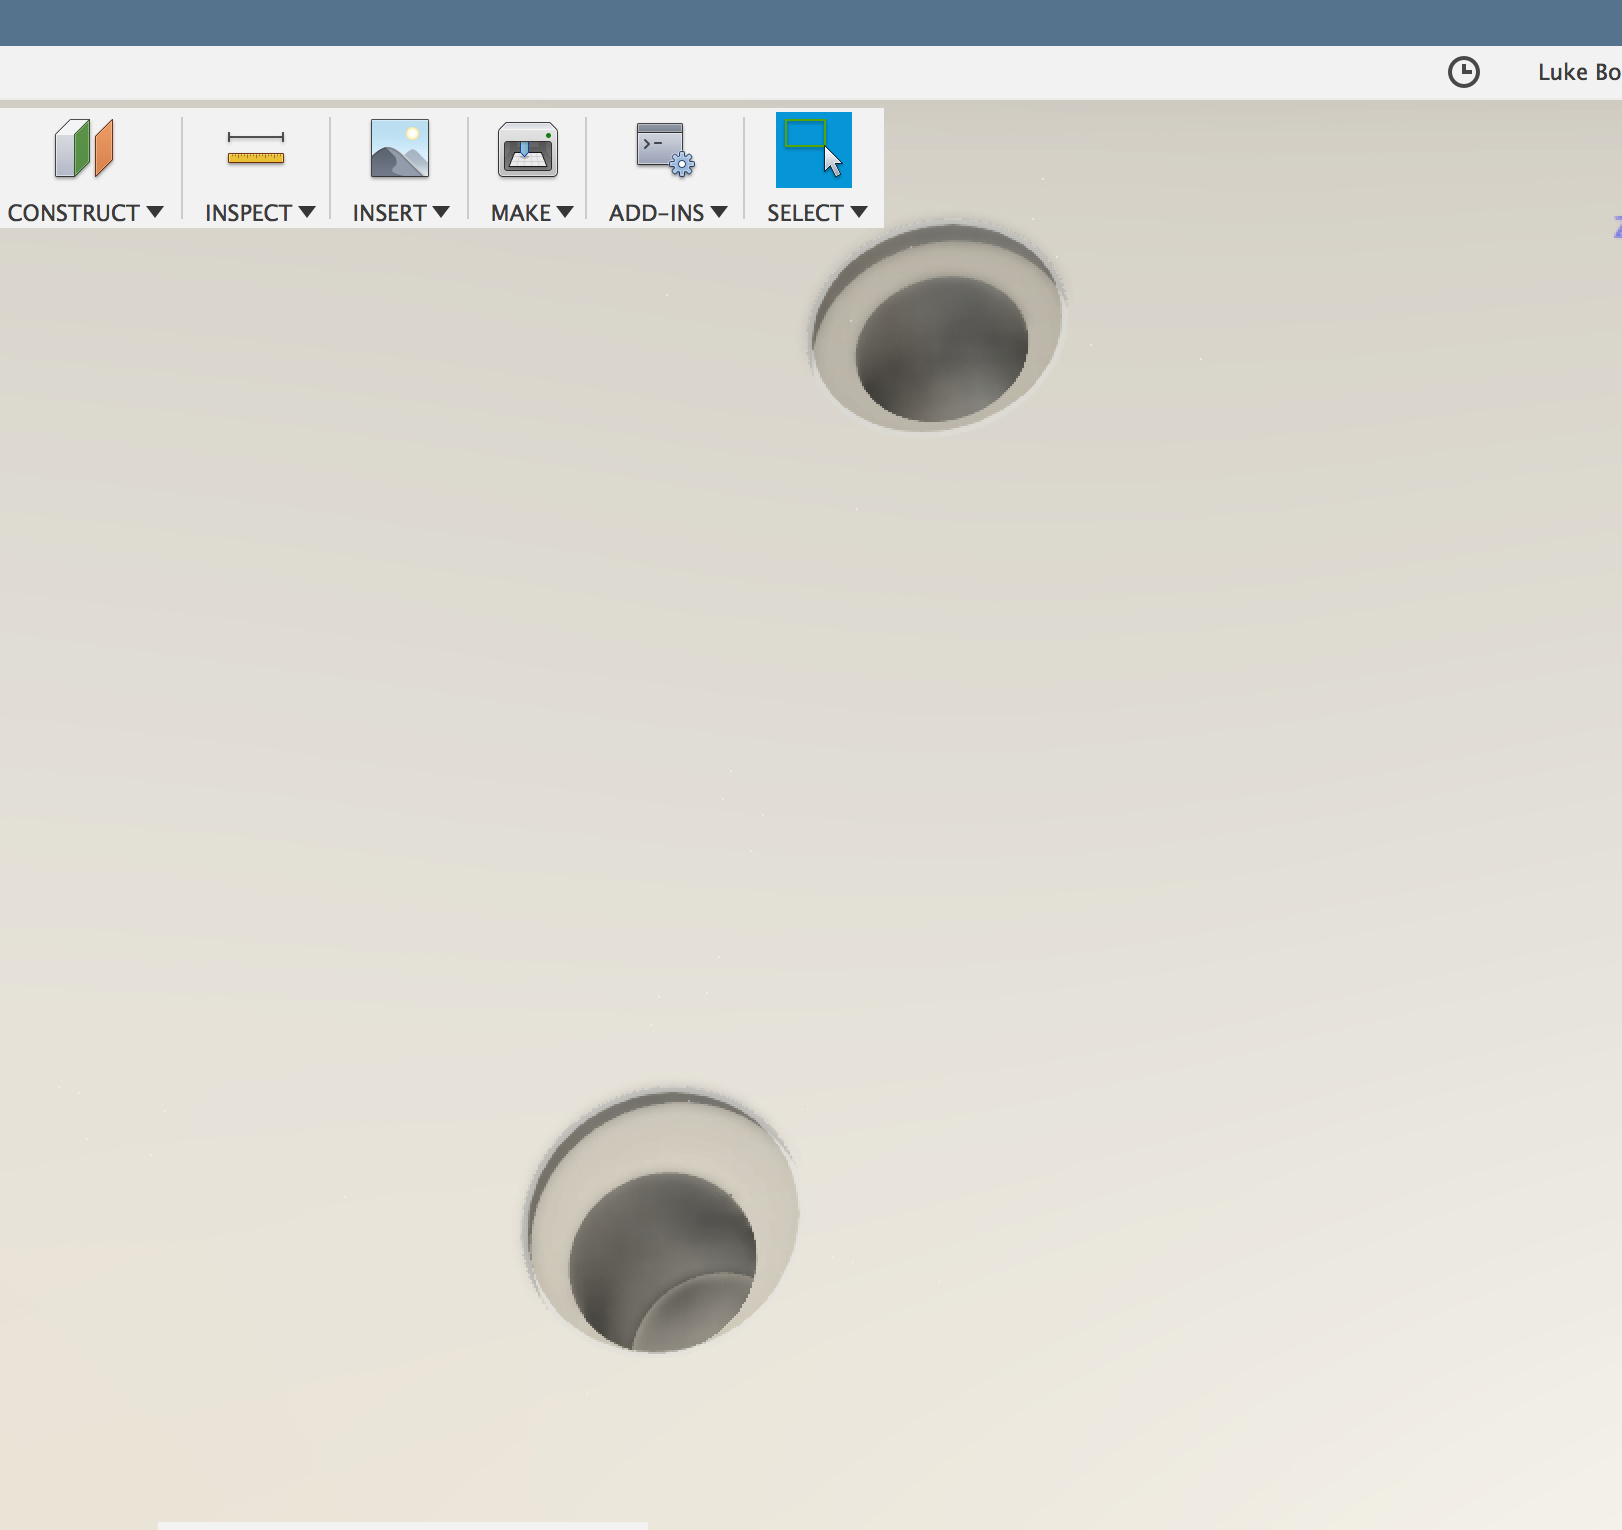
I decided the best thing to do was attack my spoil board… make some mounting holes.
I went off into indesign and knocked up a board with something like 170 recessed holes.
I then pressed go!
At this point things wet well. As you expect it absolutely chewed through the MDF so I bumped the speed to 200% again it kept going.
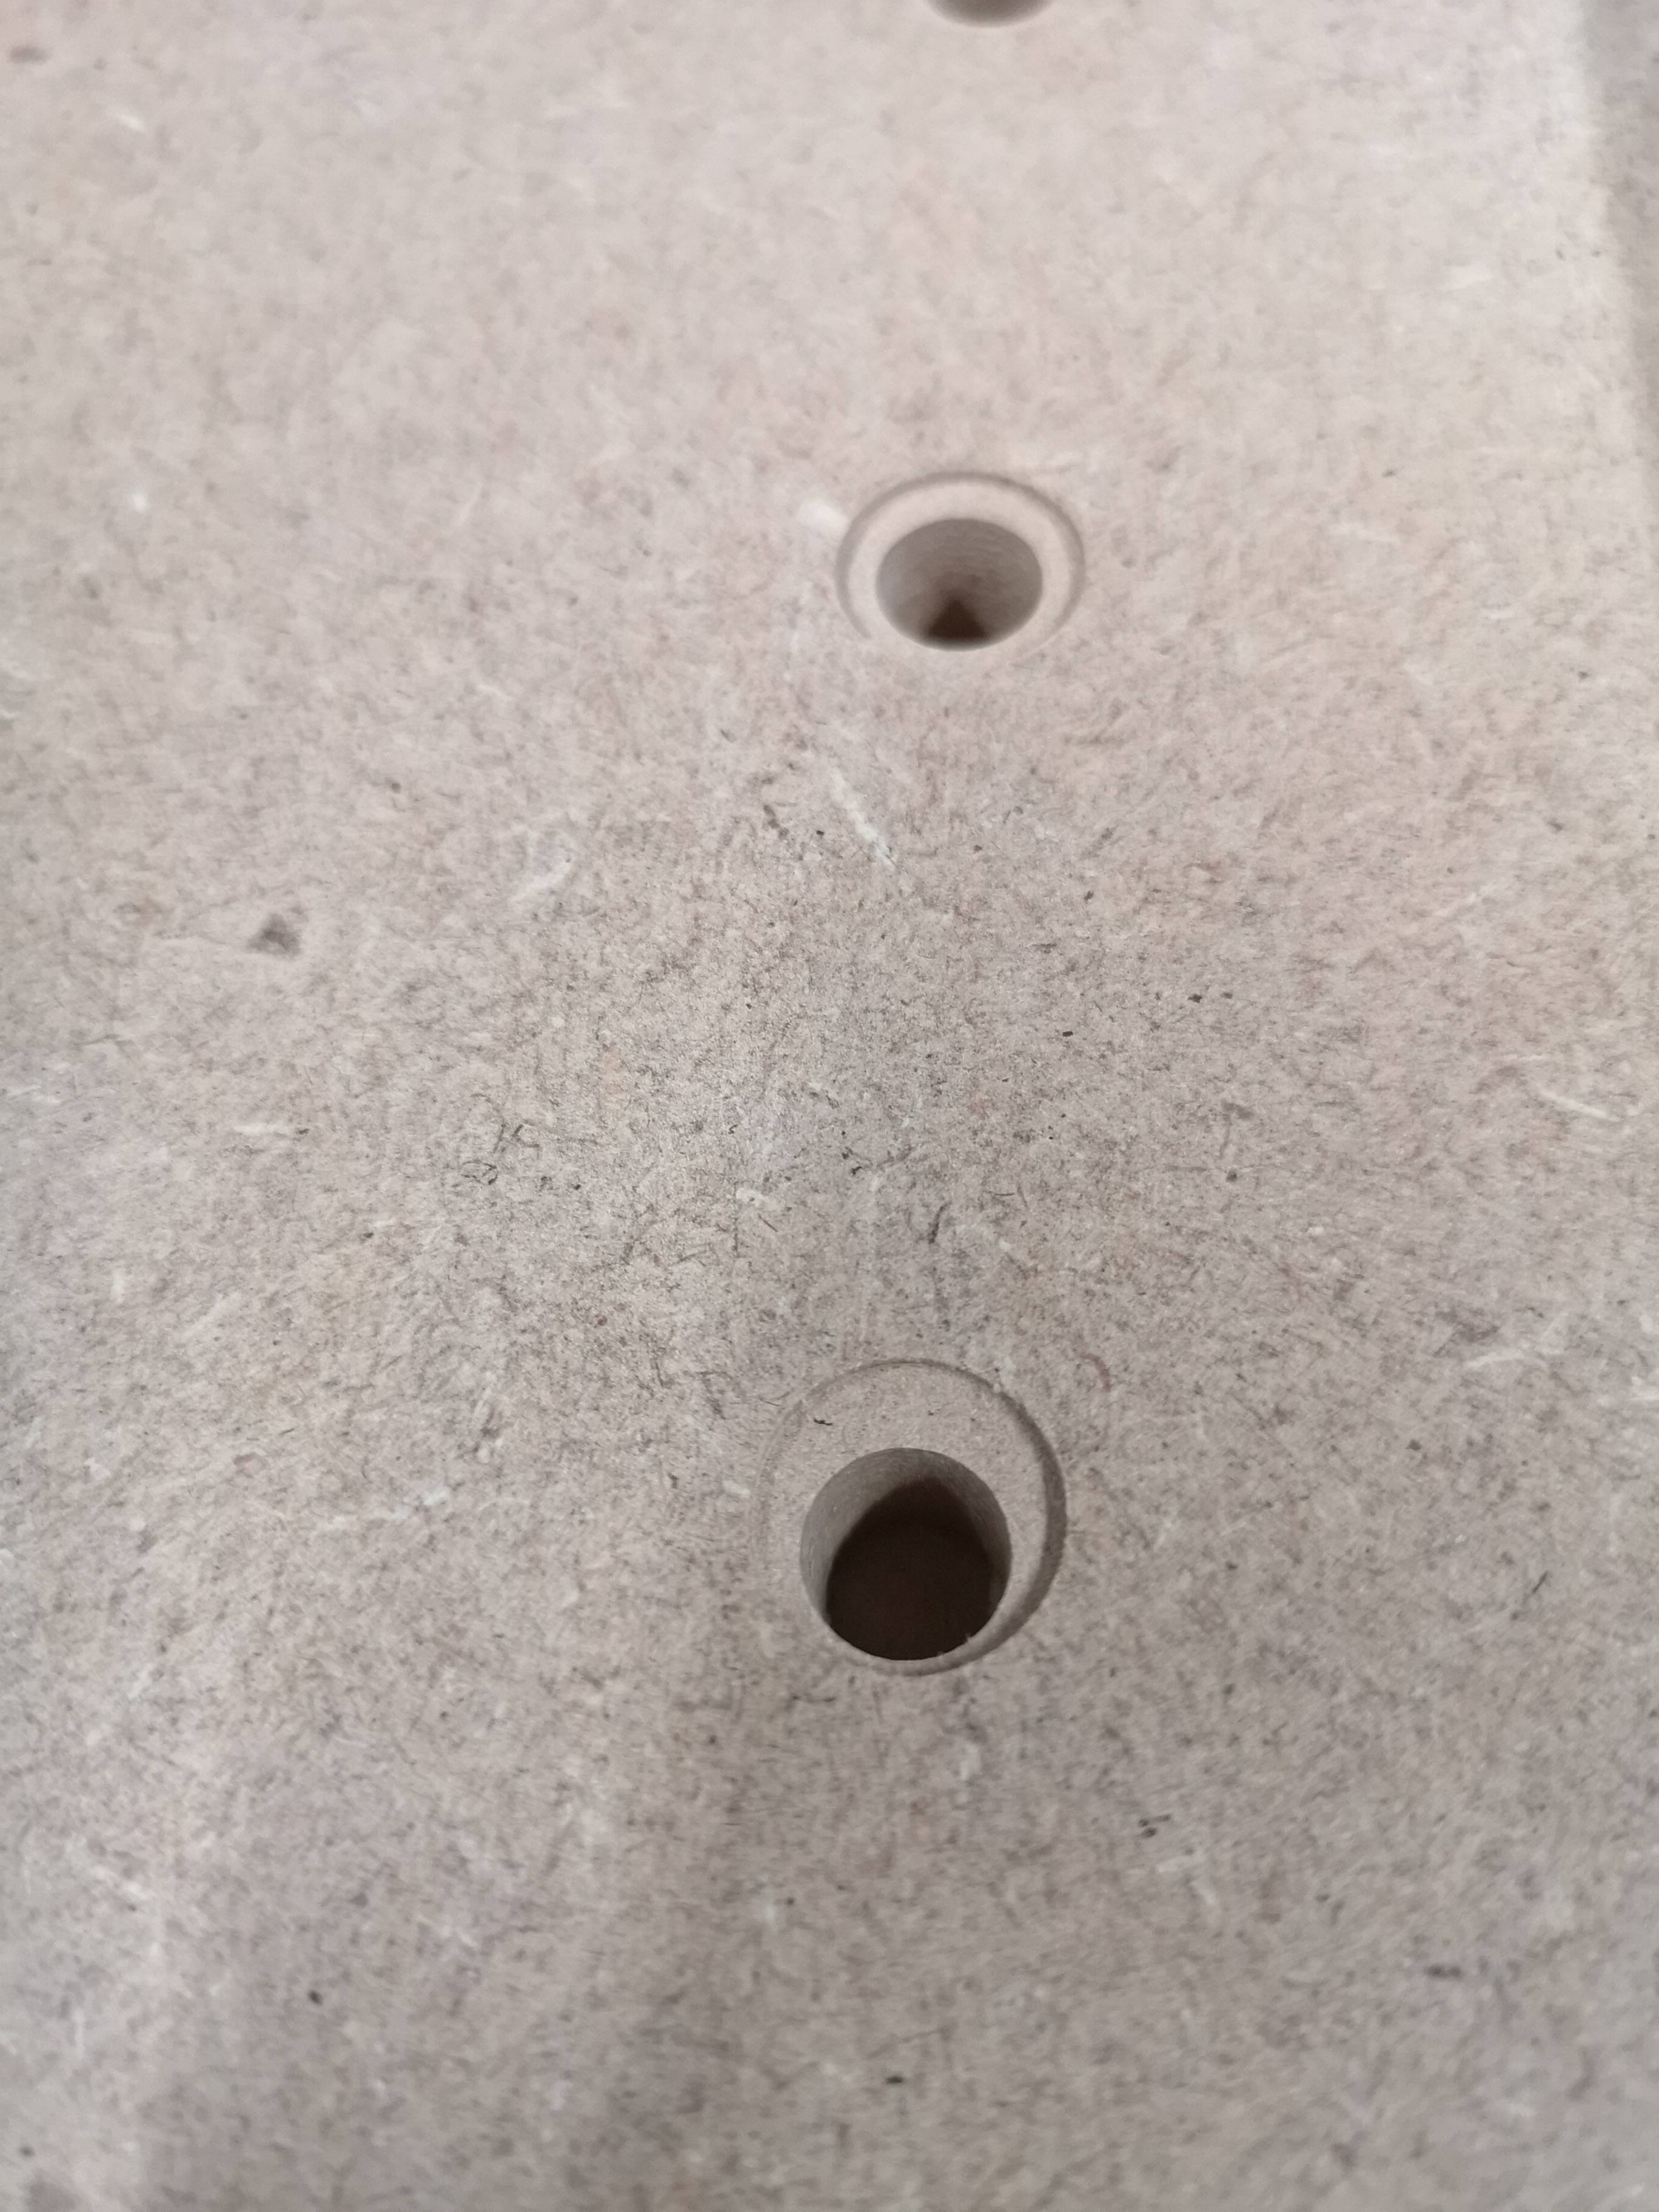
When the dust settled I had some worrying sights. Here is one of my recessed holes.
As you can see the bottom hole was well off centre from the top.
The strange thing was there was no little behind the holes being off… I thought maybe I was missing steps or perhaps the way I wired up the drivers was shoddy… I spent a good 20 min scratching my head.
Sometimes the simplest solution is the winner. I checked my design… what a numpty
I have designed several CNC’s in CAD but not actually built one yet - all are quite similar to your design.
If you have any more issues with electronics, I have upgraded my SO3 XXL to a Gecko G540 and LinuxCNC, and I cannot recommend it enough - it is absolutely bulletproof, no issues with VFD/Spindle control or electrical interference at all.
Thanks again for the inspiration, might be just what I need to start my own build using the SO3 to make parts
Happy to share and glad to inspire. I will say this project is either impossible or incredibly expensive without your own CNC i.e. shapeoko.
I’m hoping now I’ve built this one I can re-make some of the parts to a higher precision. The ball screws give it a far better repeatability and reliability. I’m starting and stopping jobs and being able to re-start within 0.01 mm - I was lucky to get 1mm on the shapeoko.
I would also add I wish I researched other control options, whilst it’s up and running it was the worst part of the build. Everything electronically changed, and I have no doubt I’ll be making more enhancements over the coming months. I think I will be swapping out the control board at some point but I don’t know what I will change to. I just don’t want to do doing a complete re-wire.
Over the weekend I added my new control box, and lifted the machine and put it on rubber feet, then re-screwed it down. My next job is to mill the left side vertical arm. I had a crash half way through milling it which made one of the ball screws 0.5mm higher than it should be. Whilst it works I can see strain on that area so need to resolve it.