What did you cut on your Shapeoko/ Nomad today?

When your wife is a Kindergarten teacher you gets some strange requests. 40 Christmas ornaments with a window for a picture so the kids can decorate as a gift for their parents.

27 Likes

Those Christmas ornaments are cute. You are going to make 80 parents very happy.

1 Like

Nice. Hope you don’t mind if I use this idea for my granddaughter’s class? 1x1 then 1 1/4 x 1 1/4 for the inset?

Use away. Mine is a little large but that is the general offset, yes.

This reminded me of the 35 Rainbows I made for a cousin’s 3rd Graders that she had to deliver to their homes as it was still lock-down time for them.

Great idea though! Saw something similar, but only in paper at our Thanksgiving gathering.

2 Likes

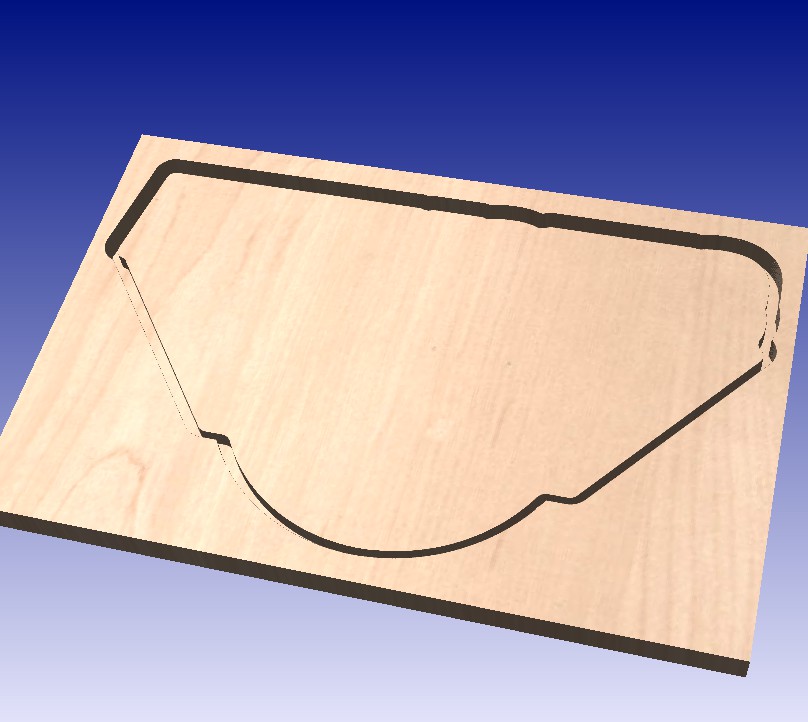
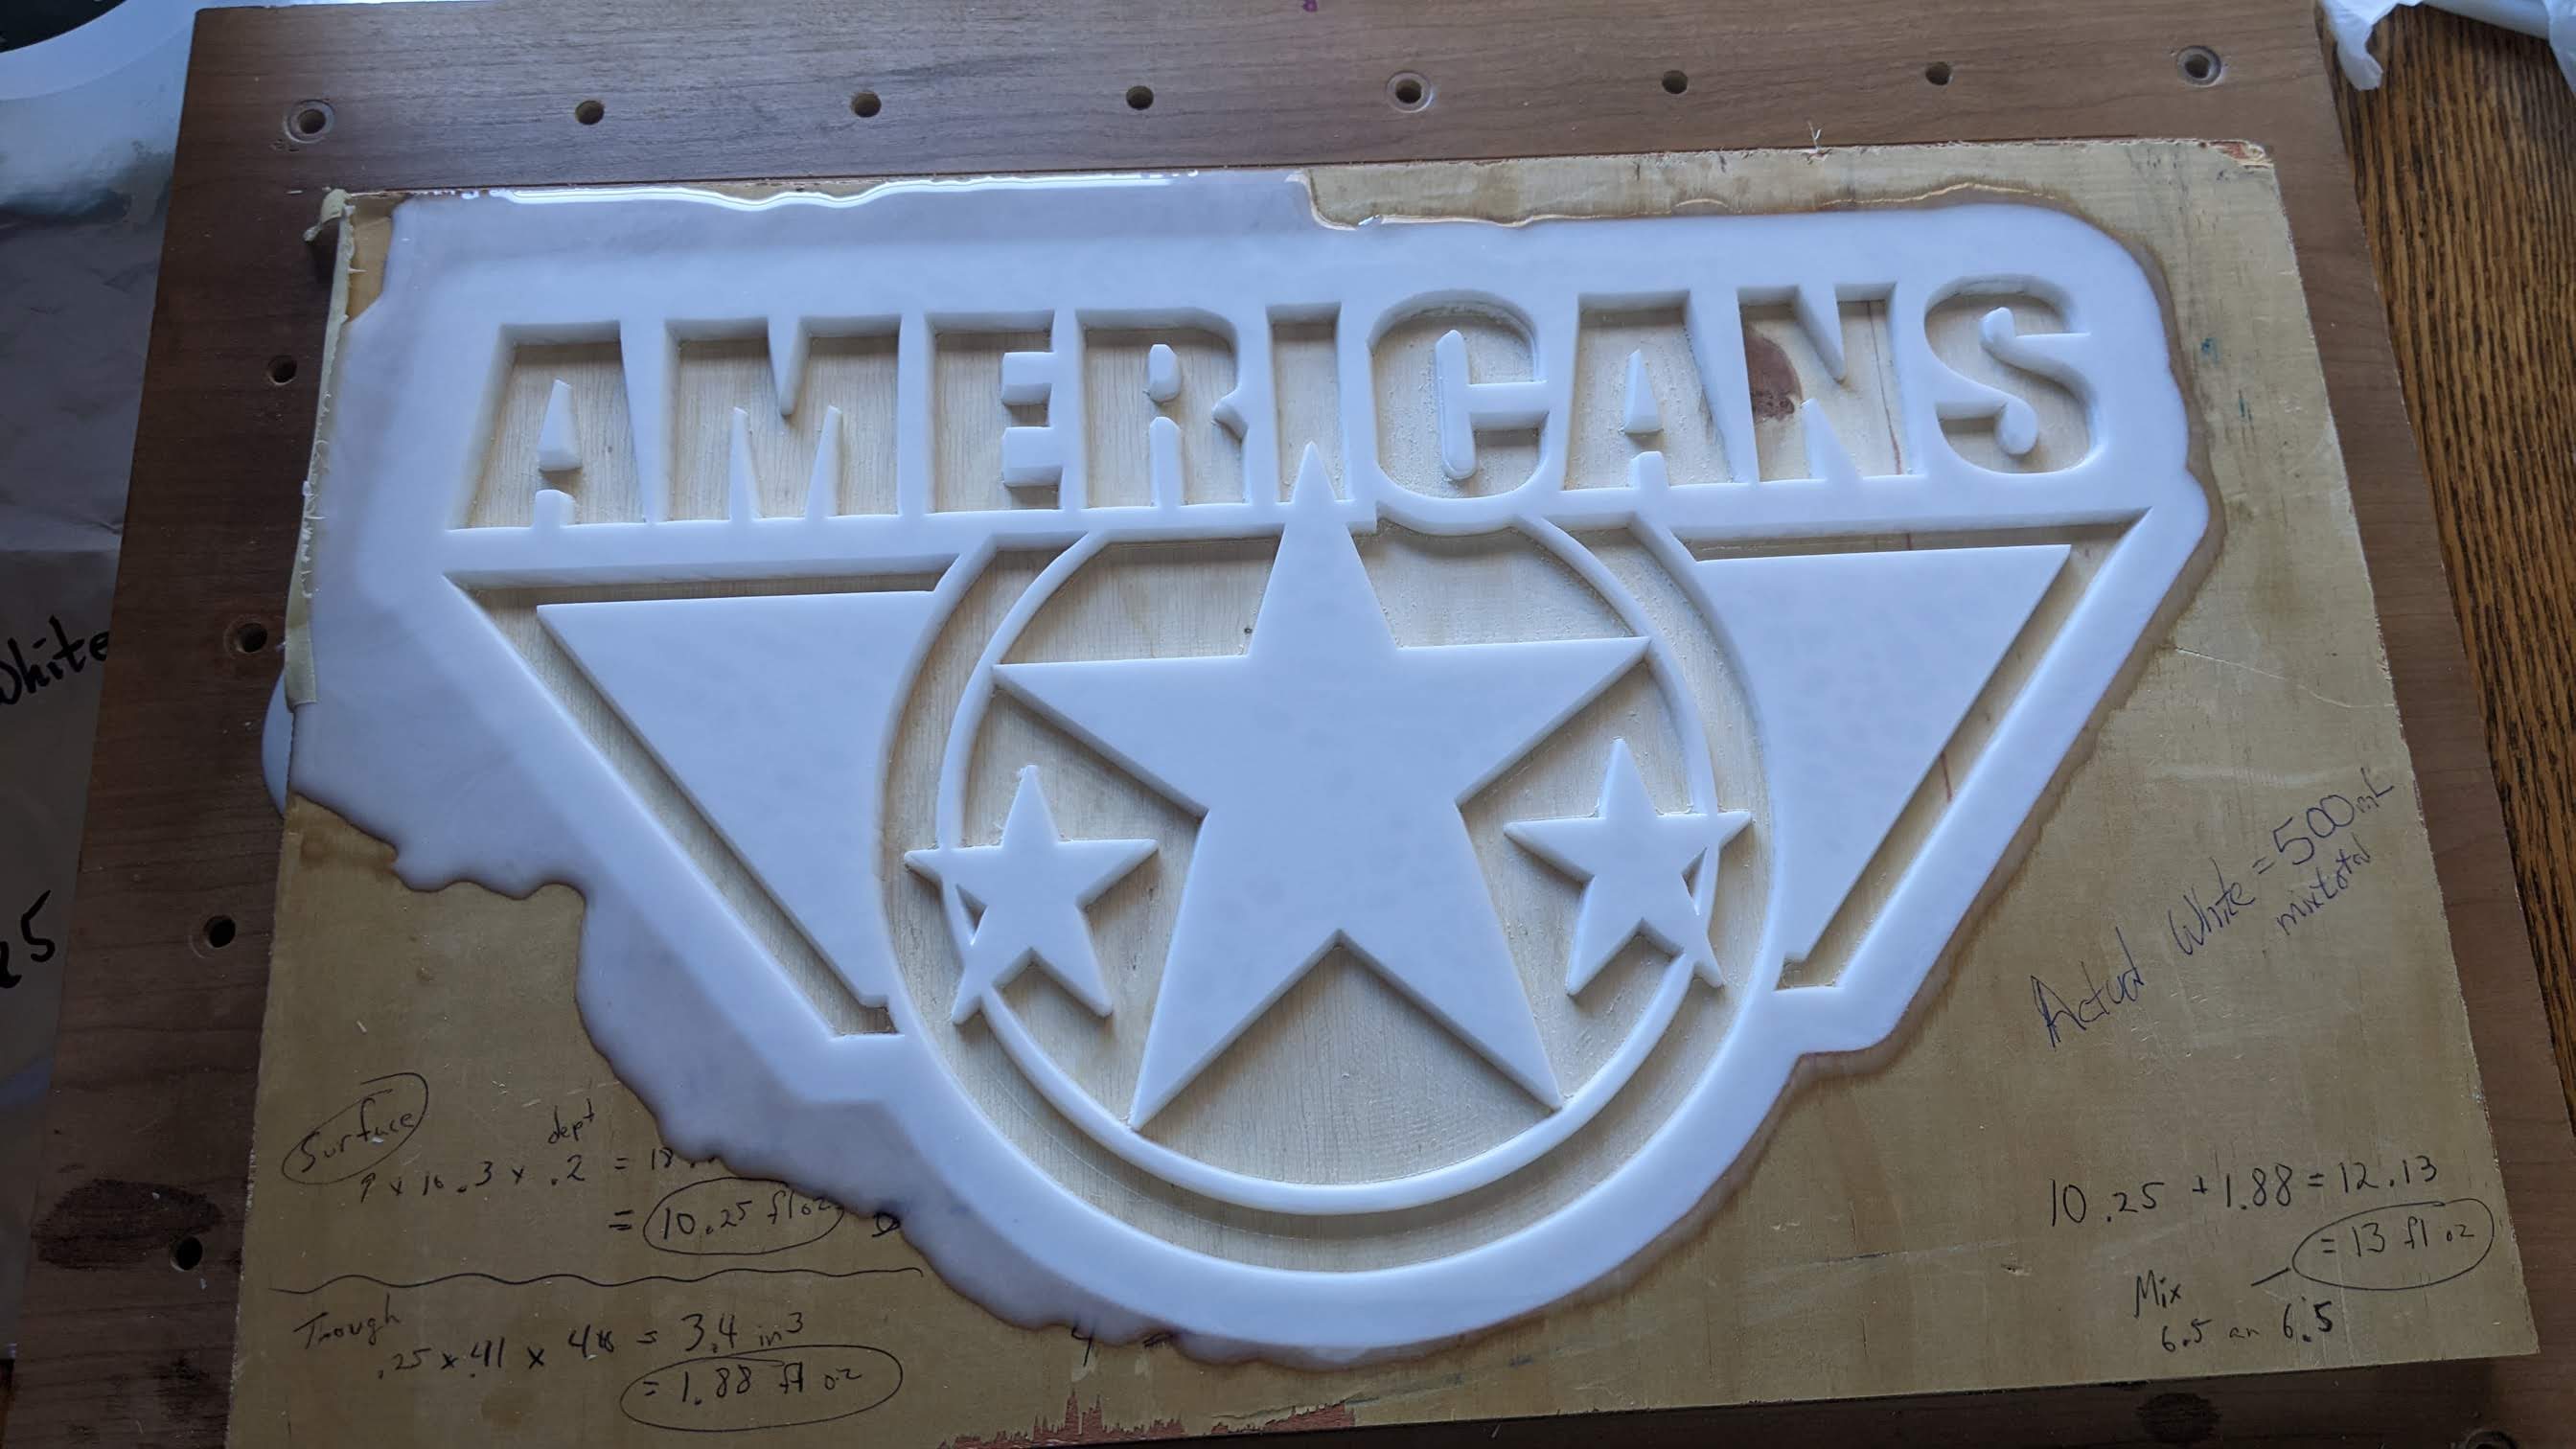
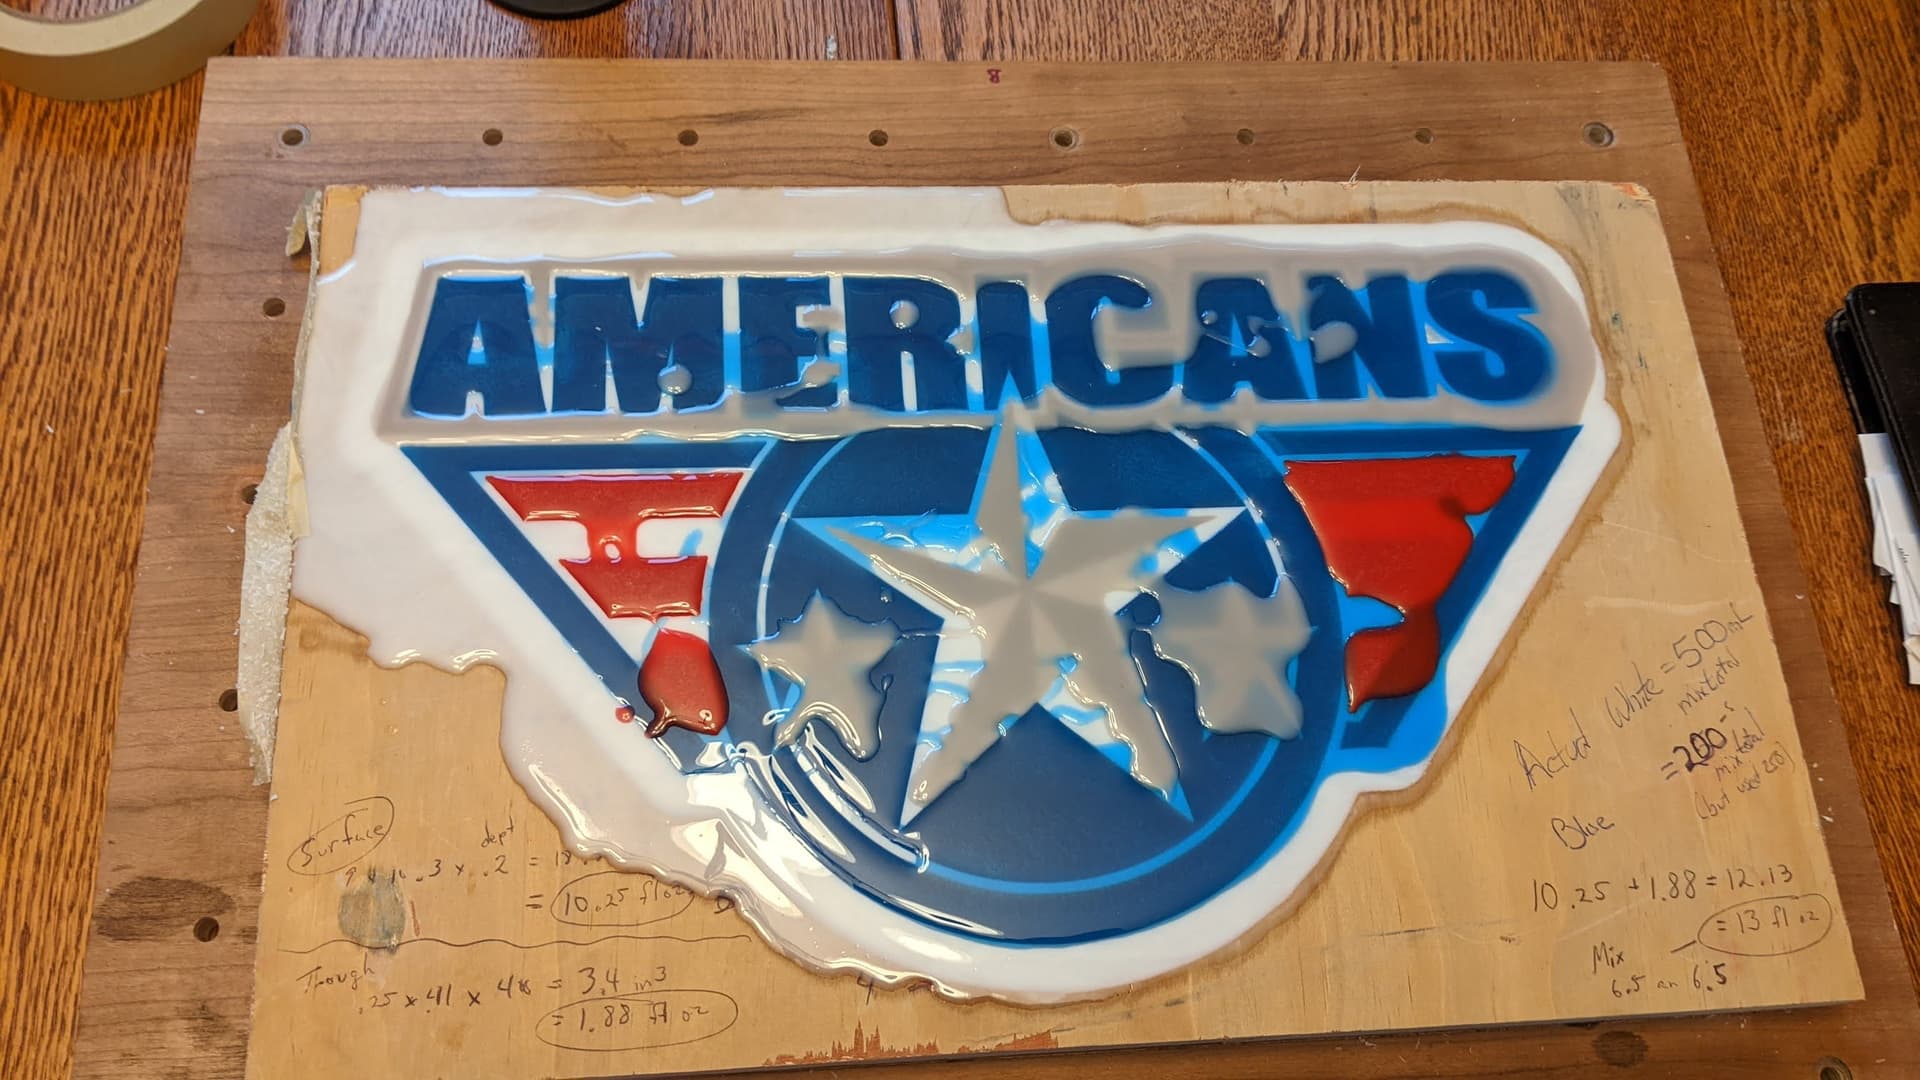
This is my first project using multiple resin pours. I’m very pleased how it turned out. This is The Tri City American Hockey logo (WA state). It took 3 separate pours. I used 3/4 in plywood to create a pour mold. Poured my base color of white. 2nd pour was blue. 3rd was red and gray. Resurfaced. Then poured a clear coat.


29 Likes

Hurray for the Red White and Blue. :us:

1 Like

I made some bottle stoppers and pens for our Woodworking Club Christmas gift exchange. The bottle stoppers and pens were turned on my Jet 12-21 VS lathe. The one with the gear shift was cut on the Shapeoko 3. I made a jig to hold the round blank I roughed on the lathe and cut the gear shift pattern. Then I mounted it back on the lathe and finished the shape. Ho Ho Ho Merry Christmas. Since Halloween people have been putting out Christmas decorations so now it is officially Christmas season. I painted the gear shift pattern with black acrylic paint and finished with sanding and Shellawax.

10 Likes

That looks great, what bit did you use. I’ve been playing with the diamond drag bit.

I used a Foos 20 degree vee bit (Amazon). I previewed a 60 degree but it made the whole thing muddy looking.

Worked on the serving tray using White Oak and Roasted Maple using the CNC to cut the 3 parts, glue up and then surfaced bottom/top and machine recesses/pockets following contour of the glue seam. Each Pocket chamfer is using a 45deg Vbit (top half of pocket) and a 60deg Vbit (bottom half of pocket) so after some sanding it gave the walls a little bit of a rounded profile.

Top Side

Bottom Side

Edit: I did read afterwards that oak may not be the best for charcuterie/cutting board because the grain is porous however I’ve also read that you can seal these up using food safe beeswax so may give this a try.

22 Likes

Actually, wood grain is fine — the drying of the wood pulls moisture from any trapped bacteria, effectively sterilizing the board.

1 Like


A cutting board I made for a friend who raises Black Angus cows. Made of maple and Mexican Ebony.

10 Likes


I like the way this one turned out. this was my first try at a multi pour

11 Likes

I have been busy the last couple of days getting some Christmas Party presents ready for my Woodworkers Club of East Texas. We pick a number and then the numbers are randomly selected and you go up and pick the present you want. I made some pens (5) and bottle stoppers (3) and had some unfinished projects of keepsake boxes big enough to hold most Hallmark cards and some 3"x5" trinket boxes. I put Danish Oil on the trinket boxes and am finishing the keepsake boxes with wipe on polyurethane.


Keepsake Boxes with Carved lids .


This is the side profile of the keepsake boxes. They were cut with Eagle America box making router bits.


These are the 3x5" trinket boxes. They were carved on the Shapeoko 3


These are the pens turned on the Jet 1221 VS Lathe and the bottle stoppers. One of the bottlestoppers has the gear shift pattern carved on the Shapeoko.

I seem to go through these manic periods where I am super productive and then Ehhhh for a while. Plus I had a bunch of unfinished projects that were 90% done. Our party is December 3 and everything will be finished by then. Wheew I better get cracking.

Edit: Here are the finished items.


Inside of keepsake boxes.


These little trinket boxes are thanks to John Clark from youtube fame.

Everything

20 Likes

Guy, those look too good for giveaways! :smiley:

Do you use anything special to wipe the poly on?

I sand to 220 then apply dewaxed shellac (Zinsser Universal Sanding Sealer). The shellac only takes 20-30 minutes to dry. I give it a 320 grit light sand and use The Minwax wiping polyurethane with a rag (old Tee Shirt) liberally. I put the first coat on last night so I will give it another light 320 grit sand this morning and apply another light coat. Then tonight just before bed I will give it one last light coat. Usually 2-3 coats is all it takes. I prefer to wipe on the poly on smaller projects for two reasons. The rattle can polyurethane dries slightly quicker but it is hard to control in tight areas. On the last coat I do not use sand paper but will use the white 3M finishing pads to just go over the surface to knock down any dust nibs that can pop up. If I have time I will let the project cure for a week or so and use the Howards Restore-A-Shine polishing paste to really amke polyurethane look great. The Howards also works on scratches on older projects.

I have an Earlex HVLP sprayer but for just the 3 boxes the clean up is twice as long as the actual spraying not to mention the hour getting everything prepped for spraying like the spray booth, table in spray booth, craft paper on table, mixing poly , straining poly, running power cord to outside spray shelter, etc… So it is faster and easier to wipe on poly and I get a great finish with the satin polyurethane wipe on so why fight fate.

Edit: I do not put poly on the inside of boxes because every time you open the closed box you get a yucky smell of poly. I put this lemon oil was from Craft Supply on the inside walls. When you open the box you get a pleasant odor. You could just use paste wax.

The trinket boxes 3x5 have Watco Danish Oil on them. The pens are sanded 150/240/320/400/600 dry sanding and then Yorkshire Grit black and then white. The I apply Shellawx friction polish on the pens and the bottle stoppers. The Yorkshire grit is the secret to a great finish on your lathe projects. The Yorkshire grit is not a substitute for good sanding but it makes your wood feel like smooth as butter.

Some people get older and wiser and some people just get older. I fancy myself getting wiser and have learned a few things along the way. After getting close to 50 years of woodworking you have to learn a few things or you would not still be doing it.

7 Likes

Great info, copied verbatim to my Finishing Notes File.

Thank you!

1 Like

Thanks for the notes. I’ll apply this to my SO5 Pro bench top. I have applied a few coats of shellac. I have spray can poly I can use and it sounds like it will work great since there is no detail on a flat top. :slight_smile:

Rattle can polyurethane works well as long as you do it outside. I use this to shake rattle and roll my rattle can sprays. It is cheap and easy and gives you perfectly mixed spray paint without the tennis elbow.

Youi need the Oatley 3" drain plug
2 foot piece of 3" PVC
Drill to spin it


Roll your rattle can in a tee shirt


Push the tee shirt and can down in the pvc pipe


Hold the drill and pipe pointed straight up and spin for a couple of minutes. I will reverse direction half way through. The holding the can straight up in the air keeps centrifugal force from firing the can out the pipe like a cannon. I leave the cap on the can while shaking (spinning) to make sure the tee shirt does not pull the trigger on the spray nozzle.

Been using this for a while and it works great and easier on my arms.

5 Likes