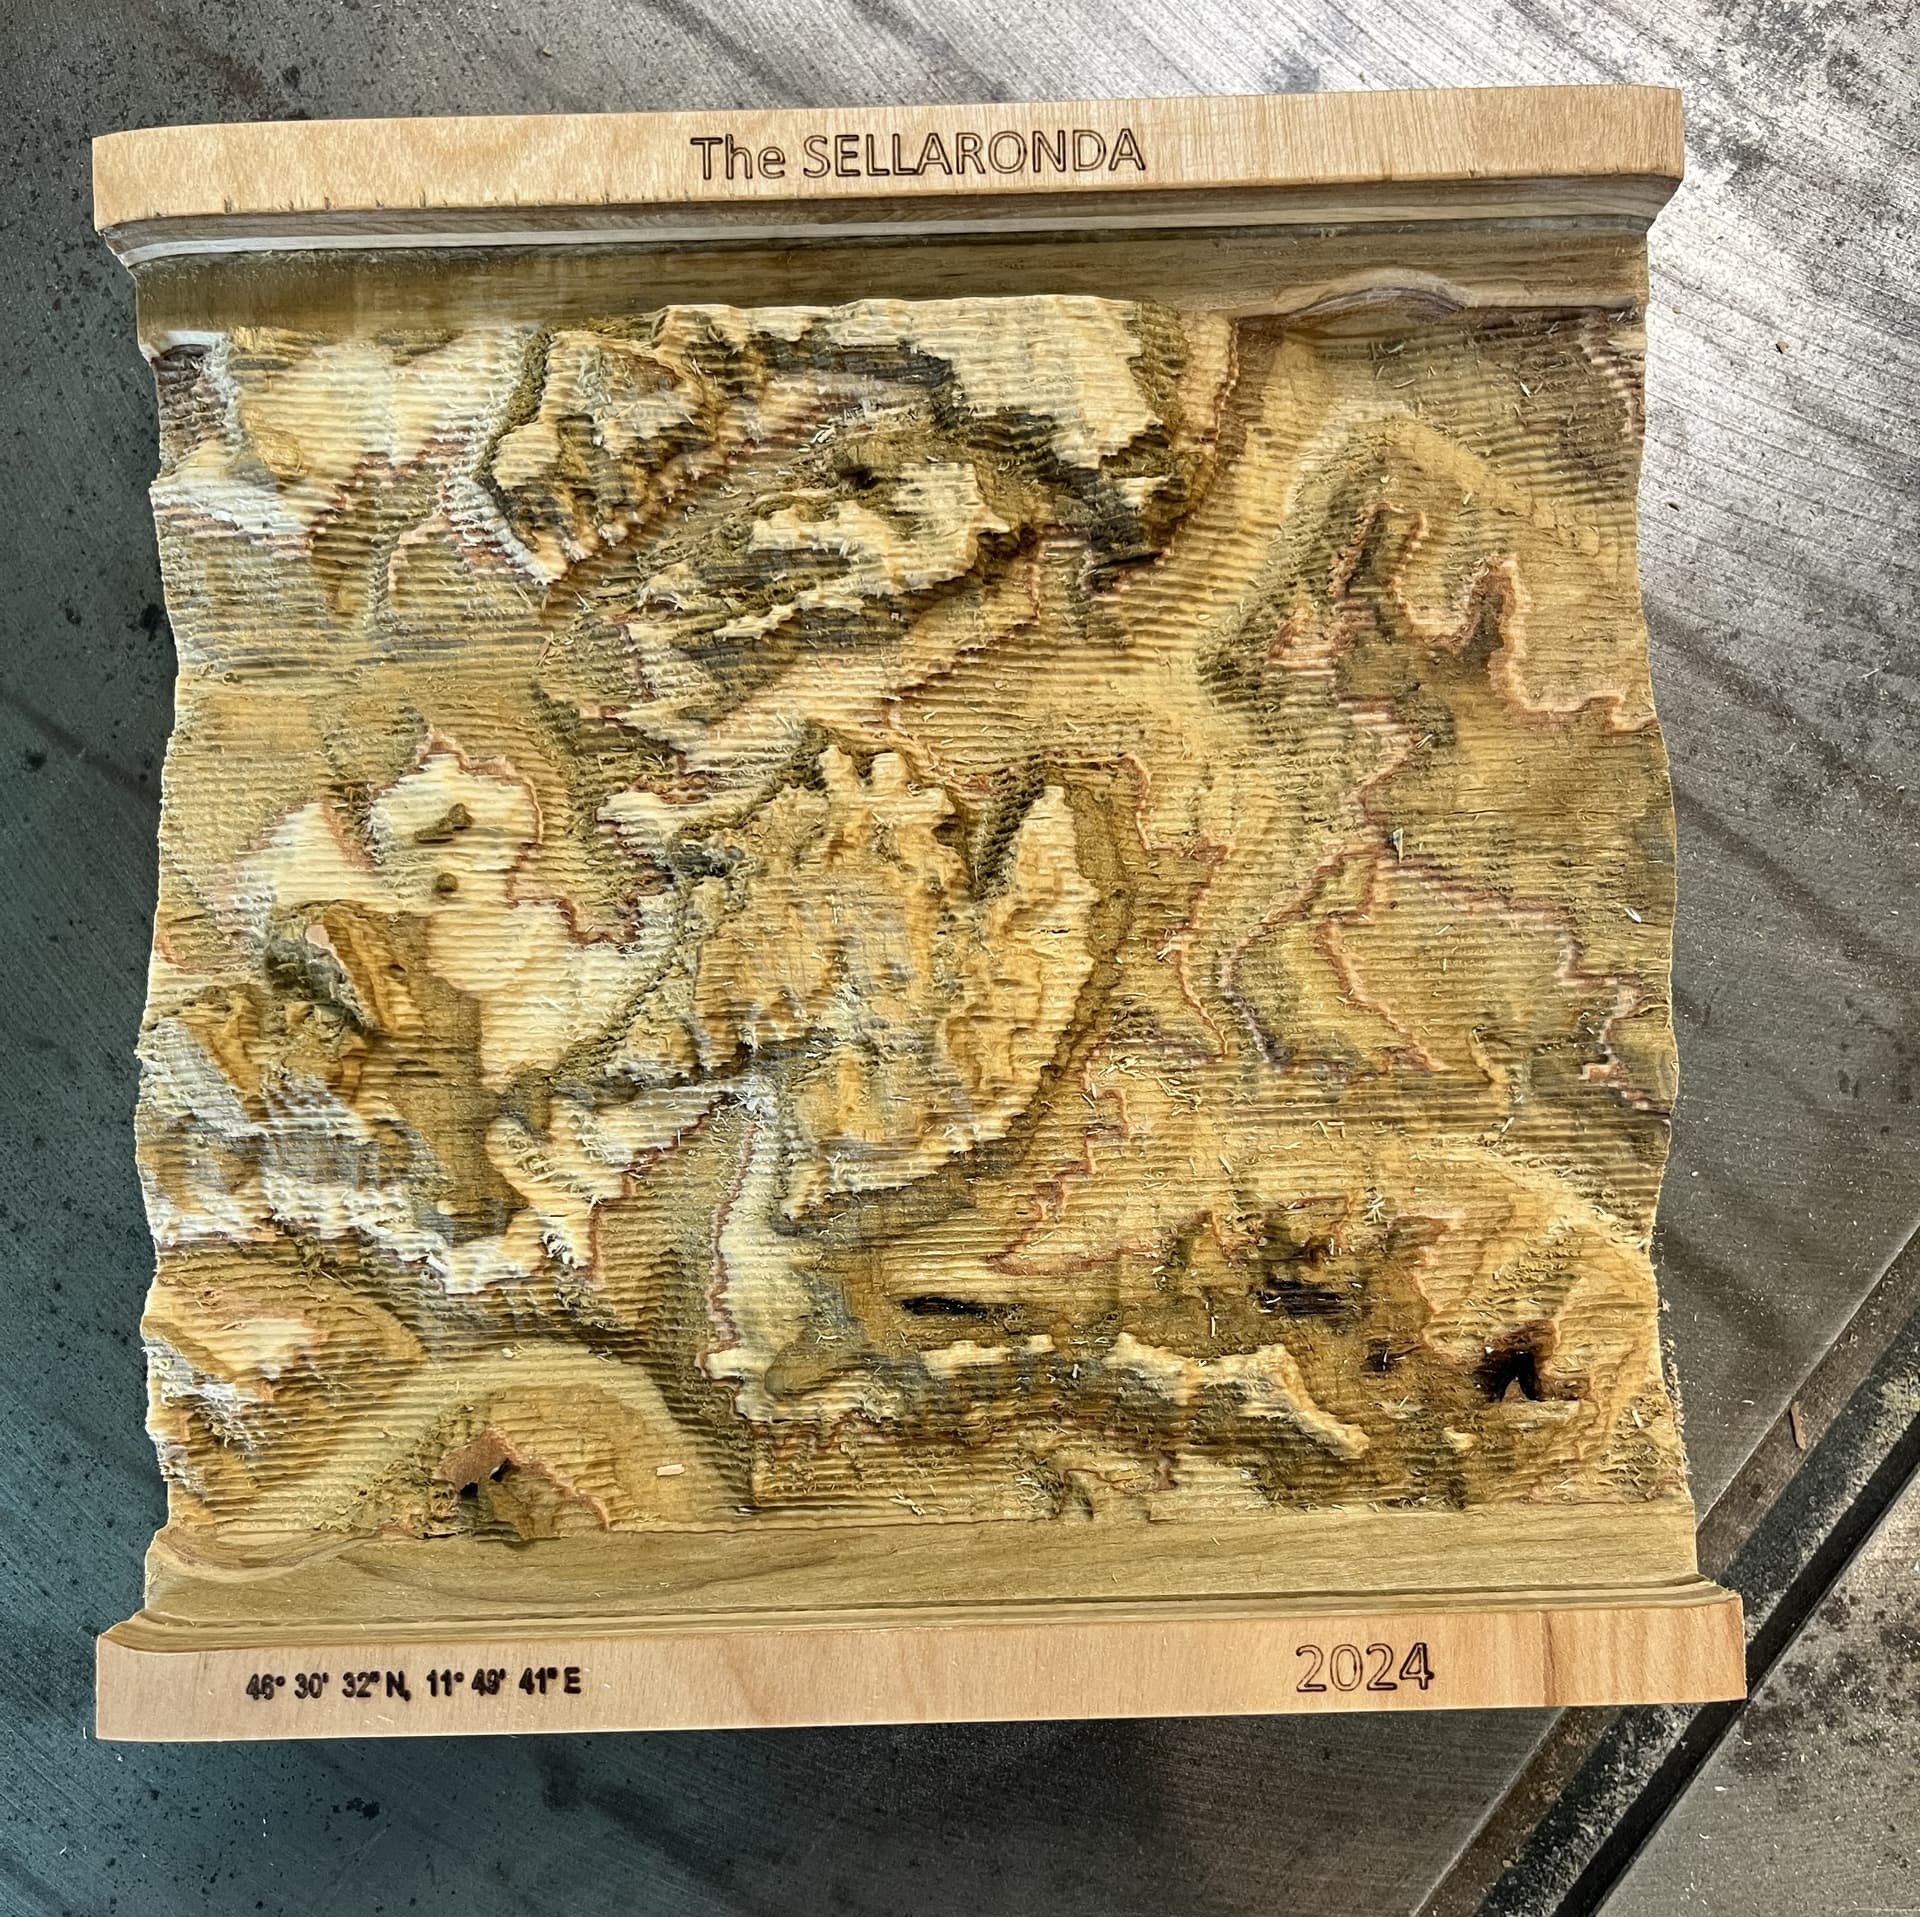
That is really slick. Very realistic look.
Excellent attempt. I haven’t tried any 3D stuff yet.
Paint and Poly.
#@$* this 20 character crap! ![]()
2 Likes
Thanks for the recommendation, I might have a piece of firewood I can retrieve for a try at it.
Thanks, keep playing.
1 Like
Thanks, very nice work. I tried with 2 pieces of 3/4" glued together and it came out pretty good but, I need to work on getting something as nice as yours. I think I need to decrease the stepover on the finish cuts
.
6 Likes
What I like to do is use the angle feature on finishing toolpaths.
Without changing anything the 3D paths work left to right, right to left, etc. You can reduce the stepover and it will make the horizontal lines thinner, however you can also use the angle property on a 3D finishing toolpath to make the tool work up to down, down to up, etc.
So I rough first with a 1/4 (no angle setting available, always left to right)
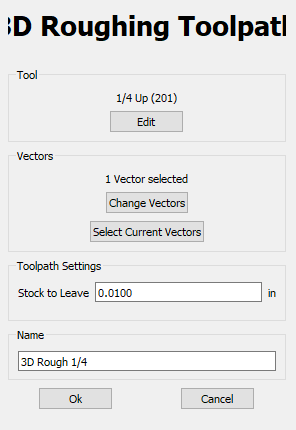
Then make my first finishing path using angle at 90, so the tool is now pathing perpendicular to the previous.

Then make a second finishing path using angle back to 0, smaller bit, very high feedrate.
At this point very little material is getting removed, so I start really pushing the feedrate into the 100 to 200ips range. At this point you can make the argument that an additional finishing paths are faster than hand sanding.
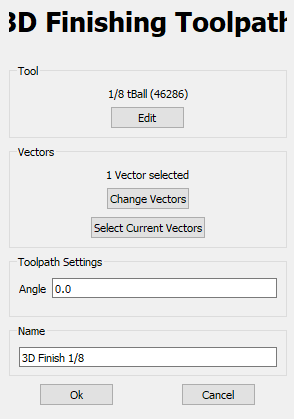
And remember that each finishing toolpath does not need to be the entire area. On my mixed resin/wood project I added an additional finishing toolpath just over the resin area.
Note: Be very aware of the stepover used in 3D finishing. There is a bug in Carbide Motion that it will always default to 50% of your tool width, which is not a good value when using ball nose bits. You will need to do the math yourself and override the stepover until the bug is fixed. I use 12%, so 1/4 ball nose is a 0.03in stepover.
3 Likes
Very nicely put. I think that some fail to realize that the machine has values preset that will not do us justice in finishing a project. It’s not that it is necessary the company’s fault at this. They set values and we have to learn what values we really want. For newcomers to 3D carving, when a toolpath tab pops up, we don’t always know what the values on that page actually mean, which means one would allow the default settings to be left as is.
This proves to be frustrating when someone is working on something like these topographic landscapes that come out with tool lines in the project. This also means that the person new to this feels they have a lot to learn on 3D carving, and may even step away from it for awhile, because they don’t understand it. I have that issue at the moment because I’m still learning the basic principles of Carbide Create Pro.
This is where our community comes into play. I’ll use myself as an example. I have been asking questions and researching many topics covered in the community, some still active and others closed out because of the 30 day no response limits. Many responses that I have received have been very helpful, but again, with me not necessary applying them I may not remember them at first.
I have not tried a single 3D carving yet as pertaining to true 3D carving. I have made layered projects that have depth. I still don’t know how to stack text where things like letters and numbers are stacked on top of each other and the the machine is set to cut both sets out at the same time. The steps I follow on YouTube videos are usually using a different program from Carbide Create Pro.
With my attempt at stacking text, I got as far as putting the text in different layers and then tried to make a welded layer where both text come together for the cutting. That is where I get lost. I bet it is simple to do, but not doing it before, means I won’t understand all of the final steps to finish out a program design. I’ll learn it sooner or later.
A lot of the videos on stacked text that I have seen are using straight endmills rather than V which makes the whole thing a lot more straightforward. The text is very crisp that way but may not be the look you want.
Using the v endmill you have to calculate the appropriate offset for that bottom layer so that it doesn’t eat into the top. That depends on angle and depth of cut. And then do welding like you say. It took me a while to get the process down but once you get it then it is fairly easy to repeat.
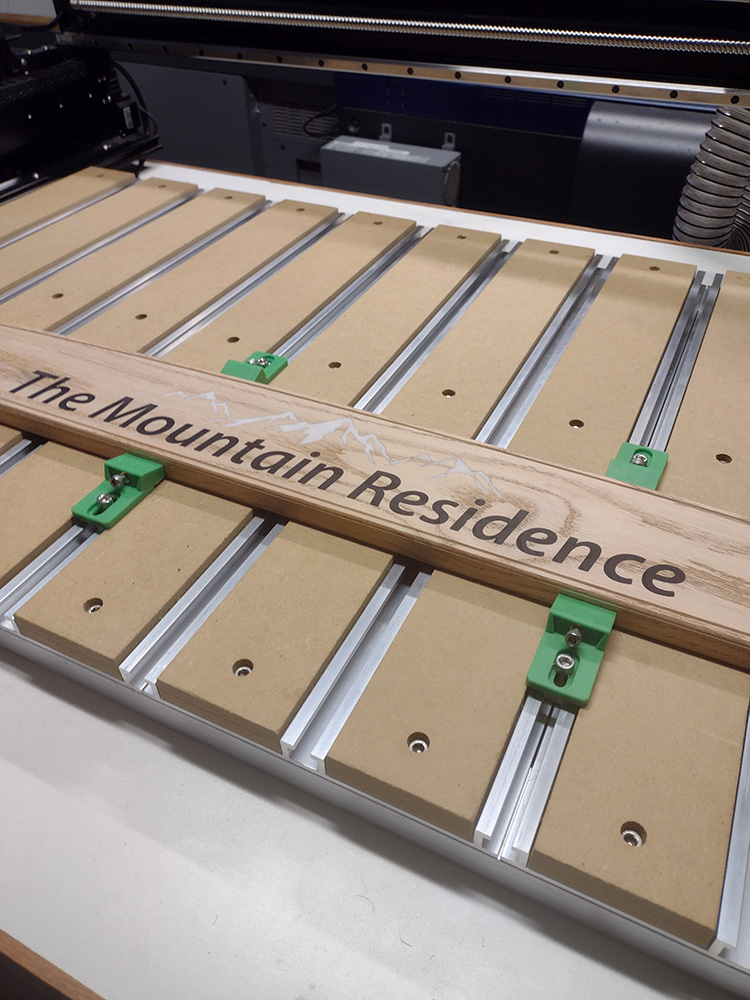
But I still can’t figure out the weld right. I had a text that I tried with once and when I went to the last stage of the text coming together and giving me a toolpath, I couldn’t find the last stages of the process. It’s just so simple but yet so hard. Stacking text, once one figures that out, then leads to being able to stack images the same way, this, creating more of a 3D image. I created the wooden panel that was rustic looking but didn’t use stacked layers. I just went in and made my lines and used the measuring tool to make sure there was enough clearance at the beginning and end of the deeper toolpath to not hit the sides of the upper slats, but to be as close as I could get to make it look like the cut made a slat board that was under the upper board.
I will figure it out. Carbide Create Pro is just a program and the program has capabilities that come to a limit and end, and once dig thru, I know I will have figured out all the capabilities of the program. I have time to figure it out.
Make sure that you convert to curves first. And then when you do the weld you unselect the inner islands like on lower case e’s and a’s.
If you’ll post the file you are having trouble with we can walk through it with you.
This is a great video on stacked text. He is using Vectric but the process is the same.

Bought a plan today for a laptop stand as computer is perilously dangling off the edge of the work table when cutting, so figure I will need it. All the cuts done, finished gluing and hoping tmw will be assembly day.
(Plan bought from CNC Laptop Stand Plans - Customizable Woodworking Design)
10 Likes
Here is a file @WillAdams helped me with.
3 Likes
For a nice finish you need 2 finishing passes, both at 10% step over. The first is across the grain and the final one with the grain, which helps hide tooling marks.
1 Like
Thank you, I’ll try.
I need to engrave a wooden tray that’s taller than the gantry bottom, but just under the max tool height, measuring about 5 1/5". Anyone have a workaround for this? Machine is a S5P with VFD. I do have an alternate plan if needed.
My first project.
Here are a couple of photos of my porch bench top rail.This is showing the machined piece.

After the epoxy inlays were filled I used a 1 1/2" dia facing cutter to flush everything.
This is 3/4" Red Oak. It’s ready for finishing and hope someone has a recommendation for a finish coat that will work with the epoxy. Much appreciated.
12 Likes