I also provide these pegs with each of the boards I sell. There is no slop in the hole with these pegs.
The drill bits really should be run somewhat slower but I am still not getting any burning with them and the holes all come out fine. I did find that if I was not careful with the length of the bit and had too much sticking out the bit could wander slightly. So I make sure and have the bit inserted far enough that the collet grabs right above the last of the fluting. Makes it stable enough for my needs. I also decreased the plunge rate a little from my initial test.
Thank you! When you say run somewhat slower, what rpm are you doing? I currently have my spindle set to 7200 on the low end (50hz), but could check on whether it’s safe to program slower. It’s water cooled, so I suspect it should be ok, but not 100% sure. Also, what’s your plunge rate?
I am running the Carbide 3D router so the slowest it goes is 10000. I was talking about the plunge rate. I think I am going at 15 IPM and a peck distance of only .0625.
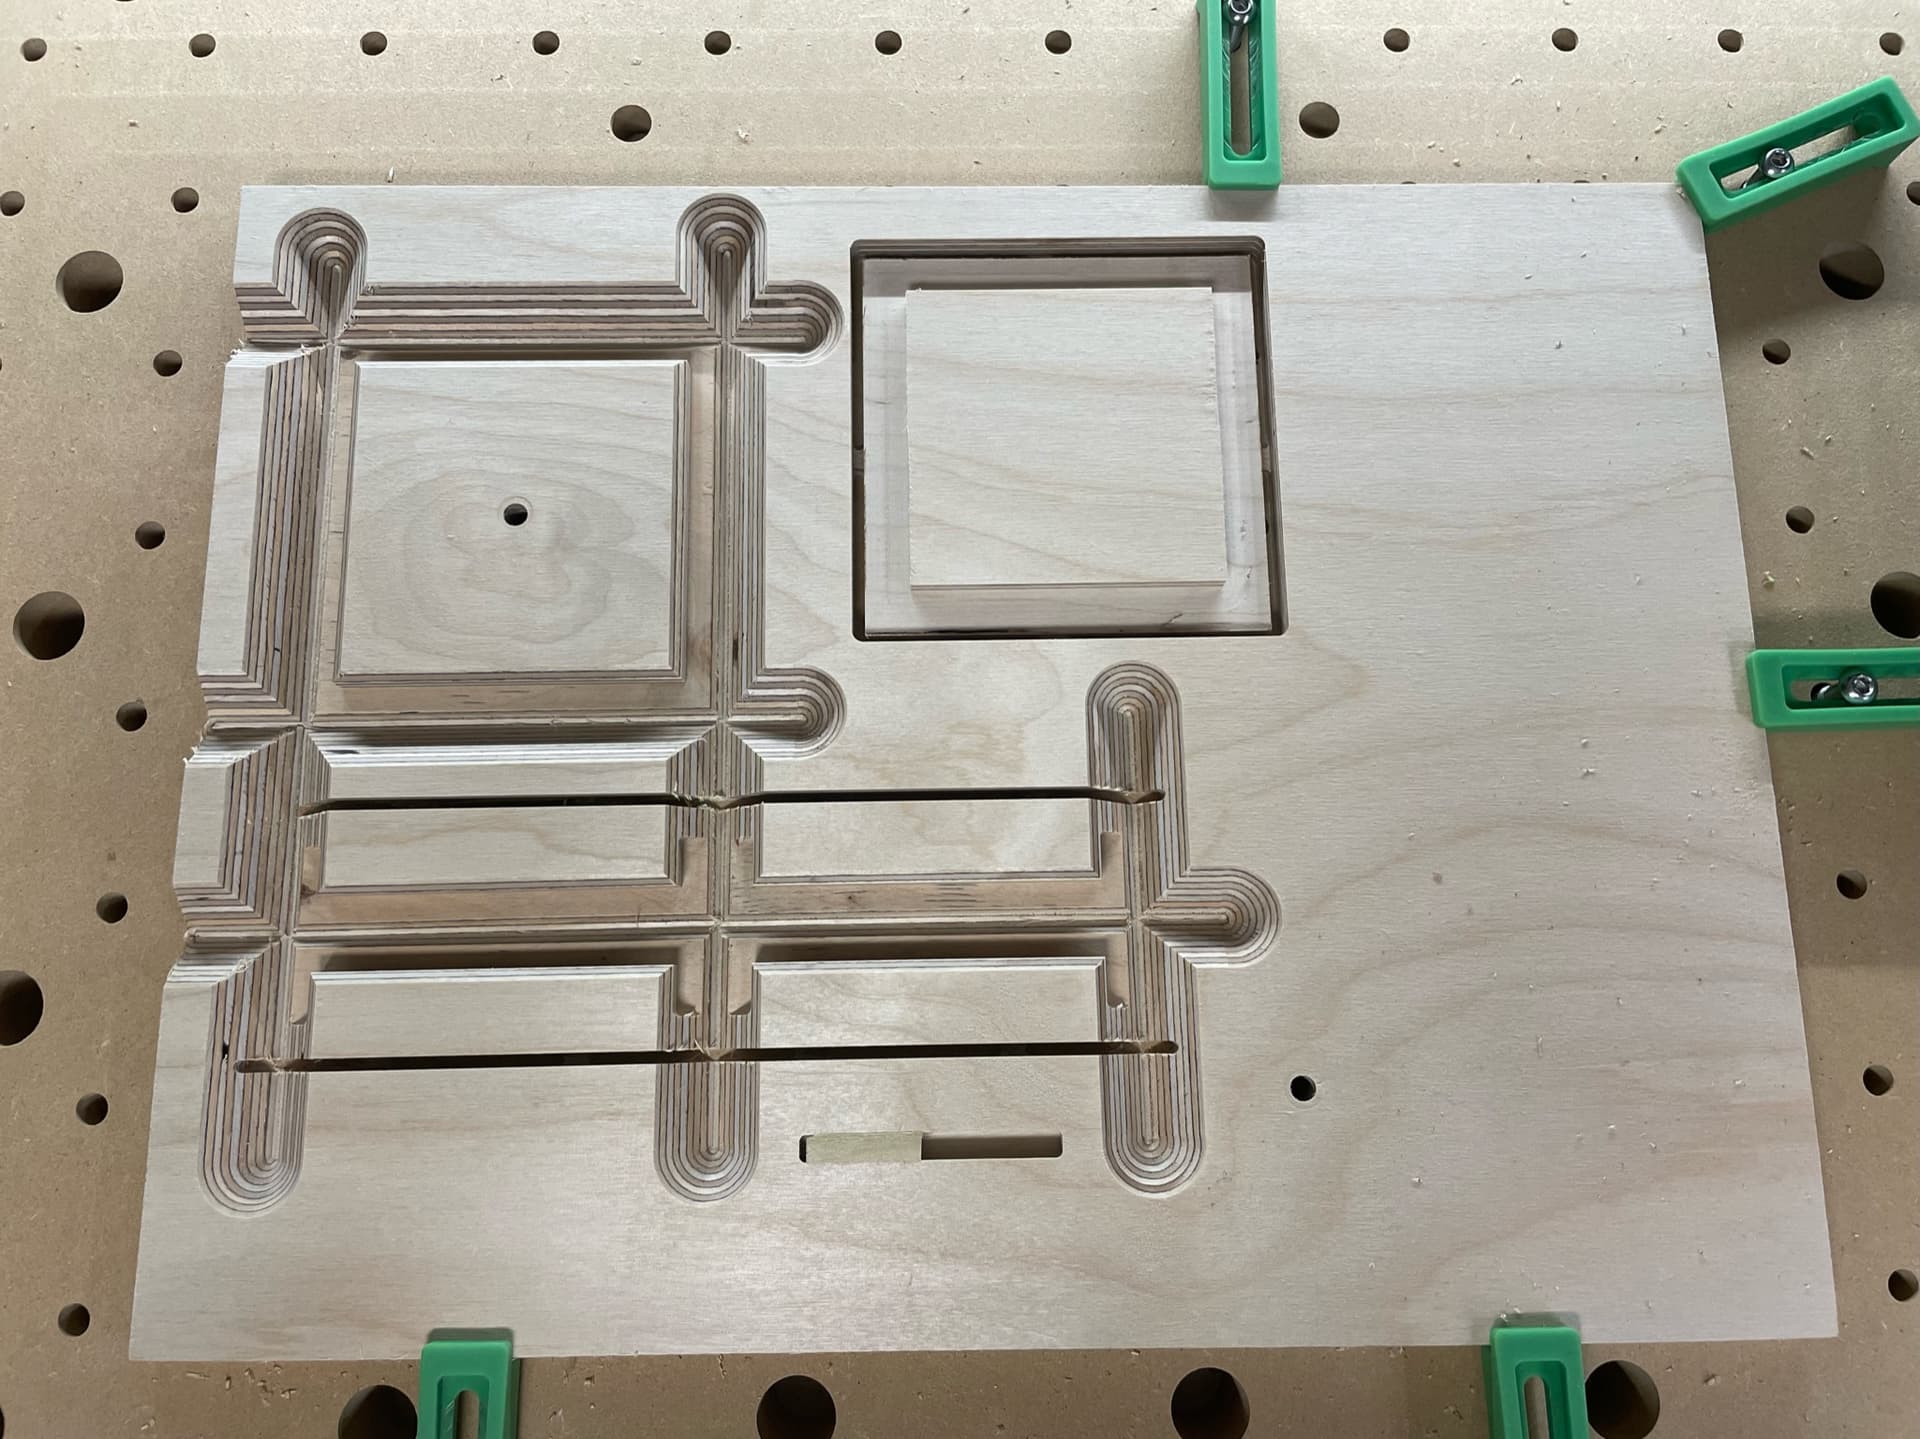
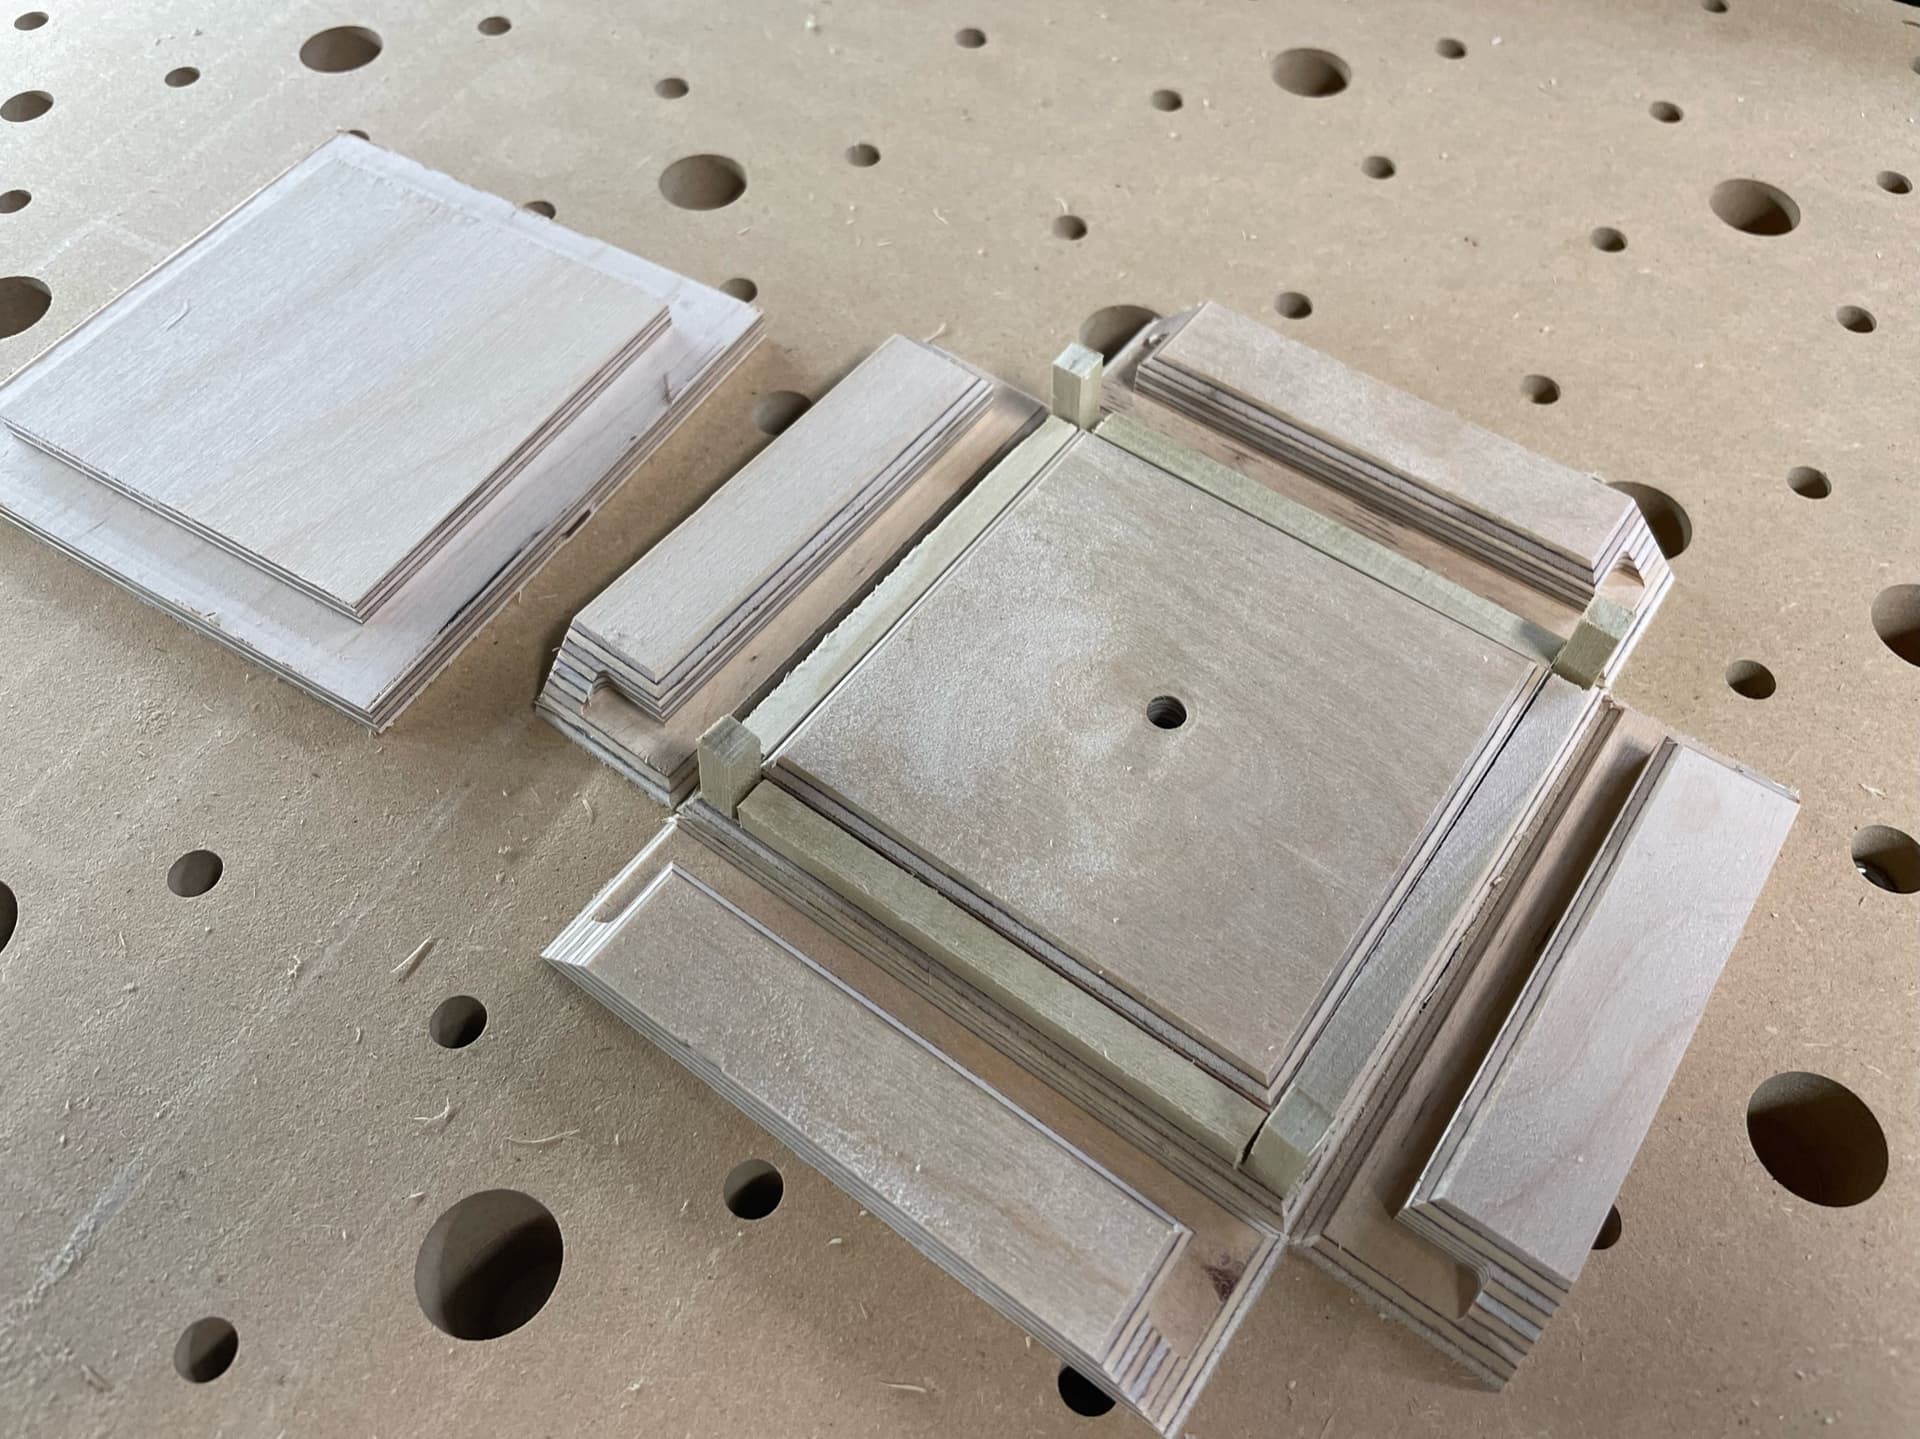
I haven’t seen much on the internet about anyone doing this with CNC although I’m sure I’m not the first to try this. Rather than anything useful, this box is a test of some techniques I want to use in the future, but didn’t want to use a lot of material in case it was an utter failure. The idea is to create a box with joints that are incredibly strong. The joints are mitered with a square dowel inserted into a slot. I picked up some square 1/4" poplar dowels at the local hardware store and the material is 12mm baltic birch plywood. The top of the box has an inset cut to only a couple of thousands smaller to test squareness and fit. The miter cutter I’m using is the Amana RC-1140 which is a 91 degree V bit. Compared to a 90 degree V bit this one gives you a bit of clearance on the inside of the joint to insure the outside meets perfectly. Before I started cutout I did a test to see how the dowels would fit and found them too snug. A measurement proved they were about 2 thousands wider than 1/4", which isn’t much but enough to matter on the fitting. As for speeds and feeds the Amana site shows the same settings between the RC-1140 and the RC-1148 that CC sells. So I used the same settings adjusting only the angle and width. With those settings the HDM plowed through without any apparent problems, but the noise was telling me the depth per pass was a bit too aggressive. I’ll back that off in the future.
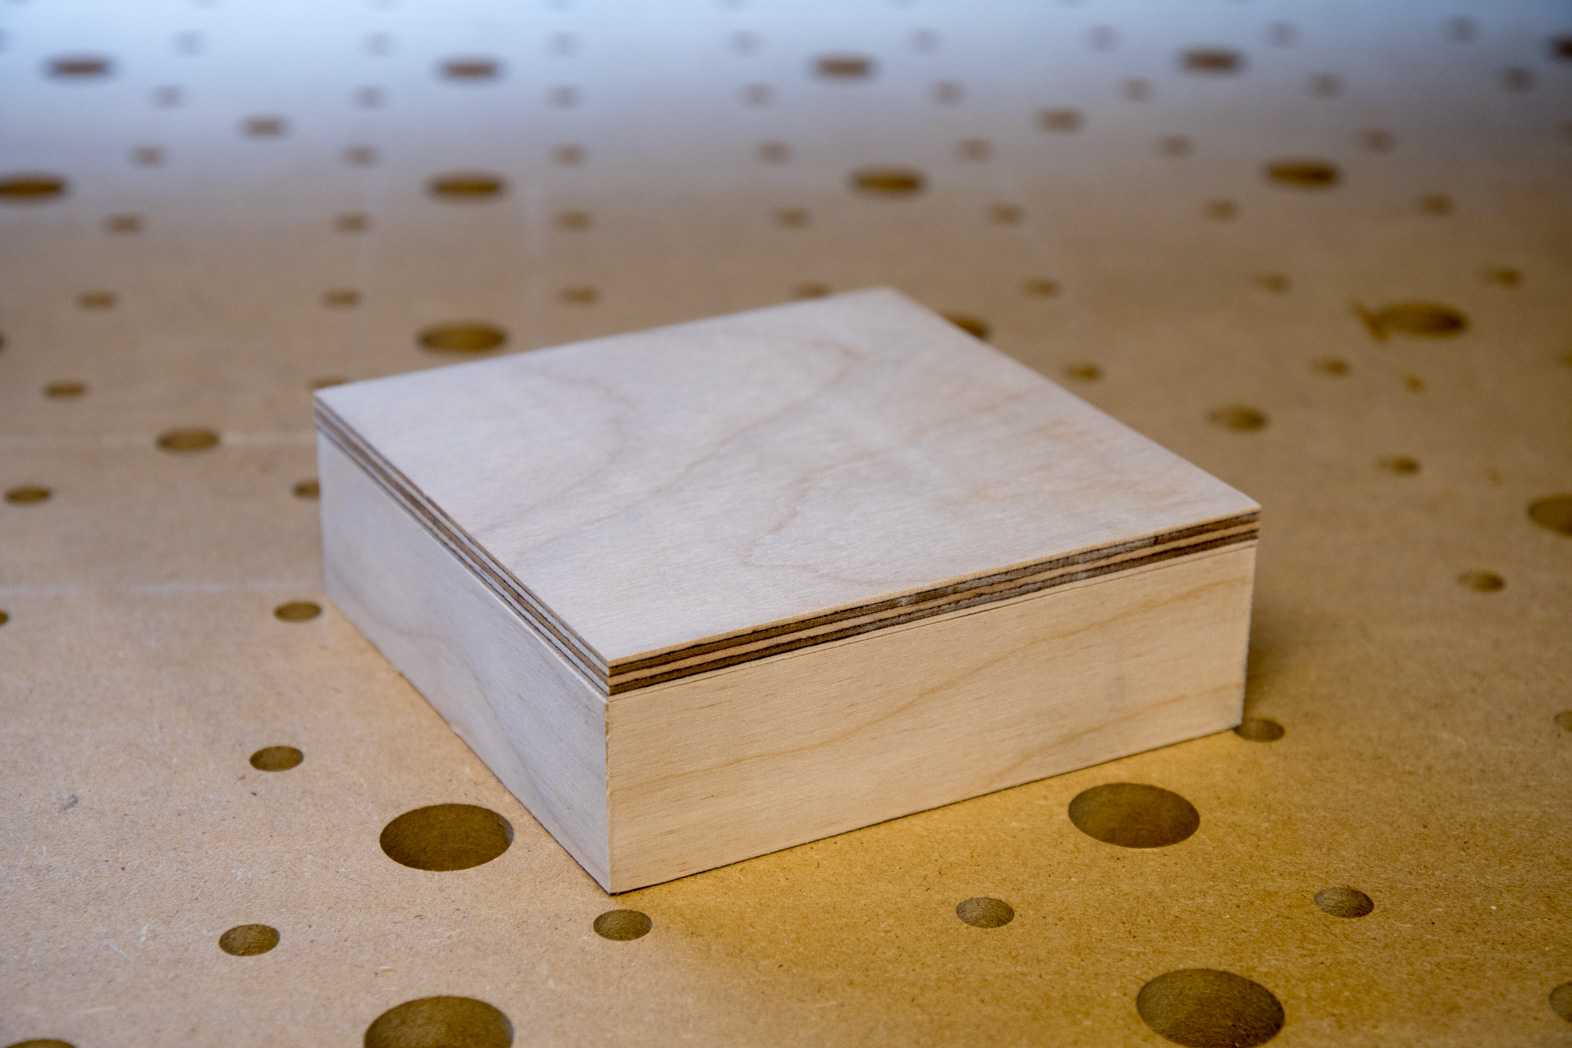
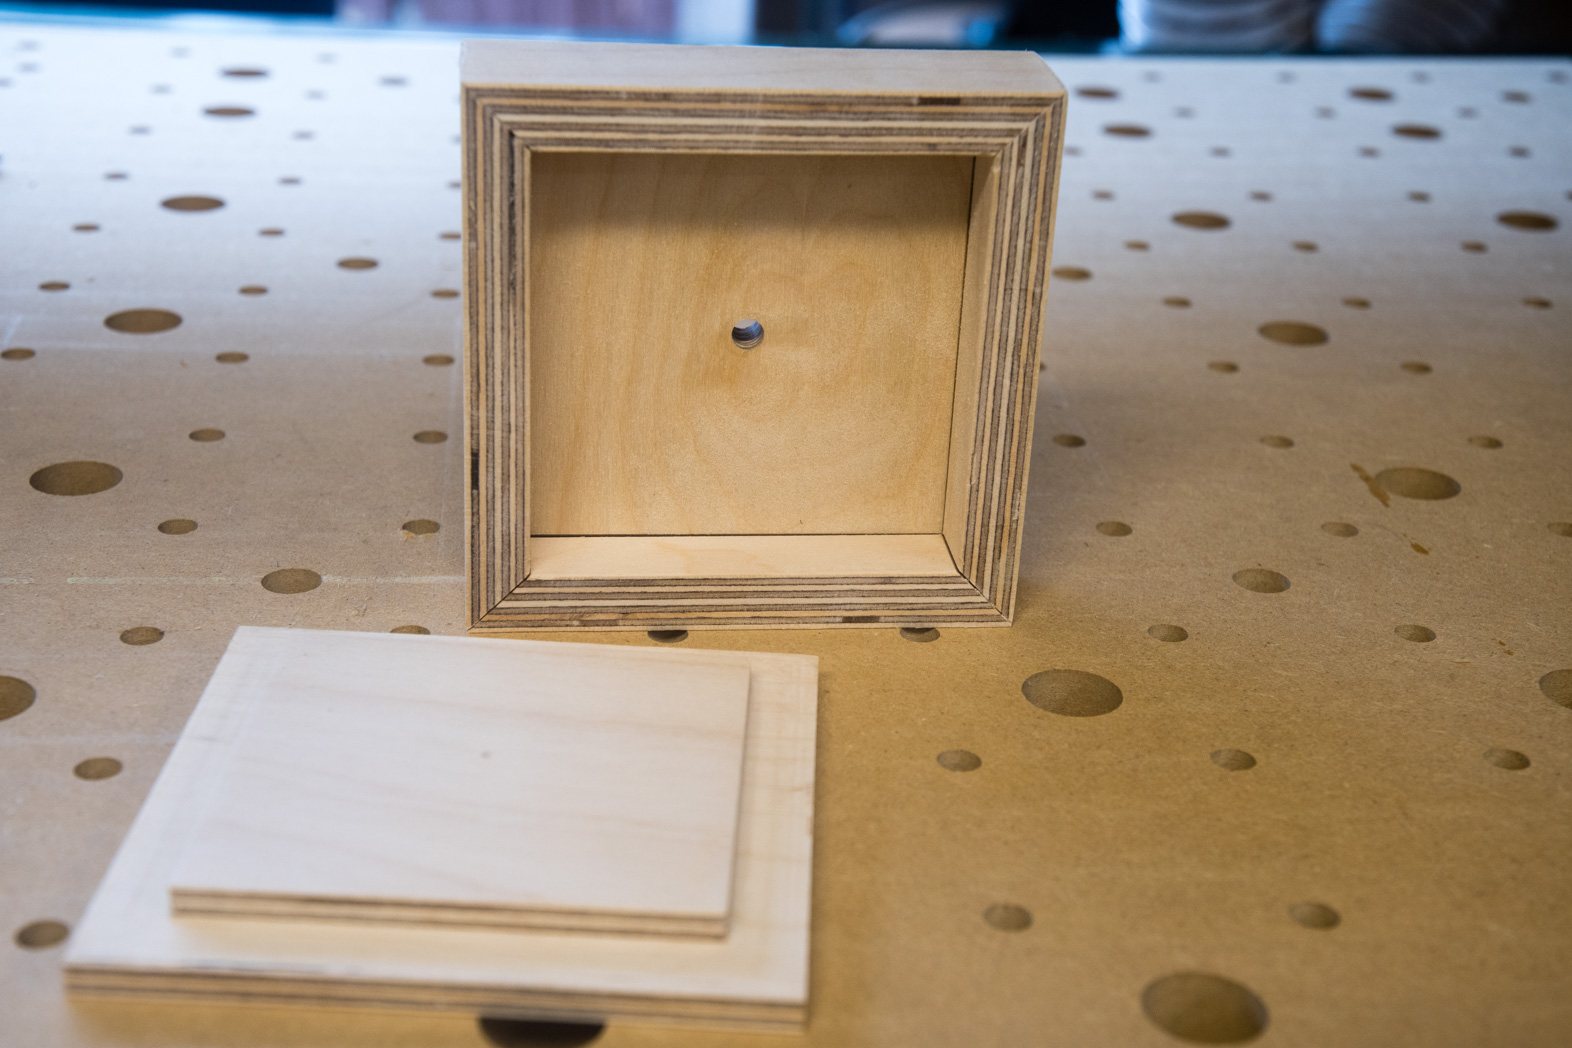
All in all I’d have to say the test was successful. Everything came together as it should. I left the dowels hidden, but you could certainly leave the ends exposed for a bit of visual interest.
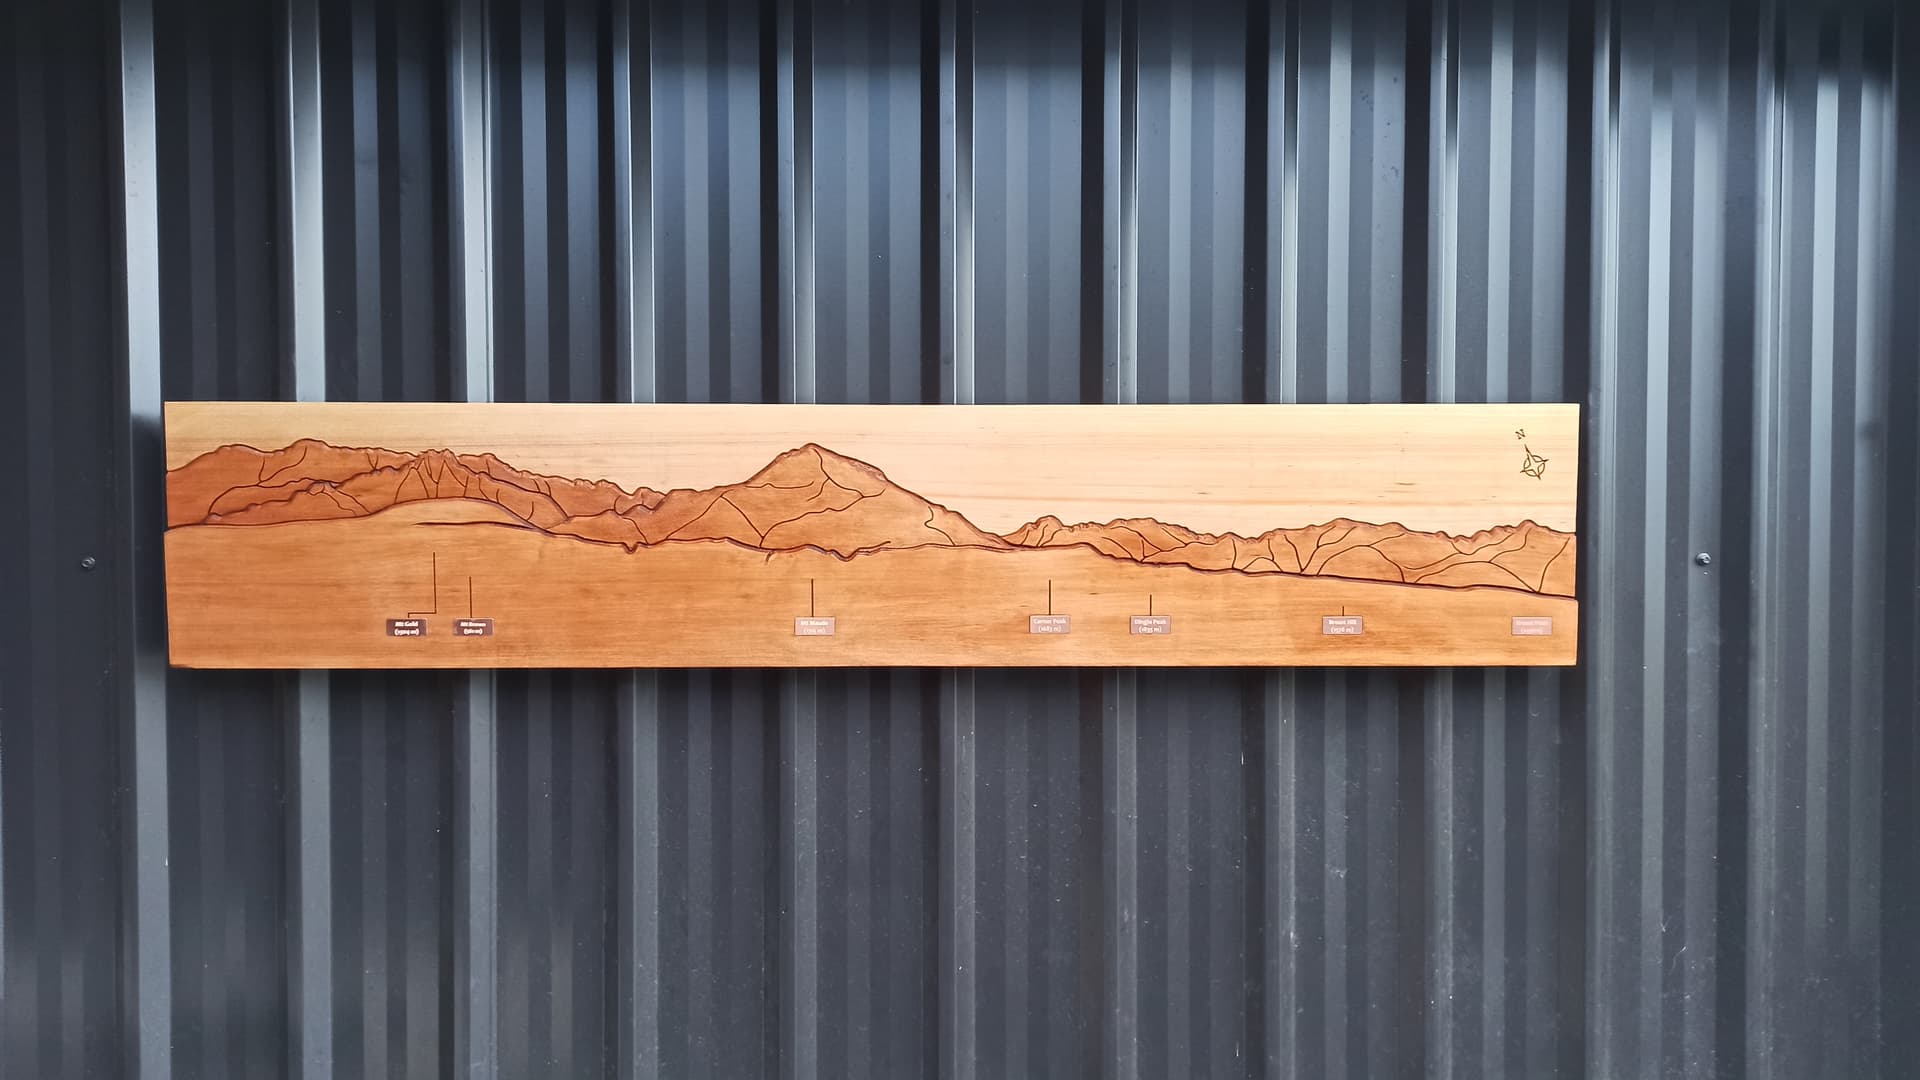
It’s already been a while since I started this project, but due to the lack of time, it takes ages to finish. Never mind, the project is done.
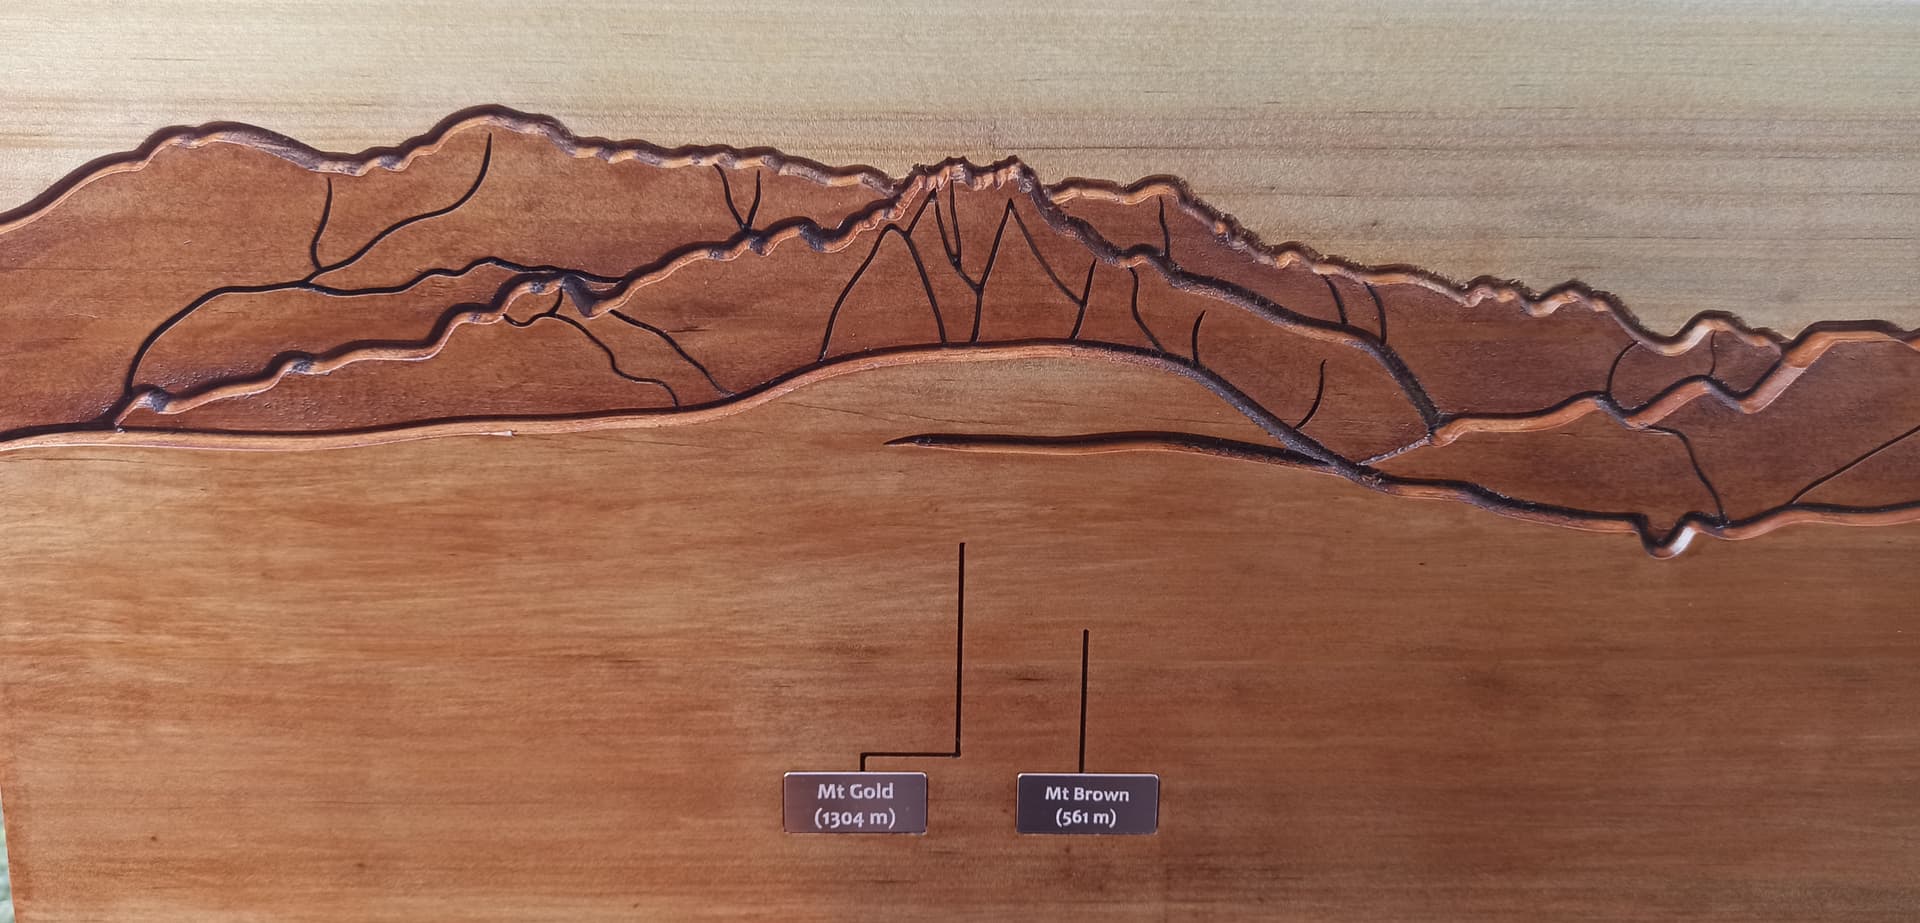
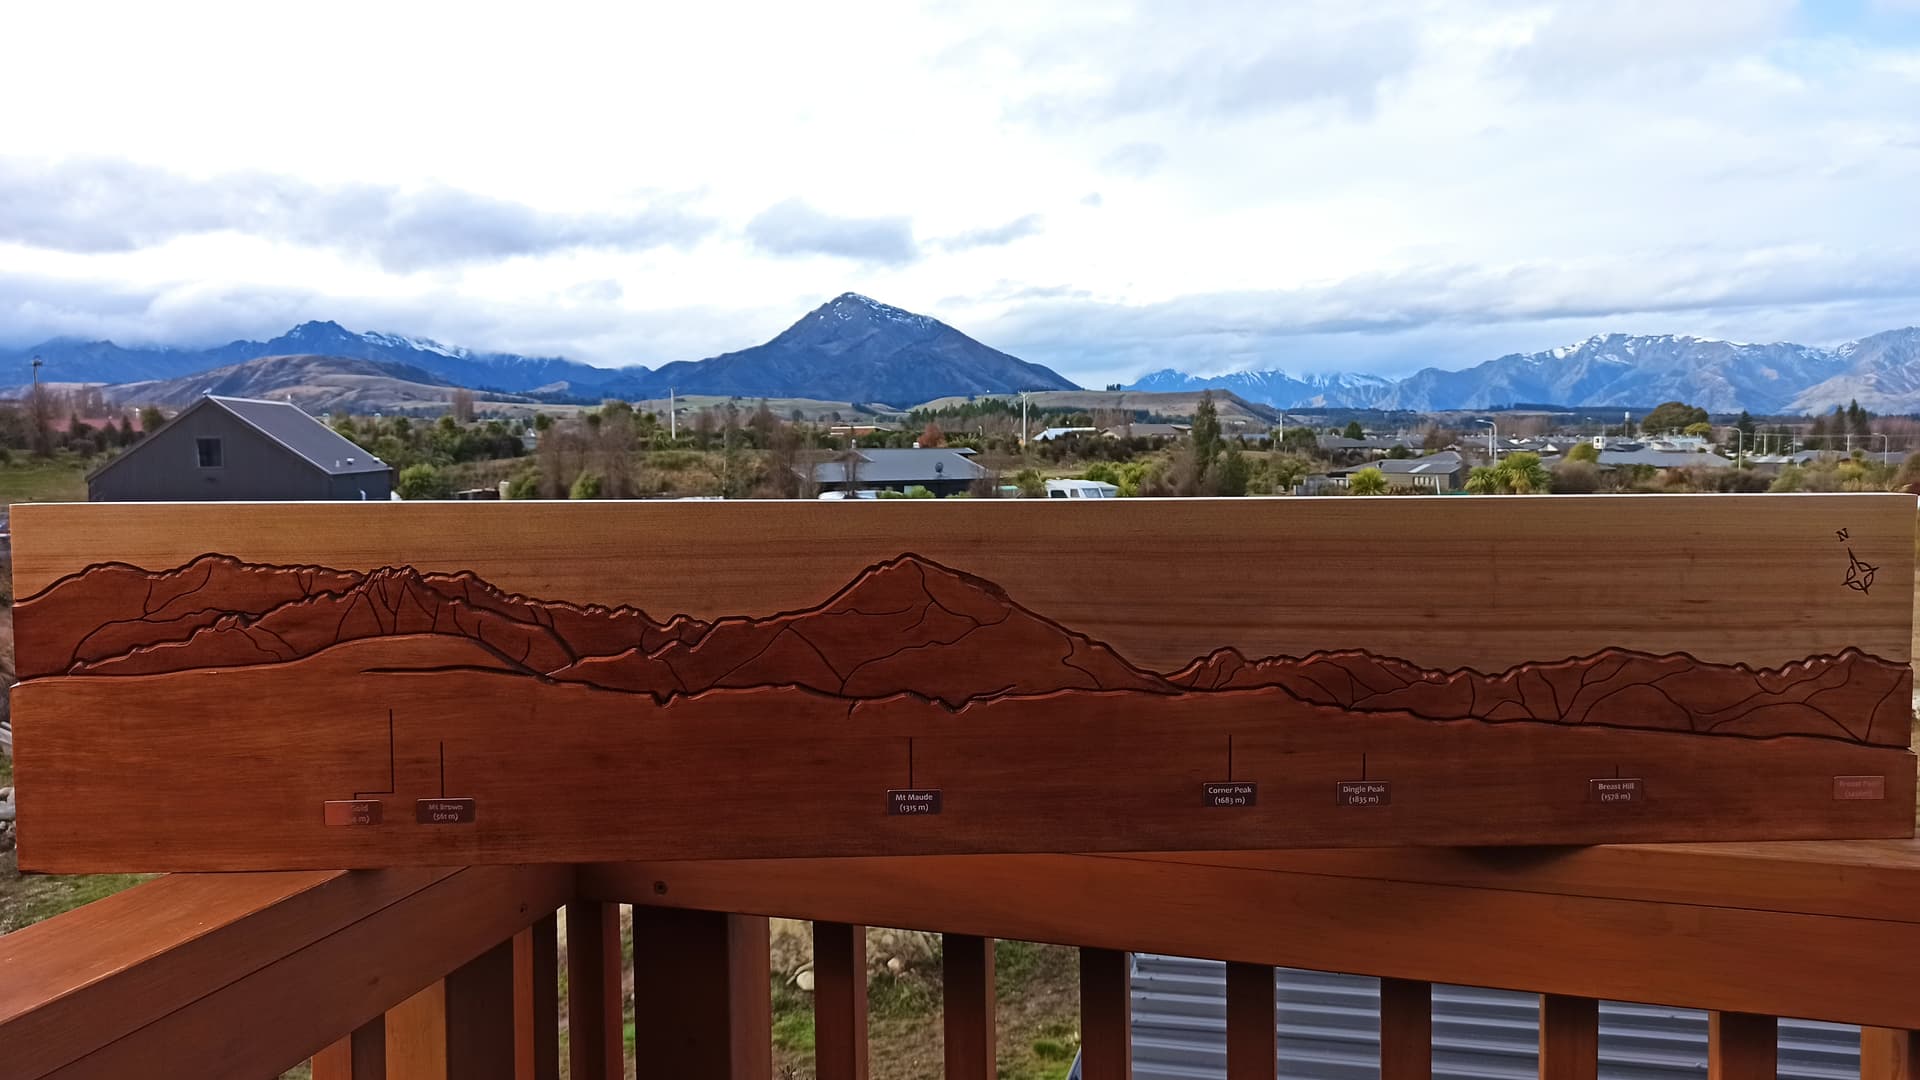
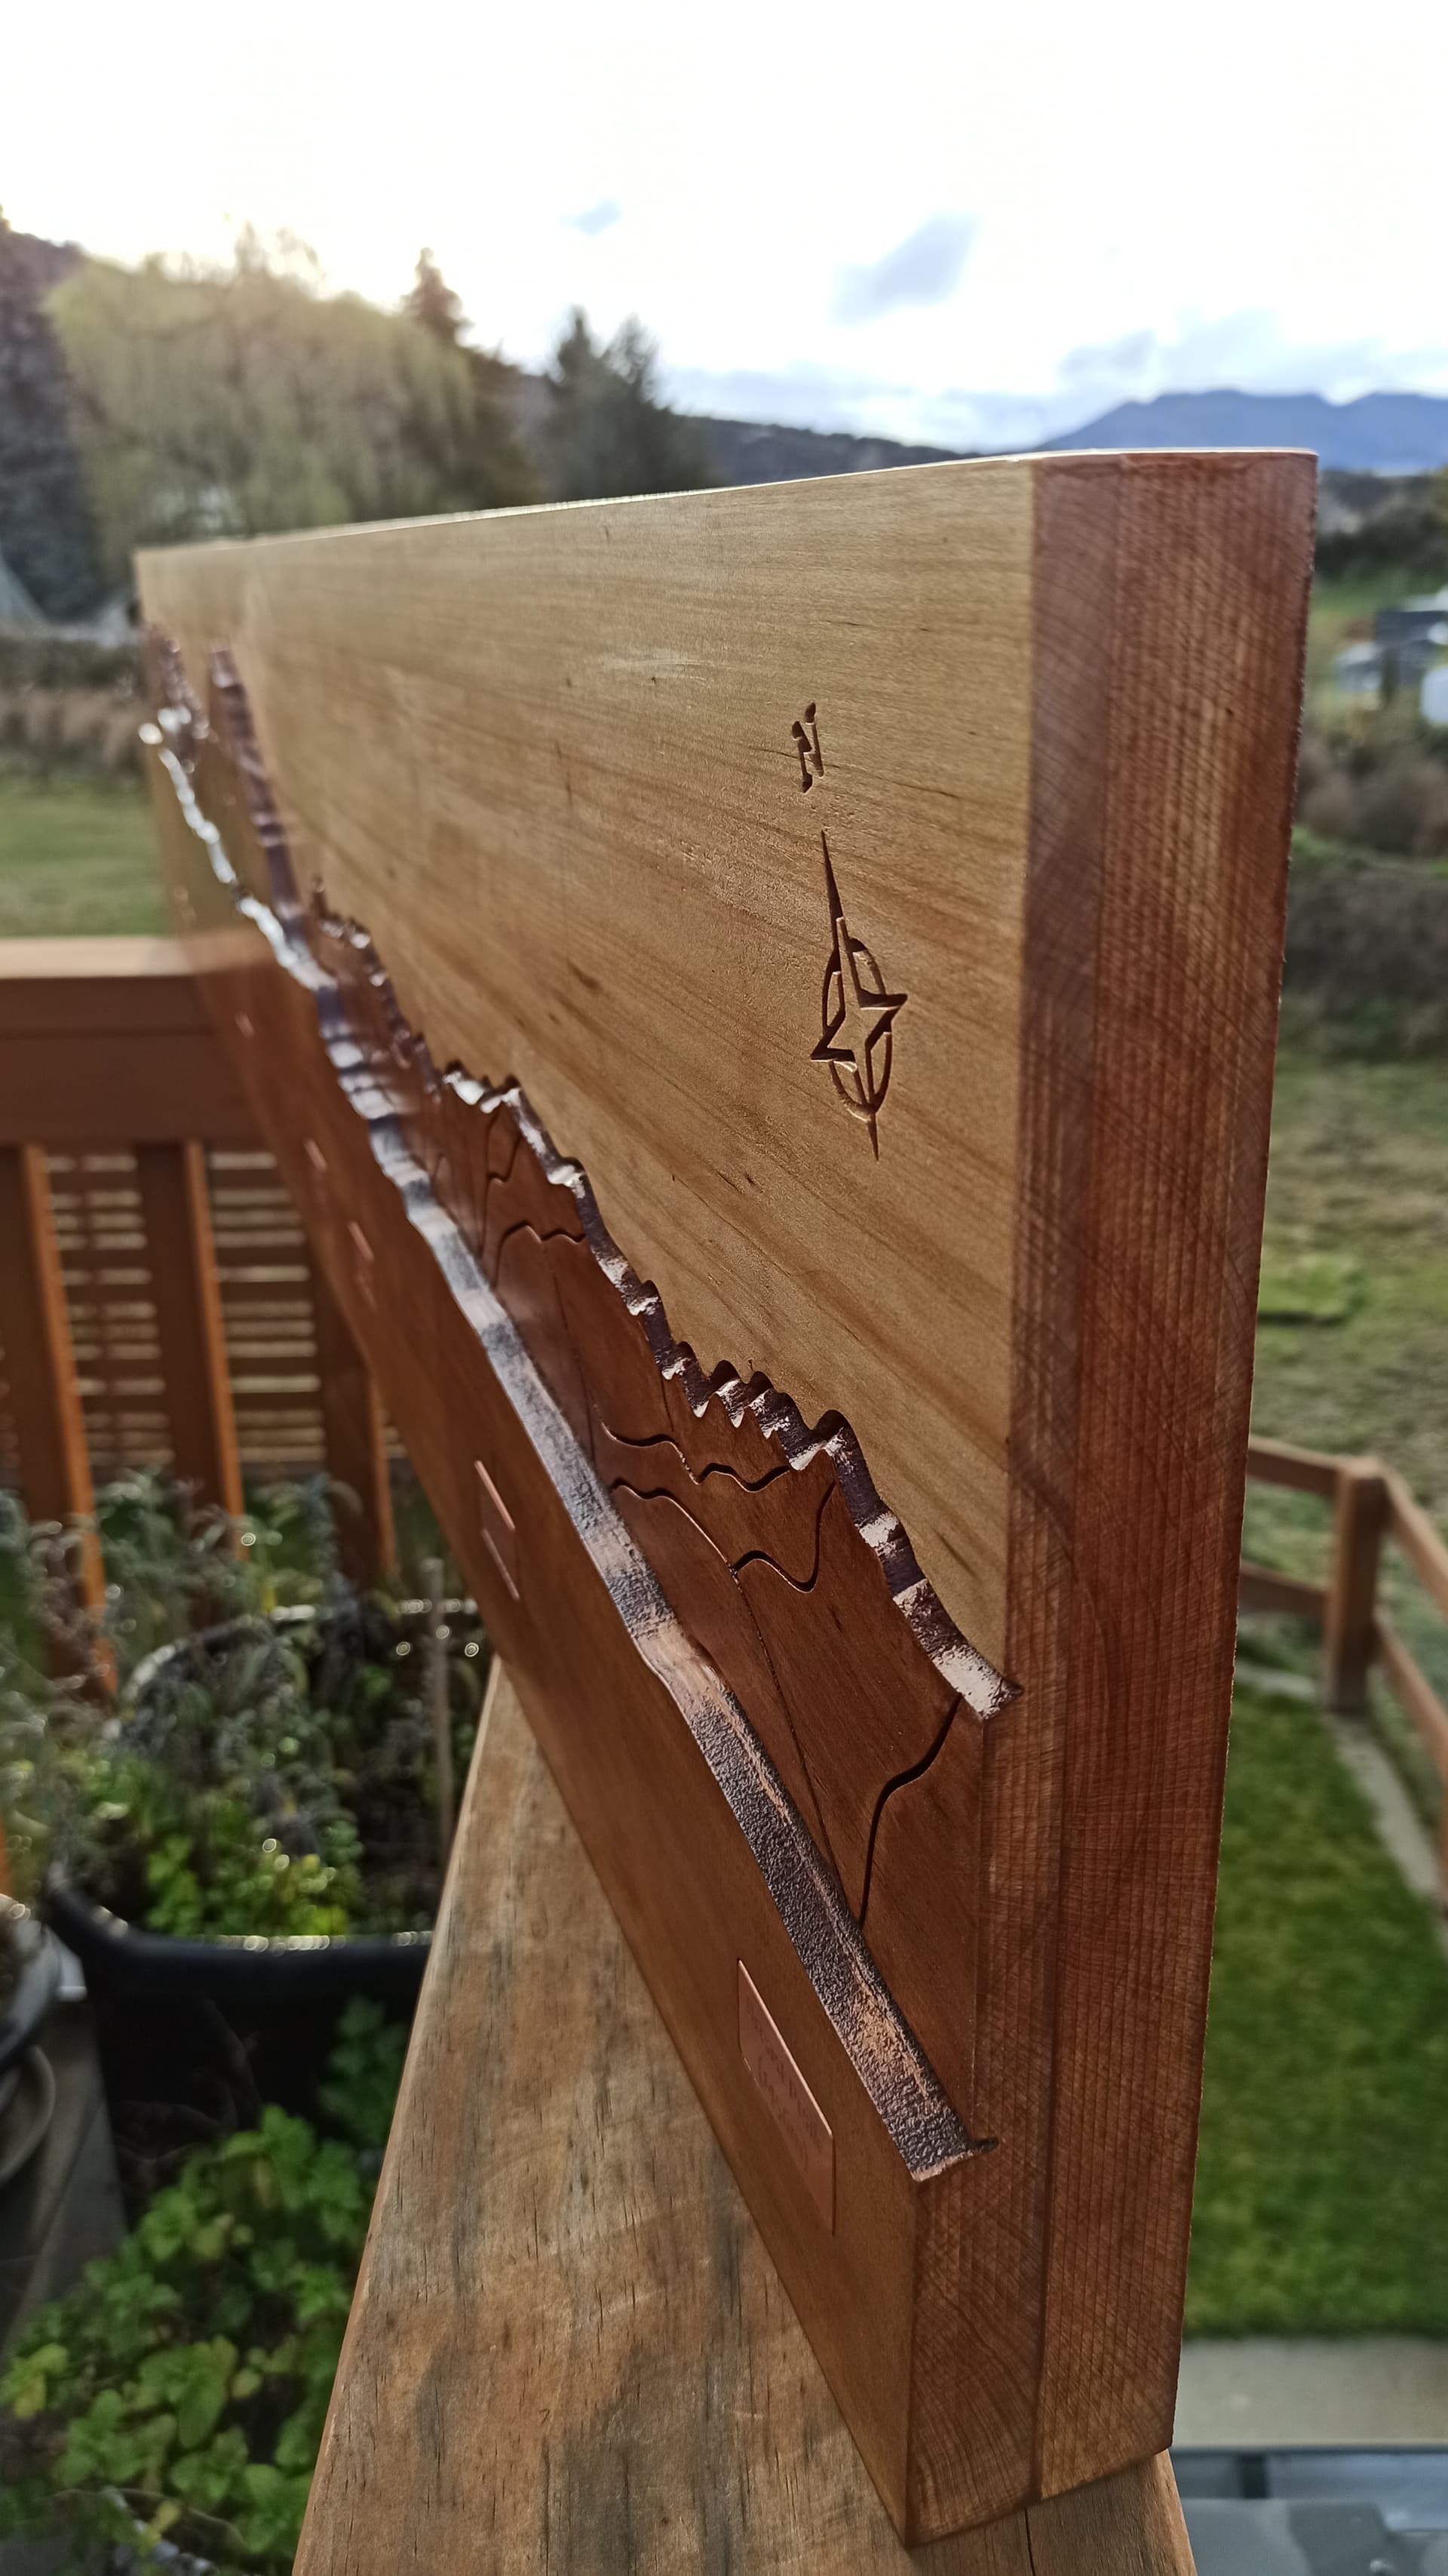
It’s a view of the horizon from my deck, milled and engraved into a 1.6 m long kauri board. I made it on my Shapeoko Pro XXL which has only 850 mm long table and it’s enclosed from the back side.
Your project is very reminiscent of Instarsia on a scroll saw. I have made a few Instarsia projects in the scroll saw and it is a wood management project to get all the grain lined up properly. I have thought about making some jig saw puzzles on the cnc. I saw a youtube video the other night about someone that made the same jig saw shape and glued the pieces onto a cylinder of wood and poured epoxy into the mold he made and then cut the project out on the lathe.
People are incredibly creative. It must be nice to look at such a nice view every day. My shop door looks out on the piney woods of East Texas. Much better than looking at the neighbors garage or if you live in the city the graffiti that is so prevalent in big cities.
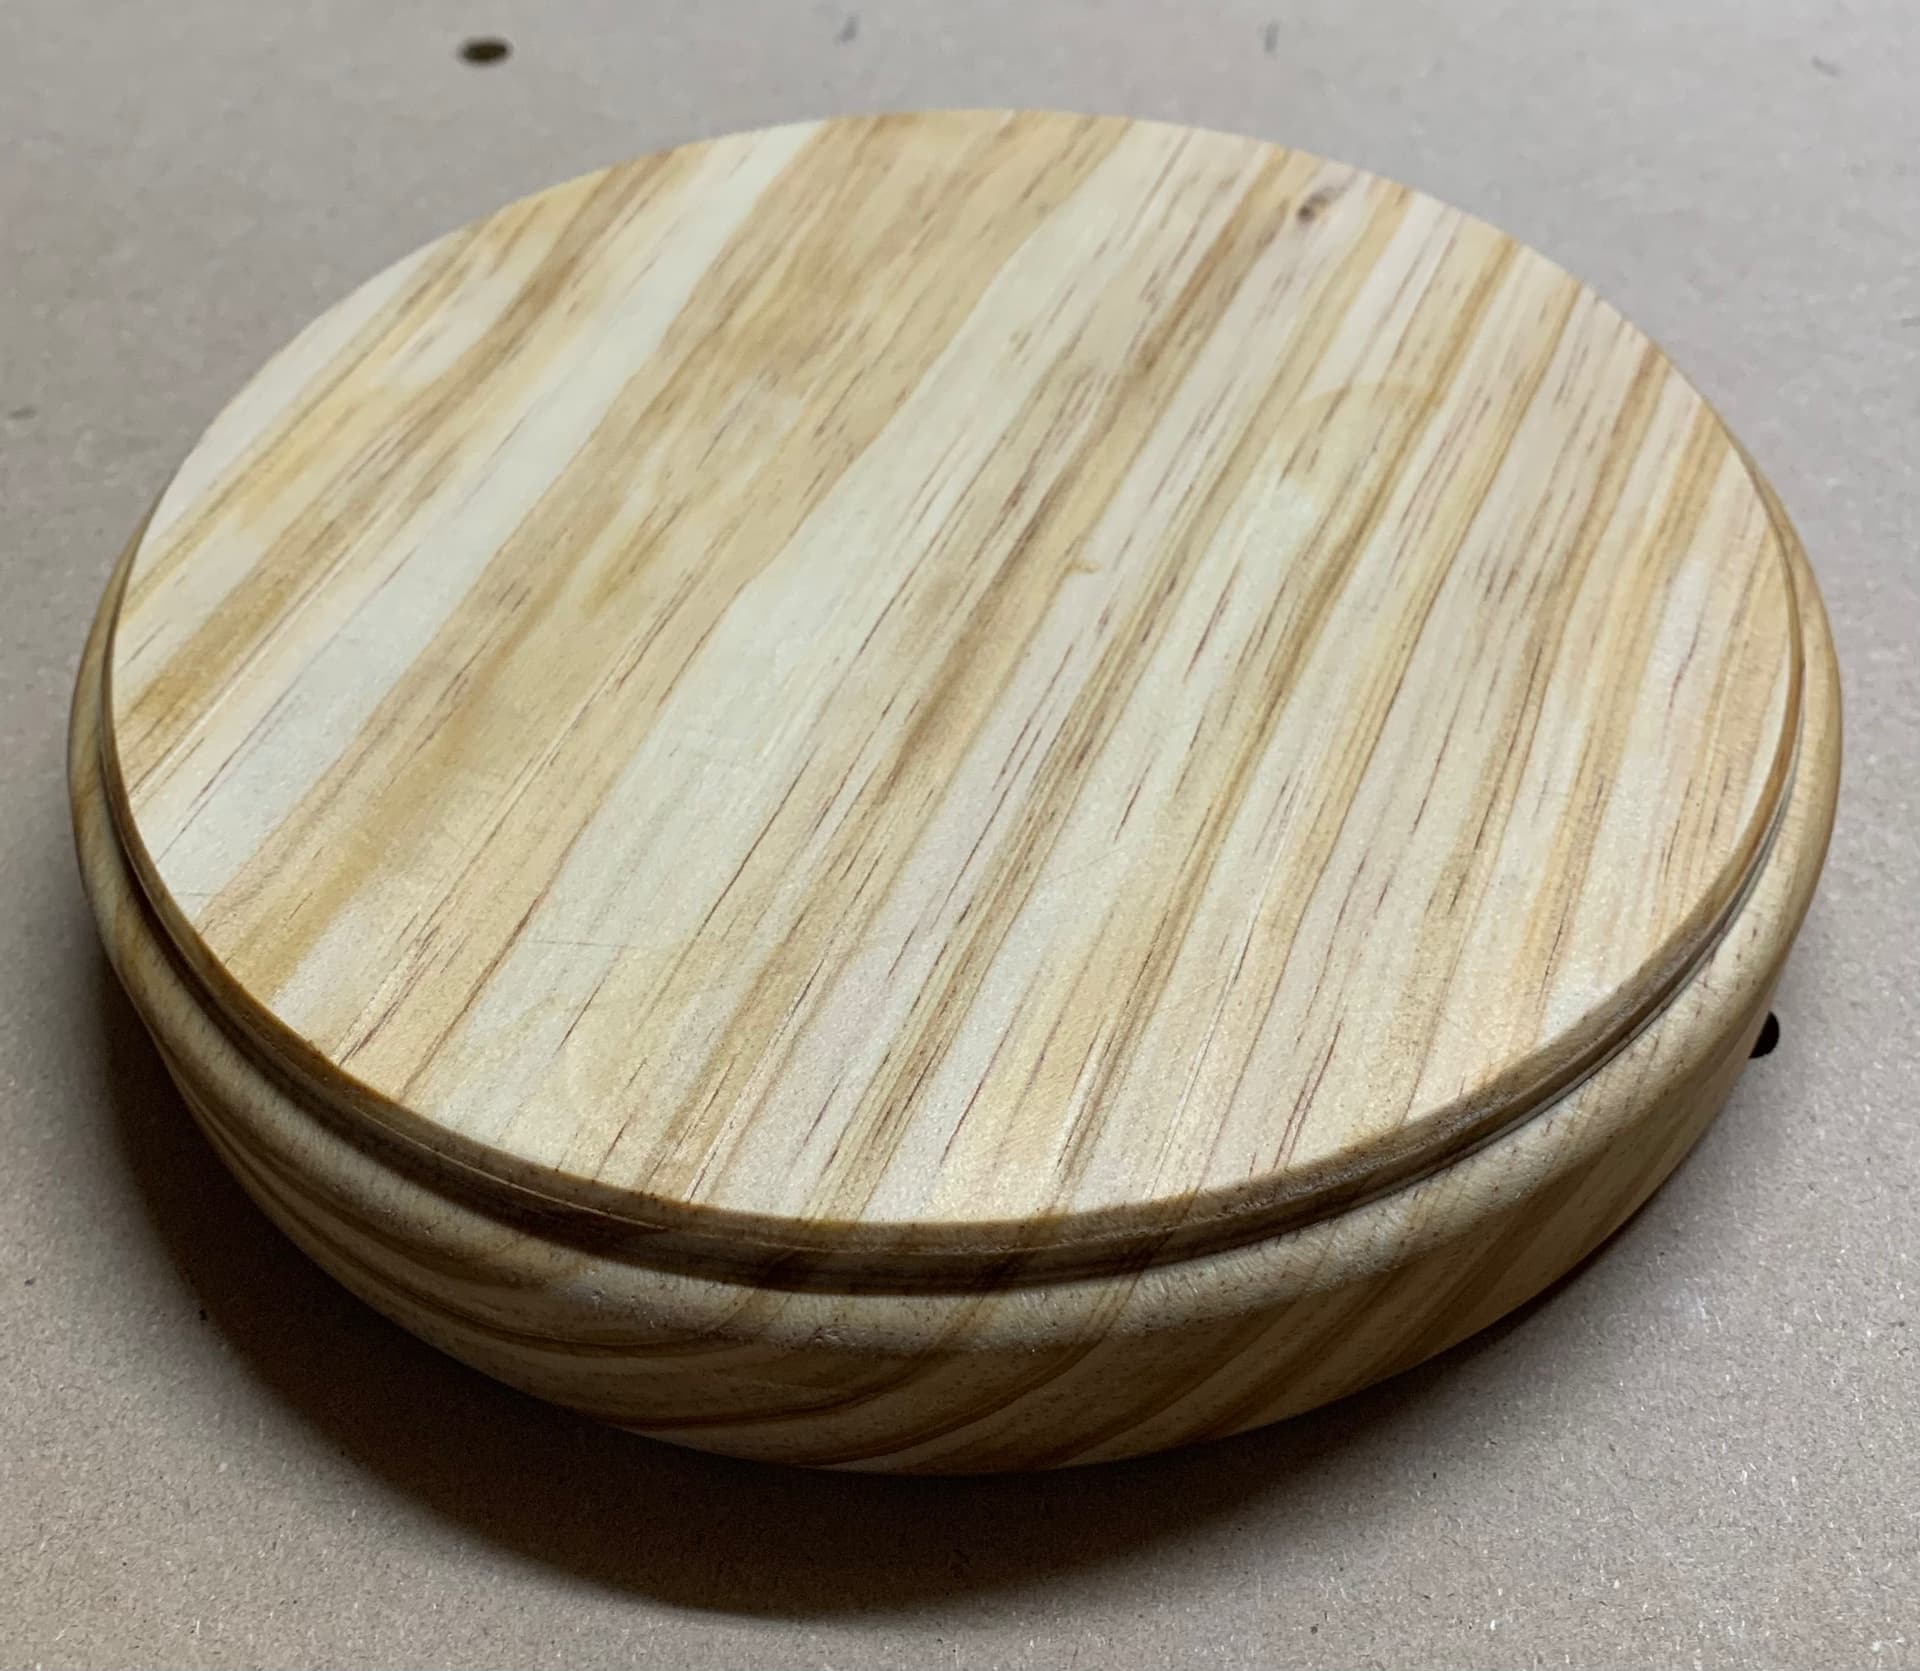
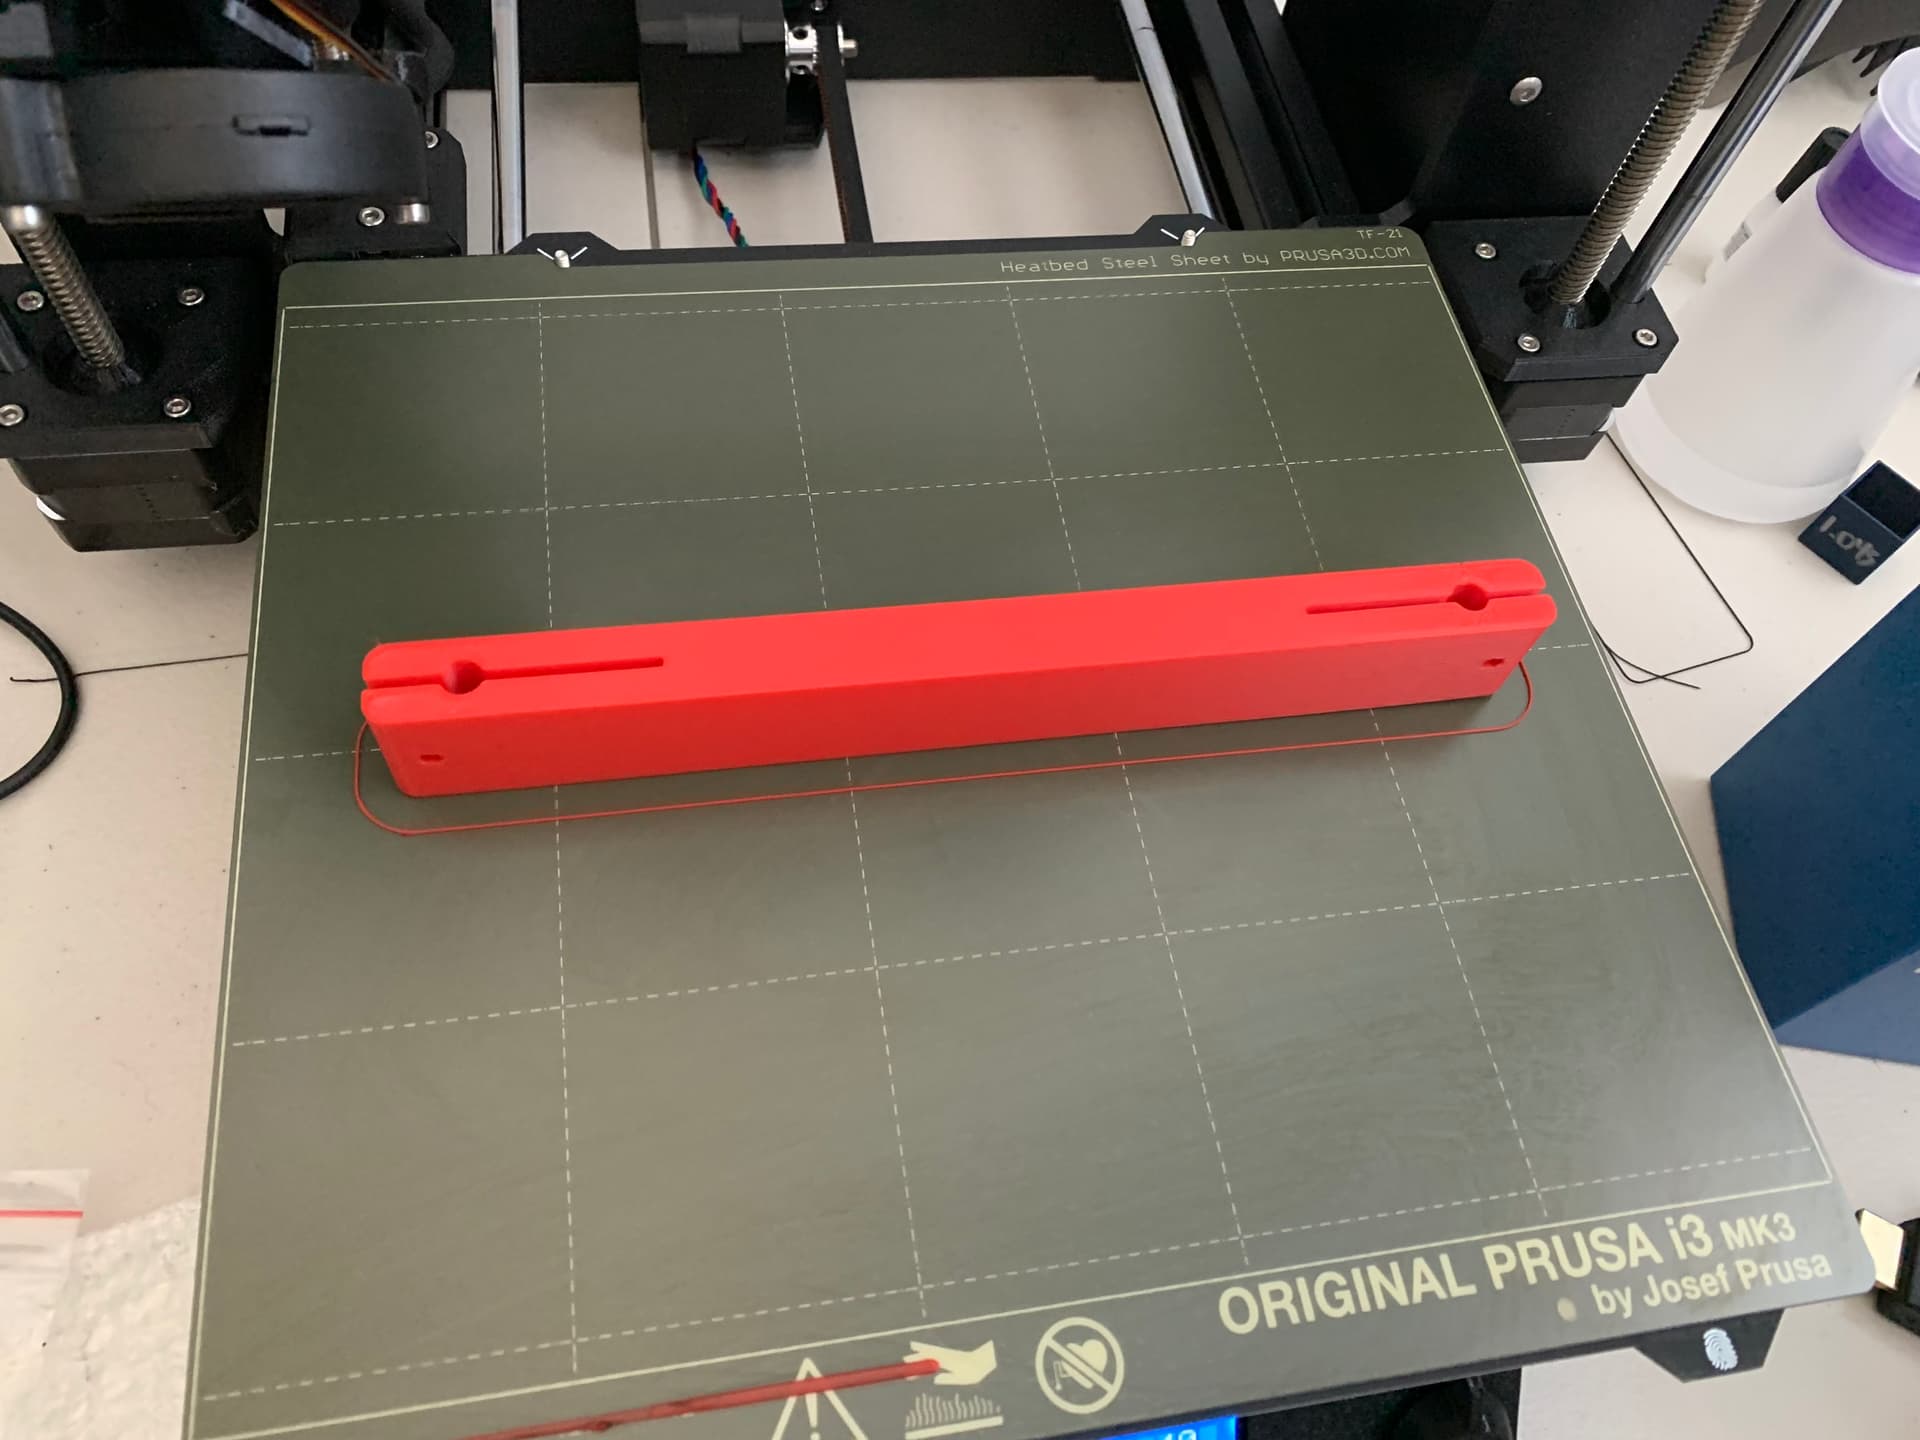
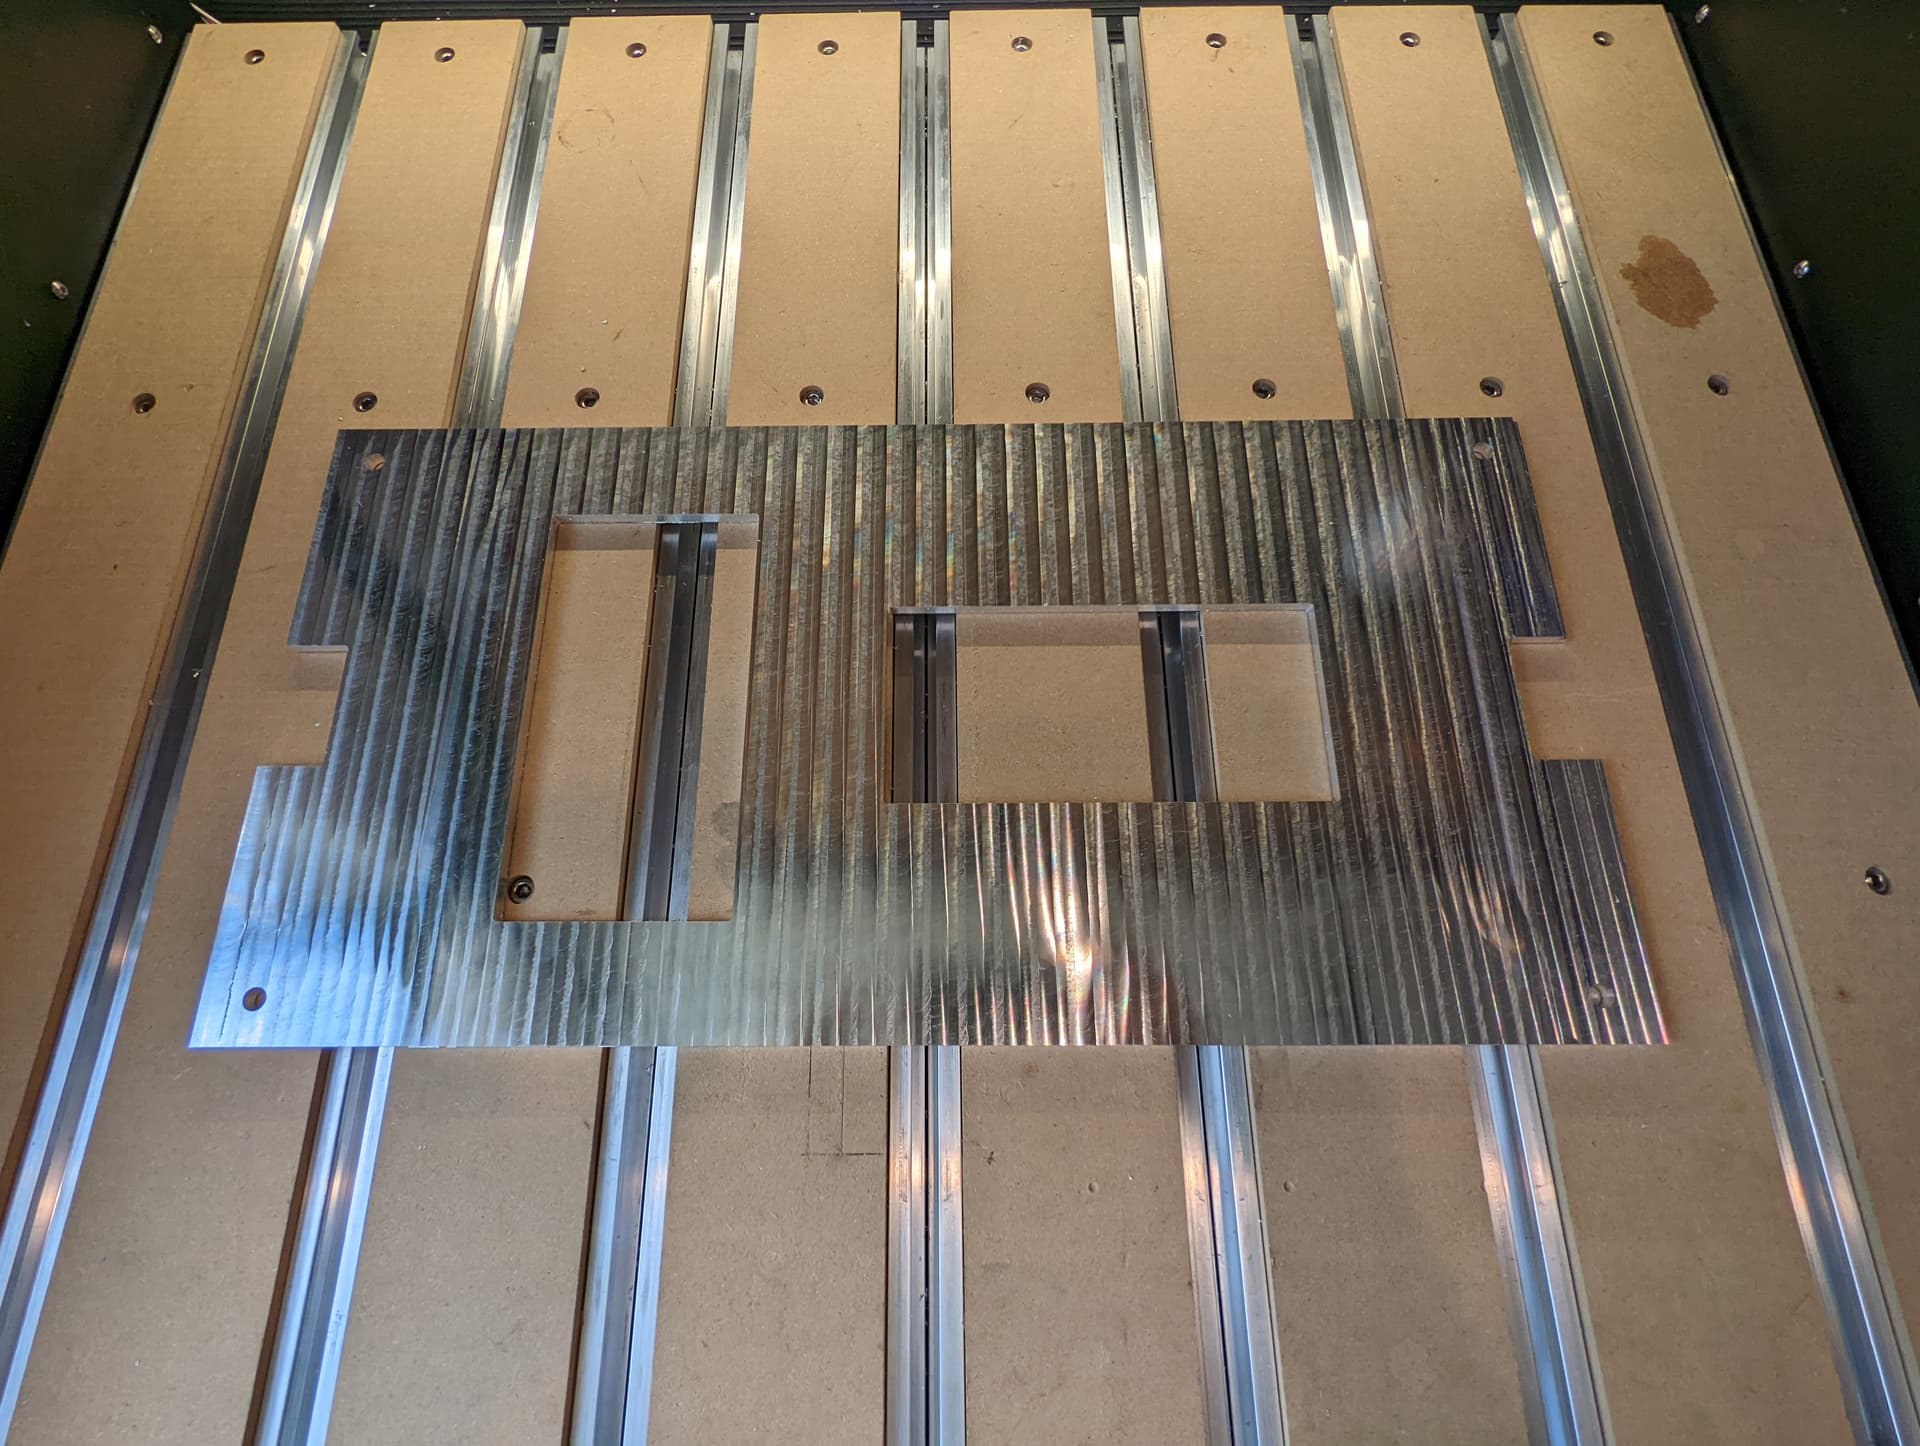
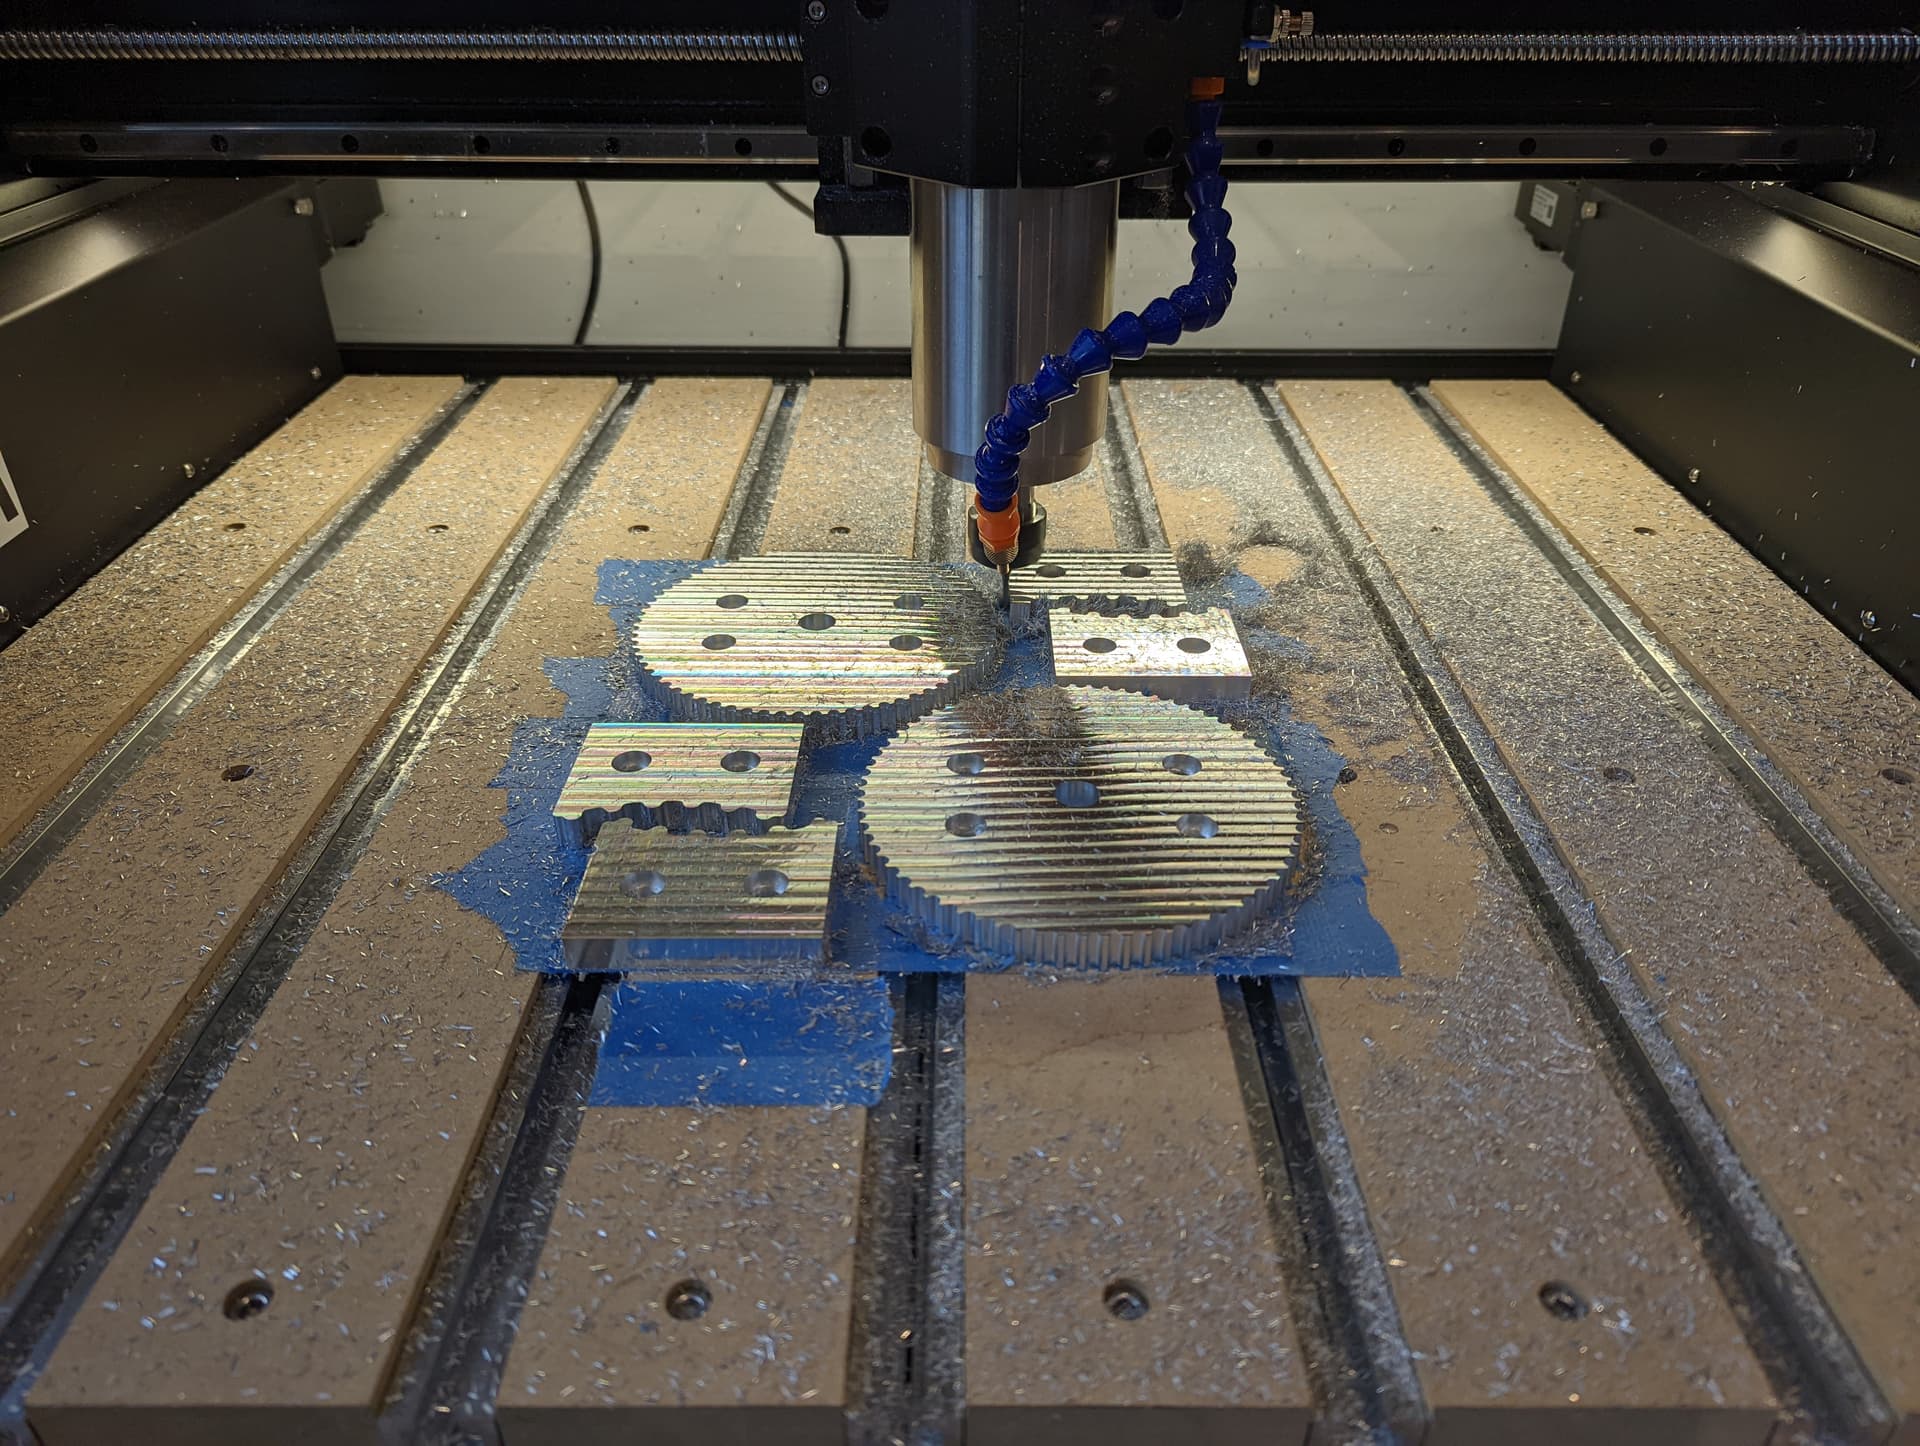
I did some two sided machining this week using the pin method. These are “stackable” plant coaster things. My wife wanted a way to bring a plant up higher into the light but also wanted the ability to adjust the height. There is an ID on one side and an OD on the other so they can stack and interlock somewhat.
It’s my first 2 sided machining project and overall went well but I definitely made some mistakes. First time I screwed up the origin orientation for the wasteboard holes vs the piece holes for the pins, so I ended up having to rotate my stock 90 degrees. I figured it was fine but I ended up getting a small line.
When I cut the next one I reversed which side was cut first so I could verify the fit was decent just in case I wanted to make the ID bigger.
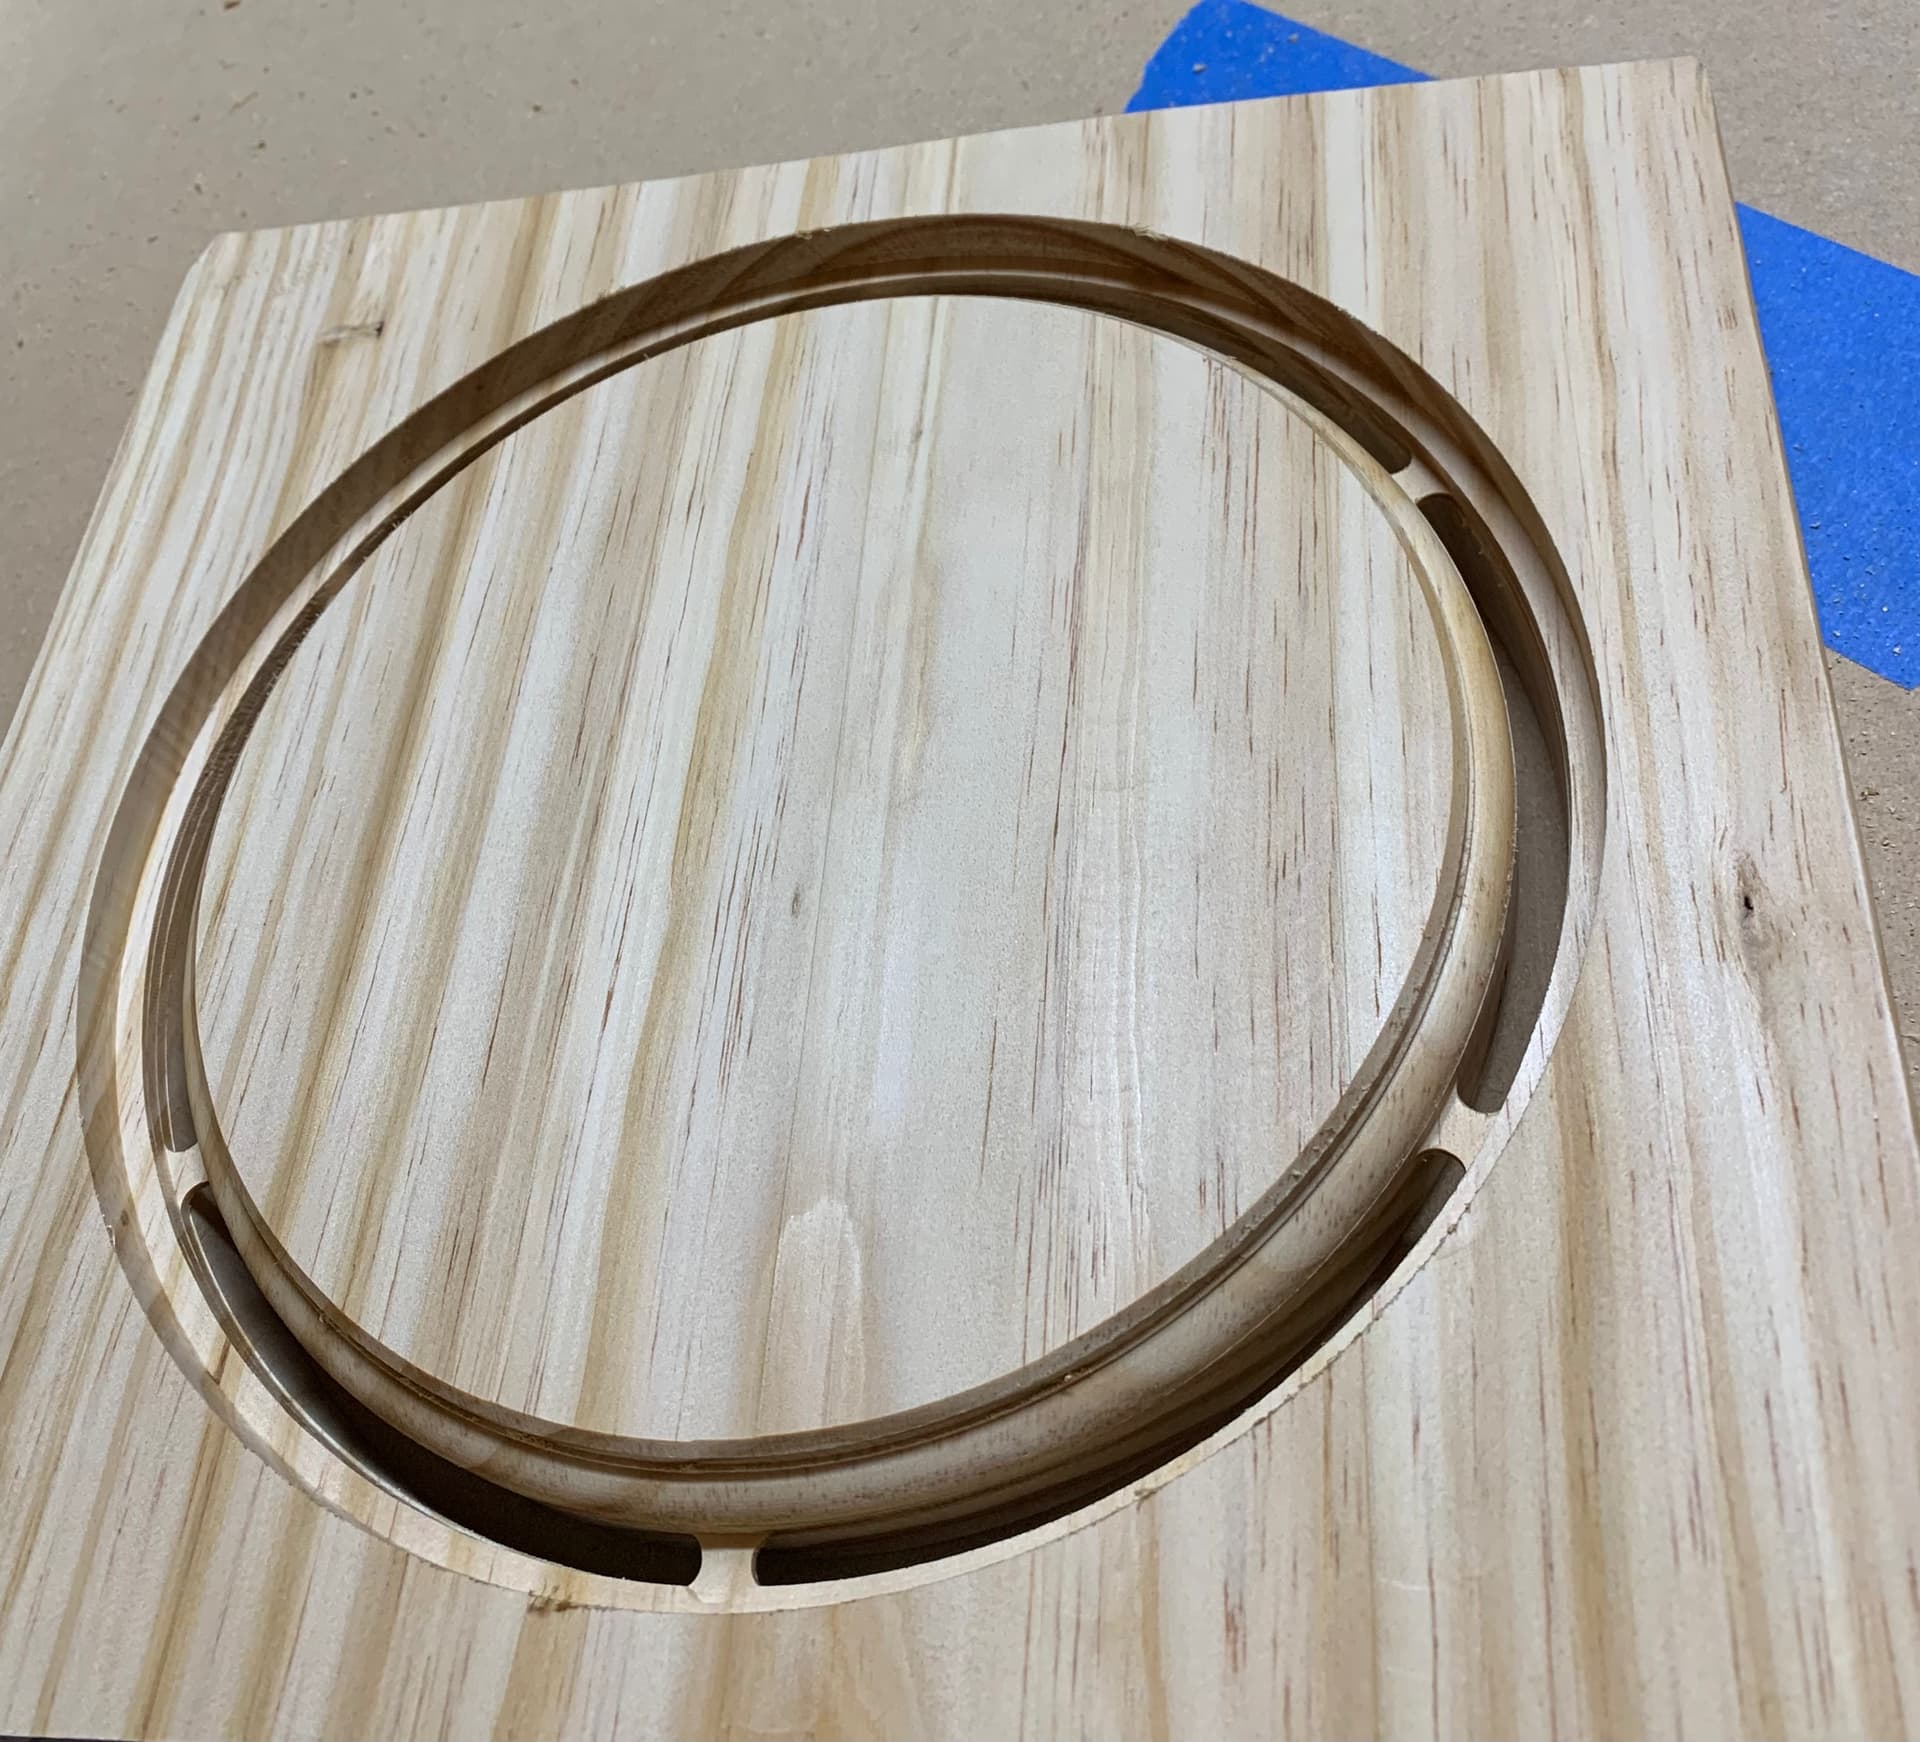
Unfortunately I realized after cutting the first side that it meant I couldn’t tape down for the second side given the ID spans most of the part so it wouldn’t be able to attach to anything.
I opted for tabs (another first) and they worked well.
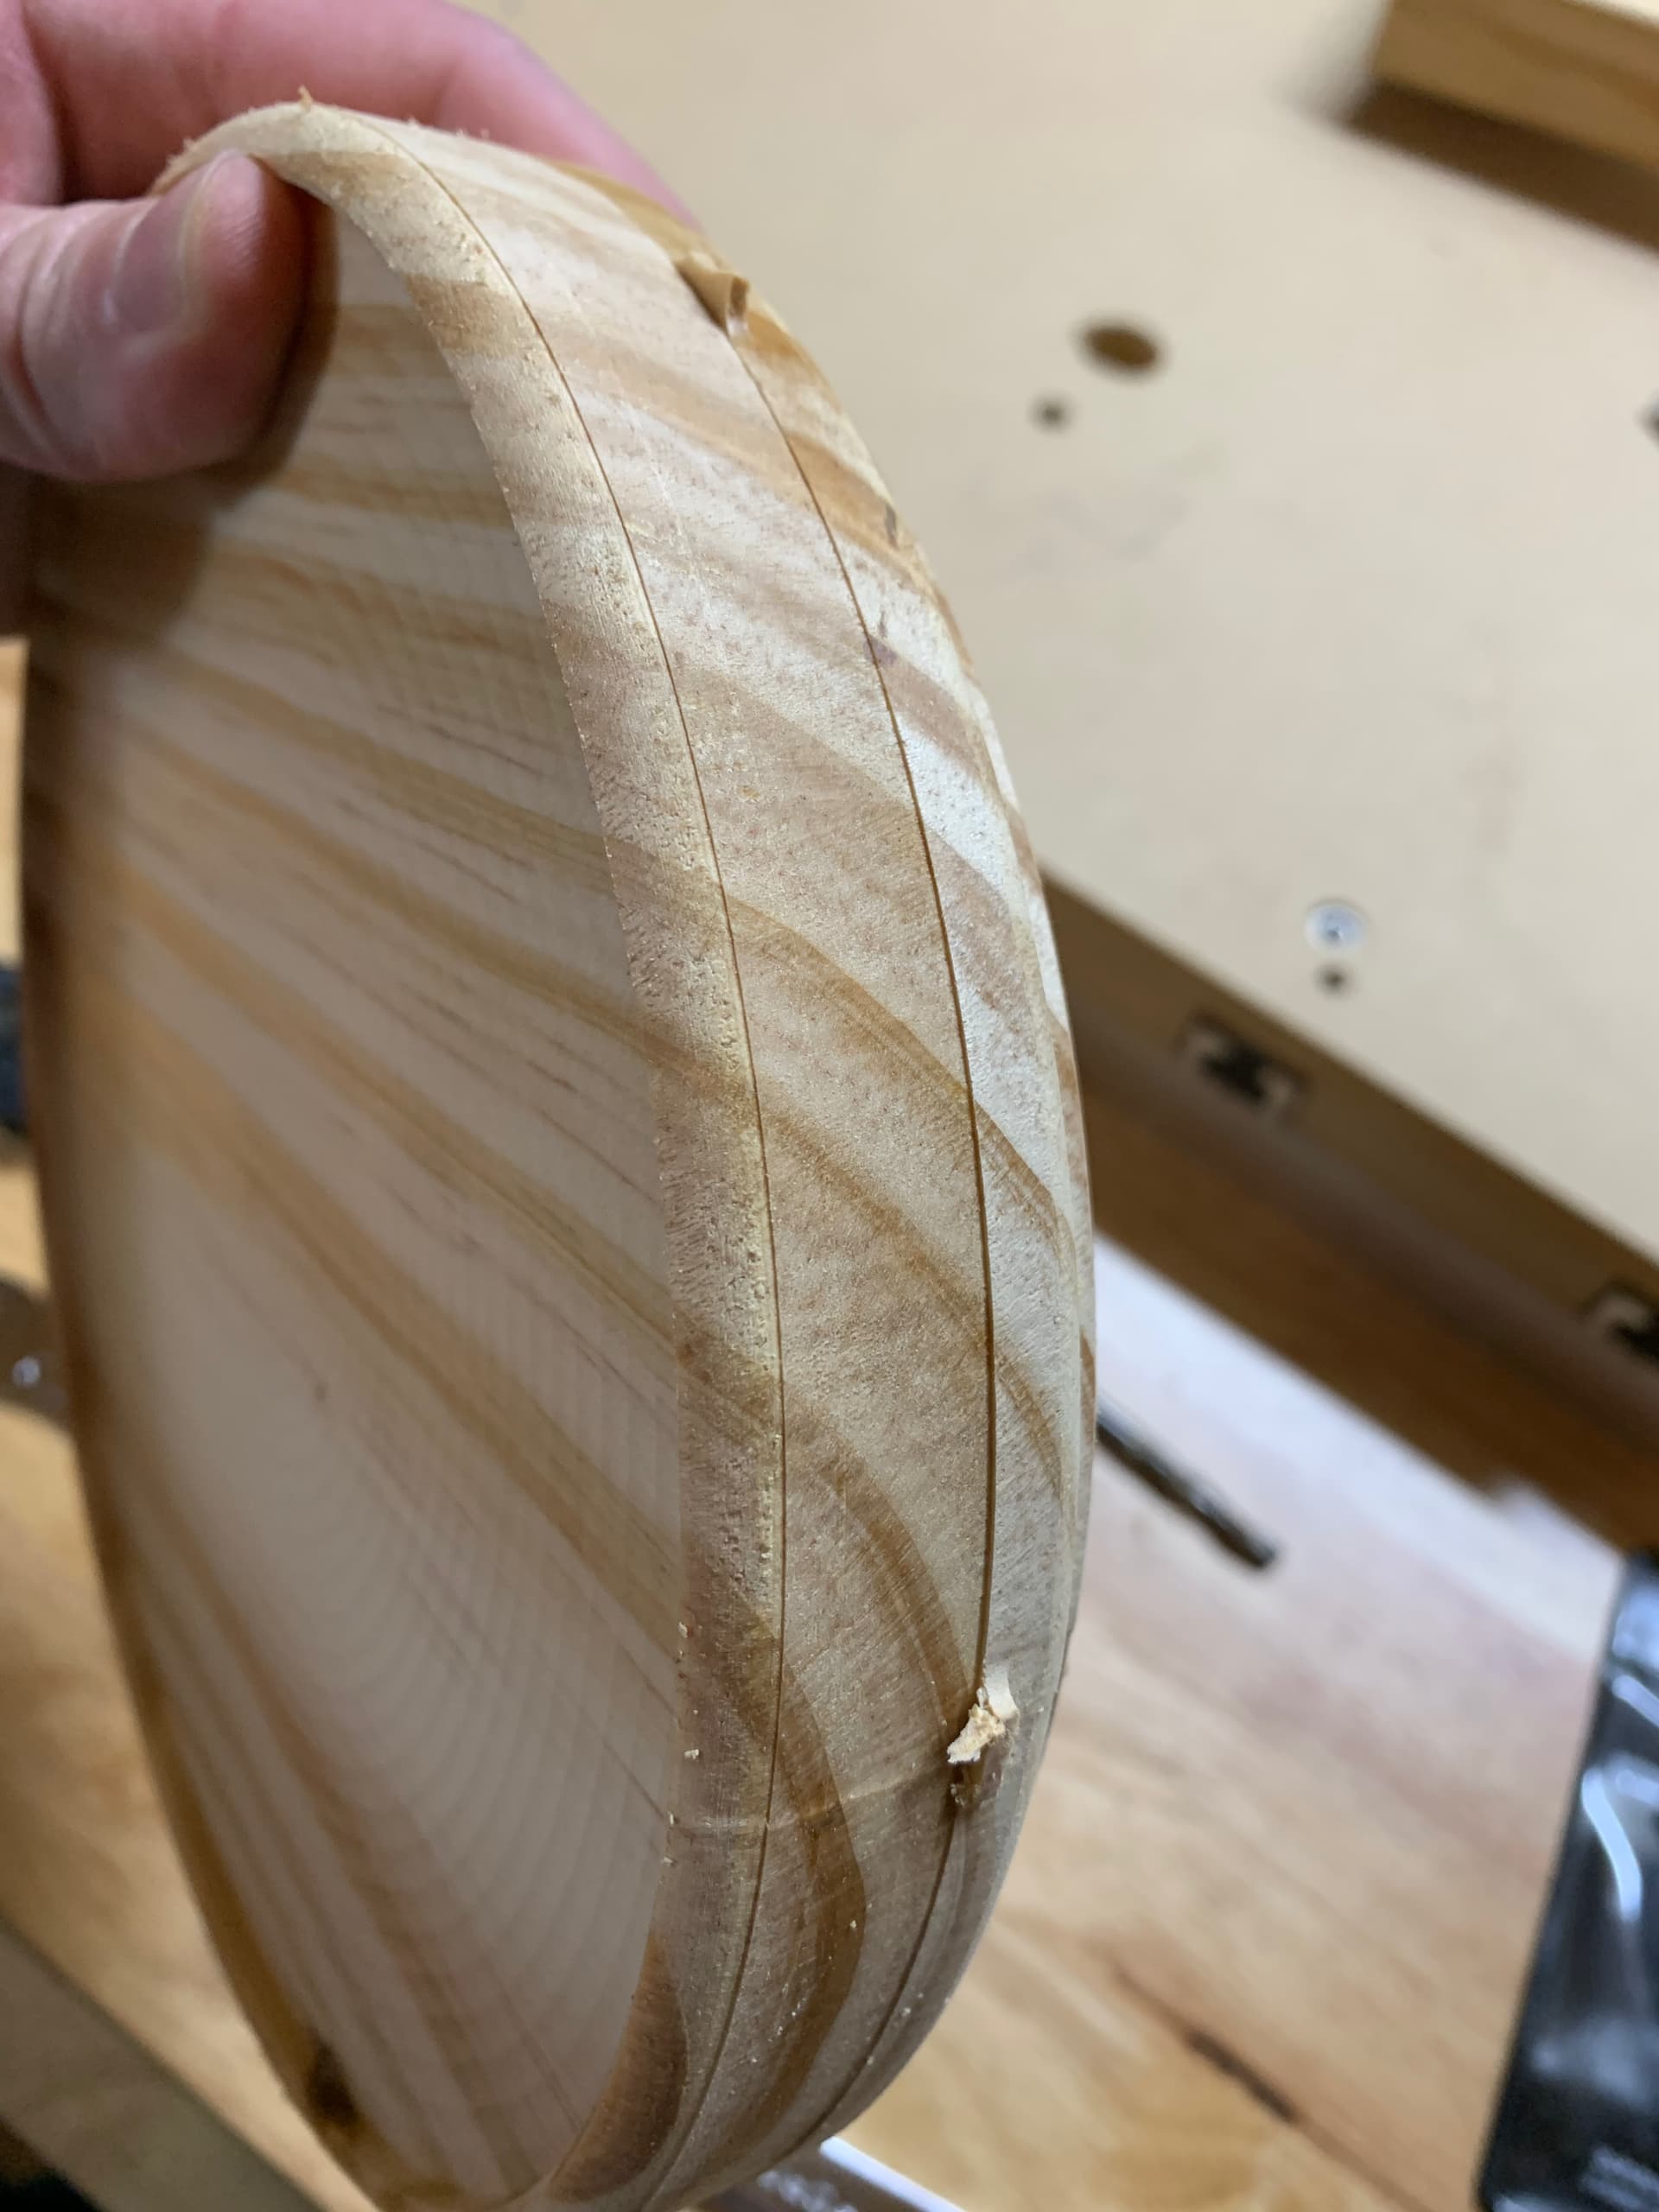
This time I didn’t screw up the orientation but I still ended up with the small line. Something like 1-2mm. It’s fine for this item but I foresee myself doing a lot of two sided machining so I need to get to the bottom of it.
I did notice if I face along the X axis that I do get some valleys/peaks unfortunately. If I face along Y I don’t. Of course that would imply my router is out of tram along the Y axis. I must admit I haven’t actually trammed it at all because it was “good enough” for one sided machining previously. Seems like I may need to add some aluminum foil shims.
But it makes me wonder, since I flipped the part about the X axis and Y seems out of tram, could that have led to this small 1-2mm parting line? Potentially if I wanted to be lazy the next one I cut I could flip about Y instead and see if the artifact goes away. If it does I suppose the tram could be to blame. The pins were very tight so I don’t think anything got misaligned and the line showed up in the same spot both times. It was worst at Ymin and Ymax for the part while it was invisible along X. Also at Ymax it was a cut into the bottom while at Ymin it was an overshoot (ie looked like the bottom cut into the top). Hopefully that all makes sense!
Anyone have a hunch of it the Y tram is to blame or if it could be something else?
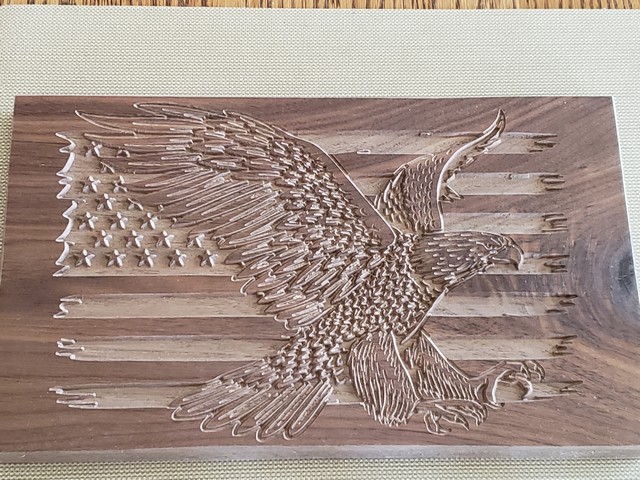
I made a few flags with an eagle, all v-carved. One in oak the other in walnut.
I have been trying to decide how I want to finish these, before I carved them both were sprayed with shellac.
I think the walnut piece I will just leave with clear coat. The Oak I think I will use stains for the different colors. Just trying to decide about how to do the stripes, will only be either red or white only in the carved section, with blue for the standard and paint the stars white.
What do you guys think?
oak has a large grain, so make sure you test your stains on some scrap first to verify they don’t bleed outside the cut areas.
The carvings look neat, good work.
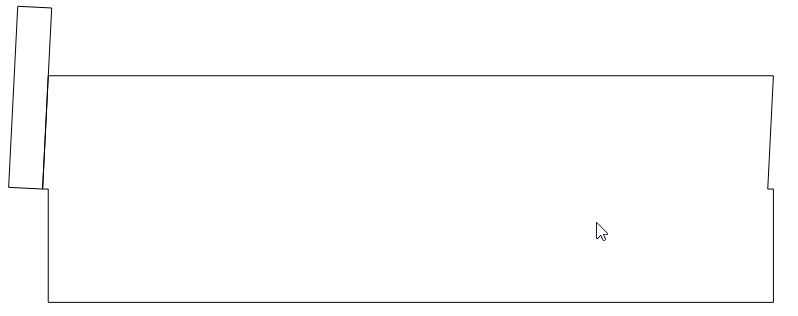
The second photo makes it look like it’s not parallel to the x axis but it is, just a weird photo effect from how I took the picture.
Now I can try and cut another plant stacker and hopefully not end up with a line! Over 7in I was out of tram by at least 3-4mm along Y. Yikes! X was also slightly out of tram but not as bad.
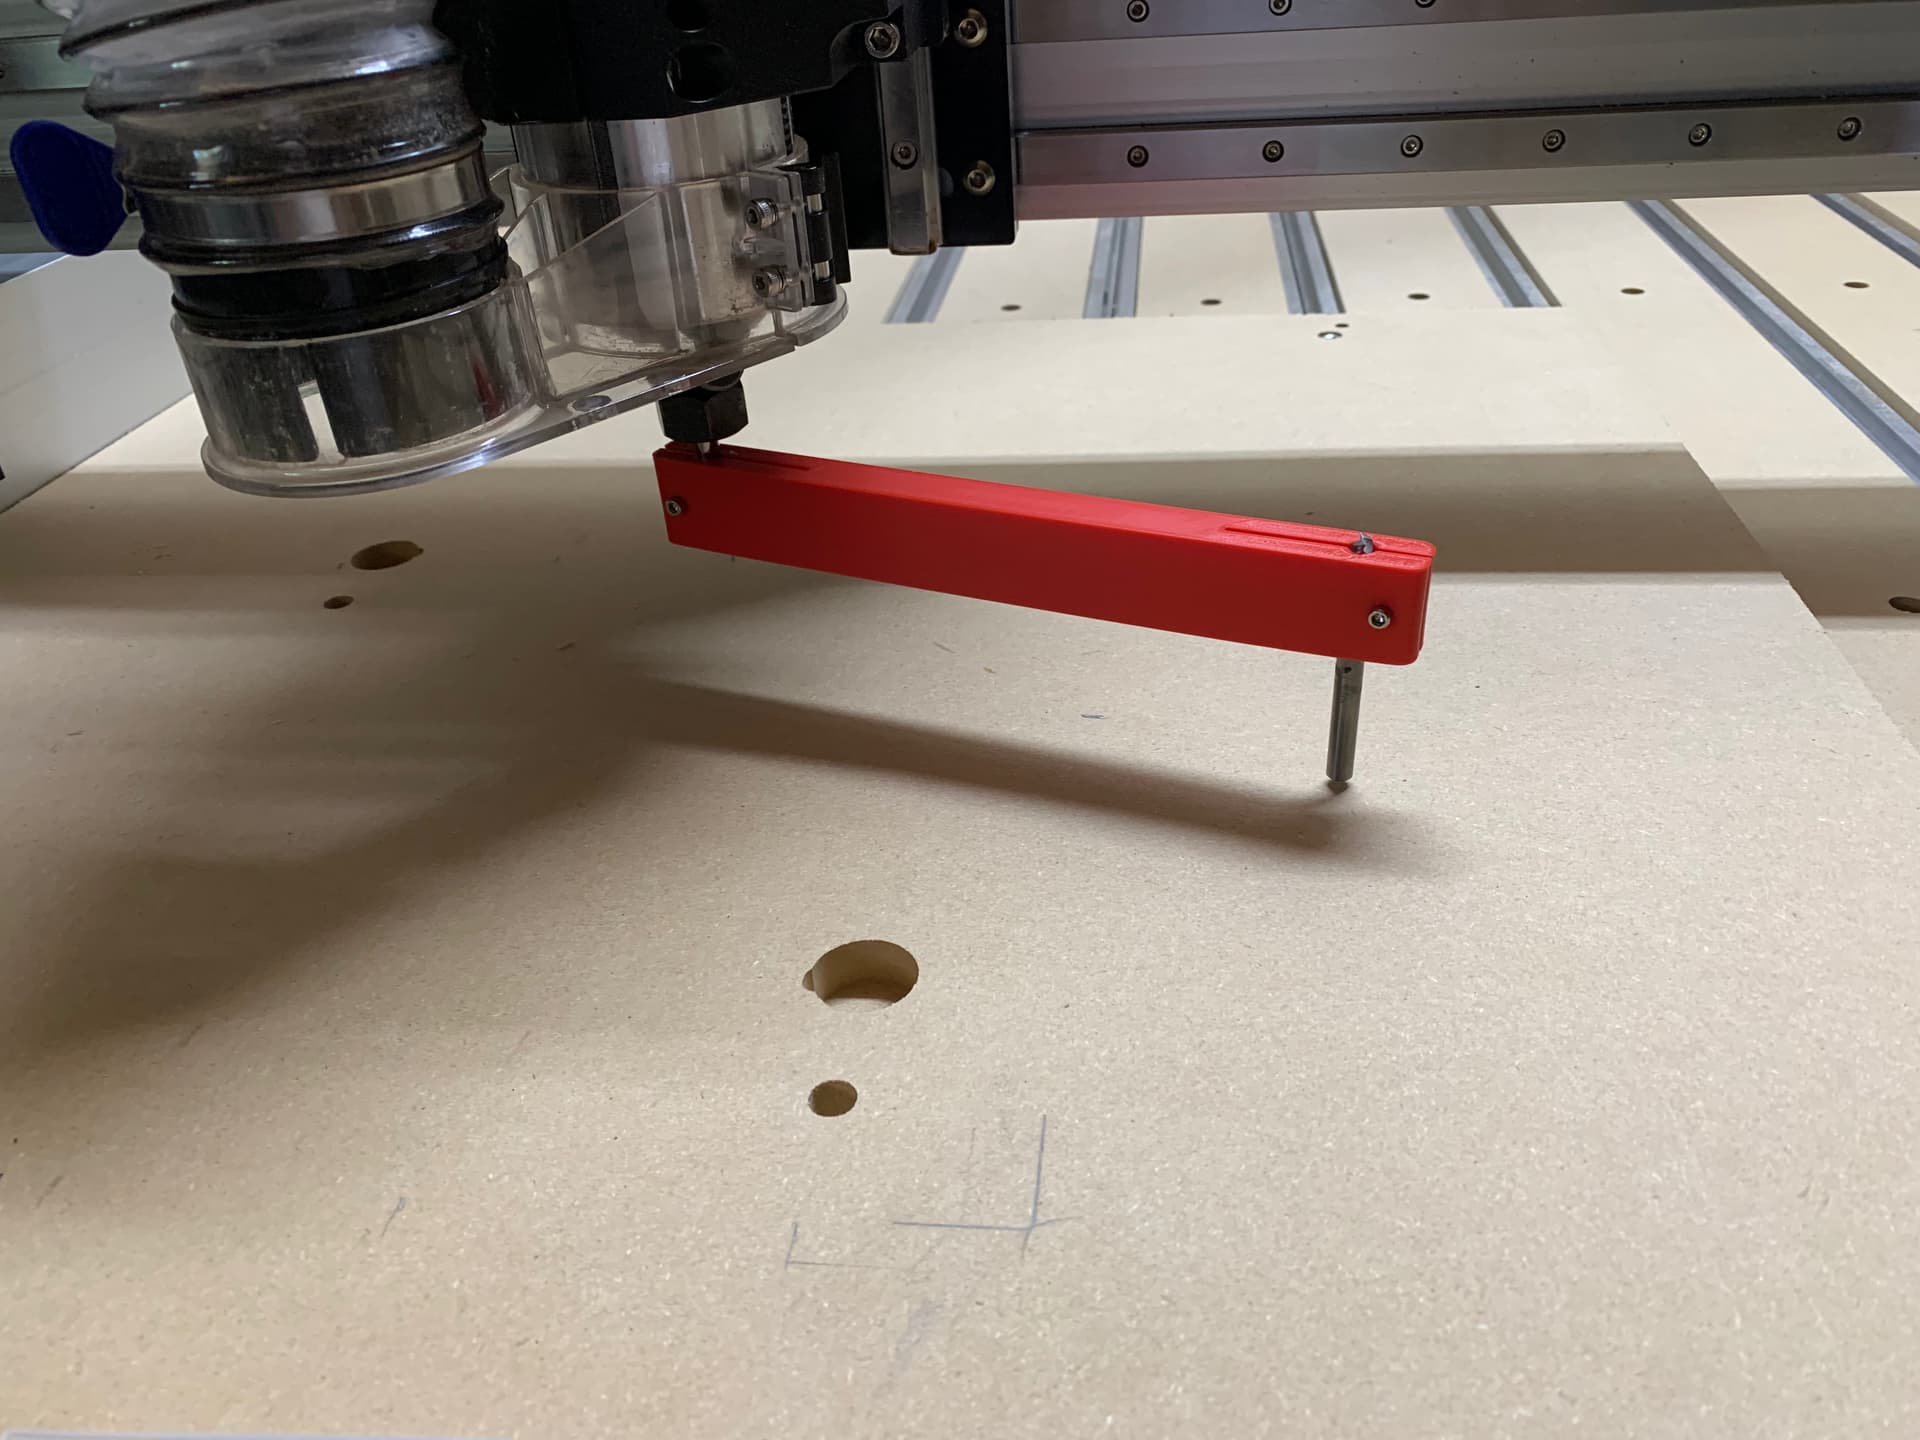
On a previous machine I had I took a length of 1/8" aluminum rod and bent it about 1 1/2" from one end to about 45 degrees, chucked the short end into the spindle, and lowered the spindle until the long end just touched a spot on the waste board. I then hand-turned the spindle noting where the rod eight dug into the waste board or floated above, adjusted the spindle, and repeated. It was amazing how well this worked, all for the price of a single length of aluminum rod. The aluminum is soft enough to bend by hand and not scrape the waste board in a high spot. Even if it bent a little on the high spot, I just adjusted the height of the spindle again and continued.
That method is an old woodworking trick. You take a coat hanger and bend it in a Z shape and chuck it up. Then spin the chuck by hand to level your table. Make the coat hanger long enough to reach as far as you can and stay on the table to get the maximum result. As you level the table you may need to move the drill quill up or down a little to just keep it touching the table. Be sure to lock the drill quill when making adjustments to ensure you are getting an accurate level.
Thank you, Guy. I’ve never heard about the Intarsia technique, but I googled it. Yes, some similarity is there. My goal was to get a bit of plasticity and 3D effect into the 2D picture. I could only carve it, but…the 3D effect makes it much nicer. And also, it was a good challenge for me; I’ve learned a lot.
Yes, we are pretty lucky to have a view like this one. But especially sunsets and sunrises are absolutely gorgeous. Sometimes I have to sacrifice my breakfast because I look at this beauty and forget that I have only 10 minutes before I run to work
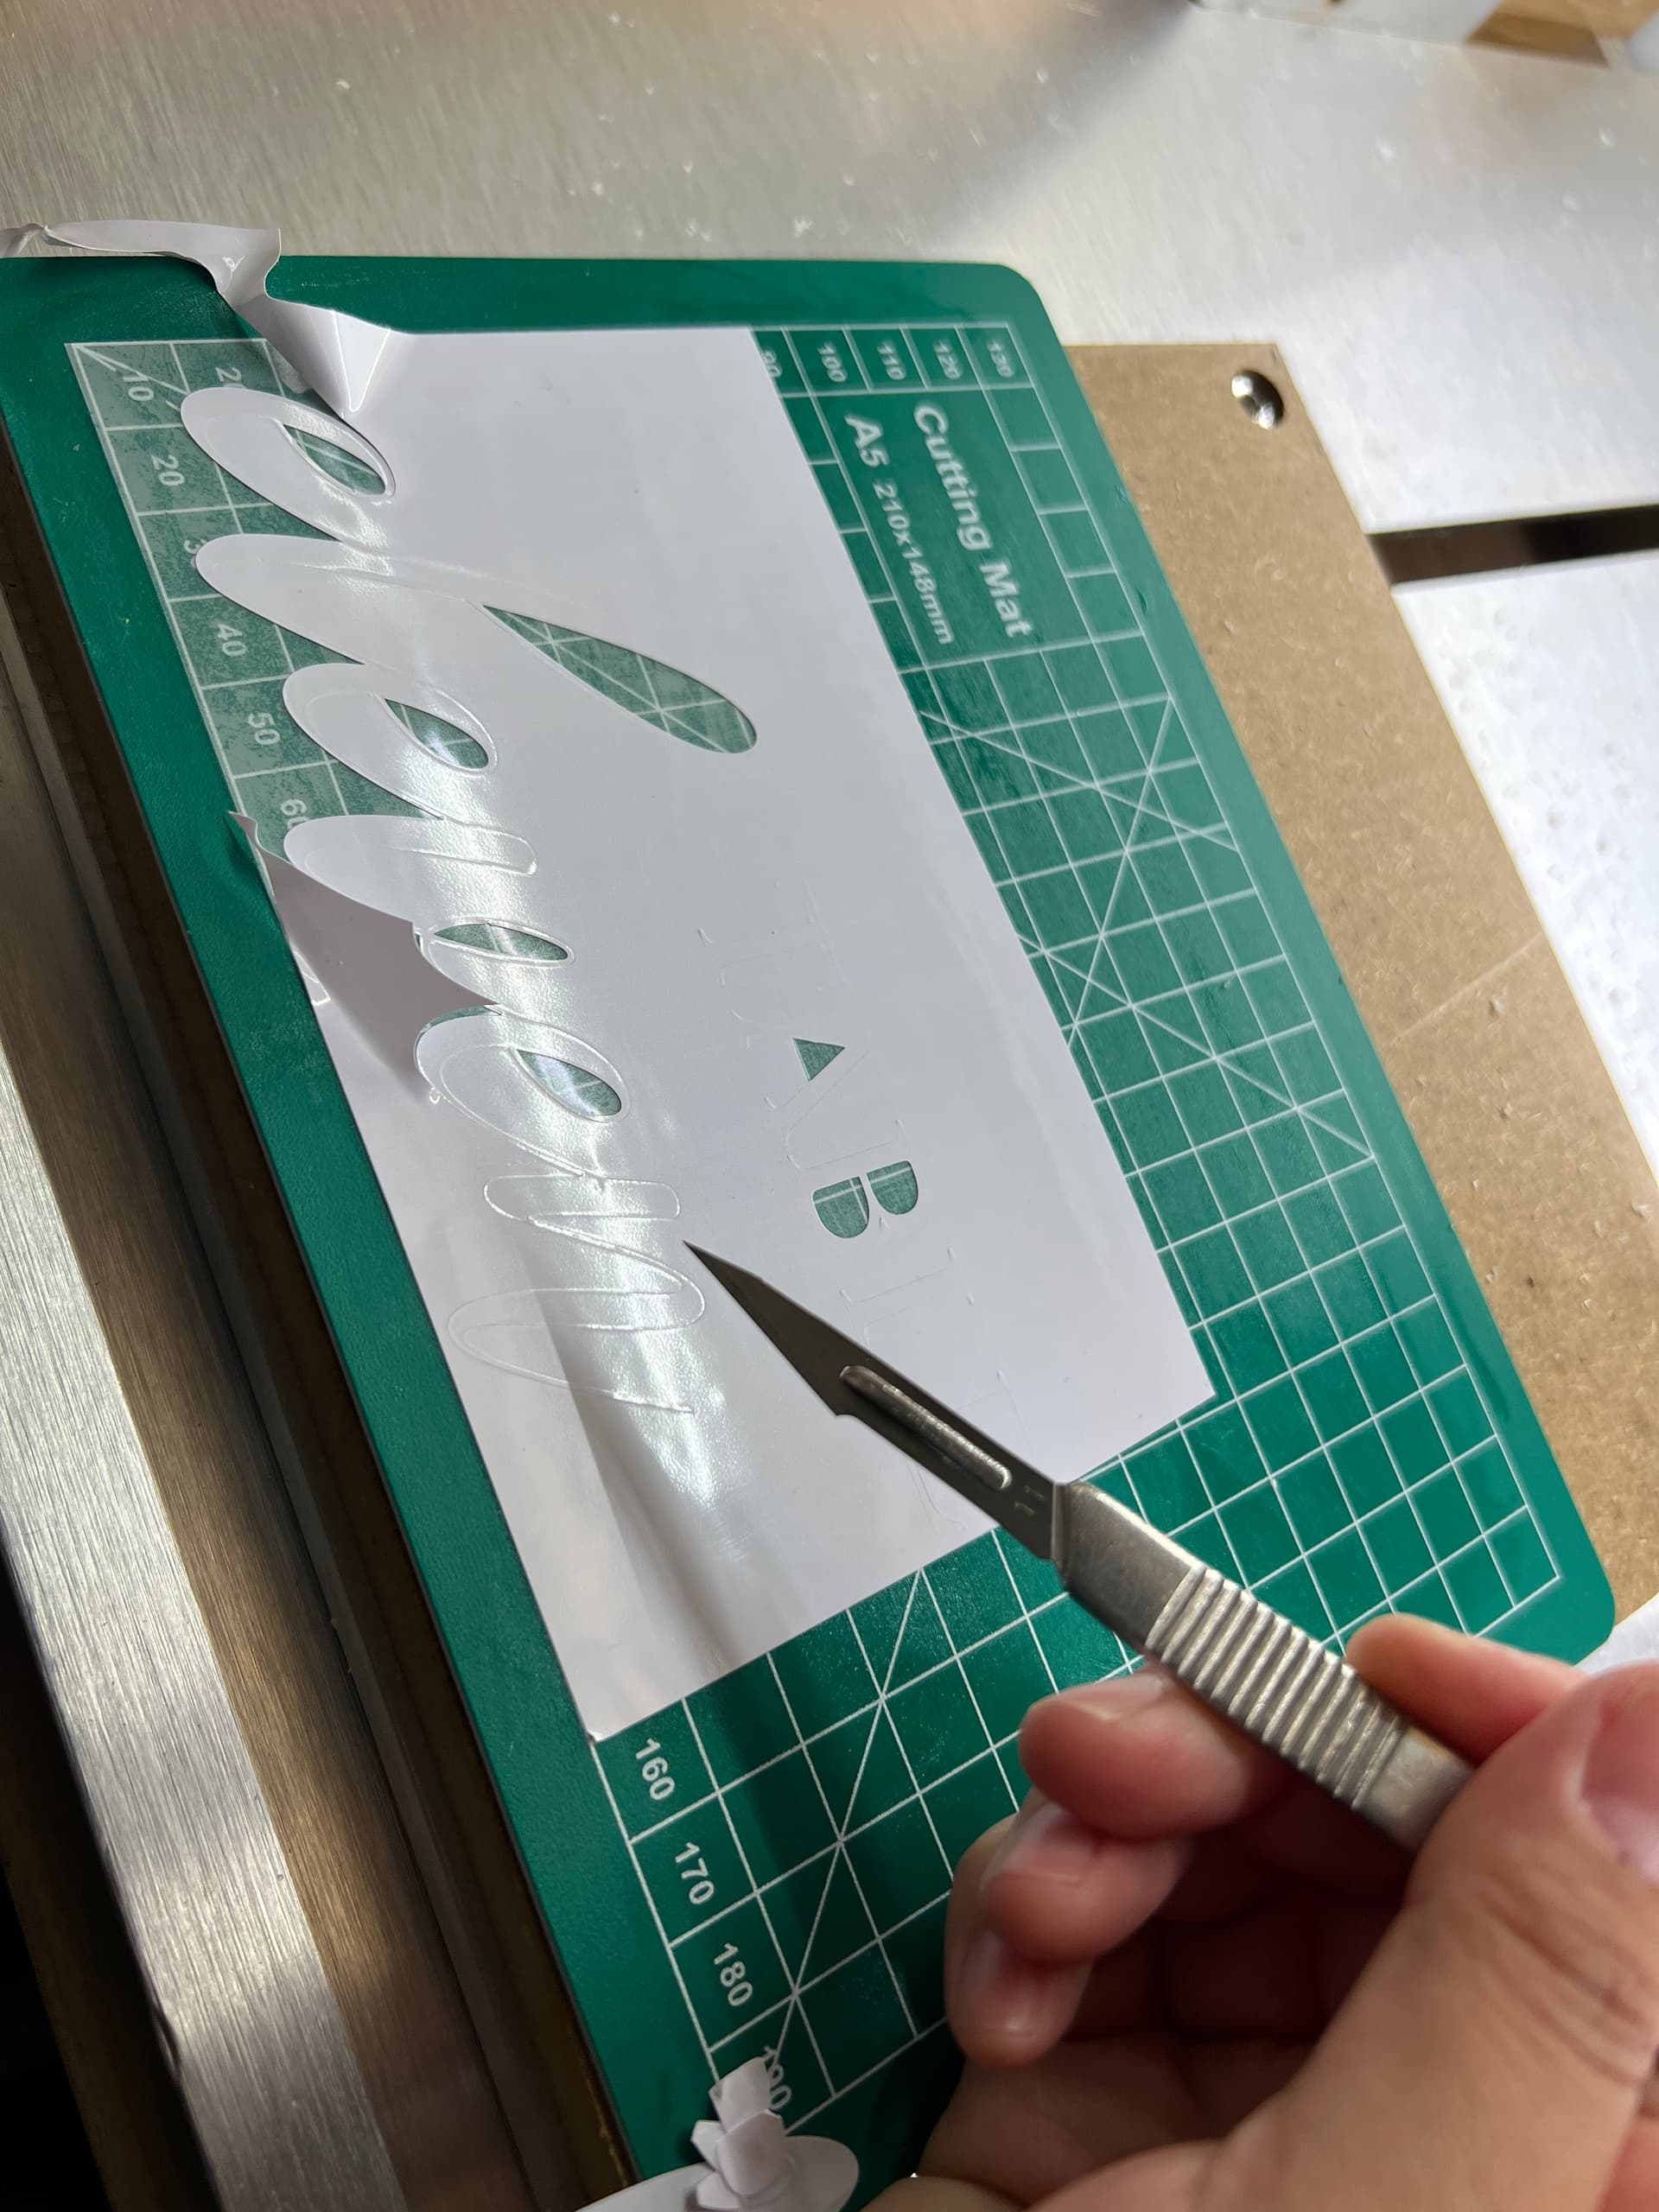
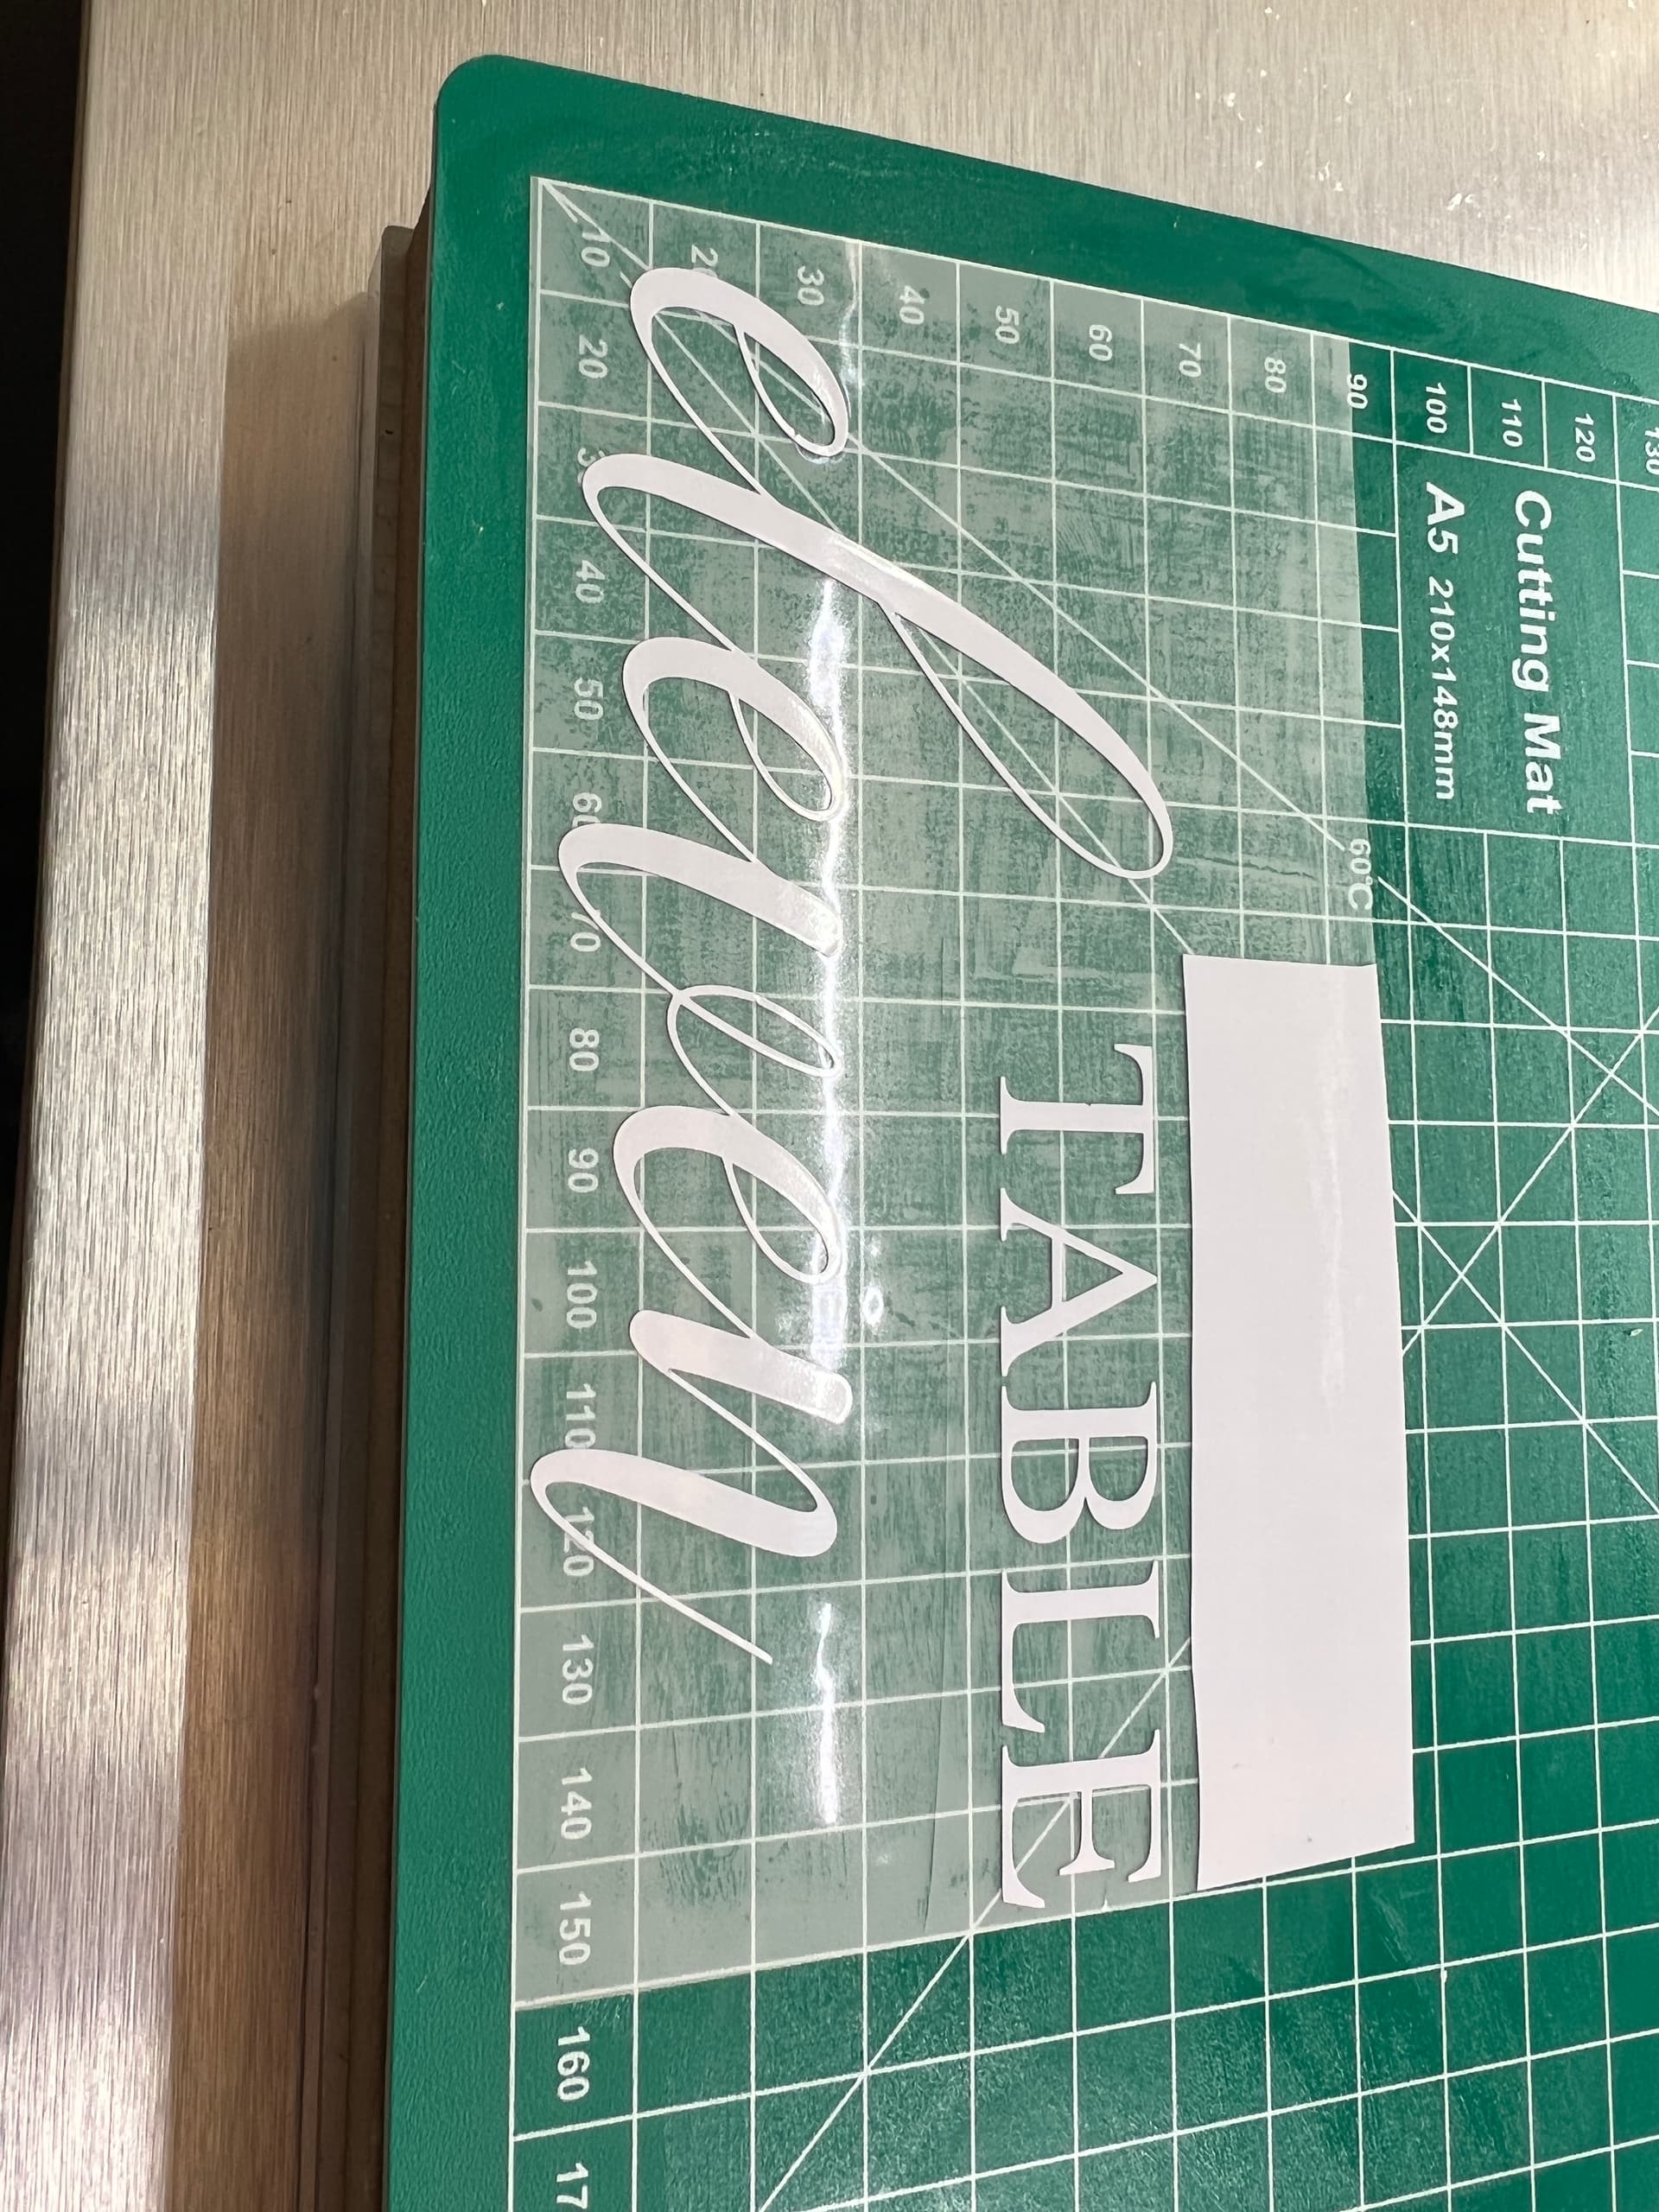
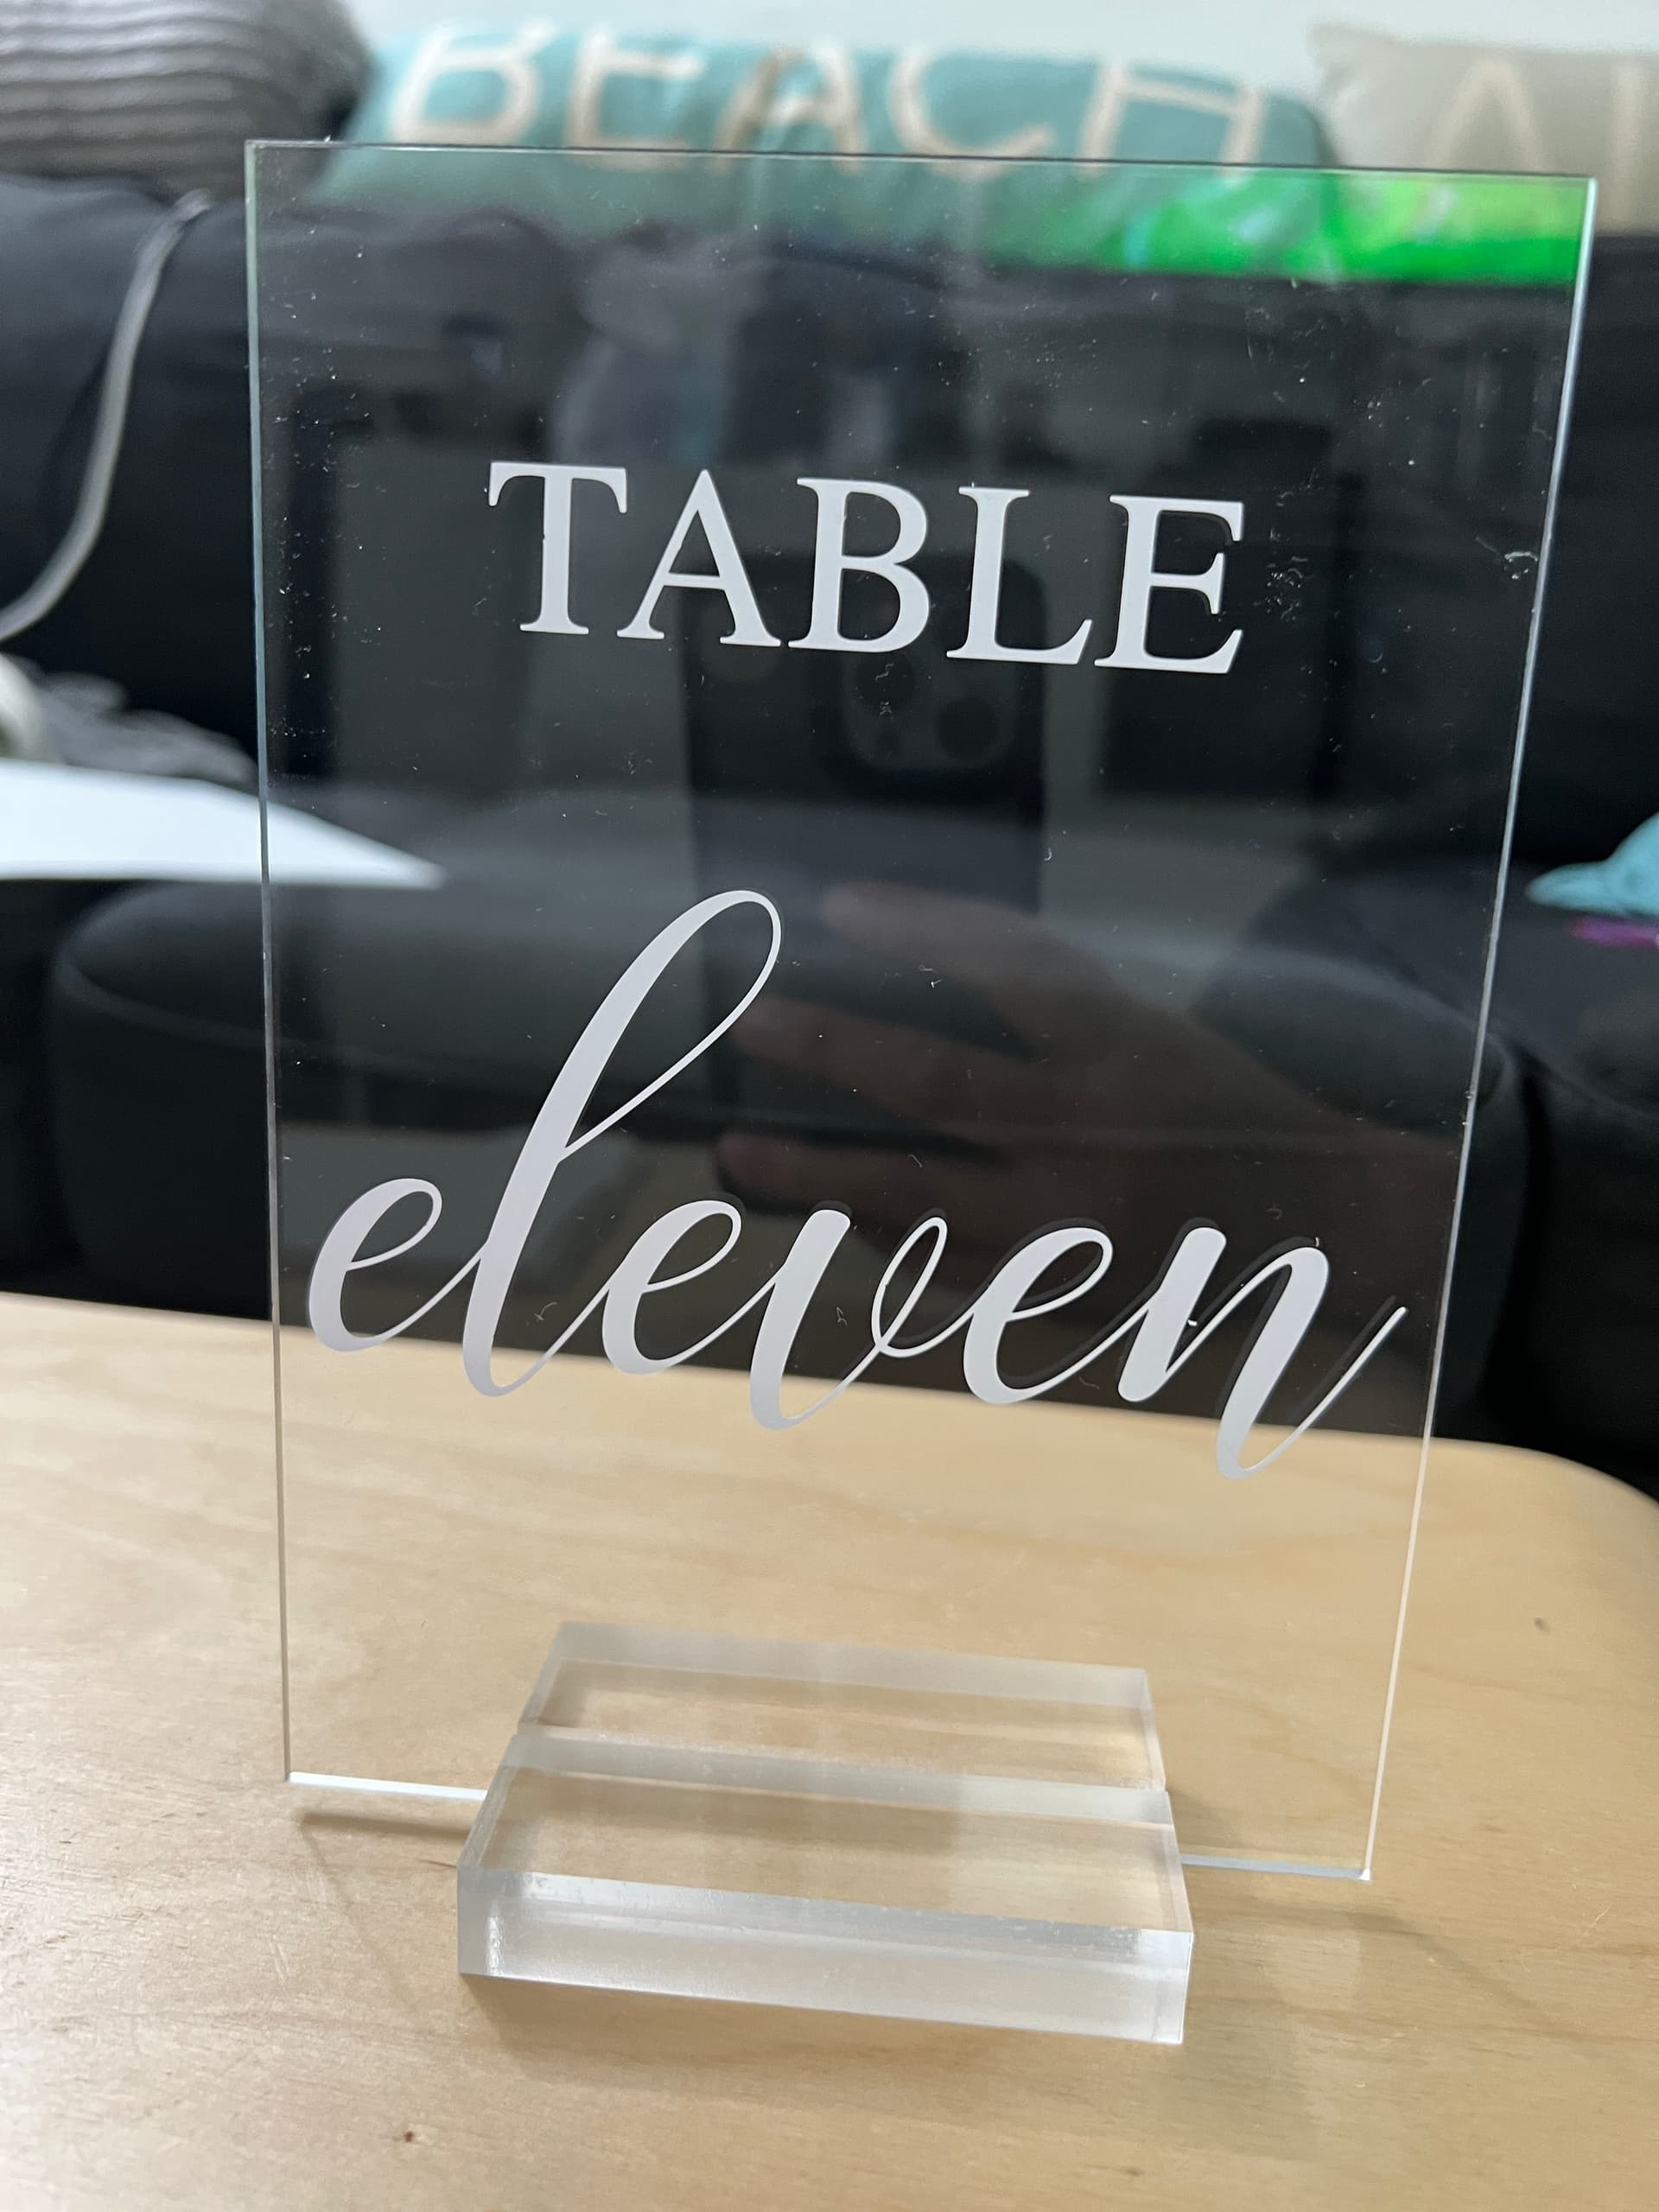
Tried the stingray drag knife for the first time. Yeah, I can see why if you want to make a lot of vinyl pieces you’d want to get a dedicated machine. But since I was asked by a friend to make only a dozen table signs this will work.
Lessons learned:
If you buy fonts they don’t always extrude in fusion 360. You’ll have to convert them to svg with Inkscape.
The arc endpoint error still happens sometimes even after changing to mm. But editing the settings in post has so far worked when inches to mm didn’t. I haven’t tried universal g code sender yet.
I have a Mac and used the fusion 360 add in you can buy from donek tools to add the swivels for the drag knife.
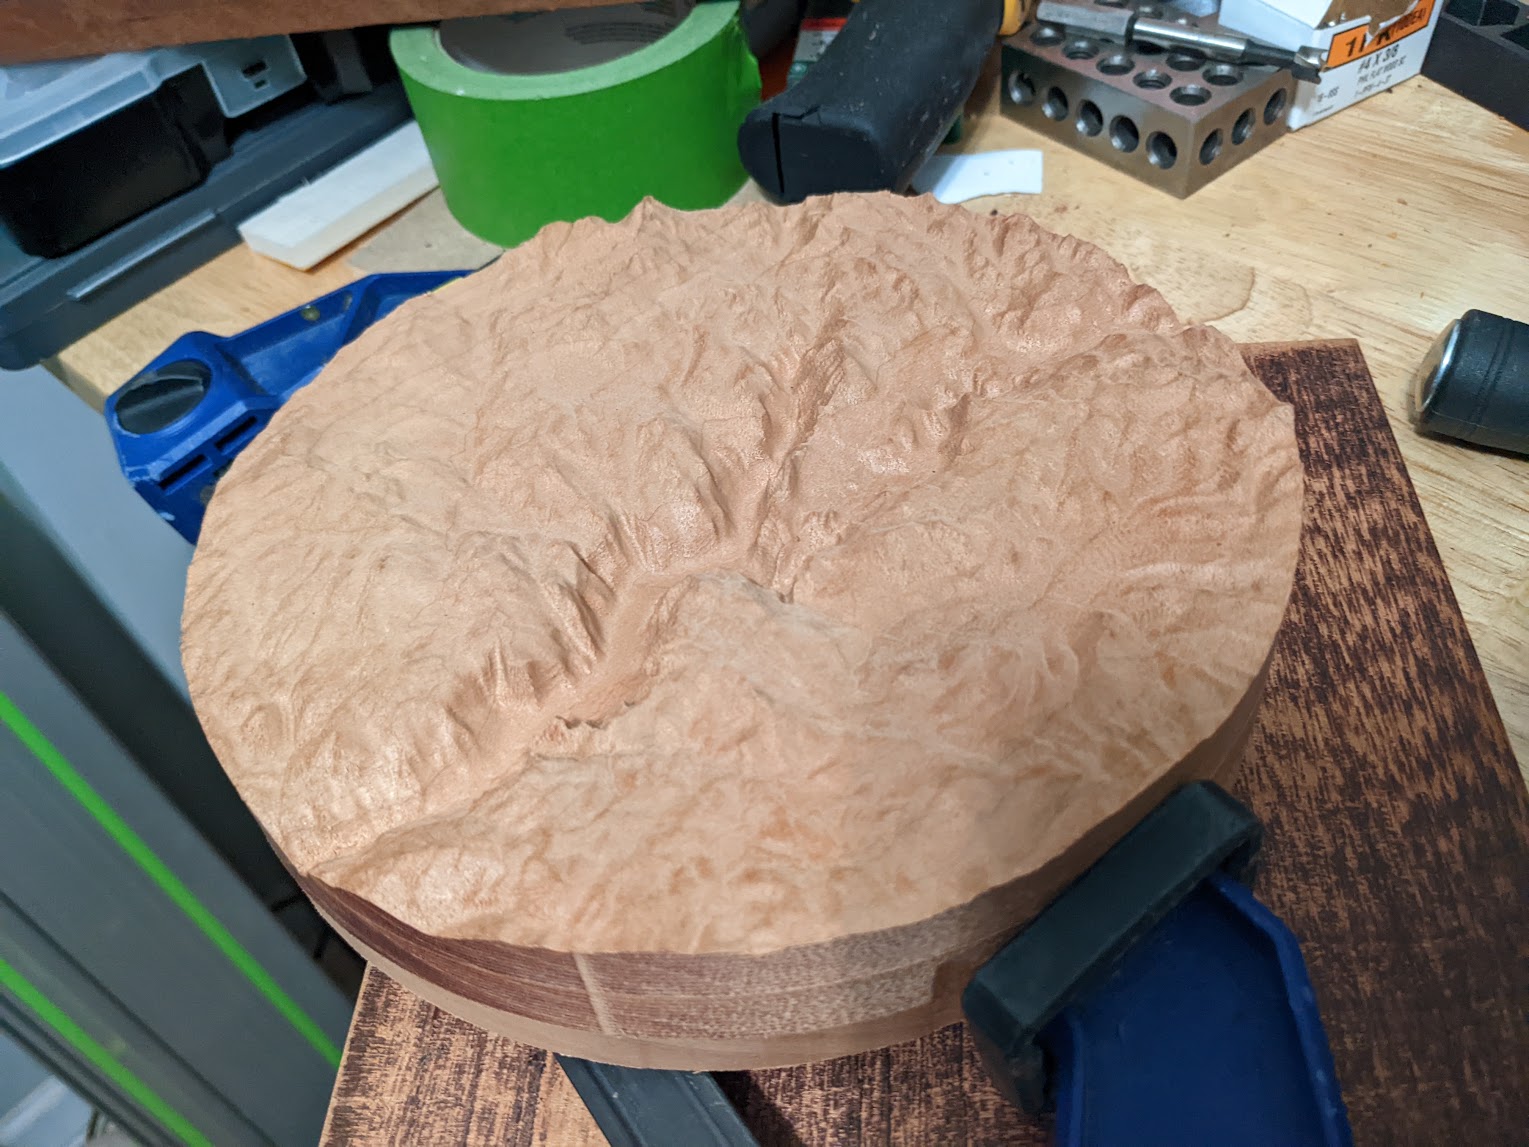
Still need to do some sanding on the sides to remove tool marks, and I should’ve measured before I took the piece off the machine, but I didn’t have a flush trim bit long enough, so I had to resaw the back, but otherwise I’m pretty happy with this. Topographic map of the Yosemite Valley, CA area in Cherry. It’s for a friend and I had a bowl blank laying around I wanted to use up on something, and this seemed perfect project for it.
I did have some tearout with the flush trim bit, but had the piece and was able to glue it back up. Hopefully sanding tonight, then finish oil on it tomorrow.
I will say, it was super nice to have a quick idea to design to cutting project. Most of my stuff lately has been a lot more stretched out.
Super nice carving! I’ve had success using stain as “paint” via glazing (apply a clear coat as a barrier, then the same clear coat with a compatible dye mixed in). It’s a bit of a pain, but the results are nice, allowing the grain to show through the color, and avoids bleeding. Specifically, TransTint dyes in a water-based polyurethane, which would also be compatible with your shellac precoat. On bare shellac, any colored medium which contains alcohol will dissolve the shellac and bleed along the grain.
Re: color, I found that a similar carving looked surprisingly good with only the white portions done (stars, stripes, eagle head and tail). You could try doing the white first, then do the rest if desired. As I understand it, there’s no such thing as white stain, only white paint or wash. I added acrylic white paint (Soho brand) to the polyurethane with good results, although being paint, it was fairly opaque. A tiny bit of brown added to the white provided an aged look.