When to retire an Endmill?

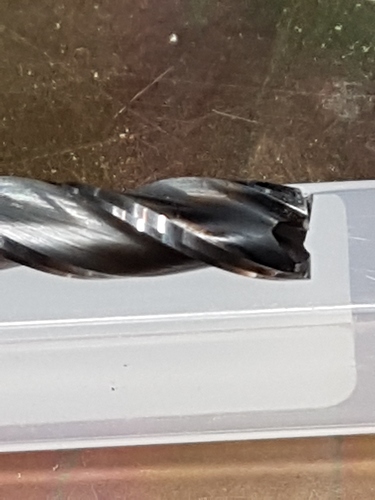
My trusty #201 1/4" endmill has done a lot of wood cutting, and is starting to show it’s age. How do you know when an endmill has reached it’s useful life? The edges still feel sharp, no perceptible nicks, but it’s changed colour from heat.

Time to retire the old girl and bring in my spare? Or is the carbon build up having an effect on the cutting ability and if so, how to clean it?

1 Like

If it’s still cutting fine… and the edges of the cuts are still precise, I’d keep on using it.

That might just be me though. :wink:

2 Likes

It really depends.

Some materials will tell you vehemently it is time, because the tool will go from good to decent to crap to broken in minutes. You see the chips become less defined, hear the motor straining a bit more, smell the heat (from coolant, oils, or burning material), the finish gets a particular look, and so on, as the edges move from cutting to rubbing. Then the tool will break (or something else will, but usually the tool) and the work may or may not be recoverable.

Other materials, like many of the softer, more machinable woods, don’t give a clear indication unless you look closely, as the degradation is much slower. You don’t see it happening `in real time’. Look at the chips- are they torn off or are they cleanly cut? Is the finish good? Is the tool clearly rubbing? Are there burn marks on the work? Do you SEE the cutting edge (huh? See the edge? Yup. Do you SEE it. On a new tool, you don’t see the edge, other than by the transition from one surface to another. On a dull tool, the edge becomes visible as it breaks down)? Are there ANY chips in the cutting edges, or chipped corners on a square end cutter?

For a lot of applications, swap to a new one and compare. The difference, if any, will tell you a lot. The photo you posted isn’t clear enough to really evaluate the tool. The glare on the cutting edge near the end could indicate excessive wear (you see this as the relief on the edge wears down and you get a cylindrical nature there, especially on materials that burnish.polish the area as that happens), or it could just be a side effect of the lighting. That you say it has changed color is a pretty good cue that it has been overheated and may be done.

Looking at the edge under magnification is a good indicator, as well. The tool will wear from the first time it touches the work, so it takes some practice and experience to read the wear (some types of tooling I am good at, others I don’t have enough experience to read at all), but, as a general starting point, compare the cutting edges to each other at the working end to look for damage, and compare the cutting edges at the working and to the less used/unused edges at the top. Get in the habit of looking at new tooling when you put it in service so you can see what it `should’ be, as well as identify bad tools before ruining work with them.

I could really go into tool geometry and all that, but, if you are still awake, that would put you to sleep. There are really good sources – textbooks and manufacturers-- that go in to that with pictures and all, that re much better than I could do. You might try looking at Harvey tool and at Helical Solutions (just the first two on my bookmarks, as I have used both for tooling). There are a number of others.
4 Likes

Correct. I have end mills that are years old…they have cut Steel, Aluminum and many types of wood and are still sharp. As sharp as NEW? No, but 90% as sharp (about), and that’s good enough for me. In fact the 1/4-4Flt end mill here is 3 years old and produces a great (smooth) finish.

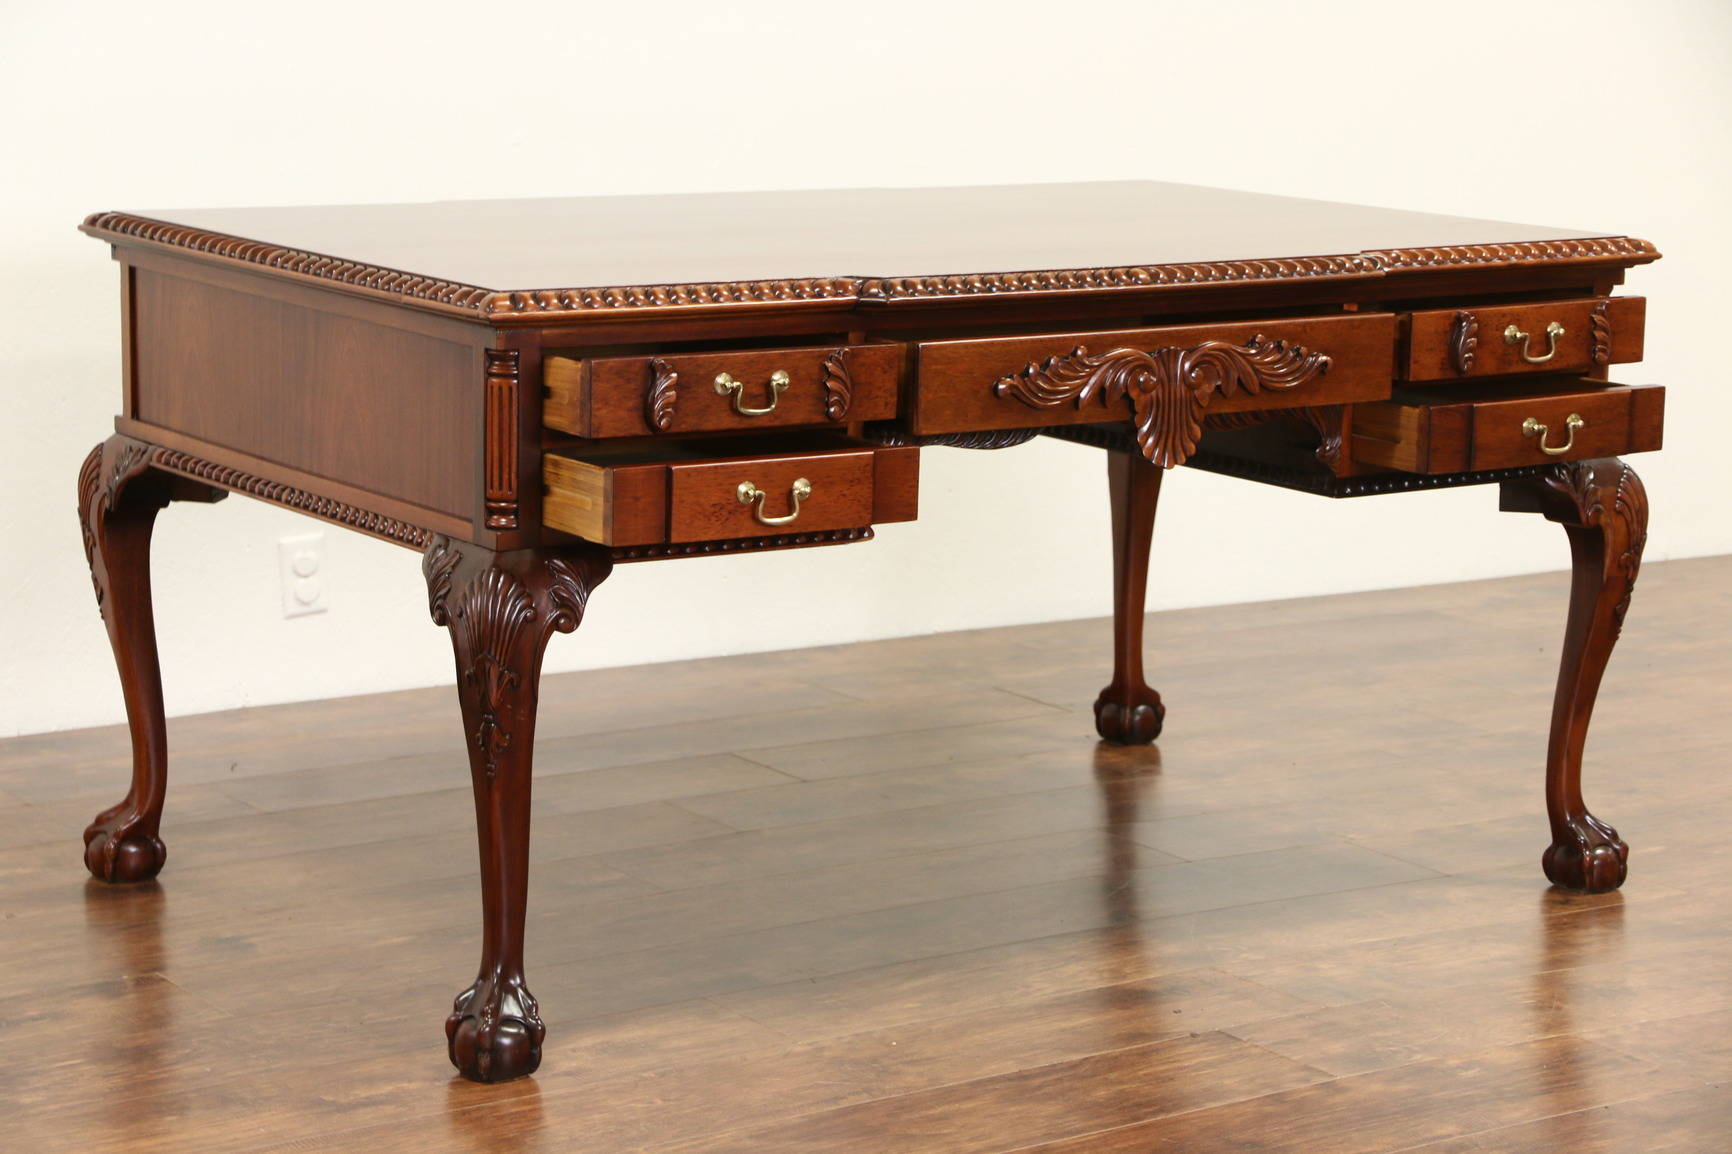
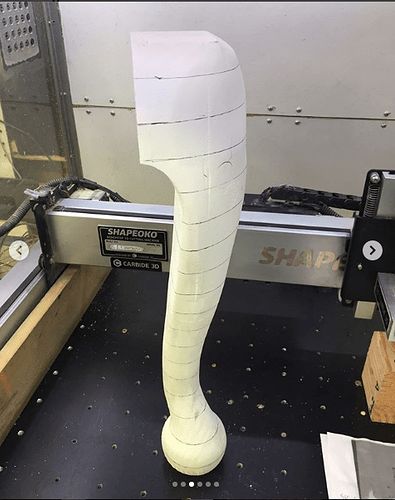
(This week’s work, trying to re-produce some 200 year old (+) John, Goddard designed desk legs ( I’ll add the fancy Shells, Acanthus Leaves, Toes and Claws carving details once I’m pleased with the shape.) This CAD model has been a challenge working from old data scarce sketches)

11 Likes

yup… I’d say you’re right. I should not be getting burning while running 1/8" deep in 1/4" fir plywood at 50ipm. I cut almost exclusively in wood, couple of projects of open cell PVC. I’ve been cleaning tape residue off the bit with paint thinner, but I’m wondering if it could just be pitch on the bit. I might have a go at it with brass brush and some dish detergent to see if that will help, otherwise I’ll have to retire it. It will get a place of honor on the wall, the grand ol’ #201.

BTW, I quoted a few lines, but I read the whole thing with great interest. Lots of info I hadn’t considered… those were just the most relevant to my situation

1 Like

Do my eyes deceive me? Is this the same Rich, cutting WOOD? :slight_smile:

4 Likes

Sadly yes…I have run out of projects, and decided to challenge myself in building an heirloom desk. I have decided a one-sided version of this circa 1800 Chippendale partner desk. I figure it’ll take me 9-10 months…(carvings and all) At present I am checking my overall shape of the leg (less the fancy Shells, Acanthus Leaves, Toes and Claws carving details, which I will add once I am happy with the shape)

5 Likes

Lovely!

To be honest I was expecting:

2 Likes

Wow, that’s awesome…Well, I am originally from Rhode Island, so I’m partial to John Goddard’s work (from Newport RI), and have always been a big fan of Ball and Claw Feet (furniture).

2 Likes

Yeah, a piece like that, maybe rolltop desk (my father had a fascination with them, but unfortunately never had one), some traditional British Campaign furniture, and some Korean pieces are all on my to-do list once I retire (along with a sailing canoe) — they all have to wait until I build my workbench and ultimate tool cabinet first — that latter is getting closer to getting started, since I’ve pretty much got all the tools I need, and have begun replacing tools I have w/ nicer ones — latest indulgences are a Blue Spruce Toolworks coping saw and a matched set of Korean chisels.

2 Likes

That looks like something Michael Bay would make a movie out of :slight_smile:

1 Like

Great looking tables, guys!

First of 3 test legs. It actually came out better than it looked in CAD…so that’s good. Now to add the fingers (claw) to the ball end is my next step. This one took 6 setups…the final design will take 12 setup (per leg, 4 rotations, and 3 moves)…and you thought 2-sided machining was difficult!

3 Likes

That is just insane. So you have a reference on the table, clamp your stock material in to it, machine a side, turn 90 degrees, machine, turn, etc? Then cut off the un-machined ends?

Yup. I am using a dowel and a stop for my XY constraints. Simple, right?

2 Likes

This topic was automatically closed 30 days after the last reply. New replies are no longer allowed.