So, my JTech laser arrived today. It’s the one that mounts directly into the spindle chuck, which will make a tidy setup.
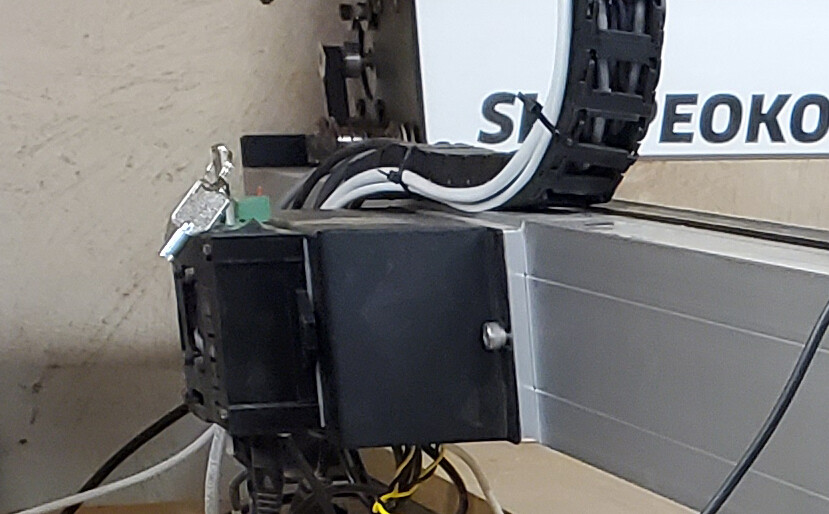
The installation instructions say you can mount the laser driver board on the back of the Shapeoko PCB case, or just have it laying on the table. Mounting it on the PCB case requires drilling two holes in the back of the case.
Where would you put the laser driver? I’m thinking it would be cleaner to have it mounted on the PCB case.
Also, if anyone here is using the JTech laser with a Shapeoko, what do you do with the laser when CNC carving? Do you detach the laser and cables and store it somewhere?
I have an S03 XL and I mounted mine on the PCB case. I attached the wires to the laser on the drag chain and they just hang there by the spindle when not in use. I just stash the laser in the drawer with my other CNC related stuff.
Mine is pretty much the same except I used double sided tape to mount the controller to my left rail right near the front of the machine. It’s very easy to get to to turn it on and press the reset button when I use it.
If you do mount on the controller case you need to use short screws or mount the heads inside the case and the nuts on the outside. You do not want to use excessively long screws because you could short out your electronics or interfere with wiring inside the case. I like Stan’s suggestion for double sided tape.
As for storage of my unit, I feel that I want to keep the lens as clean as possible (dust is not your friend when it comes to lasers), so I don’t leave it out where dust can get at it. I keep it in a small Tamrac camera bag zipped shut - and stored in the drawer under the CNC with my other bits and stuff. The wires are attached to the drag chain and sit on the top right of the Z when not in use. It’s simple to connect and go.
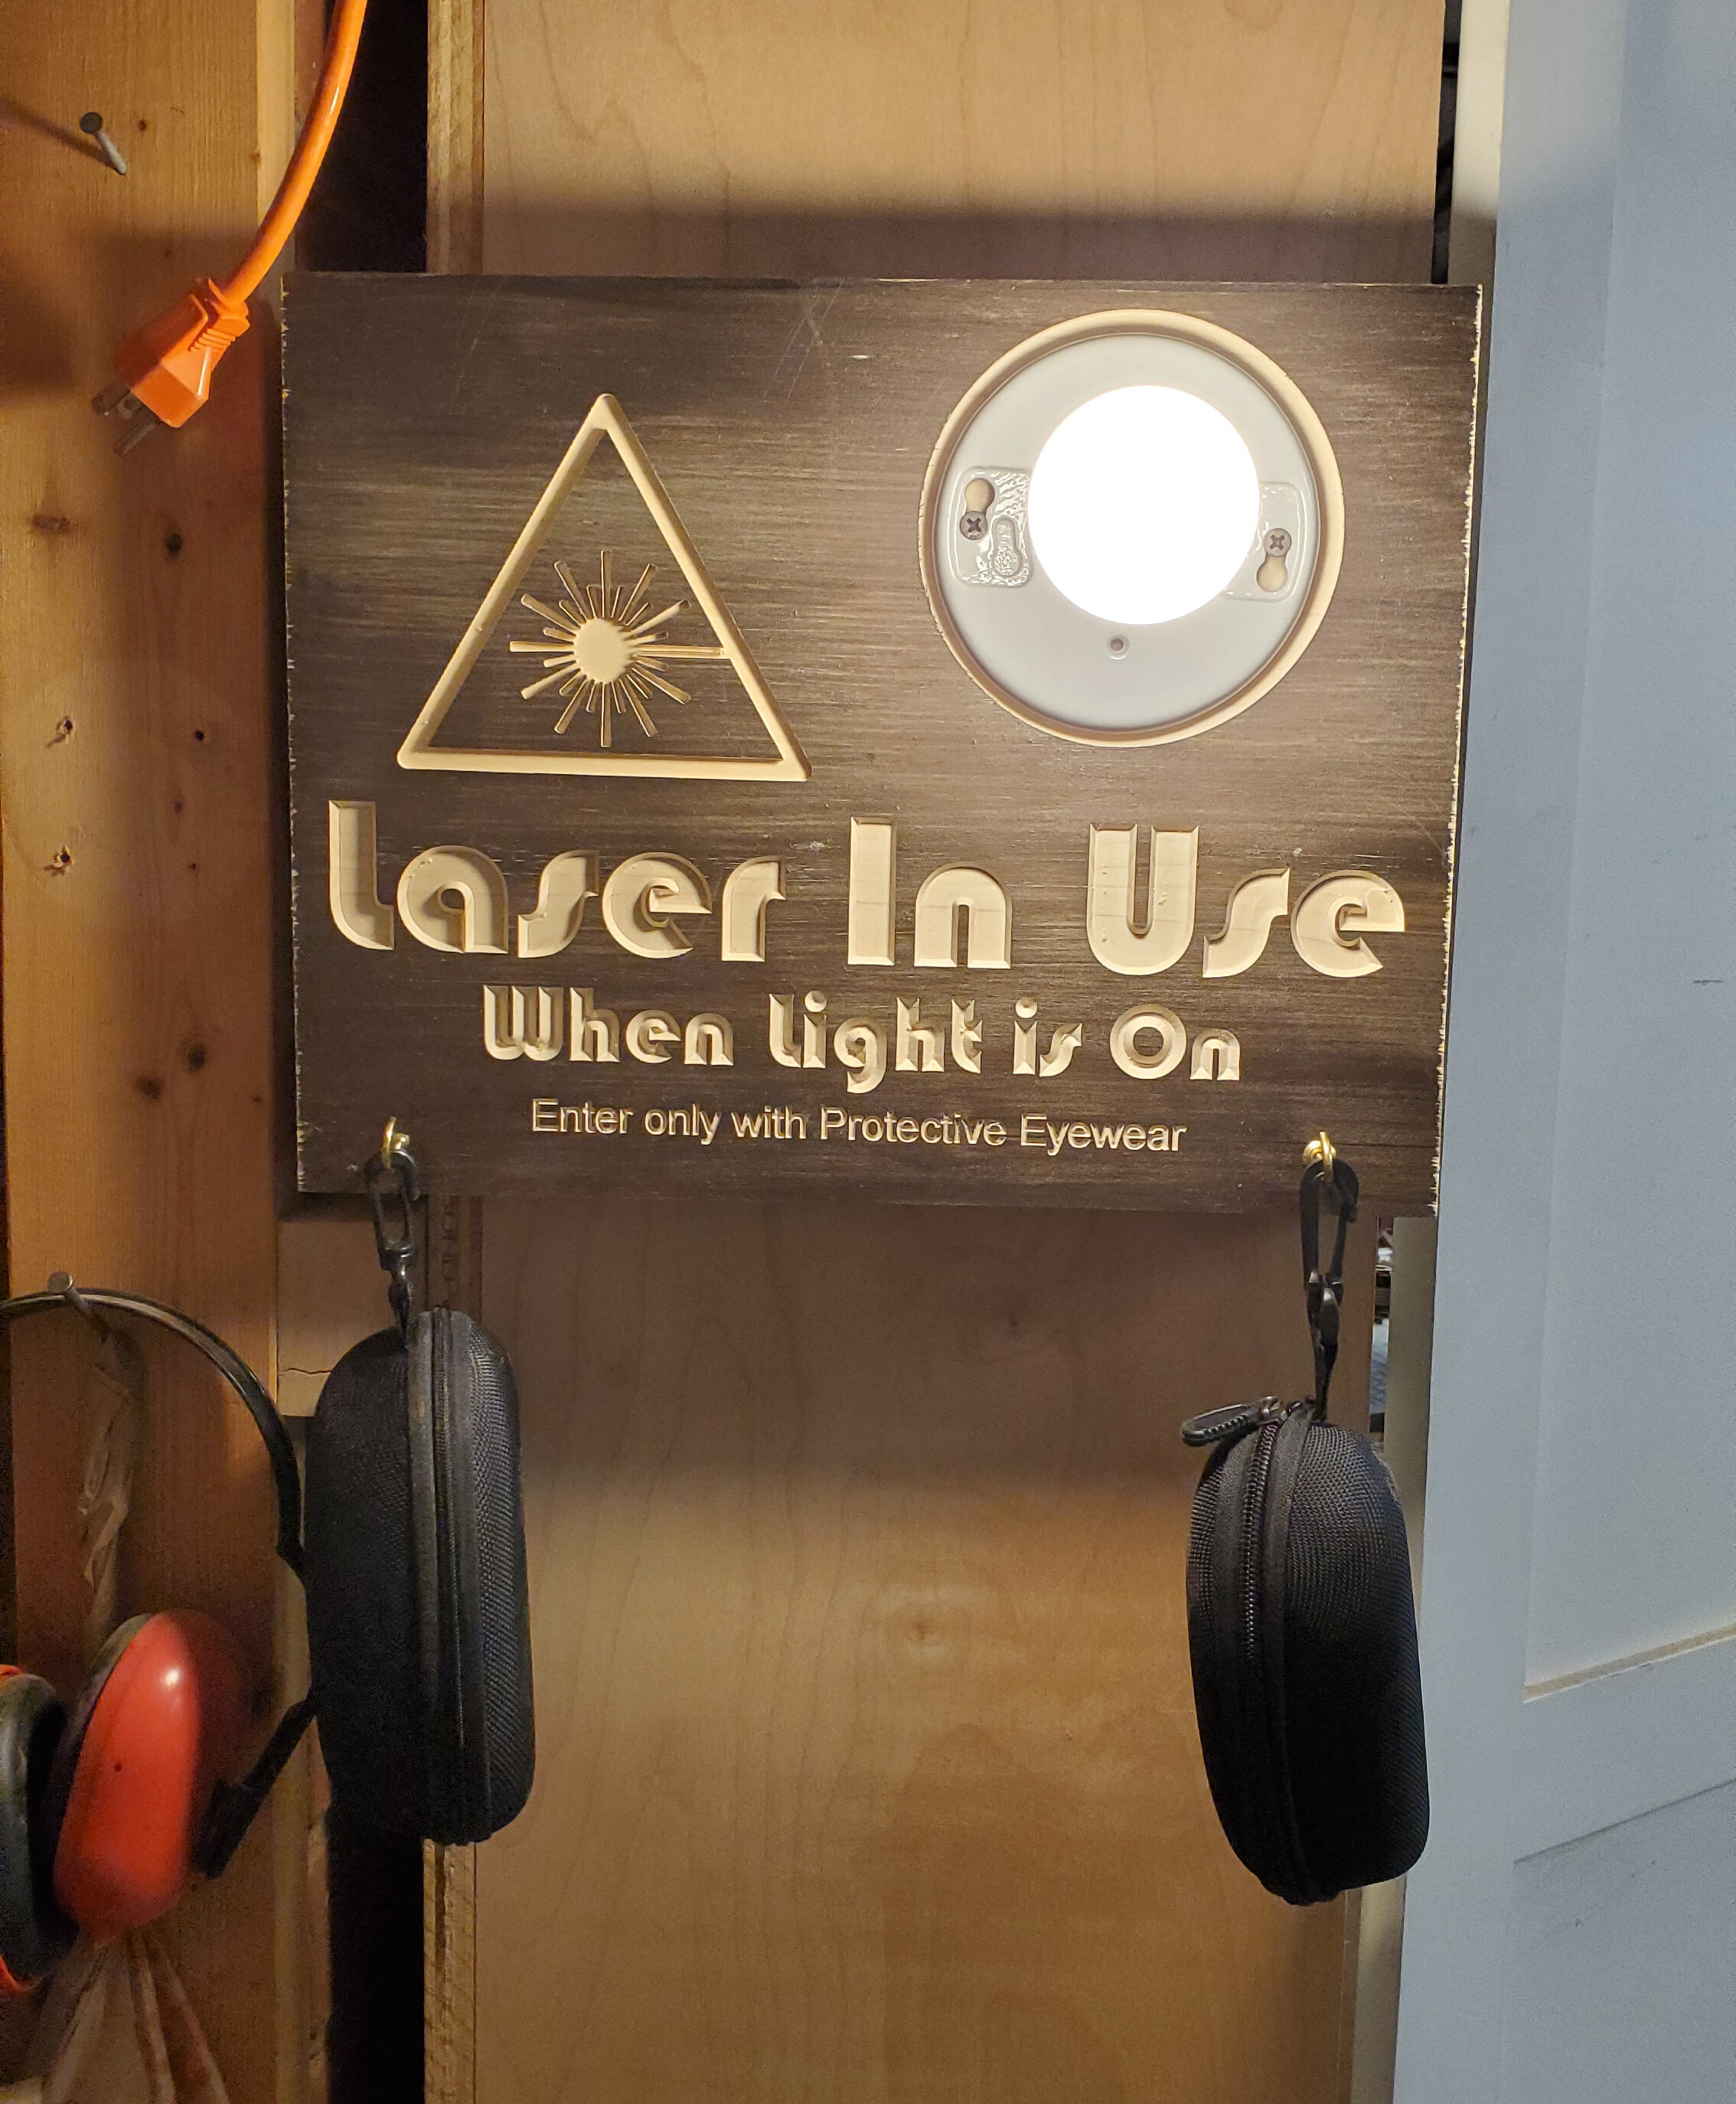
And, if you’re interested: I have the Power to the laser’s control box routed through a switch on the front of the CNC. You still need to press the reset button on the JTech when you turn the power on, but I like the convenience of turning it off independently from the rest of the power.
From the switch (the switch with the yellow “L”), I have the power split - one line to the laser box and the other to a sign that has a light on it and my “visitors” sets of goggles, so I know the light is always on as long as there is power going to the laser control box.
Thanks to everyone for your replies and very helpful information!
Another question - Which connectors on the Shapeoko PCB did you use to connect the laser - the ISP or the other unlabeled connector where you have to add the pins?
It seems to me that the ISP connector is much easier to work with.
I think I’ll use the ISP connector. This requires no modification to the Shapeoko PCB and is more straightforward. I need to be careful to translate the positions described in the JTech documentation, as my newer Shapeoko 3 has the PCB mounted upside down.
quick tip: before connecting the GND and PWM to the laser, you can issue a M3S1000 command in the MDI command line (after homing) and you should read +5V or so between PWM and GND. At least you’ll know you connected correctly at the Shapeoko controller side.
I used the kit that came with the JTech and followed Jay’s directions…everything worked out. I remember having some question as to whether the pins were set in enough and called Jay - he had me look at the back side of the board an confirm that they were fully seated…and all has been good.
I will remind you that there’s a button on the JTech controller that has to be pressed each time power is turned off and then turned on to the laser’s control box. I didn’t know that when I first got it and ended up calling Jay for the simple solution.
I also will warn you (as Jay did me) that next to that reset button is a toggle switch that will turn the laser on full power - make sure you’re wearing your goggles before you throw that switch.
Personally, I power mine off when the laser is not in use (like when I’m using the CNC). So my general process is to connect the laser, put on my glasses, throw the switch that powers my laser box (and sign) and then press the reset button.
If you never turn off the power to the control unit of the laser, you would not need to push the reset button unless you accidentally lost power
Mine is set up the same way as Gary, power is normally off to the laser unless I am about to use it. My system is wired up so I select between power to the router or the laser, you can’t accidentally have both on. I have the reset button wired up to a button on the front of my table. It’s a lighted arcade button, the light is hooked up to the laser fan power so it glows red when the laser has power. There is about a 2 second delay for the power supply/driver to be ready for the reset button to be pressed, I think that is from the power supply charging up. Details of the setup are here:
And to answer the original question, I have my laser driver board mounted under the table my XXL is on. Keeps dust away from it and saves me a couple of inches of clearance on the side. The under table setup would be really inconvenient without the remote power and reset controls. The couple of inches saved on the side were useful to have when I built an enclosure later. The sides get a bit tight. The enclosure is nice for the laser, no more wearing glasses for my wife and I while the laser is doing it’s thing (often for long periods). Still need the glasses when doing the initial aiming but that is just a minute or two, and just for me since the back of the enclosure faces my wife’s side of the basement. A few pictures of my enclosure are here:
First, i didn’t know such a thing existed. i have been wanting a laser, even before i got my XXL. The two together, mind blown… This is a bit off topic, but do any of you laser engrave footballs or basketballs using this setup? I think the height might be troublesome, but just curious.
I do heartily endorse J-Tech’s products. They work really well with the Shapeoko and the customer service is top-notch. Basically, they work.
You’ll also find that Lightburn software (not a JTech Product, but the one they recommend) is very nice and useful. For a $40 investment, you not only have a driver for the laser, but you have a very powerful design tool that I sometimes use even if my goal isn’t the laser. The tools are so much more powerful than CC and you can export the SVG from Lightburn and import it into CC. There are also some tricks to coordinating laser burning with your CNC cuttings - to assure alignment with the two products.
That’s what I was thinking. You just have to be sure it’s very flat. Lasers like a fixed focal length. Otherwise people have lasered leather with good results.