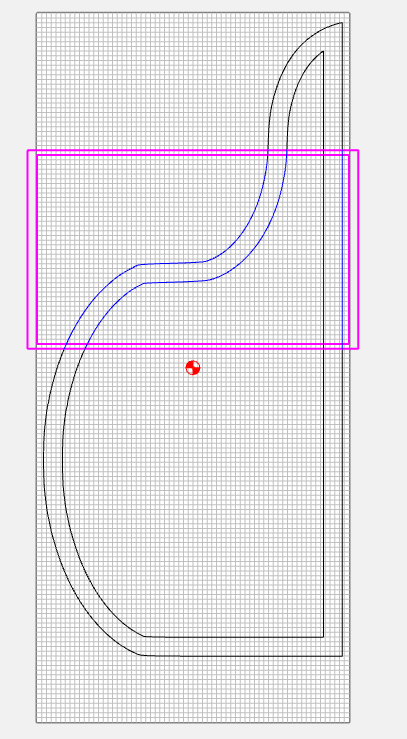
I thought I knew how to set up tiling, but this file only shows two tiles and only cuts part of the design. How to I get the full design cut? Shouldn’t it get a third tile for the final piece?
piano top 3.c2d (116 KB)
I thought I knew how to set up tiling, but this file only shows two tiles and only cuts part of the design. How to I get the full design cut? Shouldn’t it get a third tile for the final piece?
piano top 3.c2d (116 KB)
Thanks. Solved it. Must be to late in the day. ![]()
I assume you just made the workpiece taller. ![]()
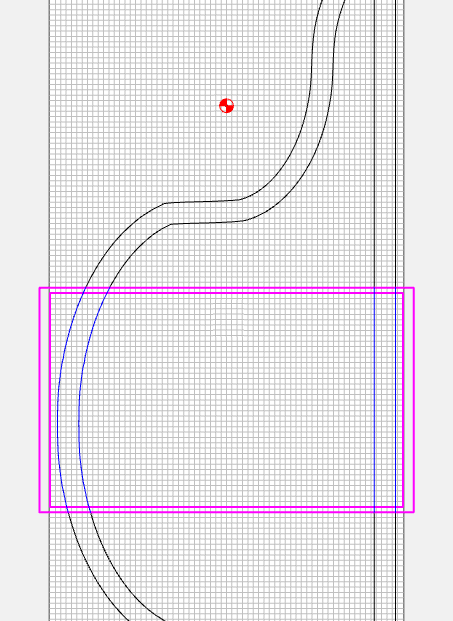
A couple things to consider. The top of the 2nd tile passes through the horizontal section of the design.
It might be better, since you have 4 tiles anyways to align it so the tile edges are more aligned with vertical curves. This will allow for slight variation in the alignment on the machine without showing obvious steps between the tiles.
Also, with tile 1 your zero point is in the center of the whole part

With tile 2, the zero point will move along with the tile, and shift another 20" with each tile.
This is all fine, as long as you are aware of it. You might want to position the zero point in a place where the machine can reach it from the first tile. ![]()
Excellent suggestions. Appreciate the feedback.
Thanks
This topic was automatically closed after 30 days. New replies are no longer allowed.