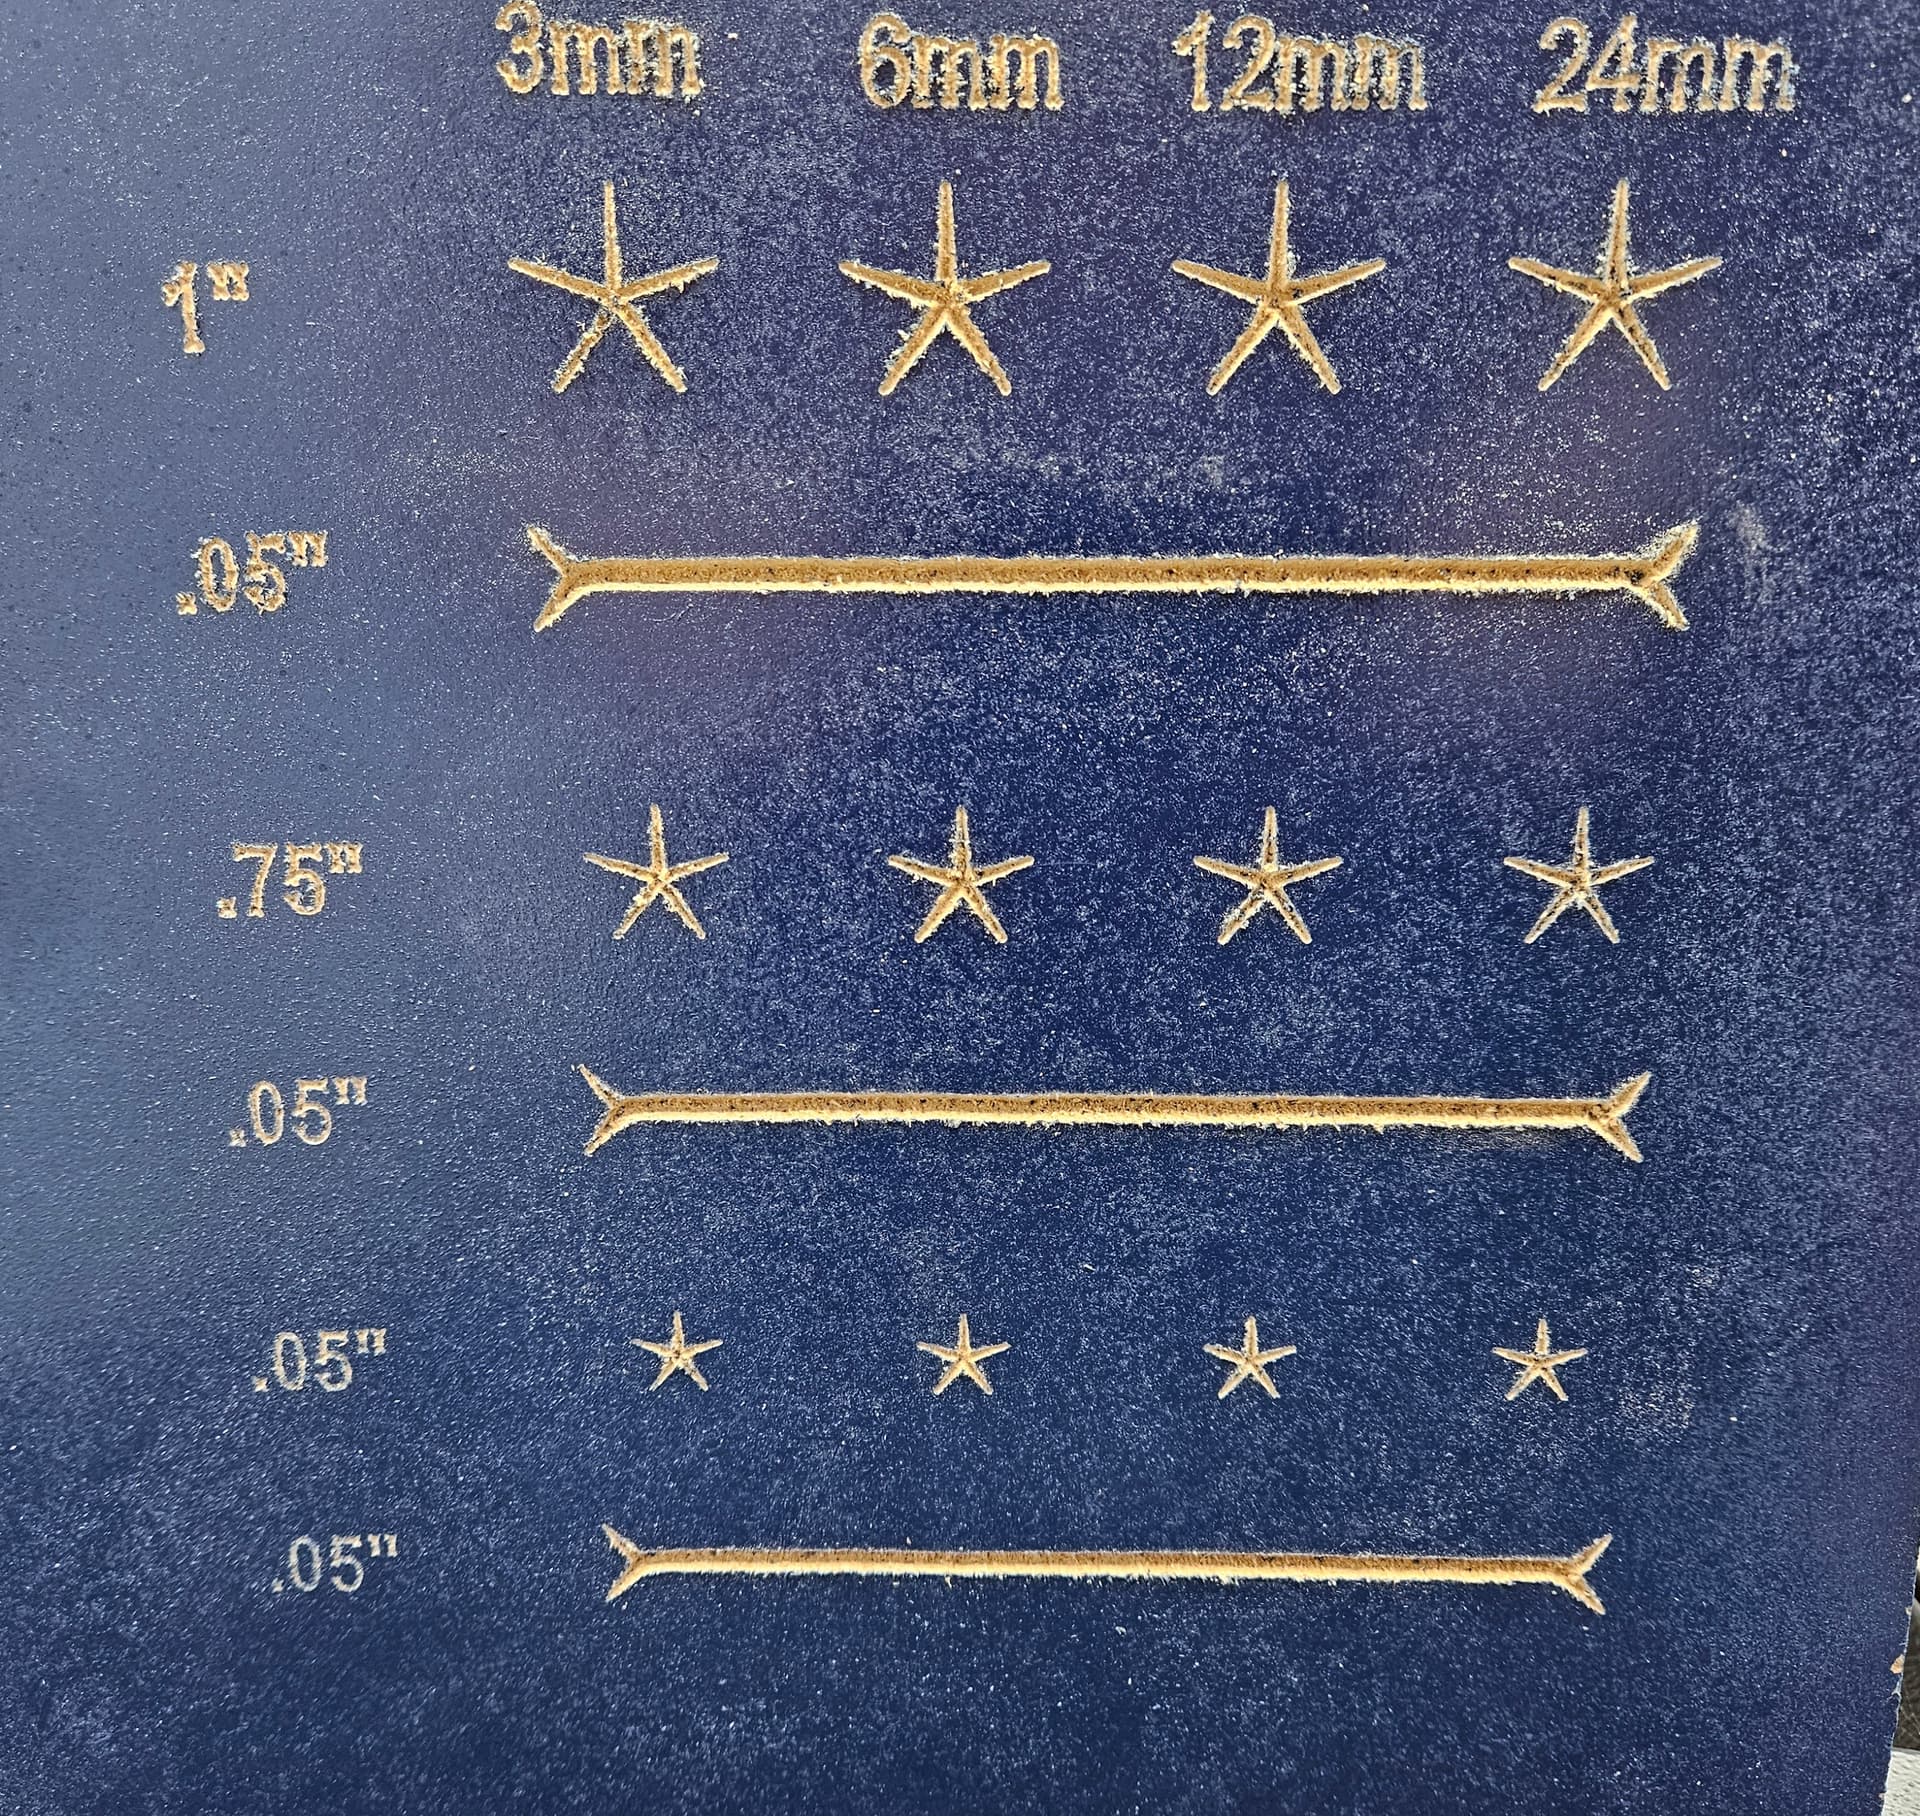
I am having a terrible problem getting my 5 point stars to carve properly, they end up looking like something out of Sponge Bob Square Pants. Not able to get them carved straight across from left to right, tip to tip. They look like they have their arms up and are skinny.
Have tried Vcarve and Advanced Vcarve both 60 deg and 90 deg bits. Bits are 1/2" in diameter and I am testing out on 1/2" MDF.
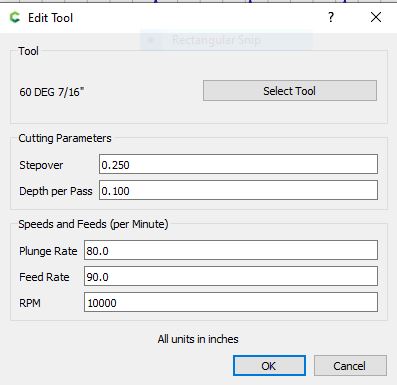
Base settings:
cuts per pass: 0.1
Have used stock bottom for depth and almost every increment from 1/2" to 6" without any change in results.
Star sizes 1/2", 3/4" and 1"
I have watched this over and over and over. My results end up like his worst star in the upper left corner of his board. Doesn’t matter what depths I use I get the same results.
Will, I am trying to wrap my brain around what you are saying. . . I want deeper cut stars as in the youtube video, not shallower. As it stands I am only achieving stars that are barely over a scratch in the surface. Obviously I am missing a step, or setting somewhere.
The image you show above is what happens when you use V-carve & don’t set the max depth deep enough. The “rule of thumb” to set the depth to the stock thickness is a two-fold solution.
Set the depth deeper than it needs to go. But use Stock depth to prevent cutting into your table if the carve is wide enough for your tool to fall through.
Since no-one has asked, is it possible that the depth it’s cutting is as far down as the Z axis will go? i.e. away from the part will your tool touch the table? If so you need the tool extended from the spindle more, or move the spindle down a bit.
I have tried using depth of cuts down as far as 3" with little change in results. Not suspecting a problem with the Z axis ability, notice the depth of cut on the straight lines in my example above. That is a 1/2" wide cut with 1/2" depth of cut, one pass.
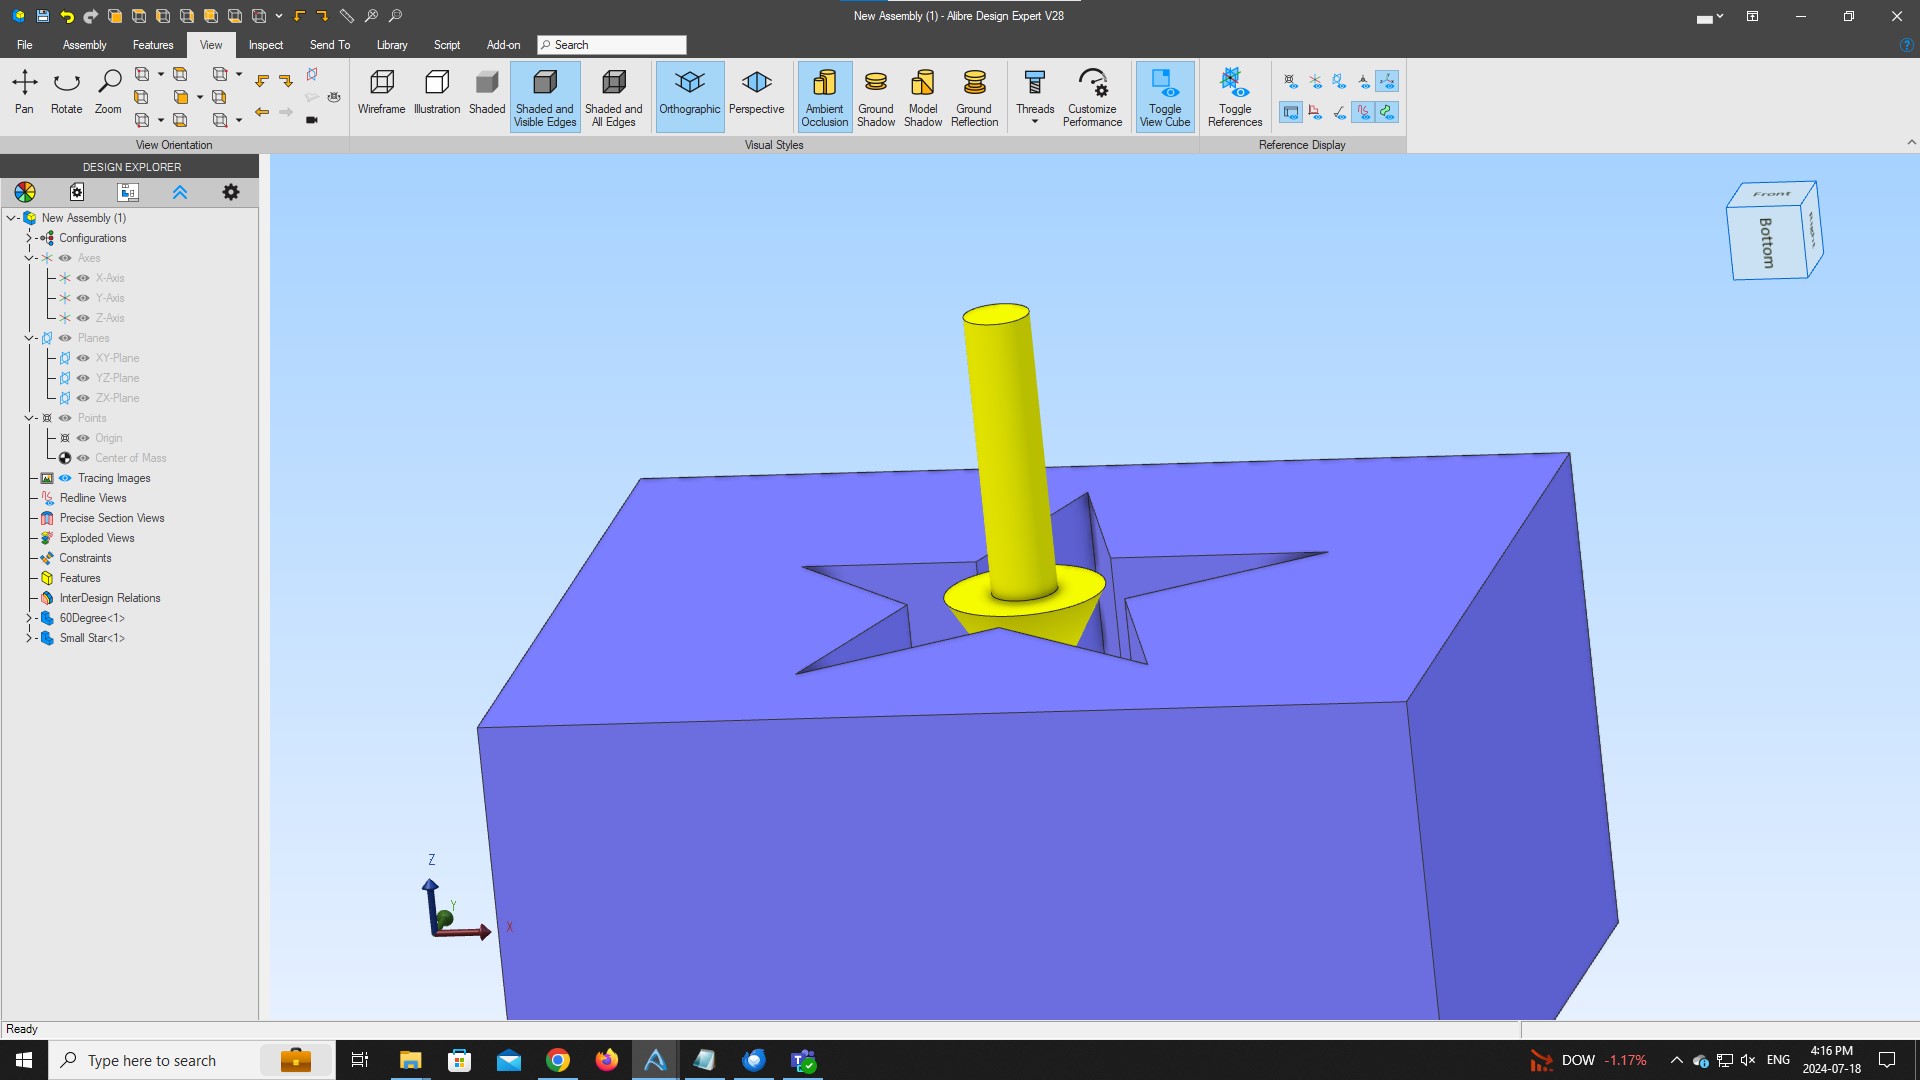
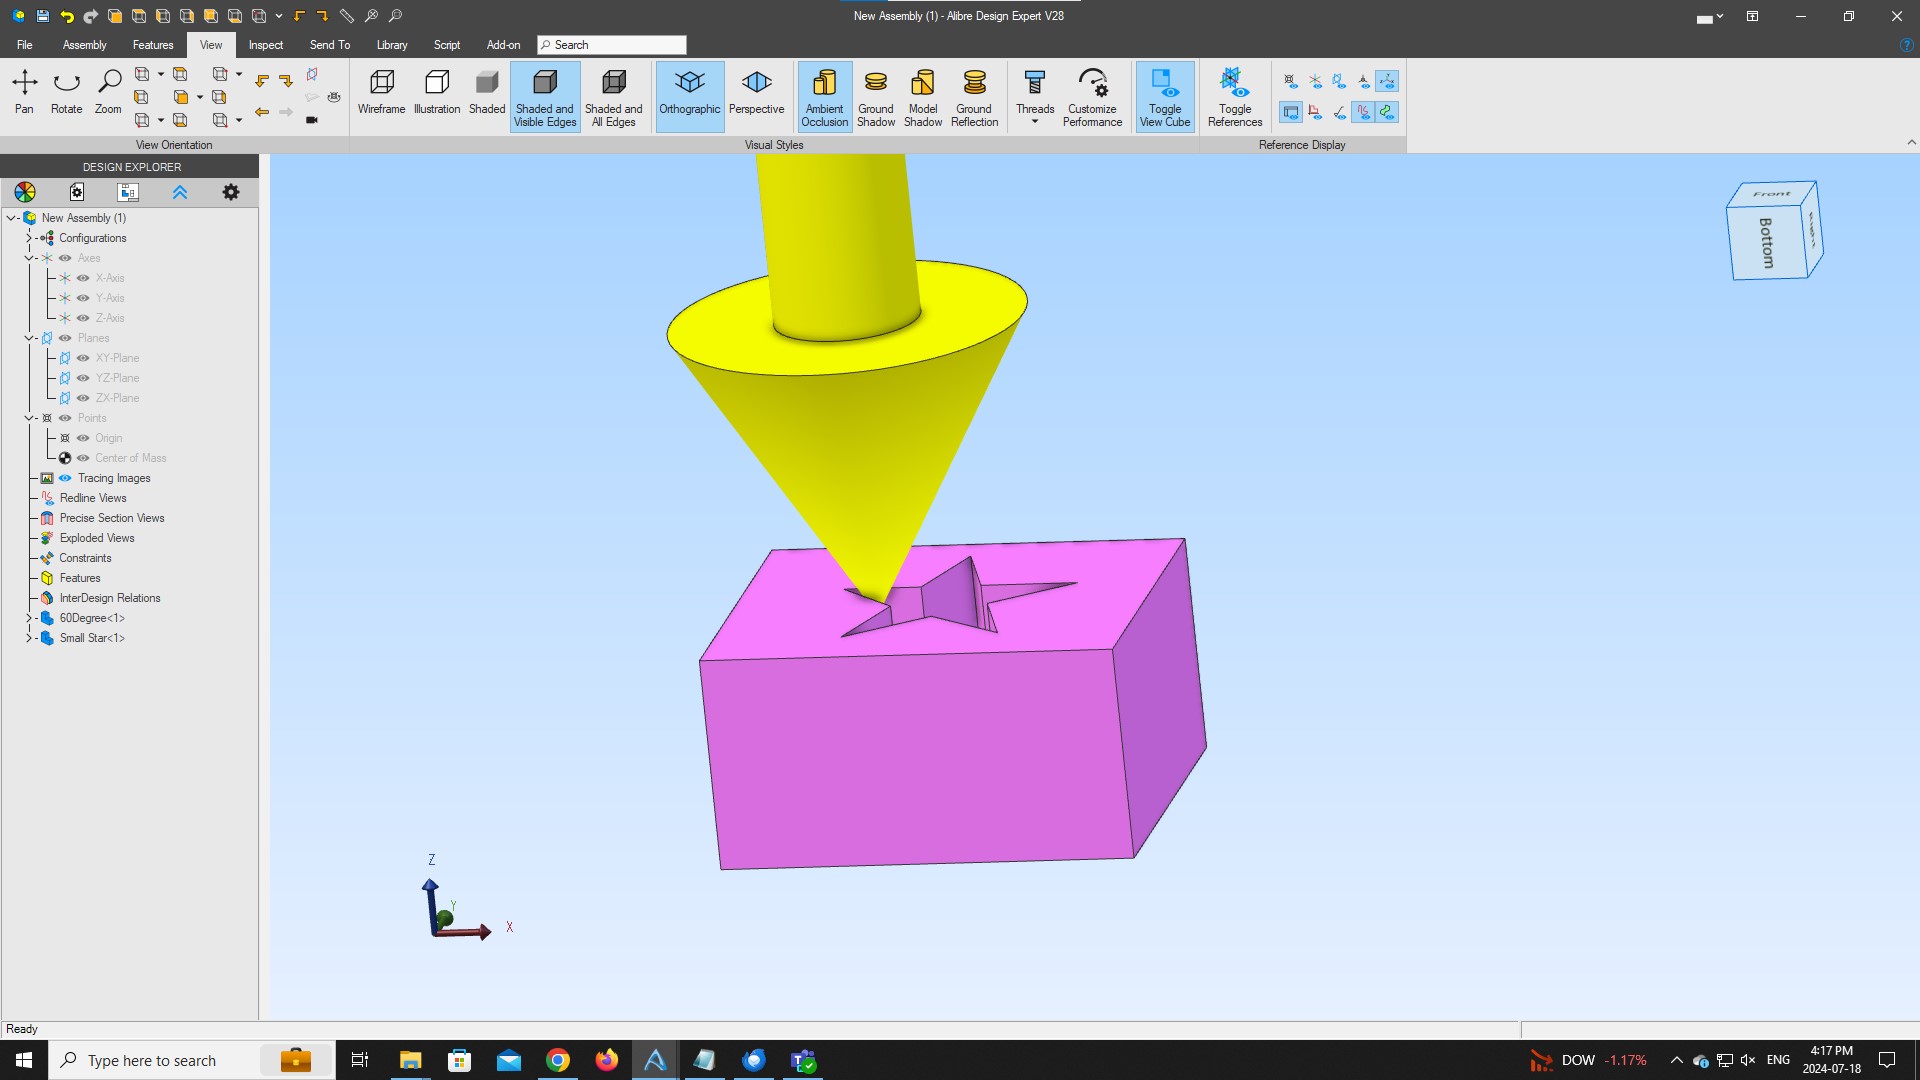
Upload a .c2d file, and post step-by-step notes on how you are securing your stock and setting zero relative to it and managing all tool changes and a photo showing an attempt at cutting still in place on the machine with the machine at the origin or a specified offset from that position.
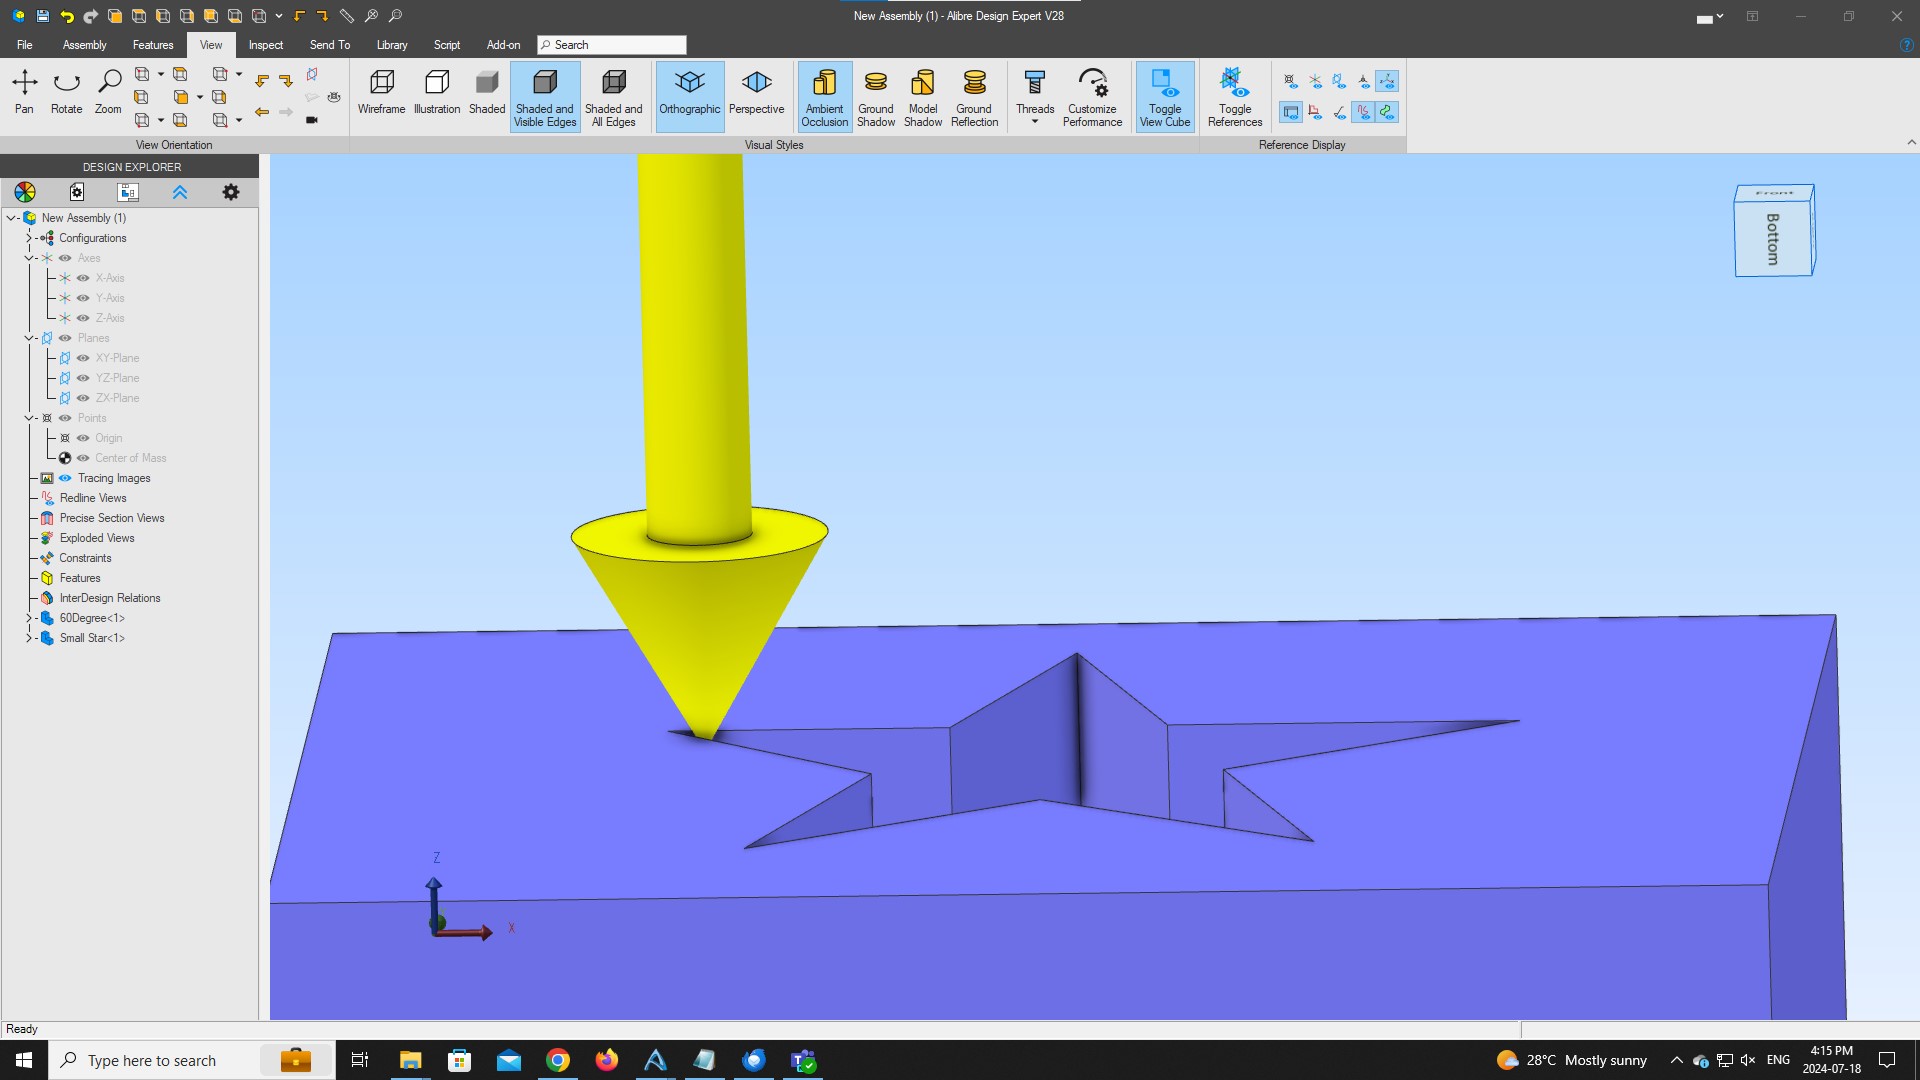
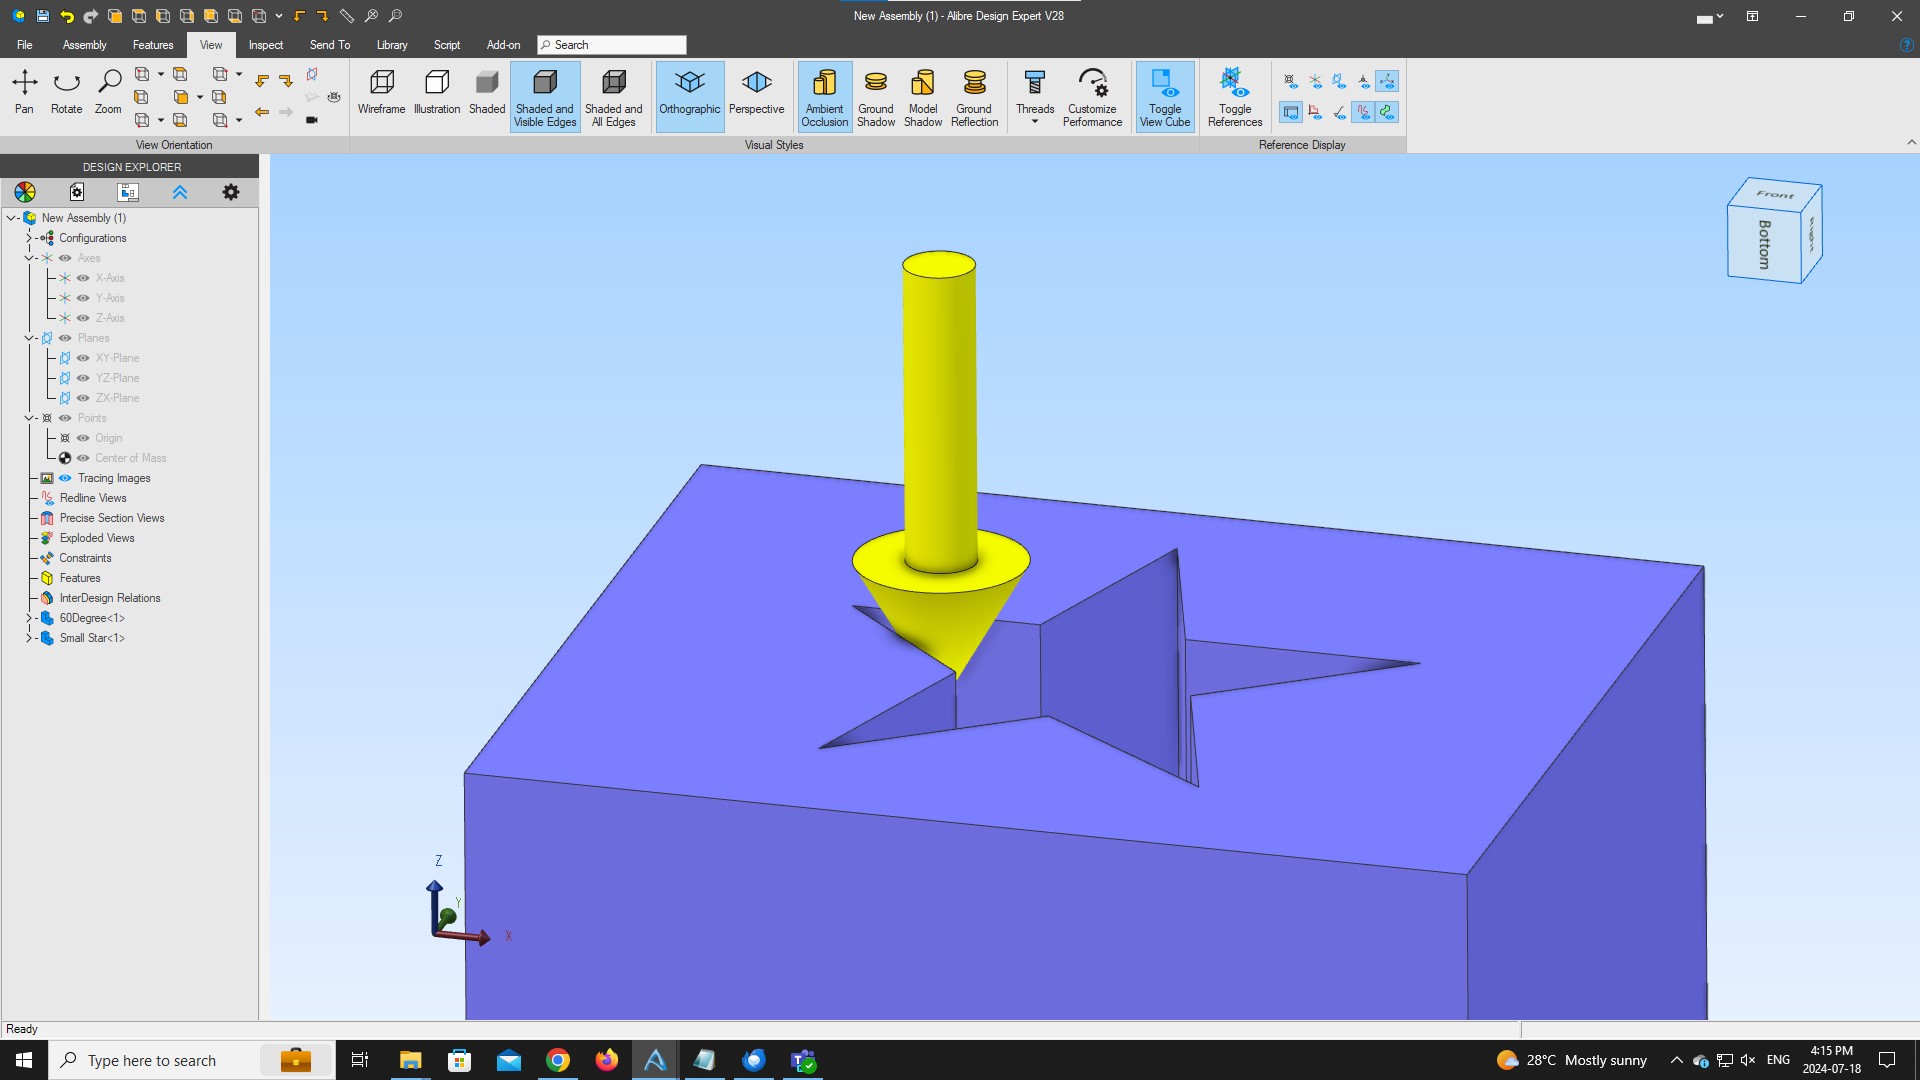
Its my understanding that the depth of a Vcarve is constrained by the drawing dimensions rather than by toolpath settings (I assume toolpath settings can just limit depth). Meaning the V-bit will plunge until both sides of the cutter touch the drawing. See below in blueish-purple an example of a star big enough (Too big) to get the effect you’re looking for.